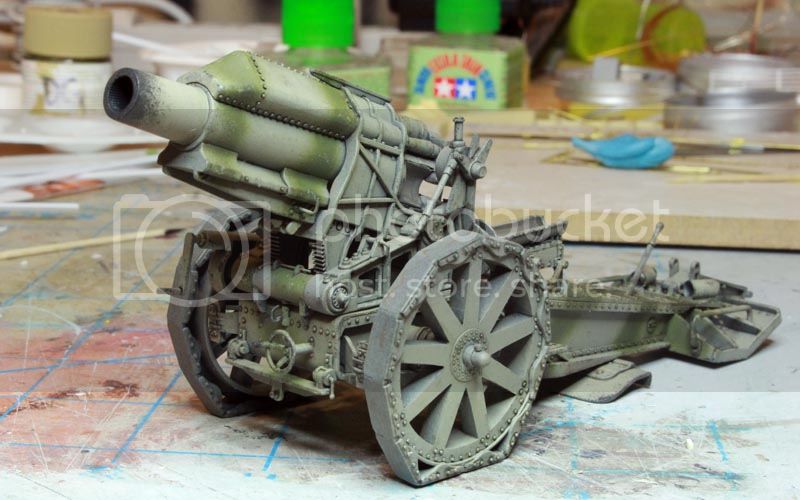
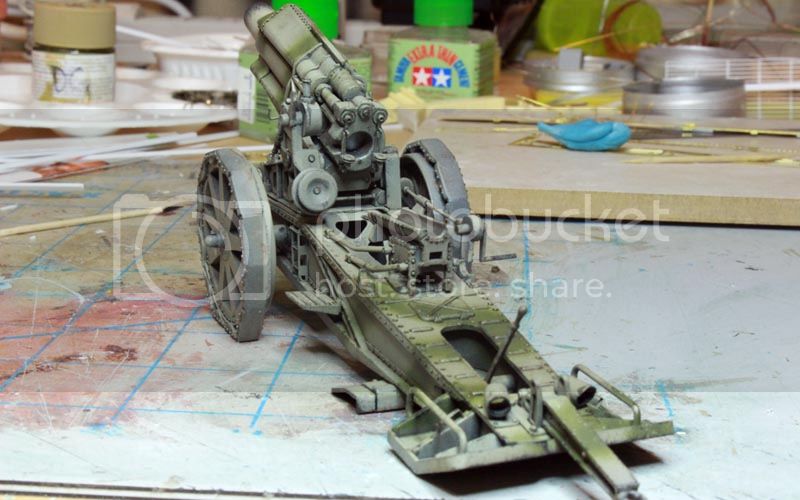
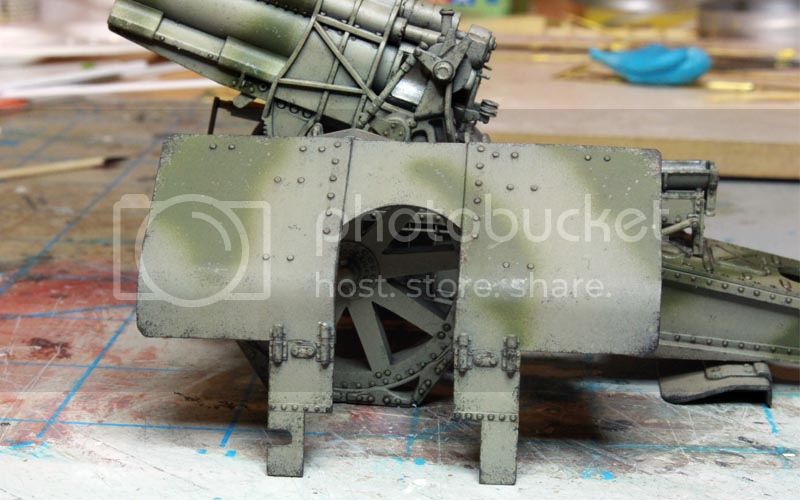
Captured 21cm Morser - Vimy Ridge
ColinEdm
 Associate Editor
Alberta, Canada
Joined: October 15, 2013
KitMaker: 1,355 posts
Armorama: 1,229 posts
Posted: Tuesday, December 06, 2016 - 04:15 AM UTC
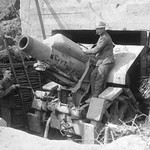
In honour of the upcoming 100th anniversary of the Canadian Army's capture of Vimy ridge in April of 1917, I am planning on doing a diorama depicting a 21cm Morser that was captured by the 27th City of Winnipeg Battalion. My inspiration comes from these photos:
[

I have Takom's kit for this and am searching for some good WWI Commonwealth figures, there are a few that I have found that will probably do the trick with some rework but any suggestions would be great. Also, does anybody have any information on the concrete emplacement behind the gun? I am assuming it is basically a single room to shelter the gun when it is not being fired, but if anybody has any plans or line drawings of a similar emplacement they could share I would be very grateful!
Cheers

The voices are back.....excellent....
Washington, United States
Joined: March 15, 2009
KitMaker: 3,670 posts
Armorama: 2,052 posts
Posted: Tuesday, December 06, 2016 - 04:29 AM UTC
Master Box with the surrendering Germans and the first Tamiya issue (the second issue was a re-boxed ICM set that is OK but is a little soft on detail and needs quite a lot of work) are the best inexpensive plastic sets out there. There are several good resin sets-- the Stalingrad British tanker set is a good one. Looks like a fun project!
VR, Russ
Queensland, Australia
Joined: September 04, 2015
KitMaker: 1,517 posts
Armorama: 1,109 posts
Posted: Tuesday, December 06, 2016 - 04:53 AM UTC
Tommy's war are outstanding IWW figures but in 1/32 (54mm)
https://tommyswar.co.uk/ColinEdm
 Associate Editor
Alberta, Canada
Joined: October 15, 2013
KitMaker: 1,355 posts
Armorama: 1,229 posts
Posted: Tuesday, December 06, 2016 - 04:54 AM UTC
Yeah, I was looking at those two today, the figures in the rebox would need less major surgery but more detail work...gonna have to mix and match.
The voices are back.....excellent....
ColinEdm
 Associate Editor
Alberta, Canada
Joined: October 15, 2013
KitMaker: 1,355 posts
Armorama: 1,229 posts
Posted: Tuesday, December 06, 2016 - 04:58 AM UTC
Those look good, they wouldn't look out of scale?
The voices are back.....excellent....
Queensland, Australia
Joined: September 04, 2015
KitMaker: 1,517 posts
Armorama: 1,109 posts
Posted: Tuesday, December 06, 2016 - 09:13 AM UTC
Quoted Text
Those look good, they wouldn't look out of scale?
That's the problem!.. for sure you cant mix with 1/35 figurines,the Mörser is pretty big maybe you not notice
also MasterClub make IWW figurines but i dont know if do commonwealth stuff
http://www.masterclub.ru/New Jersey, United States
Joined: December 08, 2003
KitMaker: 2,864 posts
Armorama: 2,497 posts
Posted: Tuesday, December 06, 2016 - 11:22 AM UTC
In 1917 the difference between British and Canadian troops was minimal. Canadian manufactured uniforms were a slightly different color and finer quality. They were much sought after by all Commonwealth troops. Other than that no difference would be noticeable other than unit insignia.
By the way enlistment records indicate that Commonwealth troops like Canadians ran larger than their British comrades. If you mix scales might be funny to have all the Canadians 1/32 and any British in 1/35.
"The only thing a man should take seriously is the fact that nothing should be taken seriously."
Samuel Butler, Victorian satirist
Steve Willoughby
Queensland, Australia
Joined: September 04, 2015
KitMaker: 1,517 posts
Armorama: 1,109 posts
Posted: Tuesday, December 06, 2016 - 01:00 PM UTC
Quoted Text
By the way enlistment records indicate that Commonwealth troops like Canadians ran larger than their British comrades. If you mix scales might be funny to have all the Canadians 1/32 and any British in 1/35.
mmm...i have fear a 1/35 near a 54mm is like a European near a Pygmy,after depends also form the manufacturer
New Jersey, United States
Joined: December 08, 2003
KitMaker: 2,864 posts
Armorama: 2,497 posts
Posted: Tuesday, December 06, 2016 - 02:00 PM UTC
Quoted Text
Quoted Text
By the way enlistment records indicate that Commonwealth troops like Canadians ran larger than their British comrades. If you mix scales might be funny to have all the Canadians 1/32 and any British in 1/35.
mmm...i have fear a 1/35 near a 54mm is like a European near a Pygmy,after depends also form the manufacturer
As any ethnographer or anthropologist will tell you, "variation within a population is greater than between populations."
So in any group you're going to have the giant and the Pygmy whether a military unit or figures from different manufacturers.

"The only thing a man should take seriously is the fact that nothing should be taken seriously."
Samuel Butler, Victorian satirist
Steve Willoughby
Queensland, Australia
Joined: September 04, 2015
KitMaker: 1,517 posts
Armorama: 1,109 posts
Posted: Wednesday, December 07, 2016 - 03:46 AM UTC
Yes for sure but in this case the difference is not just physical,helmet,guns,and all the gear and accessories are in scale
I already try to give a 1/35 gun and bicycle to a 54mm Beneito figurine the difference in not massive but the Lee-Enfield looks a BBgun and the bicycle a kids/teenager one,and if you do the opposite the 54mm gun seams a Arquebus of the 1500
Noord-Holland, Netherlands
Joined: October 10, 2010
KitMaker: 764 posts
Armorama: 742 posts
Posted: Saturday, December 10, 2016 - 04:38 AM UTC
Quoted Text
does anybody have any information on the concrete emplacement behind the gun? I am assuming it is basically a single room to shelter the gun when it is not being fired, but if anybody has any plans or line drawings of a similar emplacement they could share I would be very grateful!
Cheers 
ColinEdm
 Associate Editor
Alberta, Canada
Joined: October 15, 2013
KitMaker: 1,355 posts
Armorama: 1,229 posts
Posted: Saturday, December 10, 2016 - 09:46 PM UTC
Thank you Maarten! That is just what I am looking for! only problem is that now I feel like I will be copying you...😕
The voices are back.....excellent....
Noord-Holland, Netherlands
Joined: October 10, 2010
KitMaker: 764 posts
Armorama: 742 posts
Posted: Sunday, December 11, 2016 - 12:01 AM UTC
No worries it's no longer in my possession.
ColinEdm
 Associate Editor
Alberta, Canada
Joined: October 15, 2013
KitMaker: 1,355 posts
Armorama: 1,229 posts
Posted: Saturday, February 04, 2017 - 11:00 AM UTC
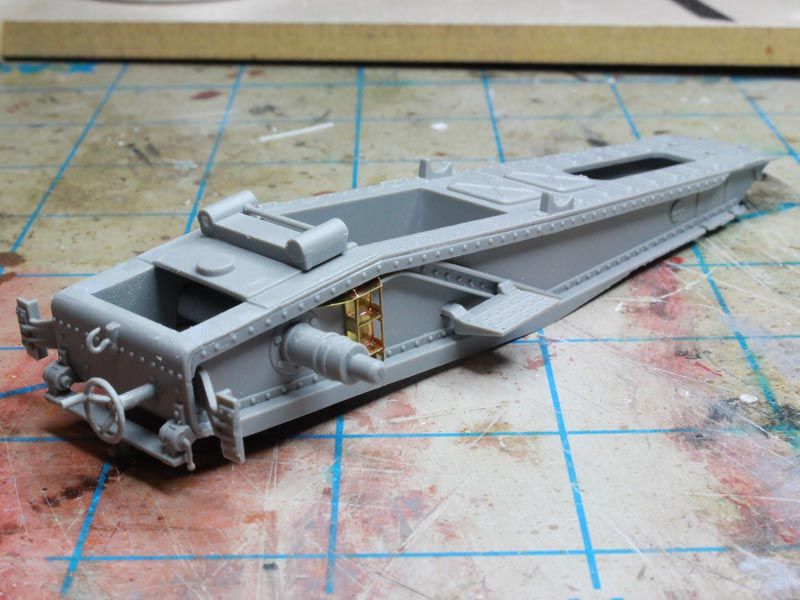
Finally started on this, a bit of work on the trail of the gun:
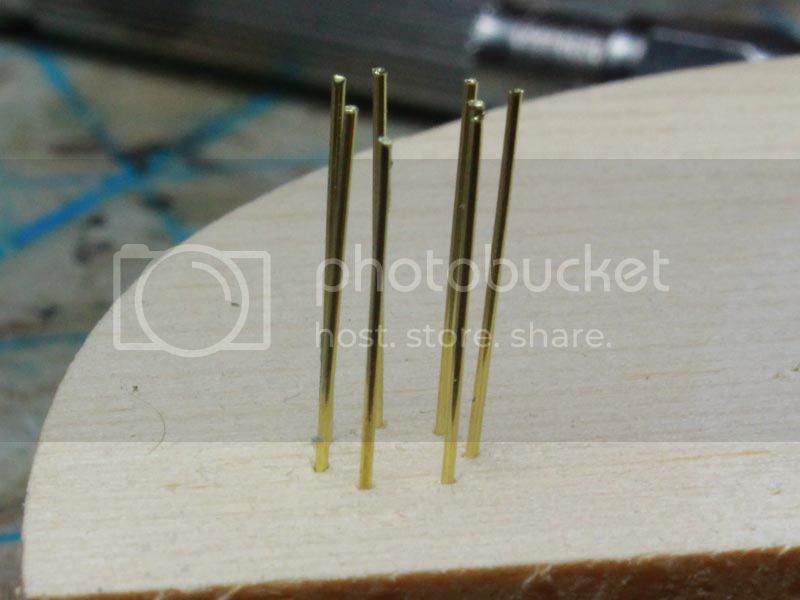
And the really fun part, making the wicker ammunition panniers that can be seen lying around the position. For my first attempt I made a jig out of some pine board with holes drilled in a circle the size of the shell, then inserted 0.020" brass rod:
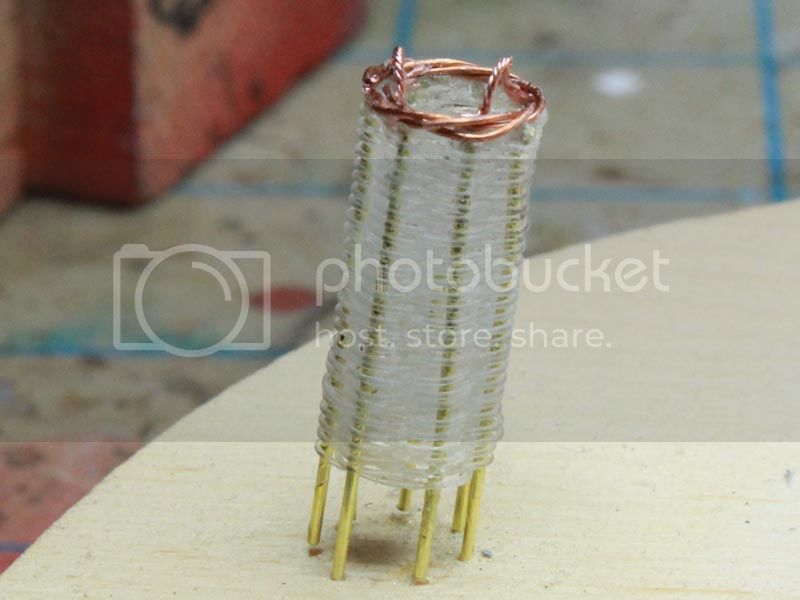
Then I started weaving 0.020" fishing line around the rods until I got to the proper (approximated) height:

At the top I added some braided copper wire and handles:
Then I flipped it over and mounted it on some 6mm tube I had and bent the brass rods in to make the base. Having a devil of a time threading the line through that!
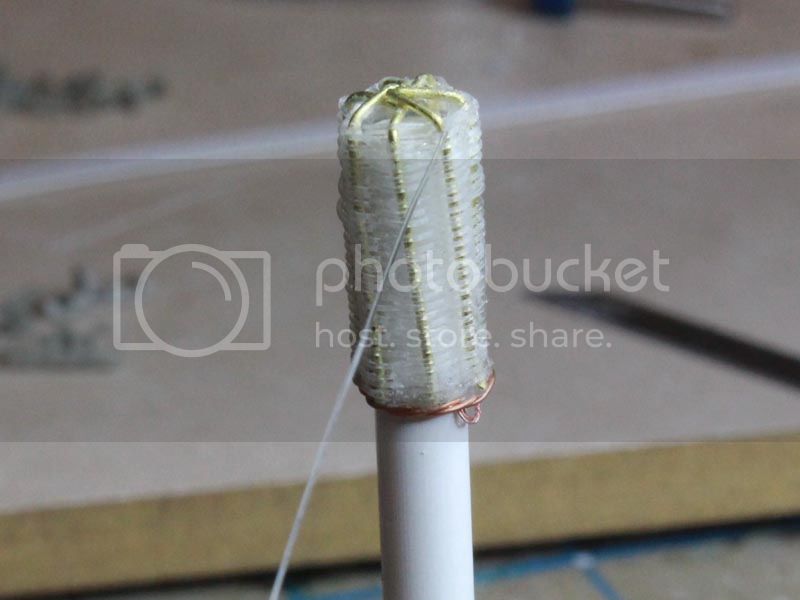
I am trimming/filing these down a bit to make the base flatter, but it doesn't have to be perfect with all the dirst/mud and other junk that will be lying around. Going to try and get some thinner rod to use for the next one.
The voices are back.....excellent....
Noord-Holland, Netherlands
Joined: October 10, 2010
KitMaker: 764 posts
Armorama: 742 posts
Posted: Saturday, February 04, 2017 - 03:53 PM UTC
England - East Midlands, United Kingdom
Joined: January 17, 2006
KitMaker: 1,694 posts
Armorama: 1,584 posts
Posted: Saturday, February 04, 2017 - 06:52 PM UTC
What a brilliant idea! Cheap and cheerful but looks really effective. How many have you got to make?
Nothing is so exhilarating in life as to be shot at with no result.
- Winston Churchill
ColinEdm
 Associate Editor
Alberta, Canada
Joined: October 15, 2013
KitMaker: 1,355 posts
Armorama: 1,229 posts
Posted: Saturday, February 04, 2017 - 07:34 PM UTC
Thanks guys, I got the idea from a WWI airplane modelling site, a guy was re-doing the wicker seat of his Sopwith. Probably have to make at least a half dozen, more if I want to have the interior of the bunker. Also depends on how long my patience (and wine - for steadying my hands of course) holds out!
The voices are back.....excellent....
ColinEdm
 Associate Editor
Alberta, Canada
Joined: October 15, 2013
KitMaker: 1,355 posts
Armorama: 1,229 posts
Posted: Saturday, February 04, 2017 - 11:40 PM UTC
So I took a different tack on the bottom of the pannier, I started by soldering a |starfish out of brass rod:
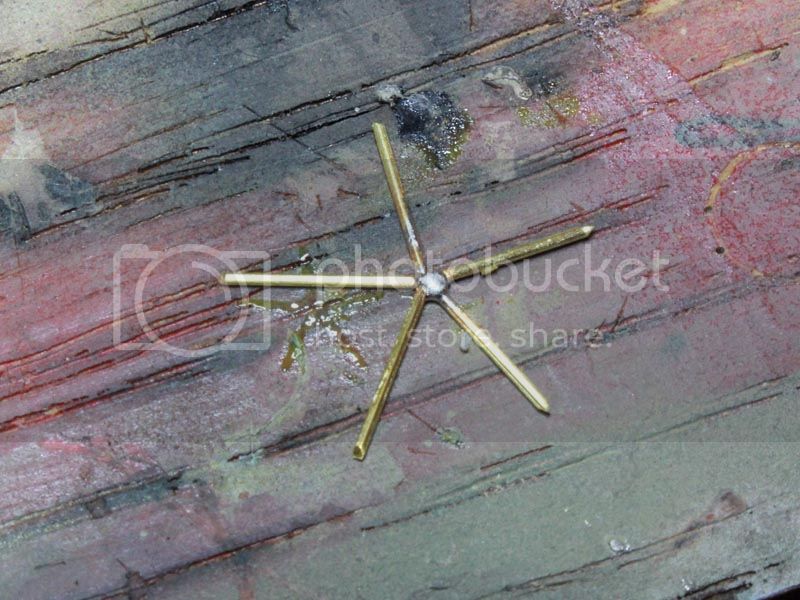
Then threading the fishing line through that:

I trimmed the excess rod off and glued to the bottom of the pannier tube. Painted up it looks pretty good, not perfect but I think it will do the trick:
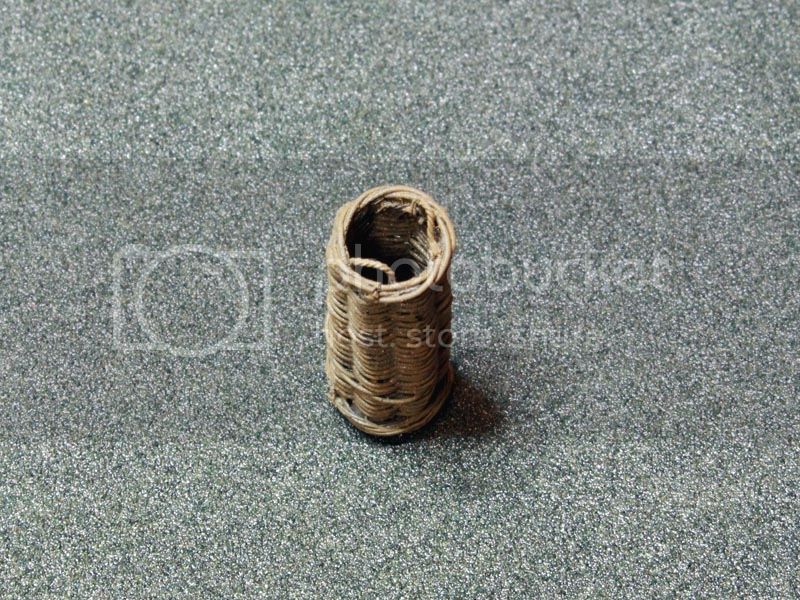

The voices are back.....excellent....
Noord-Holland, Netherlands
Joined: October 10, 2010
KitMaker: 764 posts
Armorama: 742 posts
Posted: Sunday, February 05, 2017 - 12:07 AM UTC
Smart thinking

Looks Good !
Manche, France
Joined: March 20, 2007
KitMaker: 340 posts
Armorama: 328 posts
Posted: Sunday, February 05, 2017 - 12:33 AM UTC
Excellent job and great inspiration as I need similar for a "Big Bertha"....
Thanks

Sean
ColinEdm
 Associate Editor
Alberta, Canada
Joined: October 15, 2013
KitMaker: 1,355 posts
Armorama: 1,229 posts
Posted: Monday, February 06, 2017 - 05:57 AM UTC
Quoted Text
Excellent job and great inspiration as I need similar for a "Big Bertha"....
Thanks 
Sean
Here's a good reference for you Sean:
http://www.kaisersbunker.com/cc/cc16.htmThe voices are back.....excellent....
Manche, France
Joined: March 20, 2007
KitMaker: 340 posts
Armorama: 328 posts
Posted: Tuesday, February 07, 2017 - 02:58 PM UTC
Thanks Colin,
That should keep me out of trouble for some time.....
ColinEdm
 Associate Editor
Alberta, Canada
Joined: October 15, 2013
KitMaker: 1,355 posts
Armorama: 1,229 posts
Posted: Sunday, April 23, 2017 - 09:19 AM UTC
The voices are back.....excellent....

#424
Queensland, Australia
Joined: April 23, 2015
KitMaker: 4,648 posts
Armorama: 2,248 posts
Posted: Sunday, April 23, 2017 - 09:27 AM UTC
"Artillery adds dignity, to what would otherwise be an ugly brawl."
Frederick The Great
New Jersey, United States
Joined: January 05, 2005
KitMaker: 2,185 posts
Armorama: 1,813 posts
Posted: Sunday, April 23, 2017 - 03:40 PM UTC
Beautiful build Colin , brilliant work on the ammo carriers .


