Dioramas
Do you love dioramas & vignettes? We sure do.
A Little Kindness Goes A Long Way.
zorrolobo
Visit this Community
Distrito Federal, Mexico
Joined: May 31, 2013
KitMaker: 1,457 posts
Armorama: 1,440 posts
Posted: Thursday, March 16, 2017 - 10:39 PM UTC

Quoted Text

The way my hand shakes anymore I am forced to paint the eyes first. Next I do a base color coat for dark or light complexion. I then paint the hair. Next I do a quick clear coat so I don't mess up the eyes. Then I do the skin color. Another clear coat to protect that. Then I do an oil wash over the whole figure for highlighting and contrasts. Lastly a flat coat and a dusting with pastels. Not the best process, but it's the way I've done things for a while now. The bad thing is my eyes and hands just don't talk to each other as well as they use to.


for the eyes what I do is paint the face first; then paint eye sockets black; then do the clear coat. Then with white oil paint do two tiny spots on either side of eye socket and that looks usually pretty good. If they don't, I just clean the oil and start over. Sometimes I do need to retouch the iris/pupil with black to correct too much white. Good thing is that with the clear coat you can clean the oil paint as many times as you want and try again.
YSUMark
Visit this Community
Ohio, United States
Joined: February 27, 2017
KitMaker: 110 posts
Armorama: 107 posts
Posted: Sunday, March 19, 2017 - 10:01 PM UTC
Had a few hours today to do some touch up and give the soldiers a wash.


Now I'm going to have to let everything sit for a few days, then I can give everyone a flat coat and pastels.
kubisz
Visit this Community
Wojewodztwo Slaskie, Poland
Joined: February 18, 2007
KitMaker: 978 posts
Armorama: 977 posts
Posted: Sunday, March 19, 2017 - 11:03 PM UTC
Mark, doing next photos please take a sheet of plain white paper (or may be in a different color, as long as it's monotone). No offense, but this mess behind photographed figures is very disturbing

The Iraqi faces look better.

I guess two of the soldiers have got their goggles upside down (this one next to the dog and the second one from the right - on the last photo).
YSUMark
Visit this Community
Ohio, United States
Joined: February 27, 2017
KitMaker: 110 posts
Armorama: 107 posts
Posted: Sunday, March 19, 2017 - 11:32 PM UTC
I thought those goggles were wrong, but didn't know.

I'll do the white paper thing, but that's the best my workbench has looked in months
HeavyArty
Visit this Community
Florida, United States
Joined: May 16, 2002
KitMaker: 17,694 posts
Armorama: 13,742 posts
Posted: Monday, March 20, 2017 - 05:14 AM UTC
The figures look pretty monochromatic. To bring some more life to them, you could try varying the color on the ammo pouches and such.

The larger, square M16 ALICE magazine pouches with the grenade side pouches only come in green.


You could also do some of the non-ALICE ammo and other pouches in woodland camo to add variety, like on this Marine.


The smaller first aid pouches are usually green.


9mm ammo pouches come in a variety of colors.


Adding darker buttons and snaps will add some variety. You can also vary the color of the boots, you will notice they are not the same color as the sand of the uniforms.

Lastly, the CVC helmets on the armored crewmen should not be all sand. Only the hard shell is painted sand. The side pieces are green fabric and the earphones are black. You could add the boom mikes too.

vettejack
Visit this Community
Florida, United States
Joined: November 23, 2012
KitMaker: 1,277 posts
Armorama: 1,254 posts
Posted: Monday, March 20, 2017 - 05:39 AM UTC

Quoted Text

If I may make a suggestion, for easy, decent looking faces, you might do the following: Overall coat of basic skin tone; followed by a wash of darker skin tone (Vallejo fleshtone shade wash works great) not very heavy; Then dry brush the basic skin tone to blend the shadows; then add a touch of white to the basic skin tone and lightly dry brush some highlights. Lastly, paint eyes , lips, and hair. You are done. With practice this method gives you very decent heads without having to go to oils and all that. Simple and effective.


There is a decal sheet with different types/shapes/shades of eyes...along with other human features...but I can't recall who does that sheet. Worth researching/looking into to...will greatly enhance your facial features/expressions.
YSUMark
Visit this Community
Ohio, United States
Joined: February 27, 2017
KitMaker: 110 posts
Armorama: 107 posts
Posted: Monday, March 20, 2017 - 01:54 PM UTC

Quoted Text

The figures look pretty monochromatic. To bring some more life to them, you could try varying the color on the ammo pouches and such.

The larger, square M16 ALICE magazine pouches with the grenade side pouches only come in green.


You could also do some of the non-ALICE ammo and other pouches in woodland camo to add variety, like on this Marine.


The smaller first aid pouches are usually green.


9mm ammo pouches come in a variety of colors.


Adding darker buttons and snaps will add some variety. You can also vary the color of the boots, you will notice they are not the same color as the sand of the uniforms.

Lastly, the CVC helmets on the armored crewmen should not be all sand. Only the hard shell is painted sand. The side pieces are green fabric and the earphones are black. You could add the boom mikes too.


Thanks for all the great info. I'll do some updating on the men sometime this week. I was painting the ammo pouches just brown and green. I did highlight all the snaps, but it doesn't show up in the pictures. I'm hoping it does when I flat coat everything, if not I'm going to re do them as well. I was referencing some pictures I found on line, but these pictures of the pouches are much better. With all the time I have invested in the men so far I don't mind going back and touching up things to make it better.

As for decals for the eyes, I think I'm going to keep practicing painting them. It's a challenge thing now.

Keep the critiques coming, I'll figure this non Navy modeling stuff out sooner or later.
YSUMark
Visit this Community
Ohio, United States
Joined: February 27, 2017
KitMaker: 110 posts
Armorama: 107 posts
Posted: Wednesday, March 22, 2017 - 08:43 PM UTC
Got everyone touched up and flat coated the other day, but work got in the way of an update.
Here's one of the drivers flat coated. I re did the helmets to correct the colors of the ear pieces.

I will be adding a mic boom as suggested but I'll do this before they are put on display.

I made some small touch ups before I flat coated the men. I'm happy with how they all came out. Next I'm going to give them all a dusting with yellow pastels and I'll be done with the people.


I know this isn't part of this dio, but it came in the mail last night and I'm very excited. One of my good friends drove one of these while he was in the Marines. I'm going to do a stream crossing dio with this and give it to him for his birthday.
I've always been a ship guy, but I'm quickly starting to like doing armor dios.
HeavyArty
Visit this Community
Florida, United States
Joined: May 16, 2002
KitMaker: 17,694 posts
Armorama: 13,742 posts
Posted: Thursday, March 23, 2017 - 02:08 AM UTC
Looking better. The variations in color look good and add some life to them.
YSUMark
Visit this Community
Ohio, United States
Joined: February 27, 2017
KitMaker: 110 posts
Armorama: 107 posts
Posted: Thursday, March 23, 2017 - 02:36 AM UTC

Quoted Text

Looking better. The variations in color look good and add some life to them.


Thanks.

I wish you could see them in person. My camera is seriously washing out the colors.
strongarden
Visit this Community
Florida, United States
Joined: May 14, 2012
KitMaker: 730 posts
Armorama: 624 posts
Posted: Thursday, March 23, 2017 - 06:24 AM UTC
Mark, this is really looking good, very clean painting for a "ship guy"...
The stream-crossing idea sounds interesting too. Looking for more.
Regards
Dave
YSUMark
Visit this Community
Ohio, United States
Joined: February 27, 2017
KitMaker: 110 posts
Armorama: 107 posts
Posted: Saturday, March 25, 2017 - 09:55 PM UTC

Quoted Text

Mark, this is really looking good, very clean painting for a "ship guy"...
The stream-crossing idea sounds interesting too. Looking for more.
Regards
Dave


Thanks.

Today I gave all the people a powder coat with pastels and gave the men their weapons.


Next it's time to start on the LAV.

I took pictures of all the kit's sprue if anyone's interested.
69mudbone
Visit this Community
California, United States
Joined: April 26, 2016
KitMaker: 362 posts
Armorama: 285 posts
Posted: Saturday, March 25, 2017 - 10:26 PM UTC
Hi Mark, I will be following this build I have this LAV in my wish list, curious on what you think of kit.
YSUMark
Visit this Community
Ohio, United States
Joined: February 27, 2017
KitMaker: 110 posts
Armorama: 107 posts
Posted: Sunday, March 26, 2017 - 12:10 AM UTC

Quoted Text

Hi Mark, I will be following this build I have this LAV in my wish list, curious on what you think of kit.


I am very happy with the kit. Here's a picture of me holding the top and bottom half of the LAV.

There's literally no gaps anywhere, so I'm hoping the kit falls together nicely.
YSUMark
Visit this Community
Ohio, United States
Joined: February 27, 2017
KitMaker: 110 posts
Armorama: 107 posts
Posted: Friday, March 31, 2017 - 03:59 AM UTC
With help from this site I've decided to do my LAV 25 painted like the box art.
I took pictures of all the Sprew, and posted it on my model page.
You can check them out if you'd like
https://ussnorthcaroilna.shutterfly.com/marinedio/24

I'm going to be busy until Tuesday, so there's not going to be much building going on. The first of the week they're calling for rain so maybe I'll get something done.
YSUMark
Visit this Community
Ohio, United States
Joined: February 27, 2017
KitMaker: 110 posts
Armorama: 107 posts
Posted: Wednesday, April 05, 2017 - 07:10 AM UTC
After working 5 16s in a row I was happy to get back to the build, even if it was just for a little bit.
It was nice to finally start on the LAV kit.


The glass went in easy enough, but I'm wondering how I'm going to mask it during painting.

Next I cleaned what little flash was on the main body.
Here's the best way I could come up with to clamp the halves together.

Which seemed to work nicely.


The main body fit well enough, but the back panel not so much.
I'll need to do some filling and filing to make this look right.


I also had enough time to clean up Parts A3 and A4, along with A21, A27, and A28.
Then it was time to fire up the grill, throw down some adult beverages and cook some yard bird.
I'll have some time off this week, so I'm hoping to get a lot done.

white4doc
#429
Visit this Community
Massachusetts, United States
Joined: October 14, 2003
KitMaker: 1,086 posts
Armorama: 964 posts
Posted: Wednesday, April 05, 2017 - 08:26 PM UTC
Mark,

The LAV is coming along nicely, the Trumpeter LAV's are all pretty nice kits. Just keep in mind that the jerry cans included in the kit will need to be replaced as they are the old metal ones; you'll also need a Platt mount for the VC's 240. Keep up the good work!
YSUMark
Visit this Community
Ohio, United States
Joined: February 27, 2017
KitMaker: 110 posts
Armorama: 107 posts
Posted: Thursday, April 06, 2017 - 07:36 AM UTC

Quoted Text

Mark,

The LAV is coming along nicely, the Trumpeter LAV's are all pretty nice kits. Just keep in mind that the jerry cans included in the kit will need to be replaced as they are the old metal ones; you'll also need a Platt mount for the VC's 240. Keep up the good work!


Thanks for the heads up with the Jerry Cans, I had no idea. I had plans on getting the mount, and the gunner, but these plans are on temporary hold as the wife got the ax the other day. I figure that the mount can be added anytime in the future, and the wife won't be out of work long, so purchasing extras is on hold for now. I'll most likely use the box jerry cans for now, but I'll mount them with PVA so they can easily be swapped out later.
I'm also planning on mounting the gunner hatch with PVA so I can quickly open it when I get the parts.

Anyhow back to the build. I did get a little done today.
I started out by getting the back in shape.

A lot of sanding, a little bit of spot putty and it's good to go.

Next I prepped all the parts for the rest of steps 1 and 2.


That's all the time I had tonight. More to come next week.
YSUMark
Visit this Community
Ohio, United States
Joined: February 27, 2017
KitMaker: 110 posts
Armorama: 107 posts
Posted: Wednesday, April 12, 2017 - 04:53 AM UTC
Back in town, and had a little time to work on the LAV.
If anyone's going to make one of these LAVs I've found a few things that'll make things easier for you.

First Drill the holes a little bigger for the drive train (Parts A 21, 27, and 28) the holes are just a touch to tight.

Next don't glue parts A25. I found out the hard way that if you don't glue these parts the shocks (Parts A18) will fit into their spots. I glued them down, and the front A3 needed the pin cut so A25 could move up just a bit letting the shocks fit in their spots.

The rest of the build is going nicely.
I'm done with section 3 and working on section 4.
Here's what it looks like so far.


Note the flash on part A21. I felt it'll be a little easier to scrape it glued in. I needed 3 hands to support it and not brake the axles off. Glued in I can hold the end with my finger and lightly scrape the flash with a sharp #11.
YSUMark
Visit this Community
Ohio, United States
Joined: February 27, 2017
KitMaker: 110 posts
Armorama: 107 posts
Posted: Friday, April 21, 2017 - 07:36 AM UTC
I haven't abandoned this build.
The lawn and life has put the slowdown on it.
I will have a few days off next week, and am hoping to get a lot done on the LAV.
69mudbone
Visit this Community
California, United States
Joined: April 26, 2016
KitMaker: 362 posts
Armorama: 285 posts
Posted: Friday, April 21, 2017 - 08:17 AM UTC
Hi Mark, looking good thanks for the tips on the build I'm getting close to pulling the trigger and purchase the kit
YSUMark
Visit this Community
Ohio, United States
Joined: February 27, 2017
KitMaker: 110 posts
Armorama: 107 posts
Posted: Friday, April 21, 2017 - 09:02 AM UTC

Quoted Text

Hi Mark, looking good thanks for the tips on the build I'm getting close to pulling the trigger and purchase the kit


It's a very nice kit, you won't be sorry.
YSUMark
Visit this Community
Ohio, United States
Joined: February 27, 2017
KitMaker: 110 posts
Armorama: 107 posts
Posted: Saturday, May 06, 2017 - 10:05 PM UTC
It's been a while since I've had any time to work on my dio.
Since the wife was out of town and the rain made it impossible to do anything in the swamp I once called a yard, I made my way down stairs to get some work done.
I finished up the undercarriage.


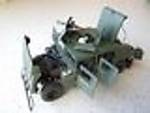
Then it was time to flip the LAV over and work on the top. I got a lot done before I had to go back to the day's tasks.


I'm hoping to get a little more done before I have to go back to work on Wednesday.
YSUMark
Visit this Community
Ohio, United States
Joined: February 27, 2017
KitMaker: 110 posts
Armorama: 107 posts
Posted: Friday, October 13, 2017 - 11:41 AM UTC
I know it's been a LONG time since I've worked on this one, but now the weather is changing and it's time to get back to work.
vettejack
Visit this Community
Florida, United States
Joined: November 23, 2012
KitMaker: 1,277 posts
Armorama: 1,254 posts
Posted: Friday, October 13, 2017 - 04:36 PM UTC
To be a bit more realistic with the eyes, ZOTZ Decals, has a set that covers just about every scale of modeling for the human eye...even in different colors. Found on EBay, and other places of course. Nice work by the way!!