Hosted by Darren Baker
MENG 1/35 King Tiger WITH INTERIOR
canuck63
Quebec, Canada
Joined: December 23, 2003
KitMaker: 122 posts
Armorama: 96 posts
Joined: December 23, 2003
KitMaker: 122 posts
Armorama: 96 posts
Posted: Tuesday, May 16, 2017 - 05:48 PM UTC
Hi one and all,
after a very long hyatus here I am at it again,this time with the magnificent King Tiger by Meng.
Nowadays we're treated to a real KT bonanza but IMHO the best offering is the one by Meng,even if it's not perfect by any means,as the "Tiger Gurus" have ointed out,still in my HUMBLE opinion it remains a great,little kit!As we all know there are two very new kids on the block at the moment,i.e. the Takom KT,which in my opinion is a sort of downscaled 1/16 Trumpy with its pros AND CONS and the Meng KT,which looks totally new!The former comes with a complete interior,whereas the latter CAN be fitted with a very comprehensive interior kit sold separately and patterned after the oustanding work by David Parker.The Takom interior isn't as refined as the Meng's but the latter can be easily fitted to the former,totally or in part!
The Meng kit(s) gives(s) you the best run for the money,in fact after I had received the kits I had preordered from a HK online shop I've purchased another tank and an interior set off eBay for £38,shipping included!!!!!!!
Along my byuild I'll use a few stunning builds of the 1/16 Trumpy Big Cat as reference,and Dmitry's and David's ones are very inspirational!
Before going on further a summarized story of the tank is mandatory:
The King Tiger was a HUGE WW2 German Tank which it had been called "King Tiger" by the Allies because it was king-size,a sort of armoured Double Big Mac! :-)
Cheers
Manu
canuck63
Quebec, Canada
Joined: December 23, 2003
KitMaker: 122 posts
Armorama: 96 posts
Joined: December 23, 2003
KitMaker: 122 posts
Armorama: 96 posts
Posted: Tuesday, May 16, 2017 - 05:50 PM UTC
The interior set is a very complete one and the box is chock-full of sprues with delicately-rendered details.Nothing is left to chance and this will be a very entertaining build from the get go,since it will only require a few added details to satisfy everyone but the most taliban of the rivet counters!Me..I'll try to stay the hell away from superdetailing this time around,but I'll try to make as clean a build as possibleI've had my local paint shop prepare for me a few bottles of one of the many hues of ROP used by the Germans,identical to the shade found inside a box from a SdKfz 10 in my collection!
I'll add some Gunze Mr. Levelling Thinner and it'll go on silky-smooth and will be impervious to rough handling and ideal for the kind of "mechanical" weathering I've got in mind!
canuck63
Quebec, Canada
Joined: December 23, 2003
KitMaker: 122 posts
Armorama: 96 posts
Joined: December 23, 2003
KitMaker: 122 posts
Armorama: 96 posts
Posted: Tuesday, May 16, 2017 - 05:57 PM UTC
Given the sheer quantity of parts I'll try to stick to the instructions booklet as much as I'll be able to,but be warned that everything is a very tight fit and that you'll be much better off pre-painting a few sub-assemblies and parts as you'll go!
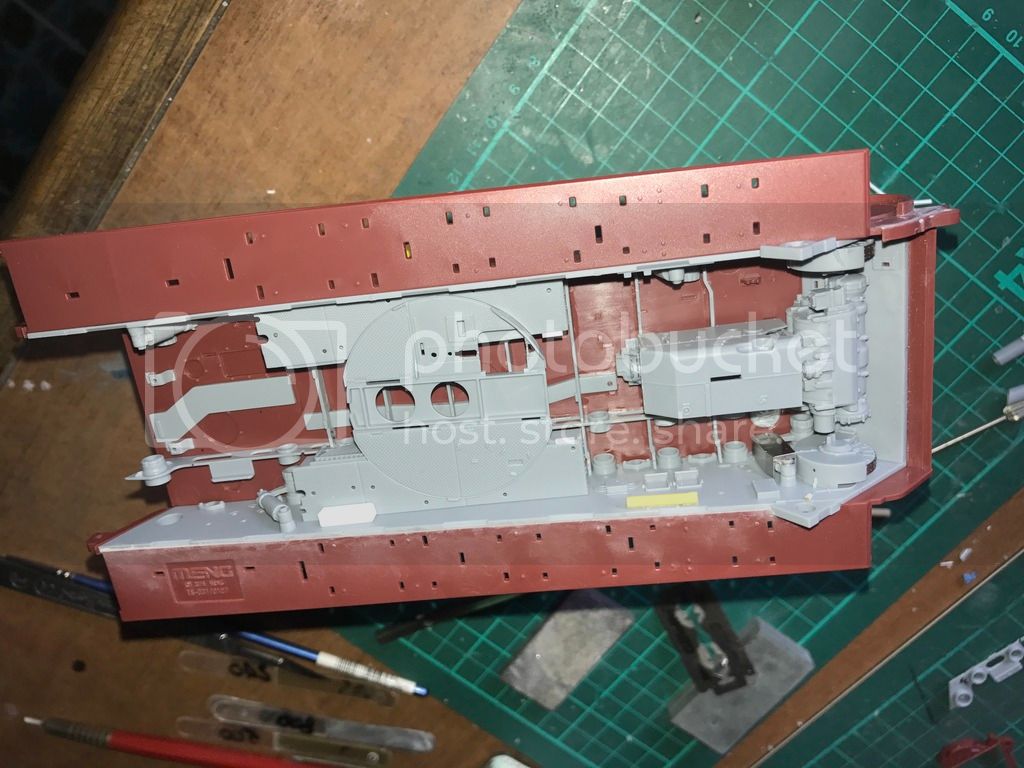
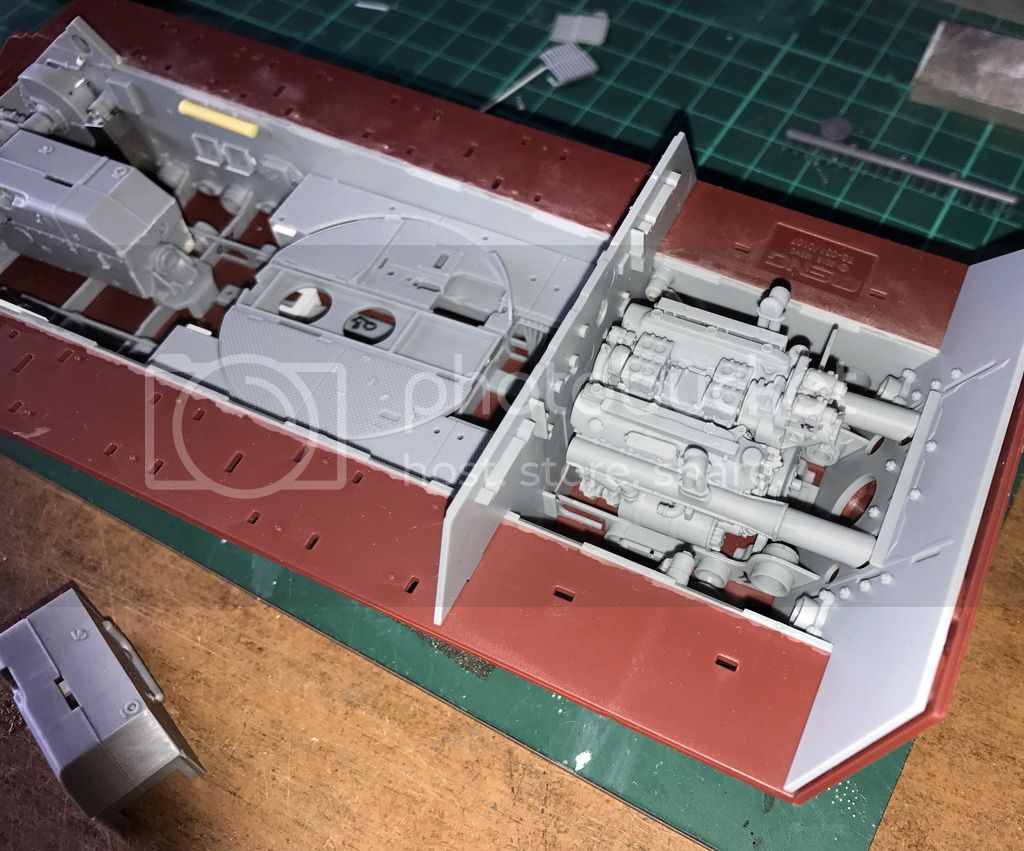
It's VITAL to check EVERY part before hitting the glue.The fit is absolutely first-rate,so good in fact that you only have to carefully sand all edges and mating surfaces to have a flawless finish/fit.That's particularly important with the lower hull's sides.A light sanding will guarantee a perfect fit,especially so on the port side where there are a few "proud" ejection marks
canuck63
Quebec, Canada
Joined: December 23, 2003
KitMaker: 122 posts
Armorama: 96 posts
Joined: December 23, 2003
KitMaker: 122 posts
Armorama: 96 posts
Posted: Tuesday, May 16, 2017 - 11:11 PM UTC
As I've already said this KT IMHO is the best option out there but it's got its share of "quirks",the more annoying of which is a noticeable "positive camber" to the roadwheels that can be solved rathger easily,though!
In this YouTube video John shows a solution to the "positive camber" issue:
https://www.youtube.com/watch?v=8RHqQ-SyEbA&t=3341s
A few days ago I came to a similar solution but didn't want to say anything because it was just a conjecture on my behalf not having actually tried it, building my kit with the torsion bars found in the Meng interior and workable tracks sets (which thing would cure this issue!) but now I know that it could and would work;if the "camber" is not there with the internal torsion bars fitted then the culprits must be the two internal braces to secure the swingarms used when building the "standard" kit.In my case I woudn't have cut anything like John suggests,becuse the two braces help keeping the torsion arms nicely lined-up,I'd have simply "secured" the internal braces at their very bottom with a few drops of glue,let it cure for,say,three minutes,install the foremost and rearmost left and right swingarms,load the hull with a LIGHT weight until ALL the four arms would evenly touch the ground and THEN secure and brace-up the internal braces (pun not intended!) with plastic stock gussets and CA in a slightly askew positon (since they'll be hidden elegance is not important...FUNCTION IS!) that would have given a positive poise to the tank,lowereing it a tad in the process,which thing would be nice because the Takom,Meng and DML KTs sit a little "high" as an empty tank would!
It's easier done than described and I hope that it will help!
Cheers
Manu
canuck63
Quebec, Canada
Joined: December 23, 2003
KitMaker: 122 posts
Armorama: 96 posts
Joined: December 23, 2003
KitMaker: 122 posts
Armorama: 96 posts
Posted: Tuesday, May 16, 2017 - 11:23 PM UTC
When I say that IMHO the Meng KT is superior to the Takom don't get me wrong;I think that the Takom KT is a nice kit but the Meng is quite a few steps above it!
As said,the Meng kit's roadwheels have a noticeable positive cambers to them when you assemble the "standard" kit!
There are lots of internal details in the Takom kit that are much more defined (and refined) in the Meng,and the most noticeable of them is the ammo stowage:
As said,the Meng kit's roadwheels have a noticeable positive cambers to them when you assemble the "standard" kit!
There are lots of internal details in the Takom kit that are much more defined (and refined) in the Meng,and the most noticeable of them is the ammo stowage:
canuck63
Quebec, Canada
Joined: December 23, 2003
KitMaker: 122 posts
Armorama: 96 posts
Joined: December 23, 2003
KitMaker: 122 posts
Armorama: 96 posts
Posted: Tuesday, May 16, 2017 - 11:27 PM UTC
The ones who already have the Takom King Tiger could benefit from a few details from the Meng interior set,rather than scratchbuilding them or waiting for the next resin detailing set,in fact many parts are almost identical dimensionwise or easily modified to fit,and the Meng interior kit is a steal at £13 from some eBay Chinese sellers!
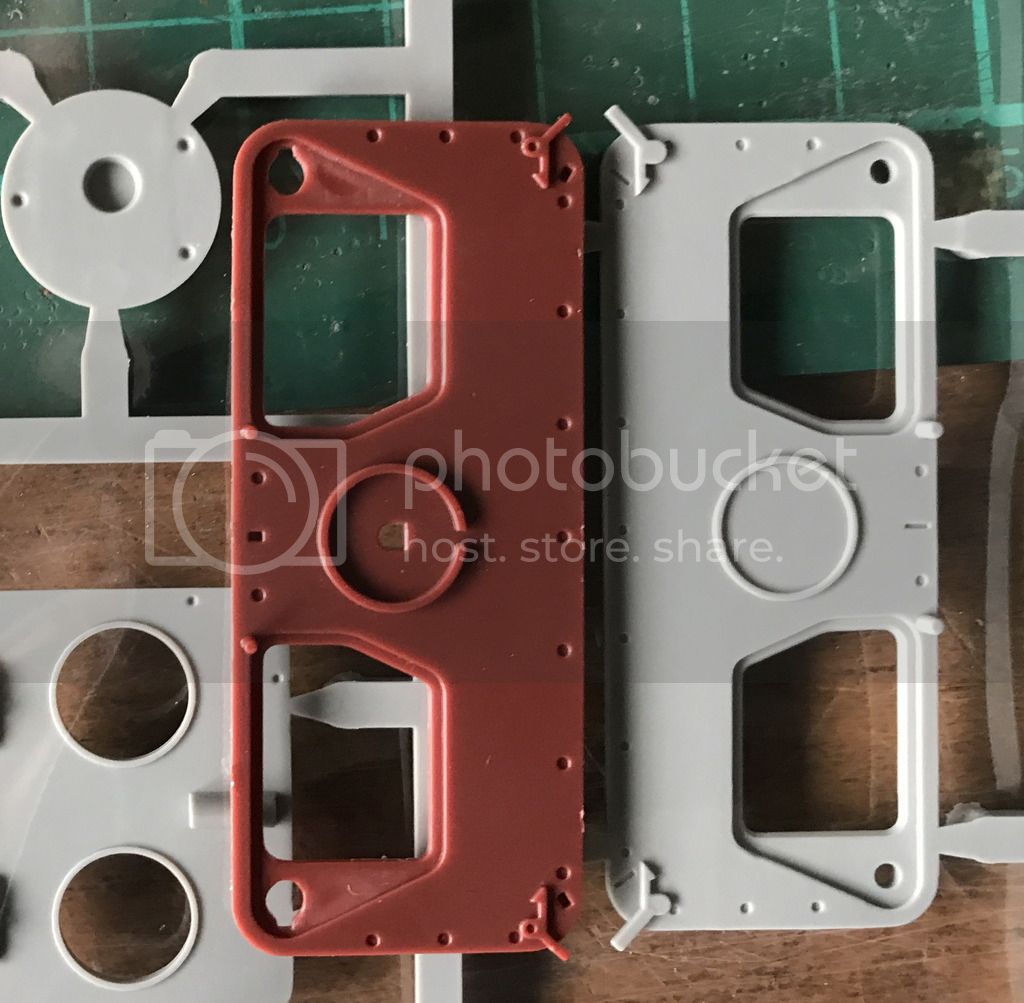
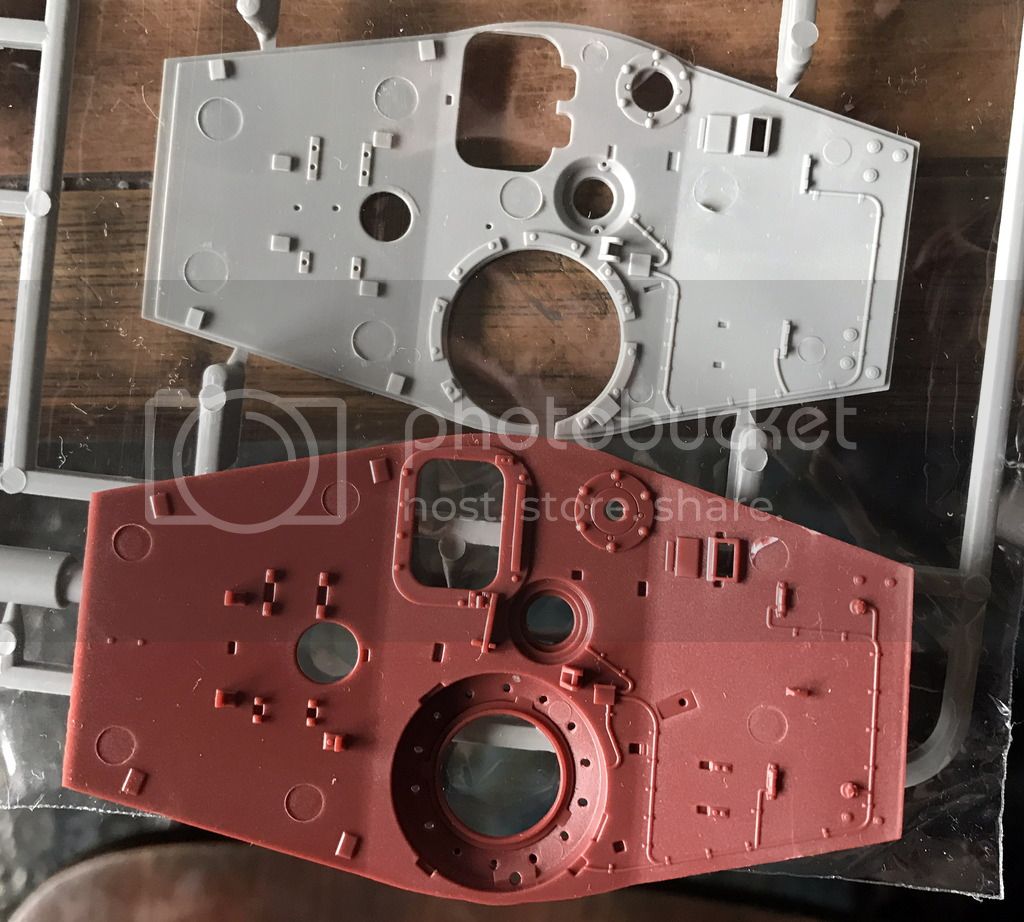
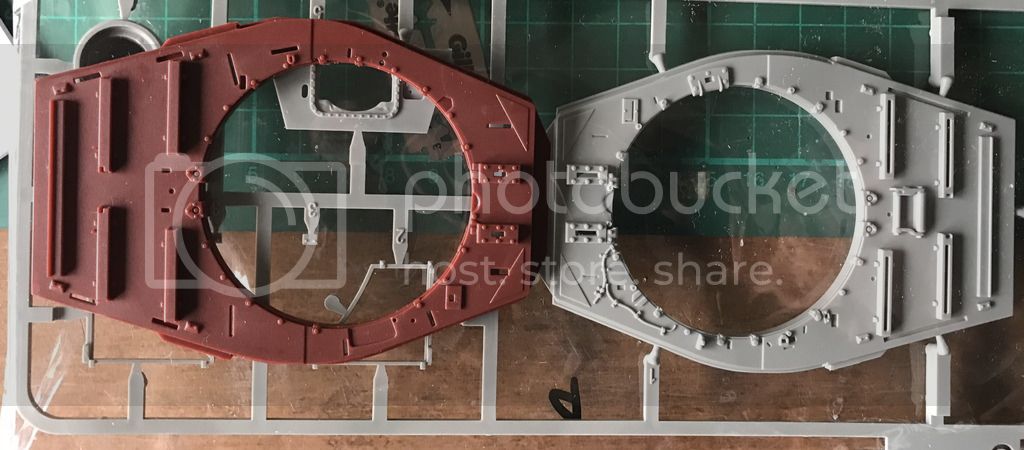
Here you go a few pictures showing the differences between the Meng(red) and the Takom (grey) parts!Some are very subtle but the Meng will win hands down and build into a more detailed and better researched kit!
DISCLAIMER;I PAY FOR MY KITS AND DO A BIT OF HOMEWORK!
Notice how on the Takom kit the spare periscopes,the "atemschlauch" and the hydraulic levers are cast on the sides!
canuck63
Quebec, Canada
Joined: December 23, 2003
KitMaker: 122 posts
Armorama: 96 posts
Joined: December 23, 2003
KitMaker: 122 posts
Armorama: 96 posts
Posted: Tuesday, May 16, 2017 - 11:31 PM UTC
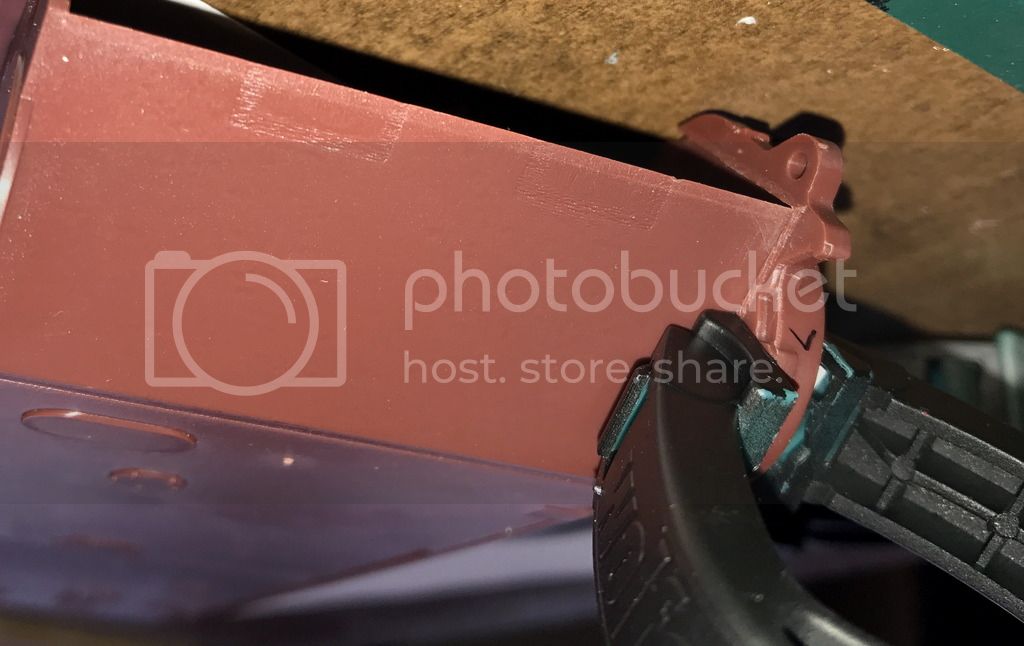
The roofs of both the Takom and the Meng turrets are marred with ejection mareks that must be filled and sanded flush.Ditto for the bolted on panel over the driver and RO!
The Meng engine hatch is wonderful,whereas the Takom isn't very accurate!
canuck63
Quebec, Canada
Joined: December 23, 2003
KitMaker: 122 posts
Armorama: 96 posts
Joined: December 23, 2003
KitMaker: 122 posts
Armorama: 96 posts
Posted: Saturday, May 20, 2017 - 04:01 PM UTC
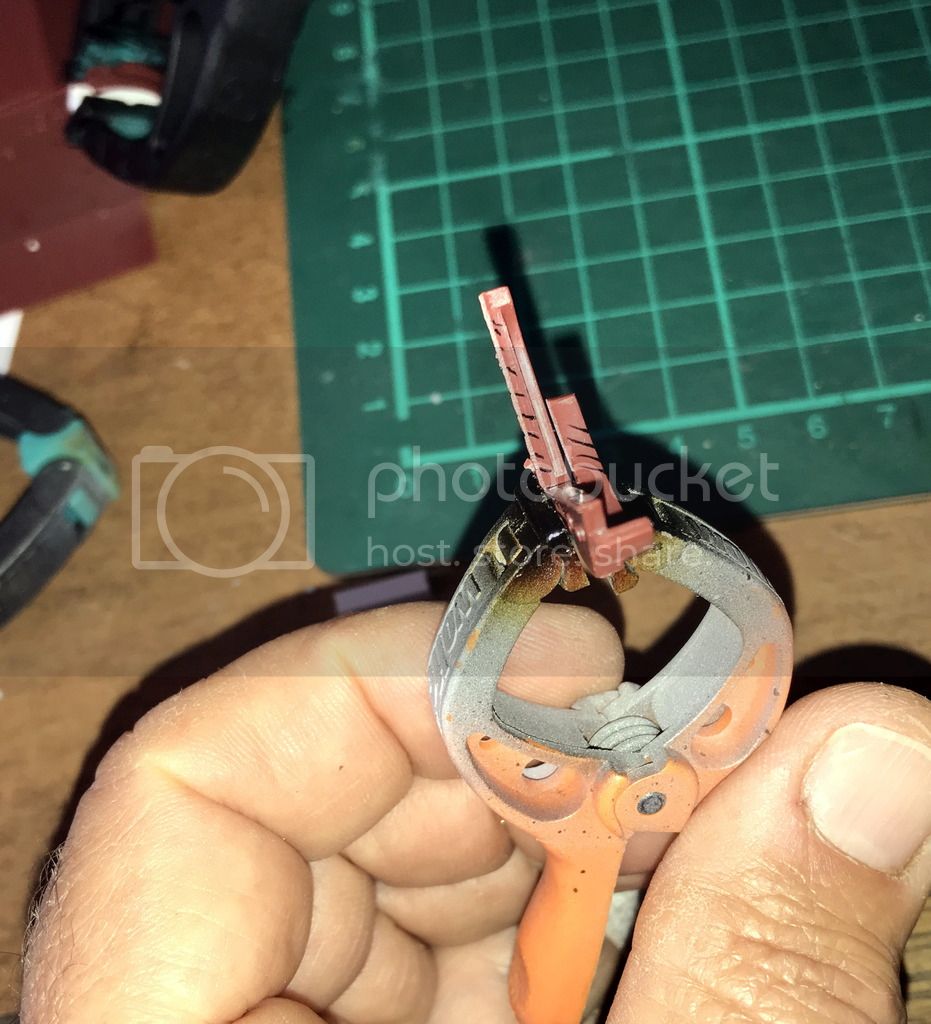
I've checked my lower hull and it's as square as they come!I've read with interest the threads started by a few modellers and part D7 and D9 are actually a bit on the "crooked" side IF glued without checking their final position!They must be scraped a little bit on their inner mating surfaces and checked for fit!No "perfect" kit has been produced so far and Meng sure isn't an exception,but the pictures I've seen so far show an error on behalf of the operator!There's no such thing as a "shake 'n bake" kit and Meng KT sure isn't one but....a little TLC on behalf of the modeller will take care of issues that he may face later on!Taking a kit for granted because it's been made in 2017 isn't very wise and if we could build the old Airfix' 1/32 Grants and Crusaders we can build just about any kit from now to 2089!
Cheers
Manu
Cheers
Manu
canuck63
Quebec, Canada
Joined: December 23, 2003
KitMaker: 122 posts
Armorama: 96 posts
Joined: December 23, 2003
KitMaker: 122 posts
Armorama: 96 posts
Posted: Saturday, May 20, 2017 - 04:05 PM UTC
canuck63
Quebec, Canada
Joined: December 23, 2003
KitMaker: 122 posts
Armorama: 96 posts
Joined: December 23, 2003
KitMaker: 122 posts
Armorama: 96 posts
Posted: Saturday, May 20, 2017 - 04:07 PM UTC
I've spent many entertaining hours watching videos on YouTube on various buildings of the Takom KT and reading threads on several fora and I must say that mine will remain unbuilt,at least as long as the interior is concerned....thick-eared or soft detail,lots of unsightly gaps to fill,odd engineering...not a pleasant build at all,if you ask me!
The Meng requires cleaning a few mating surfaces given the sheer quantity of interlocking sub-assemblies,many as little as a lentil, but the time spent will pay dividends and the fit has been nothing short as incredible so far!Add to that that all the details that David Parker has added to his masterpiece are there and its book is all a modeller could ask for to bring detailing on another planet!
Cheers
canuck63
Quebec, Canada
Joined: December 23, 2003
KitMaker: 122 posts
Armorama: 96 posts
Joined: December 23, 2003
KitMaker: 122 posts
Armorama: 96 posts
Posted: Saturday, May 20, 2017 - 04:18 PM UTC
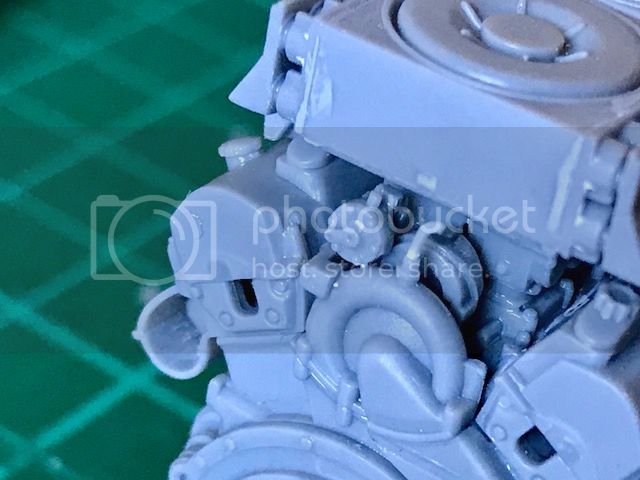
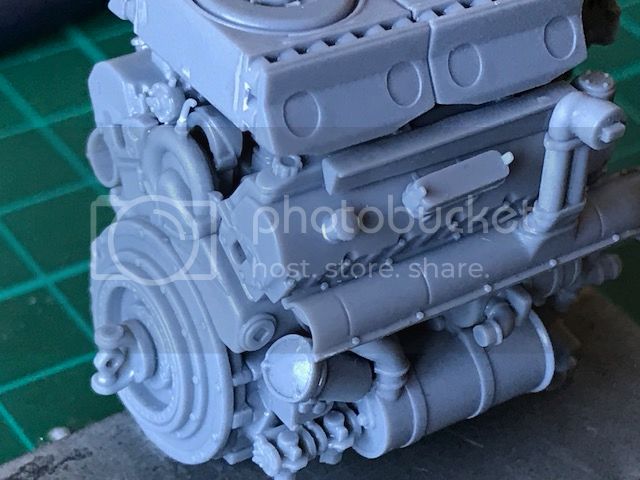
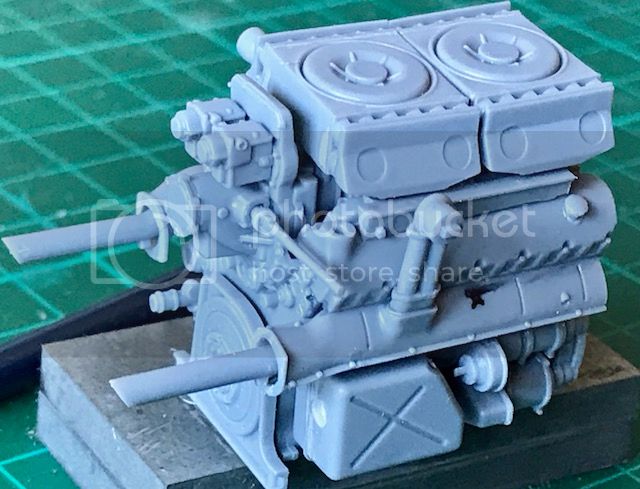
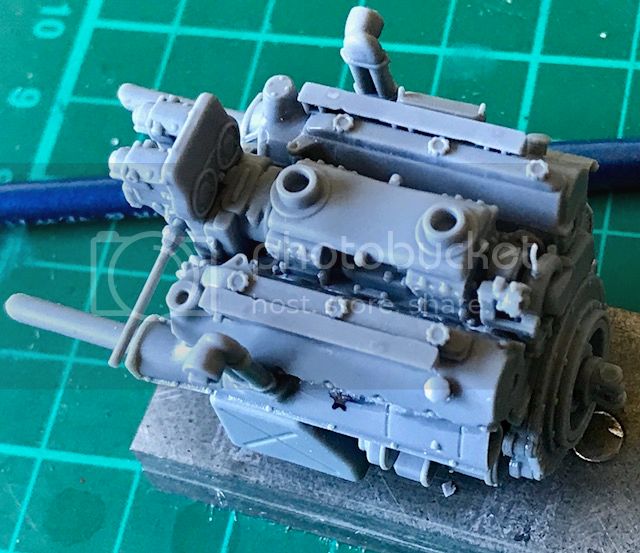
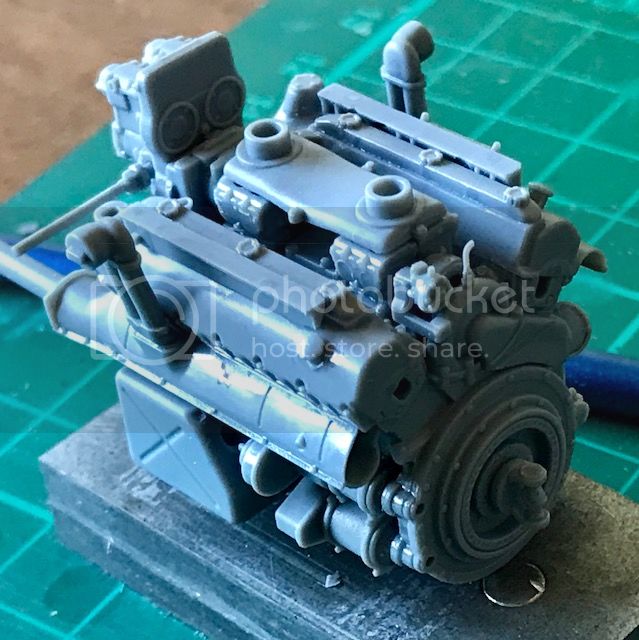
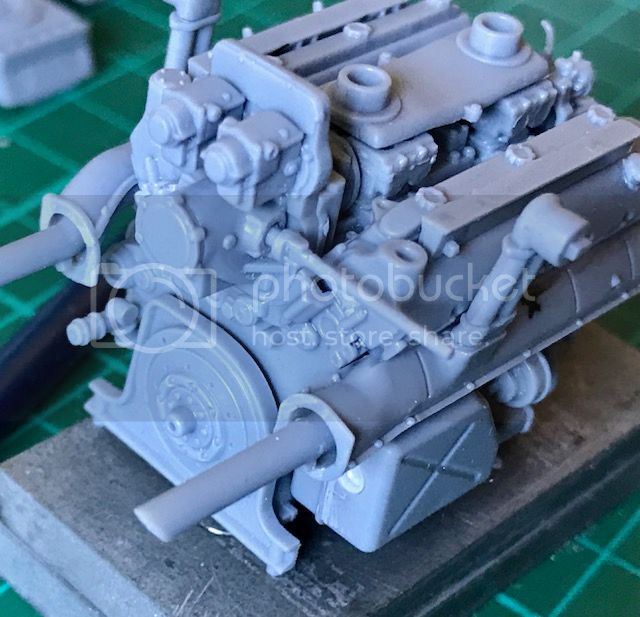
The engine is reaching completion!Meng supplies a few other pieces like the main plumbing and other bits and bobs but I'm not going to fit them now to avoid knocking them off handling the powerplant!I'll add plumbing and hoses where visible,using 1/48 scale metal fitting made for racing cars models,and 0,4 and 0,5mm head bolts and rivets.I don't know if I'll glue the airfilters yet,in case I won't I'll obviously enough replicate the throttle linkages !
The more I work on this kit the more I'm convinced that it's a model made by a modeller with modellers in mind,literally!Every single detail and correction David Parker has scratchbuilt for his masterpiece is here,down to the internal stencils he's painstakingly hand-painted on his model using the original ones inside the Thun KT as reference...just twice as small!In a nutshell,you have a superdetailed kit requiring only a few rivets,wires and some godd painting,but don't go overboard with the weathering because these tanks were well mantained AND saw relatively very little service, and this would be one of those cases where "less is more"!
I won't stress enough the importance of dry-fitting;test and dry fit EVERYTHING before even only thinking to open the bottle of glue because the fit is so tight and the engineering is spot on,perhaps the best fitting kit I've tackled to date!
The engine needs a few touches here and there with the glass-fiber pen to get rid of very tiny mold lines and the odd touch-up with Gunze Mr. Surfacer and Diluted Putty but have your reference handy because what at first may look like flash or a sinkmark is in fact a "lip" of some sort or a recess!
No,the round recesses on the air filters are not lightening holes...they're ejection marks that must be filled in,and why they're there is beyond me!
canuck63
Quebec, Canada
Joined: December 23, 2003
KitMaker: 122 posts
Armorama: 96 posts
Joined: December 23, 2003
KitMaker: 122 posts
Armorama: 96 posts
Posted: Saturday, May 20, 2017 - 04:23 PM UTC
The build goes on!As always, the engineering is absolutely fantastic but in order to achieve a 100% perfect fit you must dry-fit over and over again and touch-up things here and there and they'll magically click into each other.That's especially true with parts like the suspensions and internal braces that are made like on the real thing!This kit it's nothing short of spectacular but you must tackle it as you would a resin one or,if you're into real engines or weapons,as you'd fit the right piston to the right cylinder or the right bolt to the right frame...if you'll build this kit and take it with due respect it'll be a feast to your modelling eyes!
Nothing apart the "ribs" on the floor has been glued so far!
Cheers
Manu
Nothing apart the "ribs" on the floor has been glued so far!
Cheers
Manu
canuck63
Quebec, Canada
Joined: December 23, 2003
KitMaker: 122 posts
Armorama: 96 posts
Joined: December 23, 2003
KitMaker: 122 posts
Armorama: 96 posts
Posted: Saturday, May 20, 2017 - 04:29 PM UTC
I'm currently "studying" the Takom kit and IMHO it's like comparing apples to oranges!The Meng may not be 100% perfect to some rivet counters but the more I go on with the building the more I love it!
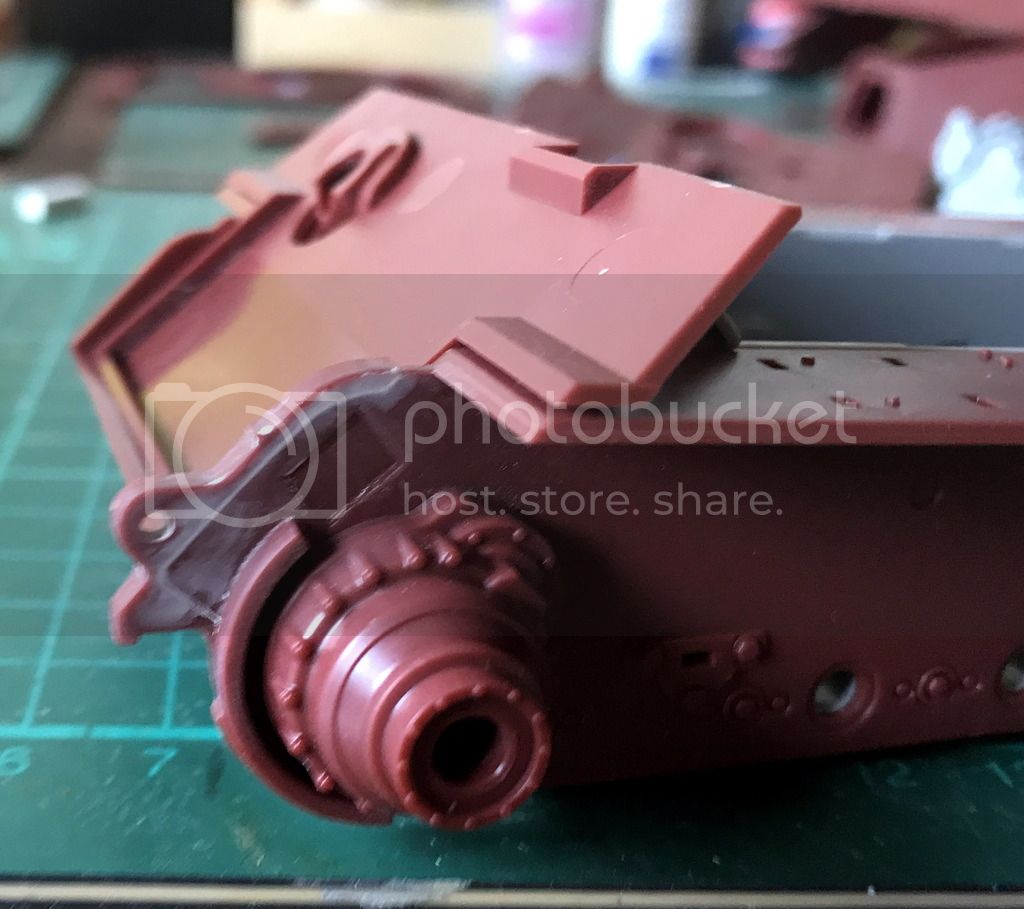
Even if it had a PZ III running gear its sheer wealth of details straight OOB added to a good paint job,especially on the interior,would make it turn heads everywhere!It's so detailed I almost find it boring,since you only have to add wires and plumbing here and there and call it a day!
Compare the fit of the engine hatches of my in-progress Dragon PzKpw IV Ausf C (after a little tweaking!) with the fit of the roof of the driver's compartment on the Meng KT...they're as different as day and night!
What's more surprising is that if you've got David Parker's book or his features on AFV Modeller about his Trumpeter 1/16 monster you'll see that ALL the details he's added are here but don't think that this kit is but a "revised" and 2,18 times smaller Trumpeter kit because it's not,most likely the Takom is,and it costs a lot more...I've just bought another MKT plus interior set from HK for £50 including shipping (most expensive option),whereas the cheapest TKT would set you back £60!
Cheers
Manu
wedgetail53
Queensland, Australia
Joined: October 02, 2008
KitMaker: 658 posts
Armorama: 629 posts
Joined: October 02, 2008
KitMaker: 658 posts
Armorama: 629 posts
Posted: Sunday, May 21, 2017 - 02:43 AM UTC
G'day everybody
Being well advanced in my construction of the Takom KT (the non-zimmerit one) I can say that, even given a few shortcomings, it's still a fantastic kit.
I've added a few bits along the way, mostly around the radio rack, which is incomplete, but for the rest there's virtually nothing to add.
Regards
Rob
supaderpa
Malaysia
Joined: March 28, 2016
KitMaker: 157 posts
Armorama: 140 posts
Joined: March 28, 2016
KitMaker: 157 posts
Armorama: 140 posts
Posted: Sunday, May 21, 2017 - 03:22 AM UTC
Thanks for this build log and review, I'll be getting this kit plus the interior and tracks over the course of the next few months and it's good to know what to look out for. It will be my 3rd Tiger II but damn do I just love those big lugs.
canuck63
Quebec, Canada
Joined: December 23, 2003
KitMaker: 122 posts
Armorama: 96 posts
Joined: December 23, 2003
KitMaker: 122 posts
Armorama: 96 posts
Posted: Sunday, May 21, 2017 - 04:19 PM UTC
Hi Rob,
I have both kits but comparing them is like comparing appleas and oranges!
The Meng is much more detailed and refined,whereas the Takom is a little bit "thick-eared" here and there and the amo stowage is what you'd expect from a 70s kit!
There are a few more shortcoming like the swingarms having a toe-in to them (people mix-up toe-in,positive and negative camber aso!) without any fault on the operator's behalf!
It will build into a reaonably detailed kit but it's the down-scaled version of the 1/16 Trumpeter Big Cat,with all its pros and cons!
Cheers
Manu
canuck63
Quebec, Canada
Joined: December 23, 2003
KitMaker: 122 posts
Armorama: 96 posts
Joined: December 23, 2003
KitMaker: 122 posts
Armorama: 96 posts
Posted: Sunday, May 21, 2017 - 04:24 PM UTC
Quoted Text
Thanks for this build log and review, I'll be getting this kit plus the interior and tracks over the course of the next few months and it's good to know what to look out for. It will be my 3rd Tiger II but damn do I just love those big lugs.
Hi Bryan,
IMHO this kit is nothing short of AMAZING and its engineering is top-notch but remember to test fut,test fit and test fit and once you'll have checked anything all parts will click into their place!
This is not a kit for beginners and I'm not referring to the sheer number of parts,rather to the need to check all the mating surfaces and to plan anything beforehand following,whenever it's possible,the numerical order of the instructions!
The only big flaw is the dreaded "positive camber" of the roadwheels if you'll build the "standard" kit (read above on how to take care of that!),but weverything will be nice and straight if you'll fit the torsion bars found both in the interior and the "workable" tracks sets!
Cheers
Manu
canuck63
Quebec, Canada
Joined: December 23, 2003
KitMaker: 122 posts
Armorama: 96 posts
Joined: December 23, 2003
KitMaker: 122 posts
Armorama: 96 posts
Posted: Sunday, May 21, 2017 - 04:43 PM UTC
canuck63
Quebec, Canada
Joined: December 23, 2003
KitMaker: 122 posts
Armorama: 96 posts
Joined: December 23, 2003
KitMaker: 122 posts
Armorama: 96 posts
Posted: Sunday, May 21, 2017 - 04:47 PM UTC
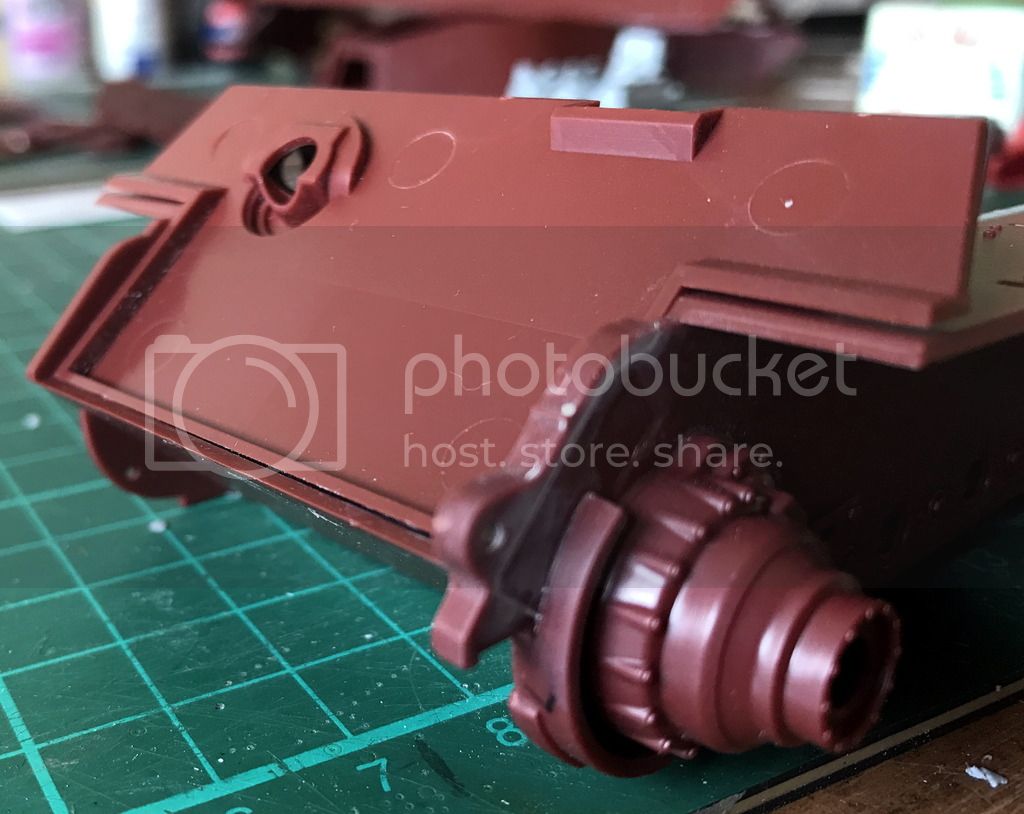
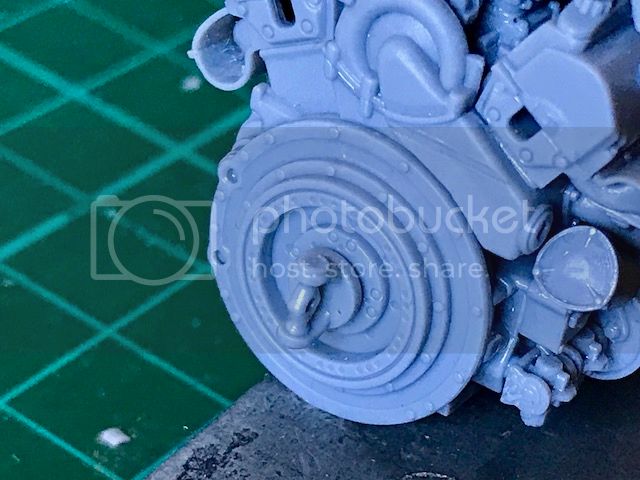
I wasn't totally satisfied with my first transmission,therefore I've put to good use a second interior set I had handy and I've built another one, to which I'll add cast texture and foundry numbers,courtesy of Archers Transfers!
While I was at it I've built a second cover after scraping off the molded fastening strap from the two halves!I still have to decide whether to use an old set of Cast-a-Coat or another method for the texture,though!
canuck63
Quebec, Canada
Joined: December 23, 2003
KitMaker: 122 posts
Armorama: 96 posts
Joined: December 23, 2003
KitMaker: 122 posts
Armorama: 96 posts
Posted: Sunday, May 21, 2017 - 04:53 PM UTC
I'll never stress enough the importance of dry-fitting and clean-up for that's VITAL to get a fit that will leave behind the likes of Tamiya (which has set a standard)...but it only comes after acareful assembly!
Never fully rely on your old Mk III Eyball though, for you'll end up finding that it ain't THAT reliable after all;
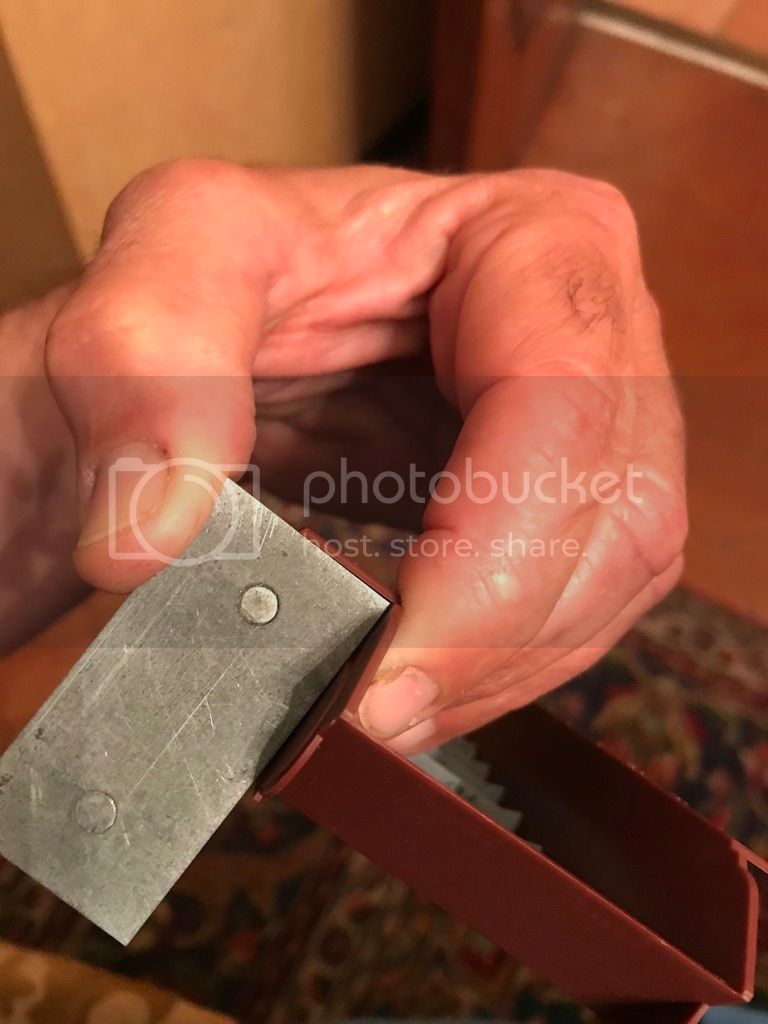
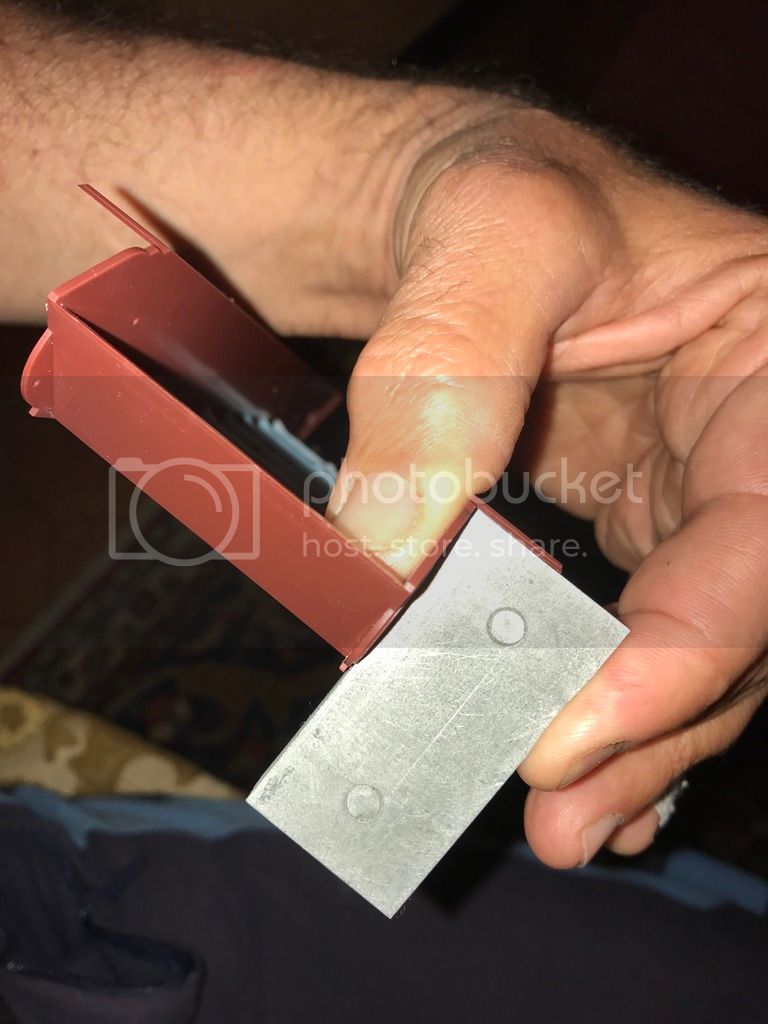
in order to glue the two rectangular tanks straight and true I've used the turret's floor as a way to keep them aligned but since even in this case ye olde Mk IV (it's been improved in the last two hours!)eyball will nonetheless remain your instrument of choice (ask me how I know!) use something that will help you and ascertain if everything is REALLY straight!In this case I've used a section of Evergreen square tubing for it weighs in at about a fraction of a gram while my other makeshift "instruments" are a trifle heavier,being made of aluminum!
Again,I don't know yet if I'll leave the turntable like that or if I'll cast a few resin copies and butcher them to show the hinged acces plate to the boxes below open!The weather is bad,my back is aching and therefore no trail riding to speak of....off in the silicone the turntable will go!;-)
Cheers
M
canuck63
Quebec, Canada
Joined: December 23, 2003
KitMaker: 122 posts
Armorama: 96 posts
Joined: December 23, 2003
KitMaker: 122 posts
Armorama: 96 posts
Posted: Sunday, May 21, 2017 - 04:59 PM UTC
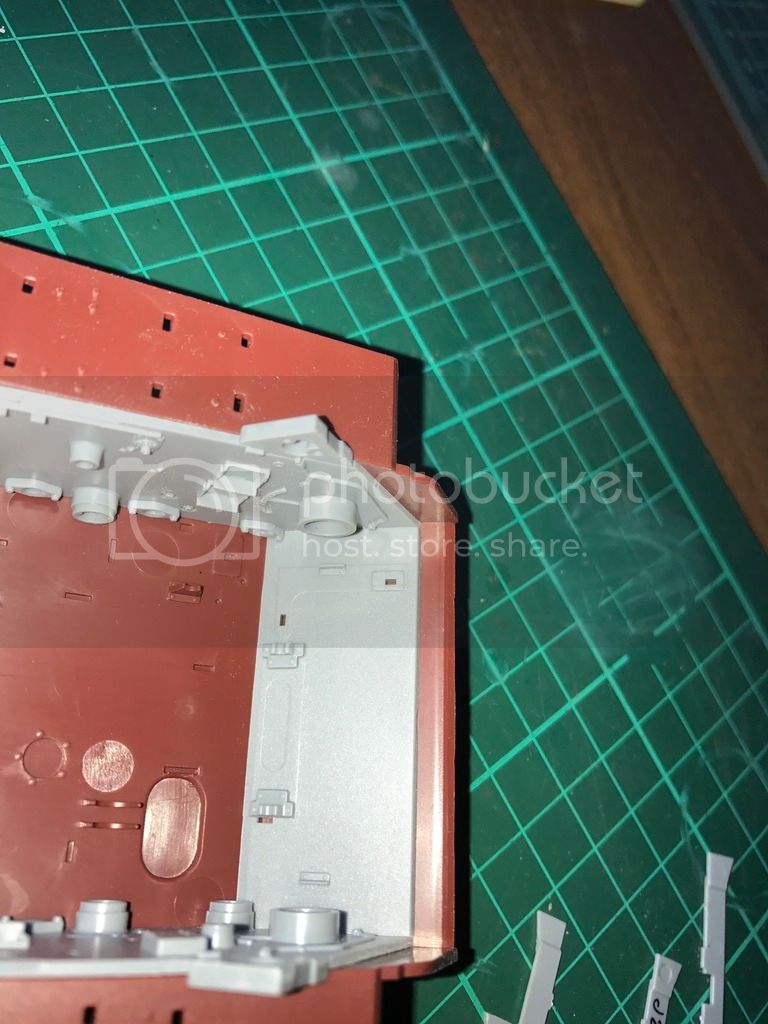
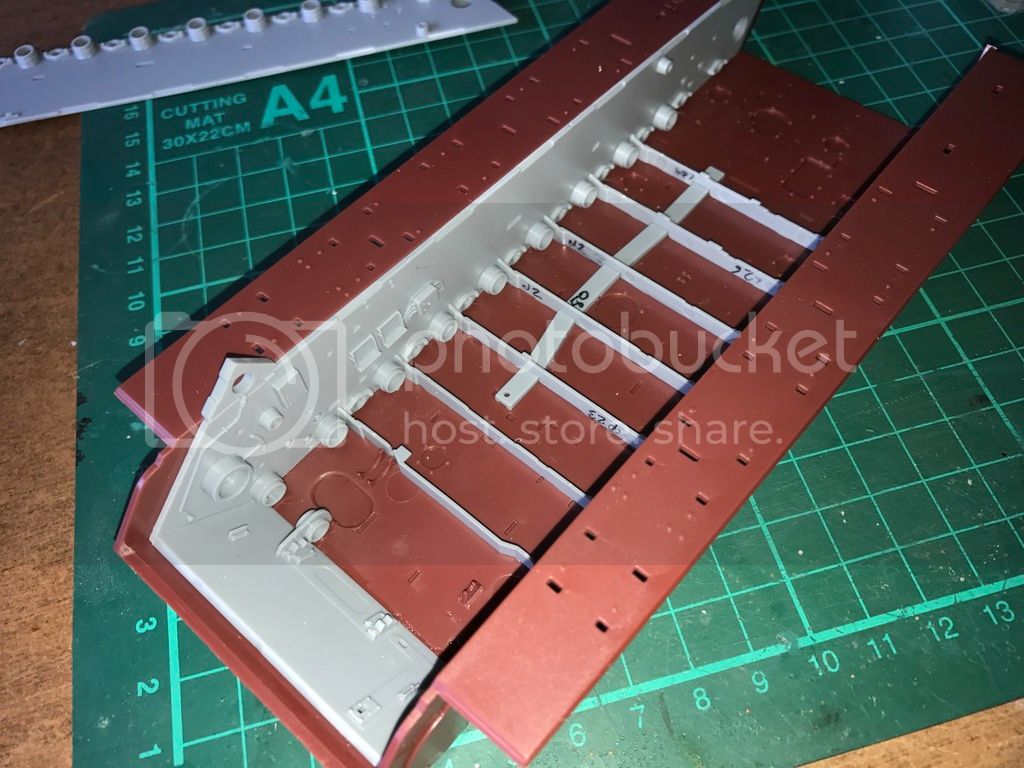
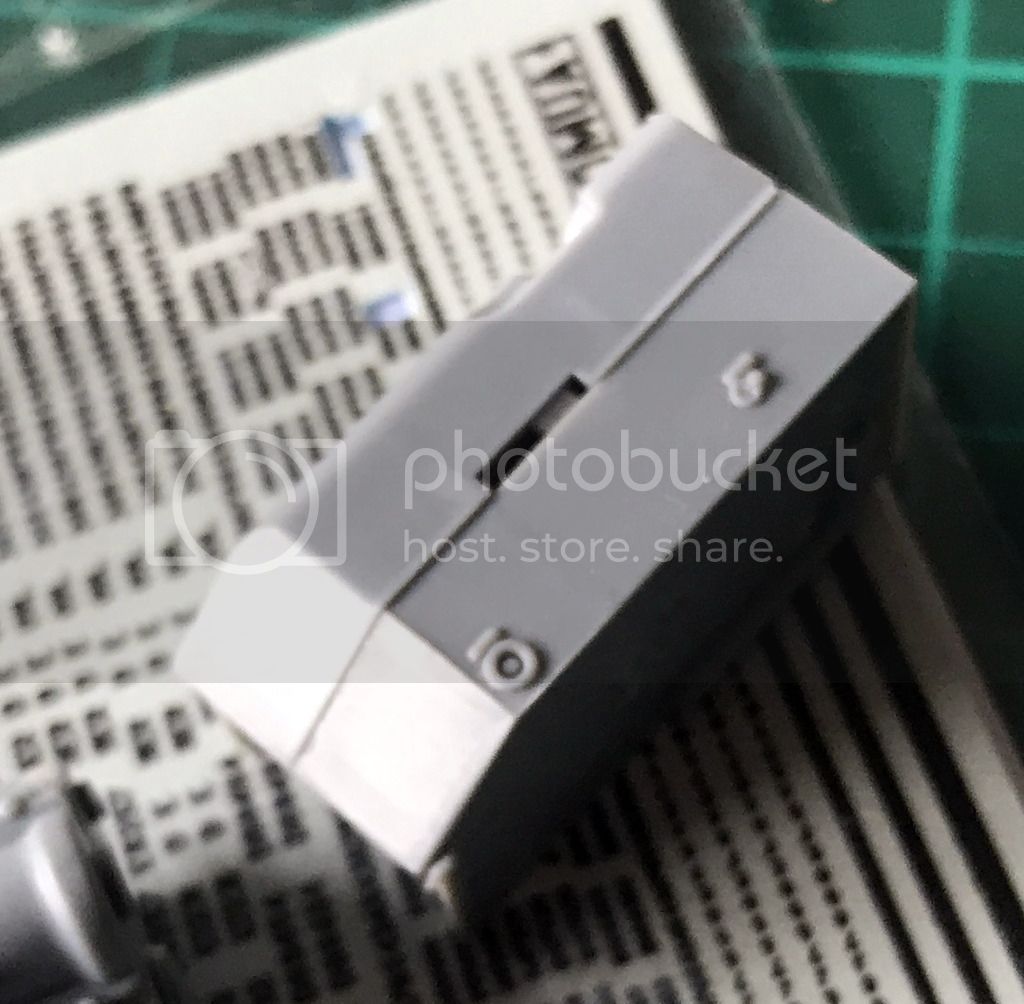
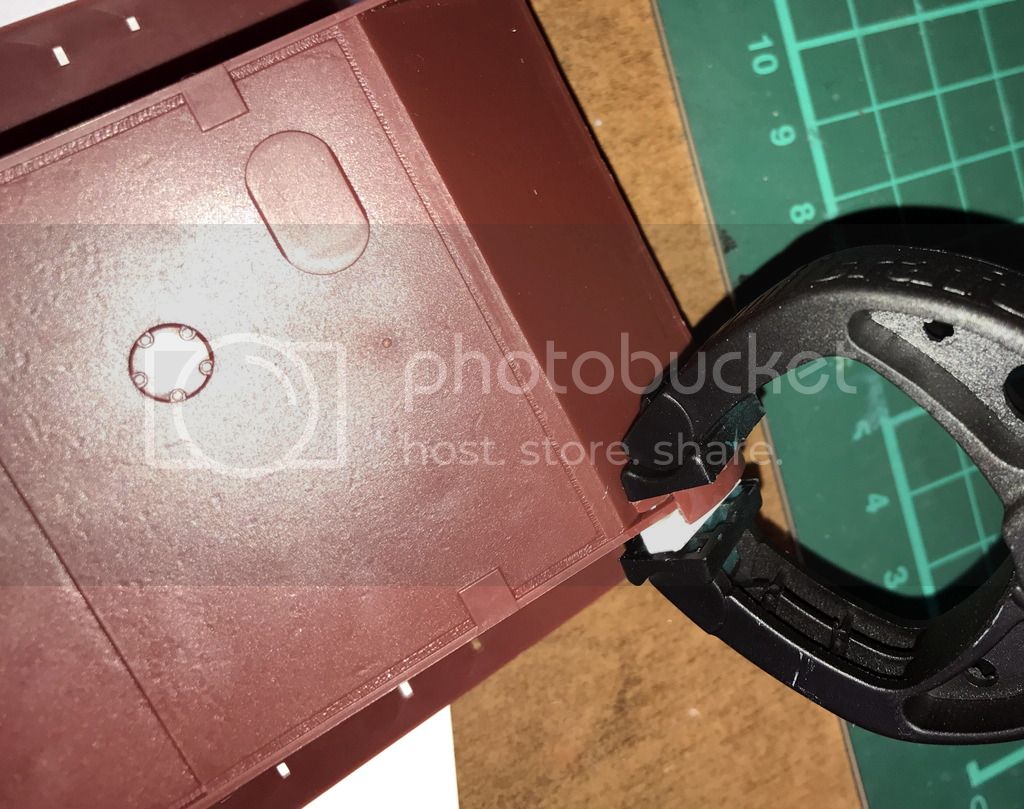
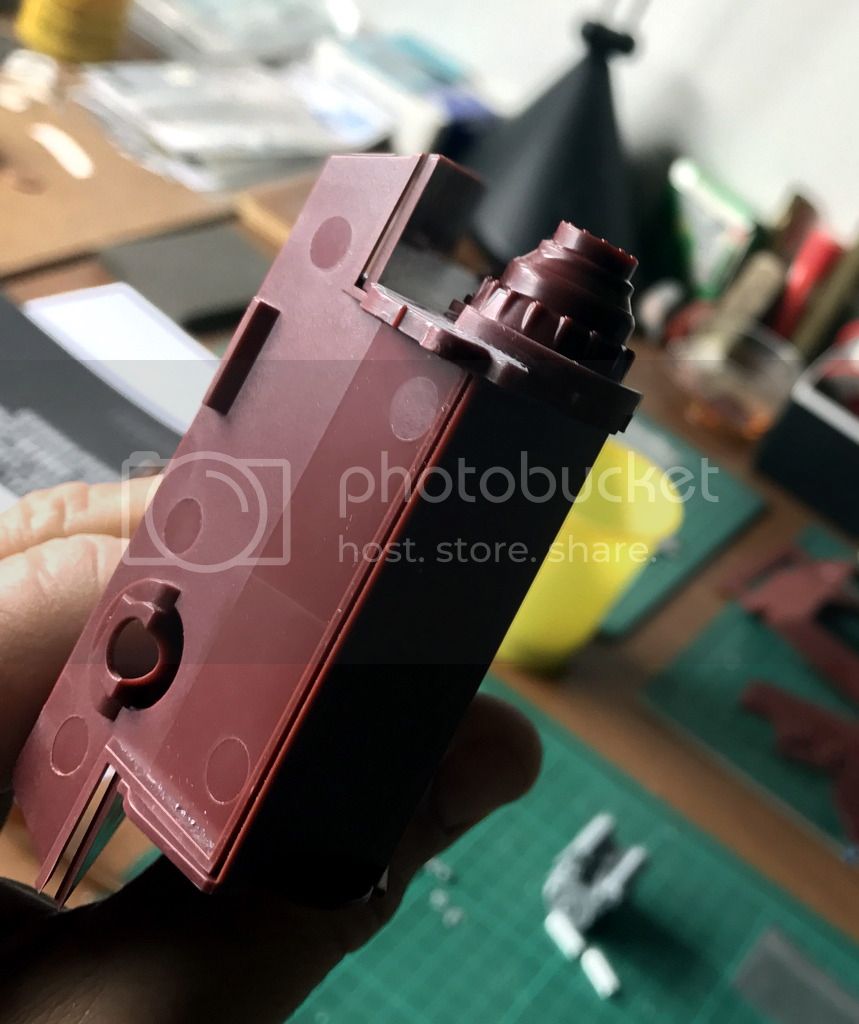
The pictures show the second most annoying "feature" of the Meng KT,i.e. the locating slots for the sponsons ammo stowage which will go through to the other side!You can either fill them after you've fitted the ammo racks or.just like me,fill them with Milliput or styrene stock from the inside,push in the tabs of any ammo rack to push out the axcess Milliput or styrene stock,wait the former to cure or glue the latter with CA,sand flush and you'rre good to go!
I won't do that with the racks fitted to avoid damaging them while handling the thing!
canuck63
Quebec, Canada
Joined: December 23, 2003
KitMaker: 122 posts
Armorama: 96 posts
Joined: December 23, 2003
KitMaker: 122 posts
Armorama: 96 posts
Posted: Sunday, May 21, 2017 - 05:08 PM UTC
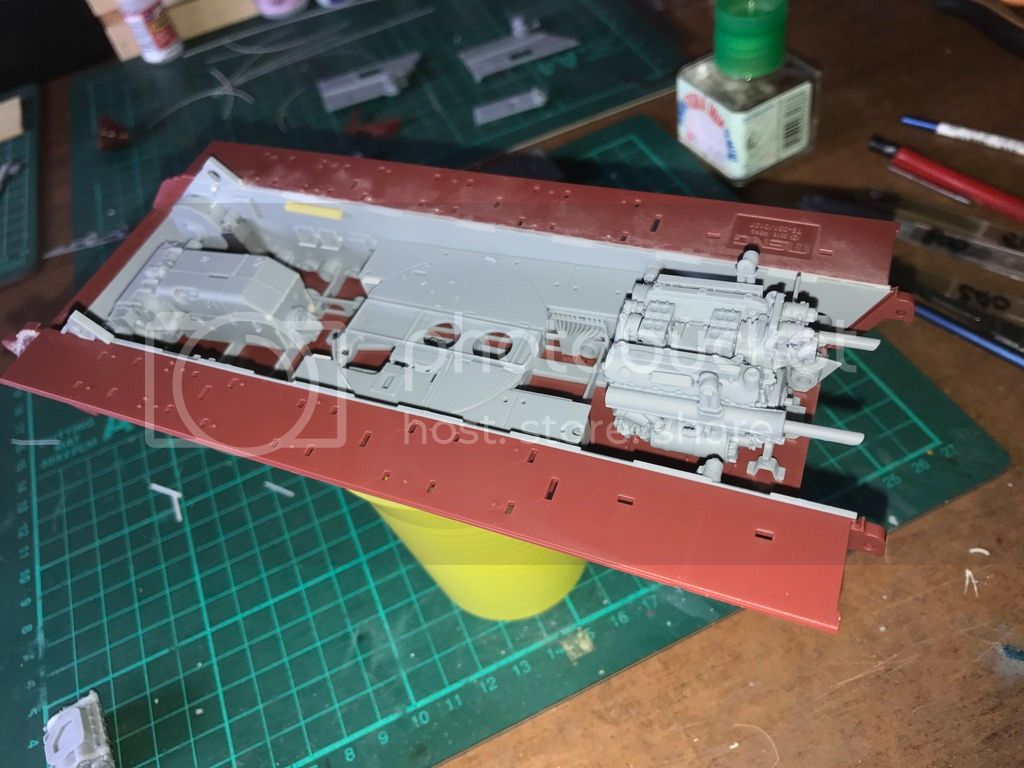
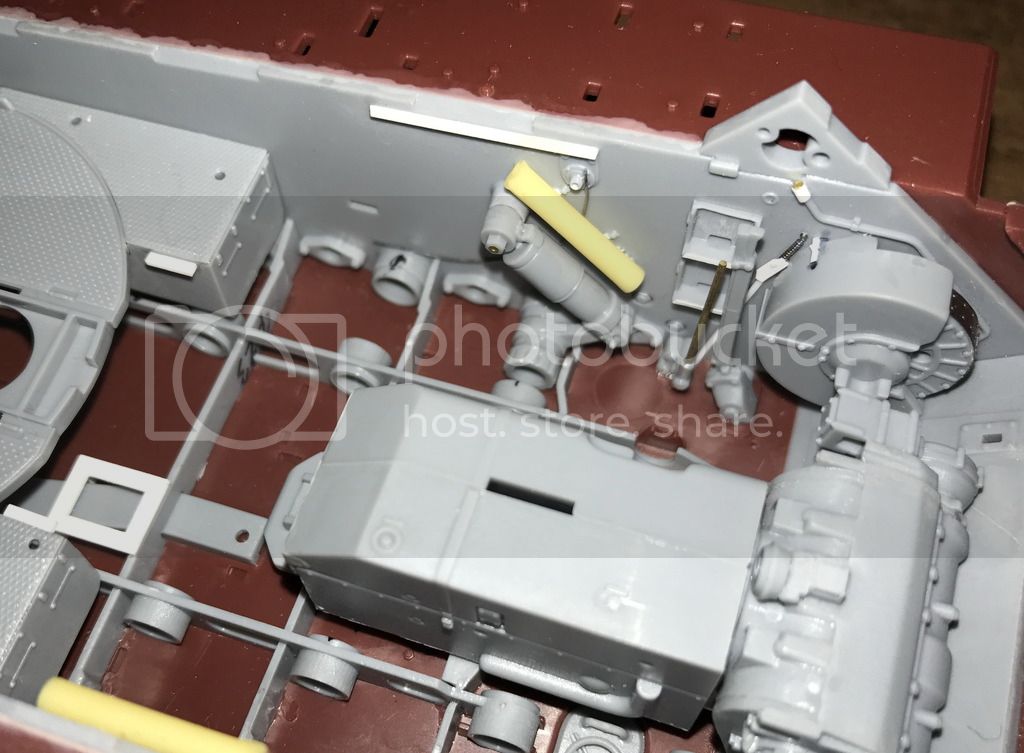
The interior is coming along quite nicely!
I'm learning a lot from this one engeneering-wise and it's a good way to improve your modelling skills dramatically as far as thinking ahead is concerned!
Everything clicks together and that's why clean-up and dry-fitting are so important!The level of detail OOB is absolutely amazing but there's always room for extra detailing and improvement..no kit's 100% perfect!
The rear buljkhead is quite nice but due to injection moulding limitations it will do with additional details,especially the knbobs on the fuel primer and the handles on the insdpection covers,just to name two
Using pictures from the net and a few WIPs as reference along with David Parker's book, I havent even touched a SINGLE book from my library!
Little touches here and there can make the difference and I'm having a lot of fun because the limit is the sky, and you don't have to burn your mojo out thumbing thru hundreds of books for that particular photo because everything is just a click away on your PC or tablet!
Cheers
Manu
canuck63
Quebec, Canada
Joined: December 23, 2003
KitMaker: 122 posts
Armorama: 96 posts
Joined: December 23, 2003
KitMaker: 122 posts
Armorama: 96 posts
Posted: Sunday, May 21, 2017 - 05:10 PM UTC
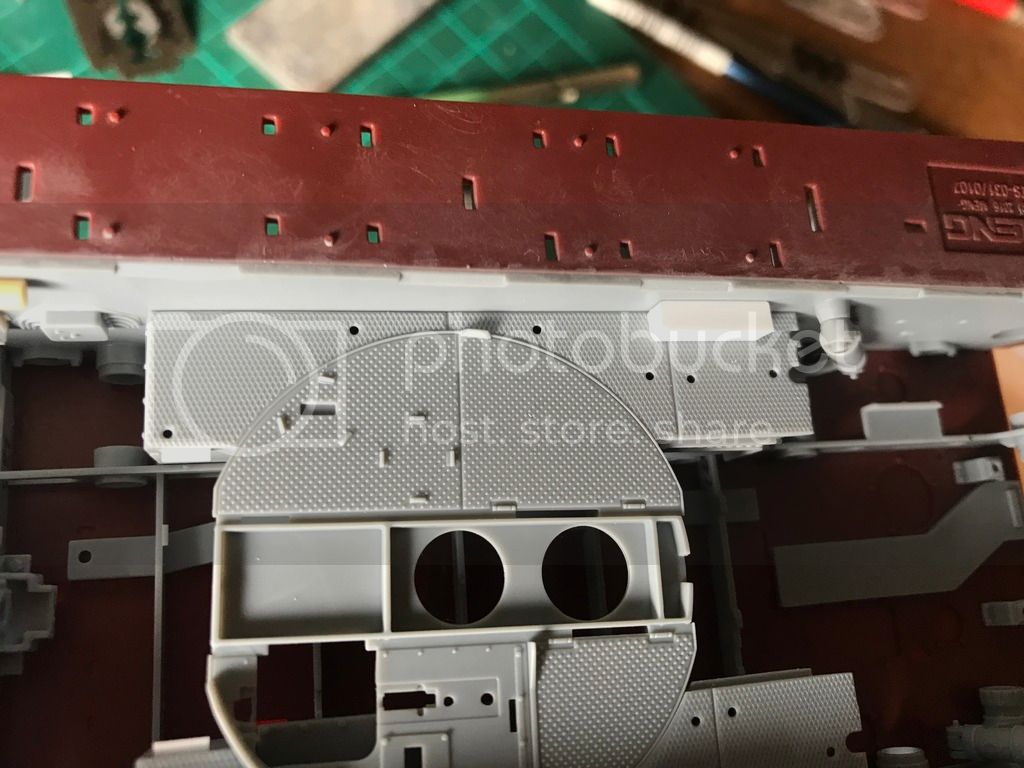
The foot guard on the turret floor is a bit too thick and it can be either thinned diown by scraping it with a hobby knife or by making a new one from scratch!
canuck63
Quebec, Canada
Joined: December 23, 2003
KitMaker: 122 posts
Armorama: 96 posts
Joined: December 23, 2003
KitMaker: 122 posts
Armorama: 96 posts
Posted: Sunday, May 21, 2017 - 05:12 PM UTC
As you may barely notice in the last picture of my previous post the RO floor escape hatch should have the closing bars longer than the molded ones, else the hatch would simply fall on the ground...I'll add two elongated sections with L-shaped thin aluminum foil!
canuck63
Quebec, Canada
Joined: December 23, 2003
KitMaker: 122 posts
Armorama: 96 posts
Joined: December 23, 2003
KitMaker: 122 posts
Armorama: 96 posts
Posted: Sunday, May 21, 2017 - 05:15 PM UTC
The greasing point will have the top hex nipple covers,which are somewhat undersized and slightly misaligned,replaced with Grandt Line nuts.At first I wanted to replace them with brass fittings but drilling perfectly aligned holes would have taken much longer.I still have to decide whether to leave the molded in hoses or cut them off and glue nee ones made of solder at their place but that will be barely noticeable for they'll be hidden by the on-board radio "umformers" tray and the tool box!