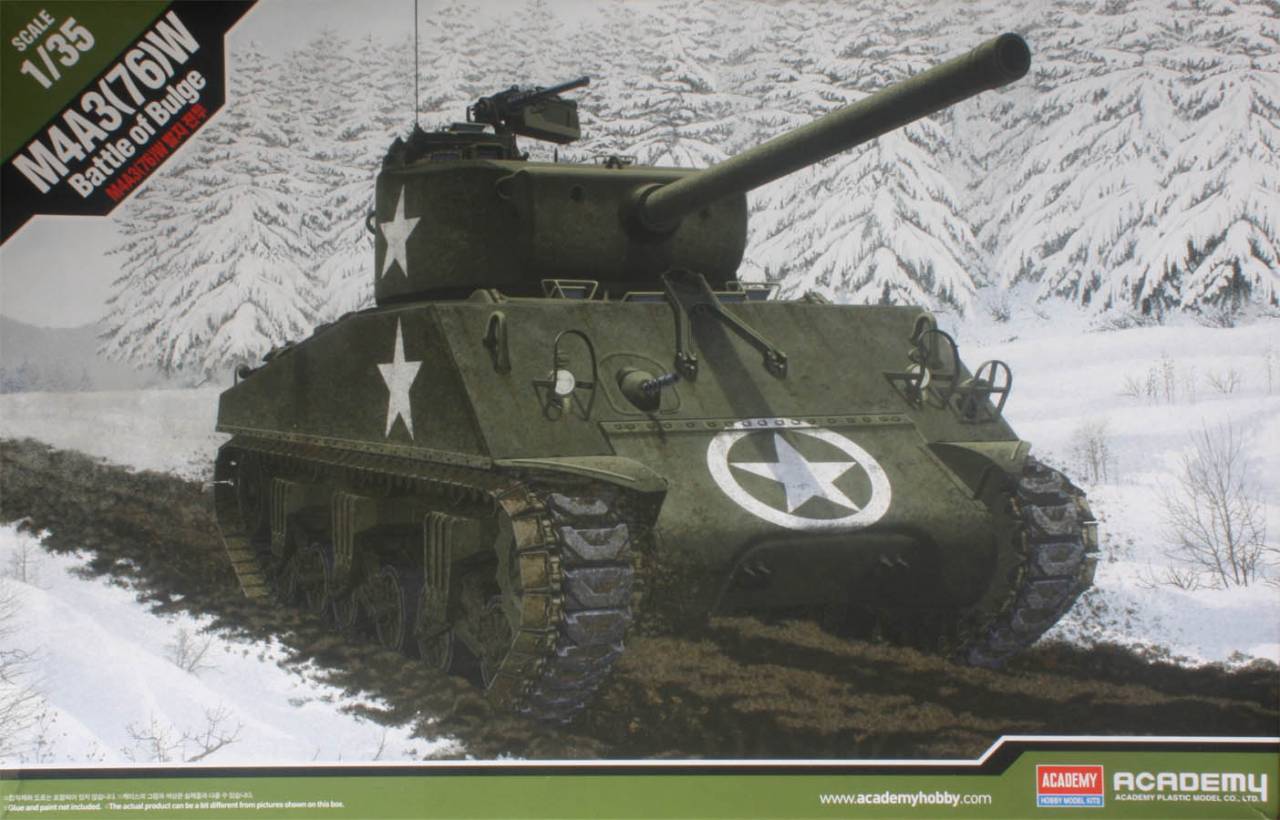
So I was looking through the Samples list and spotted this neglected little Sherman from Academy, just waiting for somebody to rescue it. Well, being a Sherman addict of the worst kind I just had to throw myself on it!
This build log is the prelude to a full-on Build Review that will serve to inform future purchasers, and will run as far as doing all the plastic – I won’t be painting it anytime soon due to a huge traffic jam at my spray booth.
“What’s in the box?” I hear you say. Turns out most of it has been seen before in earlier Academy releases – in fact this entire kit is a re-release of the T34 Calliope that Russ Amott reviewed here two years ago, minus the rocket launchers, and in the more typical Academy green plastic. The hull has been around since at least the Sherman Dozer kit, and is complete with weld “trenches” that purists will feel compelled to fill. The turret opening on top is odd – to fit the 76mm turret with its narrower ring the folks at Academy chose to add a filler inside the old hole, with a groove that looks like you could pop it out to fit the older 75mm turret. The cast texture on the driver’s hatch plate looks nice, and has casting marks, but the shapes of the hatch draining grooves are somewhat off, and the whole plate is too “flat”.
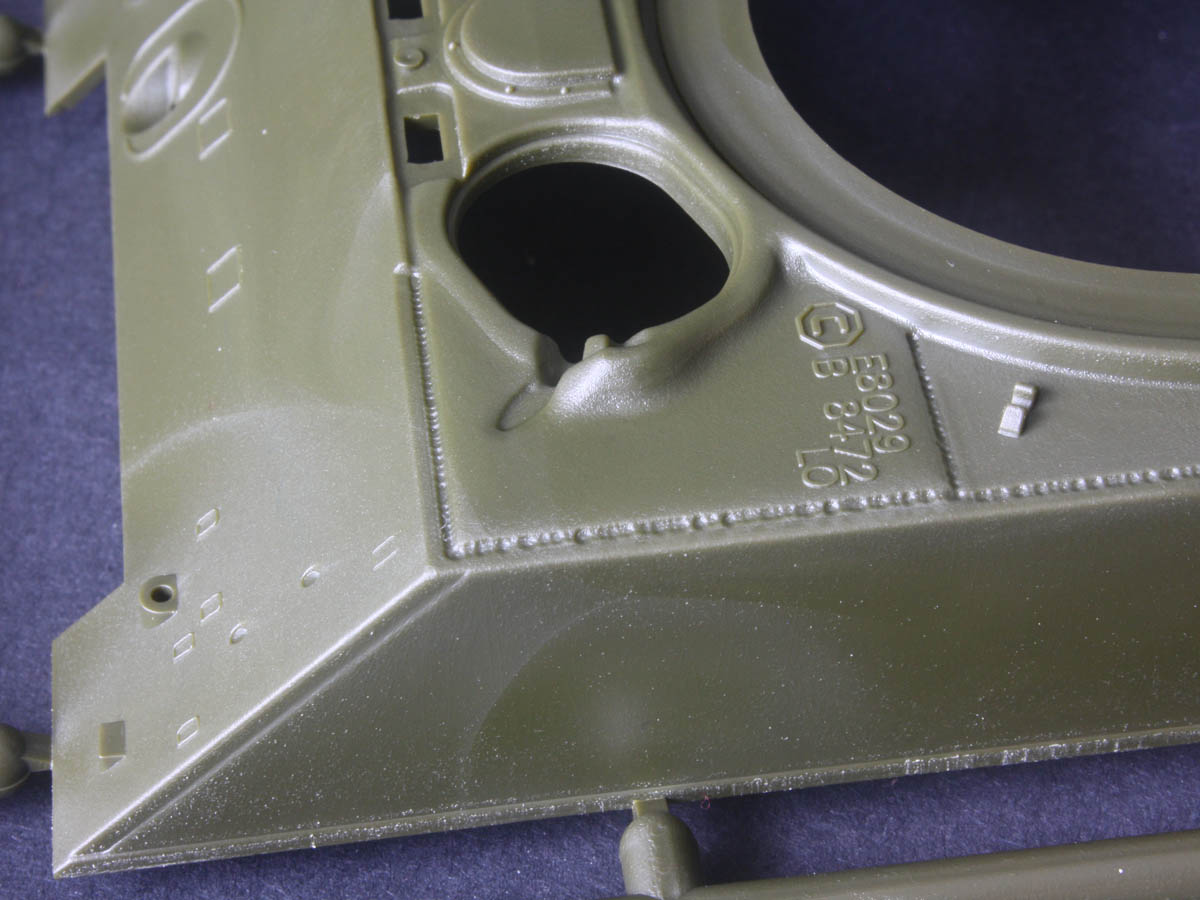
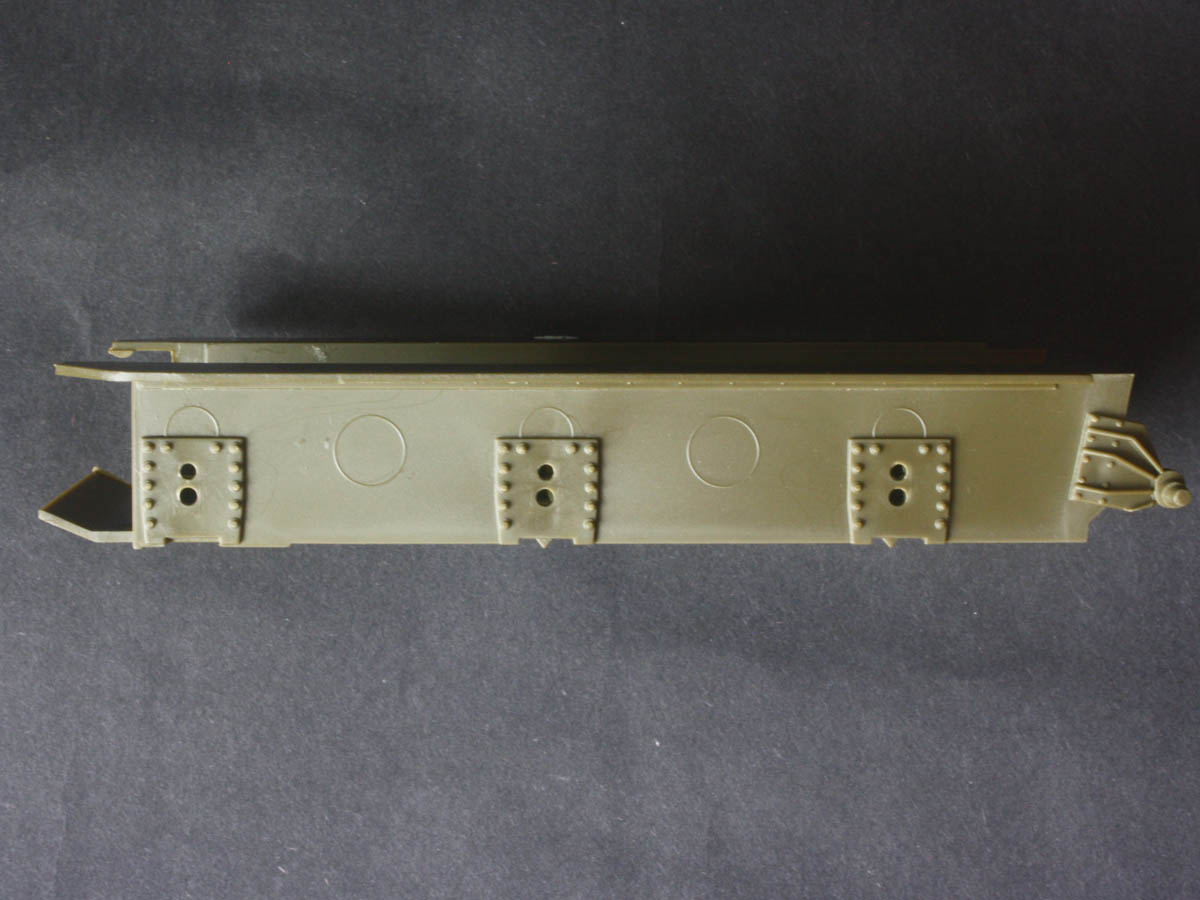
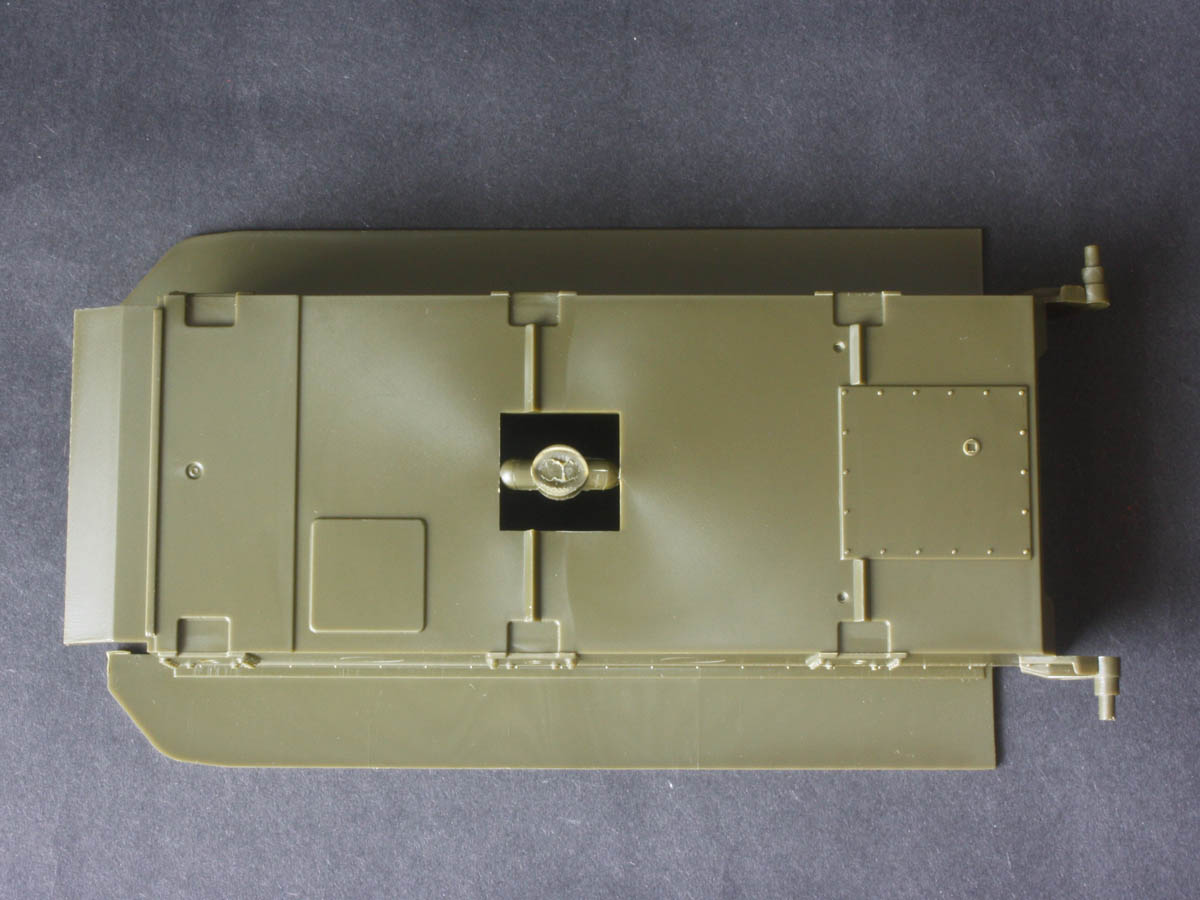
The lower hull tub is from the Israeli M51 Super Sherman, complete with rounded corners on the sponson floors and raised locating circles for the HVSS return roller mounts. Sadly the Floor-Hole Fairy lurking at the Academy factory has been at the centre of the tub, right through the triangular stiffening rib. But these are minor quibbles that we can fix with a little modelling effort, right?
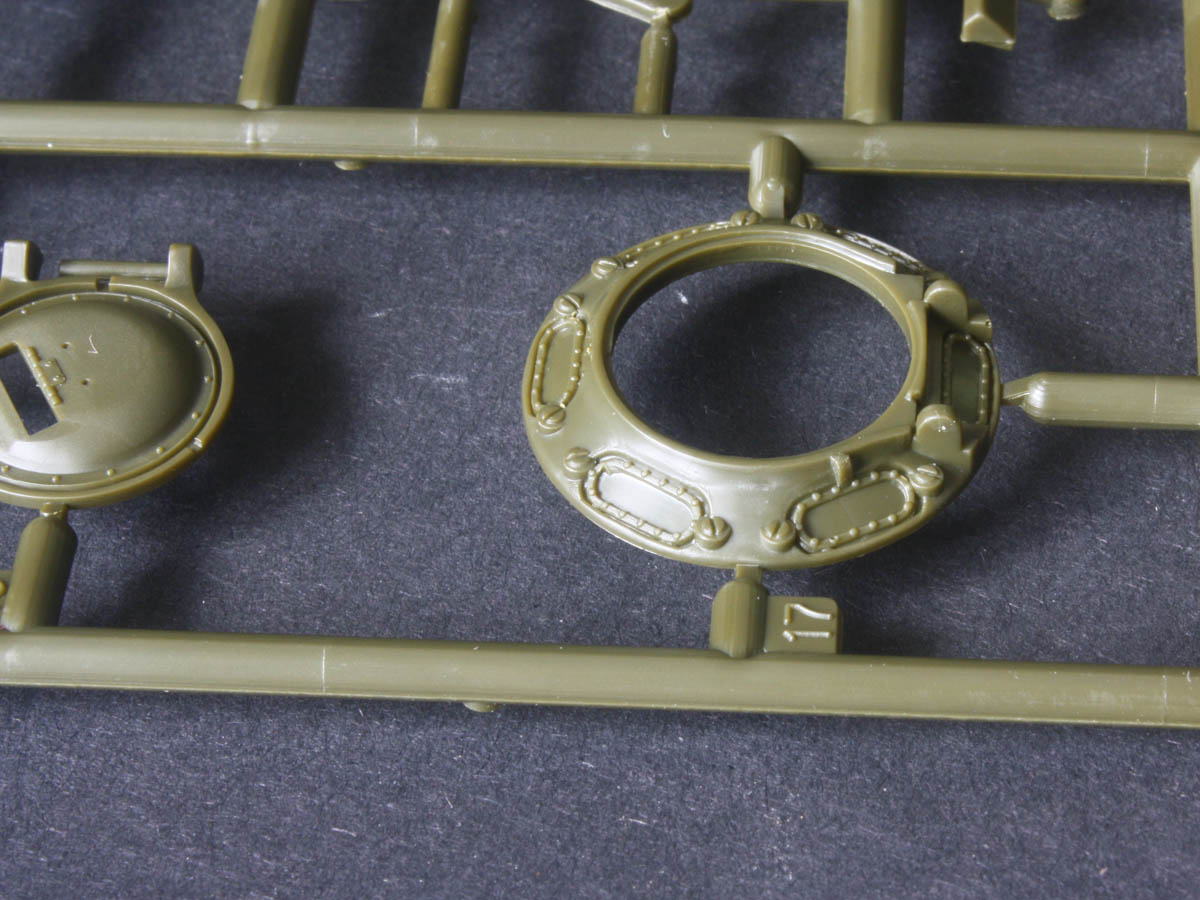
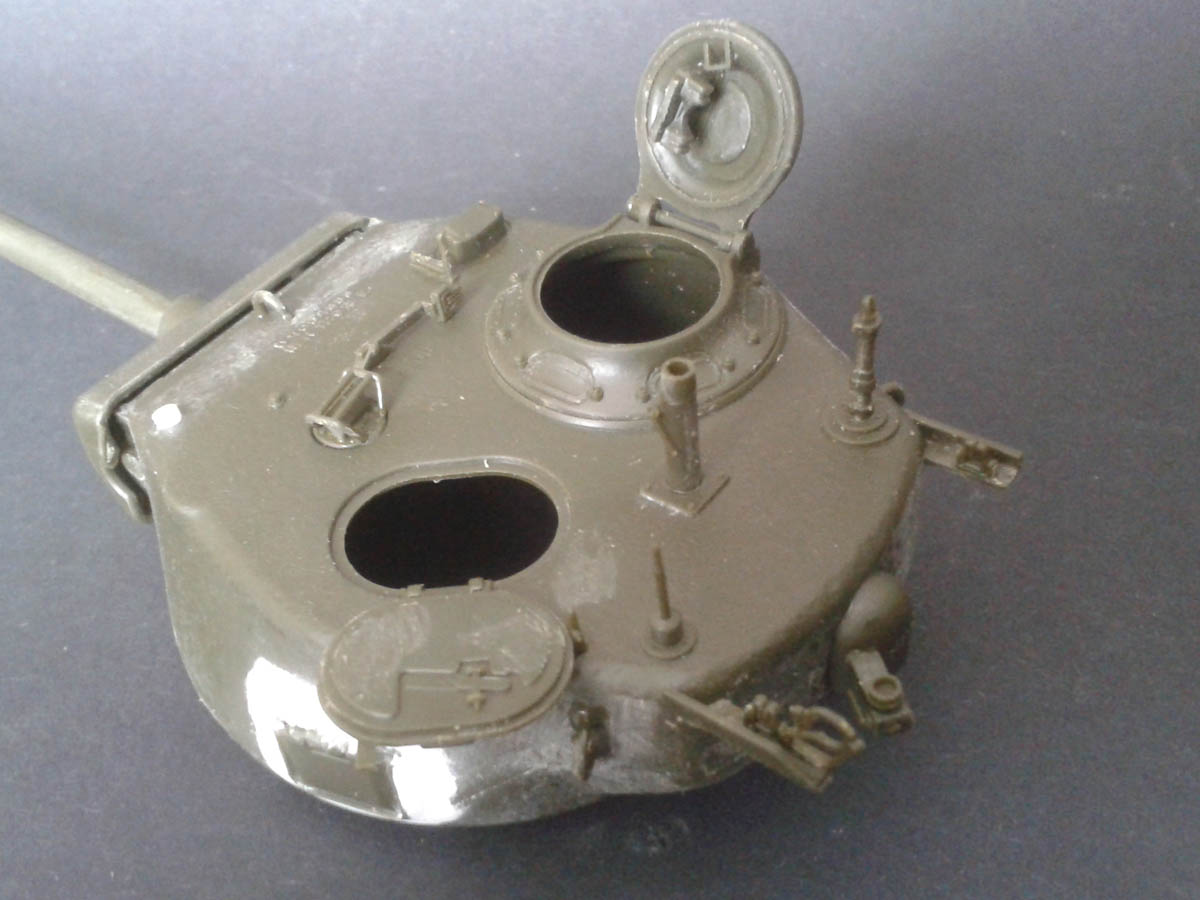
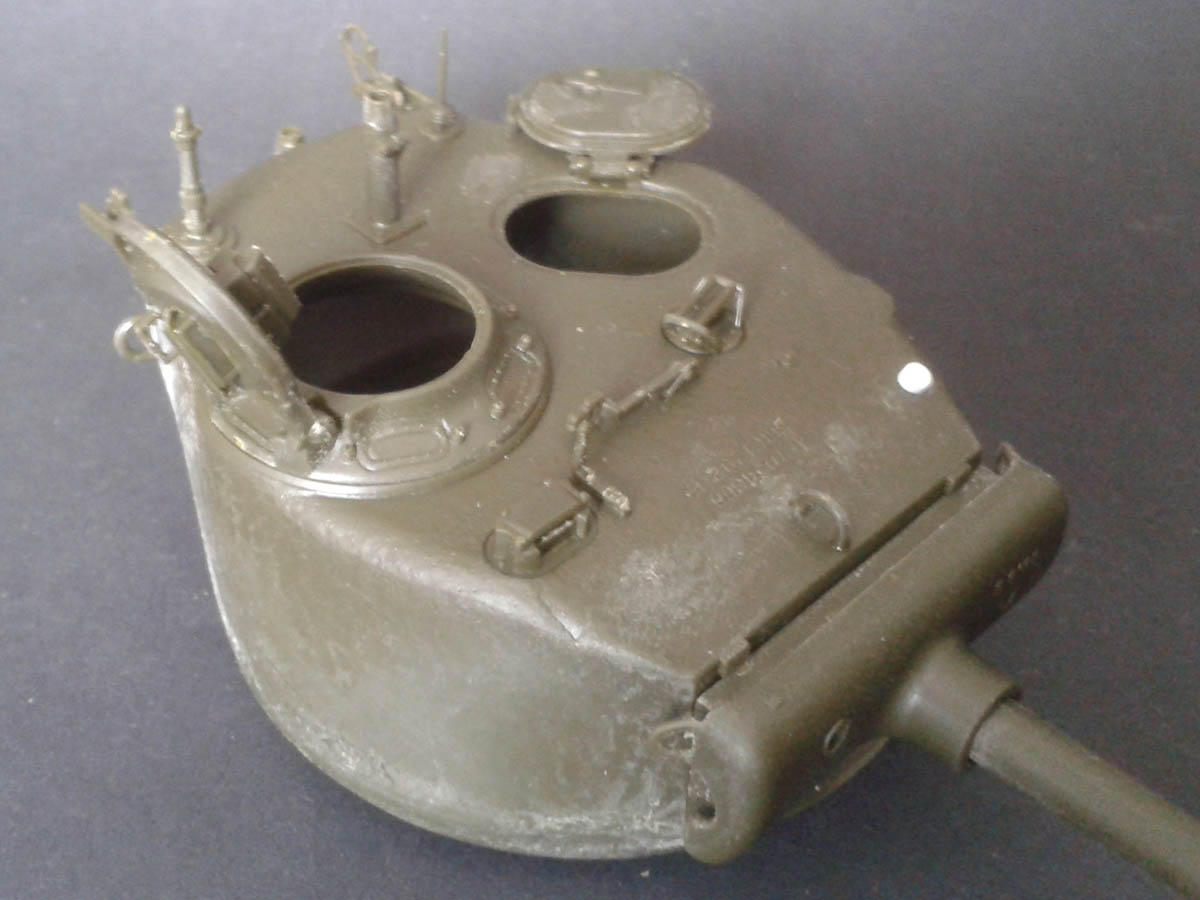
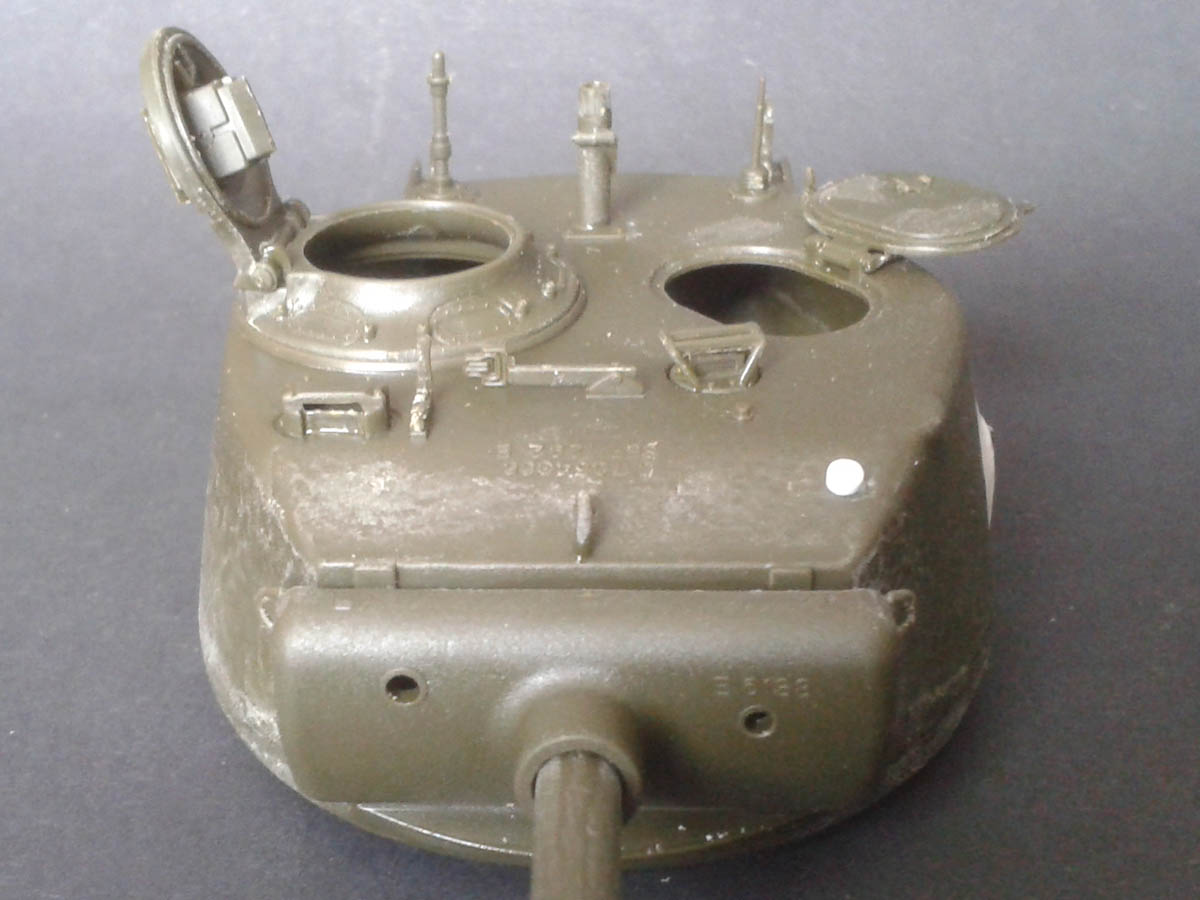
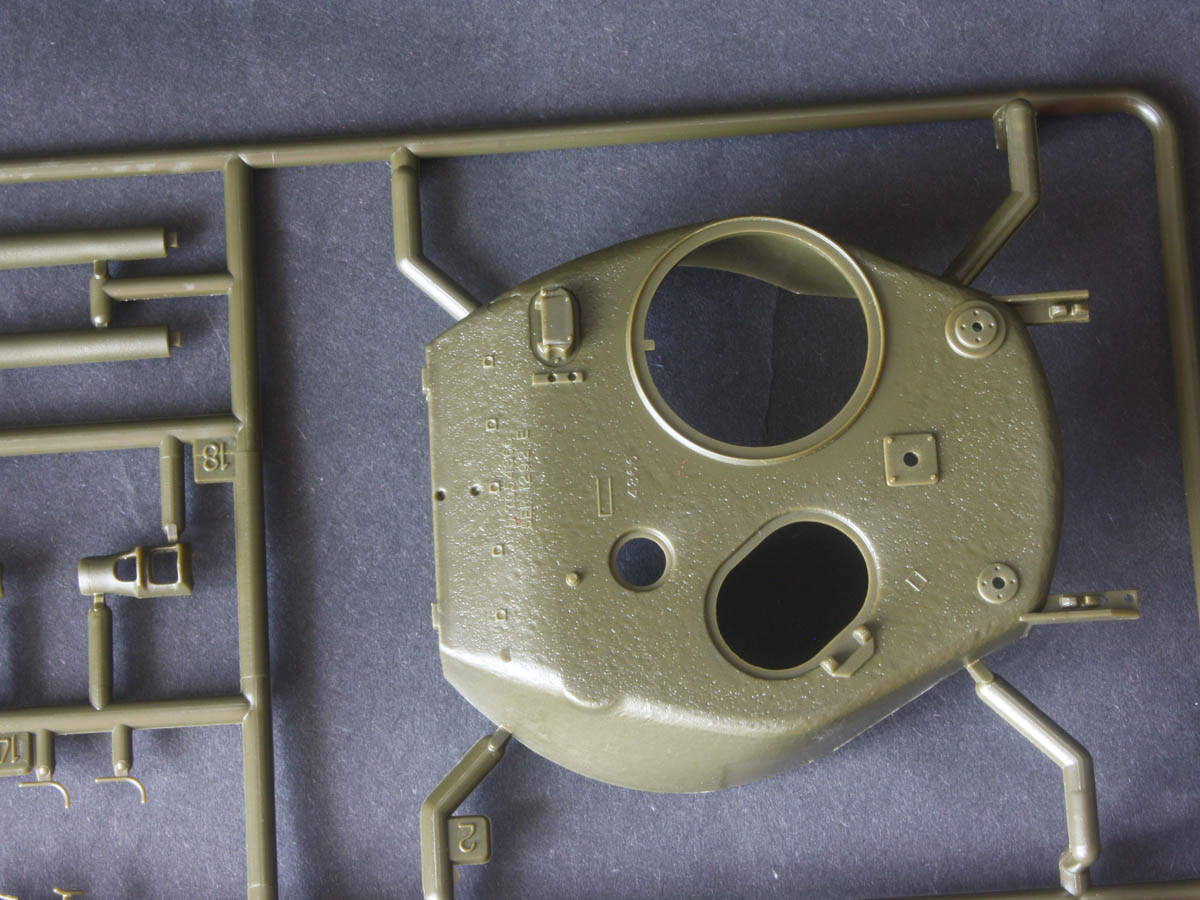
Then comes the turret – I think it first appeared in the M4A2 Russian Army kit (13010), and represents a later version with oval loader’s hatch which became common around Christmas of ’44 in the ETO. There is cast texture, and some fine raised foundry markings. The gun tube is two parts, with a choice of separate thread-protector cap or two-piece muzzle brake. The mantlet again has foundry markings, although the integral lift-ring “ears” need a little TLC. And the ventilator dome on the rear has foundry markings, upside-down! Don’t look for anything inside the turret – there is no breach or anything else. One of the two “vision” cupolas in this kit also hails from the Russian A2 kit.
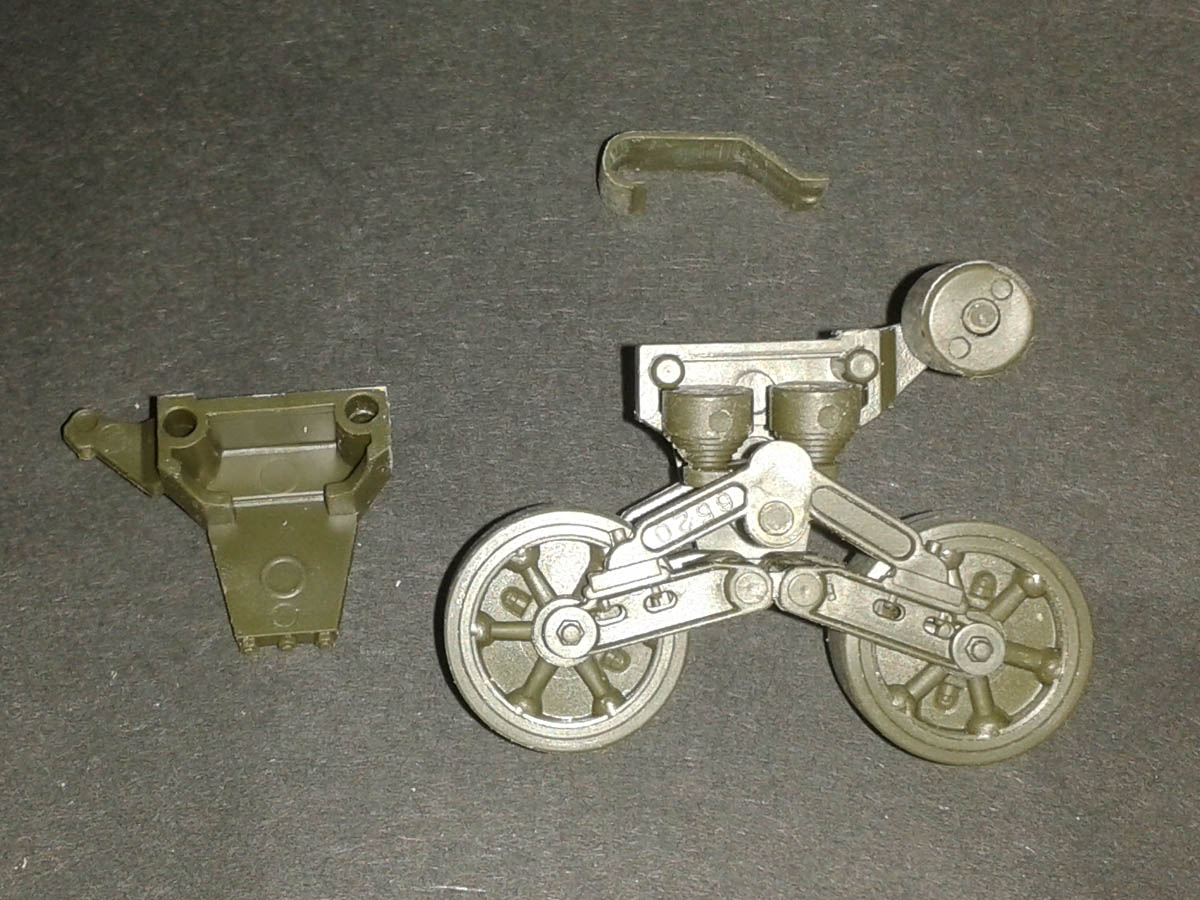
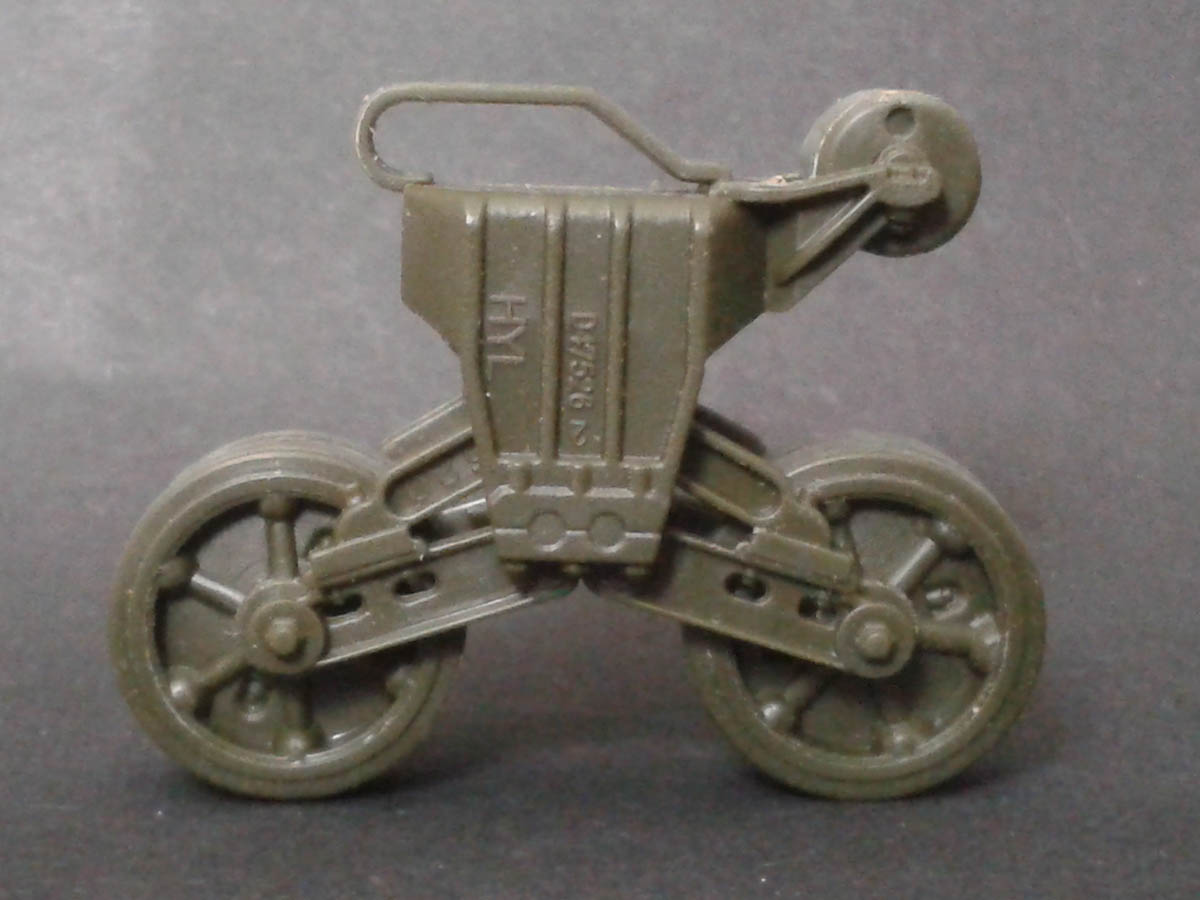
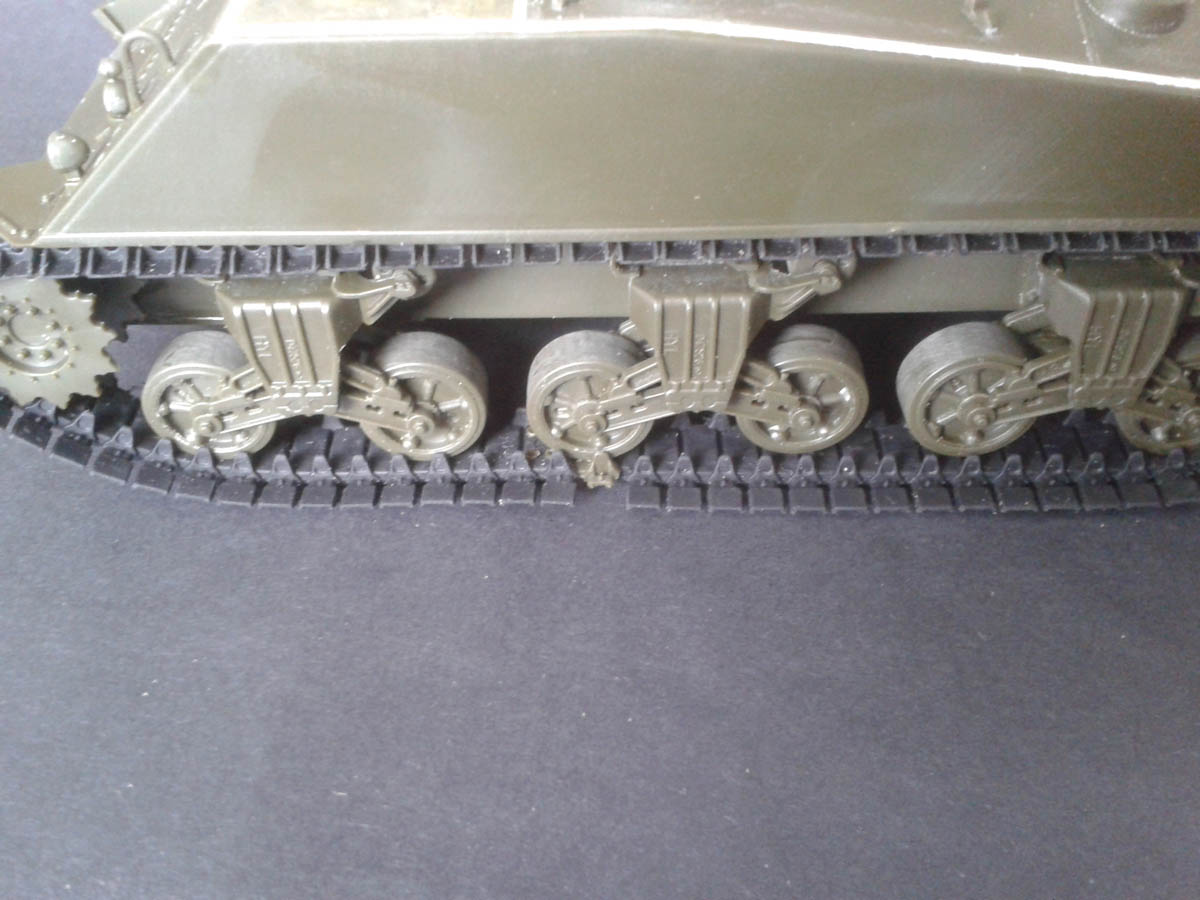
We get the familiar Academy suspension sprue first seen in their M10/M36 series, and it still holds up well. The bogies show their Italeri heritage with “rocking horse” motion, but there is cast lettering and decent detail on the frames and arms. These bogies have the horizontal return-roller arm with pillow block that are too early for this model, so they go into the spares box to uplift another Sherman build down the line. Instead, we get a new sprue of frames with upswept roller arms (from the Calliope kit), more fitting to a late-model M4A3(76)W delivered at the end of ’44. The wheels are a choice of open-spoke or solid-spoke, with the latter being the correct choice for this tank. The mix’n match sprue approach means we also get a selection of drive sprockets and spare sprocket rings, many of which go in the spares box.
Tracks are the rubber chevron T48s with cast extended end connectors (EECs) to improve flotation in mud. These are provided as vinyl lengths.
Markings are provided for tanks from 69th TB, 761st TB, 709th TB, 752nd TB, and a “beute-panzer”. Of these, the beute-panzer will require the muzzle brake and careful removal of the EECs, while the white-wash cammo’d 709th TB tank is based on a well-known photo of an early M4A3(76)W with the split loader’s hatch (not in this kit), so is not strictly accurate.
Anyway, bear with me as I get stuck in looking for any pitfalls…
Hosted by Darren Baker
Academy M4A3(76)W build log
Posted: Monday, July 10, 2017 - 05:14 AM UTC
ericadeane
Michigan, United States
Joined: October 28, 2002
KitMaker: 4,021 posts
Armorama: 3,947 posts
Joined: October 28, 2002
KitMaker: 4,021 posts
Armorama: 3,947 posts
Posted: Monday, July 10, 2017 - 06:13 AM UTC
While a brief look at my pics of the rear ventilator, I saw no foundry markings but that doesn't mean anything. And what Academy makes isn't necessarily upside down. Remember those marking and numbers didn't need to necessarily readable on the final item. One thing to note is to omit the engine crank-- that's improper for M4A3s.
Posted: Monday, July 10, 2017 - 12:42 PM UTC
Hi Roy,
You're right about orientation depending on the part (and sometimes the specific foundry!), and the ventilator only has room for the pattern number (no actual foundry symbol). In fact, the turret (which from SoS appears closest to a Continental of Wheeling casting) also lacks the foundry symbol despite having numbers and tons of space. The thing that struck me was they could have done the vent number so it was right-side up, but chose to follow what I've seen in real photos - a bonus in my book!
The crank will indeed be left off - there is much in the instructions to trap the unwary. The rest of the tools need work as well, since Academy avoided straps in favour of some odd circling band that I suppose is meant to be a clip or something. (Think Tamiya/Italeri circa 1970s) Discretion being the better part of modelling, I may be adding soft stowage to obscure the tools...
Invincible
United Kingdom
Joined: May 03, 2017
KitMaker: 148 posts
Armorama: 122 posts
Joined: May 03, 2017
KitMaker: 148 posts
Armorama: 122 posts
Posted: Tuesday, July 11, 2017 - 10:23 PM UTC
I built this a little while back, a nice kit, but be warned, the tracks are very tight and the idler wheel fits very badly.
Also, the colour of the vinyl tracks Is the same colour as the real thing, so the rubber portions won't need painting
Posted: Tuesday, July 11, 2017 - 11:17 PM UTC
Hi Invincible, thanks for the heads-up - I'm leaving the tracks til later, because there's only so much pain I can take at one time!
I'll see how they fit, but I have tons of AM tracks if needed. So far I've been ok with Academy kits, but there's always a first.
Posted: Tuesday, July 11, 2017 - 11:18 PM UTC
Looking closer at the turret, it is clear that the muzzle brake is required on all variants. My Sherman photo collection is not extensive, but I have yet to see pics of the oval-hatch turret without a muzzle brake – the earlier thread-protector cap that Academy calls for is seen on the earlier turrets with the split loader’s hatch. According to the Son of Sherman “bible” the brake and the oval hatch are nearly contemporary changes in production. Also, the oval hatch seems to appear in the ETO around New Year ’44-45 – tanks before Christmas ’44 have the thread protector and split hatch as seen on the turret in the ancient Italeri M4A1. (You could pick these kits up cheap, and do a graft for an autumn ’44 early M4A3(76)W.)
On with the build! As usual, I ignore the steps in the instructions, preferring to get the hull built up into a solid “box” before adding breakable details. And I long-ago learned that starting with cleaning up a bunch of wheels is a quick way to drain enthusiasm! Better to do simple hull stuff first, before the drudge of suspension…
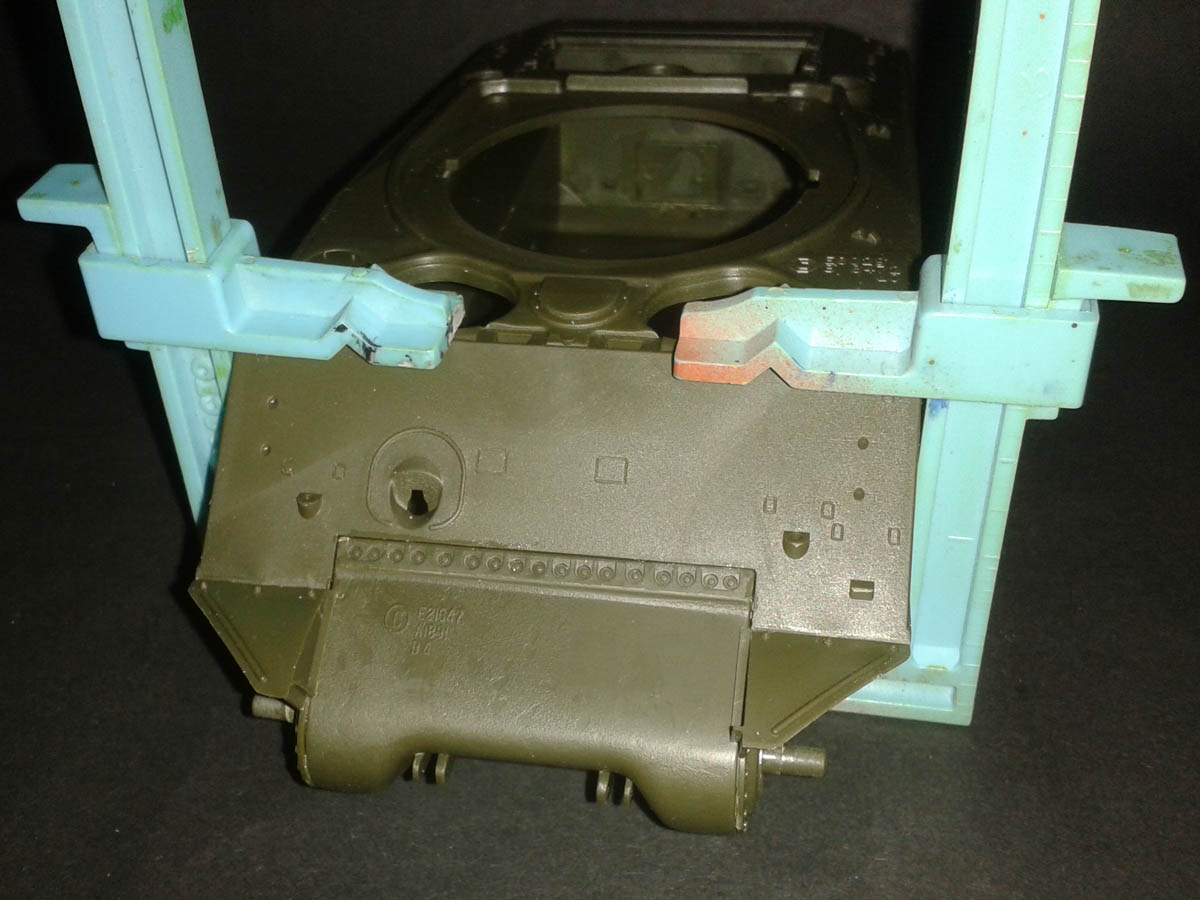
Starting on the lower hull, the FDA goes on easy enough at the front – I put the side pieces on the hull first and then slid the nose on after. The vertical row of bolts is missing at the join on the hull side, which is annoying. I added the hollow-backed bolt strip across the top as per instructions, but had to be careful to get it the right way round – this might be the cause of trouble for others who say they get a big gap between it and the upper hull. (Mine fits well enough – the trick is getting the tab on the upper hull to slide down between the bolt strip and the front of the sponson floors. But I did need some clamps to keep the upper hull from riding up as the glue set.)
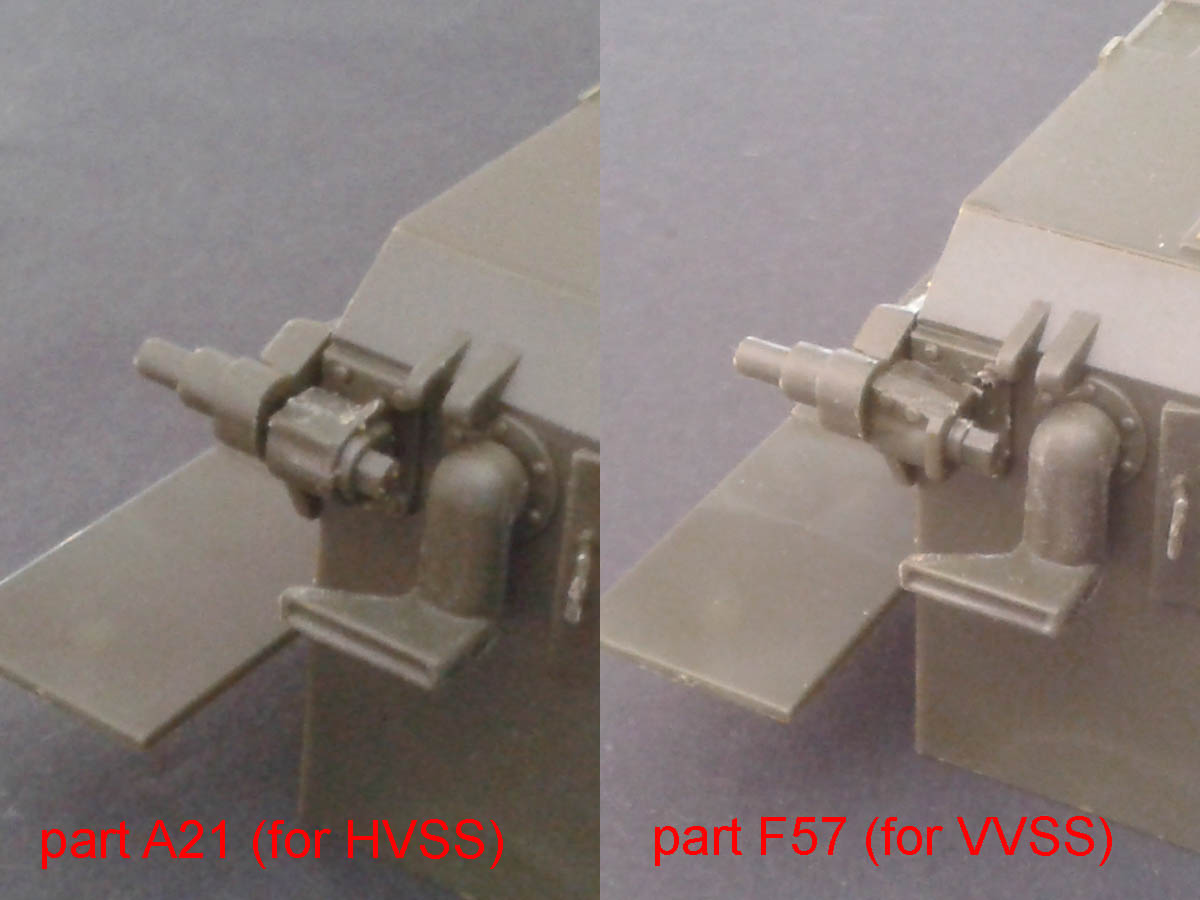
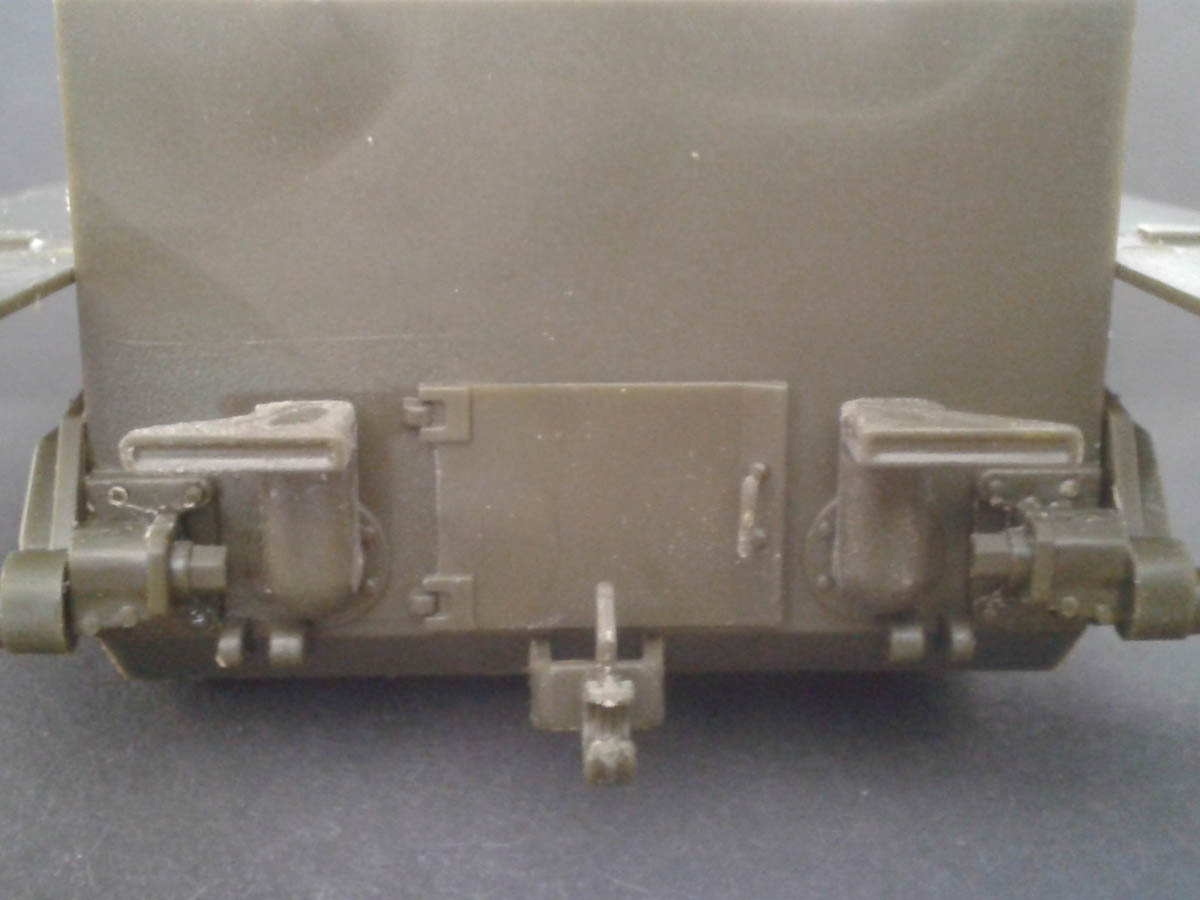
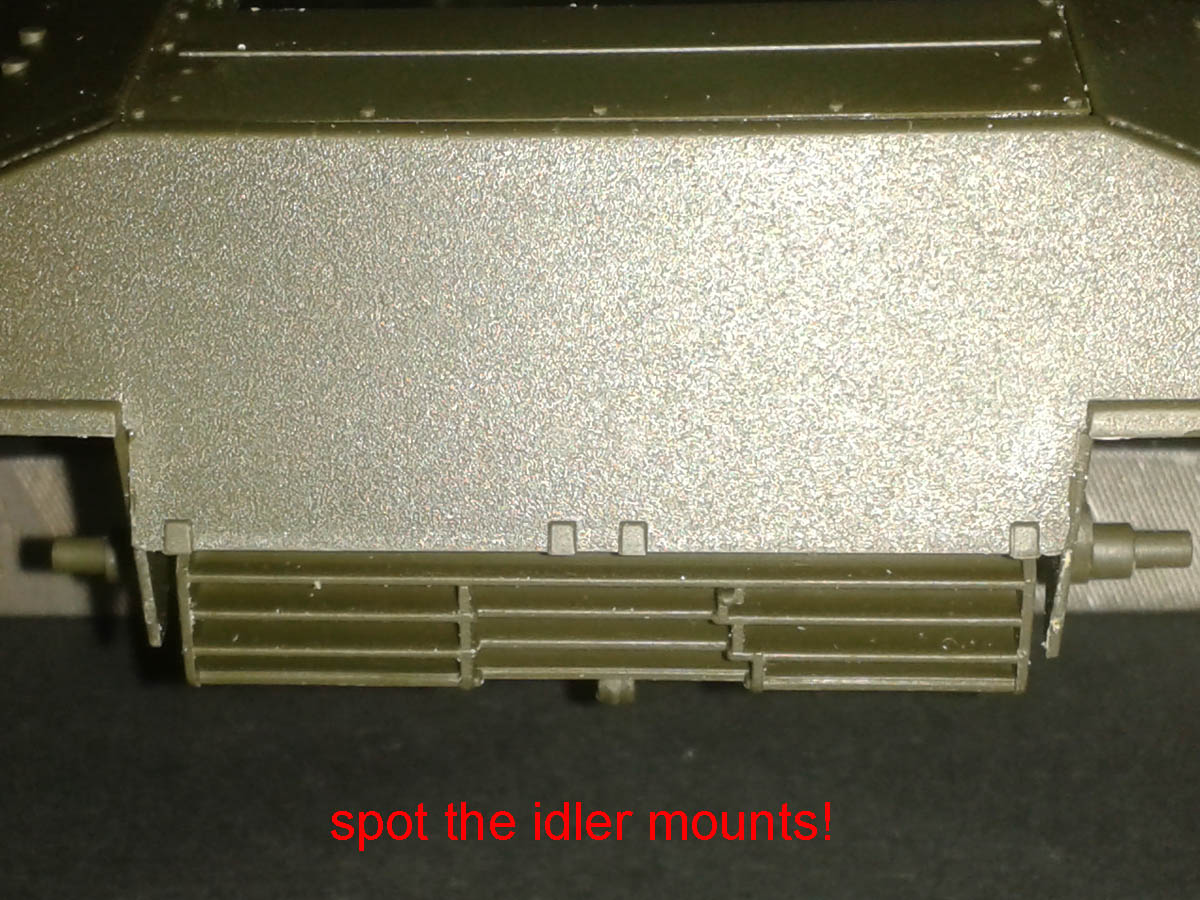
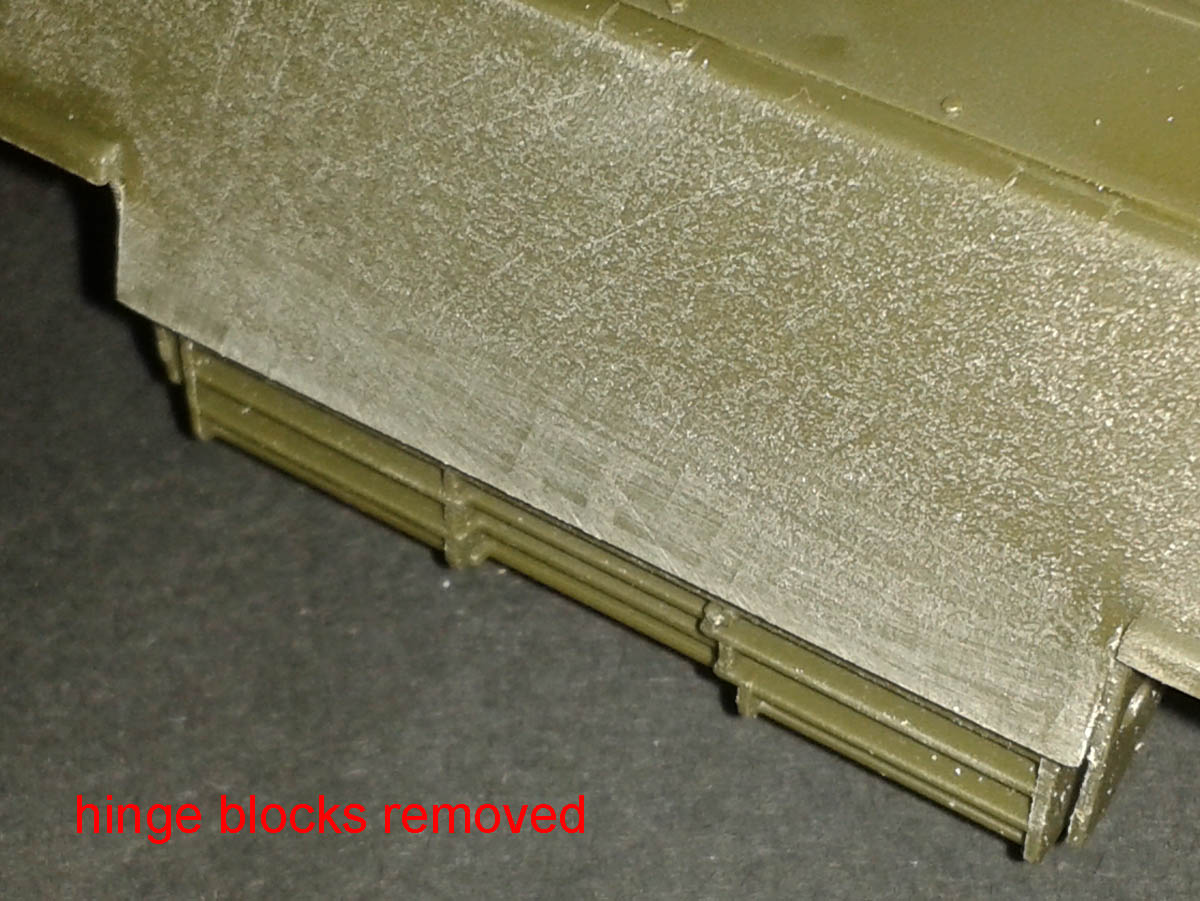
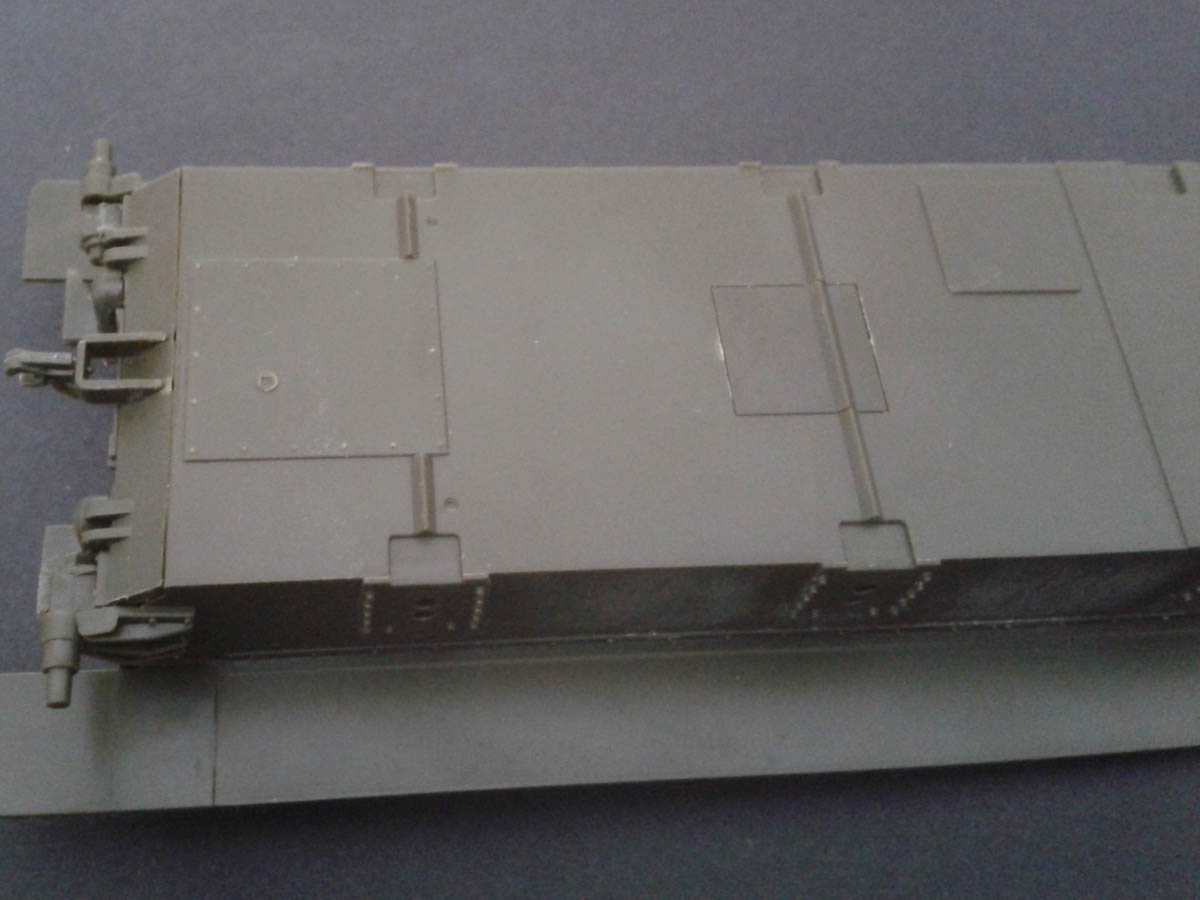
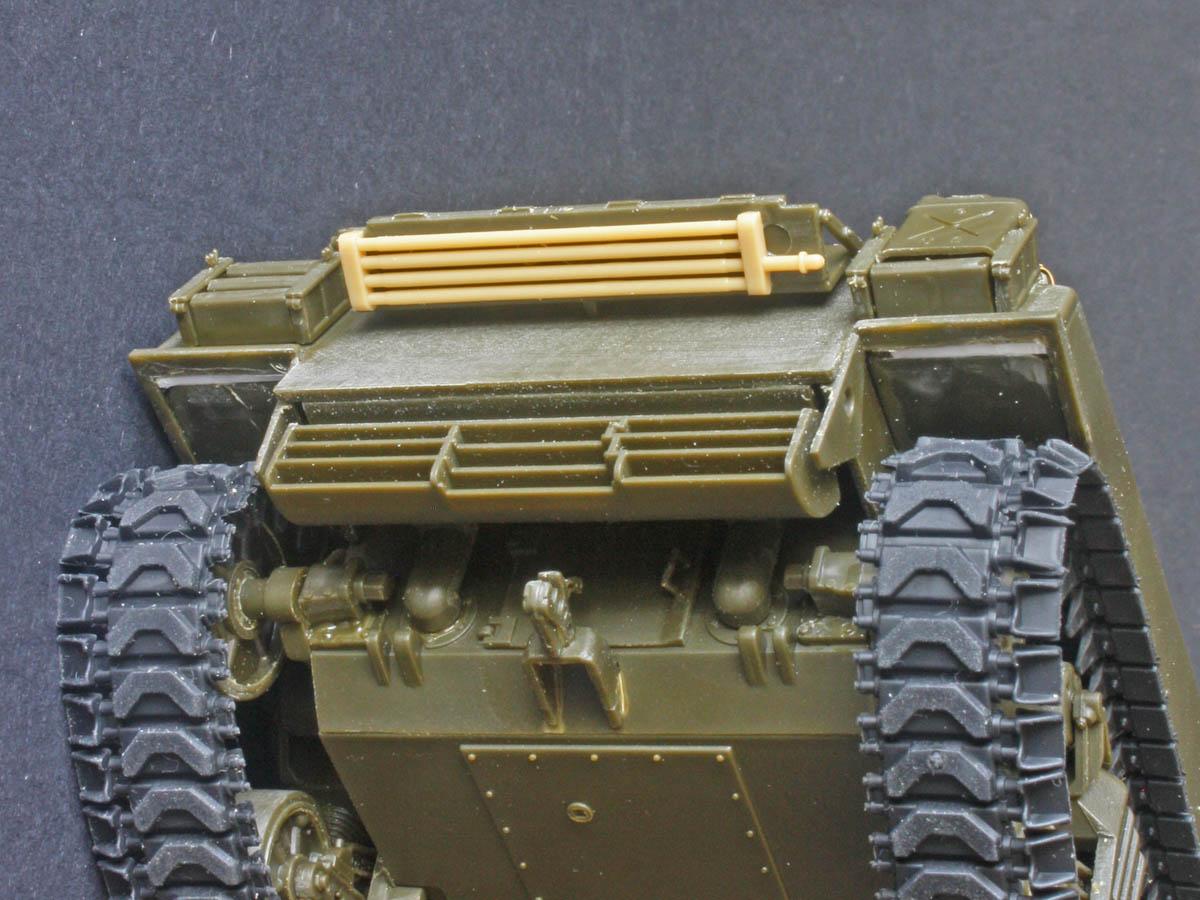
At the back things are less rosy. Academy never really knew what to do about idler brackets – the standard VVSS suspension uses a different kind of bracket to the E8, and Academy seems to have tried to create a hybrid design to avoid tooling different hulls. Leaving aside the chunky part moulded into the hull side (very Tamiya…) the details on the rear hull plate are just wrong. And to top it off they call for detail parts A21 & 22 (from the old Dozer kit, which is an E8) instead of the more correct parts F57 & 58. Note that these correct parts lack the mounting hole in the back, so you will need to carve off the square peg on the plate – it’s easier to do before installing the rear plate and the exhausts (just ask me how I know!) Of course, none of this is visible once the exhaust deflector is fitted, so it is a moot point. Also, the rear of the upper hull has four raised rectangular blocksalong the bottom edge that are meant to be hinges for the later split exhaust deflector seen more commonly on post-war tanks – these need sanded off.
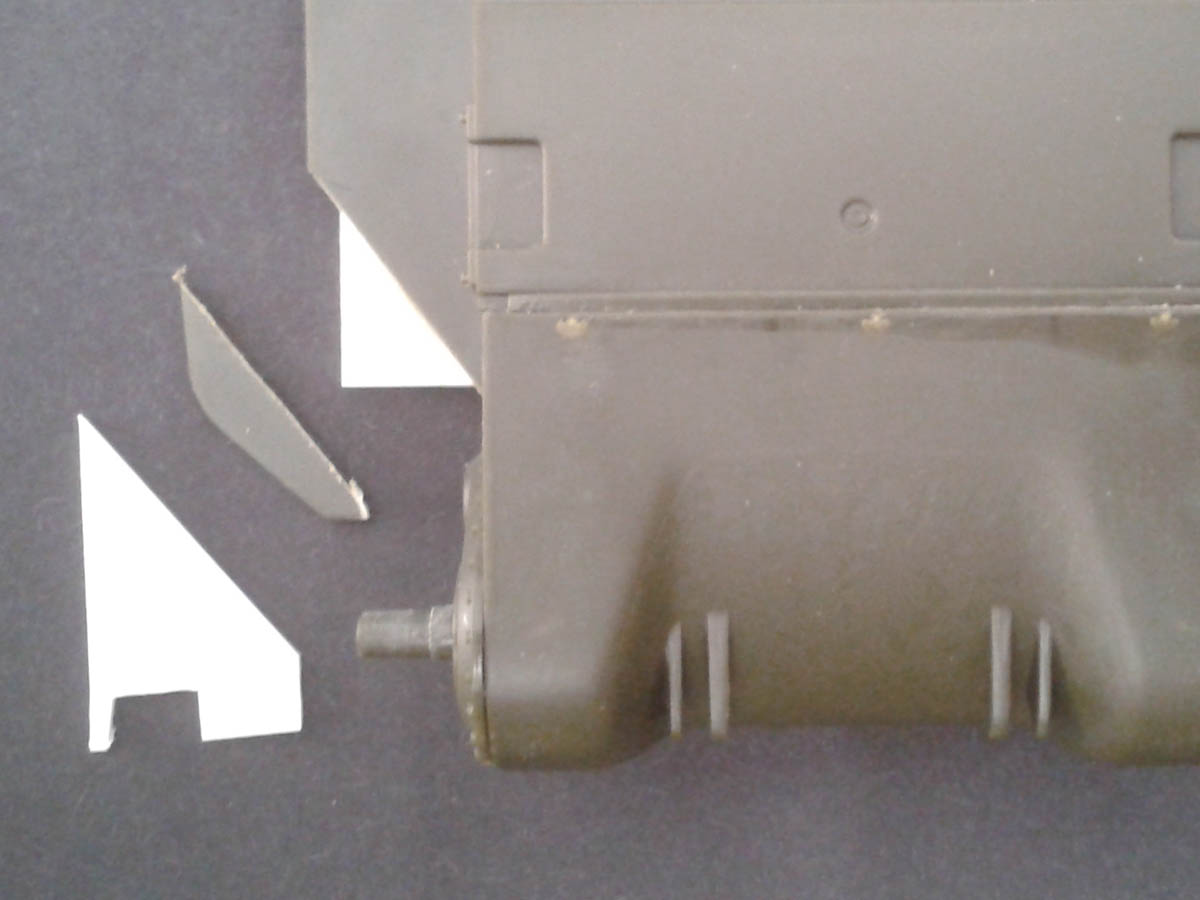
The sponson floors are a disappointment – the rounded corners need filling. At the rear you could add a strip of plastic, or just make new parts from 0.060” Evergreen sheet. Up front it’s a little more complicated – I made roughly triangular parts, then scribed and cut back the curved front edges of the kit part to fit them. You could blend this in with filler and sanding, or just apply a “goop” coating of mud that would cake on the underside of the sponsons in the wintery ETO…
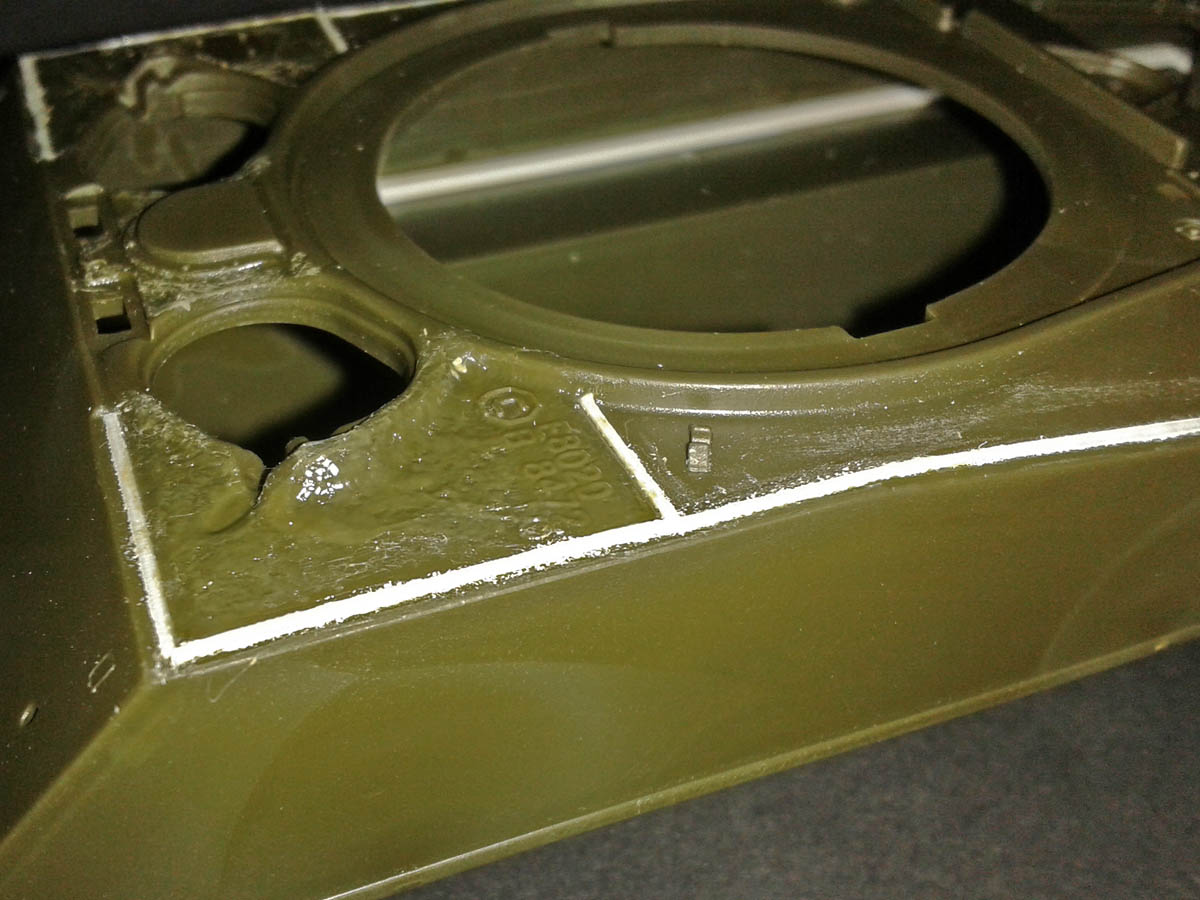
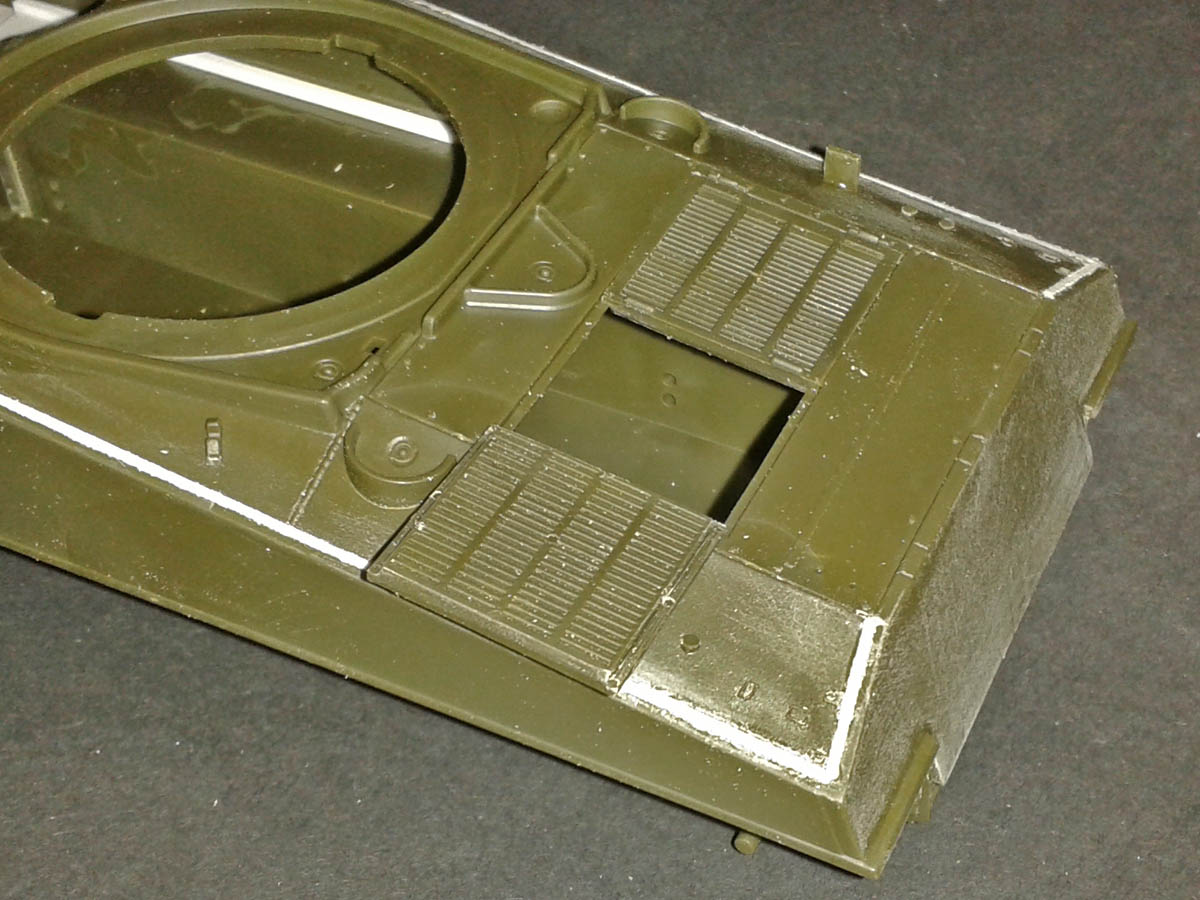
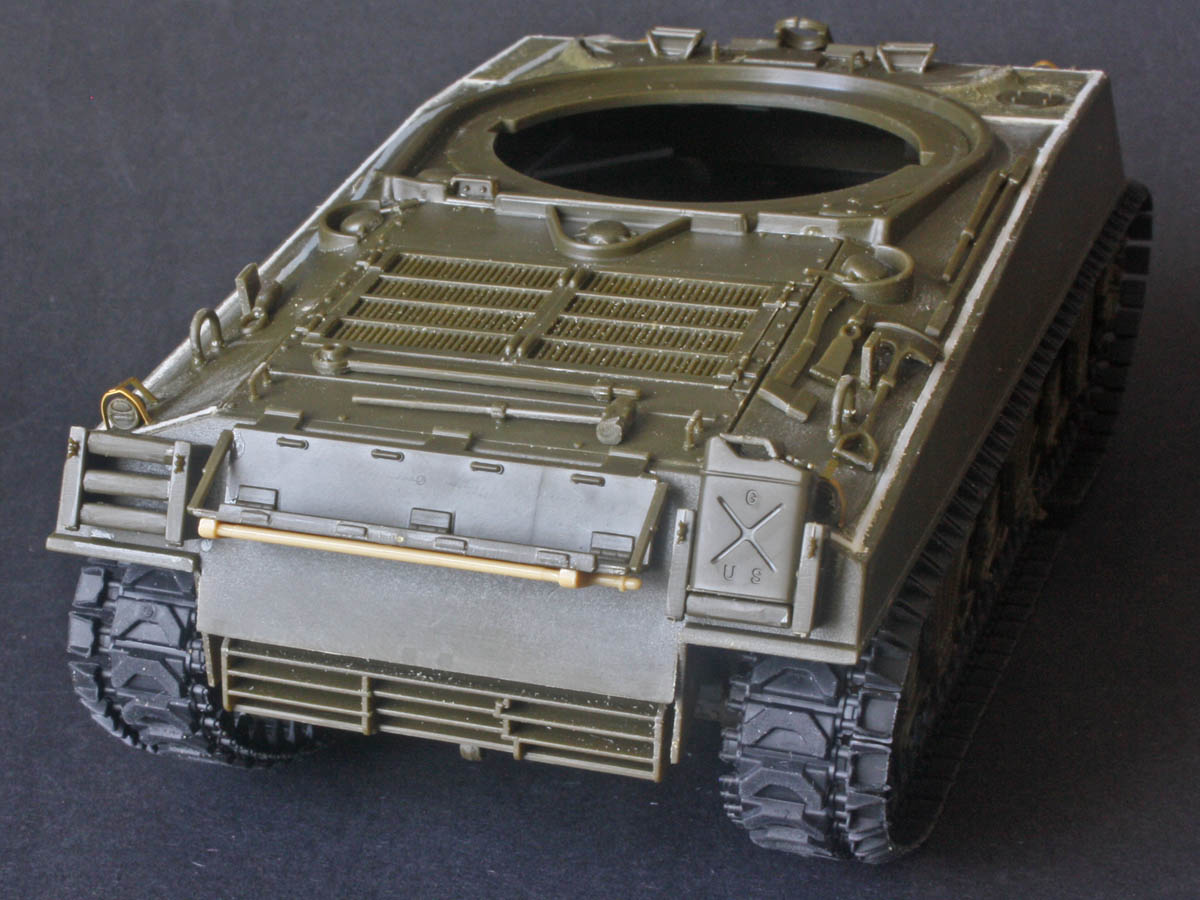
Then there’s the weld “trenches” – I filled these with Evergreen 0.020” rod soaked in liquid glue, pressed them in deep, and afterwards shaved down the tops to replicate the flat flowing welds of a Sherman. Other folks use putty – your mileage may vary! While I was at it I corrected the pattern number next to the driver’s hatch (should be “E8020”, not 8029) and stippled the cast hatch panel with liquid glue and a stiff brush to give it a bit of texture. The panel should be more “puffy” (it is too flat), but that cannot be fixed easily. (Note the 0.060” square Evergreen stiffeners inside, where the sponson floors meet the hull sides – I added these after aligning top & bottom hulls, before adding the engine hatch surround. It makes for a more solid hull. The engine doors have detail on the underside, in case you want to drop in an AM engine compartment…)
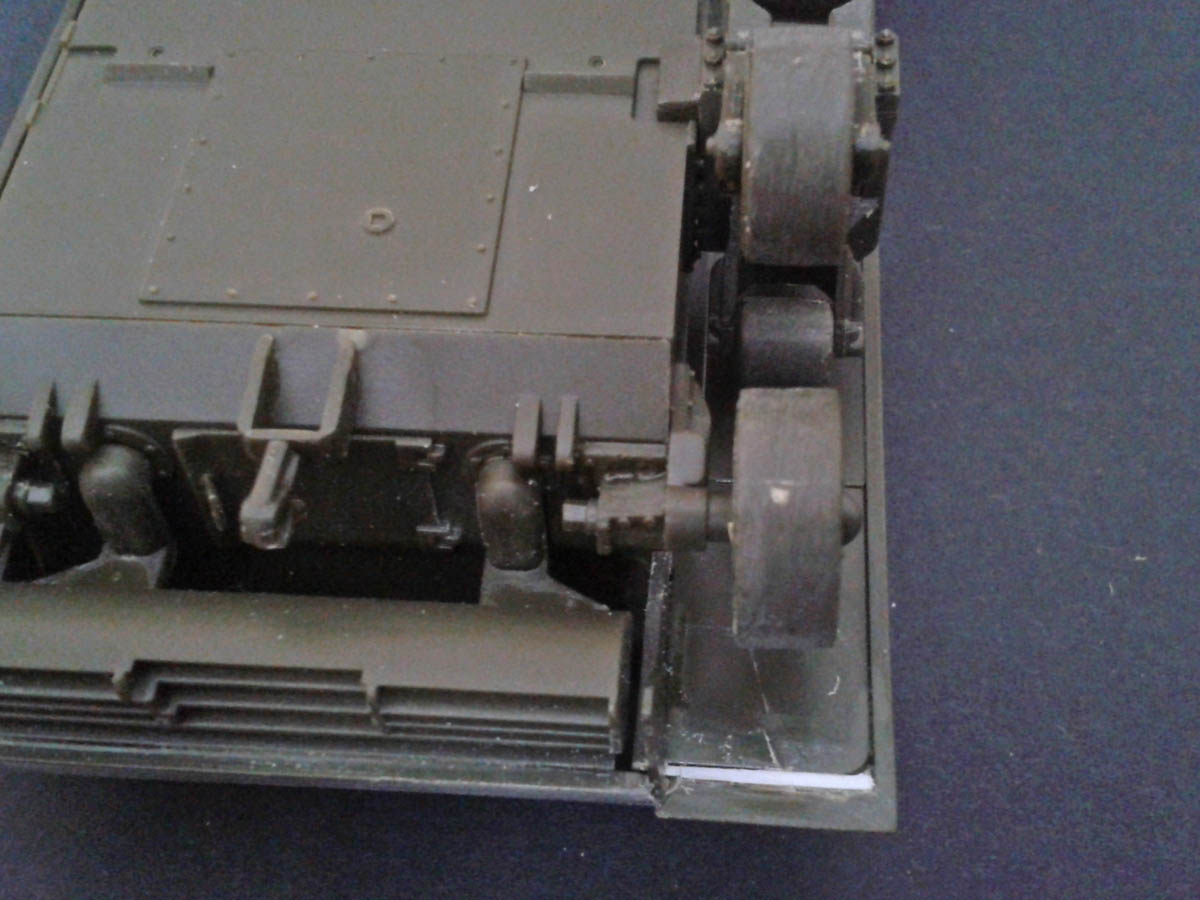
One last issue to mention is the hatch detailing on the underside. The engine access hatch is too wide and too short front-to-back – it needs to be extended forward by another 5mm or so. Then there are the missing drain holes (four around the engine hatch, one at the front under the co-driver) which are raised conical features. Combined with the square plug in the floor, these have convinced me to coat the underside in mud and avoid any dioramas where the bottom of the tank is visible!
More to come…
Posted: Saturday, July 15, 2017 - 04:11 PM UTC
Before fitting out the upper hull with details, I went back to tackle the suspension. Using the solid-spoke wheels was a given, and I found they had tiny alignment notches and pegs inside so the back face lines up with the front. I learned the hard way to slip the back in first, before running liquid glue down the joint – if you brush on glue first the back “sticks” and cannot be rotated to line up with the peg!
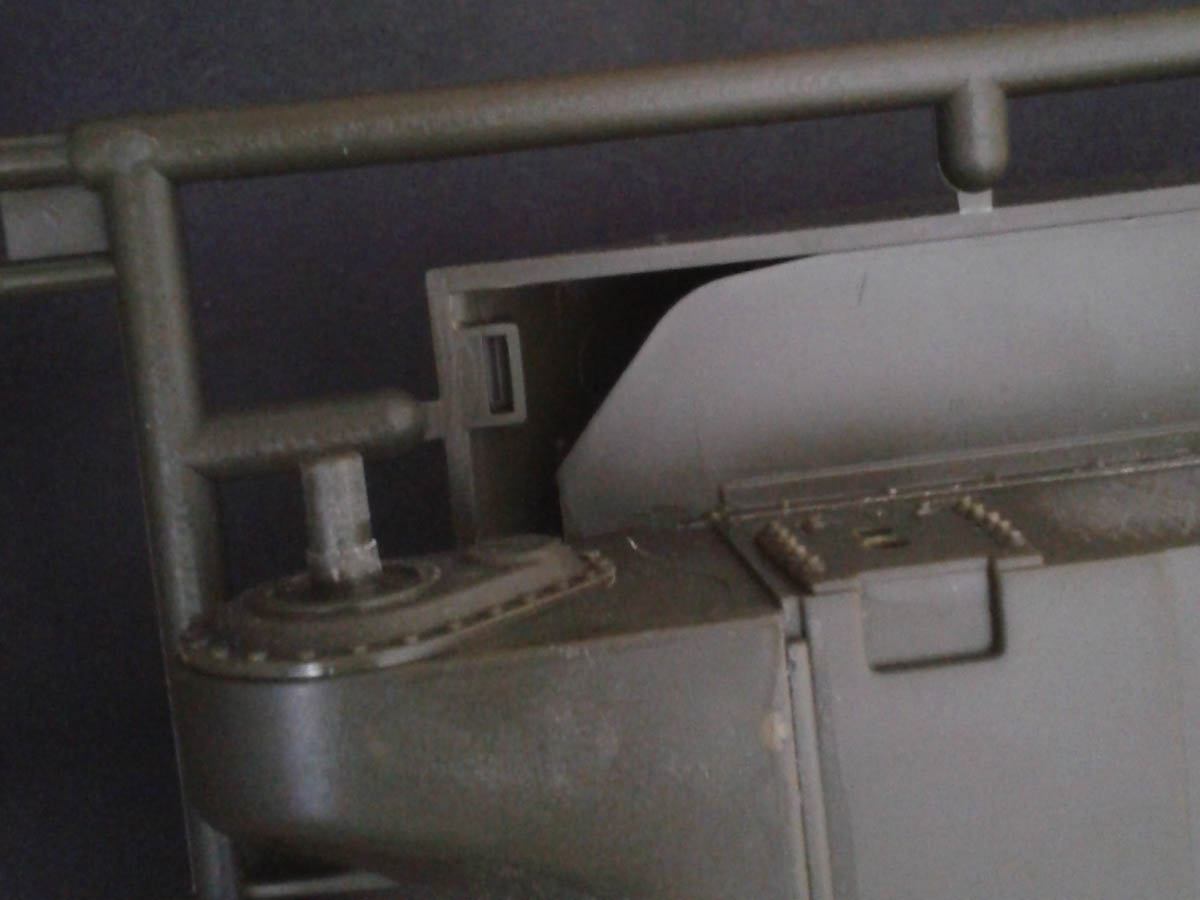
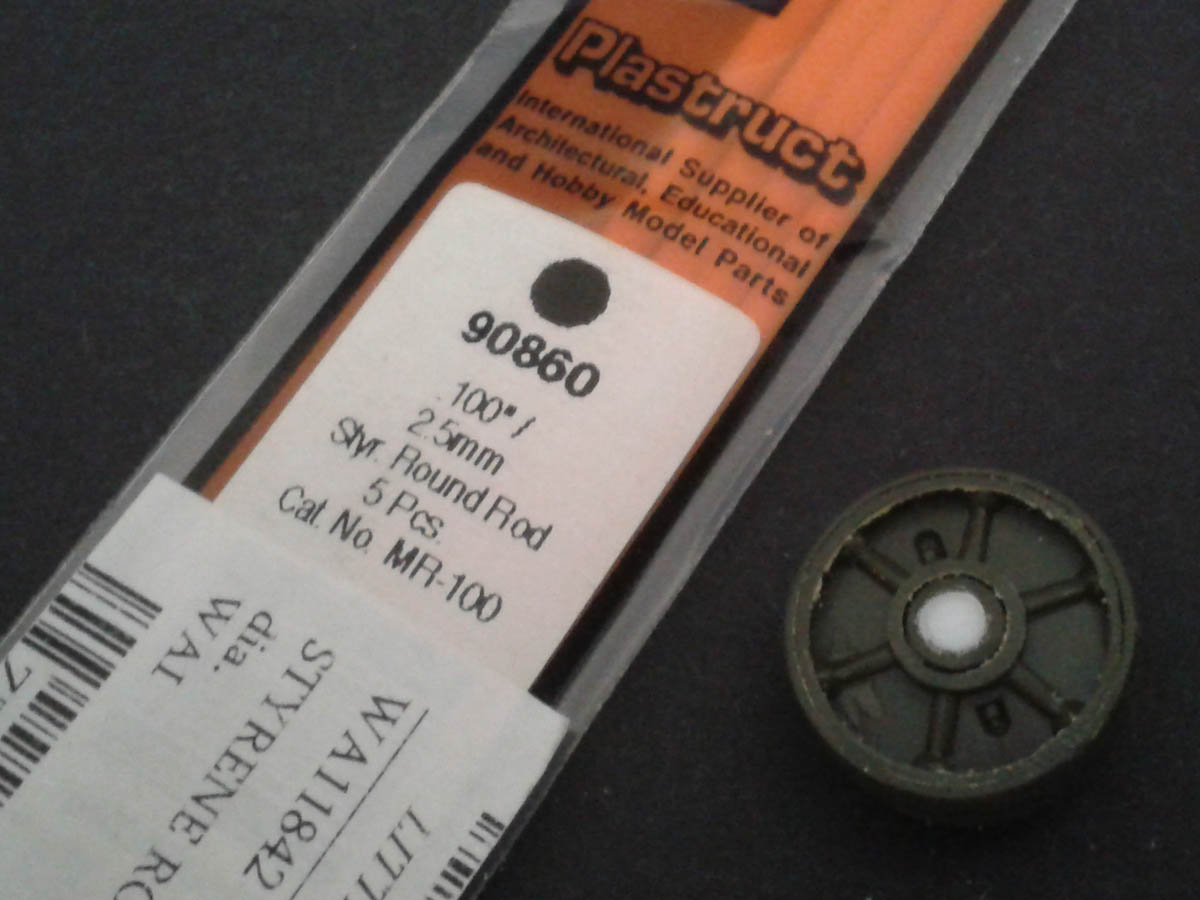
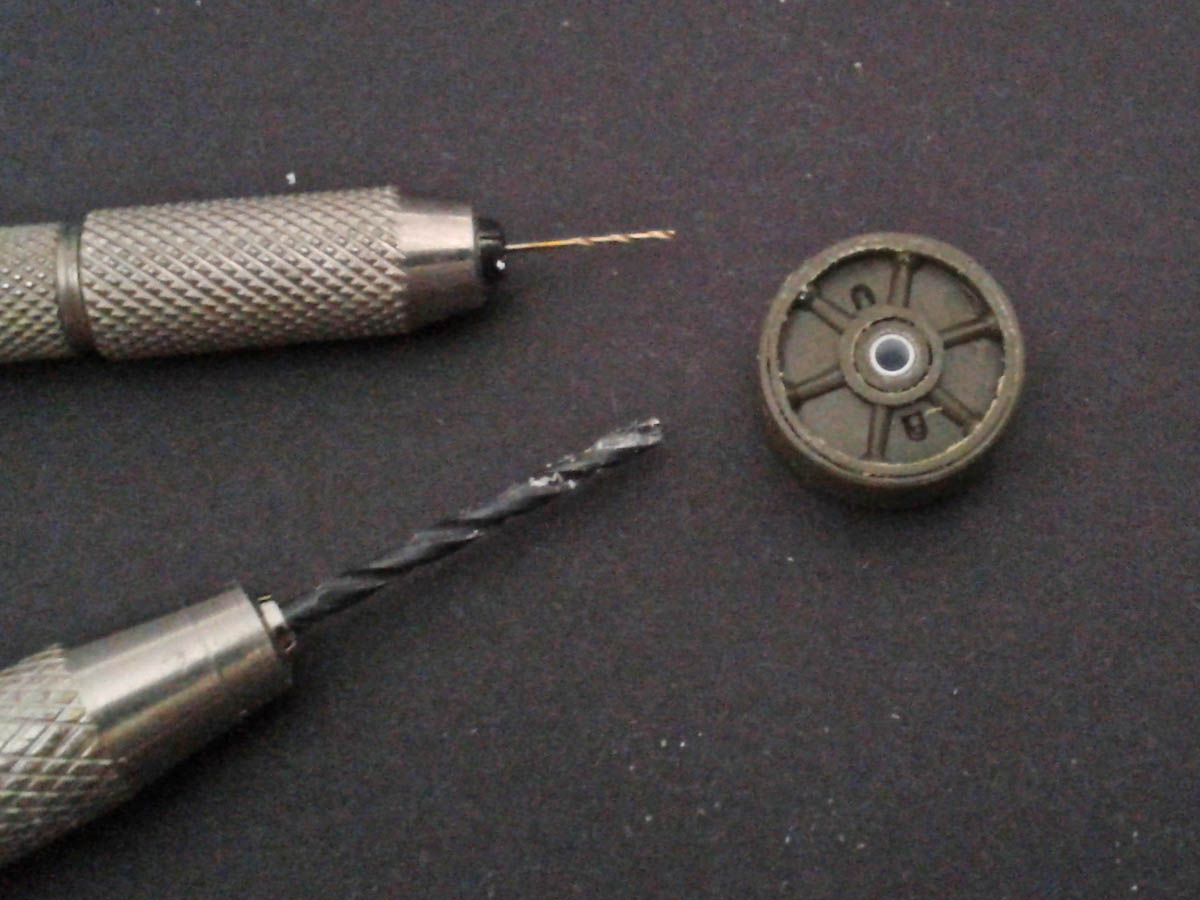
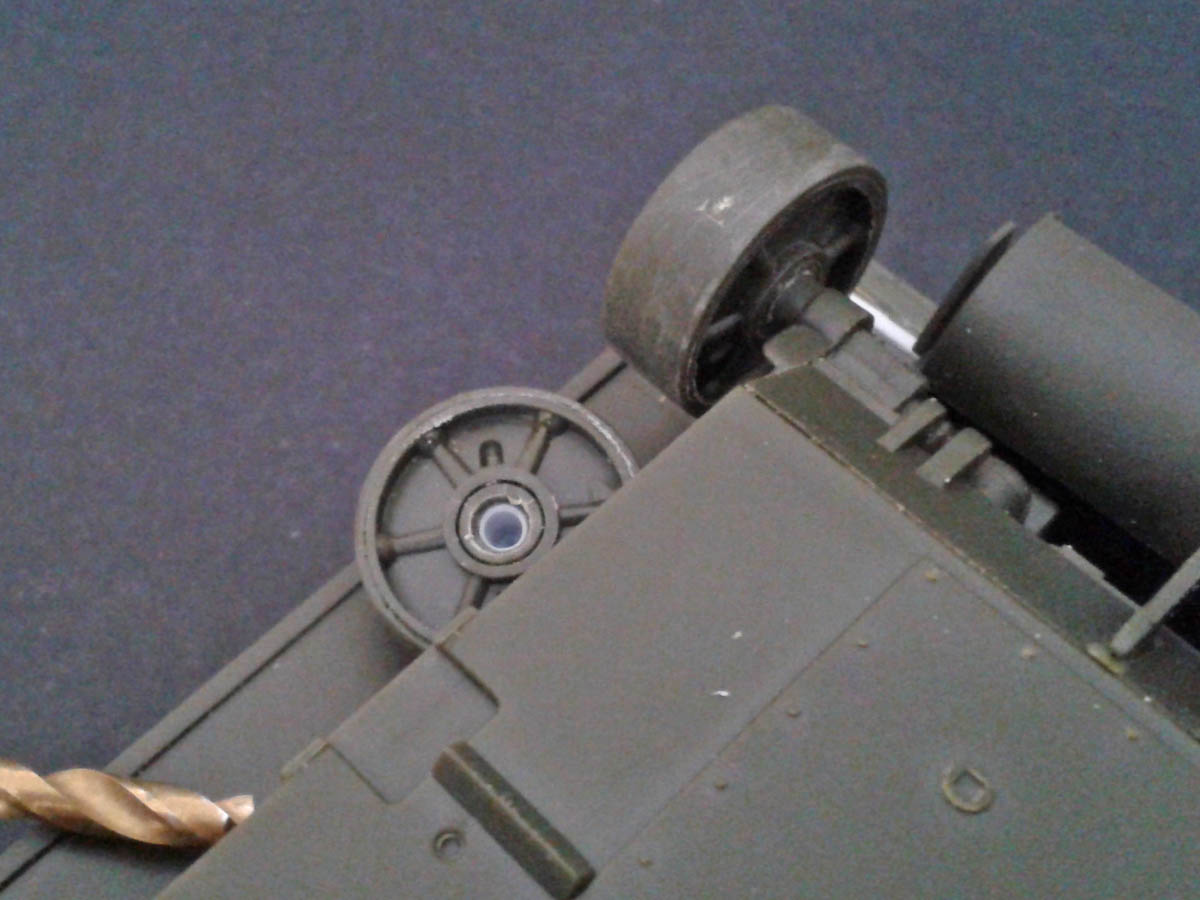
Trouble started as soon as I tried to put the idler on – the mounting peg on the hull is not designed for it. The peg has a step in its profile, narrowing down too much to fill the hole in the idler wheel. Some experimentation showed that the narrow part of the peg was 2mm diameter, while the fat part was 3.2mm. Since altering the peg is a nightmare, I opted to fill the idler hole and drill a new 2mm opening. I used some 2.5mm Plastruct rod, coating the hole with glue and twisting the rod around to ensure a strong bond. (I tried Evergreen 2.4mm tube, but it was too loose.) Then I drilled a tiny pilot hole in the centre, followed by the 2mm hole. After everything was dry the wheel was a snug fit, but stood away from the hull too much compared to the roadwheels, so to move it inboard about 1mm I drilled out the back with a 3.2mm drill, going in only the necessary 1mm. This is all very careful work that will no doubt put off any newbies who buy this kit – shame on Academy for such a sloppy mistake!
The bogies build up ok, but here again there is an issue – the holes in the arms are too small for the pin in the frame. I tested them on the older “horizontal roller” frames, and of course they fit perfectly. Seems whoever cut the new “upswept” frames used a fatter pin, but a few passes with the 2mm drill soon had the holes a decent press-fit on the pin. Again , needlessly frustrating – don’t Academy’s workers speak to one another during design-work? Pity, as the casting numbers etc are quite nice.
The skids lack the four bolts seen on real ones. I know Russ Amott suggested carving them off the unused early round skids, but as I plan to cake on some mud I didn’t bother. Also I ignored the missing holes in the front face of the bogie frame.
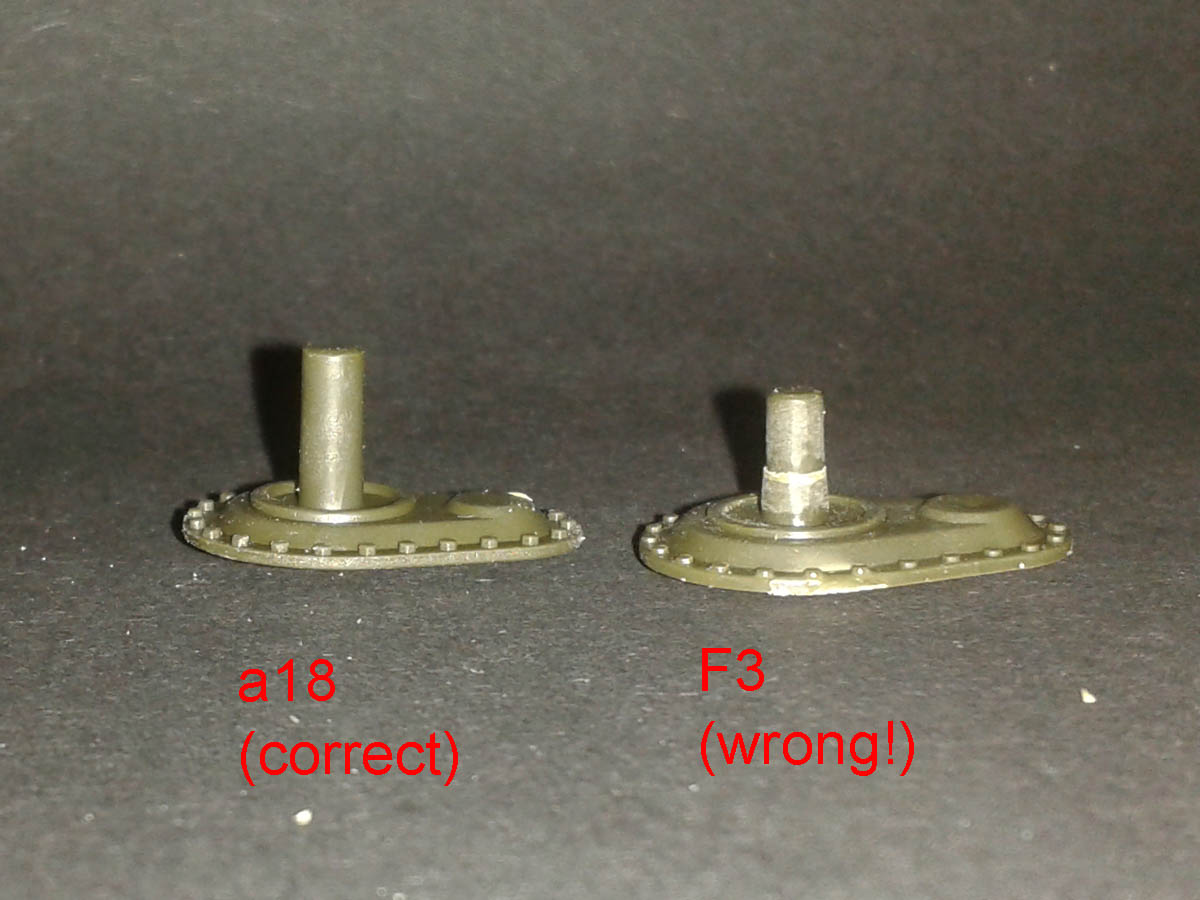
Then came the sprockets. I assembled both kinds (either could be seen on this version), and found they were a sloppy fit on the peg! I had used parts F3 as called out in the instructions, but after testing them on the alternative FDA cover a18 (on the wheel sprue) they were perfect. I thought I didn’t remember this trouble with my M10 & M36 kits! So now I had to pry off the offending F3 parts without damaging the hull, when I could have used a18 from the start.
I’ll save hull details for another time.
Posted: Sunday, July 16, 2017 - 01:33 AM UTC
Small update - I tacked the bogies onto the hull and tried to fit the tracks, only to find they were at least two links too short to go round. Counting the links, they are moulded with only 76, while real Shermans used 79 - no wonder the tracks are too tight! Oh, well - looks like I'll need aftermarket tracks to finish the build. Another demerit for Academy...
Invincible
United Kingdom
Joined: May 03, 2017
KitMaker: 148 posts
Armorama: 122 posts
Joined: May 03, 2017
KitMaker: 148 posts
Armorama: 122 posts
Posted: Monday, July 17, 2017 - 12:32 AM UTC
Sorry to hear about your problem with the tracks, I found the same issue when I built this kit. I got the tracks on with the help of a few expletives, but one of the idlers has just permanently dried bent...
Posted: Monday, July 17, 2017 - 12:59 AM UTC
Glad I'm not the only one struggling!
To add insult to injury, if I want to use AM tracks I need to widen the sprockets, as Academy's tracks are slightly narrow. I've got some DS tracks handy, and will be sawing up the sprockets tonight...
ericadeane
Michigan, United States
Joined: October 28, 2002
KitMaker: 4,021 posts
Armorama: 3,947 posts
Joined: October 28, 2002
KitMaker: 4,021 posts
Armorama: 3,947 posts
Posted: Tuesday, July 18, 2017 - 05:35 AM UTC
You're a glutton for punishment. This has shifted from a blog to a testimonial to not buy this Academy kit it seems.
Bravo1102
New Jersey, United States
Joined: December 08, 2003
KitMaker: 2,864 posts
Armorama: 2,497 posts
Joined: December 08, 2003
KitMaker: 2,864 posts
Armorama: 2,497 posts
Posted: Tuesday, July 18, 2017 - 05:56 AM UTC
Academy hasn't gotten the hang of mixing and matching parts from different kits.
And I have four incarnations of this kit in the stash. Well if sold all four I just might be able to swing one Asuka kit.
Nah, I'm too stupid for that. I have enough individual link Dragon left over that I could stitch in the two links. Be a lot easier than putting together a whole length of links because after market is not an option.
celt15
Wales, United Kingdom
Joined: September 16, 2016
KitMaker: 95 posts
Armorama: 91 posts
Joined: September 16, 2016
KitMaker: 95 posts
Armorama: 91 posts
Posted: Wednesday, July 19, 2017 - 10:50 PM UTC
As I am new to armour models, and wanting to build a Sherman in 1/35,which kit do you suggest for a first timer.?
Invincible
United Kingdom
Joined: May 03, 2017
KitMaker: 148 posts
Armorama: 122 posts
Joined: May 03, 2017
KitMaker: 148 posts
Armorama: 122 posts
Posted: Wednesday, July 19, 2017 - 11:06 PM UTC
Tamiya Sherman M4a3 late production.
Posted: Wednesday, July 19, 2017 - 11:26 PM UTC
Tamiya is a good call for a first-time build - they always go together easy.
On my track issue, I didn't get round to sawing the sprockets (had to go out of town for a conference) but had a brainwave while travelling! Academy gives a long filler piece of plastic track (used for some other kit that I can't recall, but on a sprue in the box...), and if I shorten it then it might be an acceptable patch to lengthen the kit track. It has no "duckbills", so either I steal a couple from an AFV Club track set, or cut off a few more at random around the track to disguise the missing ones as simple road damage. The real ones were prone to snapping off, and many pics show gaps.
I'll post my results...
celt15
Wales, United Kingdom
Joined: September 16, 2016
KitMaker: 95 posts
Armorama: 91 posts
Joined: September 16, 2016
KitMaker: 95 posts
Armorama: 91 posts
Posted: Thursday, July 20, 2017 - 04:46 AM UTC
Thanks lads,I will visit my LMS tomorrow and see if I can pick one up.
retiredyank
Arkansas, United States
Joined: June 29, 2009
KitMaker: 11,610 posts
Armorama: 7,843 posts
Joined: June 29, 2009
KitMaker: 11,610 posts
Armorama: 7,843 posts
Posted: Thursday, July 20, 2017 - 04:56 AM UTC
Per Scalemates, I was ready to pick up one of these kits. They get pretty good reviews. Next time I want a lesson, in pain I will attempt this build. Till then, Dragon and Asuka/Tasca.
Bravo1102
New Jersey, United States
Joined: December 08, 2003
KitMaker: 2,864 posts
Armorama: 2,497 posts
Joined: December 08, 2003
KitMaker: 2,864 posts
Armorama: 2,497 posts
Posted: Thursday, July 20, 2017 - 08:28 AM UTC
Quoted Text
Per Scalemates, I was ready to pick up one of these kits. They get pretty good reviews. Next time I want a lesson, in pain I will attempt this build. Till then, Dragon and Asuka/Tasca.
And at the other end of the spectrum, one look at the assembly required for a bogie unit in any of the Tasca/Asuka kits turned me off them forever. I don't need that kind of masochism in my fun pastime.
Most of the problems enumerated here would be solved with some careful dry fitting and creativity. And I have already invested in four of this series. (M4A3 calliope, M4A3 76, M36B1, M4A3E8) I'll tackle them myself rather than pass them on to another sucker.
ericadeane
Michigan, United States
Joined: October 28, 2002
KitMaker: 4,021 posts
Armorama: 3,947 posts
Joined: October 28, 2002
KitMaker: 4,021 posts
Armorama: 3,947 posts
Posted: Thursday, July 20, 2017 - 06:31 PM UTC
you mention the Tasca VVS -- I guess I deal with it because at the end, you get a great looking item with the option to articulate if you so choose. The assembly isn't annoying -- it's the seam clean up, really.
BUt I understand your annoyance
Posted: Thursday, July 20, 2017 - 06:58 PM UTC
I do like the Tasca/Asuka bogies - they take a little patience and more fingers than an average human possesses, but they do go together well and really look good.
Most of the issues with this Academy kit can be solved as Steve says, so the kit isn't a write-off, but it is a pain and will put off beginners. Still, as mine is a review sample I am honour-bound to press on and see how much I can do using the contents of the box...
Posted: Friday, July 21, 2017 - 06:27 PM UTC
Tracks update!
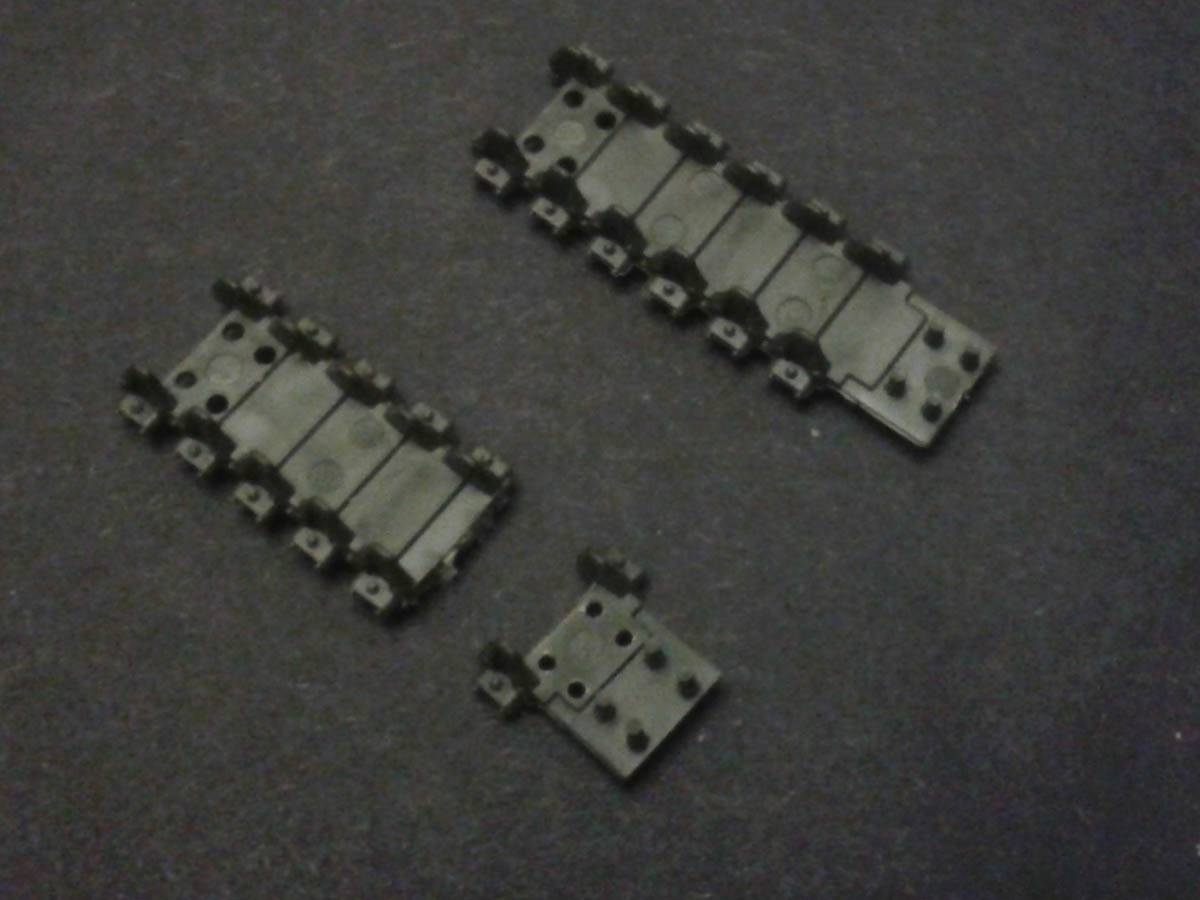
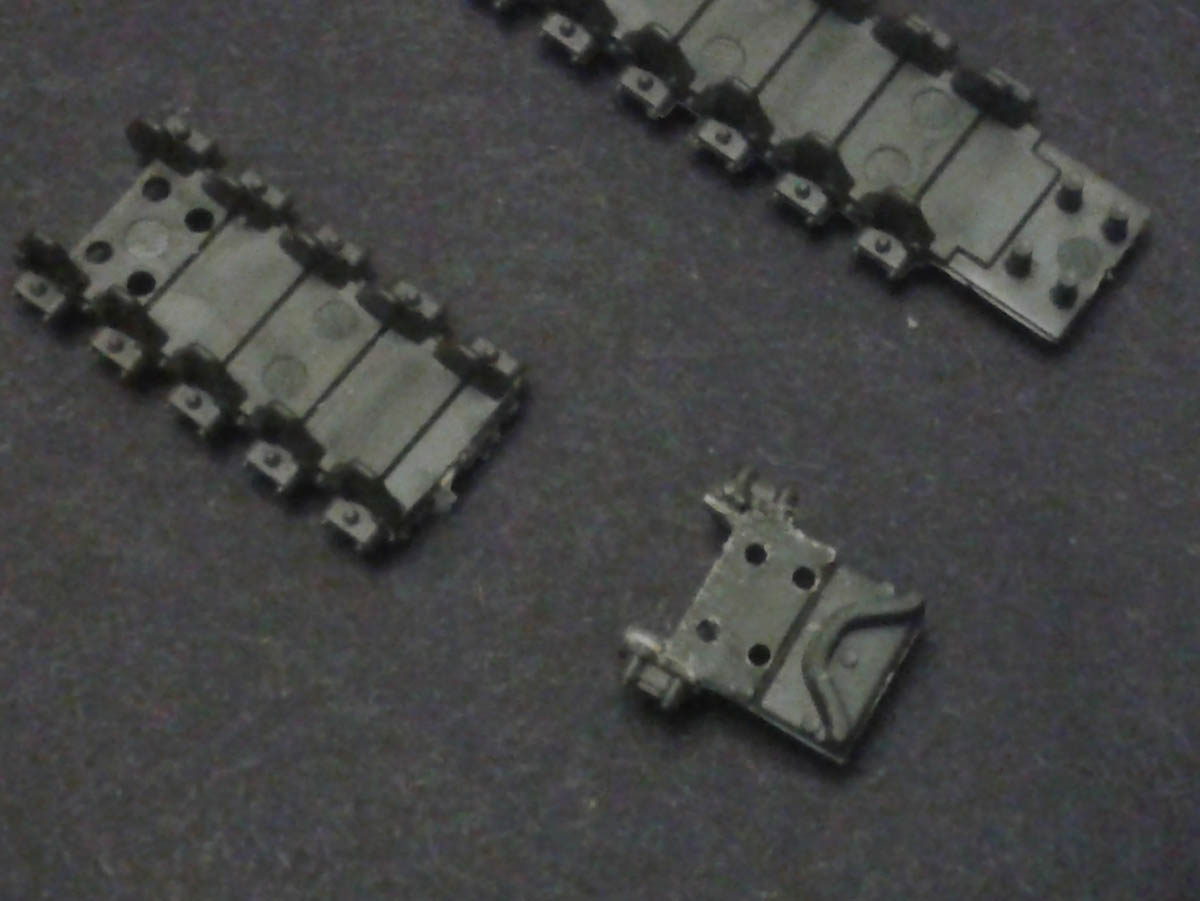
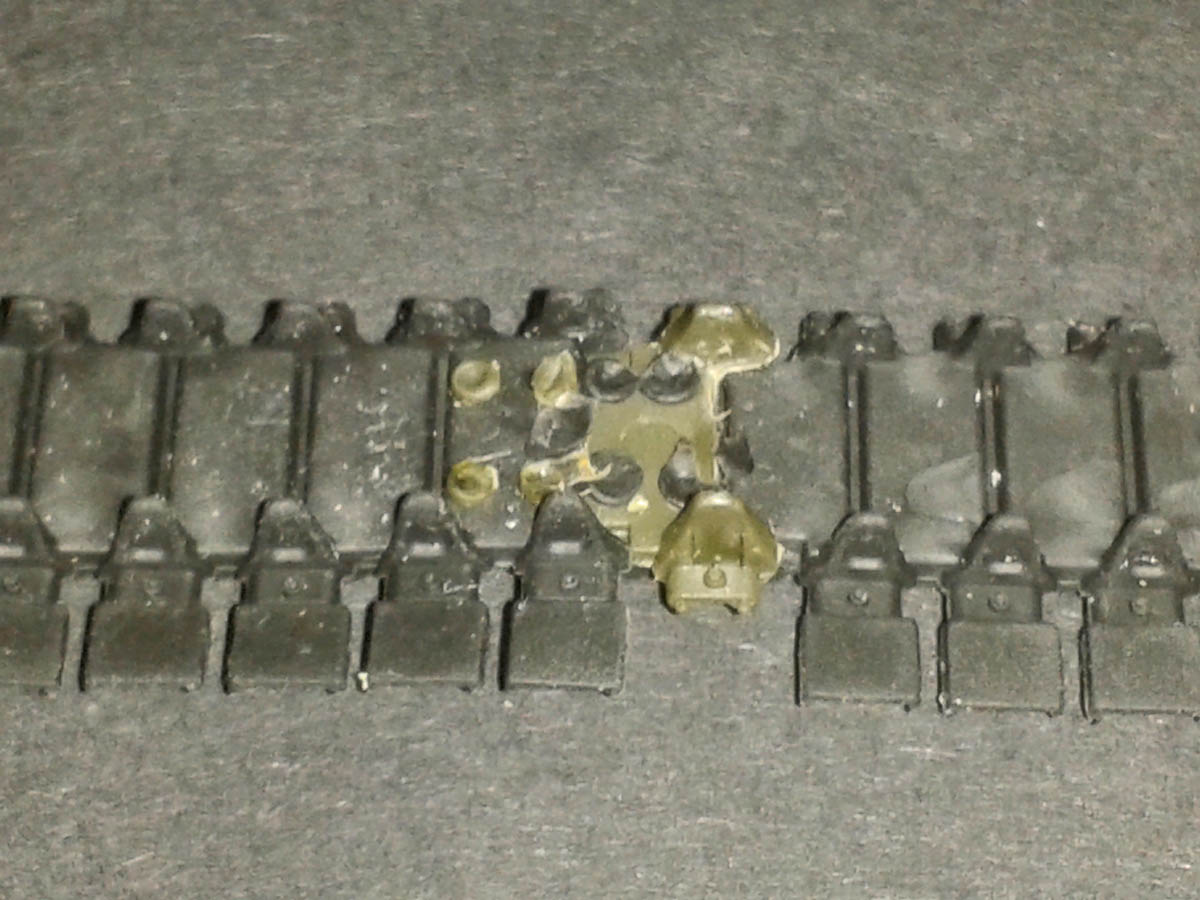
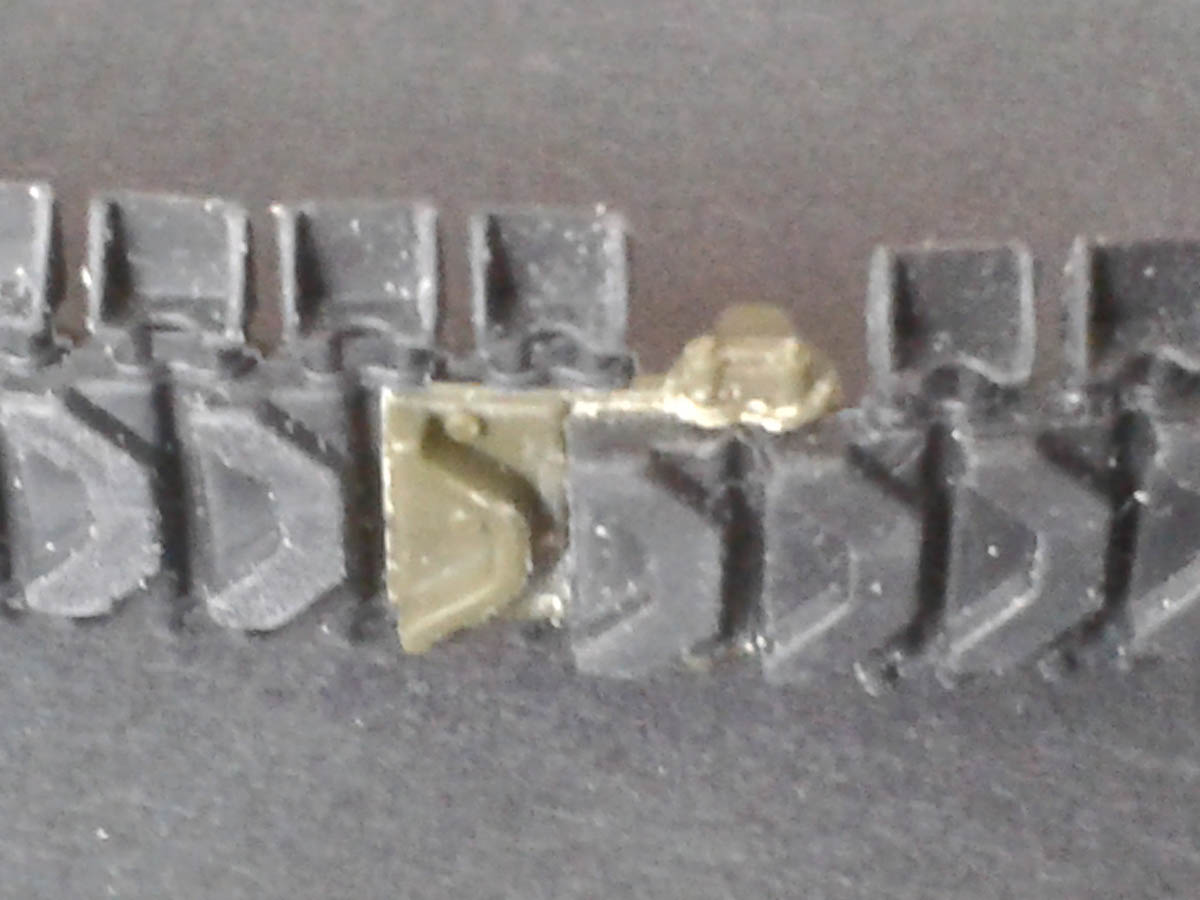
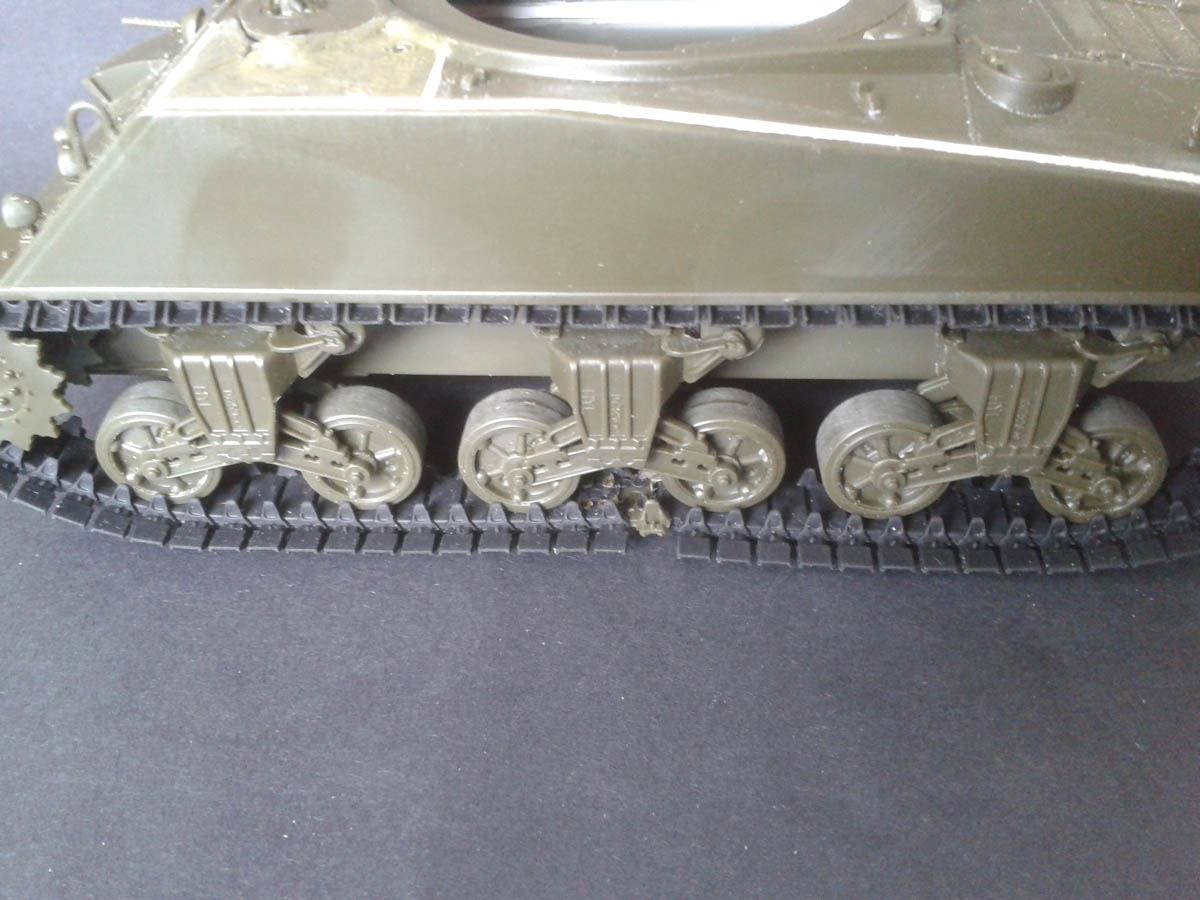
I thought I’d see if the tracks could be lengthened with what’s in the box, even though I have a spare set of DS tracks that could be used if I widen the sprockets. (Academy’s tracks are slightly too narrow, so their sprockets are too – using AM tracks requires a shim of plastic to widen the sprocket drum by the best part of a mm.) Two lengths of track extenders exist on sprue H, but are too long and have no duckbills. They are T62 “steel chevron” types, so do not match the rubber-chevron T48 tracks, but this can be hidden. I cut them shorter (to gain only one extra link), re-drilled the holes with a 1mm drill bit using the cut-off end as a template, thinned the newly-drilled link to match the cut-off, and had perfectly serviceable extenders for a few minutes’ work. Heat-riveting them is slightly tricky (need more fingers!) but the results are ok. There’s no EEC on the new link, but they did break off in use, so an easy way to disguise it is to cut off a few others randomly so it has some company. I’ll have to park the joint under a wheel, preferably sunk in some mud…
Now you see it:
…now you don’t!
Posted: Friday, July 21, 2017 - 06:28 PM UTC
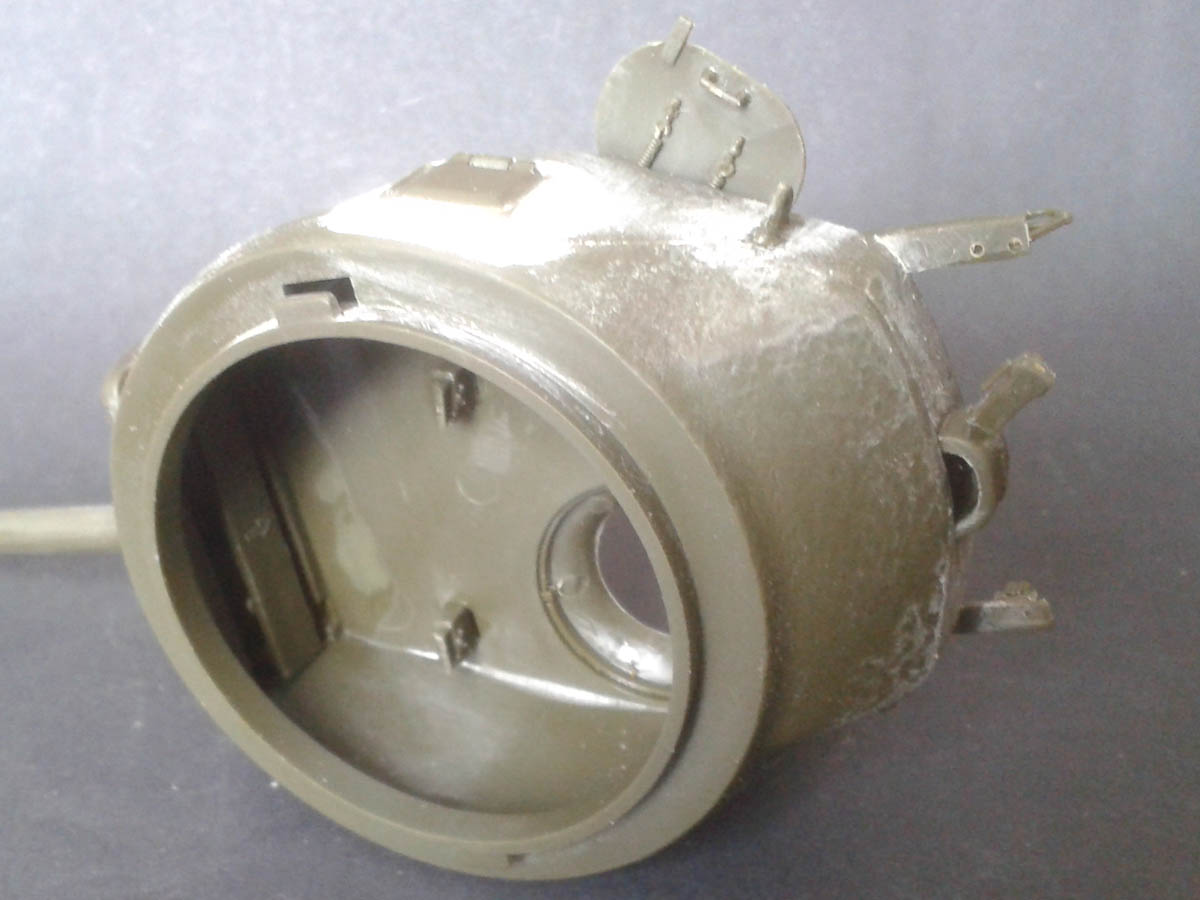
The turret was tackled next. This is the revised design with oval loader’s hatch, which started appearing at the front around January 1945. It seems to represent a Continental Foundry & Machine Co of Wheeling product, so should have a “W in circle” logo on the rear next to the vent dome, and another under the bustle – both are lacking, but are on the basic Archer Transfers set of casting symbols. The muzzle brake became a standard fitting around the time these turrets were made, so pretty much all the photos I’ve seen of this combo have one – disregard Academy’s suggestion to use the simple thread cap.
Mostly it went together as per the instructions, but there are a few tips. The main gun pivot is tricky to assemble without gluing it solid – I used micro-brushes and a lot of patience. The barrel itself is about 5mm too short when compared to “Son of Sherman” drawings, and the muzzle brake lock-ring detail is lacking.
I shaved off the mantlet-cover tabs on the turret roof as instructed, but for anyone wanting this feature there are all the fixings in the kit – they just lack instructions. (No actual canvas is supplied, but even on tanks with the fittings the canvas was a rarity in WW2.)
The pistol port frame needs blended in, and the joint between top and bottom needs sorted – I used putty for the former, and glue stippling/filing for the latter. On the back, the vent dome needs opened up at the bottom, while the MG spring clips on the L-girder arms need to be shaved off and replaced with others in the kit. I did all this shaping etc before adding any of the breakable details.
The loader’s hatch latch is in the wrong place – it should be near the antenna base. I added the hatch first and then used it to position the latch, only to find it was still too far from the antenna. There must be a geometry error somewhere!
Academy forgets to call for a periscope to be fitted in the gunner’s periscope hood, and likewise does not include a cap on the smoke launcher at the front left corner of the turret (which is represented by a pathetic stump). I added this cap from a slice of plastic rod.
Oval turrets on VVSS hulls appear to be uncommon (at least in photos), but you could swap it with the turret on an Italeri M4A1 – this would make a much more common early M4A3(76) with split loader’s hatch, and a late M4A1(76) with the oval hatch as appeared after Christmas ‘44/45.
Kevlar06
Washington, United States
Joined: March 15, 2009
KitMaker: 3,670 posts
Armorama: 2,052 posts
Joined: March 15, 2009
KitMaker: 3,670 posts
Armorama: 2,052 posts
Posted: Friday, July 21, 2017 - 08:32 PM UTC
Just a comment on the bolt heads on the suspension skids, and extra casting marks. Academy does provide a set of bolt heads and extra casting marks which are molded onto the side of one of the sprues. I almost missed them when building my M4A3. They are a pain to remove though, but it can be done with a fine razor saw.
VR, Russ
VR, Russ
Posted: Saturday, July 22, 2017 - 02:18 AM UTC
Hi Russ,
You're right - there is a wealth of extra details on the sprues, waiting to be shaved off and installed. (I've used the lettering for casting marks to good effect!). I'm just being a bit lazy with this one.
Posted: Saturday, July 22, 2017 - 04:12 PM UTC
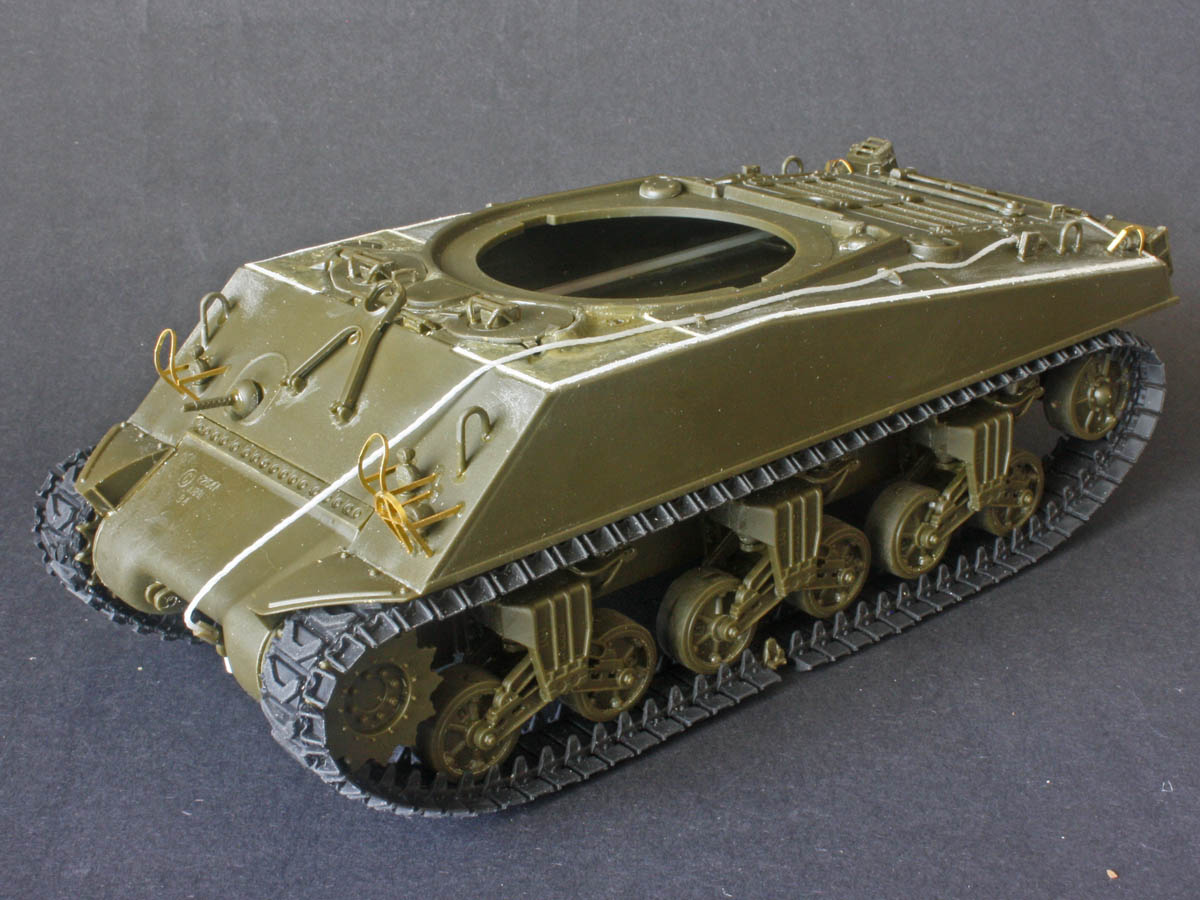
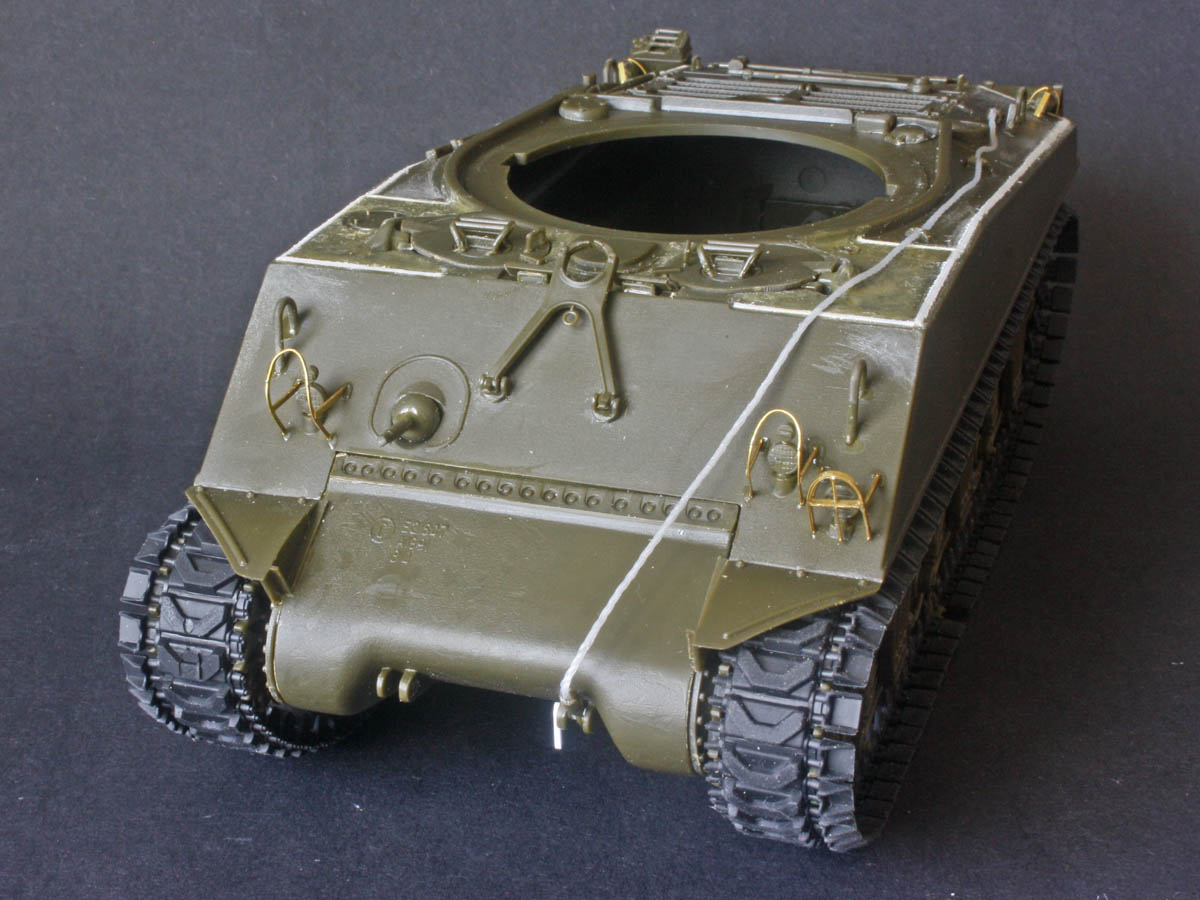
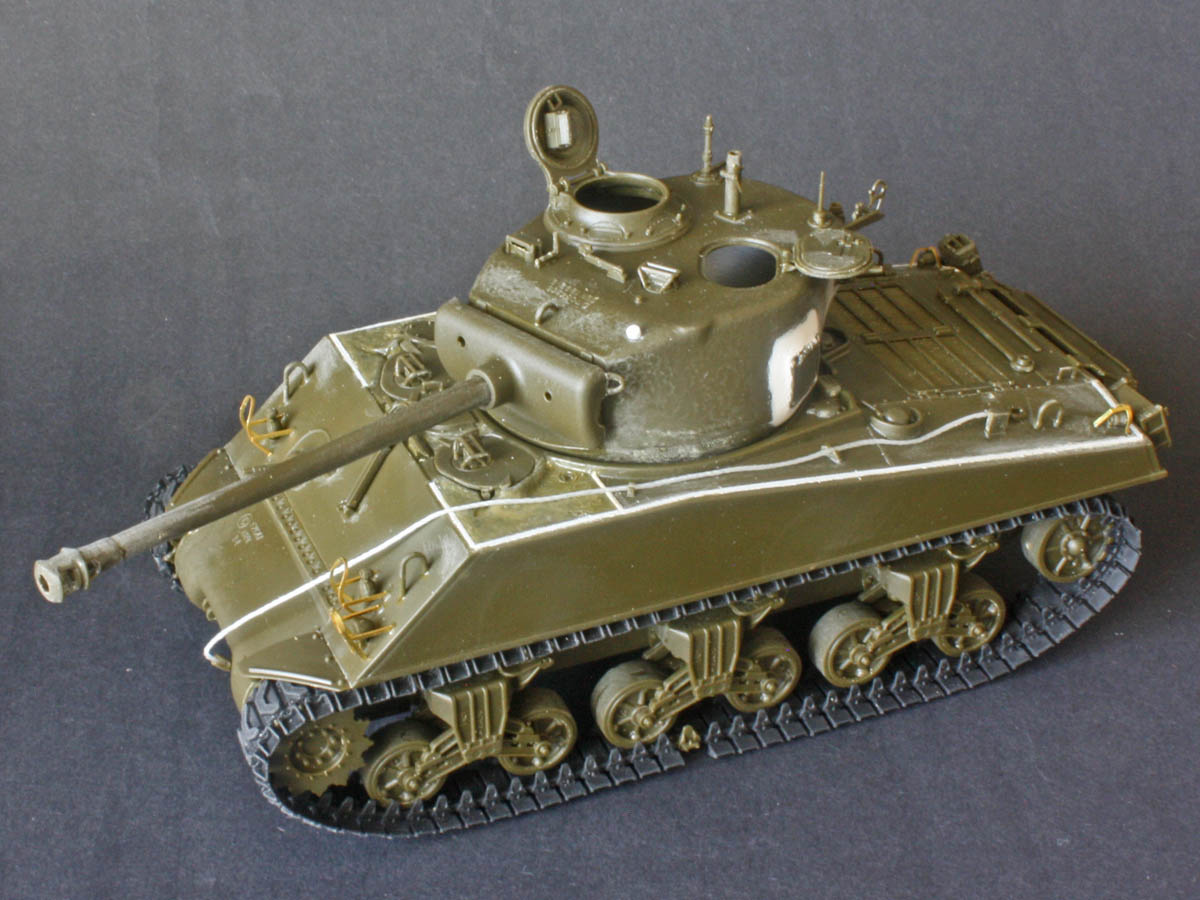
The final lap! I tackled the rest of the hull details, jumping around the instructions because the standard build sequence meant putting on fragile details before doing major handling. The issues I found were mainly those of omission – the instructions do not mention the spare track-block racks or the tow cable, for example.
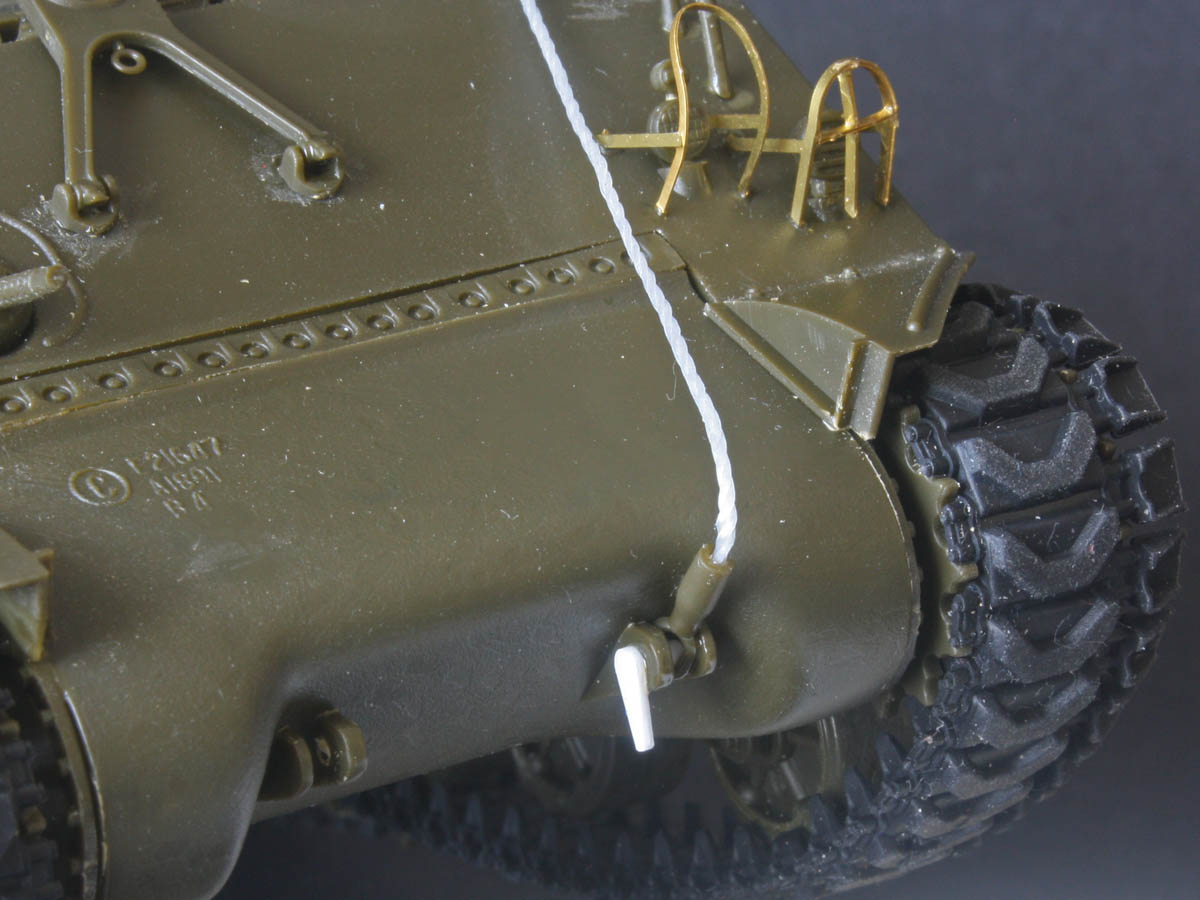
Up front I wanted to secure the cable in the towing eye, as seen in many wartime photos (for quick recovery…), but that meant adding a scratch-built quick-release pin. On the other eye I simply drilled out a 1.2mm hole and left it empty – photos often show this. (The locking handle is a scrap of 0.020” plastic, and the pin is 1.2mm Evergreen rod pushed through the drilled hole.) One thing missing that I think all of these “late” tranny covers had are the footstep brackets connected to the outboard part of the towing eye. The more I look the more they bother me, so I might have to scratch some up. The other thing to note are the PE headlight brush guards. I had a spare “saddle” forming tool from a Tasca kit, but bending these to shape without one will be fun. And the siren guard has tiny cross-pieces to add inside. It took me ages to get them as good as they are – next time I’ll use the included plastic parts instead.
Round the back, the missing tool straps are a real eyesore. I think some tarps and kit bags are called for! (I’ve made them from thin strip before, but not this time.) The rear shelf has some nasty ejector-pin marks that need filling or hiding – I chose to grab a cleaning-rod rack from an Academy accessories set to cover them up. These racks are easy to make from plastic rod and strip, and every 76mm Sherman ought to have one here. Pity Academy don’t include one in the box. Again, the brush guards are PE, but are simpler to form than the front ones.
There you have it! The only thing left (other than paint, decals, weathering, etc) is to pop on the turret, but here we find Academy’s parting joke – the lugs line up when the turret is pointing forward! So, unless you rotate it to the side a little, it remains loose. That’ll make it fun to model with the gun in the travel clamp…