more will fallow shortly.
Hosted by Darren Baker
StuG.III Ausf.G (Dragon 6365)

Kaktusas

Joined: April 12, 2017
KitMaker: 196 posts
Armorama: 196 posts

Posted: Thursday, September 14, 2017 - 10:46 AM UTC
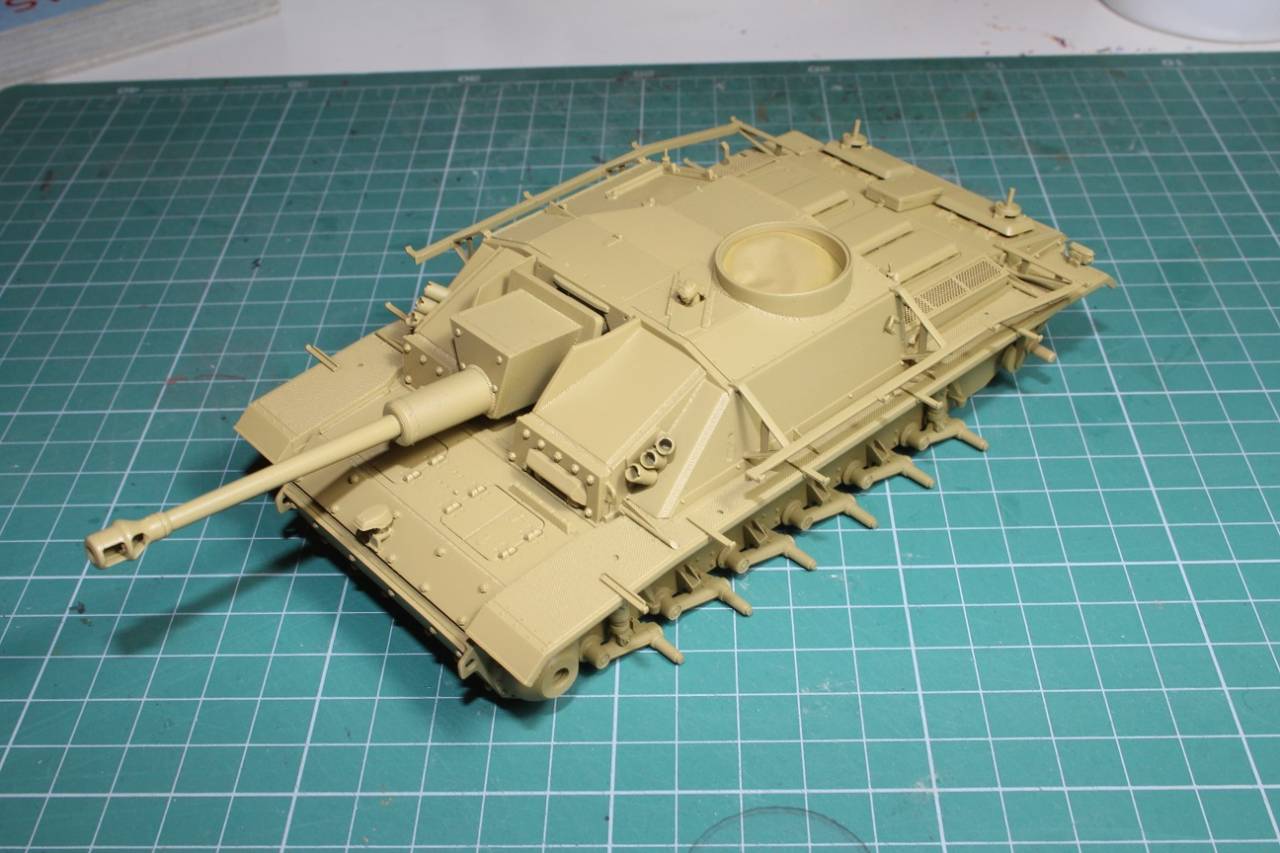
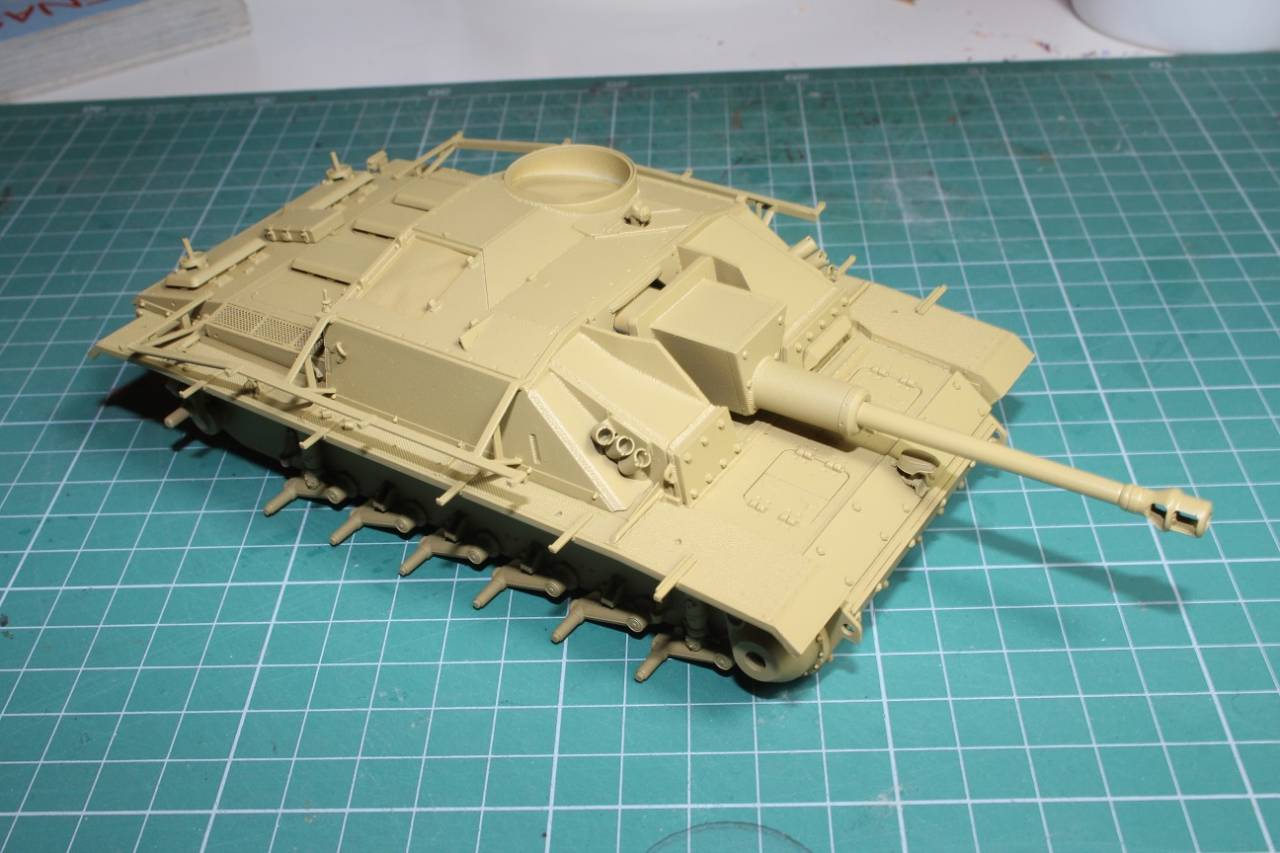
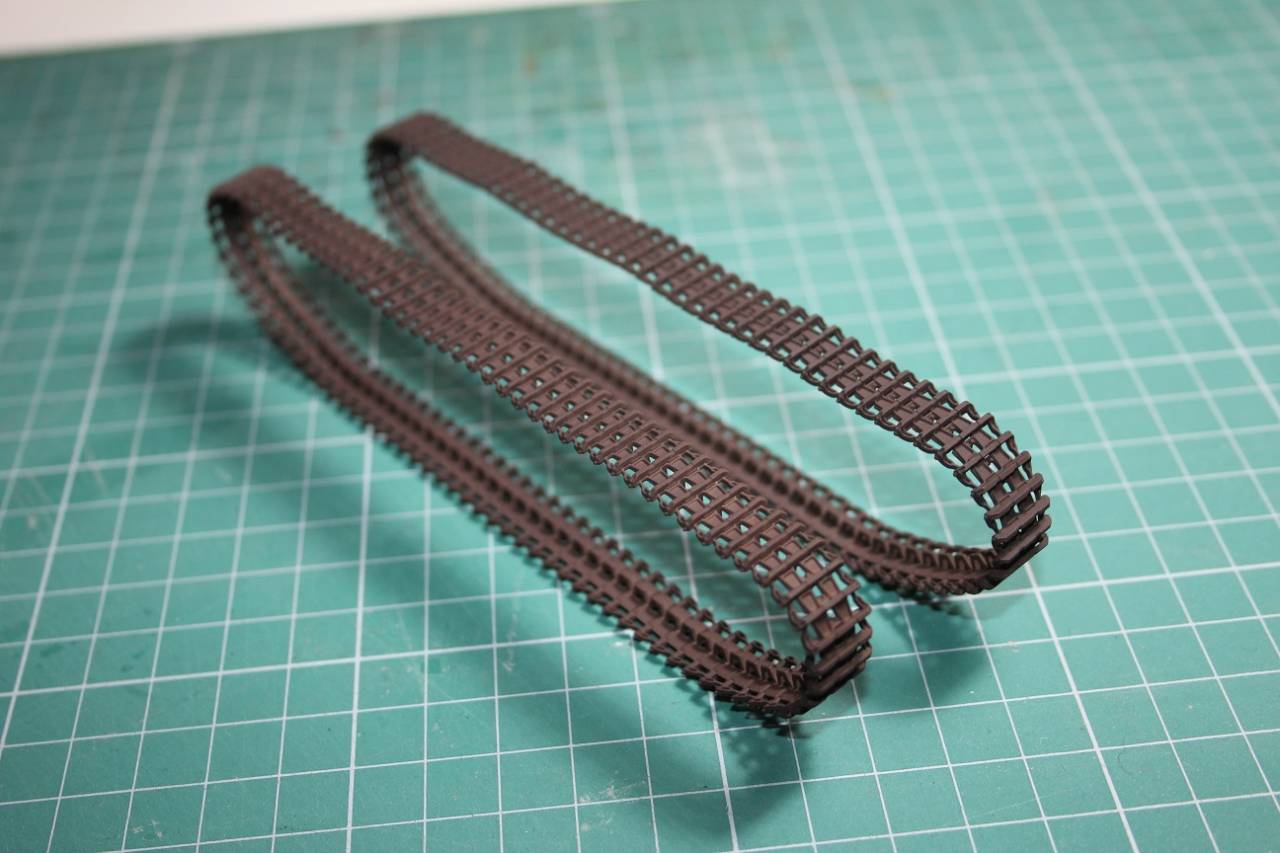
Starting bit late in the build, but better latter than never. Major assembly complete, moving on with painting. All parts now have been base coated, tracks - primed. I prefer to give base coat at least a week to cure well, then, when spraying camo, if suddenly i don't like how one or another line looks, or if airbrush starts to misbehave, i can clean of those boo -boo's with alcohol soaked tissue. Same applies with weathering. Somehow, if im overly enthusiastic with enamel weathering effects, they tend to soften acrylics, and those get easily damaged, or worse, peeled off. Clear coat helps a little bit, but as i also use acrylic varnish, it does soften too. So for me, long curing time between major steps works best. I also build other kits in parallel, so waiting isn't an issue.
more will fallow shortly.
more will fallow shortly.

Kaktusas

Joined: April 12, 2017
KitMaker: 196 posts
Armorama: 196 posts

Posted: Sunday, October 15, 2017 - 11:16 AM UTC
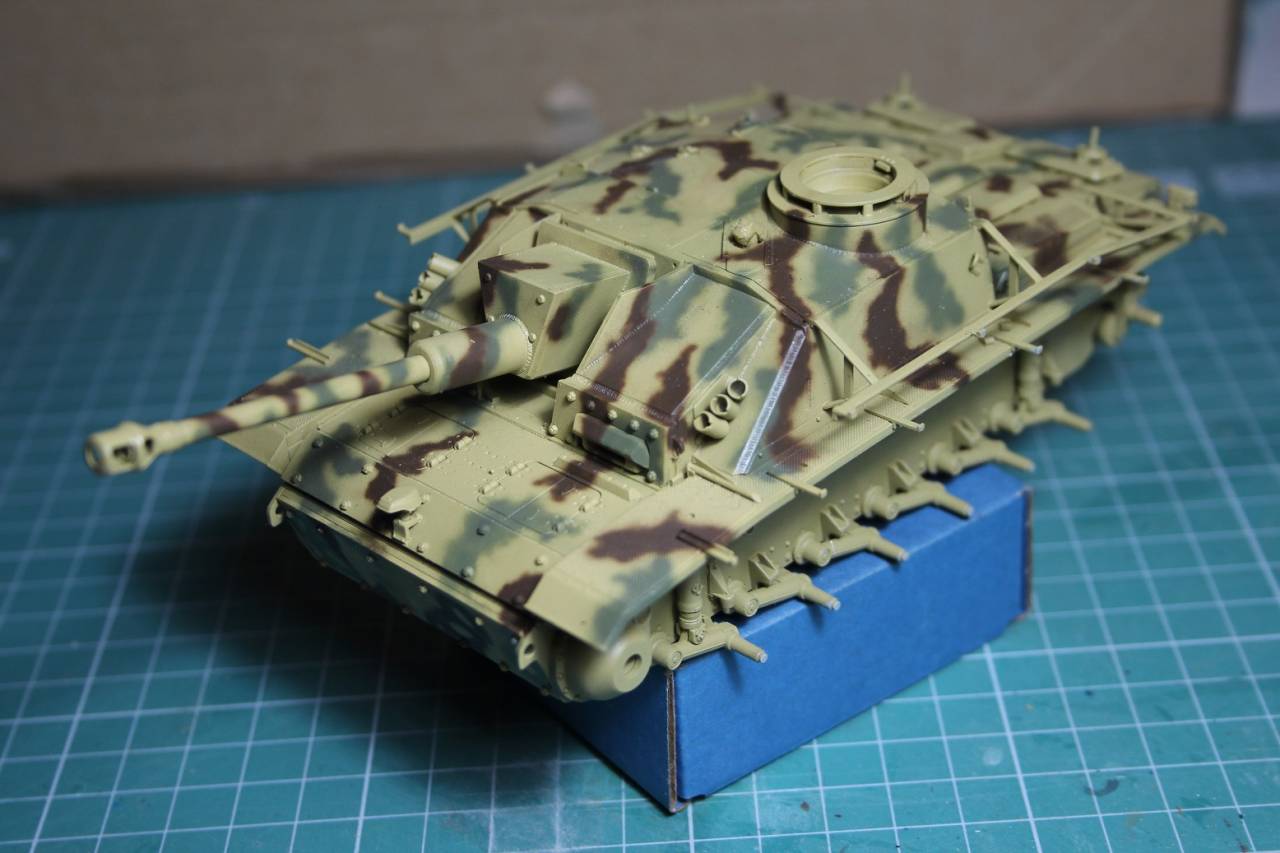
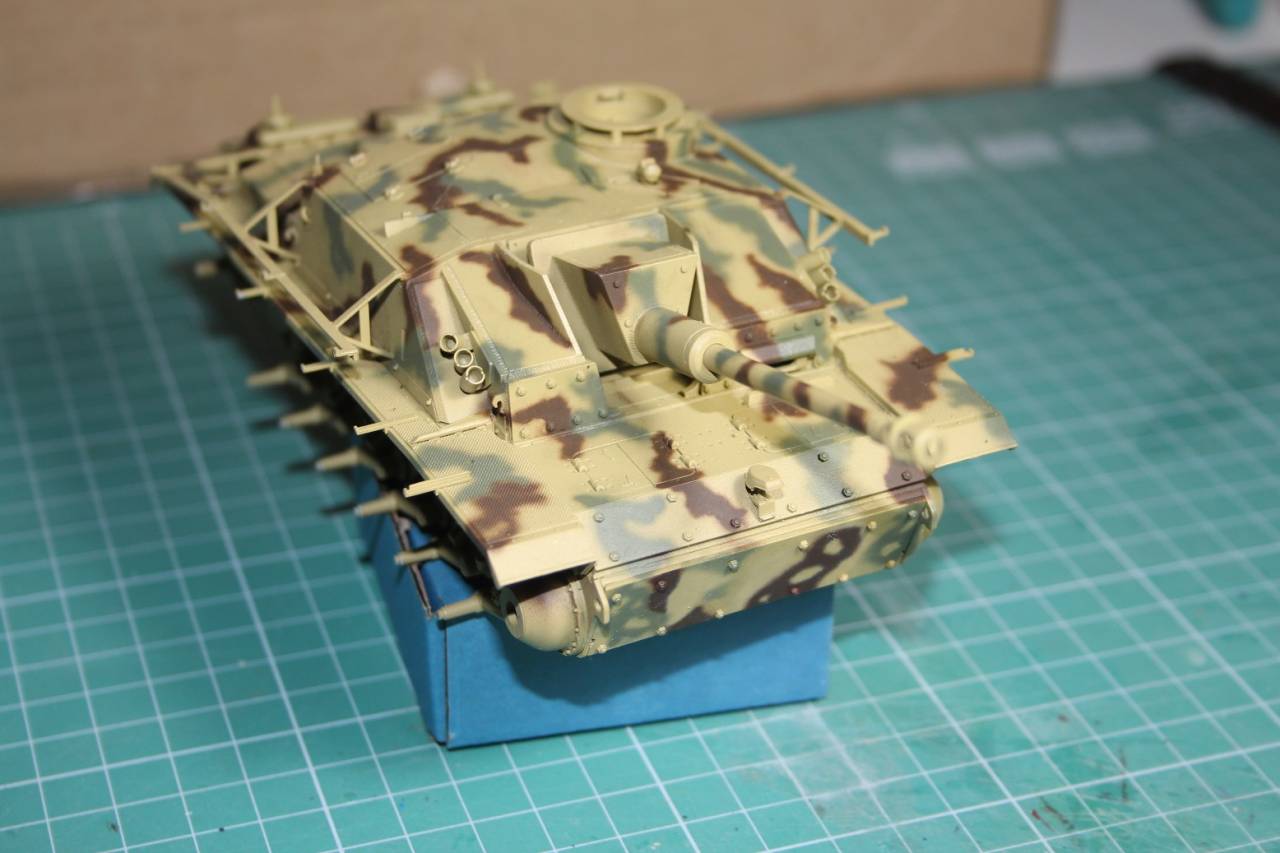
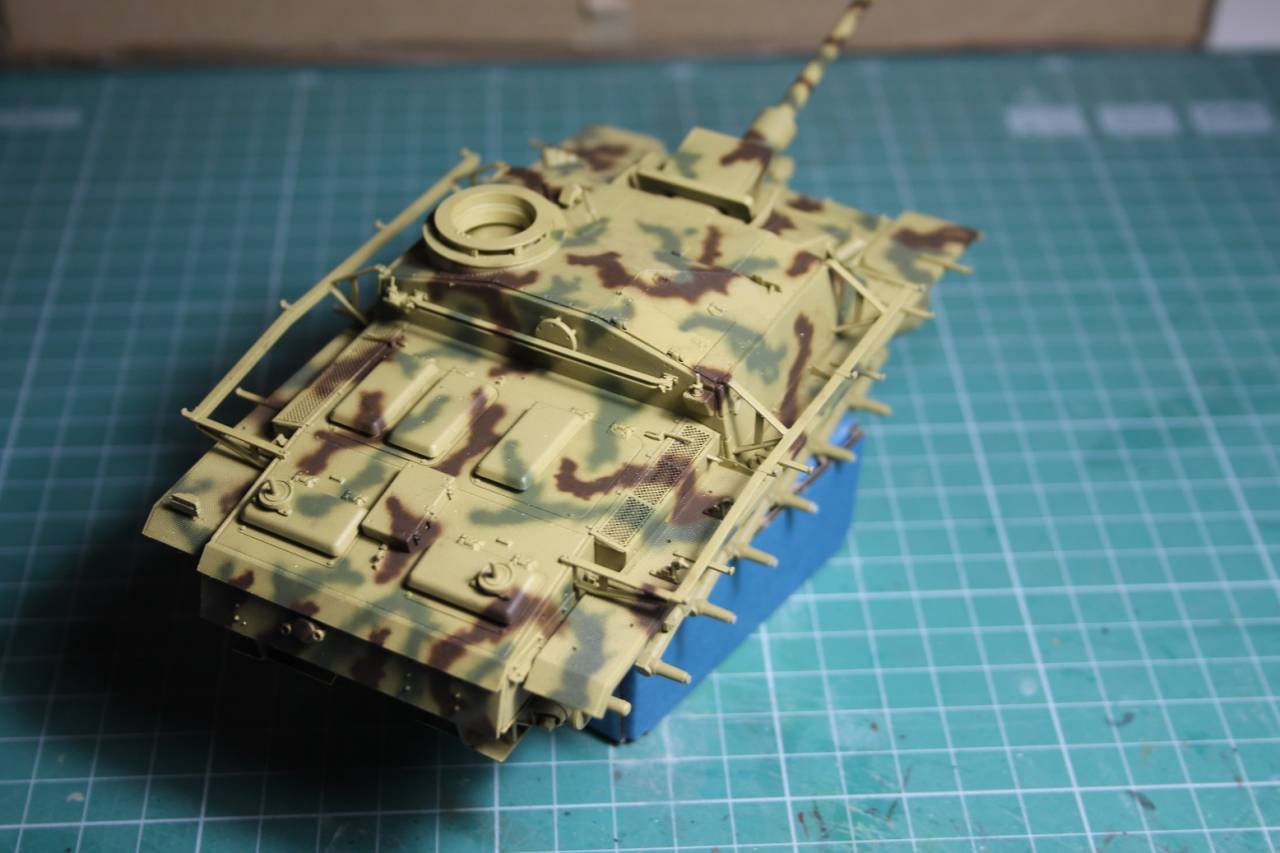
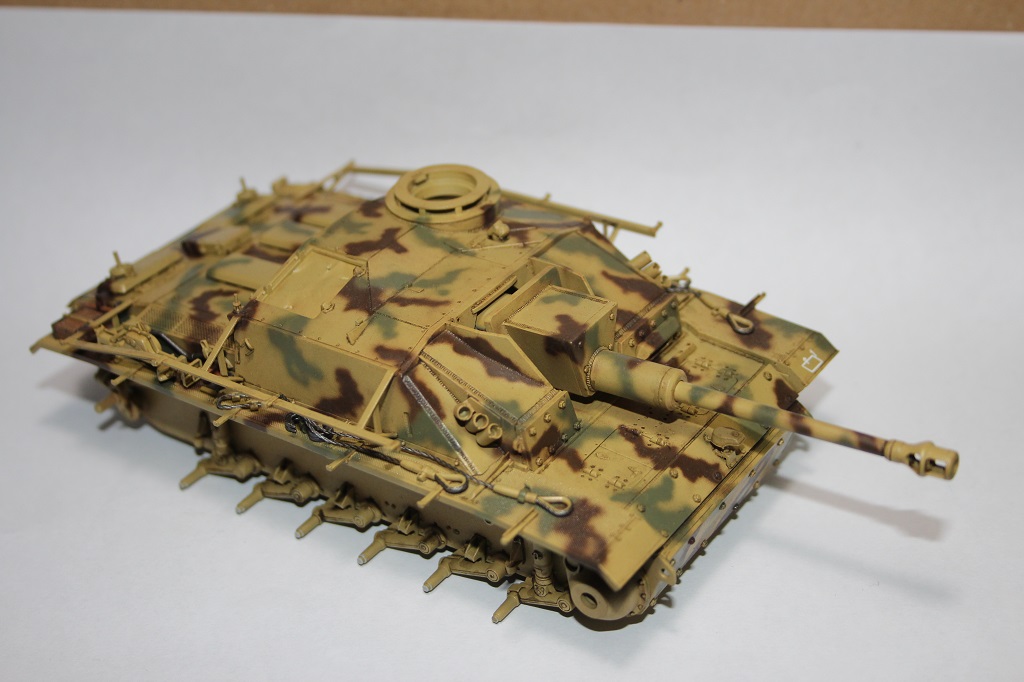
Finally managed to finish cammo. Took me a while, as had to get rid of Aztec airbrush. Now its time to add all the tools and other small painted parts. I have also painted schurzen, but i feel i will keep them off until the last stage of build. BTW, maybe its just me, but schurzen supplied dont really fit. The only way to mount them out of the box is to have them overlapping. If you ever try to hang those additional crew protection plates on top of staggered schurzen, you will end up in supper messy looking stug. Unfortunately, i realized this after i painted them, so i had to trim them, and paint them 2nd time.
Posted: Sunday, October 15, 2017 - 11:35 AM UTC
NIce looking camo.
Gaz
Gaz

greif8

Joined: January 17, 2006
KitMaker: 673 posts
Armorama: 116 posts

Posted: Sunday, October 15, 2017 - 03:46 PM UTC
I agree with Gary that the camo looks very nice. I also think you did a great job on painting the tracks, the rust looks spot on.
Ernest
Ernest

retiredyank

Joined: June 29, 2009
KitMaker: 11,610 posts
Armorama: 7,843 posts

Posted: Sunday, October 15, 2017 - 04:36 PM UTC
Nice looking build. Thank you for the heads up, on the schurzen.
Posted: Sunday, October 15, 2017 - 04:55 PM UTC
Very nice work.

Kaktusas

Joined: April 12, 2017
KitMaker: 196 posts
Armorama: 196 posts

Posted: Monday, October 16, 2017 - 11:09 AM UTC
Thanks for positive feedback guys!
Test fitted schurzen, they seem just right now. At moment, they are not fixed at place, but they align perfectly edge to edge. I have also started painting wooden tools. For painting wood, i use acrylic tan base, with brown oil paint for the wood grain. They came out little darker than i planed, so i will tone them down a little bit. But first, i need to wait until the oil paint completely dries.
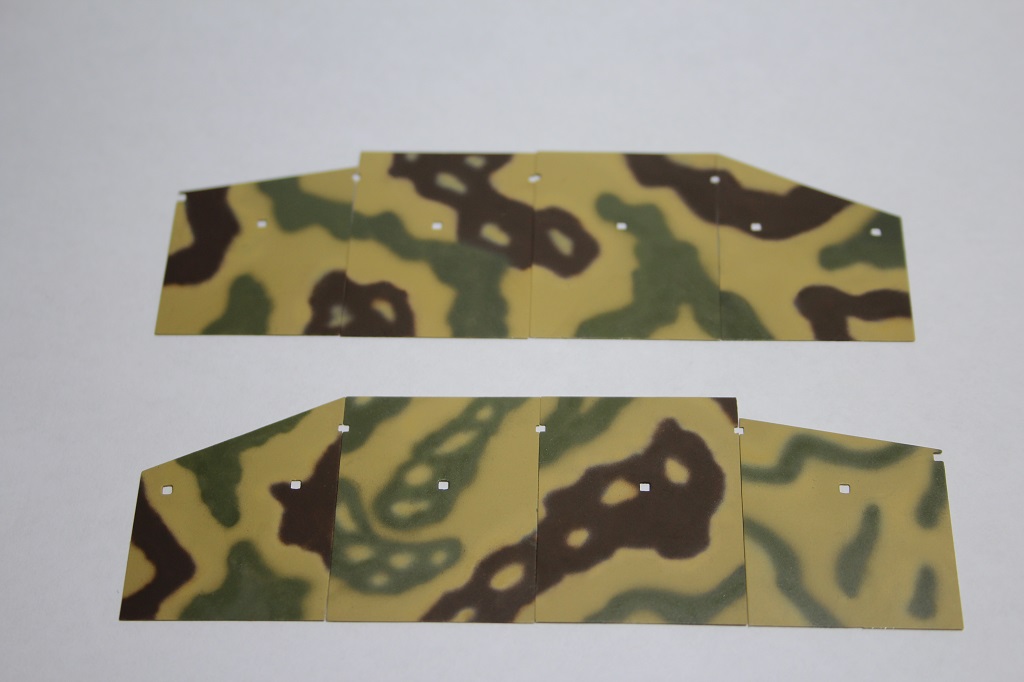
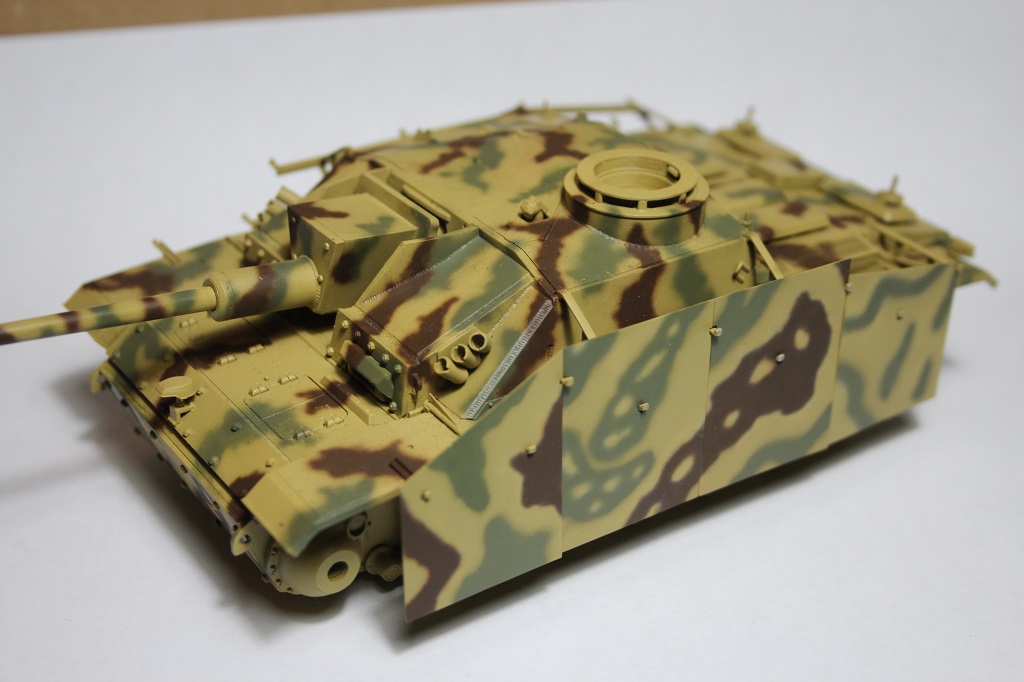
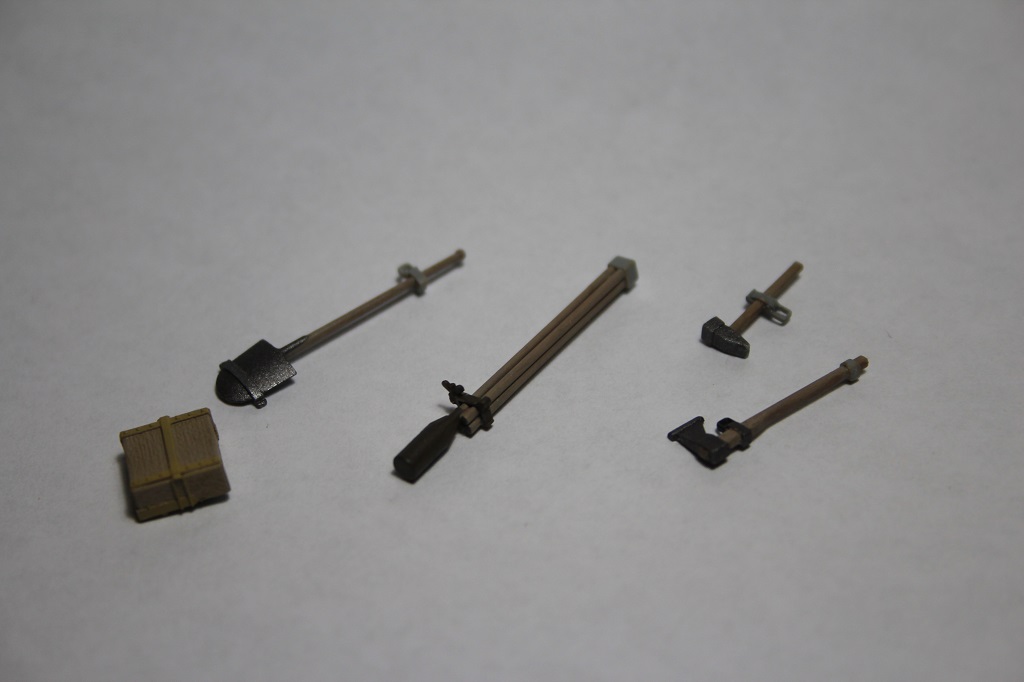
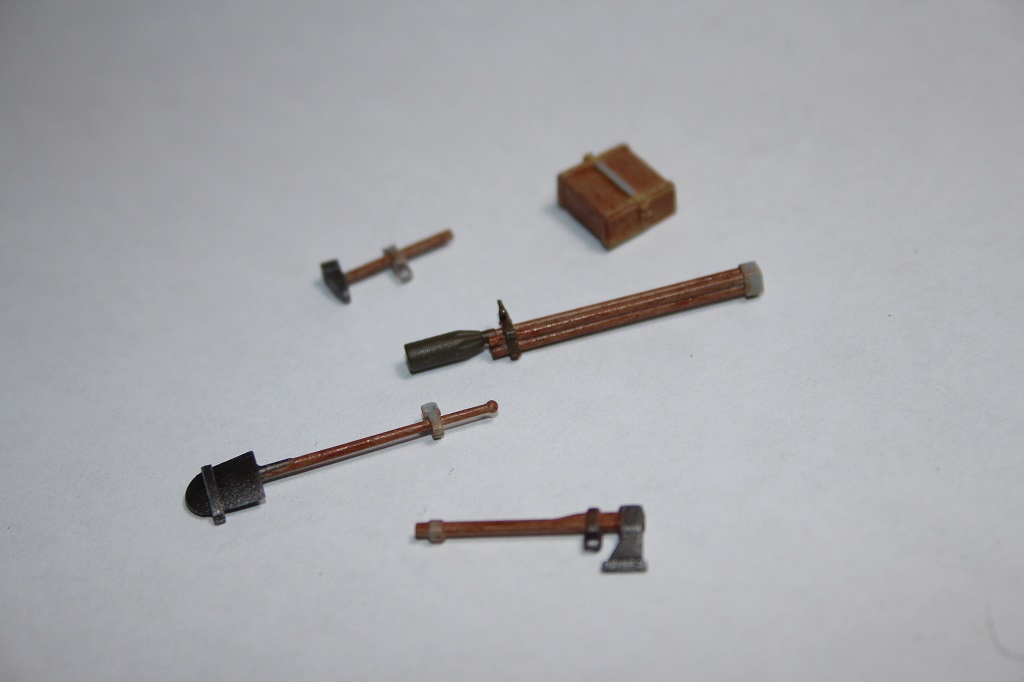
Test fitted schurzen, they seem just right now. At moment, they are not fixed at place, but they align perfectly edge to edge. I have also started painting wooden tools. For painting wood, i use acrylic tan base, with brown oil paint for the wood grain. They came out little darker than i planed, so i will tone them down a little bit. But first, i need to wait until the oil paint completely dries.
Posted: Monday, October 16, 2017 - 12:34 PM UTC
Hello Darius,
Nice build and a very nice camo pattern!
cheers,
Zsolt
Nice build and a very nice camo pattern!
cheers,
Zsolt

justsendit

Joined: February 24, 2014
KitMaker: 3,033 posts
Armorama: 2,492 posts

Posted: Tuesday, October 17, 2017 - 12:53 AM UTC
I totally agree... very nice camo!
Cheers!🍺
—mike
Cheers!🍺
—mike
Posted: Tuesday, October 17, 2017 - 02:14 AM UTC
Looking very nice. I can't wait to see the finished product. 


Kaktusas

Joined: April 12, 2017
KitMaker: 196 posts
Armorama: 196 posts

Posted: Tuesday, October 24, 2017 - 10:12 PM UTC
Got my dose of meditation, in form of painting tires:
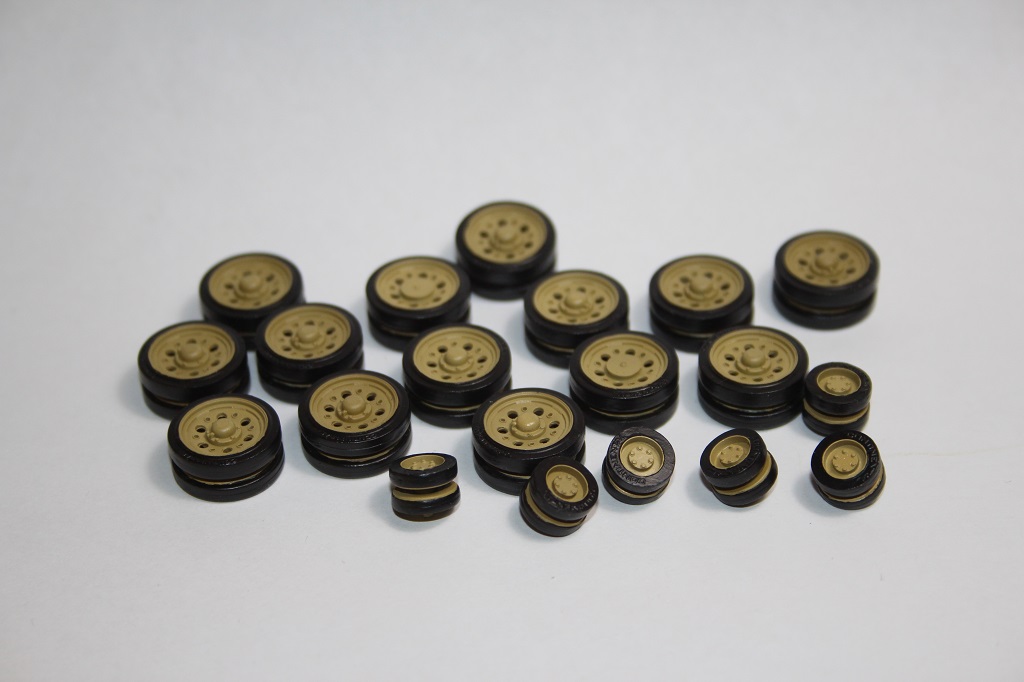
Also, attached tools, and coated everything gloss. Now, it will take few days, before i will apply filters, so back to Kettenkrad build
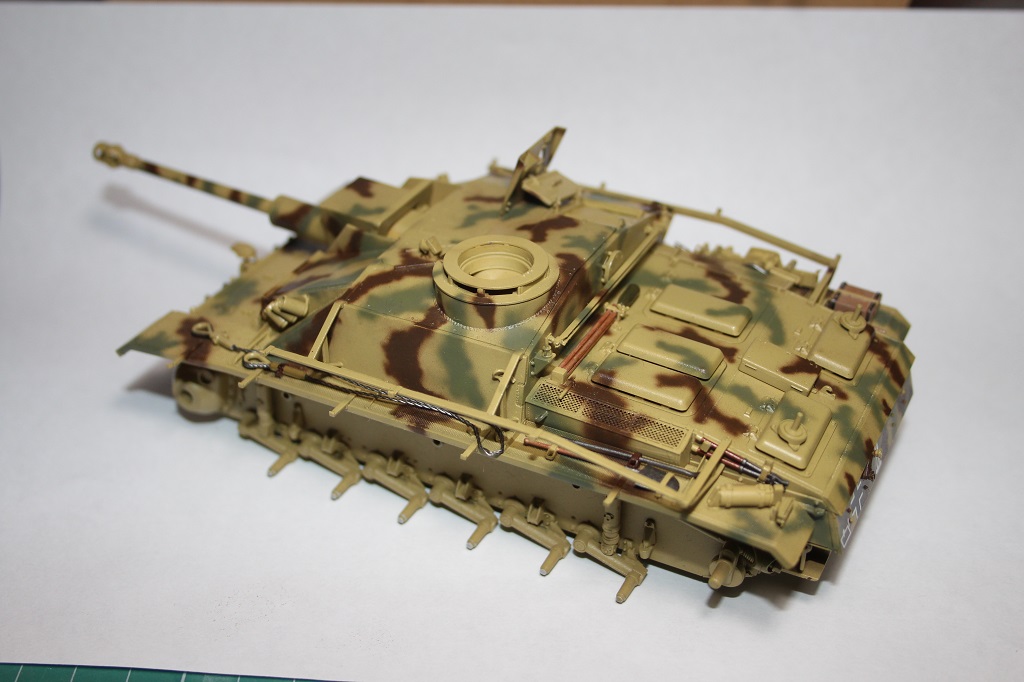
Also, attached tools, and coated everything gloss. Now, it will take few days, before i will apply filters, so back to Kettenkrad build


Kaktusas

Joined: April 12, 2017
KitMaker: 196 posts
Armorama: 196 posts

Posted: Sunday, November 05, 2017 - 01:38 AM UTC
Filters + pin wash, now its time to attach hatches, track links and start chipping some paint.
Posted: Sunday, November 05, 2017 - 04:58 AM UTC
Nice camo.

retiredyank

Joined: June 29, 2009
KitMaker: 11,610 posts
Armorama: 7,843 posts

Posted: Sunday, November 05, 2017 - 05:27 AM UTC
I have this kit, in my stash(waiting on some media). I'm looking forward to it, after my m109 bash. Your's is turning out nicely. I look forward to seeing the chipped paint.

Kaktusas

Joined: April 12, 2017
KitMaker: 196 posts
Armorama: 196 posts

Posted: Tuesday, November 07, 2017 - 12:29 PM UTC
Well, there isn't going to be much chipping. Browsing my reference books now, and my main observation is that vehicles before, or during battle of Kursk were in good condition. This version of stug was manufactured just before the battle took place. Im painting it in Das Reich markings, which means that it was freshly moved to front. There are not much trees or bushes around battle area that tanks have to negotiate, to explain scraching of the schurzen etc. Around hatches and so on... soldiers were not wearing medieval armor to knock paint of. So in most cases, there will be minor wear in dunkelgelb color, then on loaders hatch, where MG shield touches it when folded back. As well area of hatch, that touches track links on the back of superstructure. Areas where crew or "passengers" walk, will mainly have cammo wear, and only on the extremes there will be paint knocked off. As well, it seems that on drive sprockets, there should be tear only where links touch the sprockets, and teeth themselves should still have paint on, as their tips dont come into contact with tracks (if you dont drive in deep mud, when sprocket itself is already touching the mud). Going to dig in in to the books little bit more, before i start shaking paint . 

easyco69

Joined: November 03, 2012
KitMaker: 2,275 posts
Armorama: 2,233 posts

Posted: Friday, November 10, 2017 - 01:49 AM UTC
sweet camo

Kaktusas

Joined: April 12, 2017
KitMaker: 196 posts
Armorama: 196 posts

Posted: Sunday, November 19, 2017 - 12:13 PM UTC
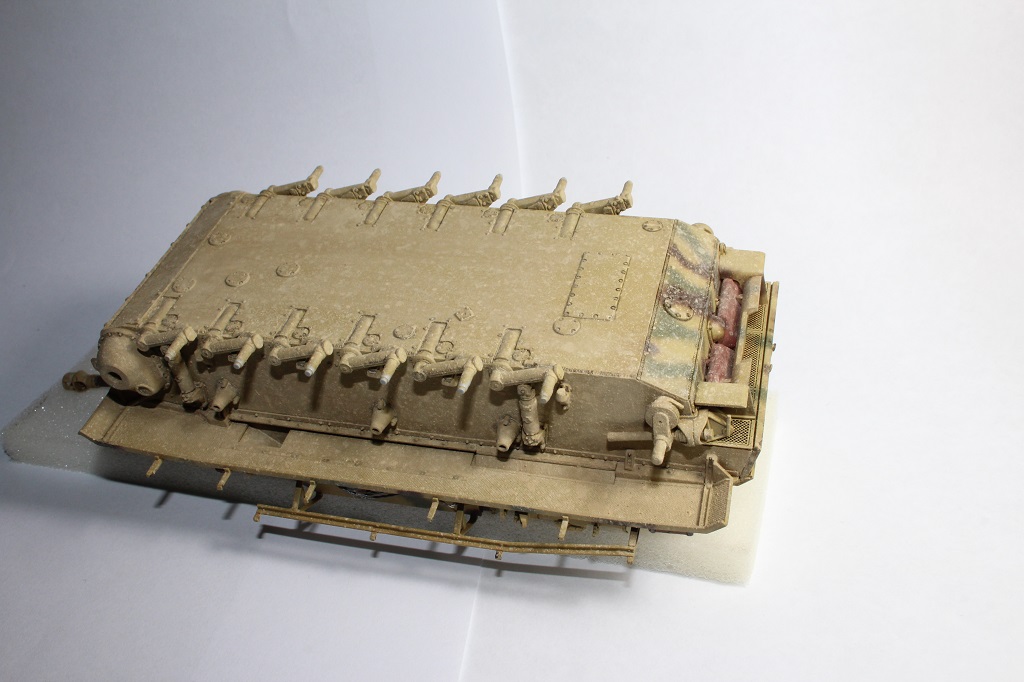
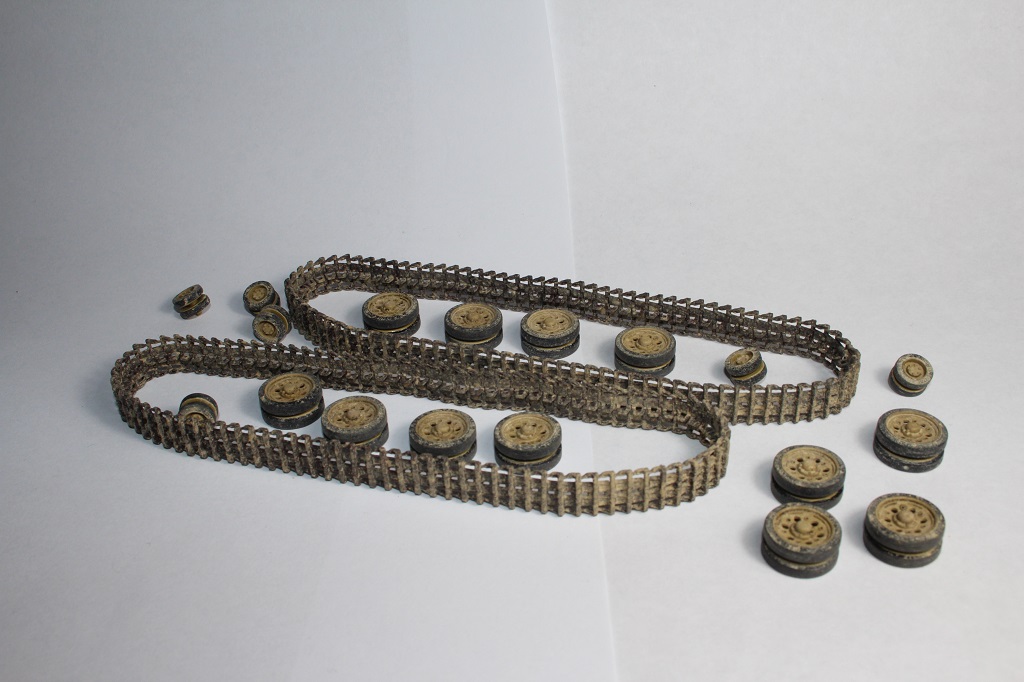
Some progress on the build. I have started doing mud/dust splashes on the stug. Its first steps, now as it will fully cure, with stiff brush i will remove excess, where i feel i don't like it, and with second pass will add some where i want more. Generally, i aim for "dirty, but not to the point you want to wash it" appearance. Before attaching wheels, i will do some "not dry yet" mud patches. I avoid using different color mud products on one kit, as it is hard to blend them realistically. You can easily end up with kit, looking like tank that recently drove in damp potato field ended up in sandy beach 


timcc2008

Joined: May 12, 2010
KitMaker: 139 posts
Armorama: 135 posts

Posted: Tuesday, November 28, 2017 - 12:13 AM UTC
This is looking really good. The camo is really well done. Looking forward to more.
vr
Tim
vr
Tim
americanpanzer

Joined: May 12, 2014
KitMaker: 542 posts
Armorama: 539 posts

Posted: Tuesday, November 28, 2017 - 02:20 AM UTC
excellent work!! looking forward to seeing it done 

Posted: Tuesday, November 28, 2017 - 04:10 AM UTC
Darius,
Very nice looking so far!
Gaz
Very nice looking so far!
Gaz

Kaktusas

Joined: April 12, 2017
KitMaker: 196 posts
Armorama: 196 posts

Posted: Saturday, December 02, 2017 - 03:45 PM UTC
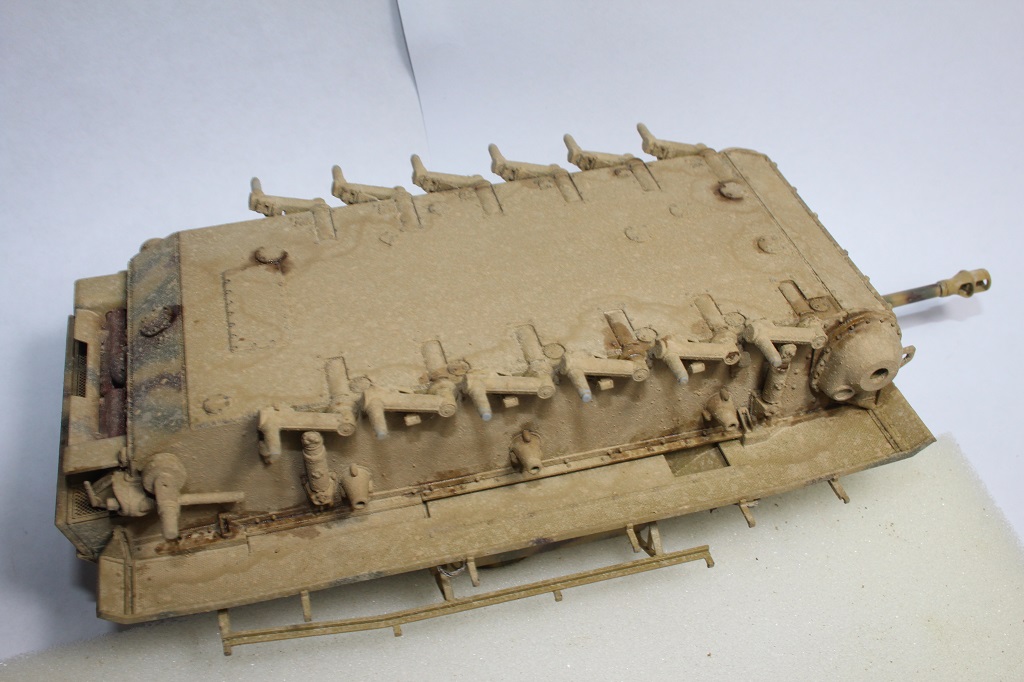
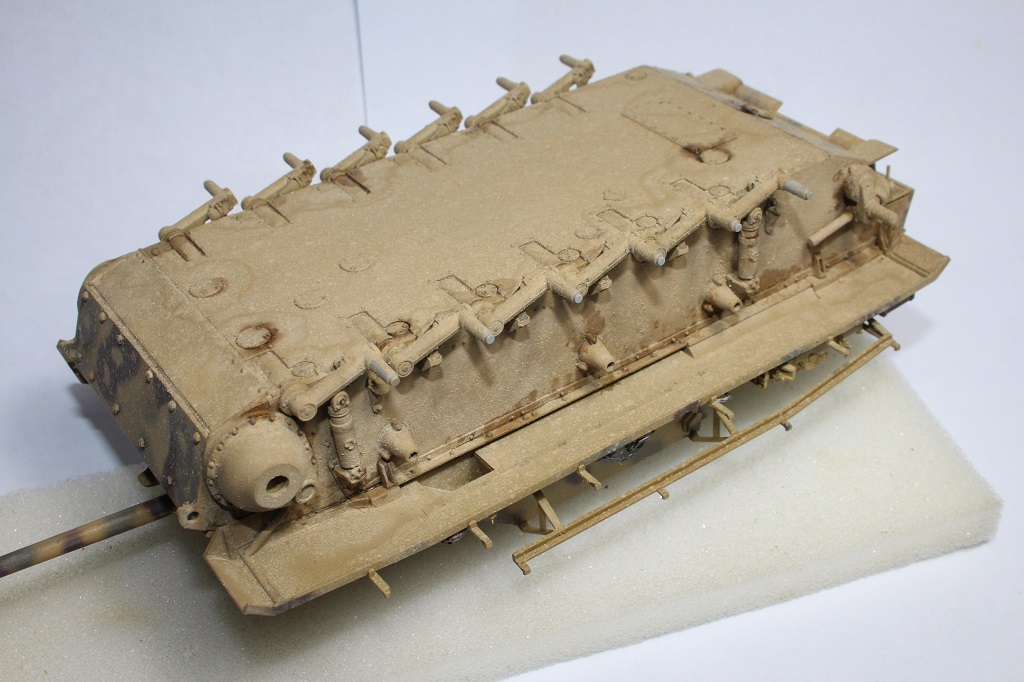
For a tank bottoms, my procedure is:
1)dry splashes (dry = undiluted)
2)wet splashes
3)dry splashes where needed, for added texture
Now after that bottom has lots of texture. Now i tone it down with stiff brush. It creates some dust on bottom. I leave it there for next step. Using diluted wash, or "fuel effects" i add some where i want it to look wet, or add some different colors. In other areas, i put dots of thinner, which runs wide. Basically, i wet entire bottom with thinner. What this does, it carries the dust left from dry brushing the splashes. The result is some run marks. I also add motor oil at this step, as on wet dust it spreads and absorbs nicely.

Kaktusas

Joined: April 12, 2017
KitMaker: 196 posts
Armorama: 196 posts

Posted: Saturday, December 02, 2017 - 03:49 PM UTC
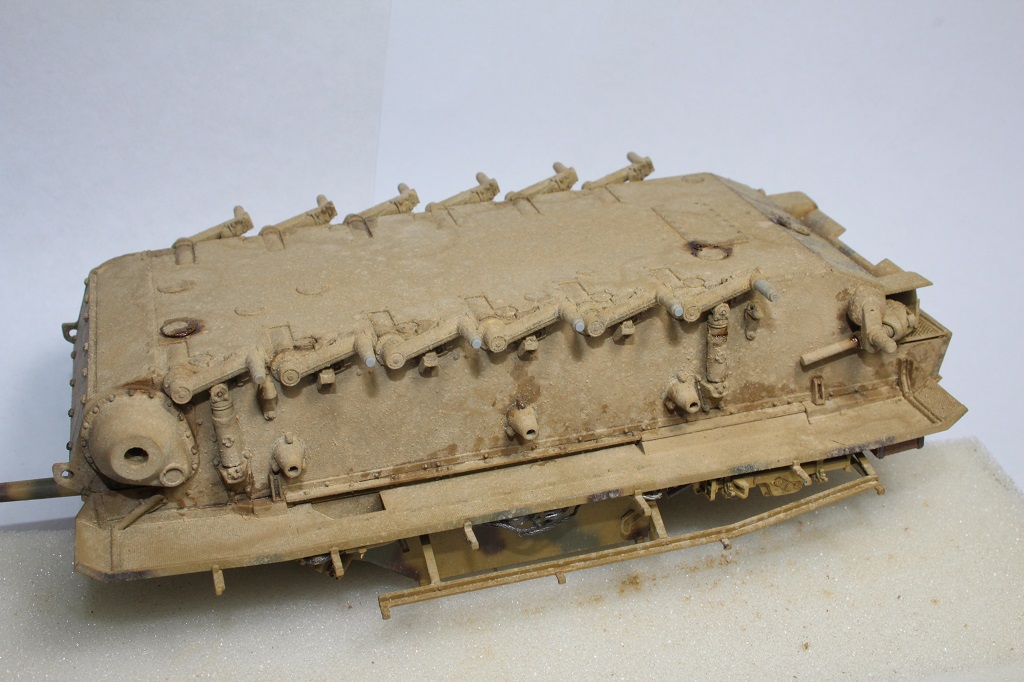
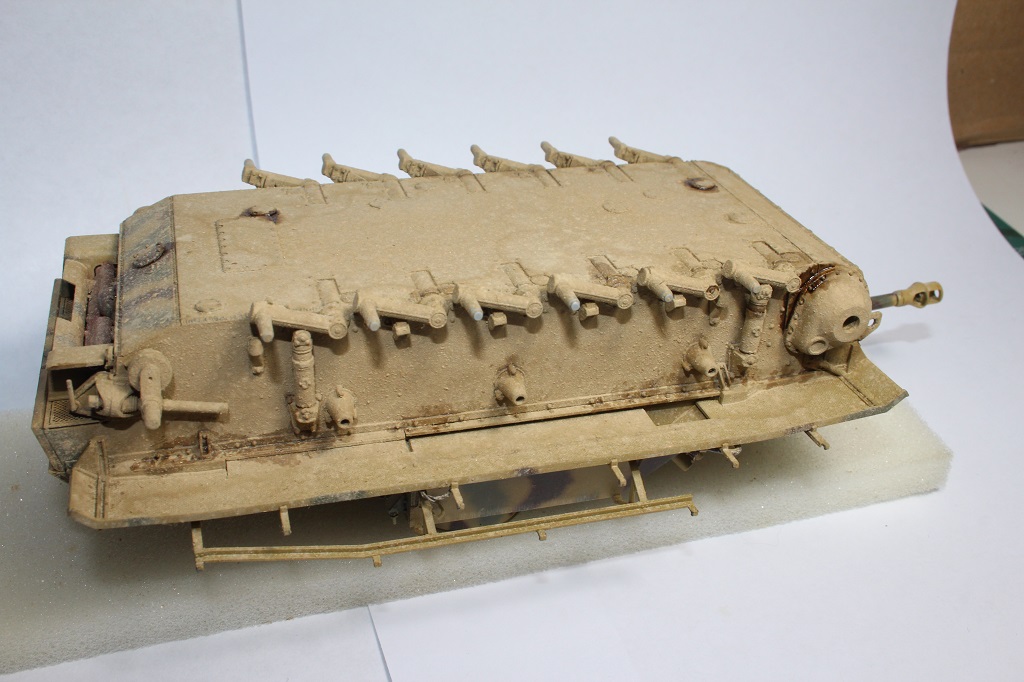
Now run marks are somewhat well pronounced. Using stiff brush i tone them down once again.
Then one more pass with dry and wet splashes, and some more layers of motor oil.
The result is bellow. I would add some more wet effets under fenders, but i will leave it as is, because these will not be too visible under schurzen. So now i will mount wheels and tracks, and will look if i want to weather it some more.
Posted: Saturday, December 02, 2017 - 04:56 PM UTC
I would say she is dirty right nice. In fact she is ready to be taken to the car wash...LOL 


Kaktusas

Joined: April 12, 2017
KitMaker: 196 posts
Armorama: 196 posts

Posted: Sunday, December 03, 2017 - 01:53 AM UTC
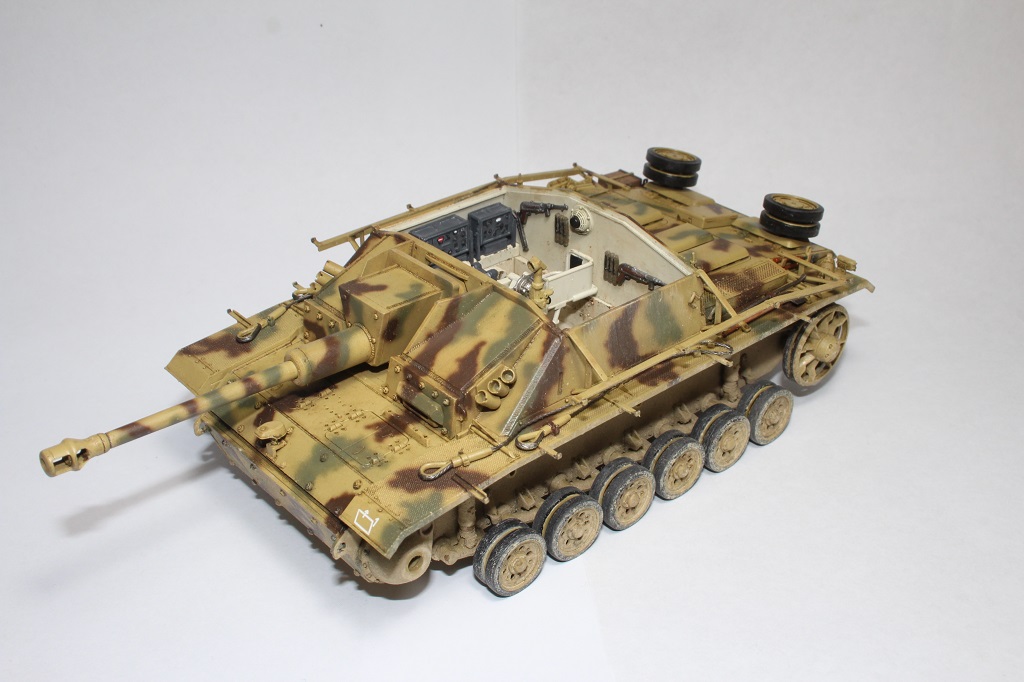
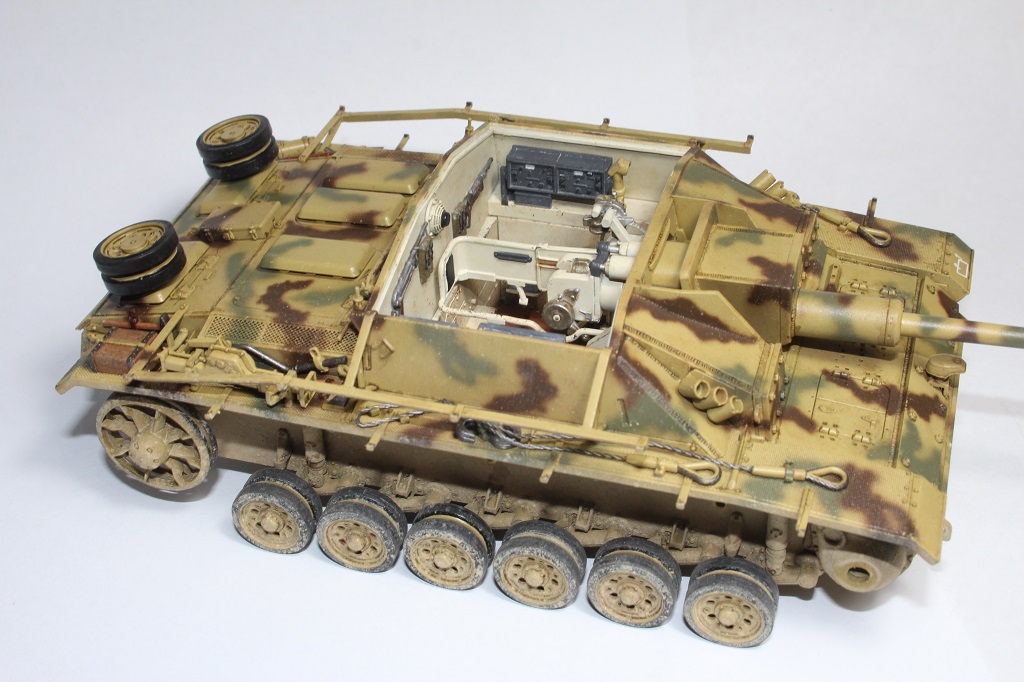
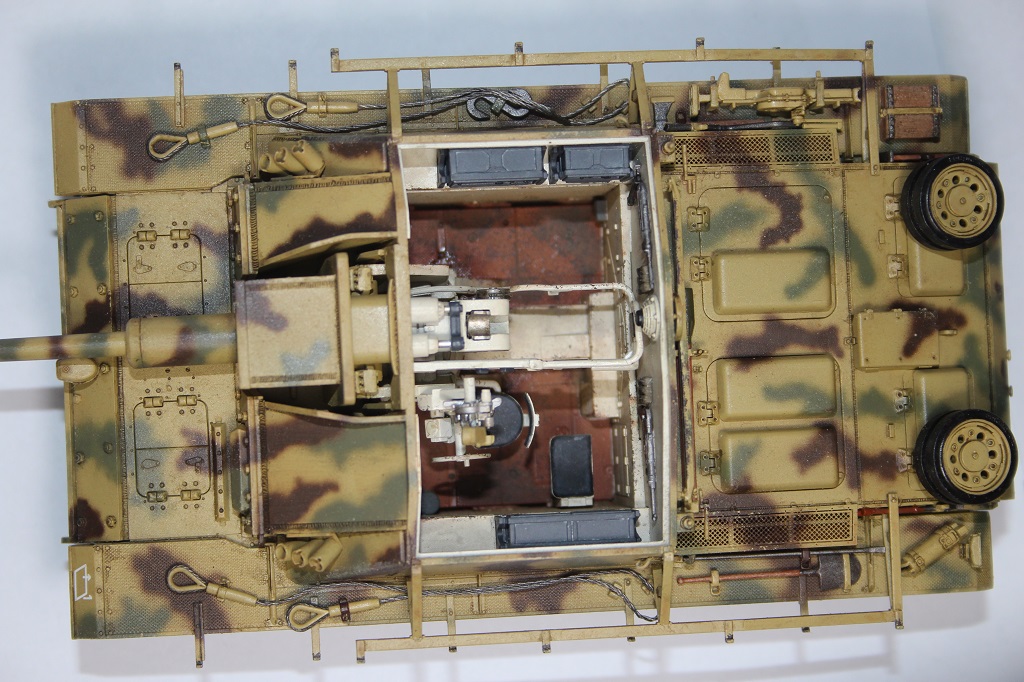
Few interior pictures. Interior is OOTB, plus MP40 and its ammo pouches from spares box. A lot of details are missing in Dragon kit, but its hard to show internals anyway, unless modeling vehicle under repair, with roof off. I love building interiors, but its hard to close all the work with hatches and panels..

Kaktusas

Joined: April 12, 2017
KitMaker: 196 posts
Armorama: 196 posts

Posted: Thursday, December 21, 2017 - 01:08 PM UTC
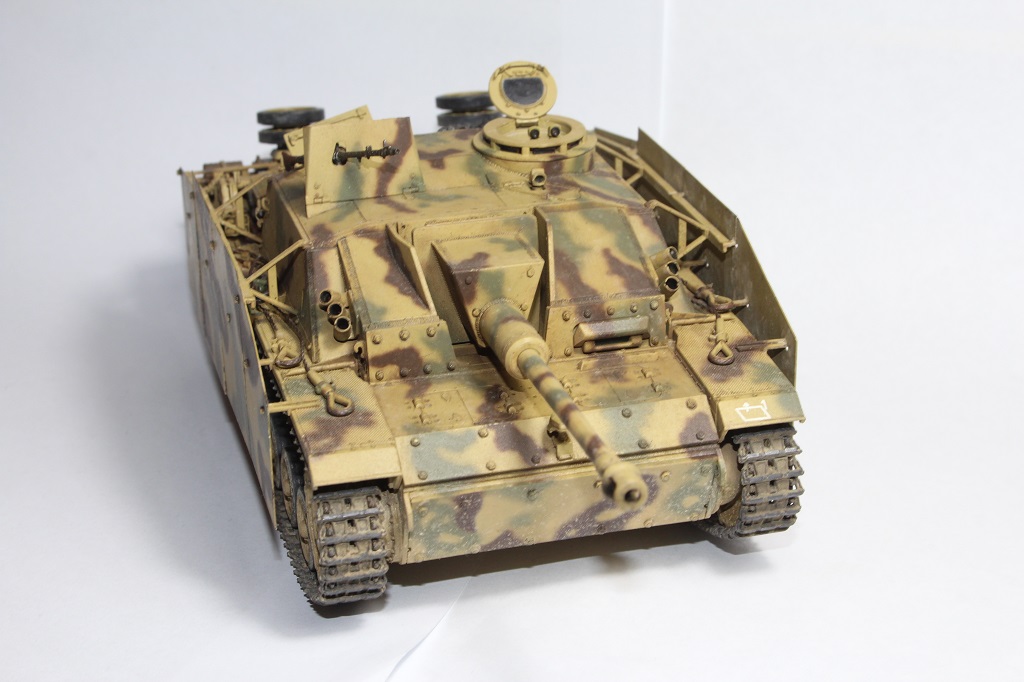
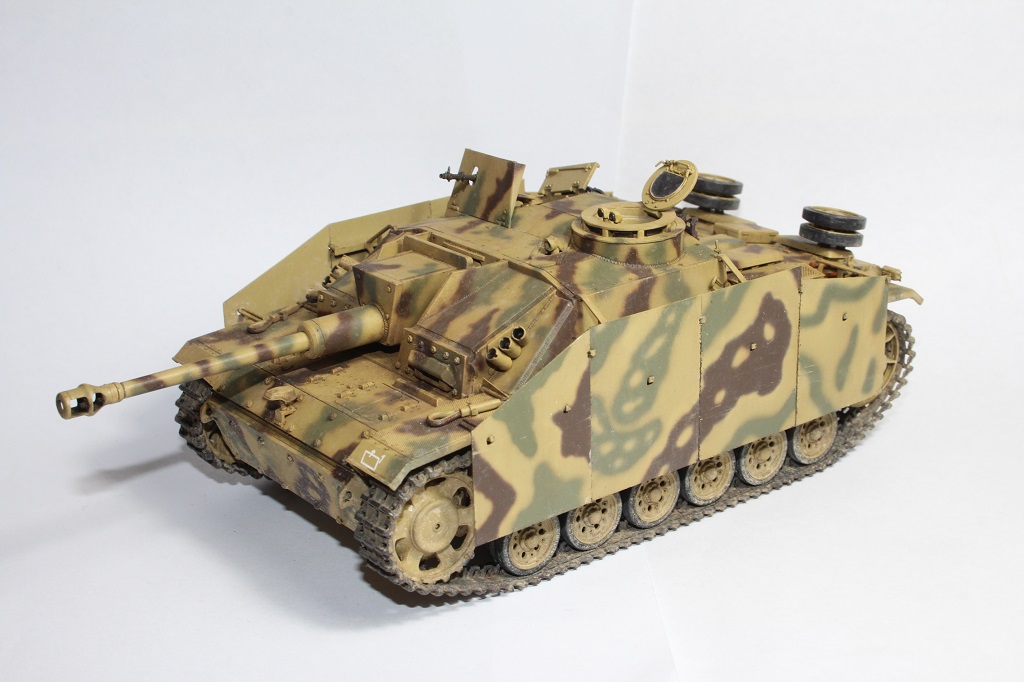
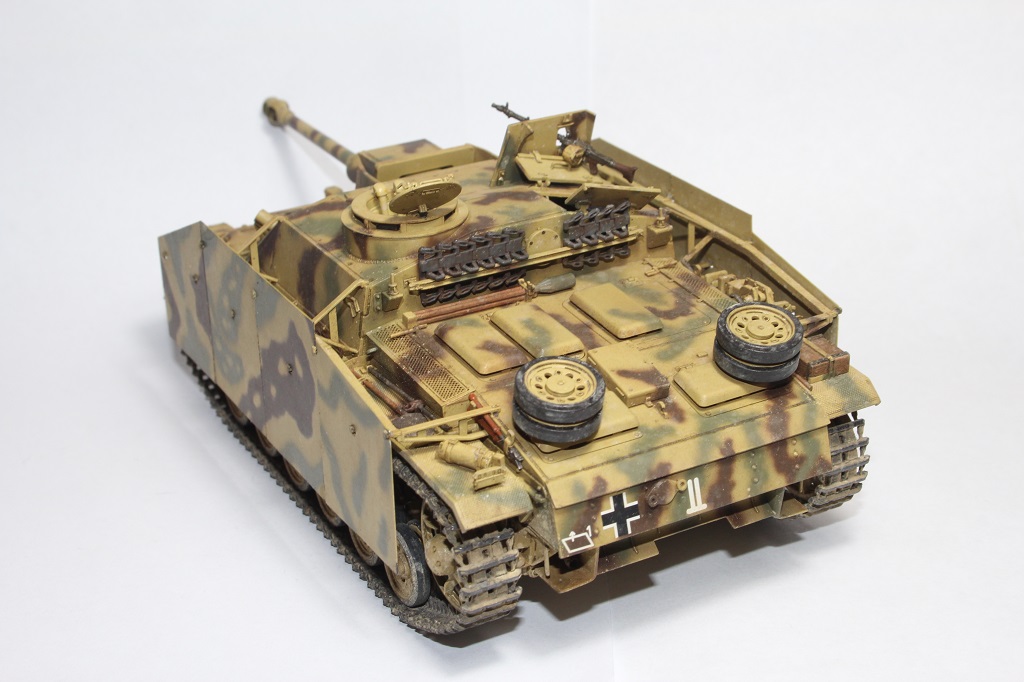
Almost finished now. Some small things left to do, such as removing excess dirt from some spots, blending outside of schurzen, antennas, plus some minor stowage, but i will add those later on. Still got to do final mat coat, but got to pick off micro hairs and dust from it first 

 |


