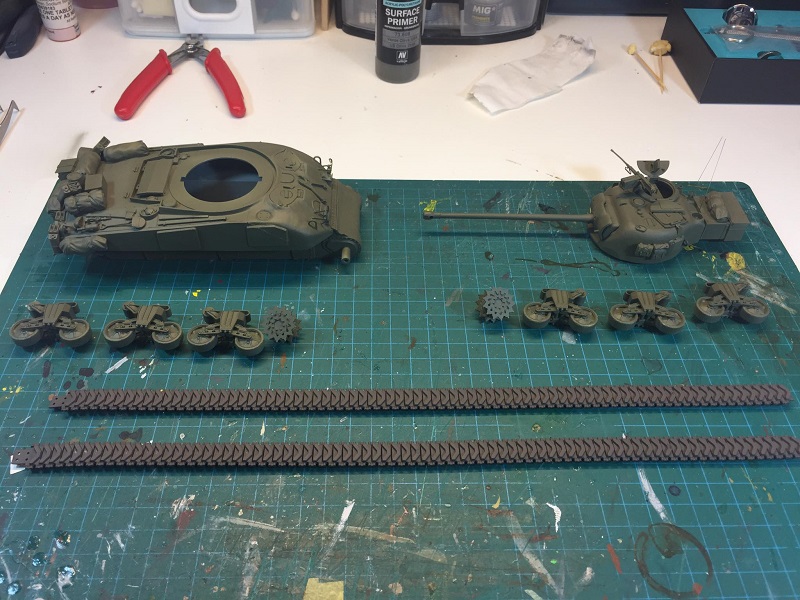
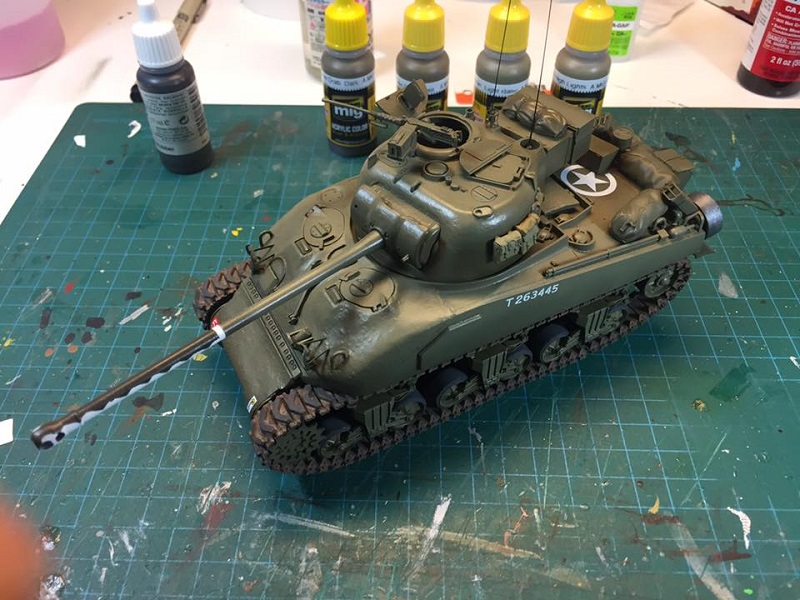
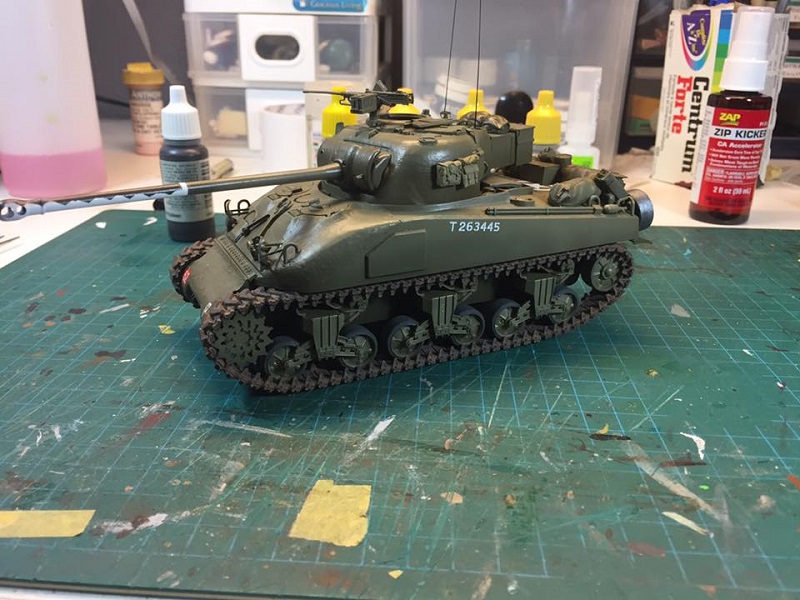
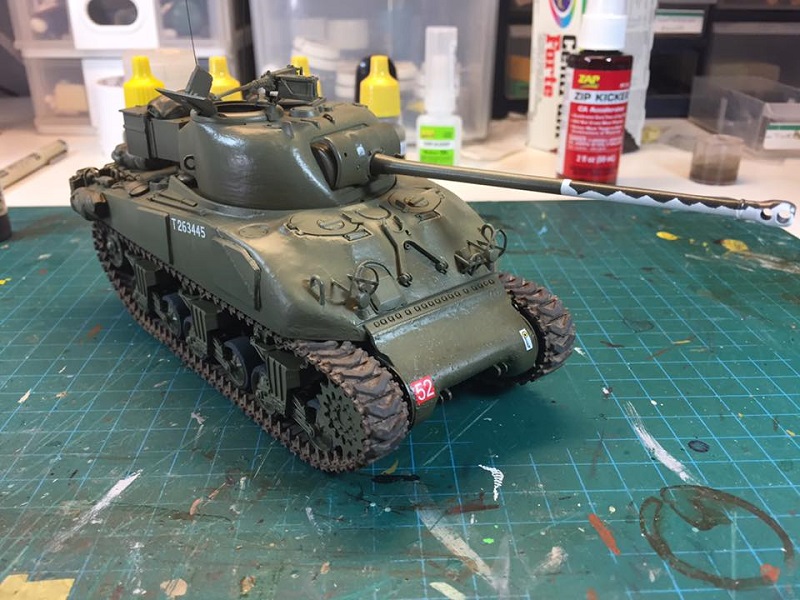
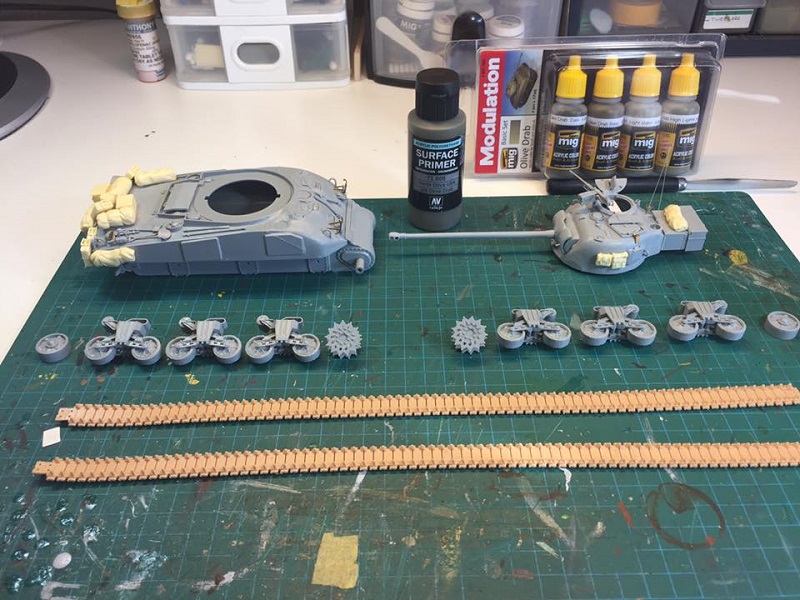
Working on my Dragon Firefly Ic build, so far, paint has been applied, and I put a filter from Ammo on, and now am starting to add a wash from Ammo as well (first time trying these products, so far so good, I'm liking them) Streaking to follow and the rest of the weathering. Since I'm not much of a Allied armour builder, I'm not too confident on my track weathering, I'm wondering if I should have some metal showing on the edges of the tracks and on the guides, but I do plan on dusting it up more later. The tracks are a mix of Mig Pigments Europe Dust and a bit of Light Desert Dust mixed in iso alcohol and 'painted' on. Lightly drybrushed dark rubber for the track cleats, any suggestions to vary it up a bit more, seems a little too uniform right now. The kit was not really a fun build, the tank had no fenders (see earlier post about my rant on it lol) I tried fabricating some, my patience was running thin, and rather throw the thing out the window, I listened to my saner side, and decided to just not have any.
Hosted by Darren Baker
Dragon Firefly Ic W.I.P.
KellyZak
British Columbia, Canada
Joined: August 19, 2003
KitMaker: 641 posts
Armorama: 503 posts
Joined: August 19, 2003
KitMaker: 641 posts
Armorama: 503 posts
Posted: Friday, September 22, 2017 - 11:20 AM UTC
ericadeane
Michigan, United States
Joined: October 28, 2002
KitMaker: 4,021 posts
Armorama: 3,947 posts
Joined: October 28, 2002
KitMaker: 4,021 posts
Armorama: 3,947 posts
Posted: Friday, September 22, 2017 - 06:33 PM UTC
Too bad about the fenders -- but we all learn as we move along. Thanks for posting your work. May I make a suggestion? your commander's left half hatch is lying flat (and covering the loader's hatch). It was designed to only splay outwards about 50 degrees -- not lay flat. FYI
KellyZak
British Columbia, Canada
Joined: August 19, 2003
KitMaker: 641 posts
Armorama: 503 posts
Joined: August 19, 2003
KitMaker: 641 posts
Armorama: 503 posts
Posted: Friday, September 22, 2017 - 08:21 PM UTC
Dang, it is probably too late to move the hatch, it's glued down pretty good to the loader's hatch. I'll have to leave as is, and make note for next one I build. Thanks for the input Roy! Learning from others, some of the best things about the hobby
Posted: Friday, September 22, 2017 - 08:21 PM UTC
Nice work with the paint job and the storage.
ColinEdm
Associate Editor
Alberta, Canada
Joined: October 15, 2013
KitMaker: 1,355 posts
Armorama: 1,229 posts
Joined: October 15, 2013
KitMaker: 1,355 posts
Armorama: 1,229 posts
Posted: Saturday, September 23, 2017 - 07:35 PM UTC
Nice work! I have this one in my stash (with fenders , I checked ), hoping to do it soon.
Cheers
Cheers
KellyZak
British Columbia, Canada
Joined: August 19, 2003
KitMaker: 641 posts
Armorama: 503 posts
Joined: August 19, 2003
KitMaker: 641 posts
Armorama: 503 posts
Posted: Saturday, September 23, 2017 - 10:06 PM UTC
Hey Colin, thanks! If the kit you have is one of the Value Packs from Dragon, watch those instructions, they're not the greatest, a lot of parts on the drawings, but no indicators of what part numbers go where