Loading SSys Schwerlastwagens
Bangkok, Thailand / ไทย
Joined: September 17, 2013
KitMaker: 1,617 posts
Armorama: 1,150 posts
Posted: Friday, January 04, 2019 - 11:13 PM UTC
Got a headache from the bogies, not ok in my view. Have to leave them for a while to get a fresh view I guess.
So working on the load for the coming Omms (maybe two) is the best way to get this build going. Started a year ago and picked it up a week ago.
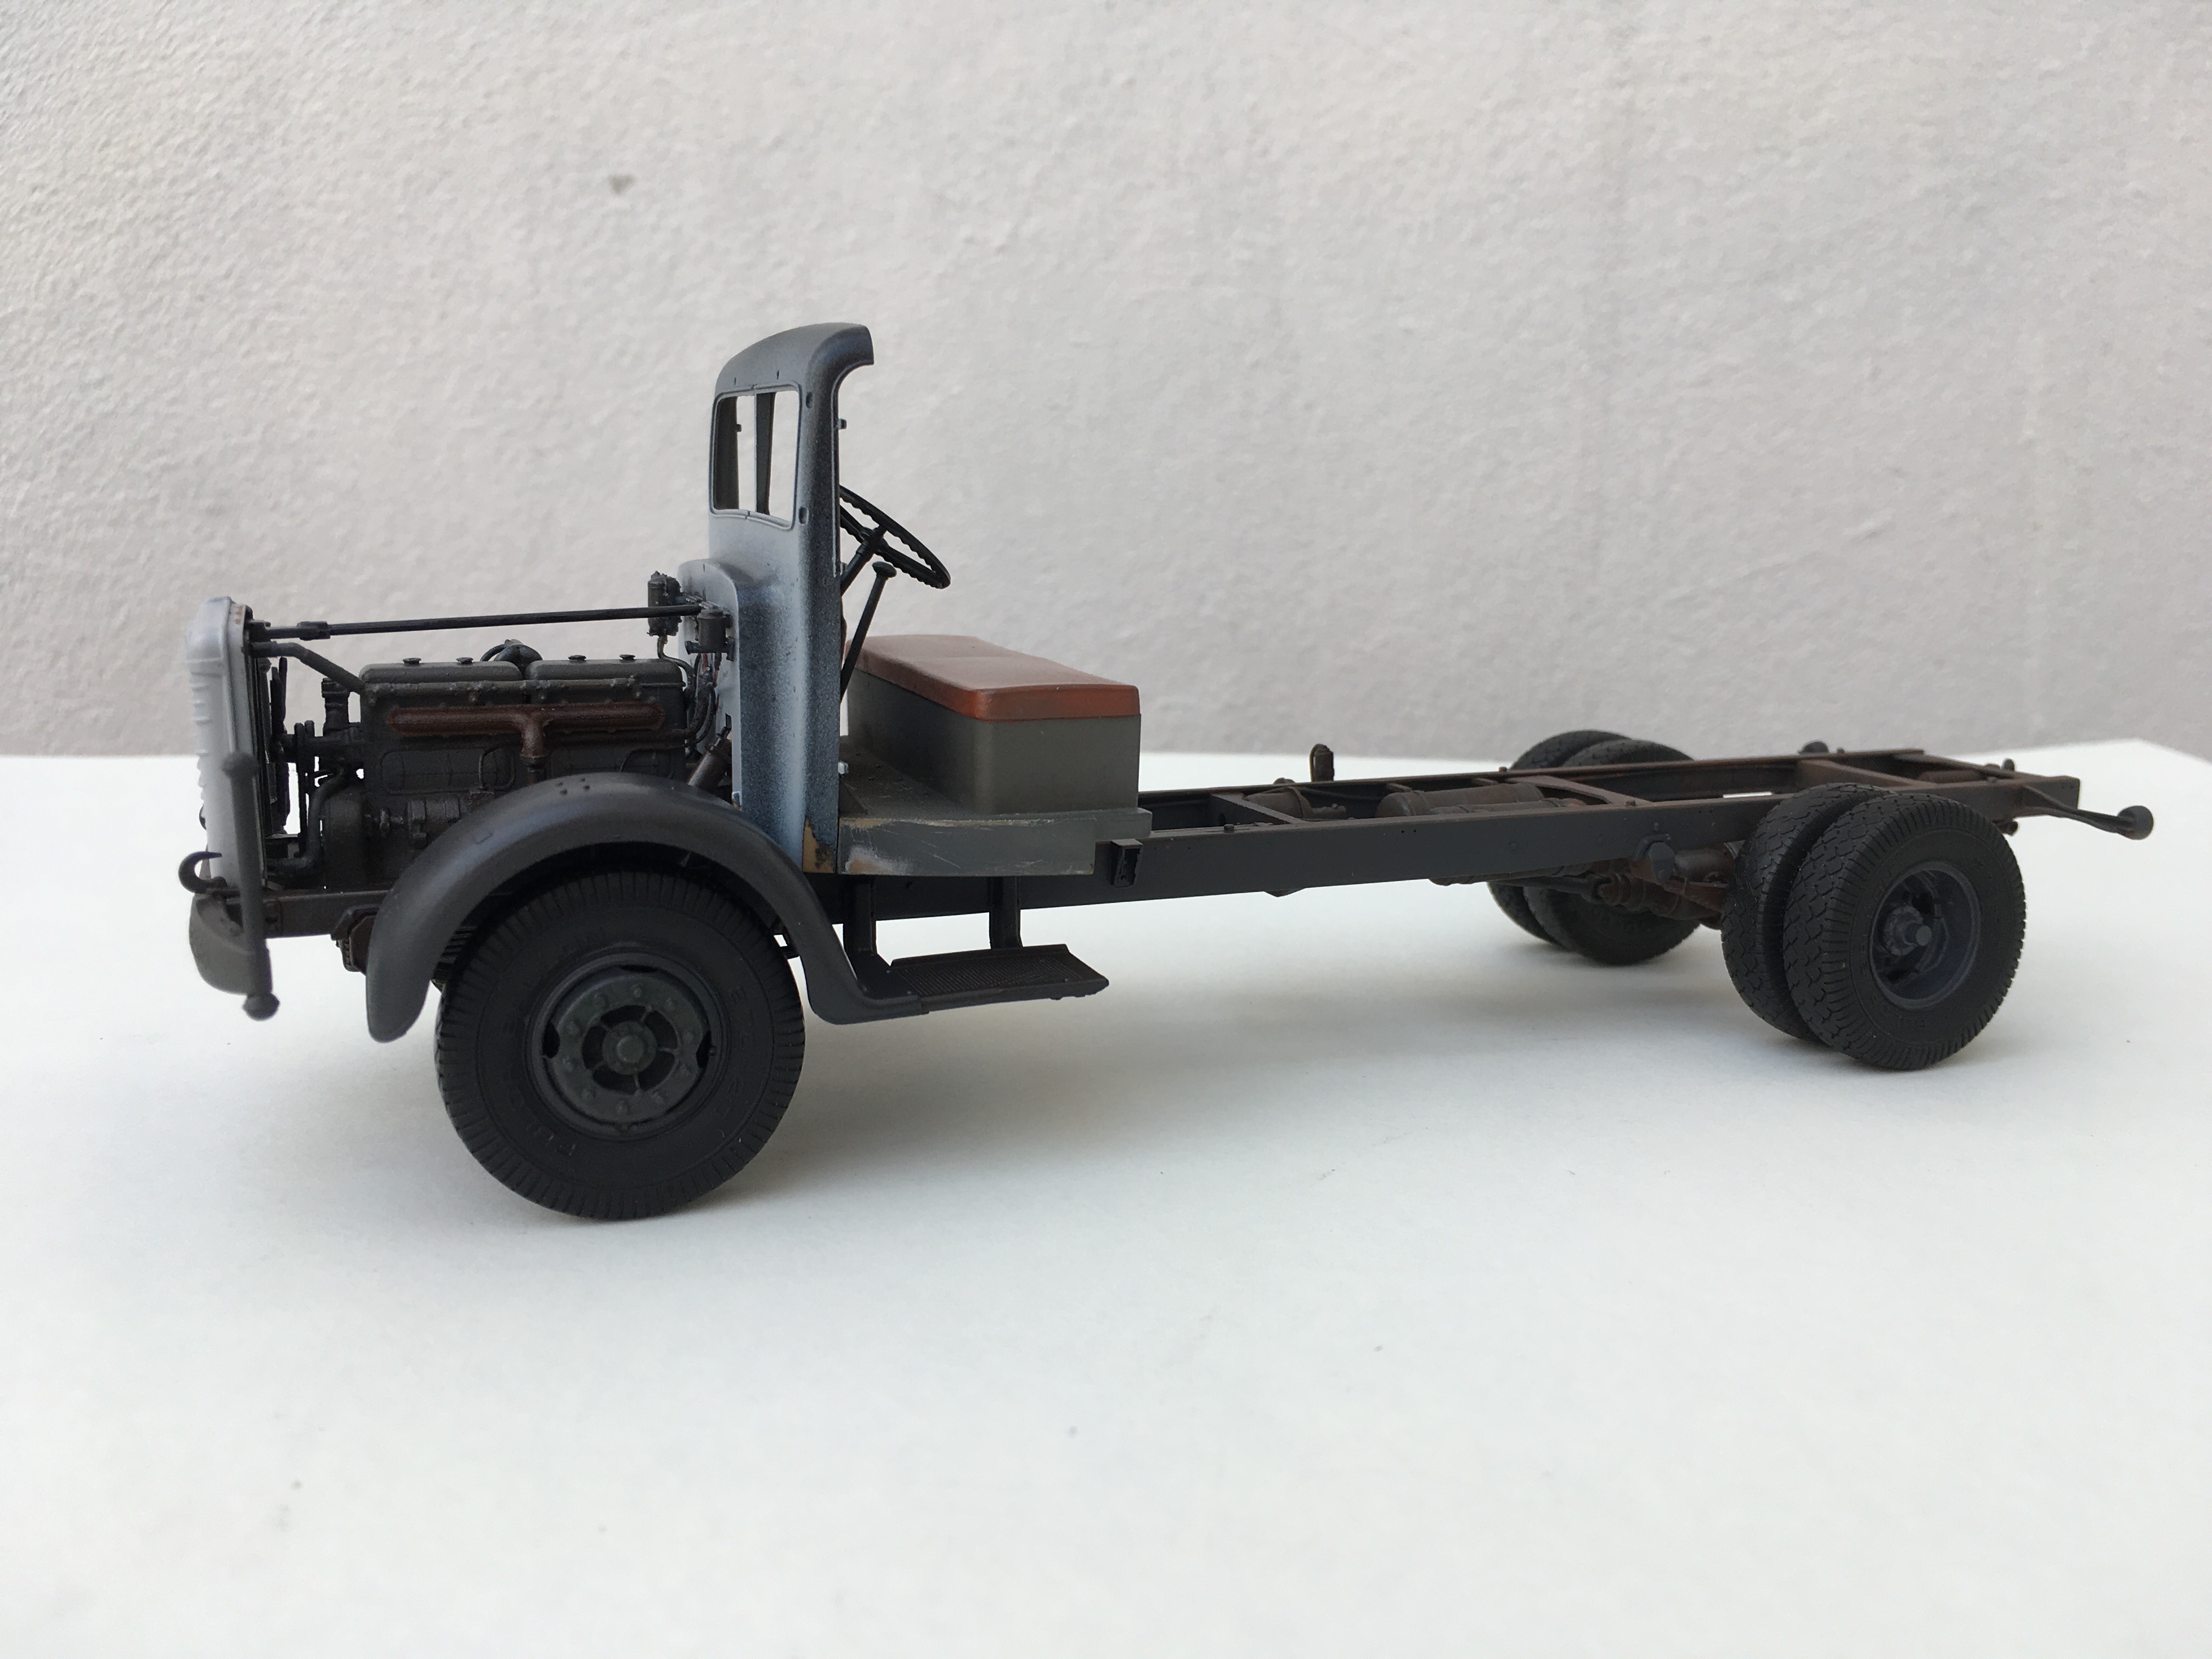
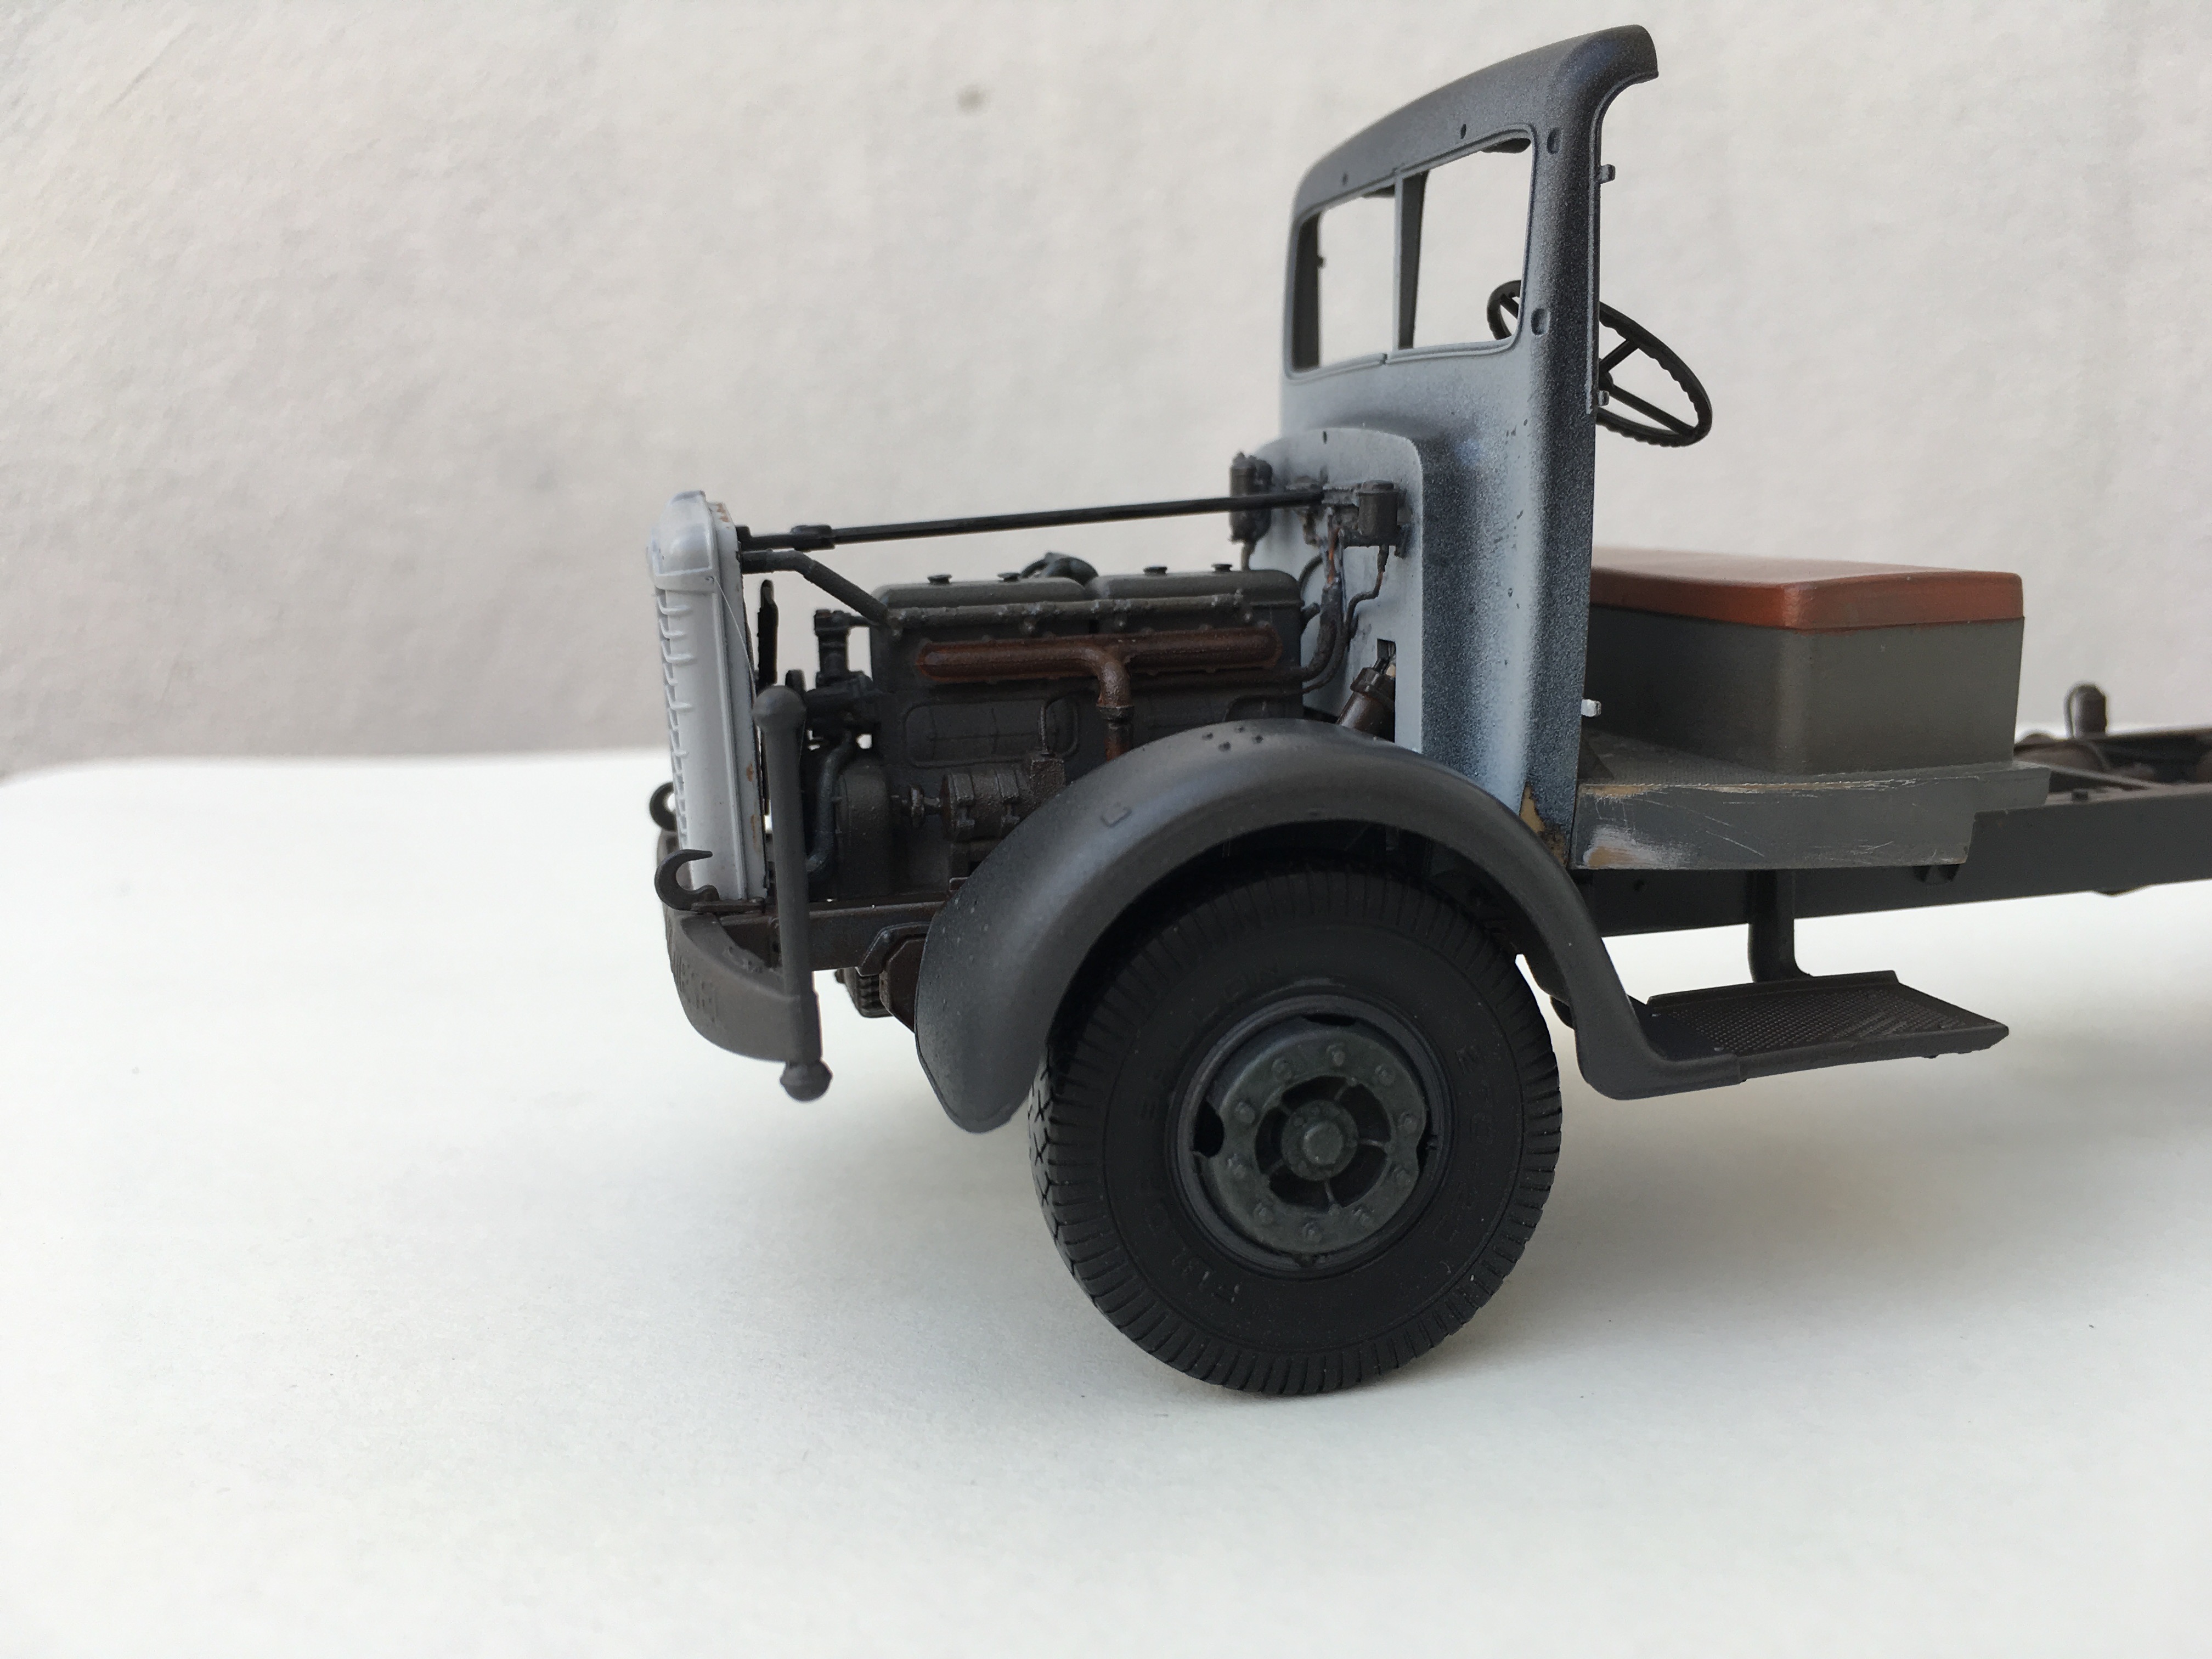
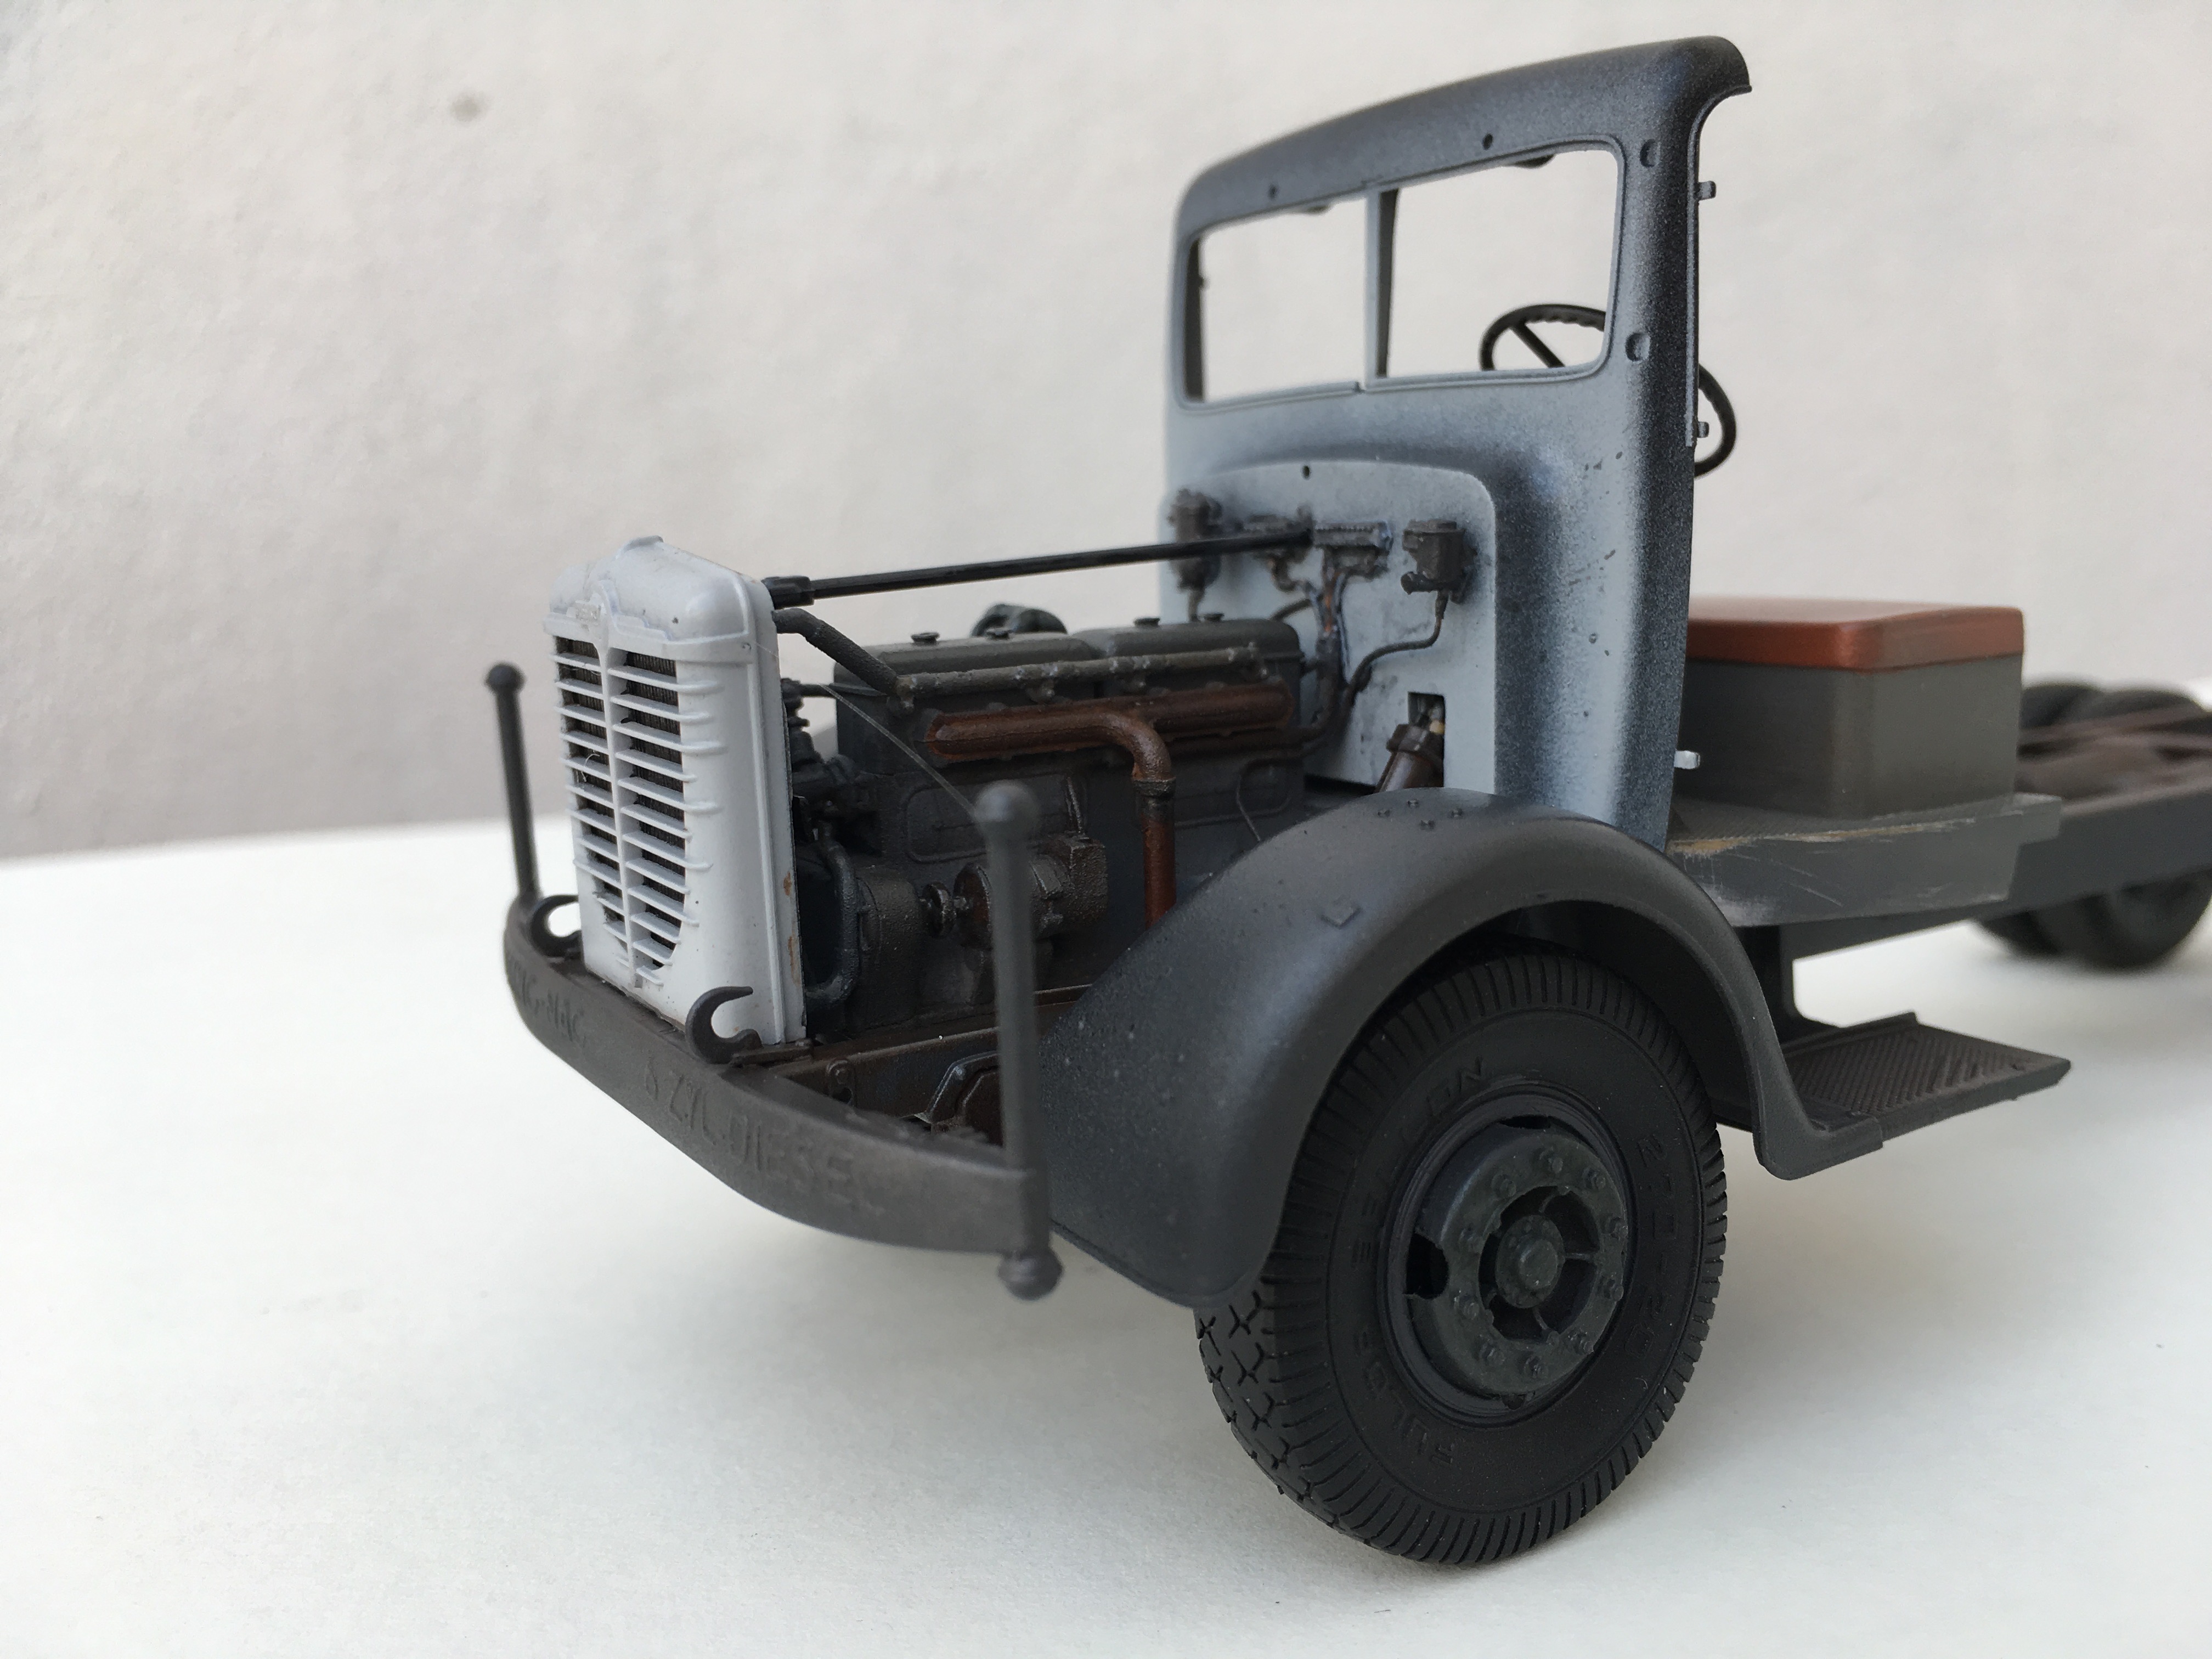
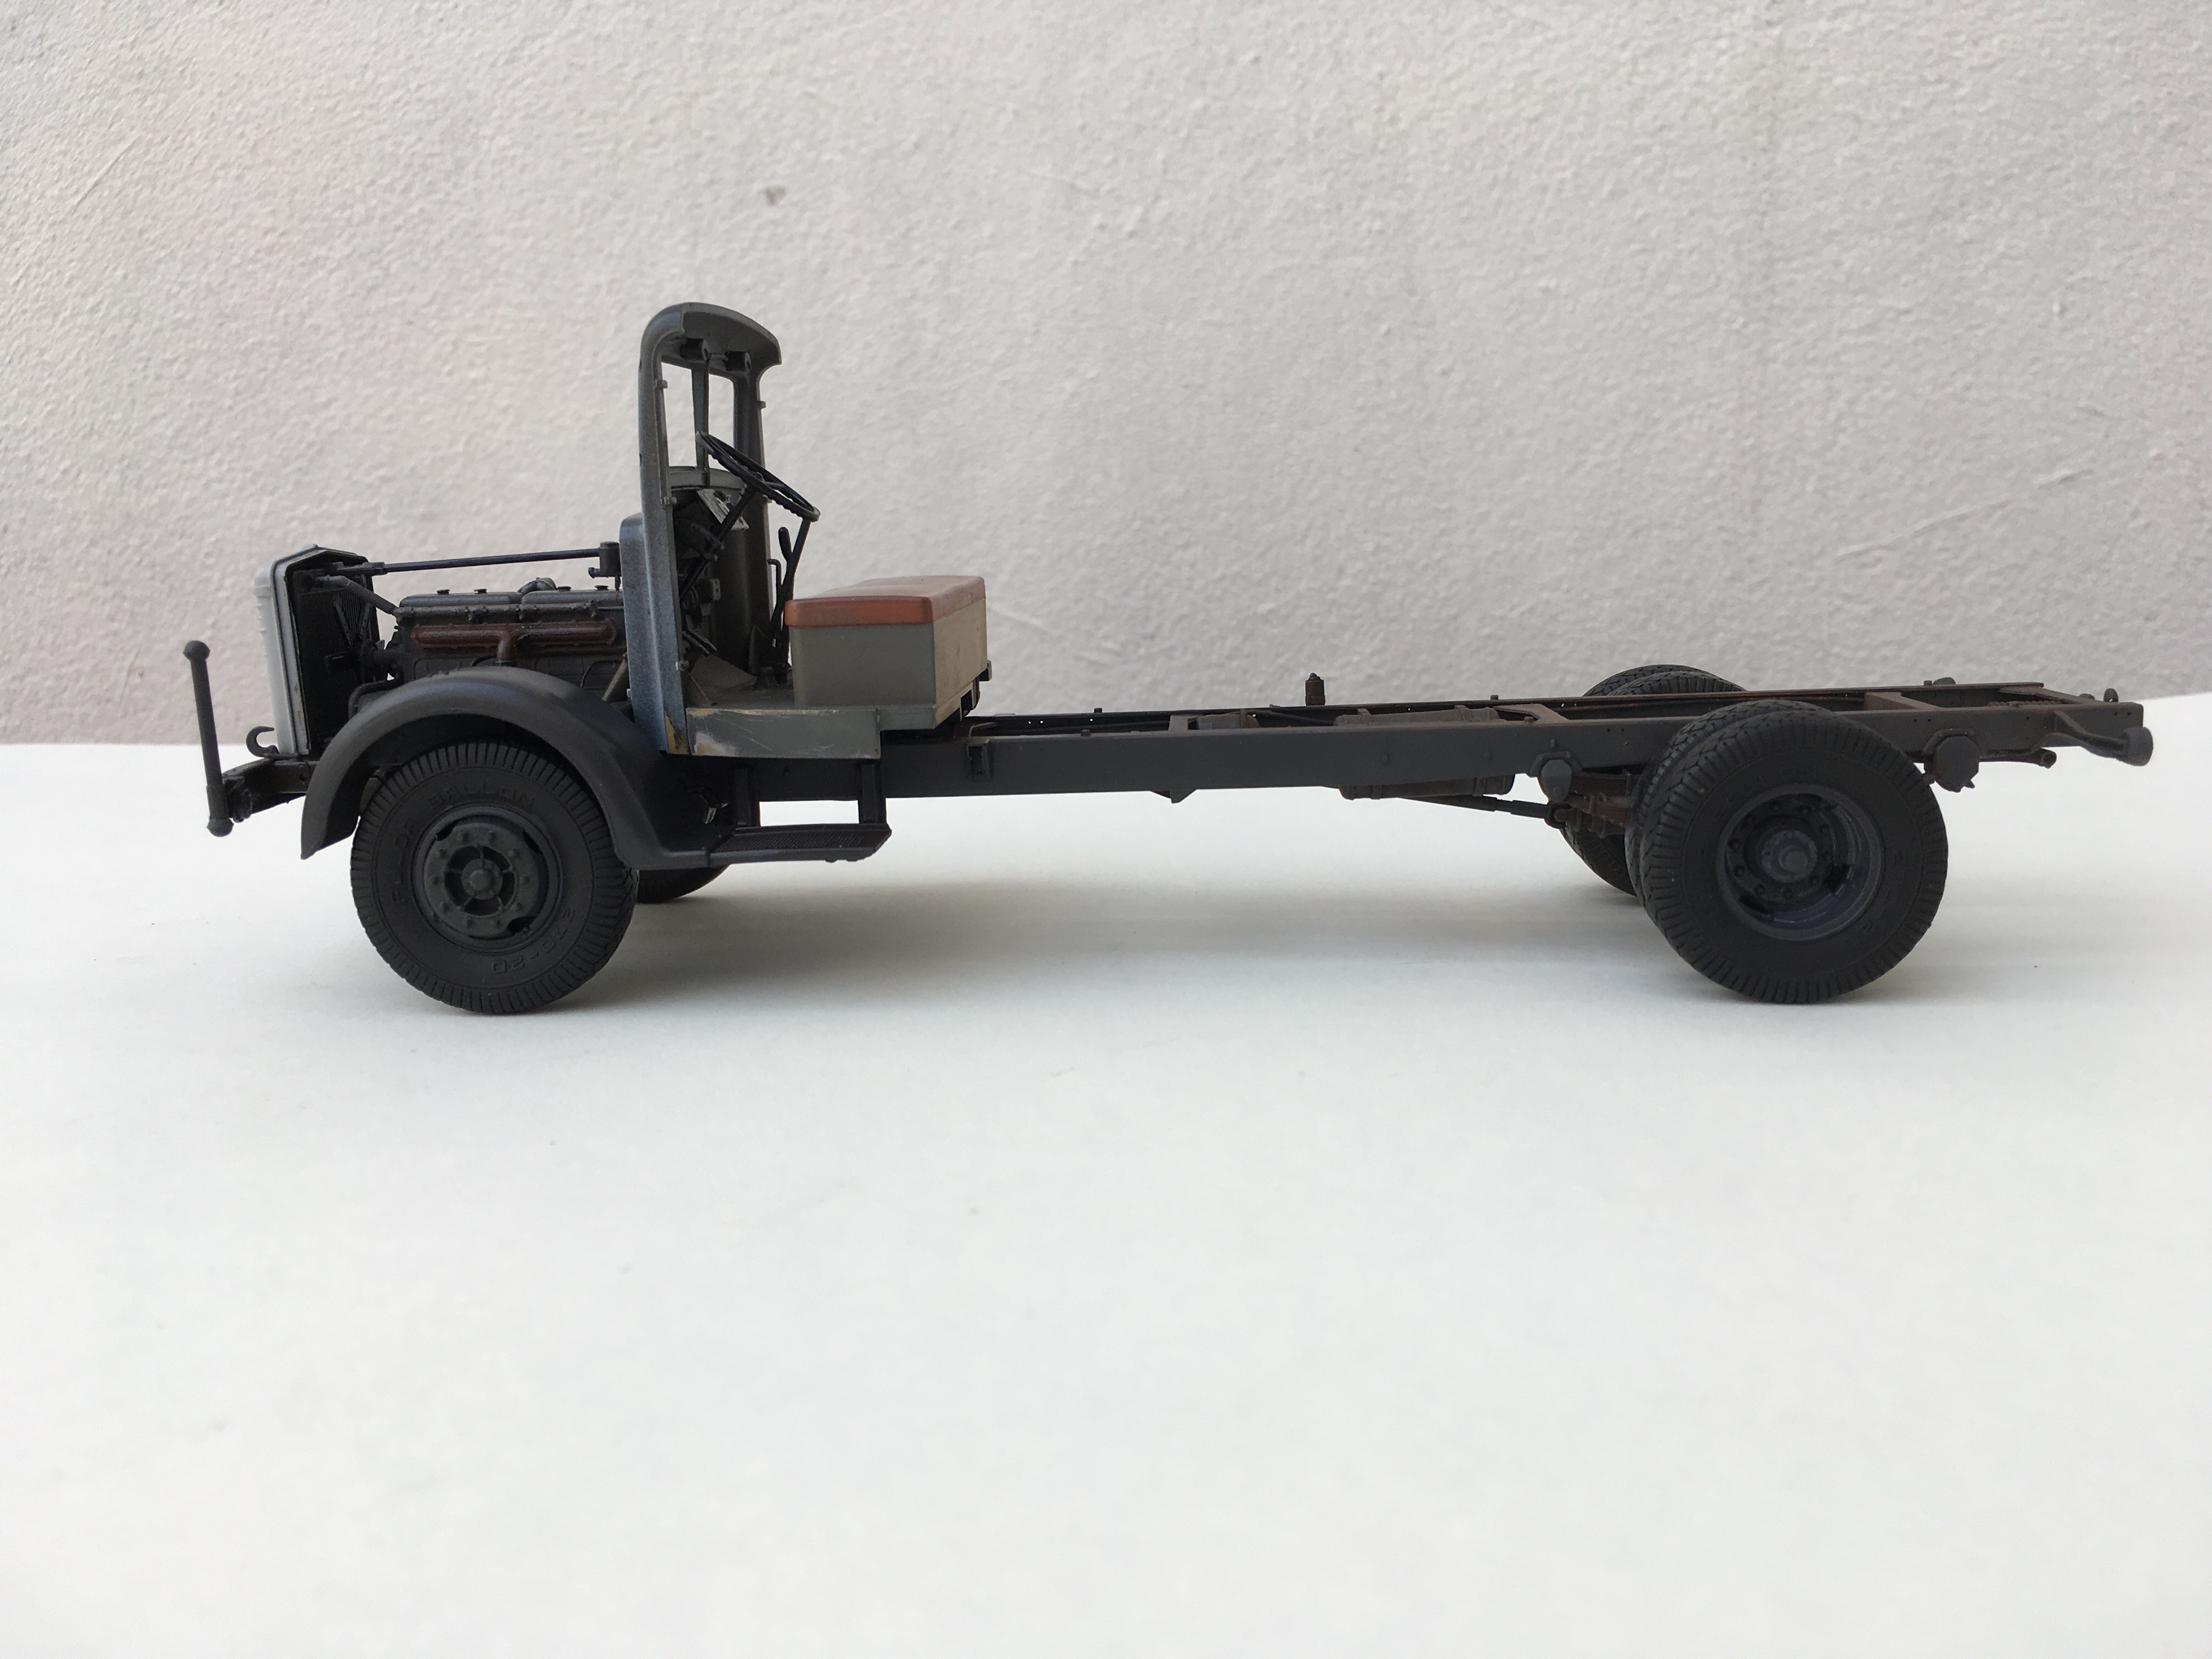
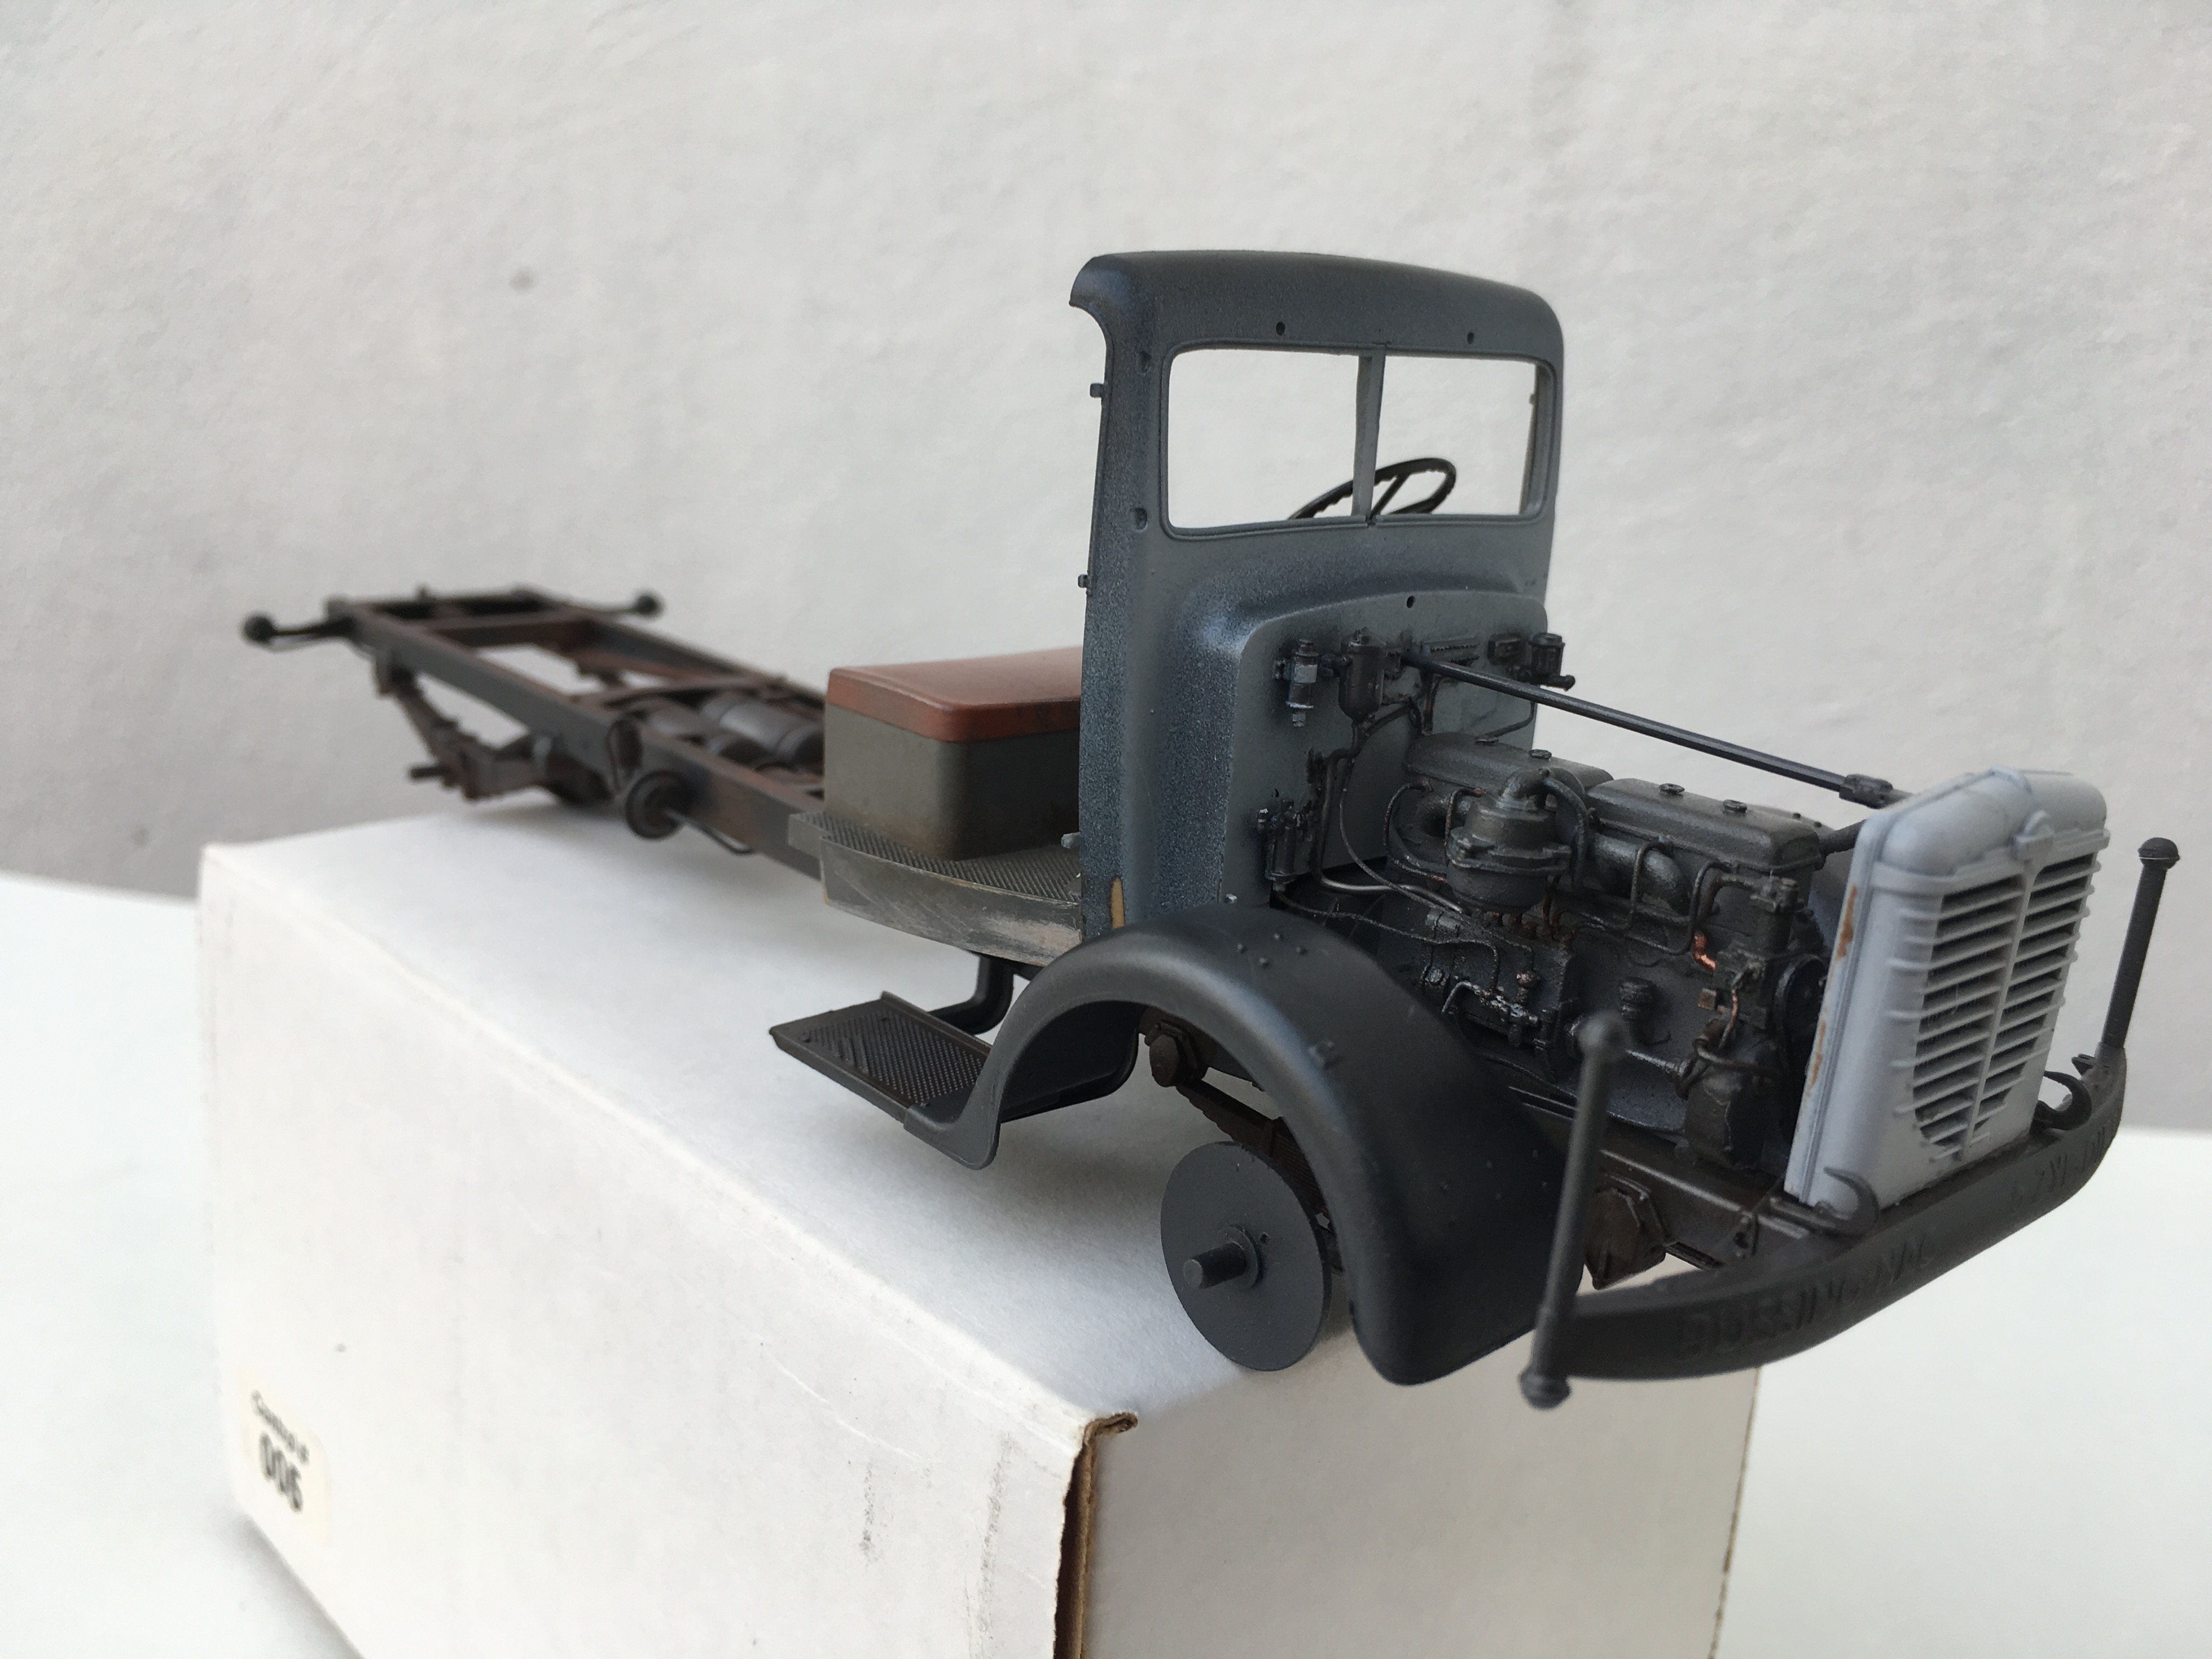
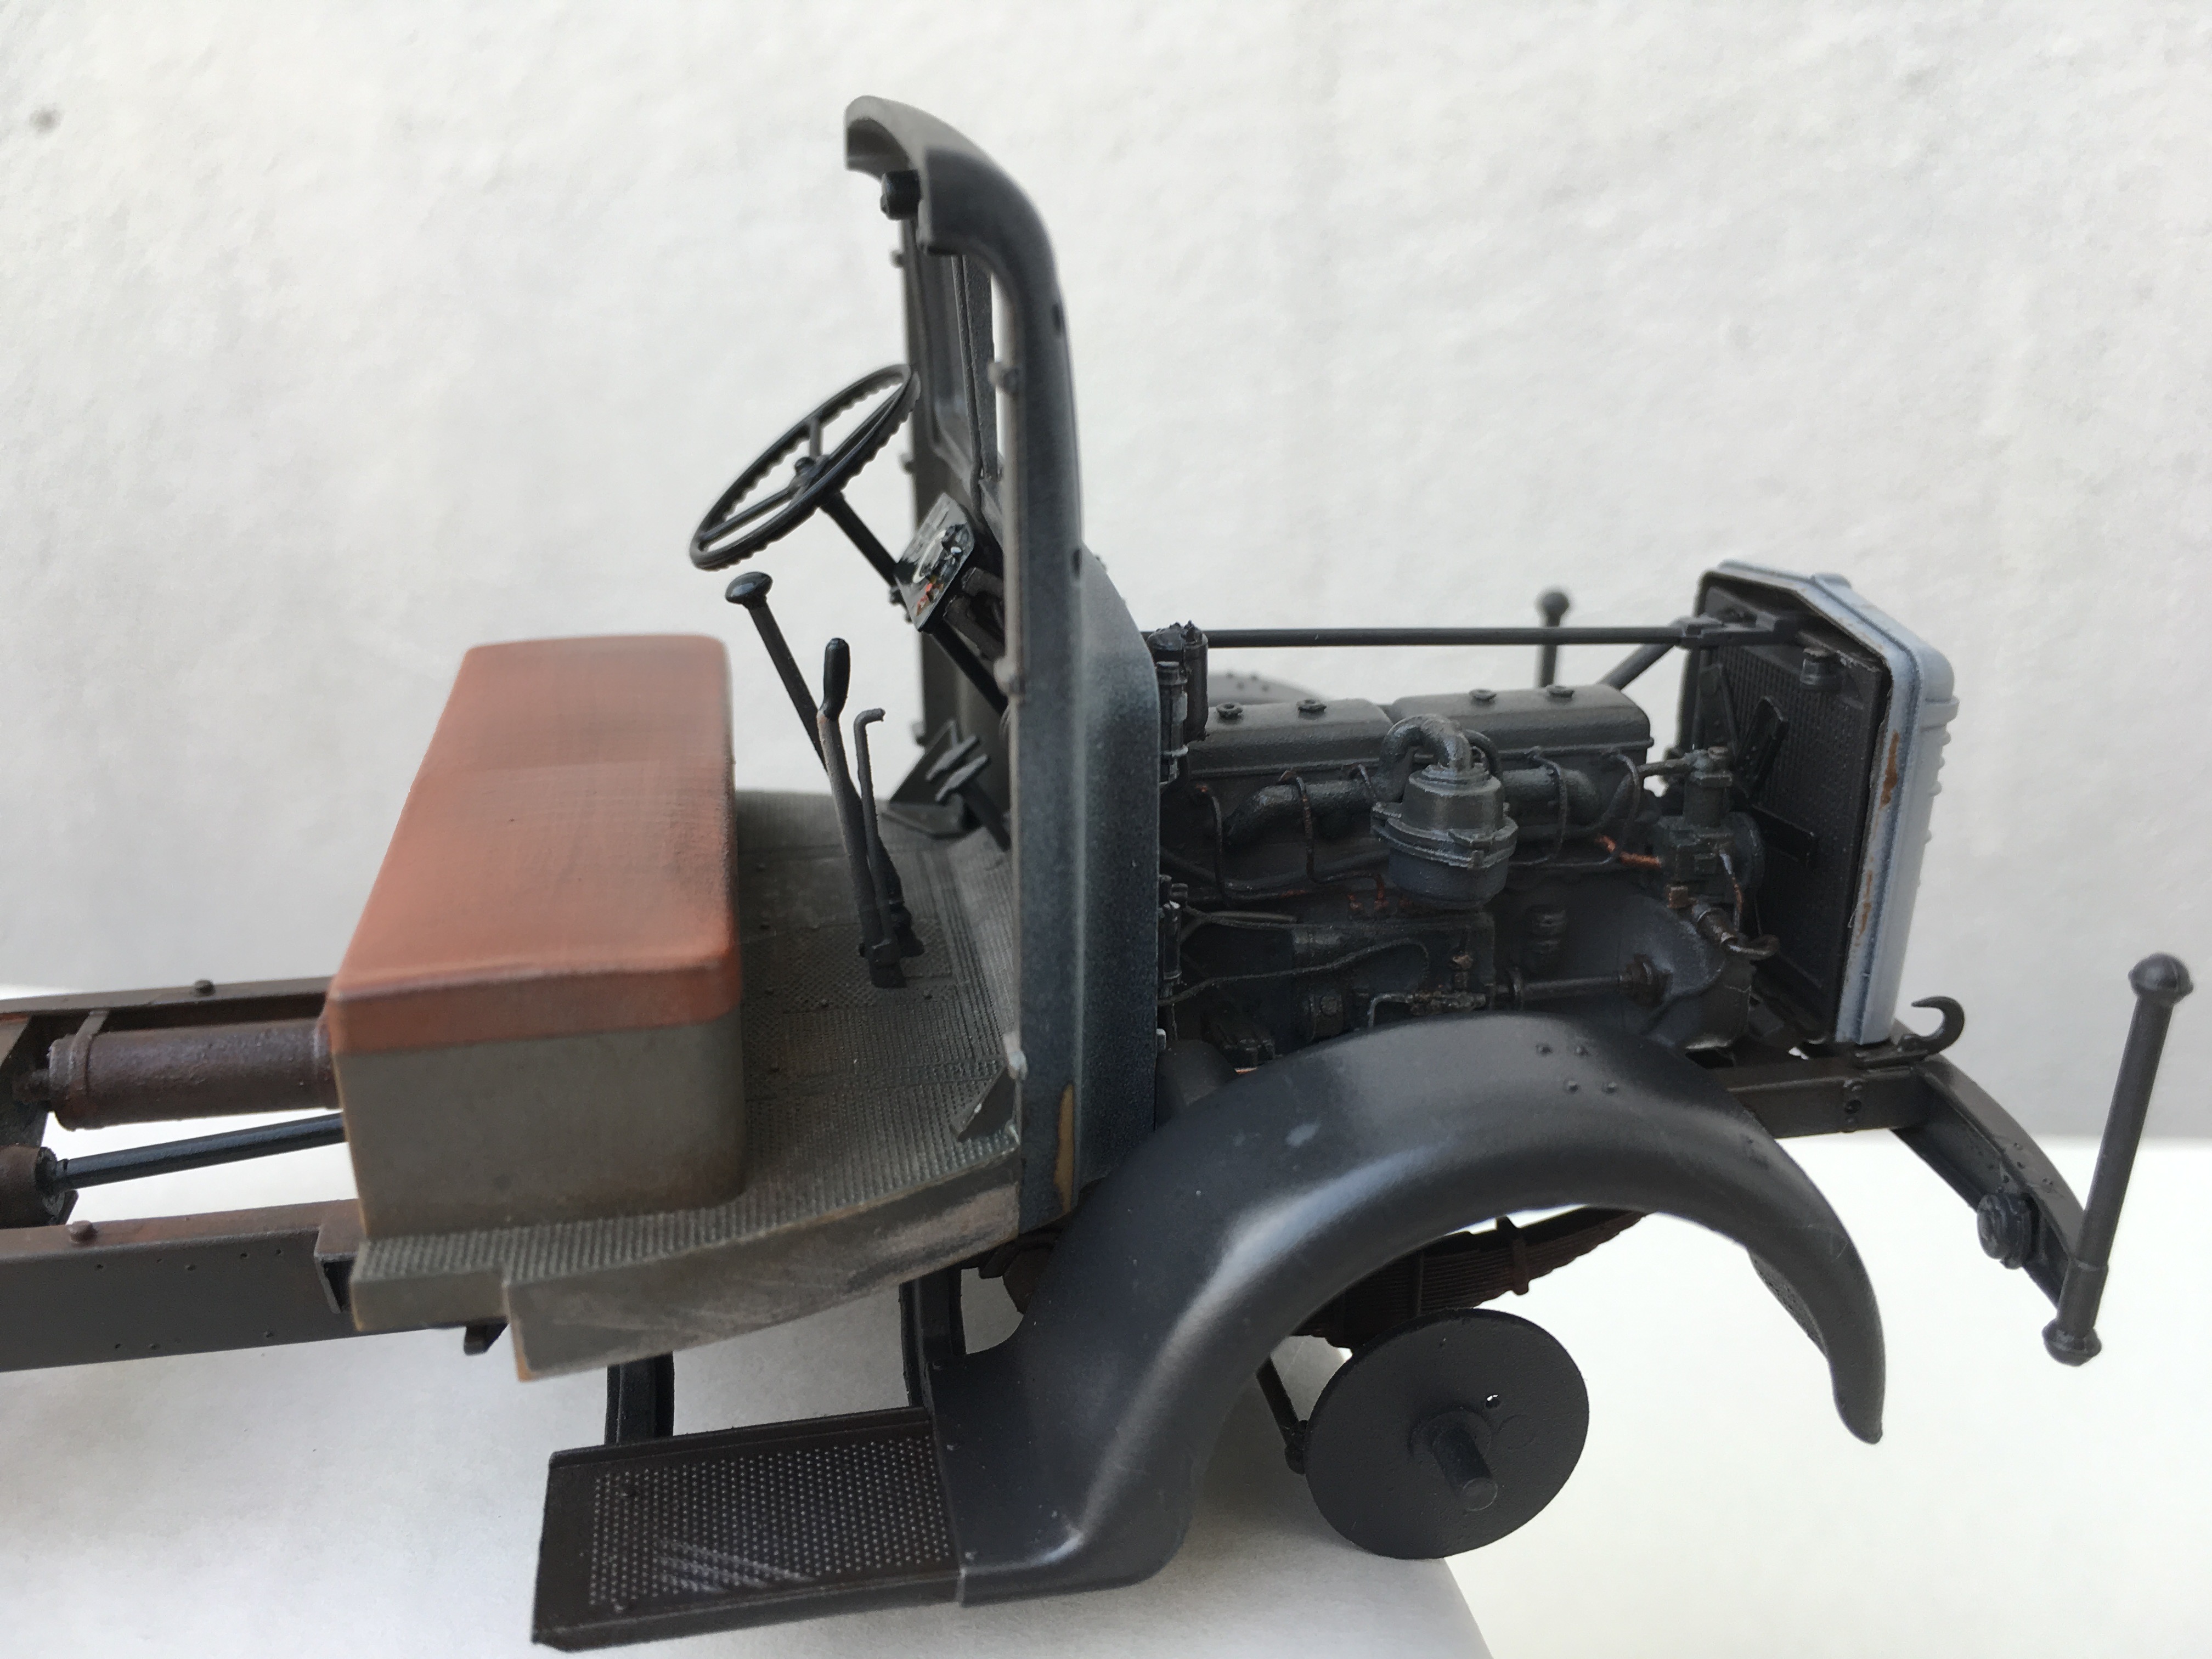
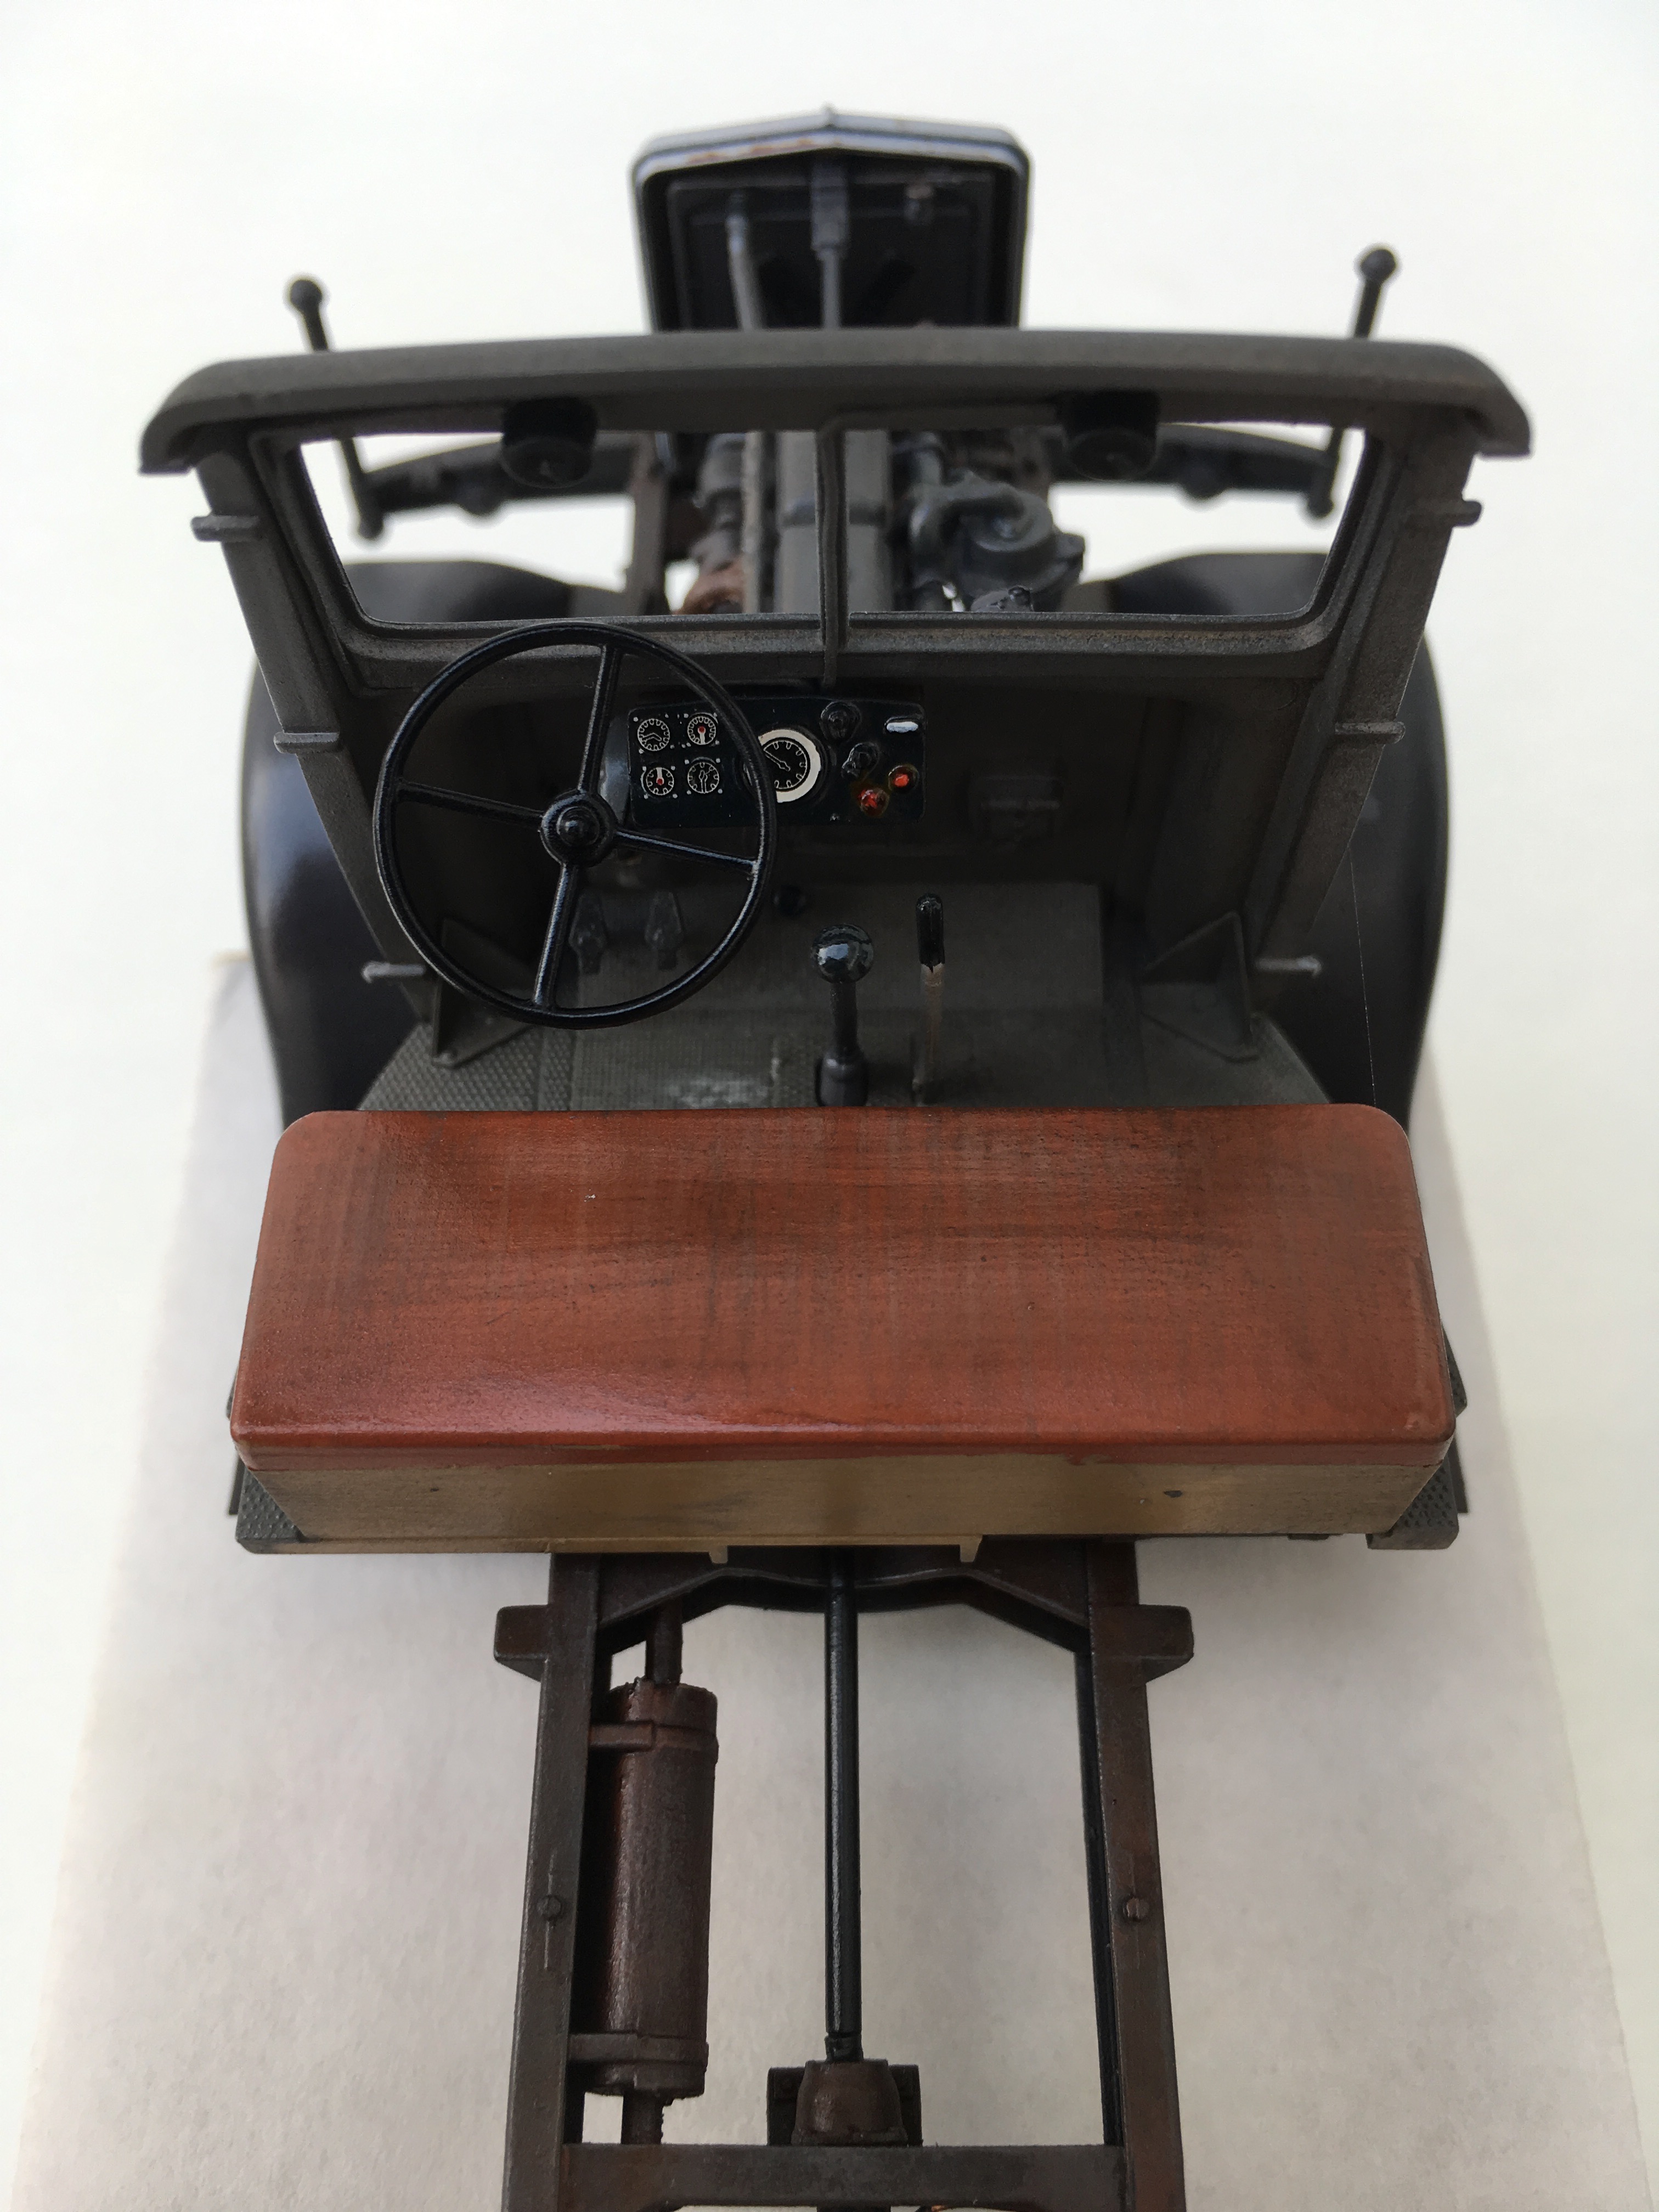
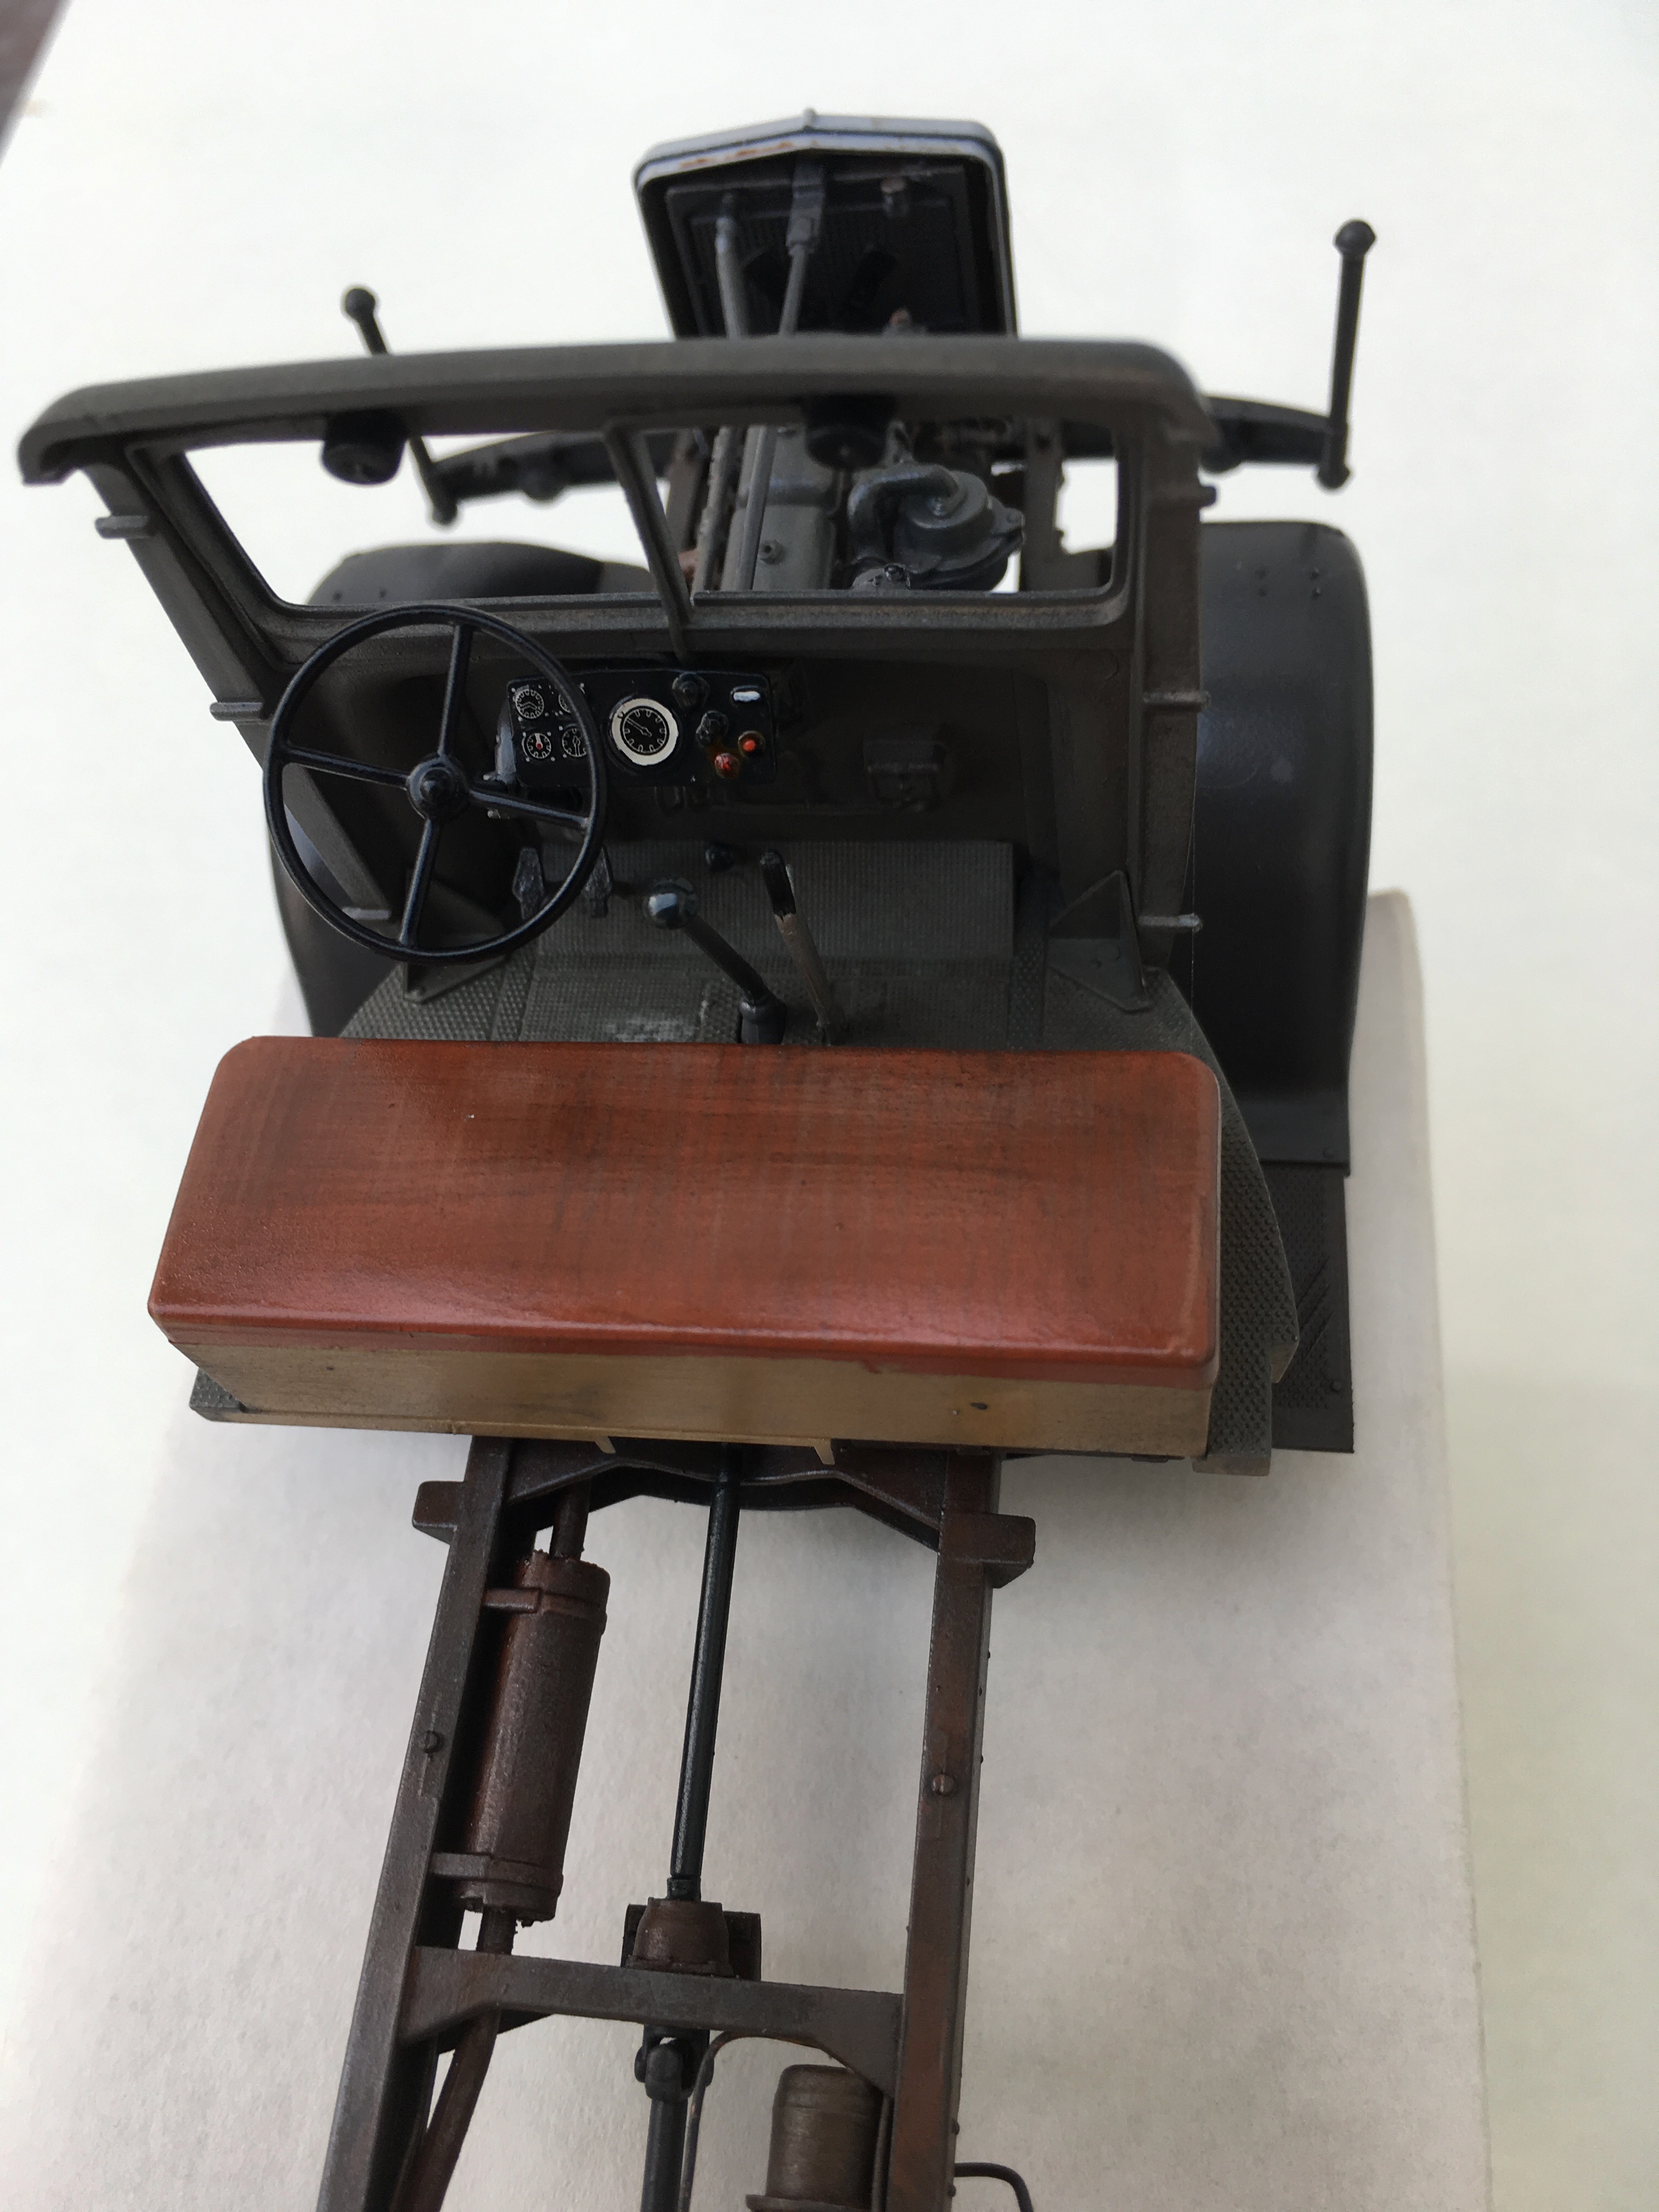
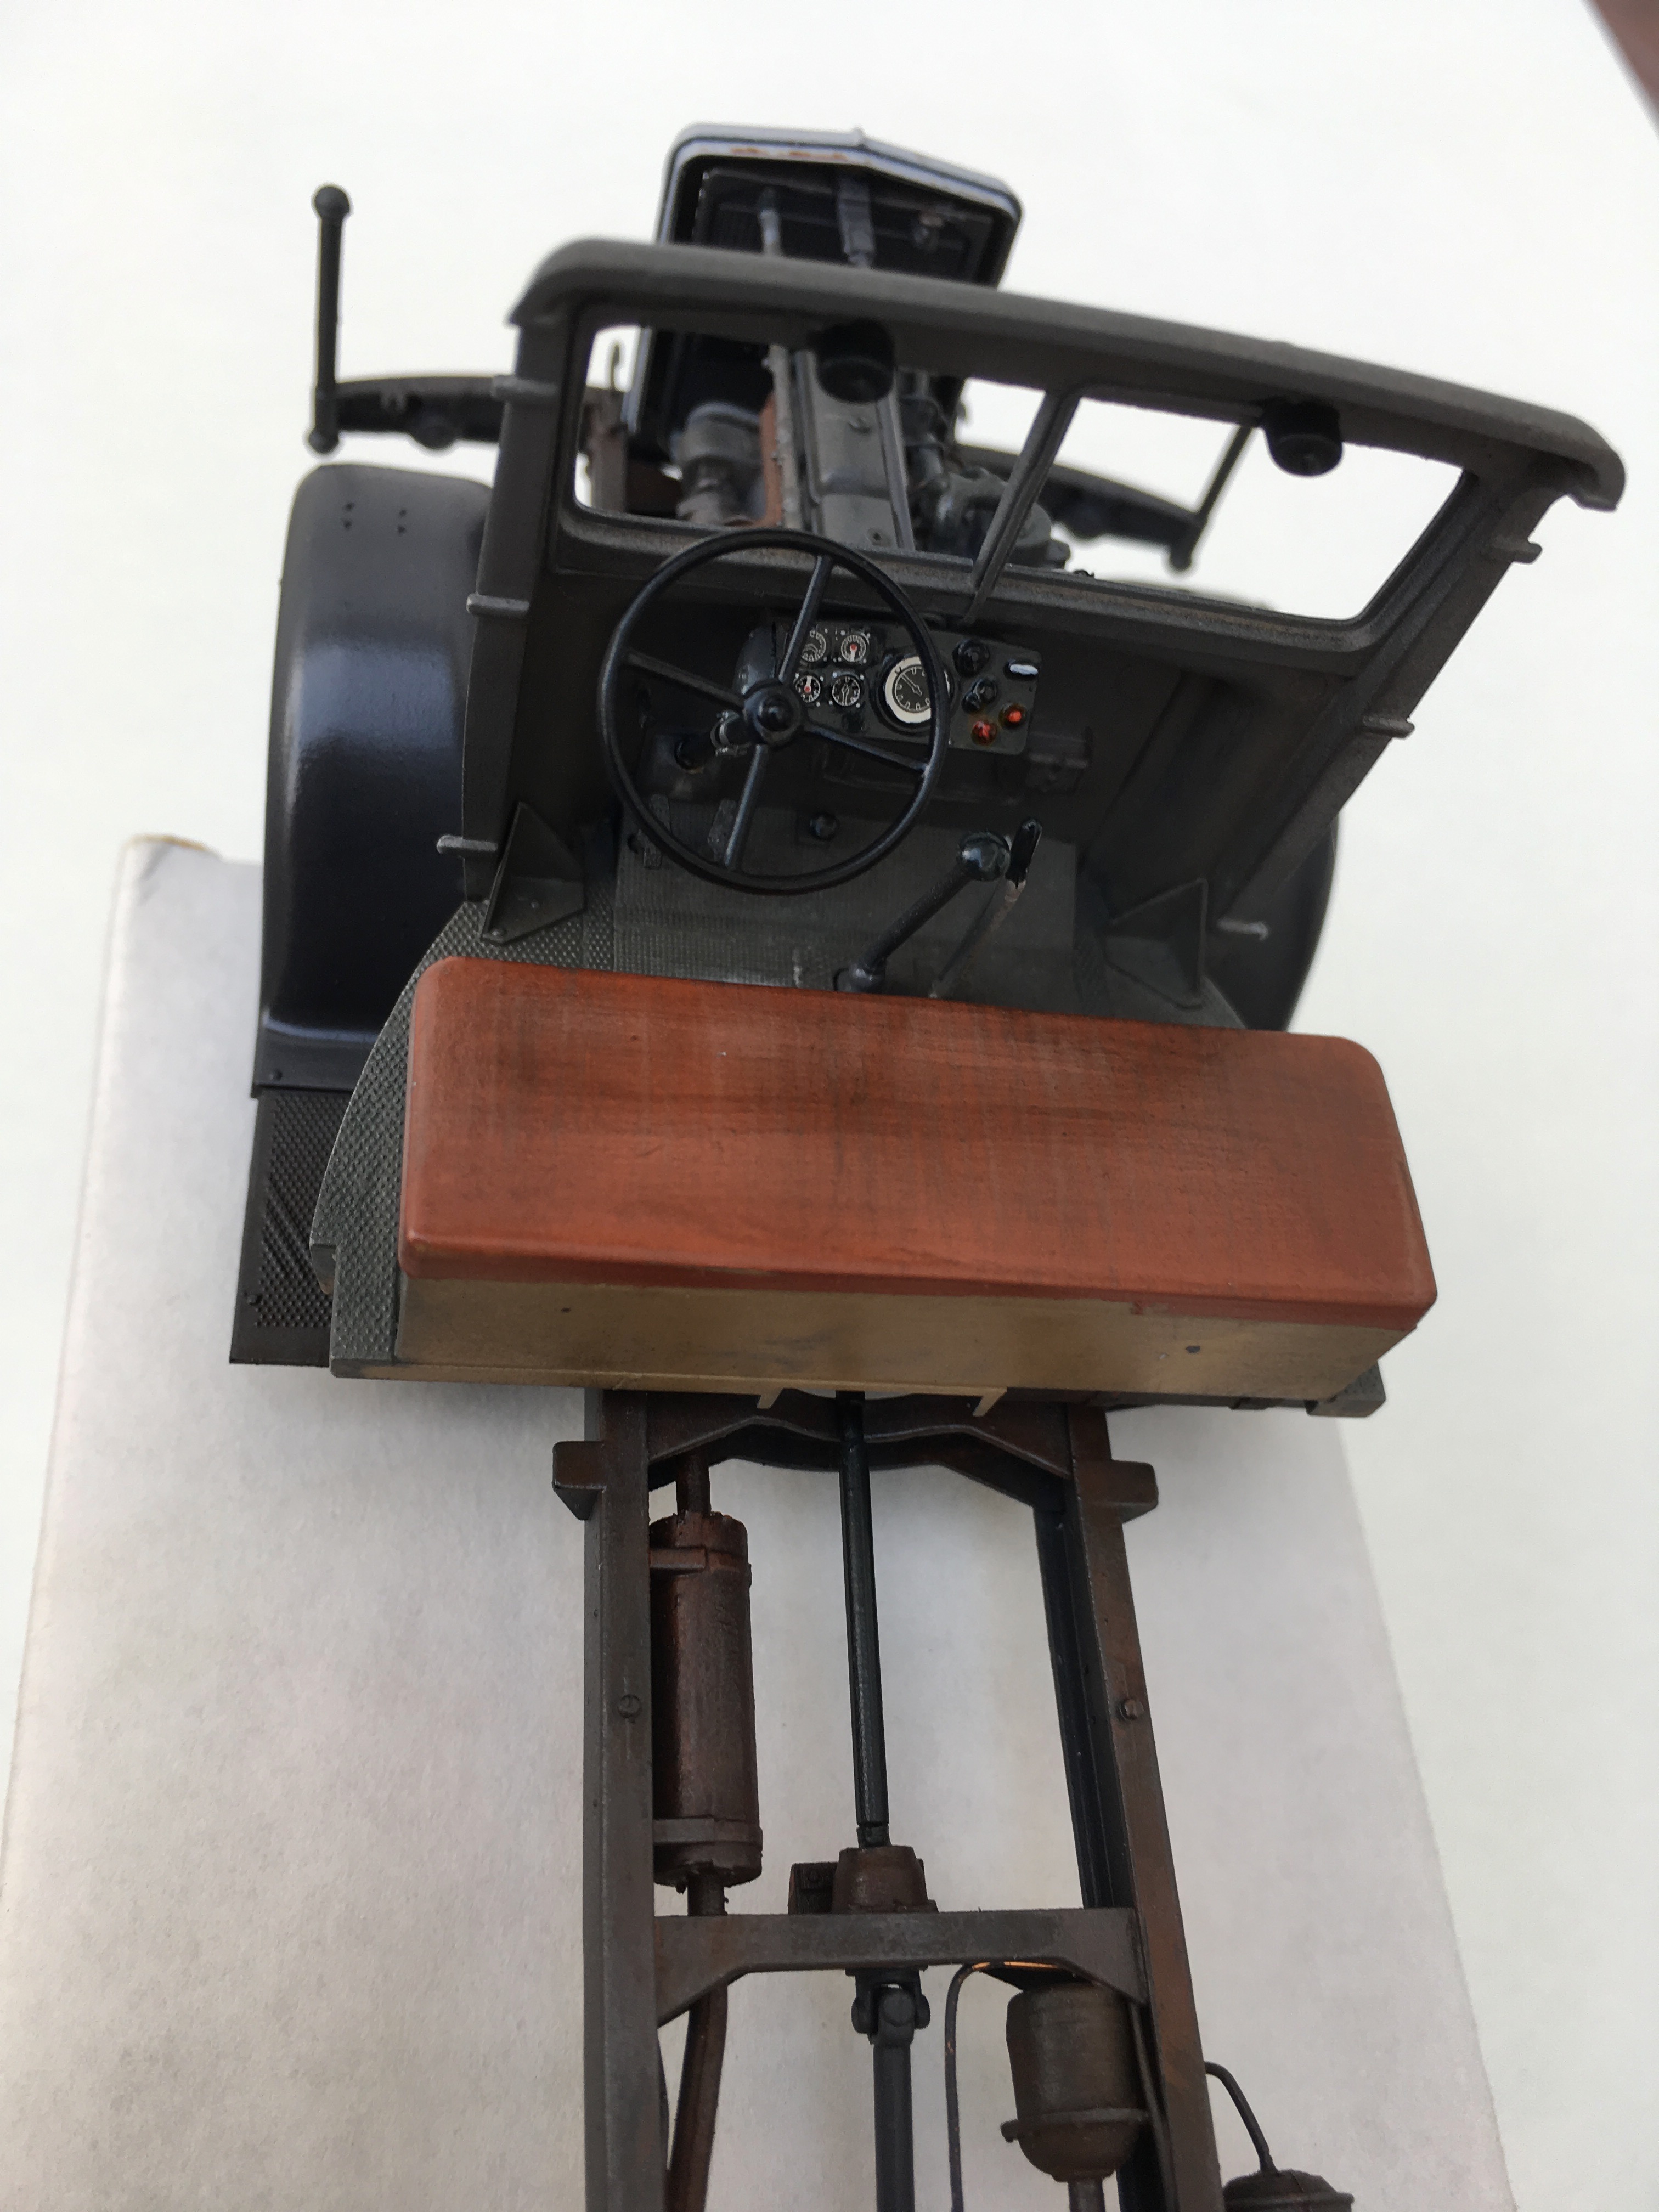
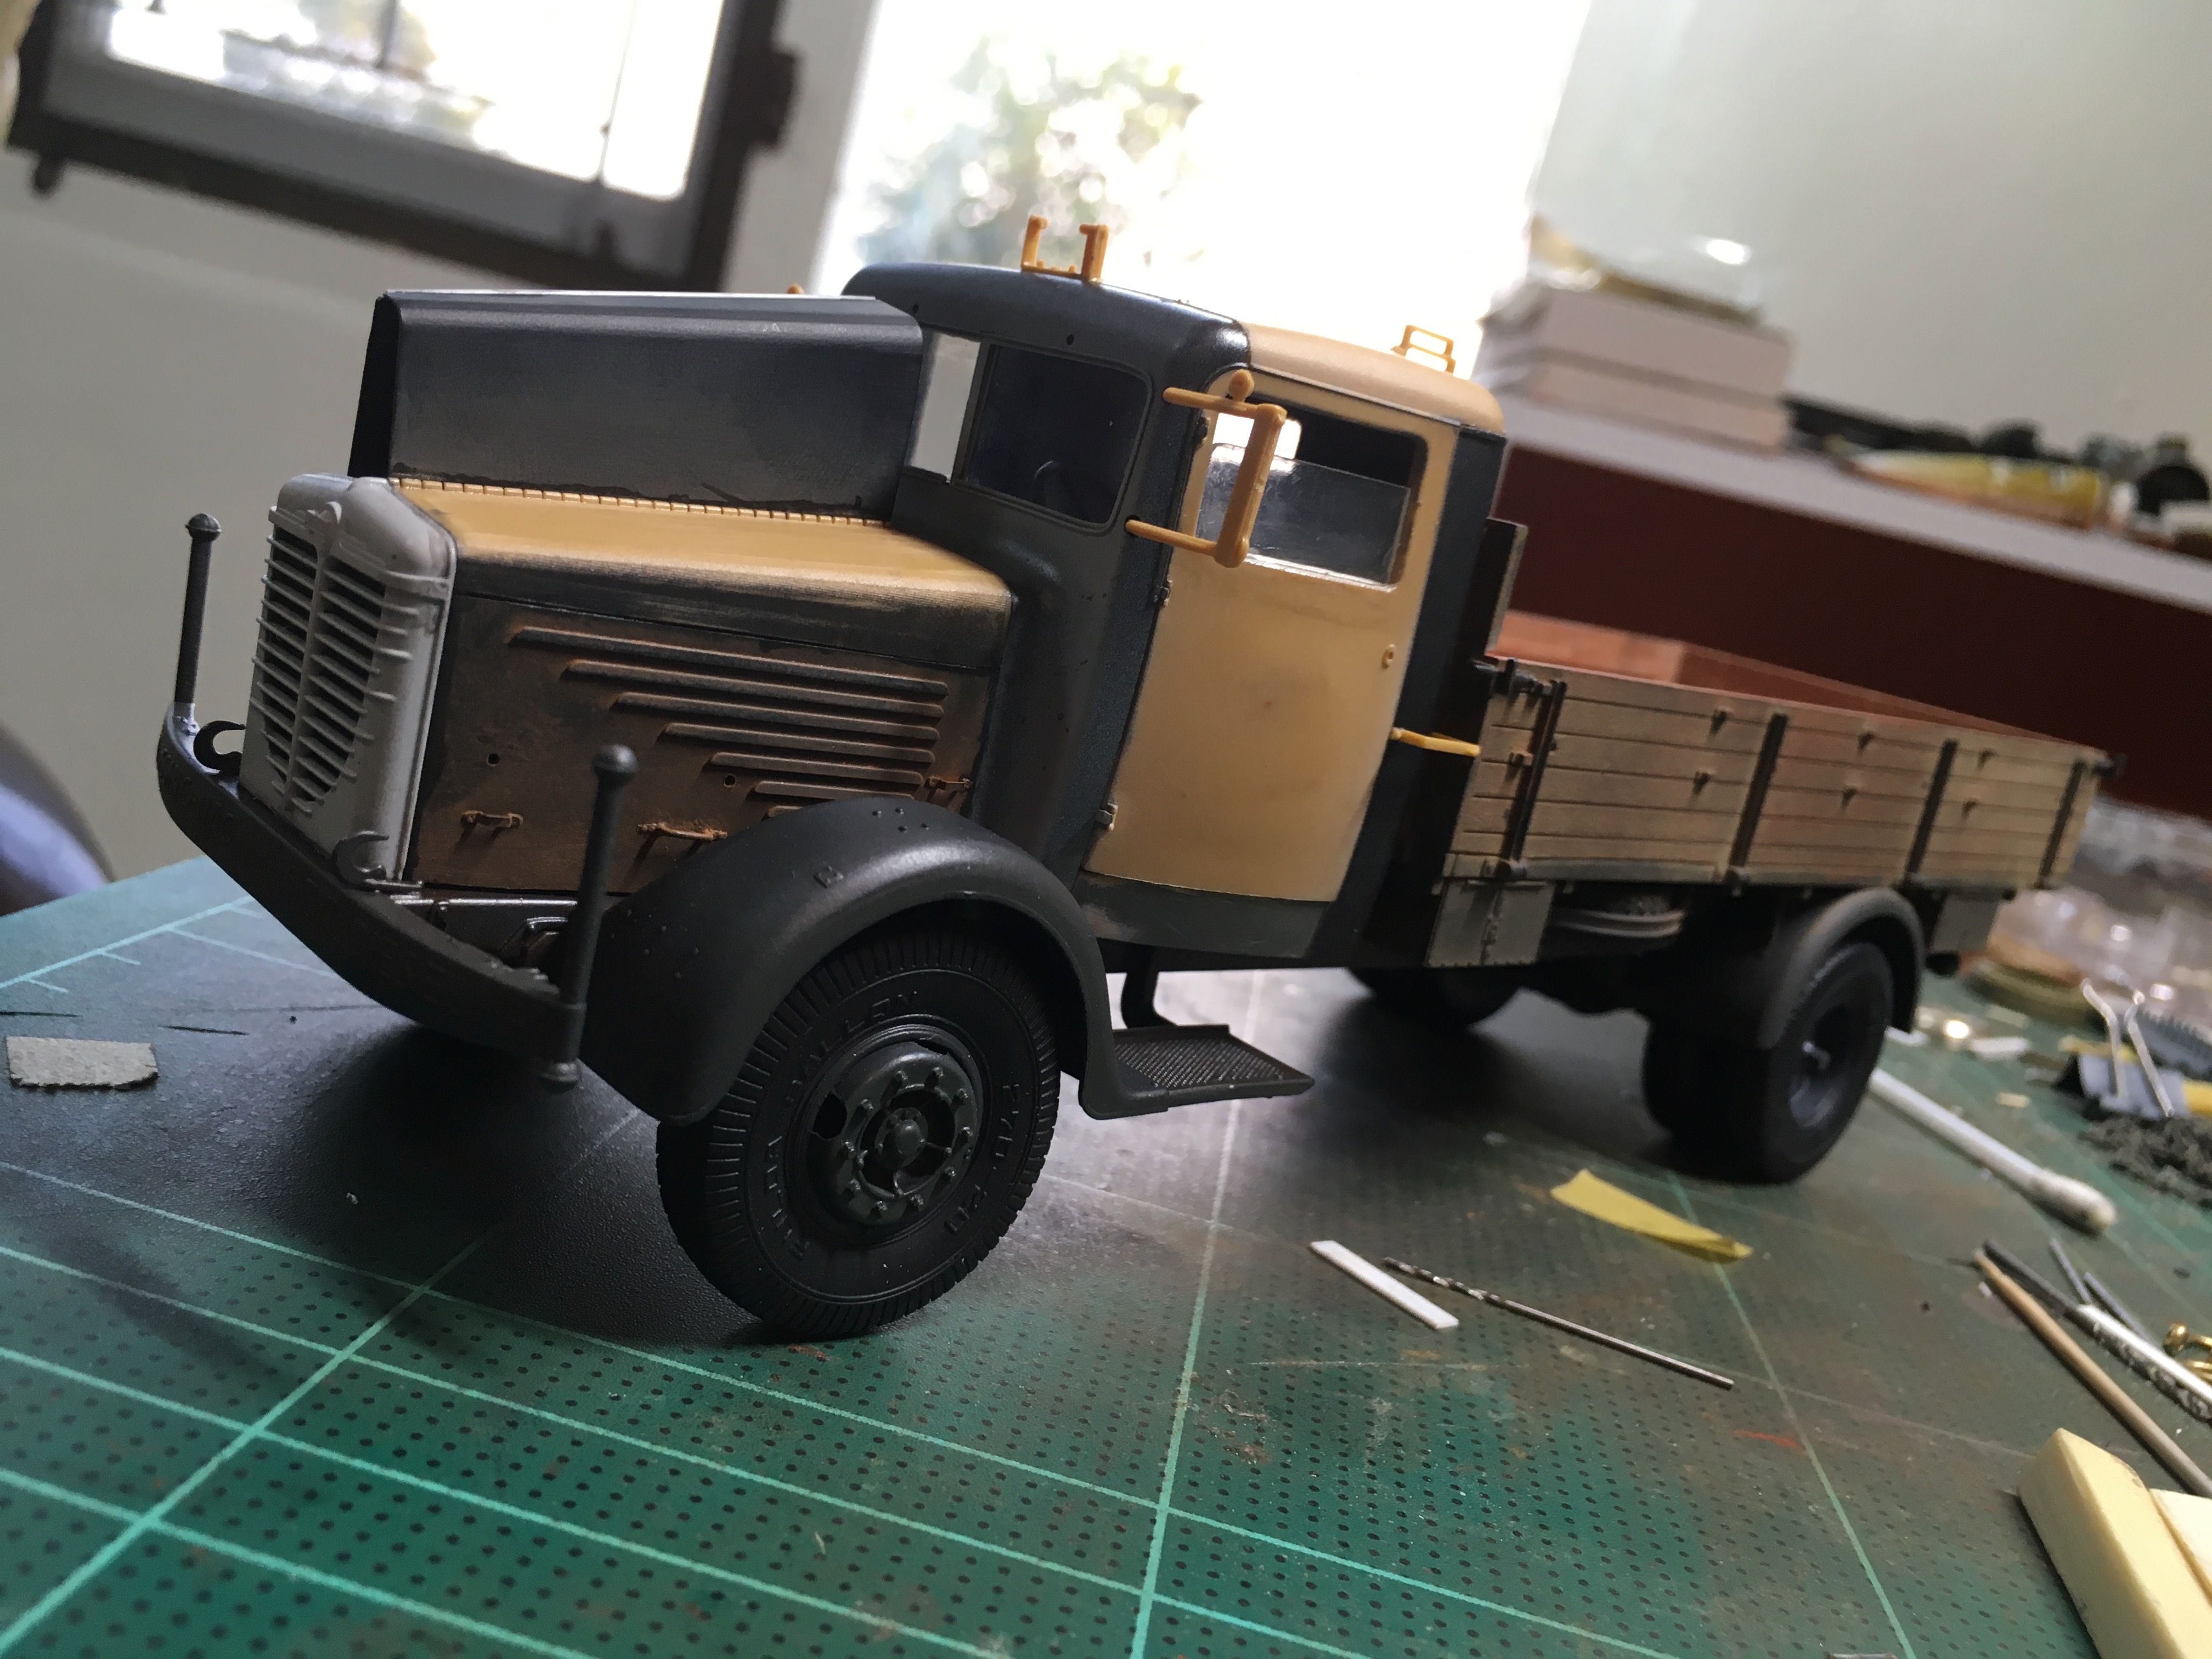
Cabin of the Büssing L4500S.
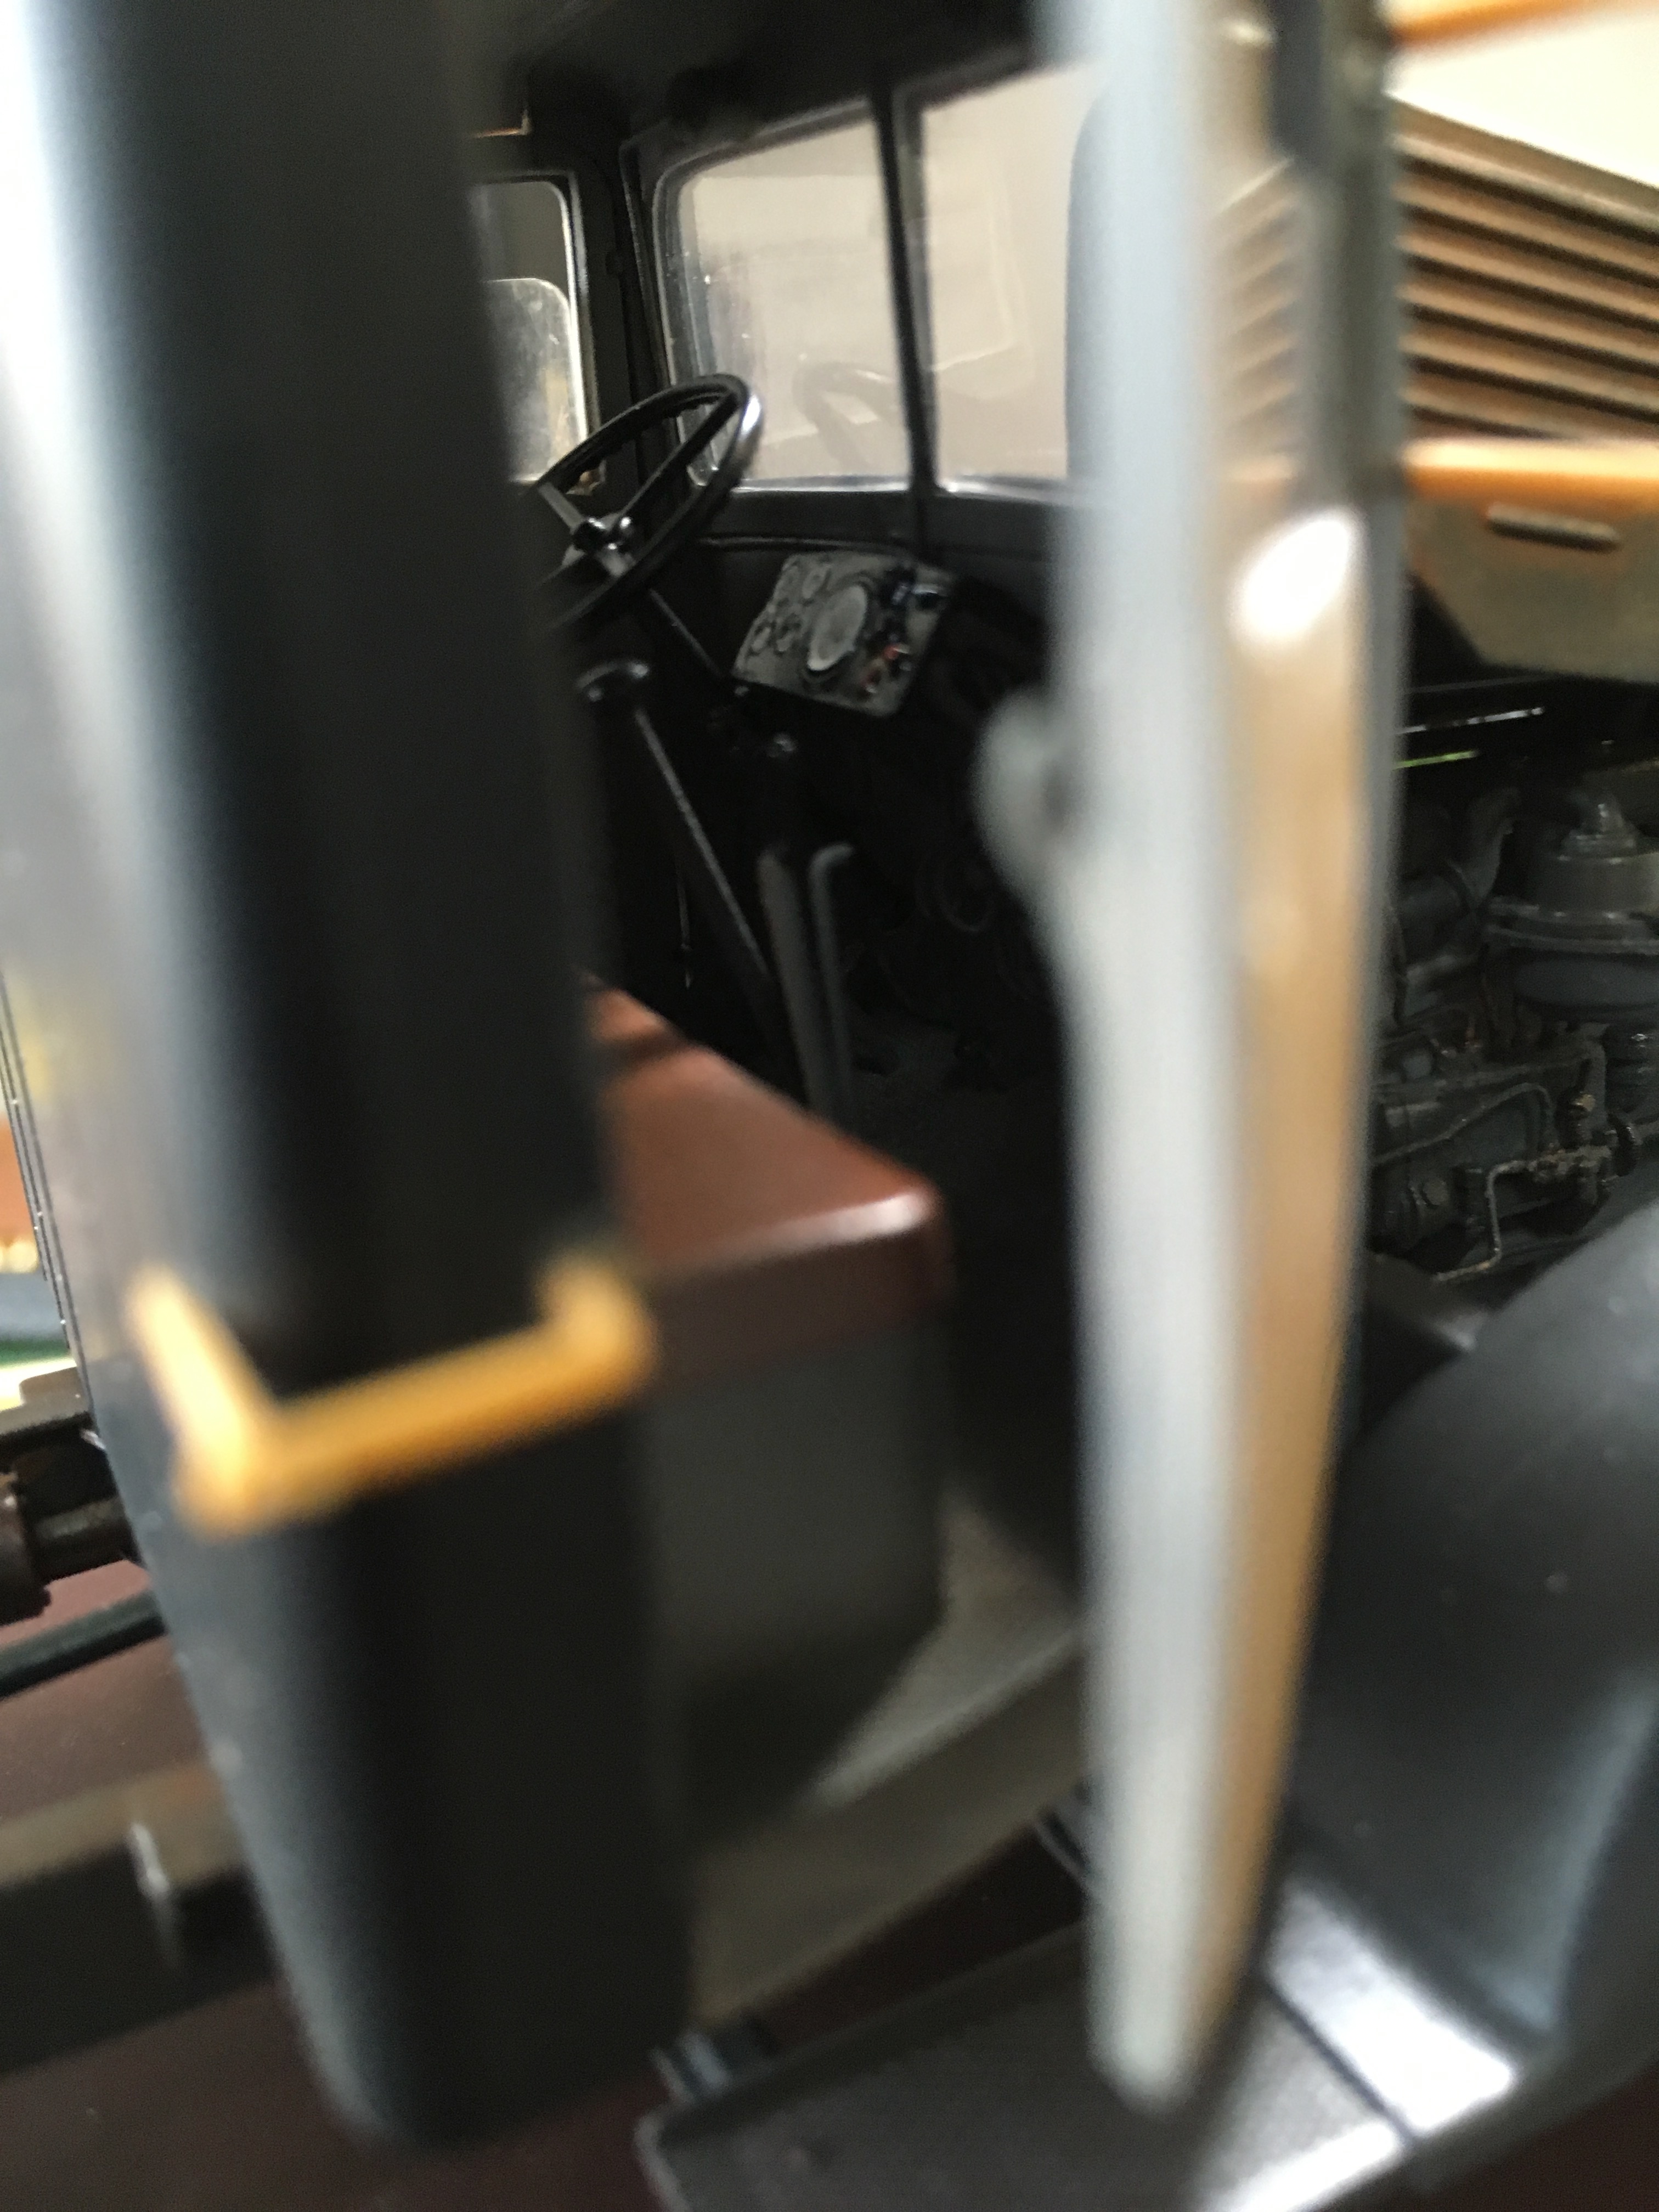
Interior is almost done. Only the dashboard needs some decals. They are not provided with the kit, but Archer has a great set, which is in my stash. A perfect Sunday morning job.
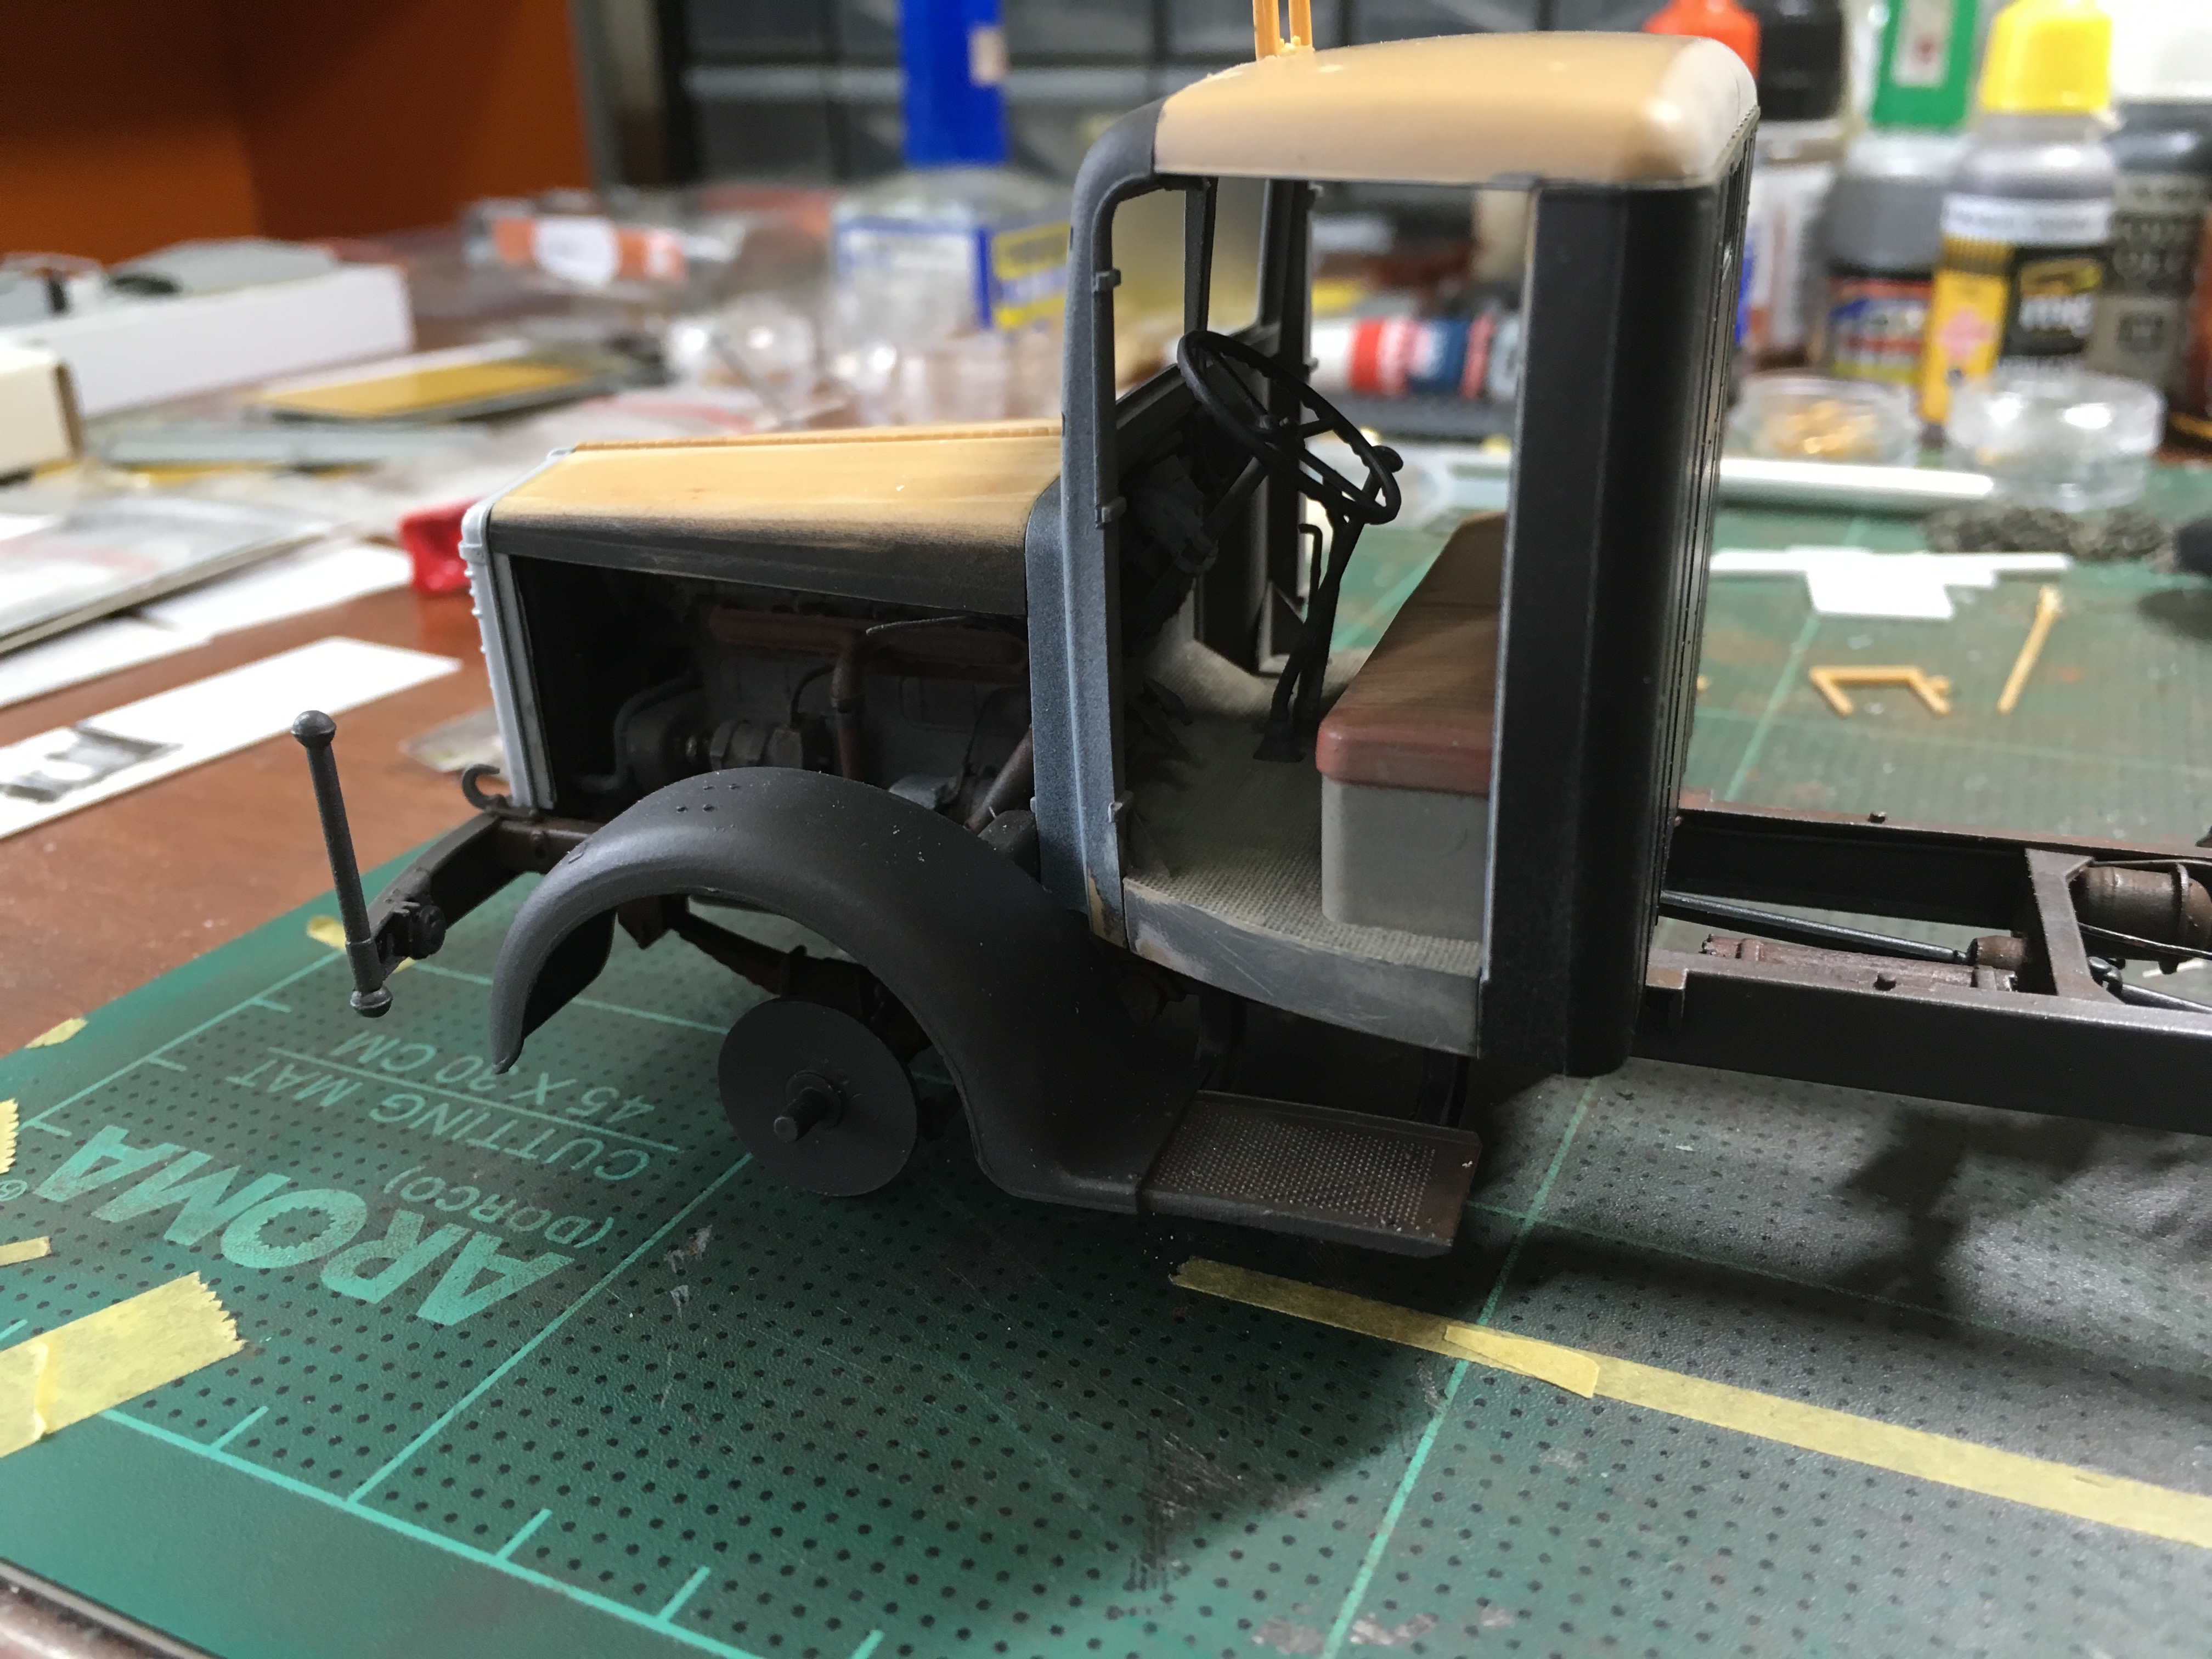
The AFV Club is a great kit, fit is very good. All you need for a good model.
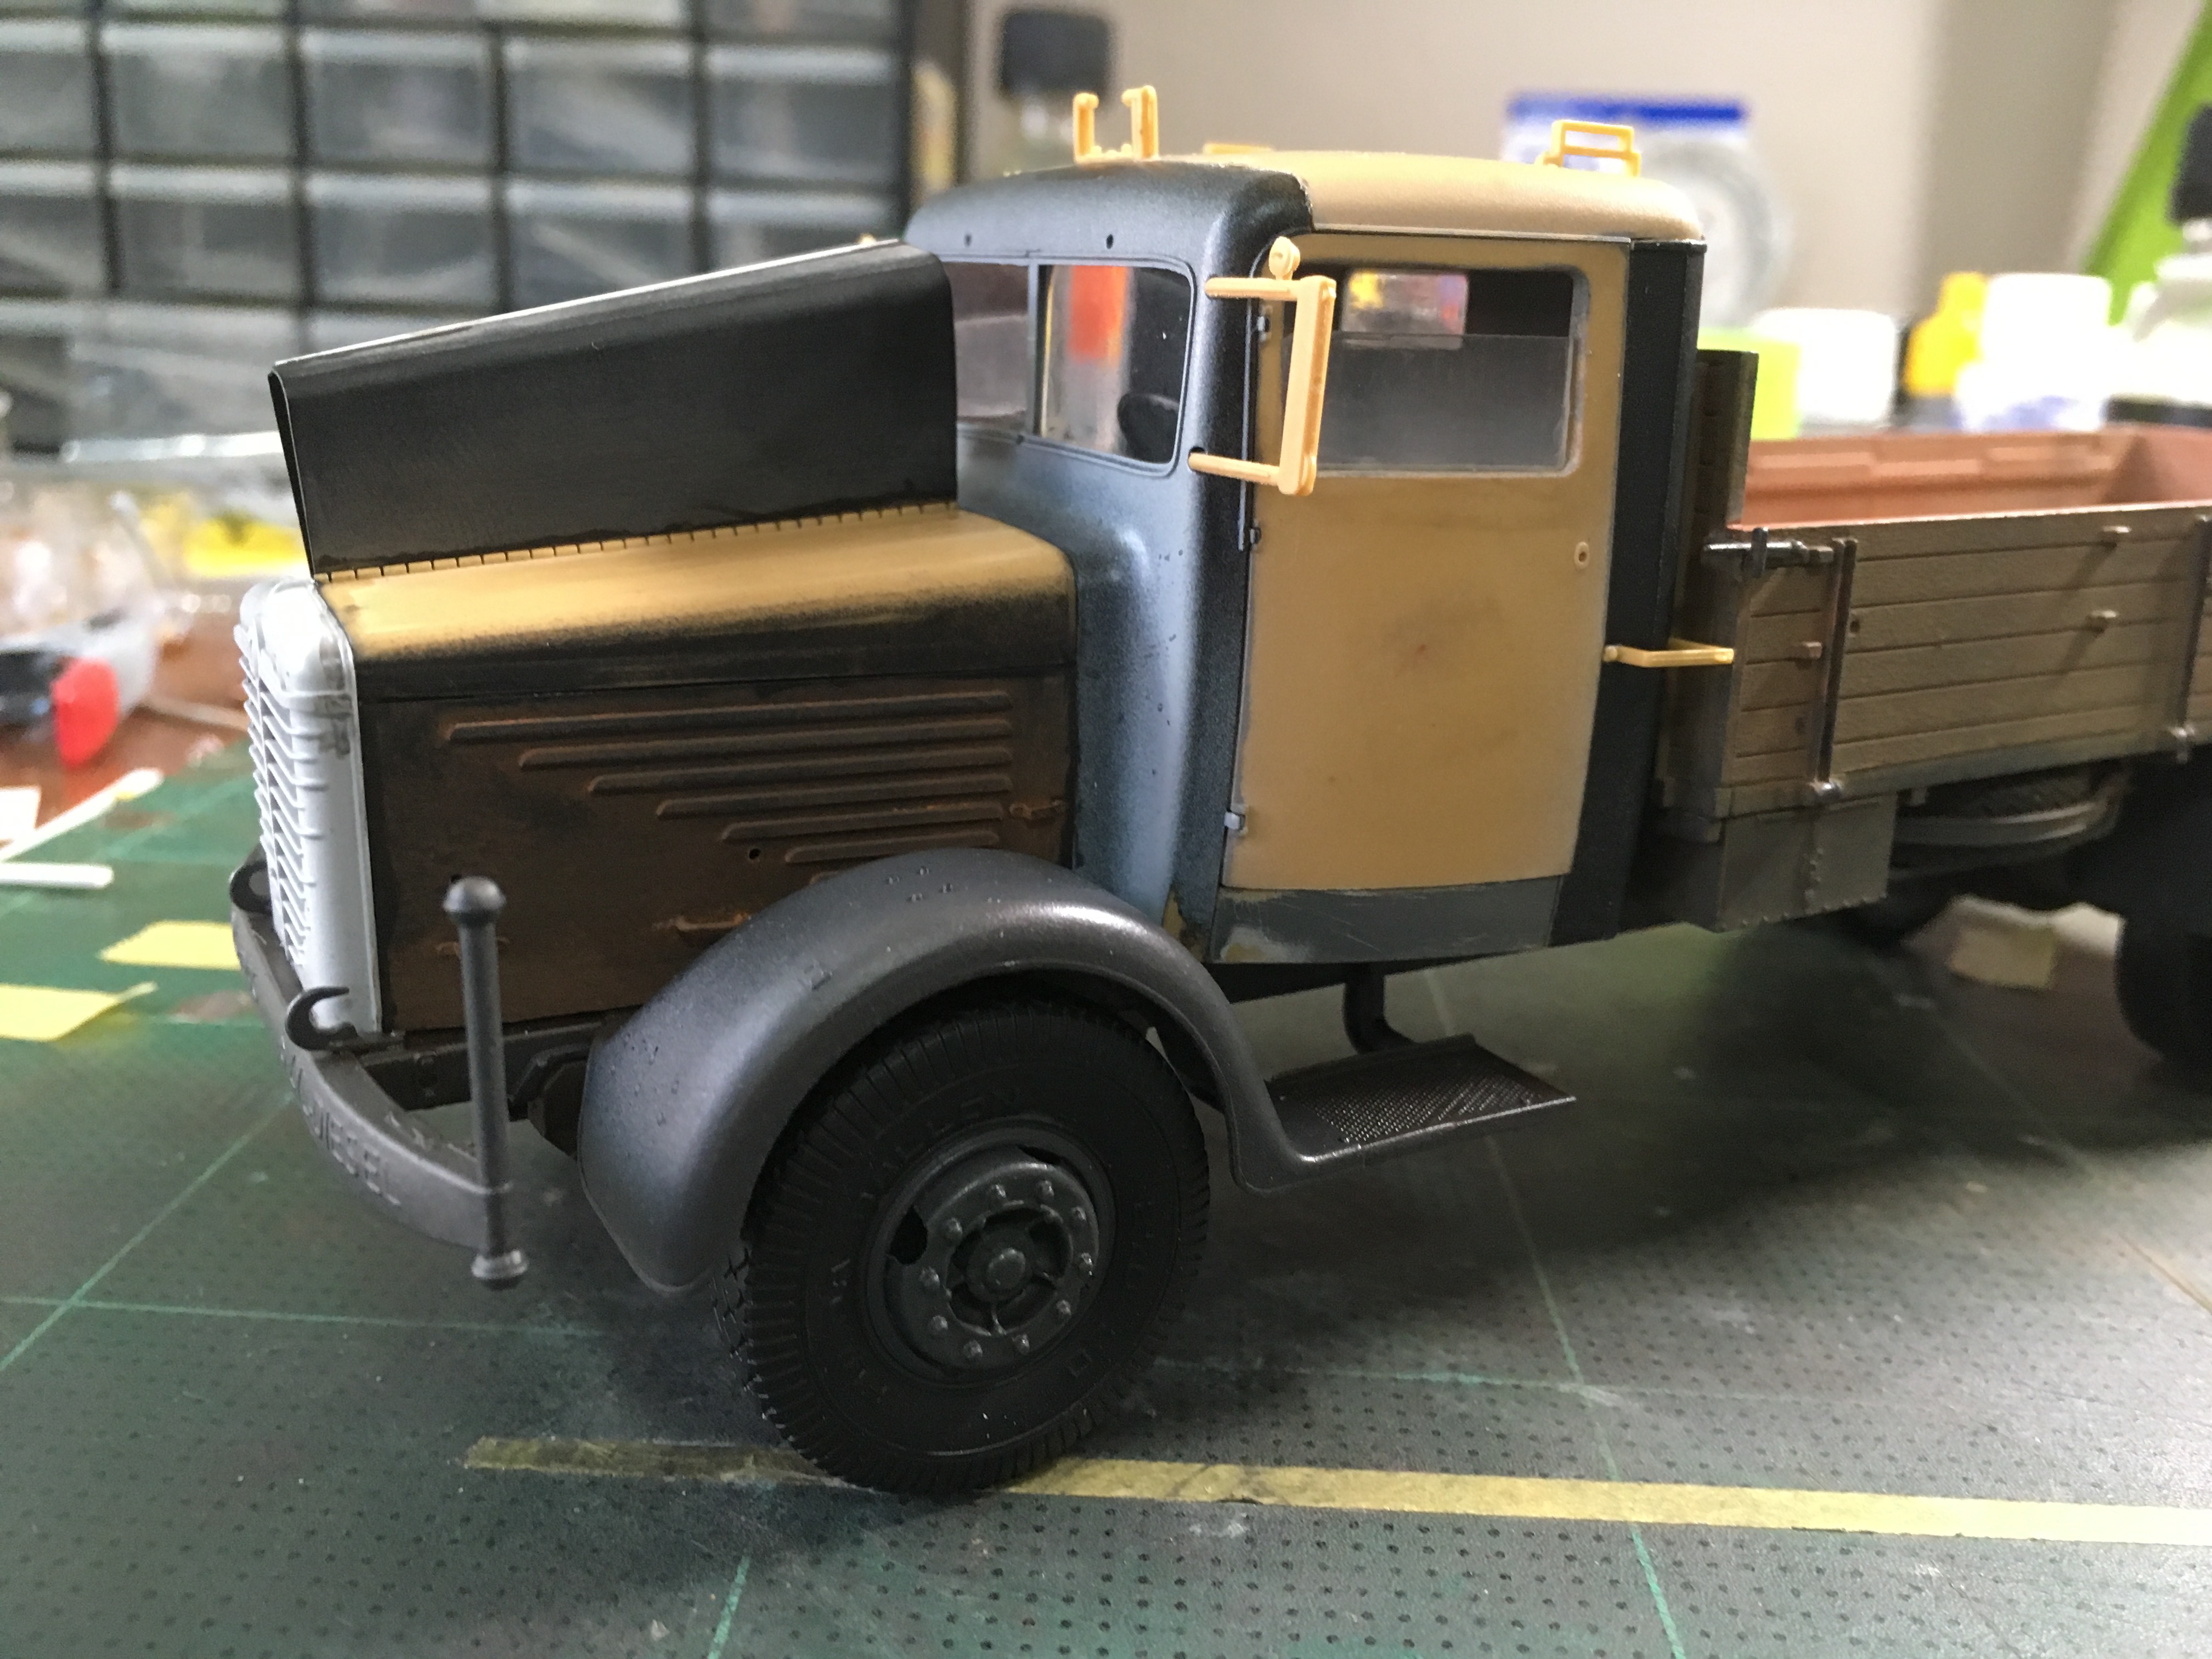
Cabin doors with some extra details
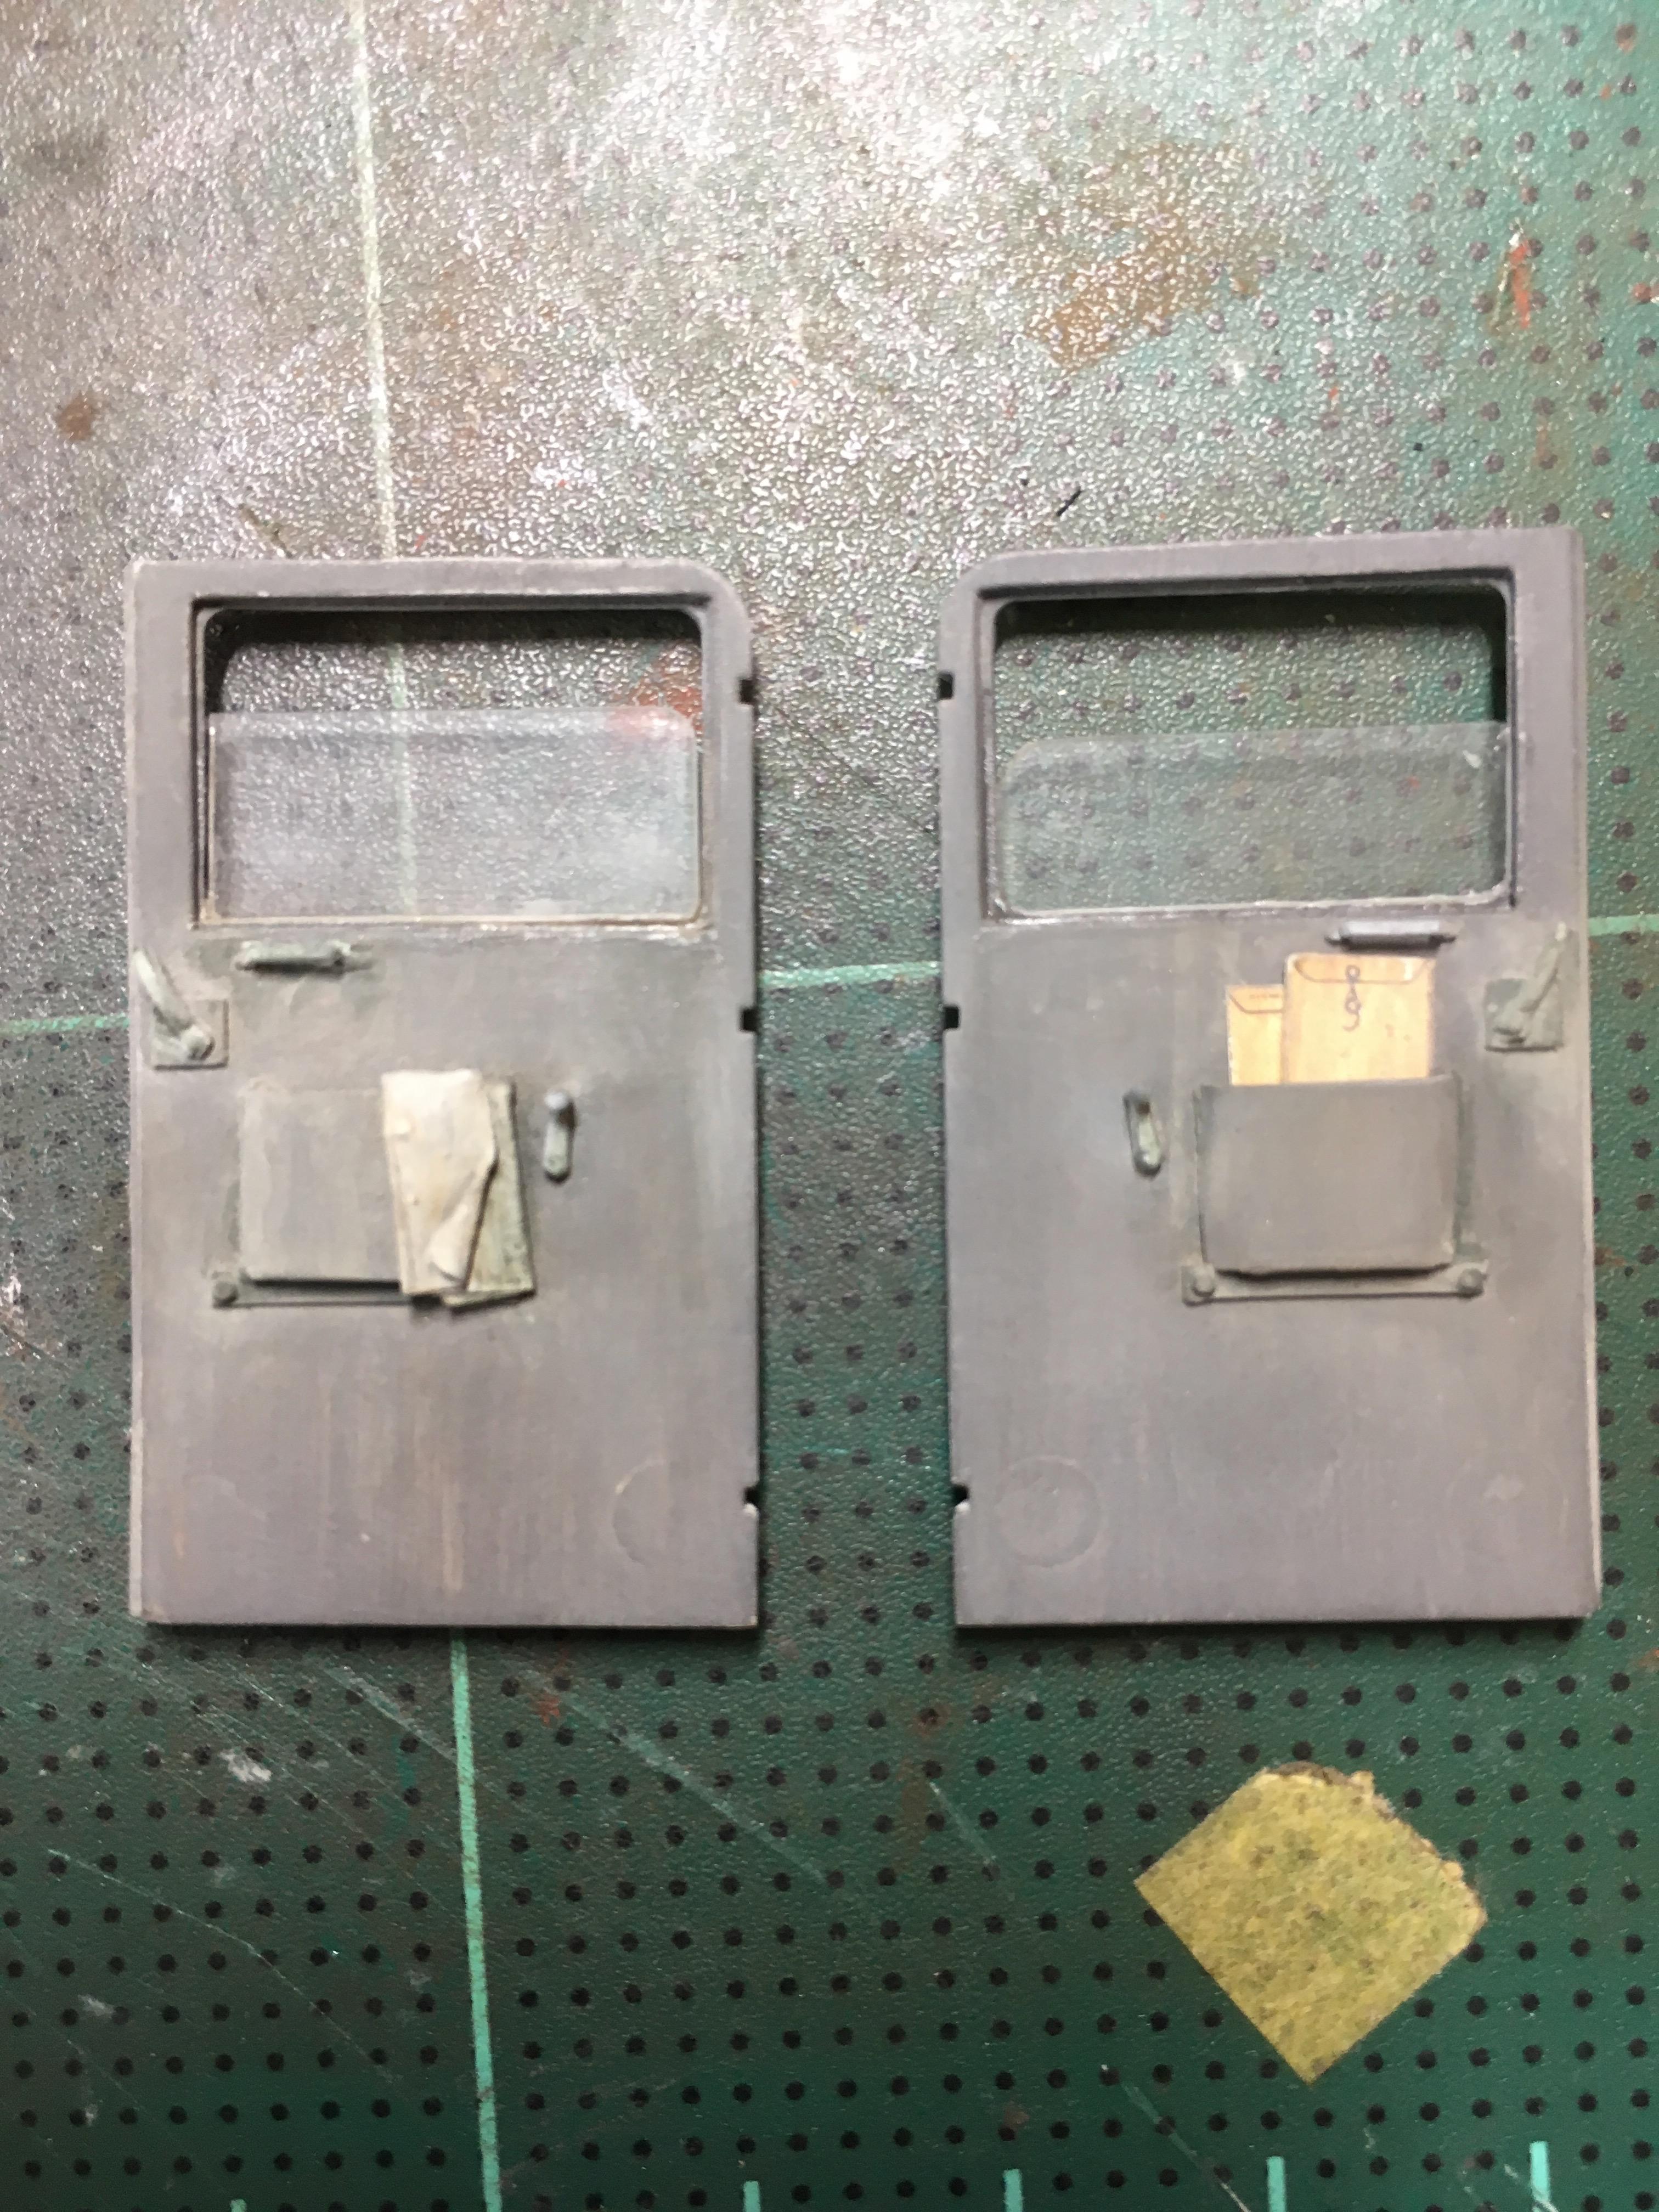
Just a very impressive truck to watch, one of my all time favorites.
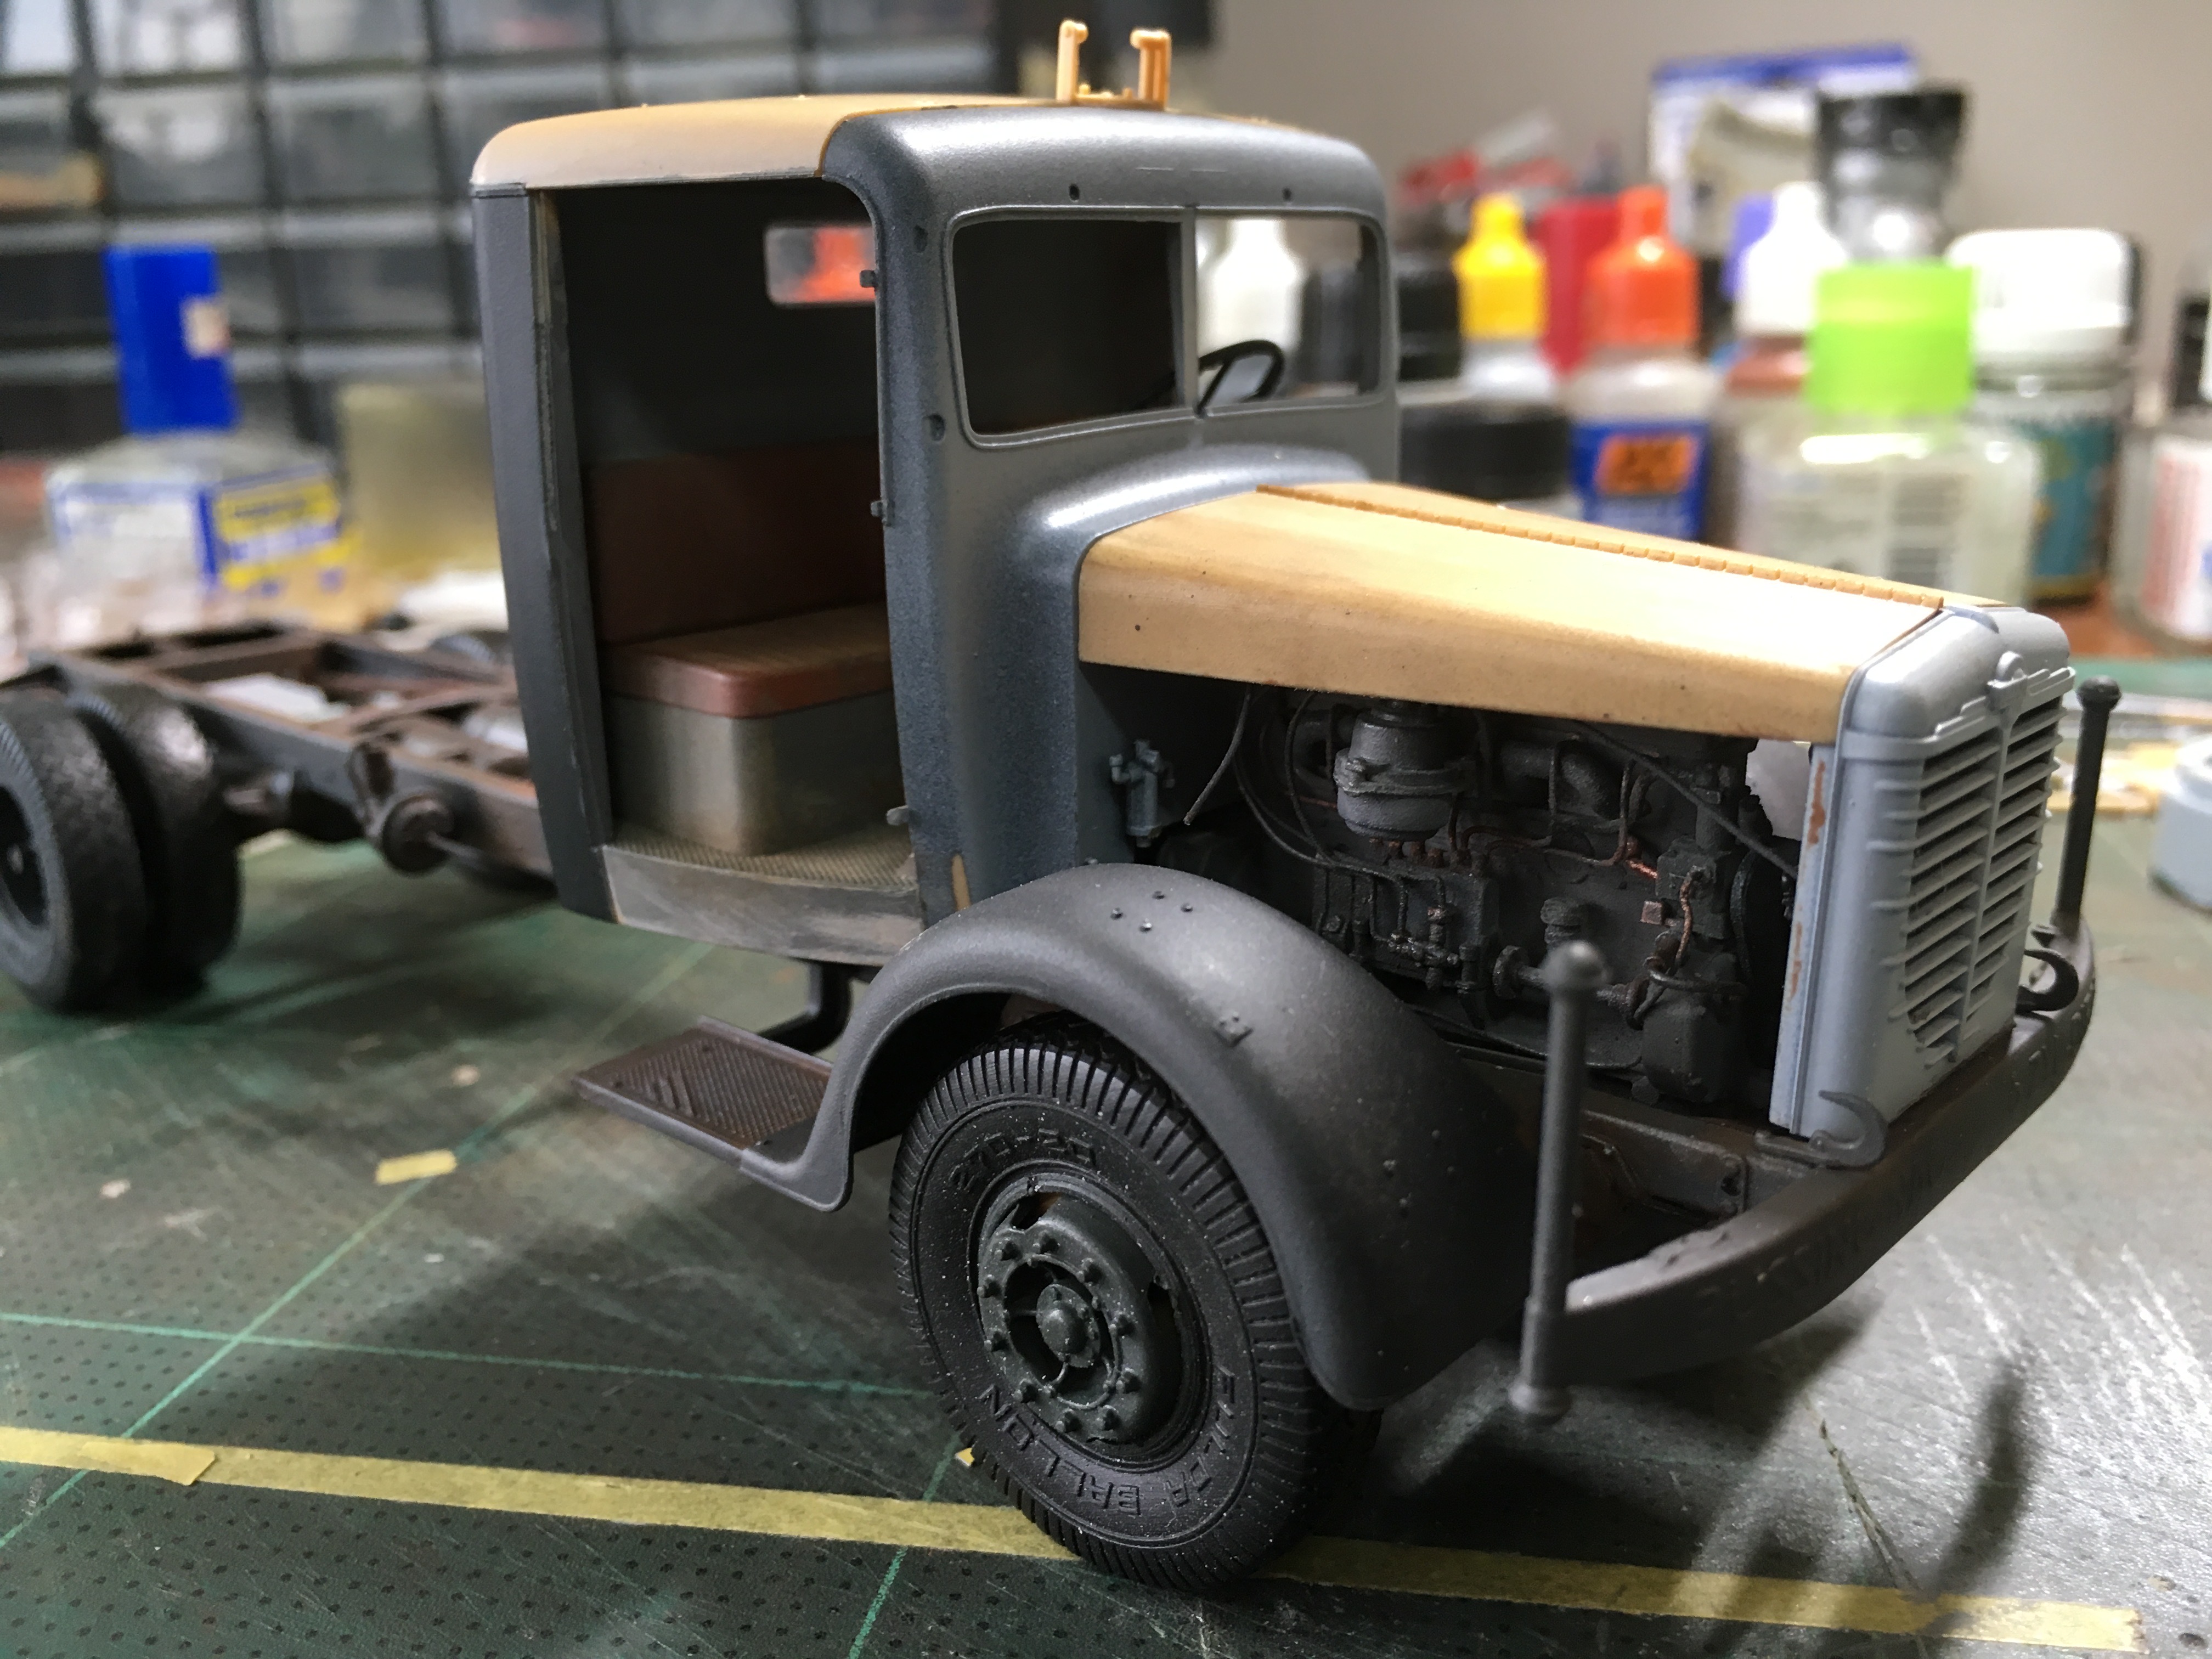
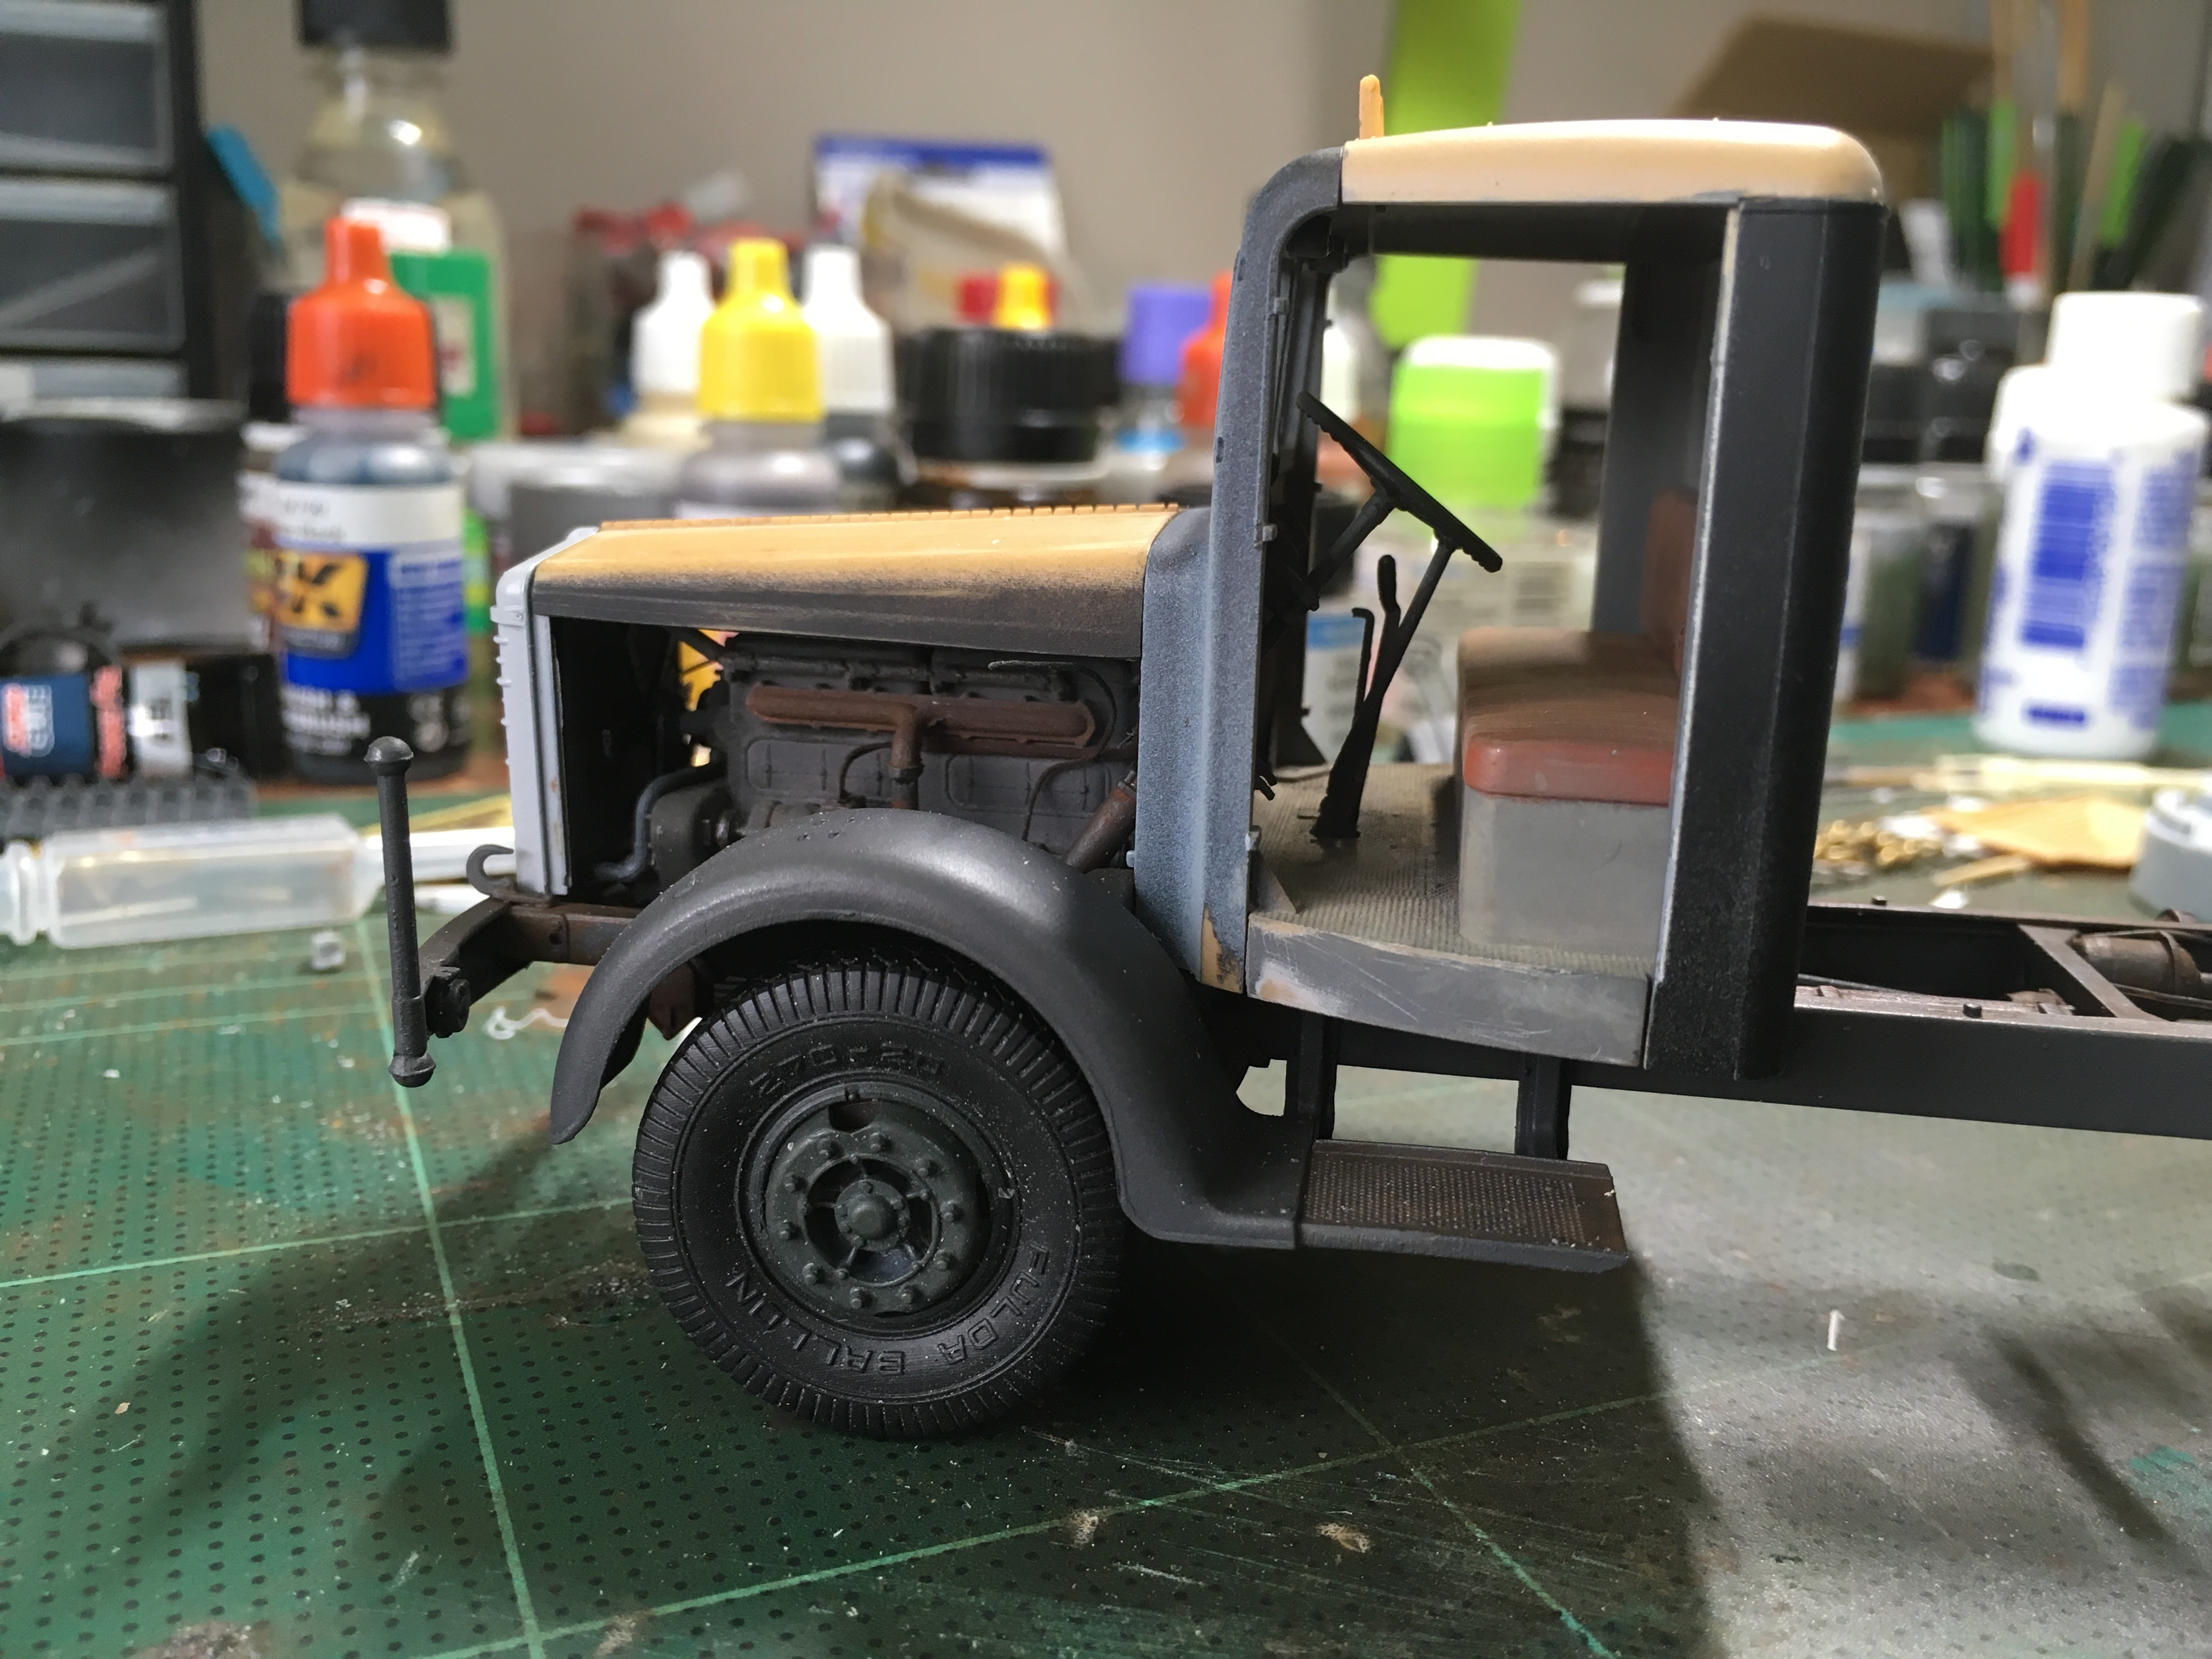
More to come later, going for diner and a couple of beers now.
Enjoy,
Robert Jan
Wisconsin, United States
Joined: April 05, 2007
KitMaker: 2,023 posts
Armorama: 1,234 posts
Posted: Saturday, January 05, 2019 - 01:08 AM UTC
Robert Jan, you have really earned those couple of beers ! I've been following along and enjoying all of your efforts.
Thanks for sharing !


On the bench :
A whole bunch of figures, Too many half built kits and a (gasp) wing thing
Pennsylvania, United States
Joined: March 27, 2006
KitMaker: 65 posts
Armorama: 44 posts
Posted: Saturday, January 05, 2019 - 02:25 AM UTC
Quoted Text
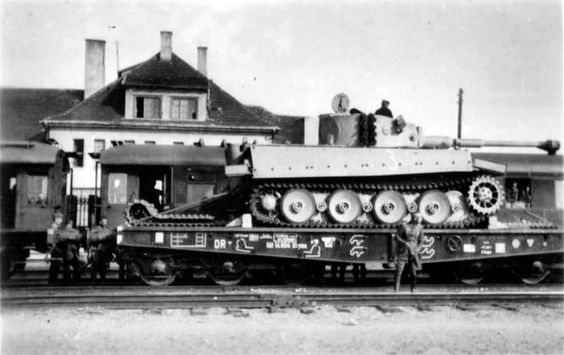
Tiger 1 on SSys.
Kind regards,
Robert Jan
Good morning,
From a very absent poster, as I stare at the picture from December 24th, it APPEARS that there is a third axle on that left-hand bogie. If you measure from the center of the car to the nearest axle on the right, then there should be another axle inboard of the 2 that are on the left. Wouldn't that make it an SSyms?
Back to sleep.
Alan
Bangkok, Thailand / ไทย
Joined: September 17, 2013
KitMaker: 1,617 posts
Armorama: 1,150 posts
Posted: Saturday, January 05, 2019 - 03:30 AM UTC
You have a point. did not see the glimpse of the length the bogies. Thanks for the eye balling on that. Makes me want to... but where to purchase an accurate flatbed that can carry my Tigers.

Got a set from Voyager, came in yesterday, just want to try for a scratch build, using the Trumpeter as a guide.
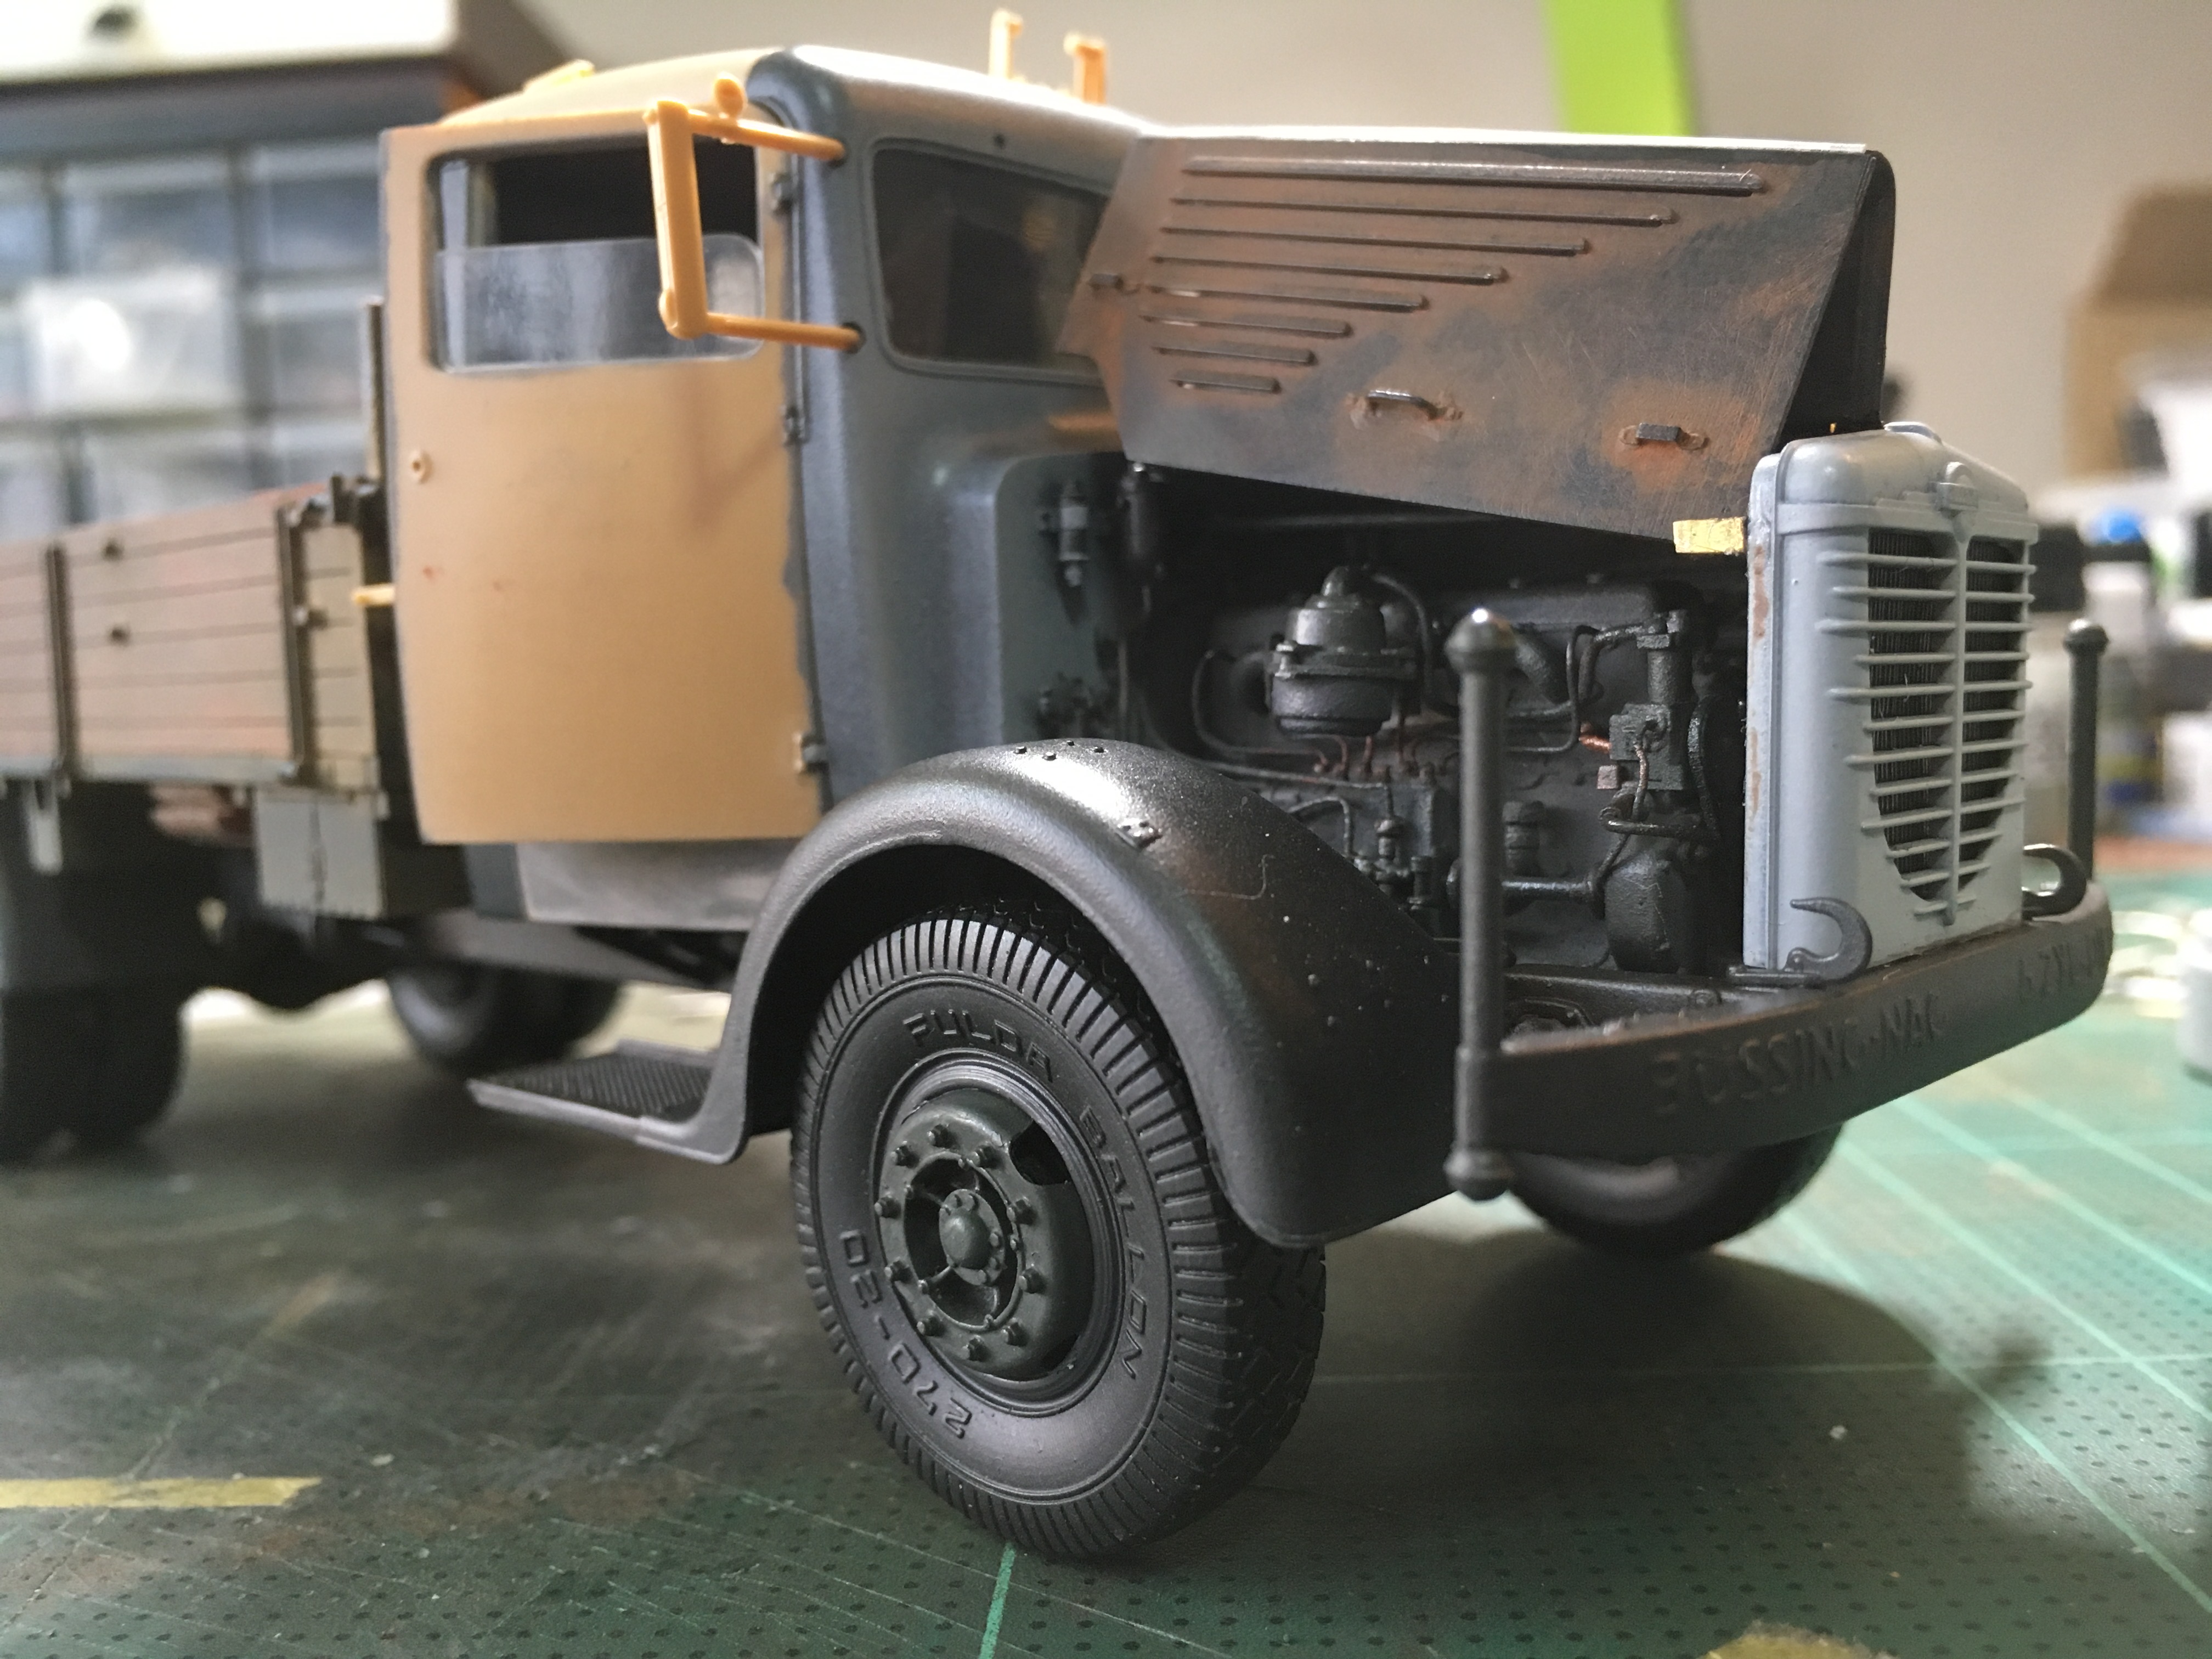
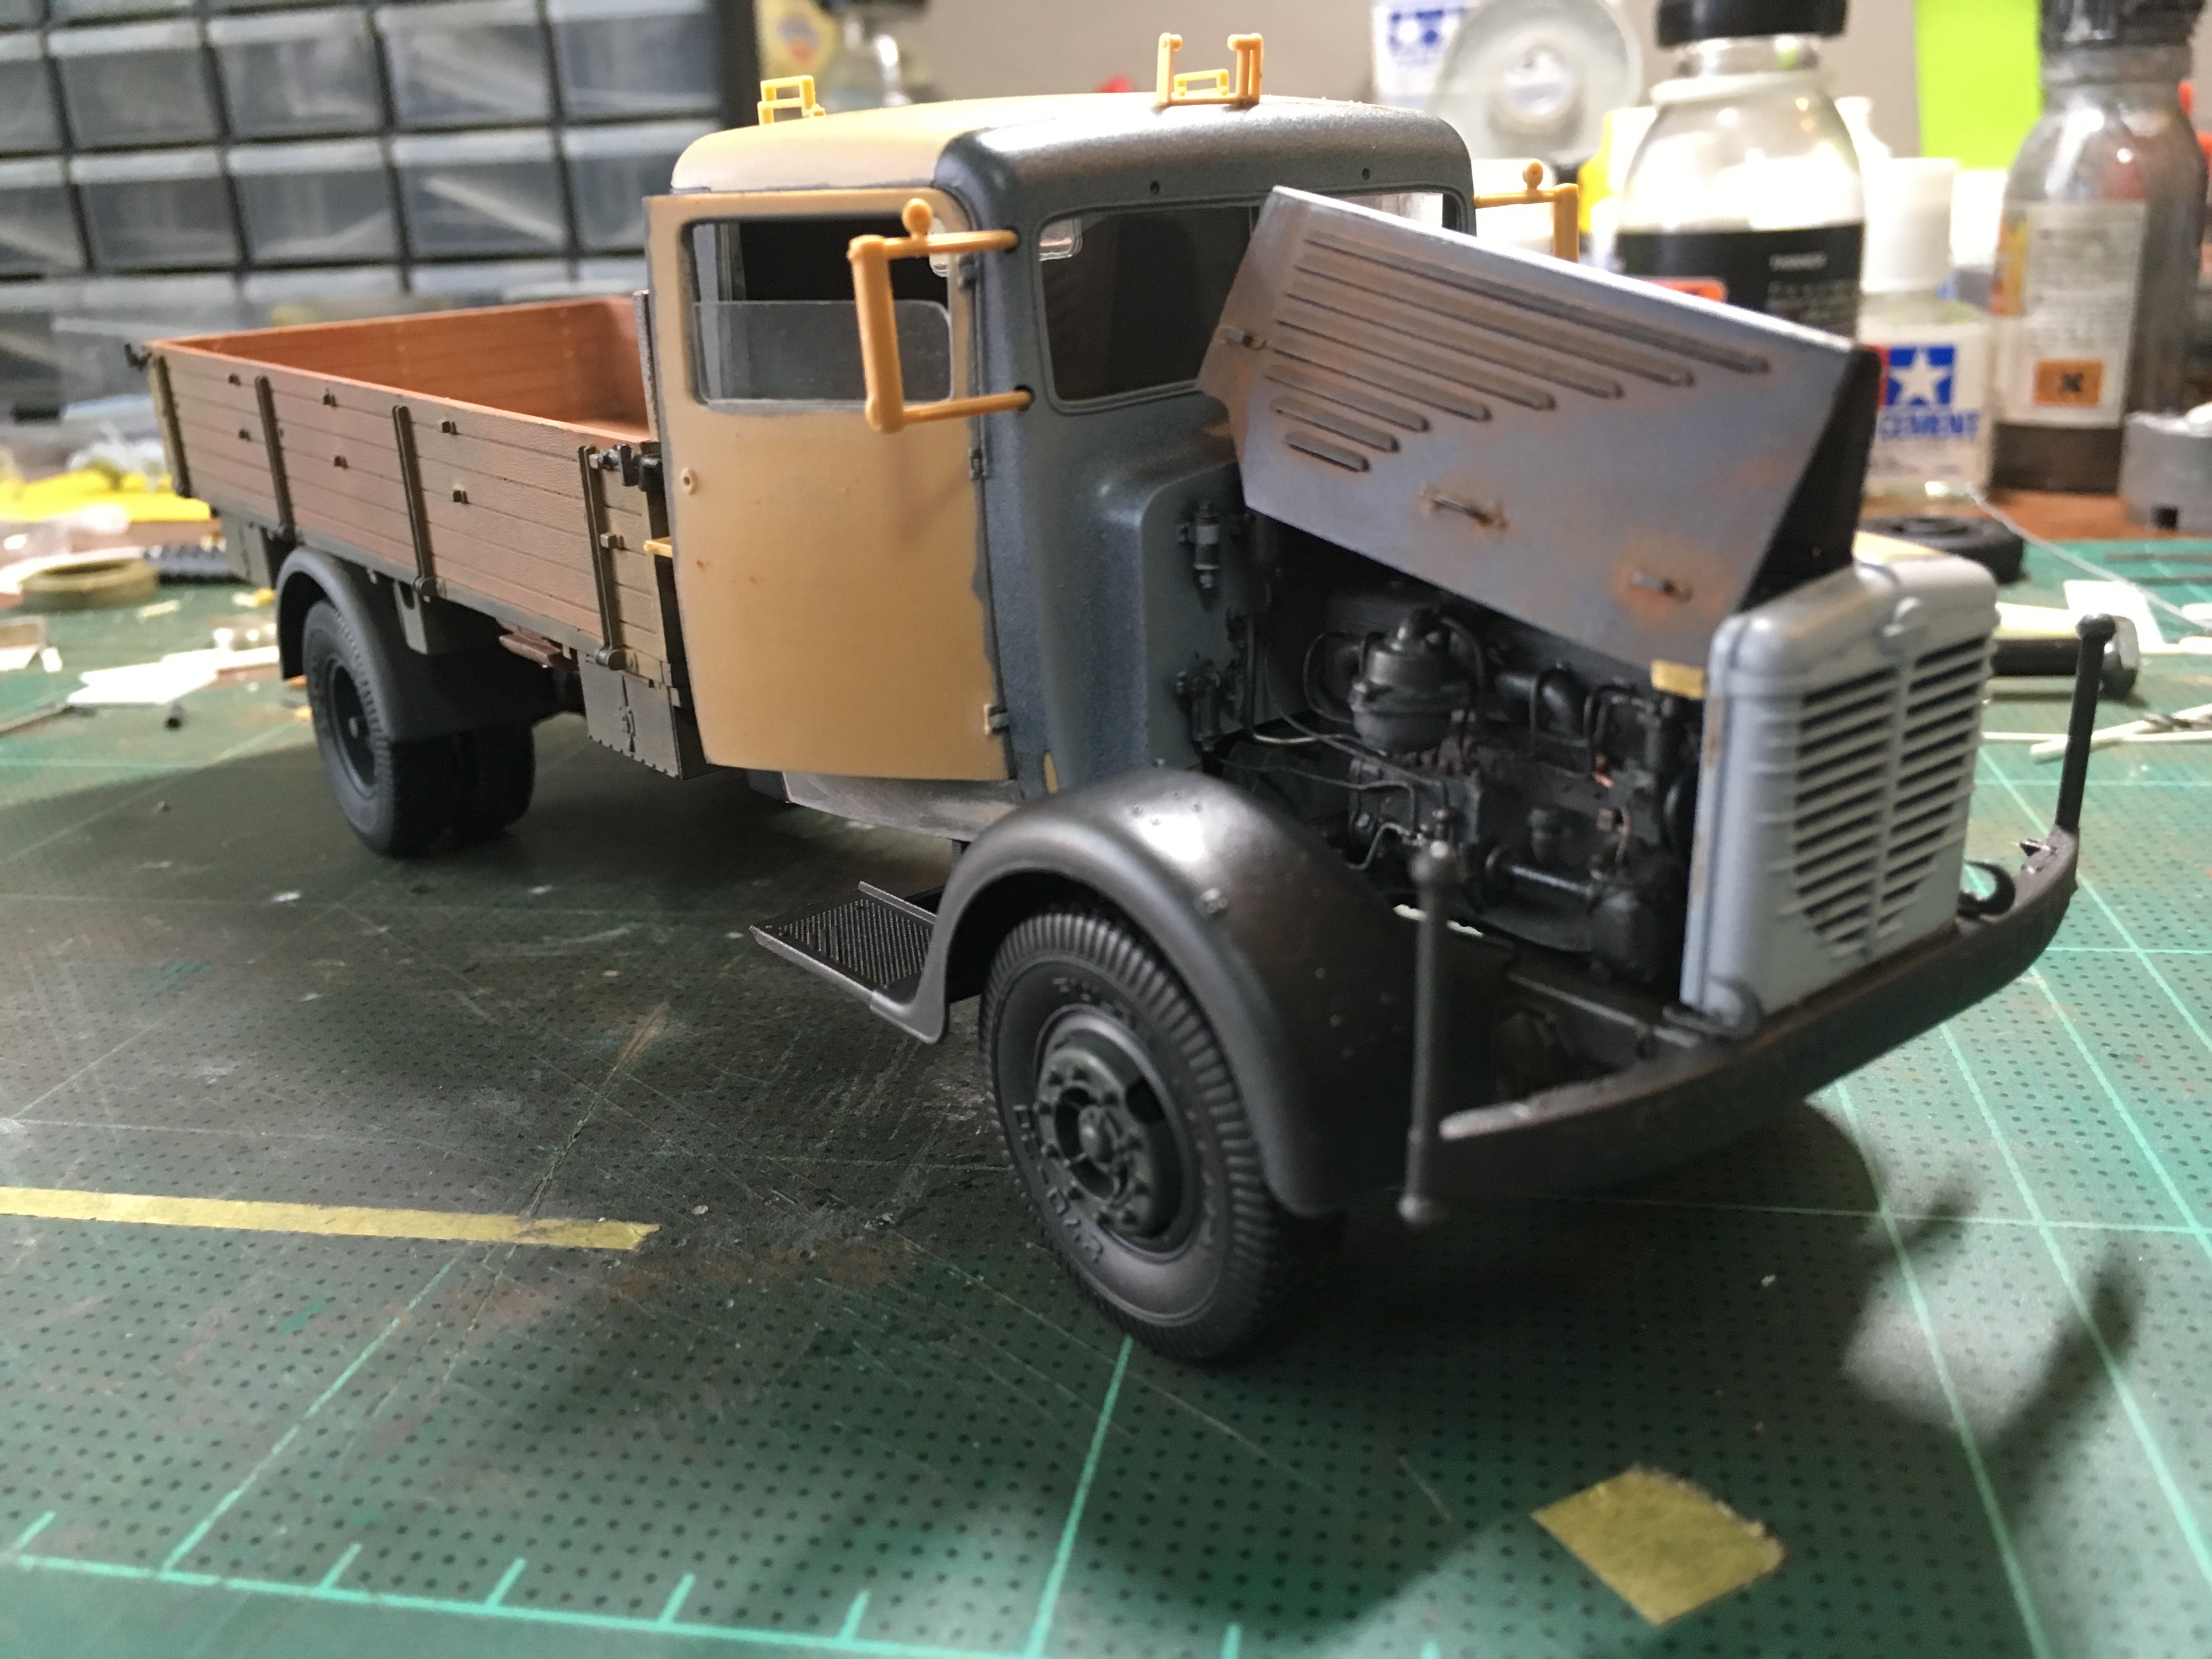
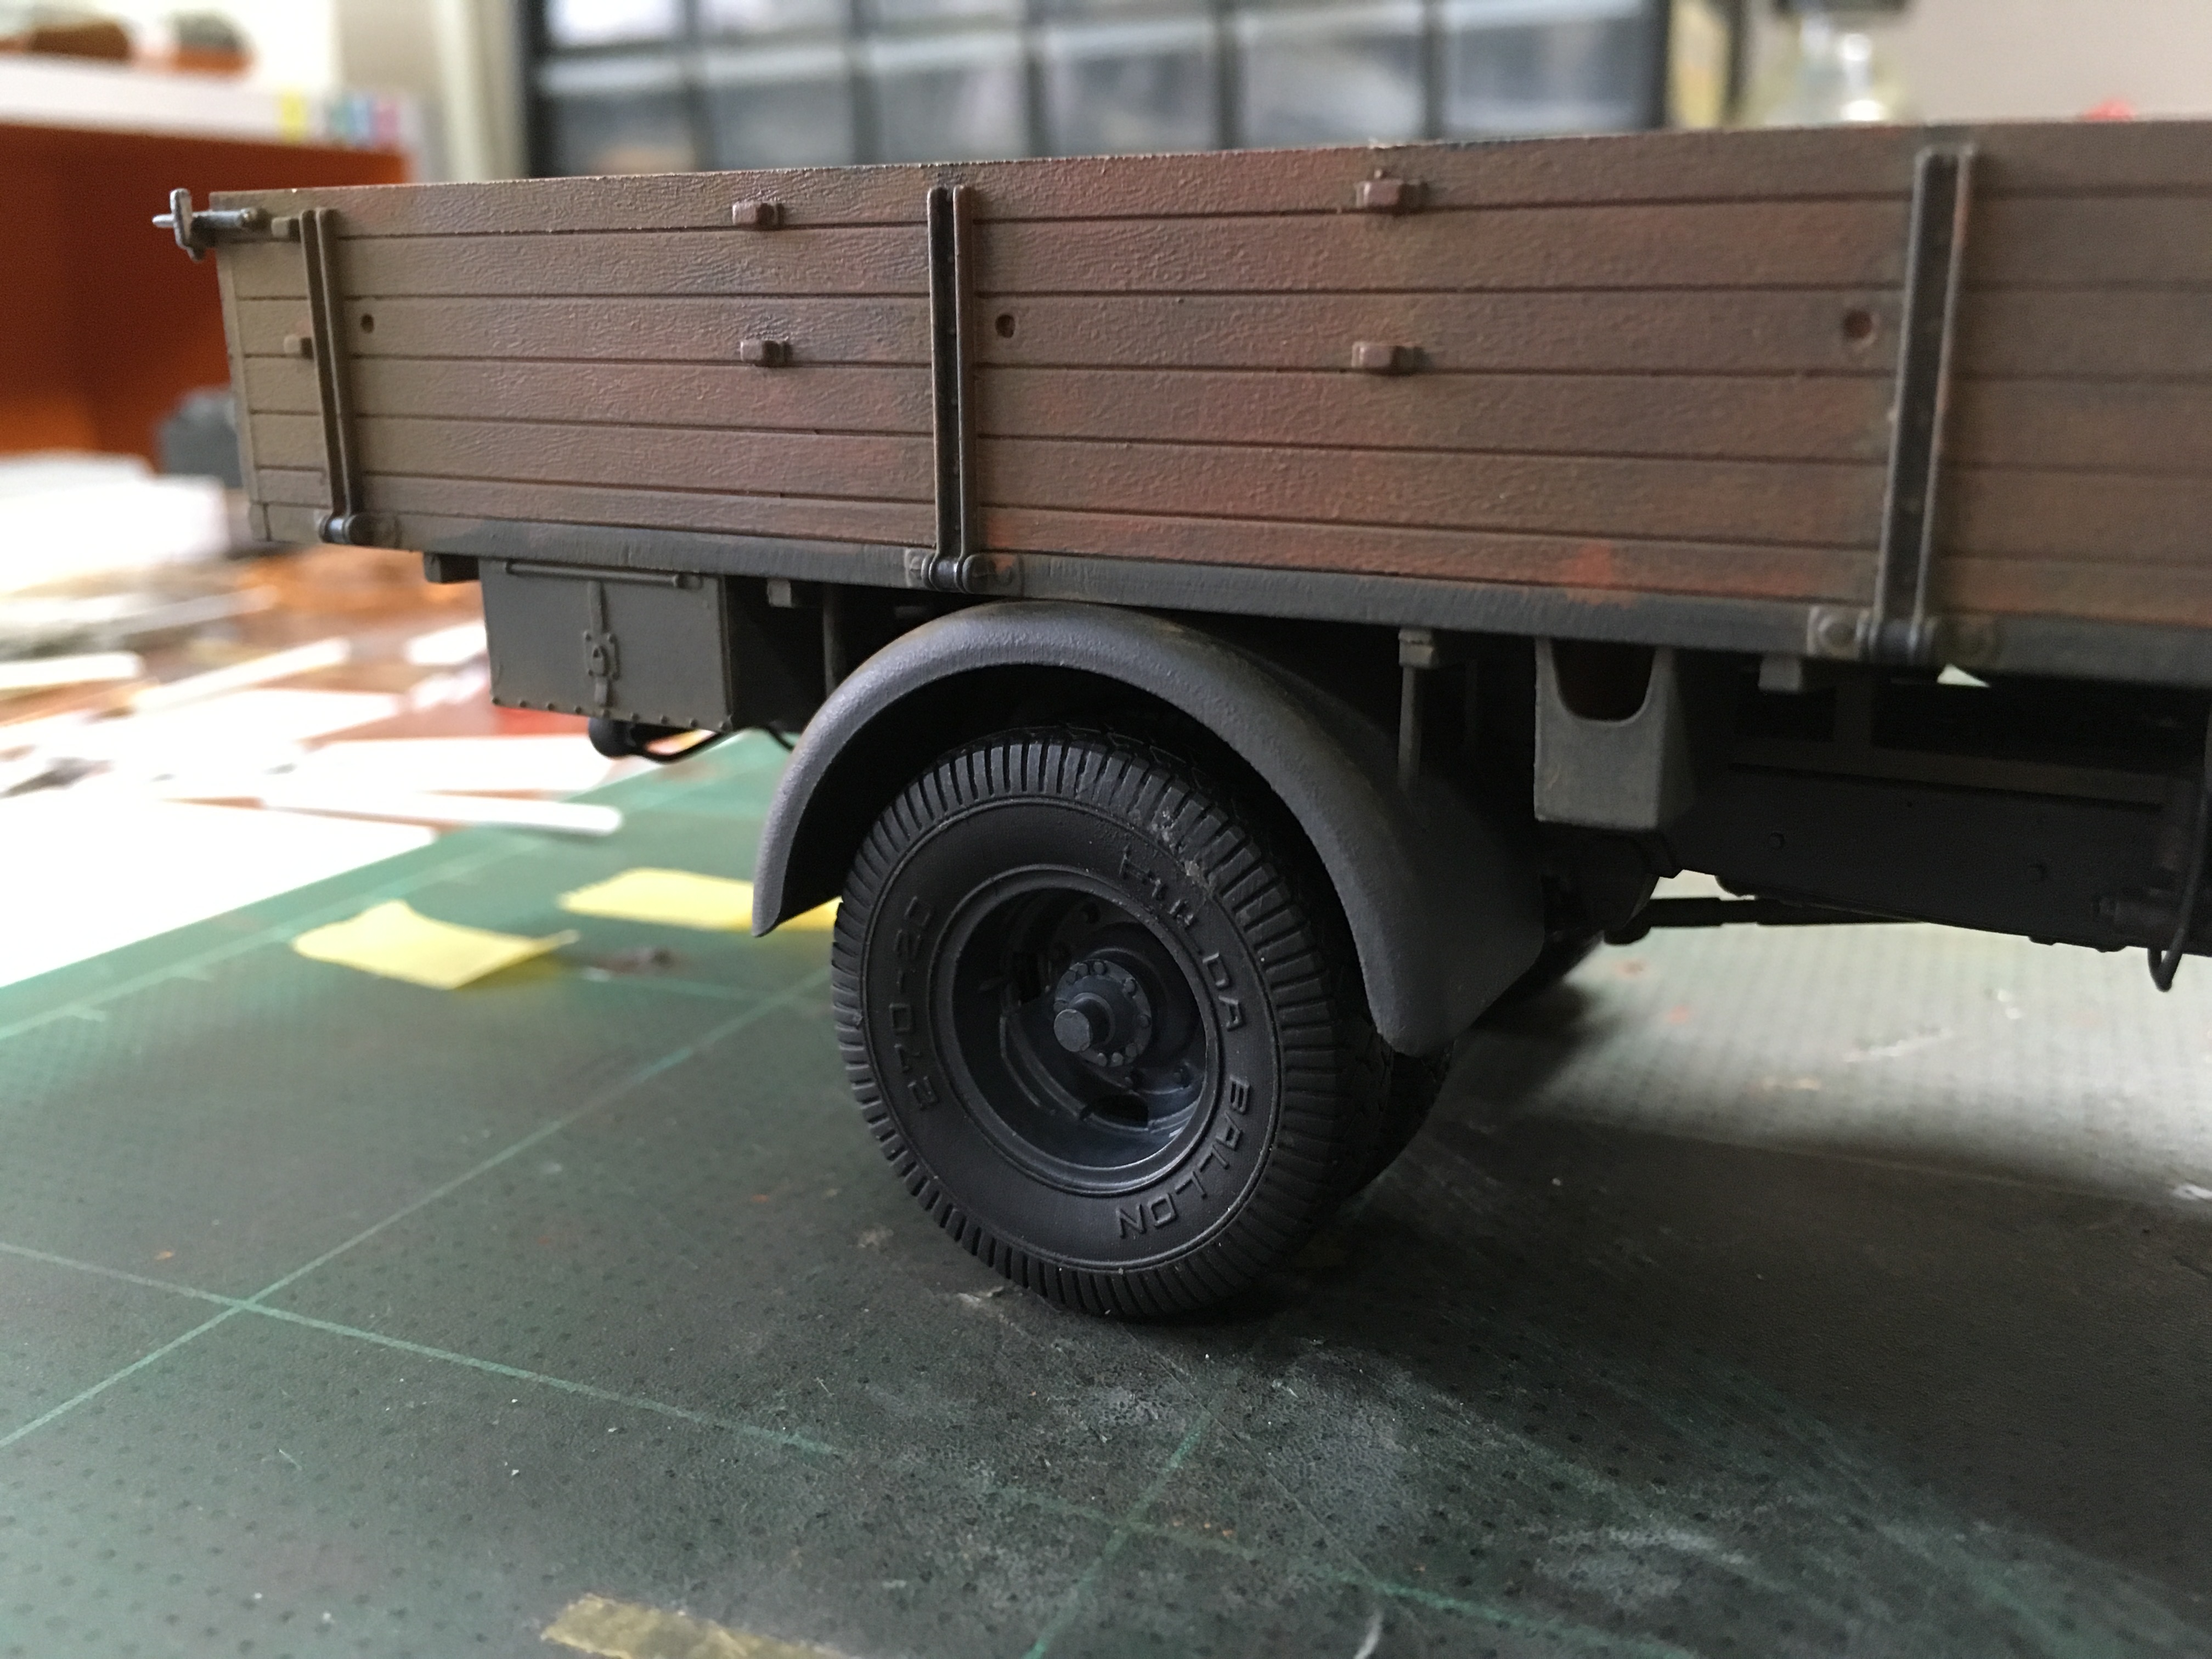
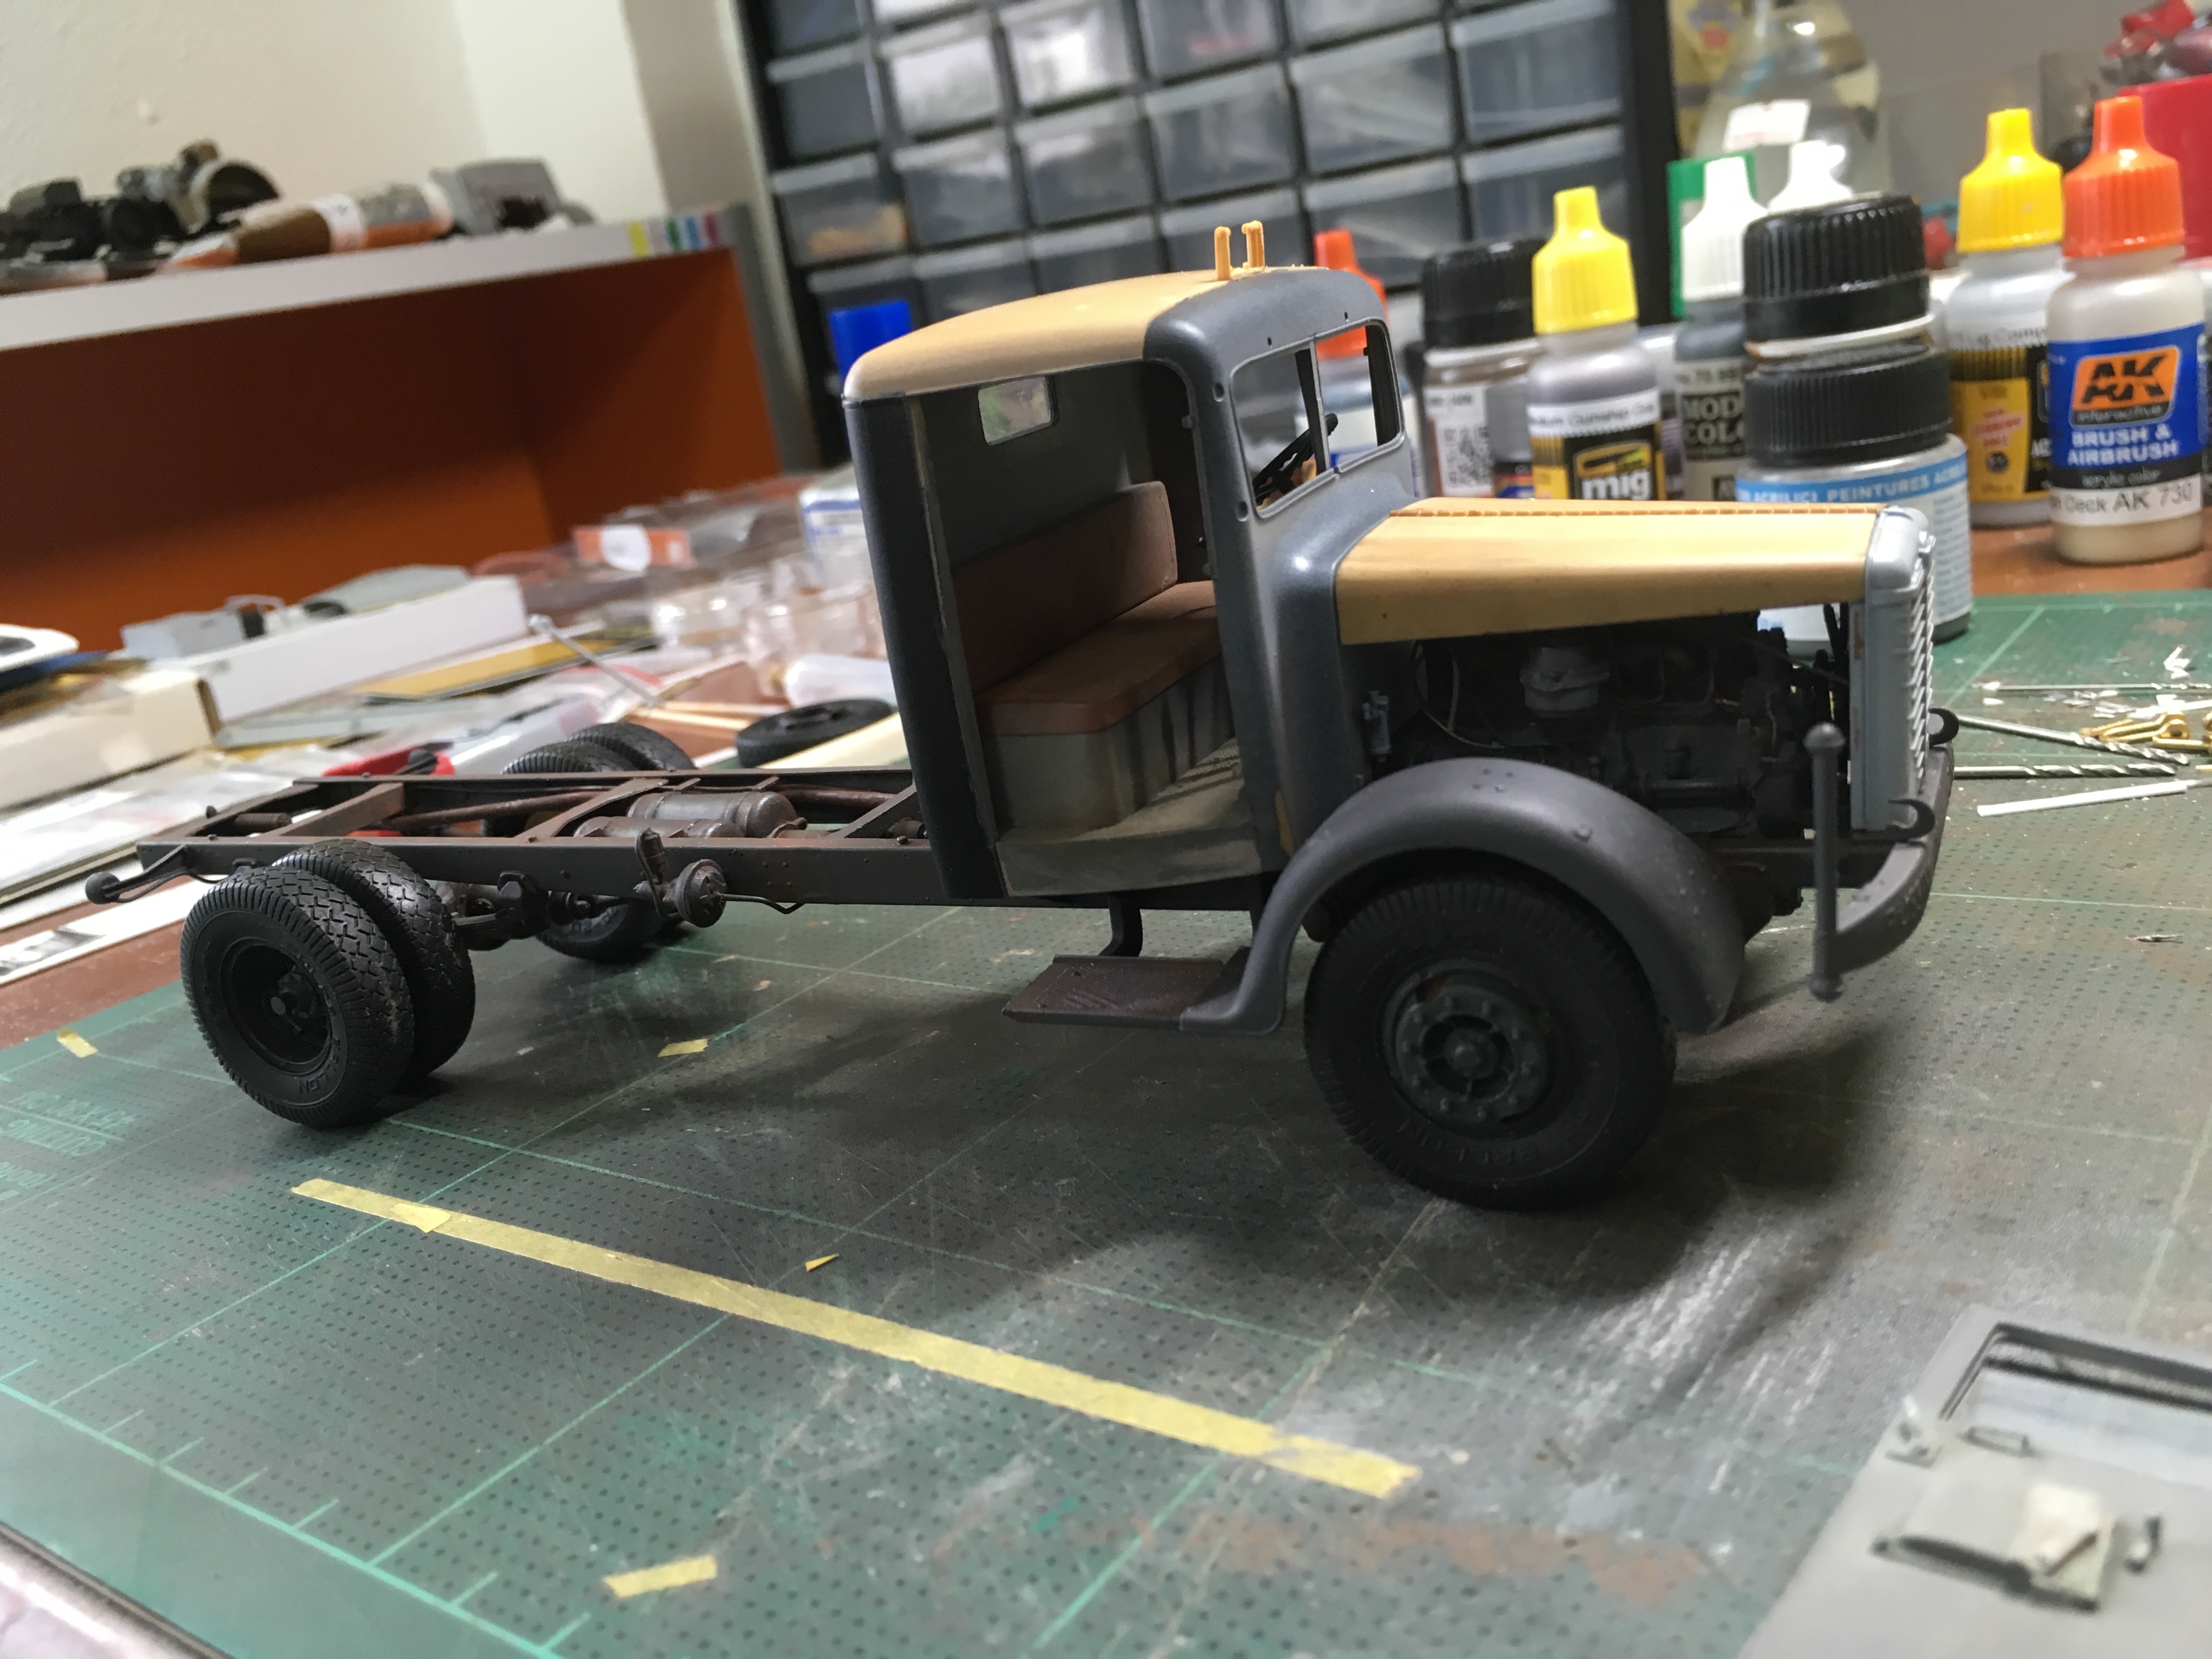
Back to where I ended before the beers and diner. Some more pictures of the Büssing L4500S.
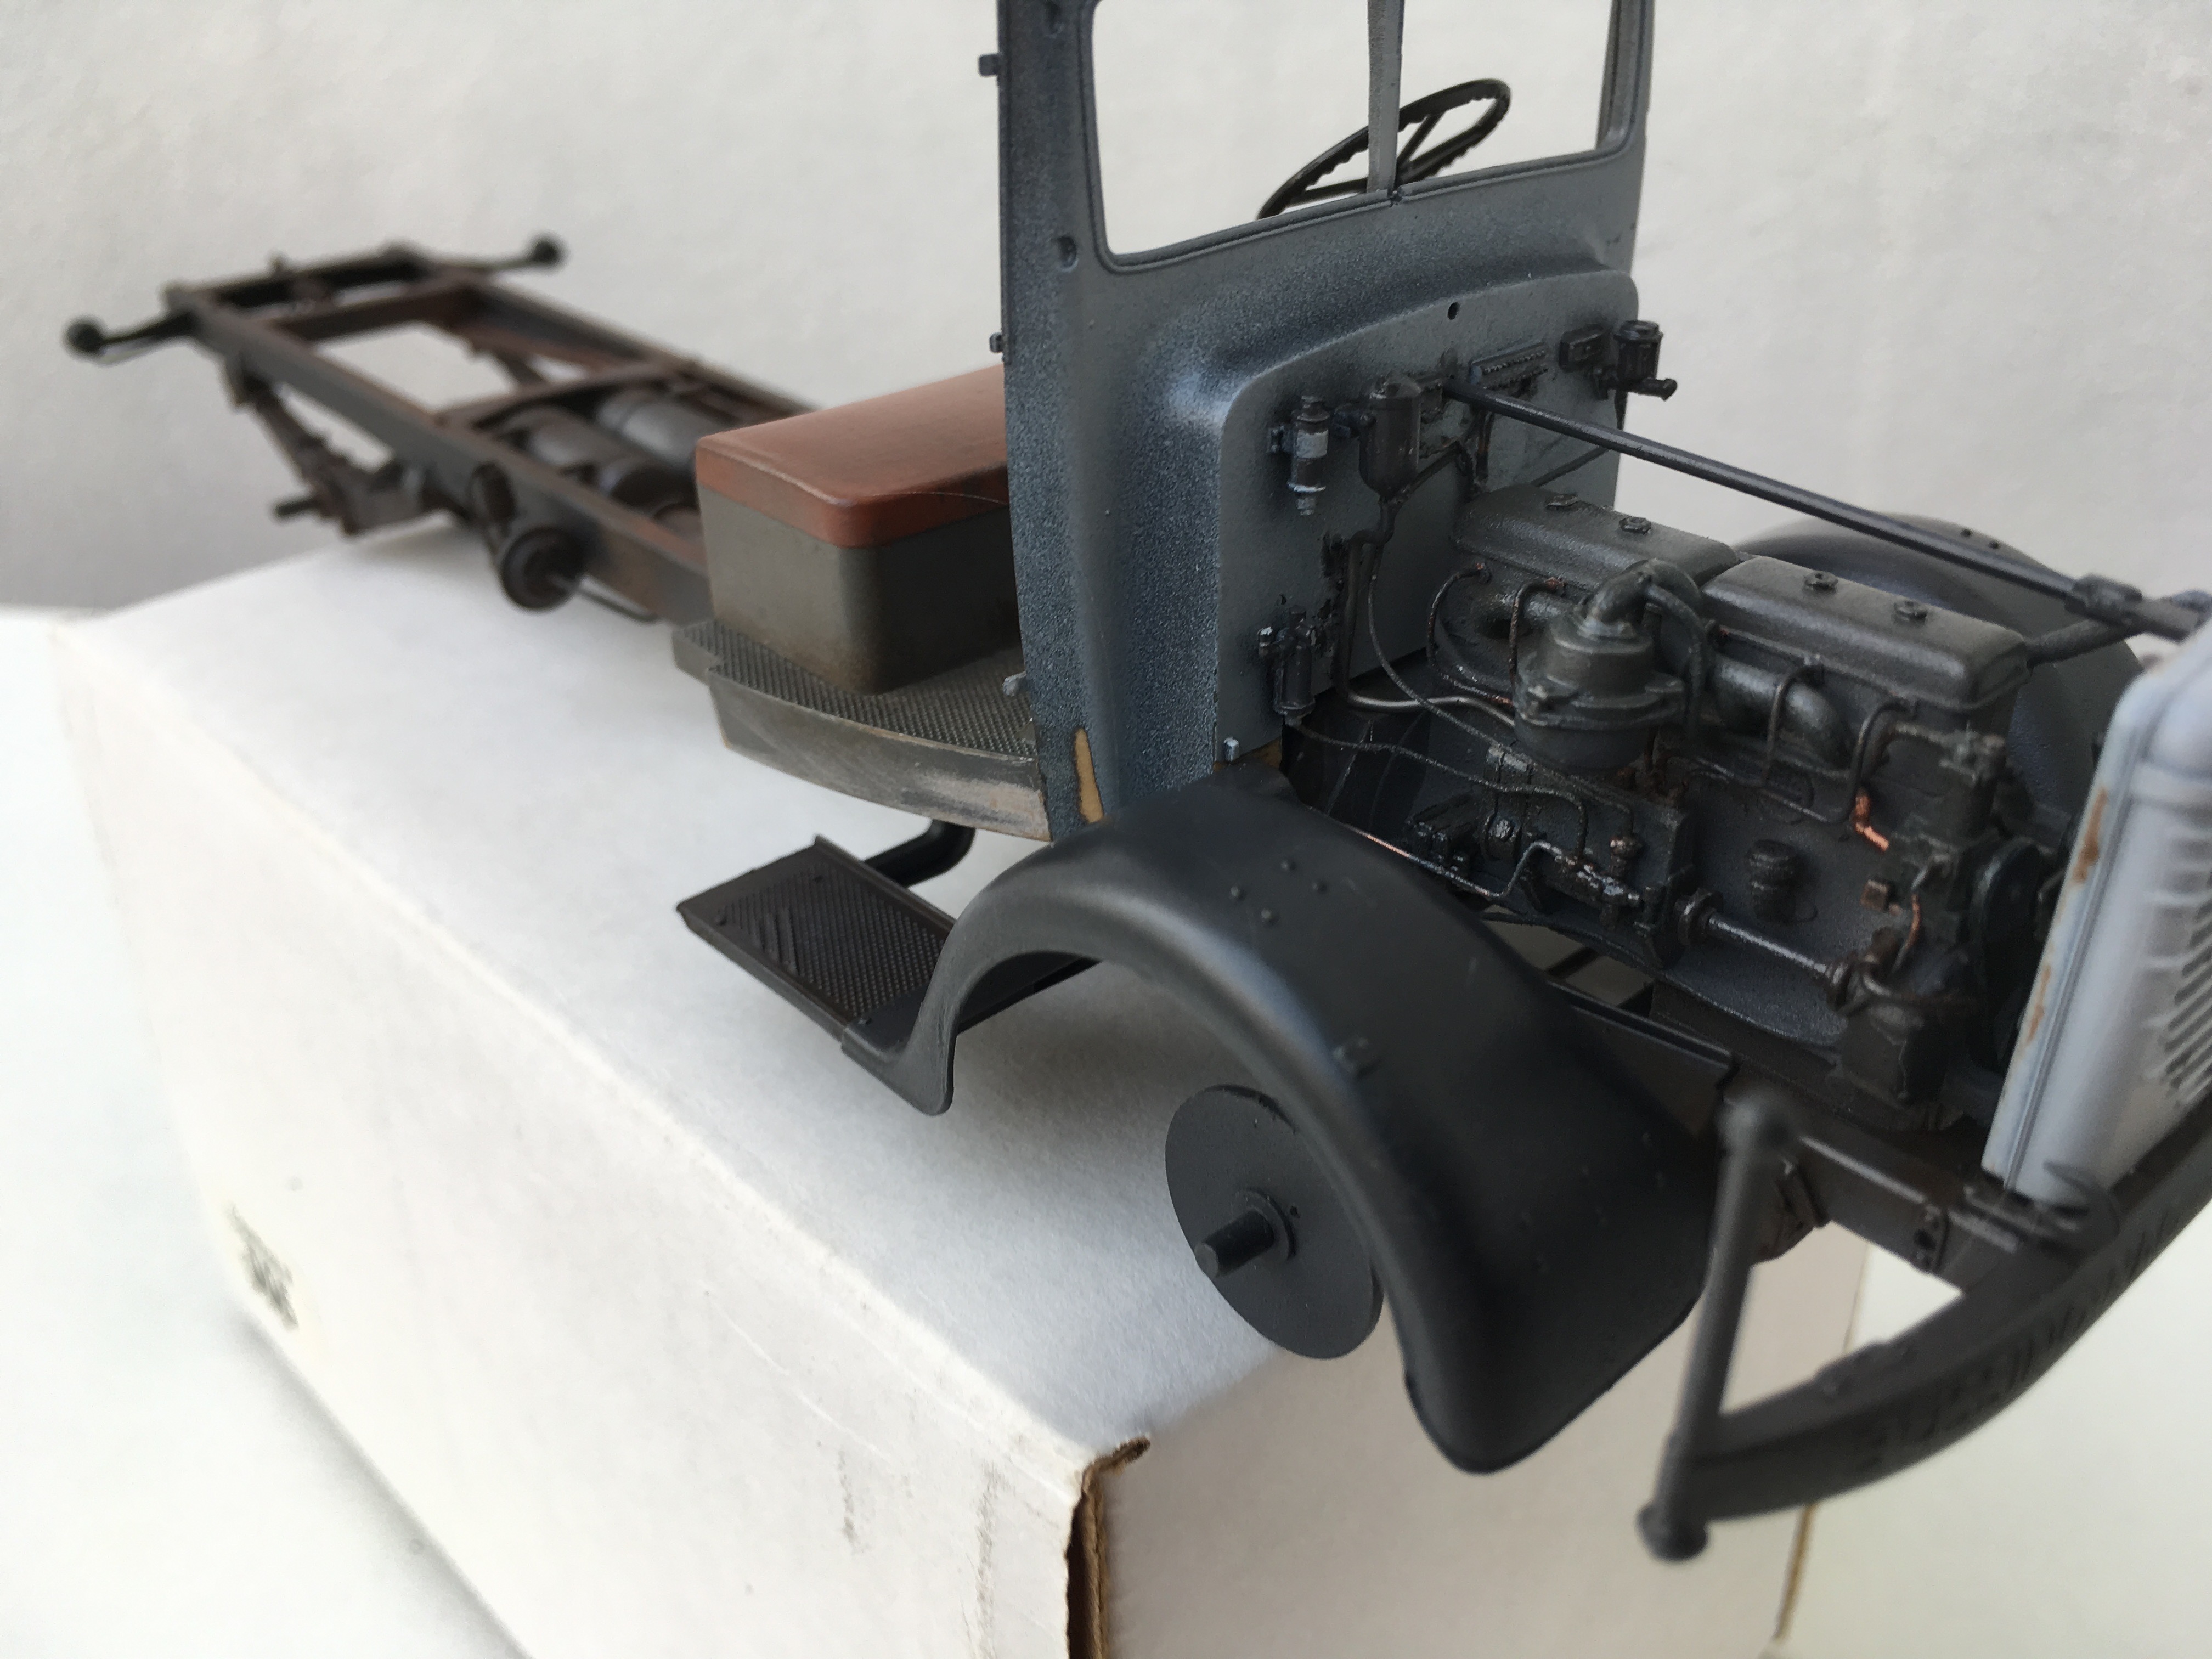
Engine. Not connected the wires yet to the firewall, but it's close to finished.
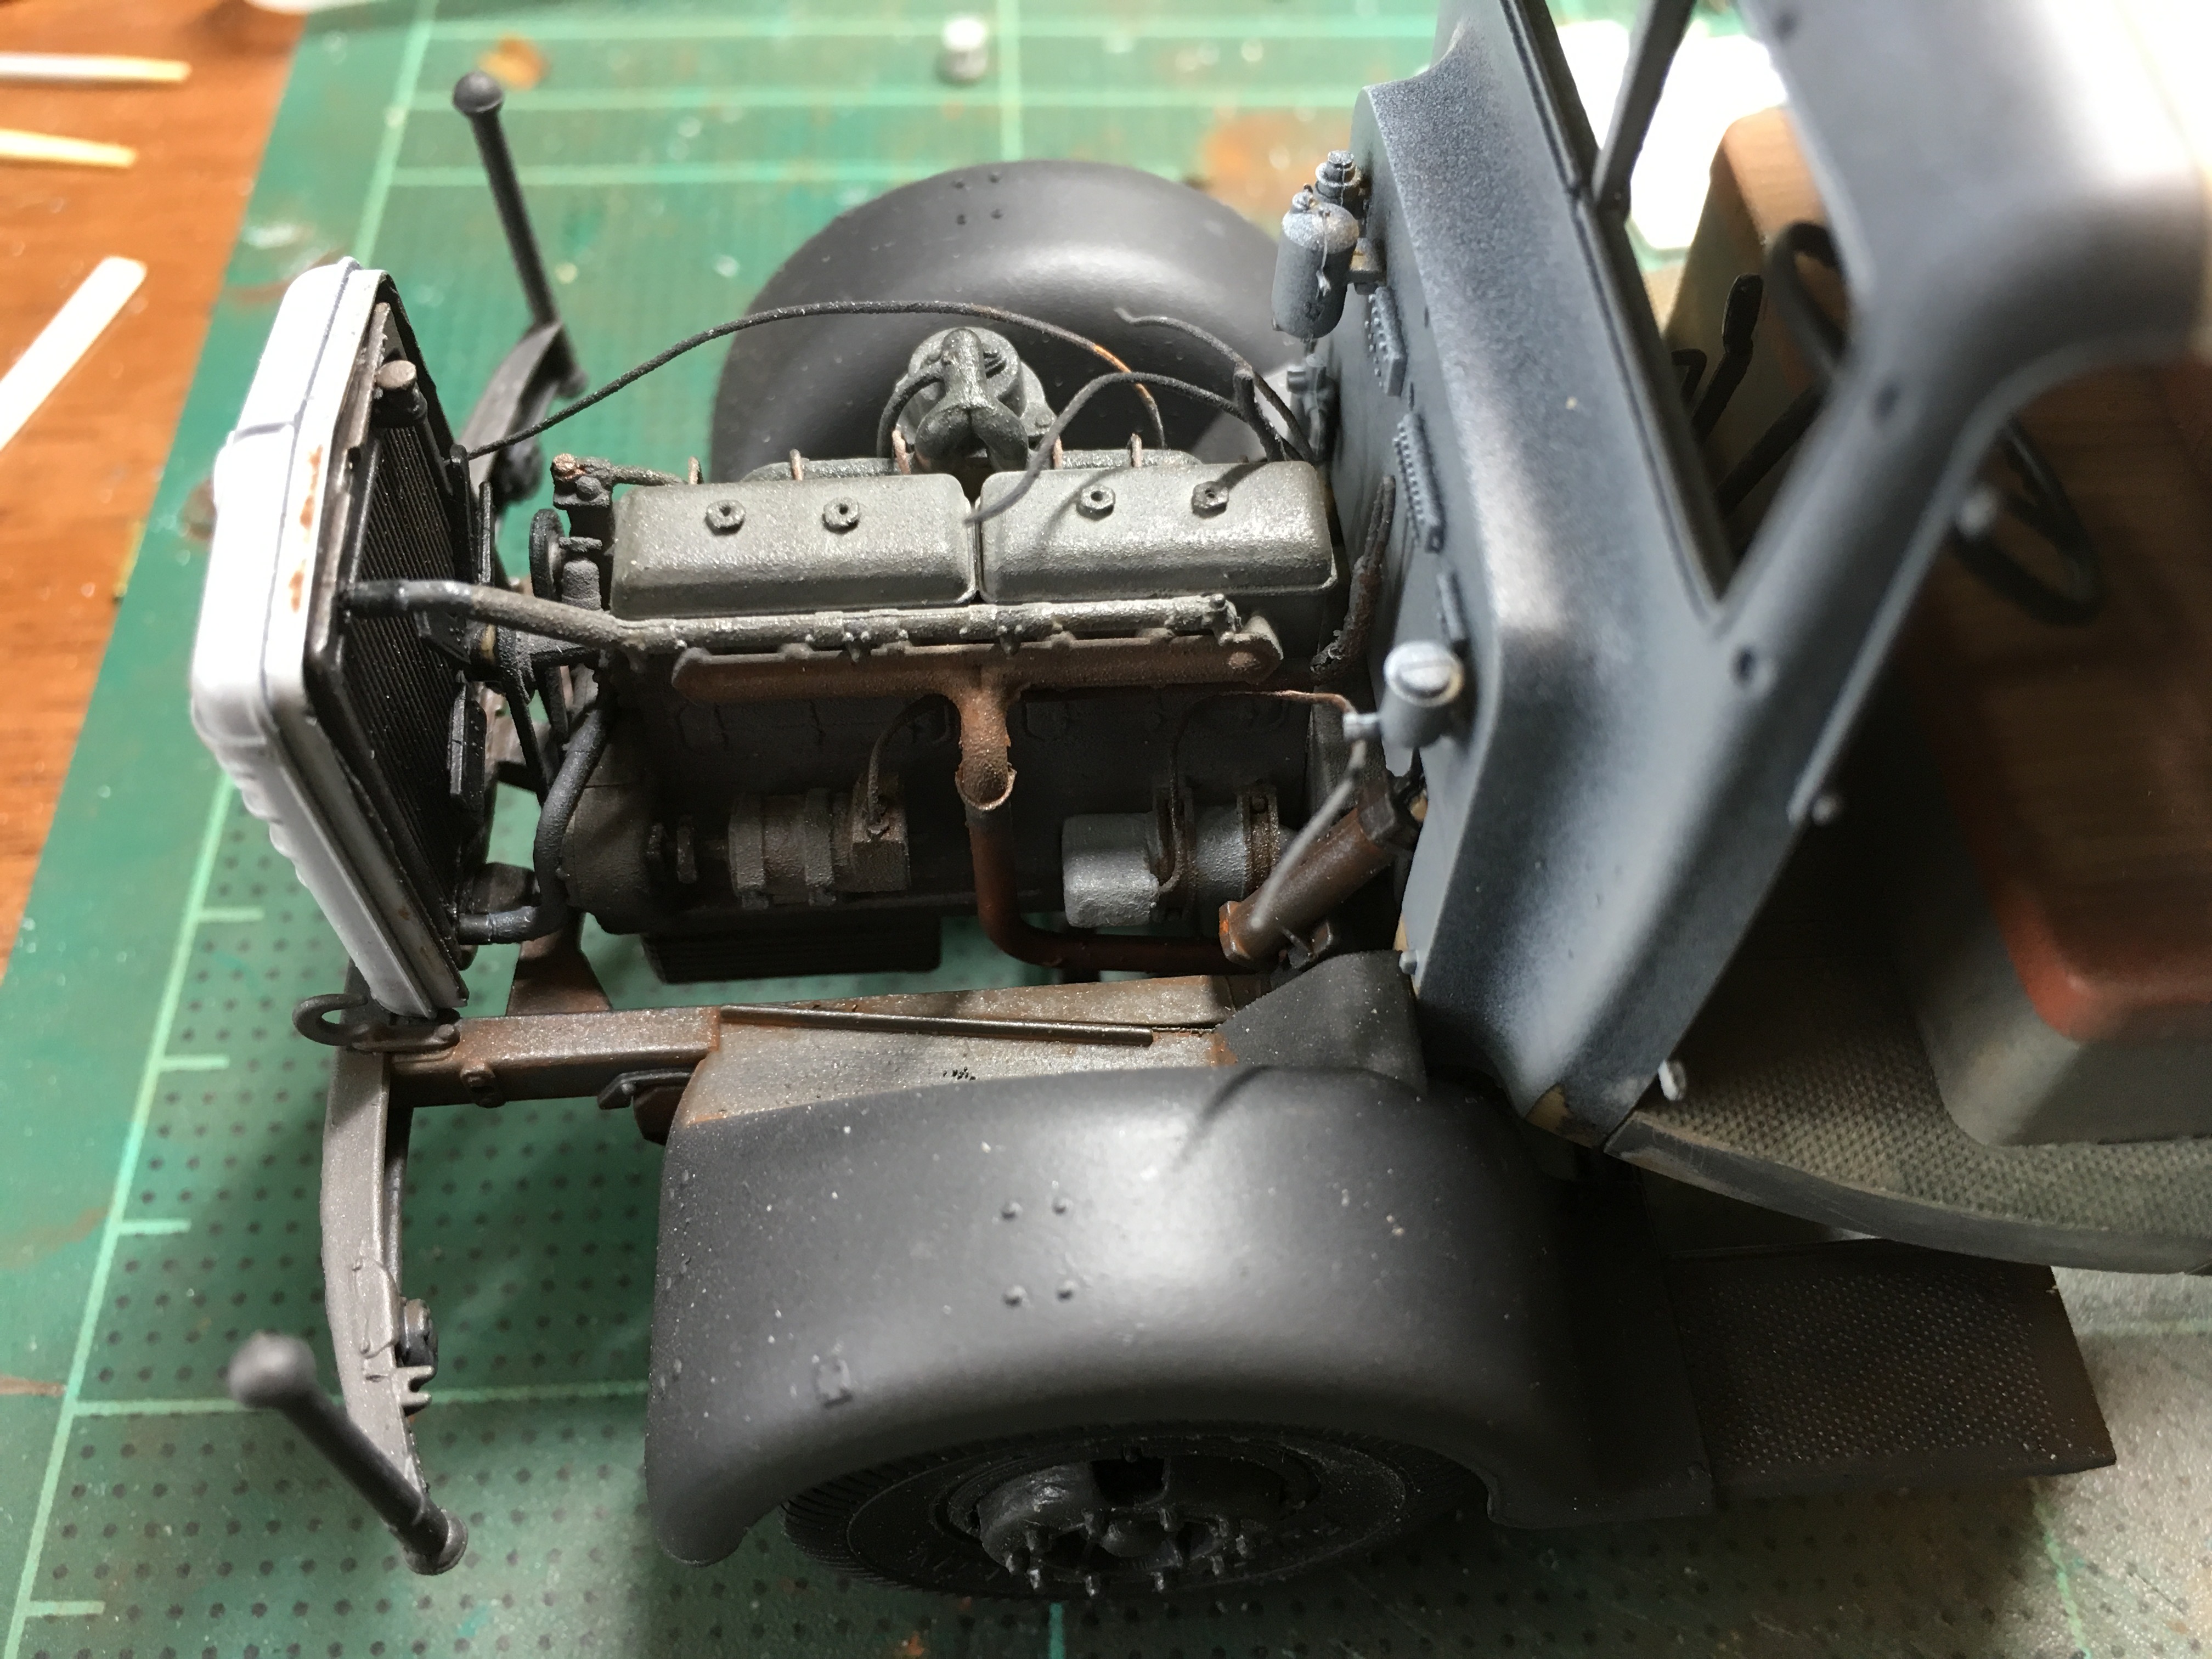
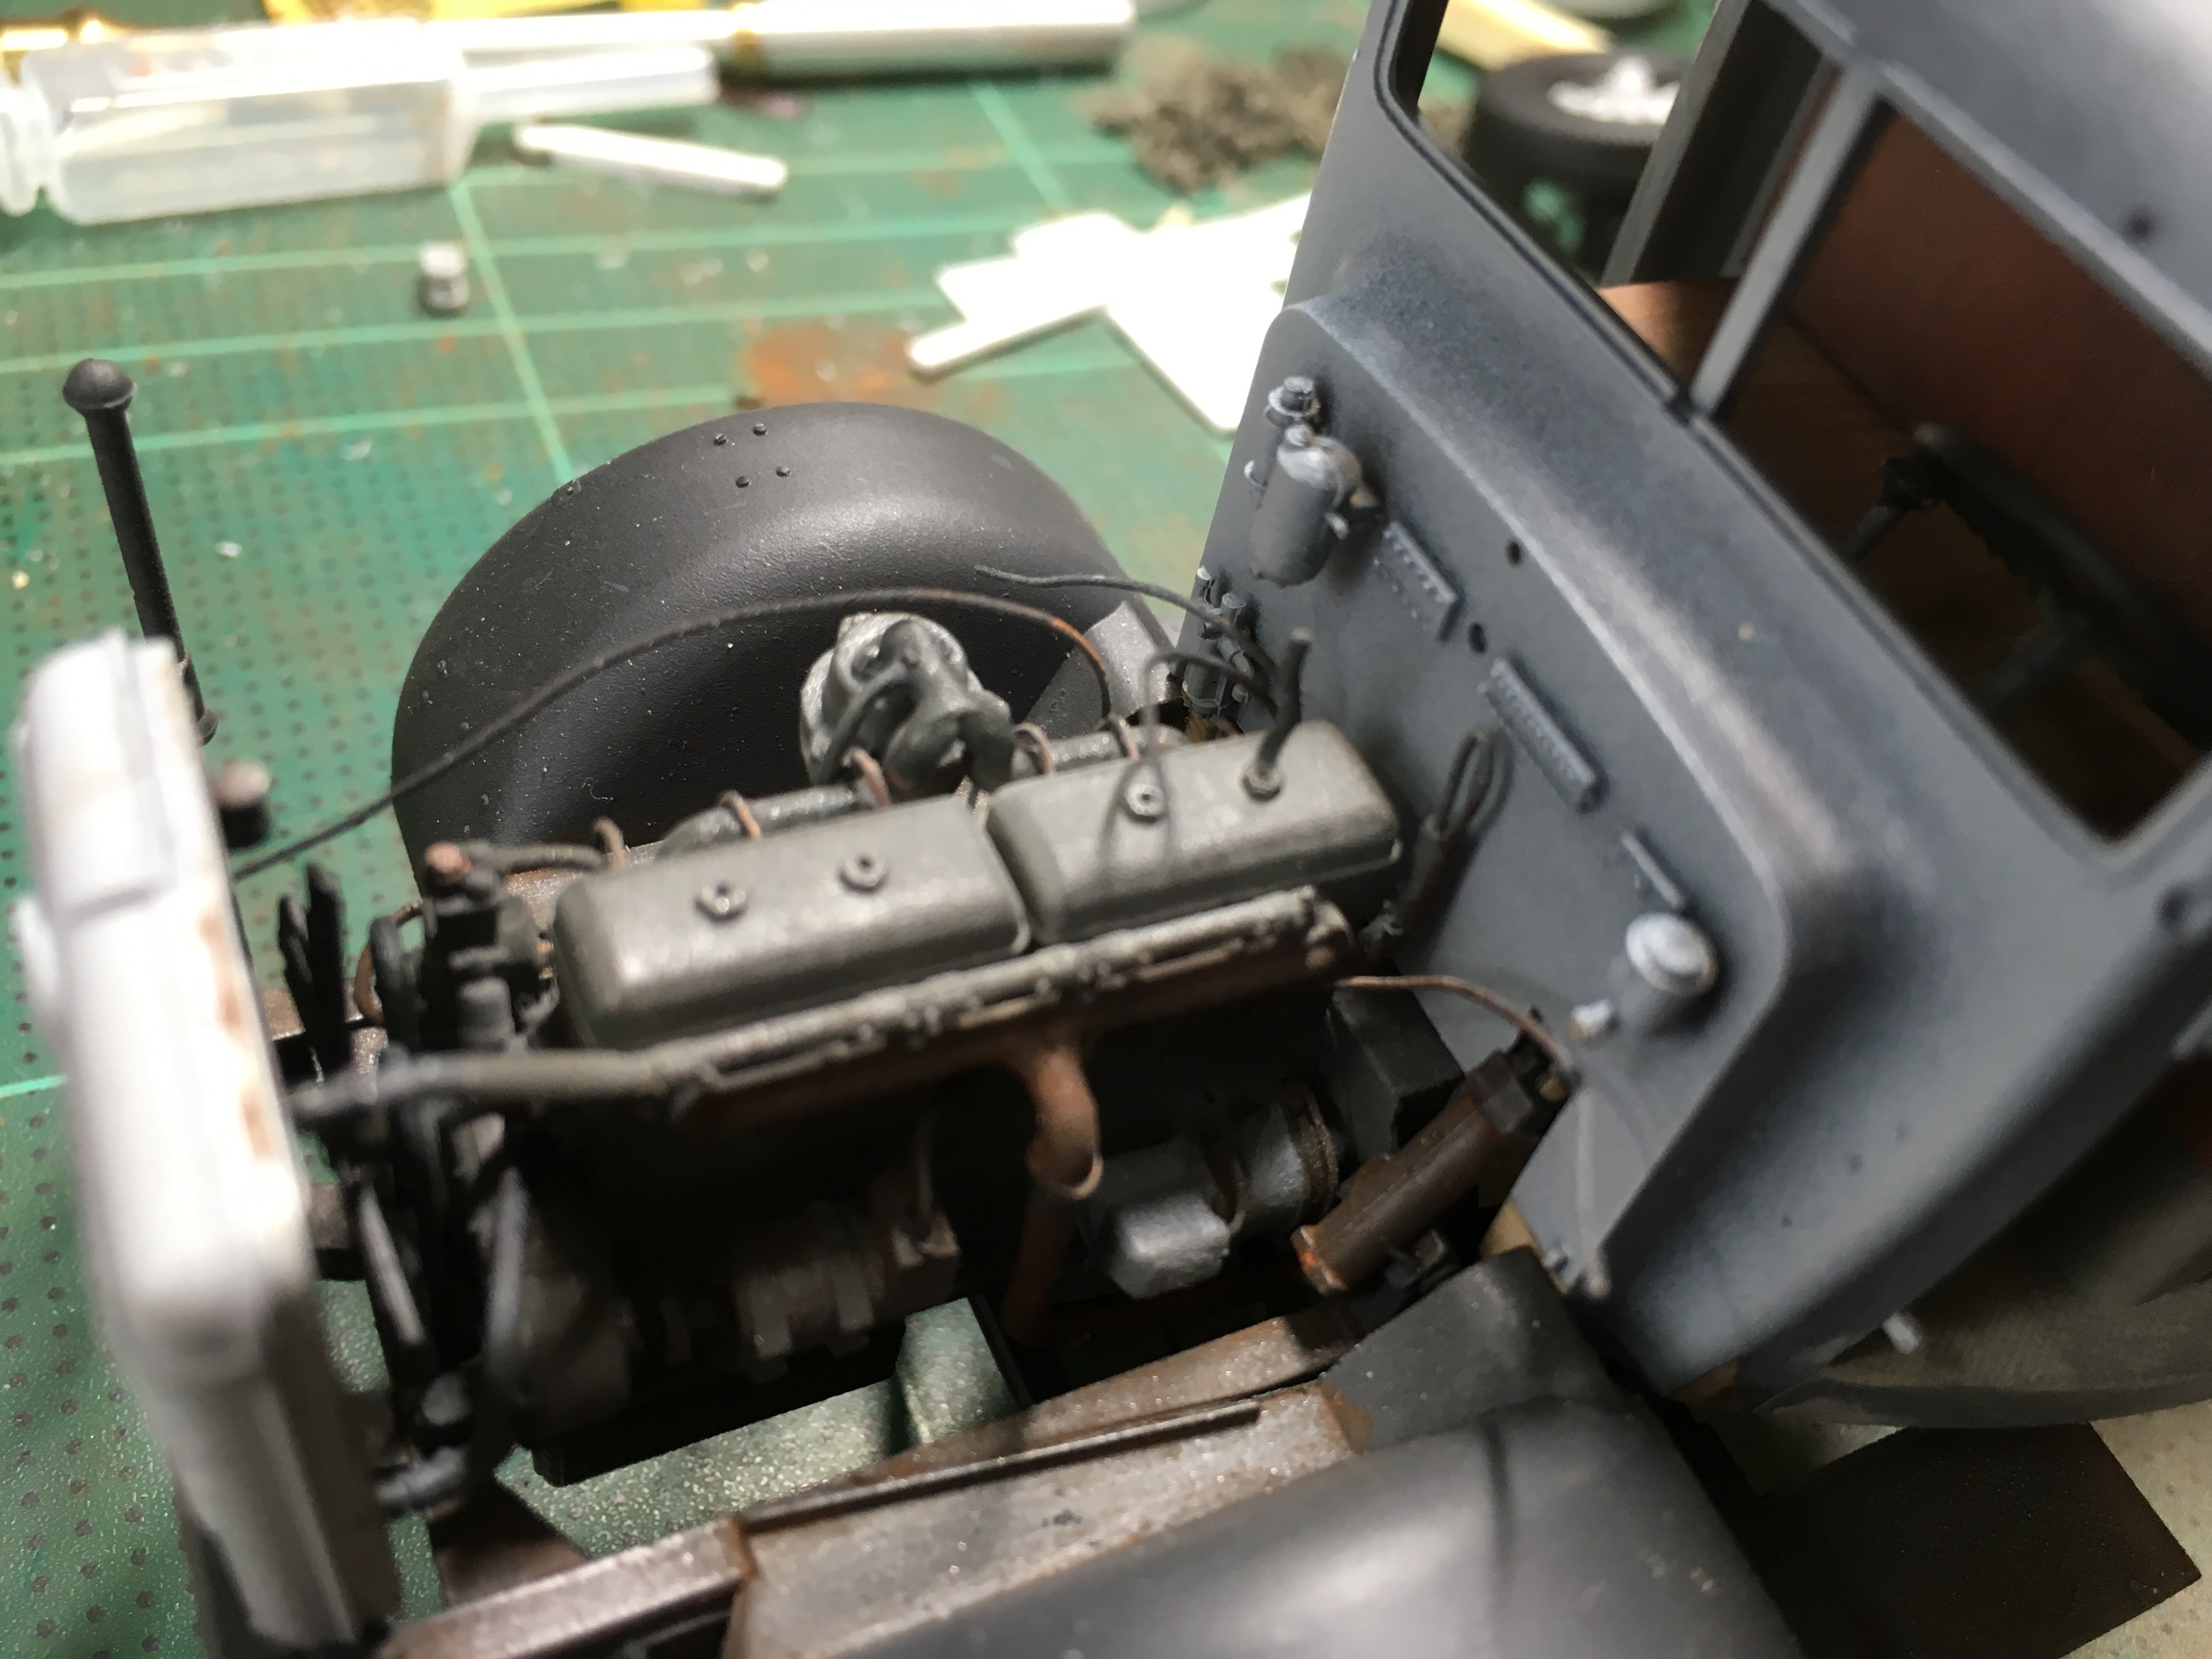
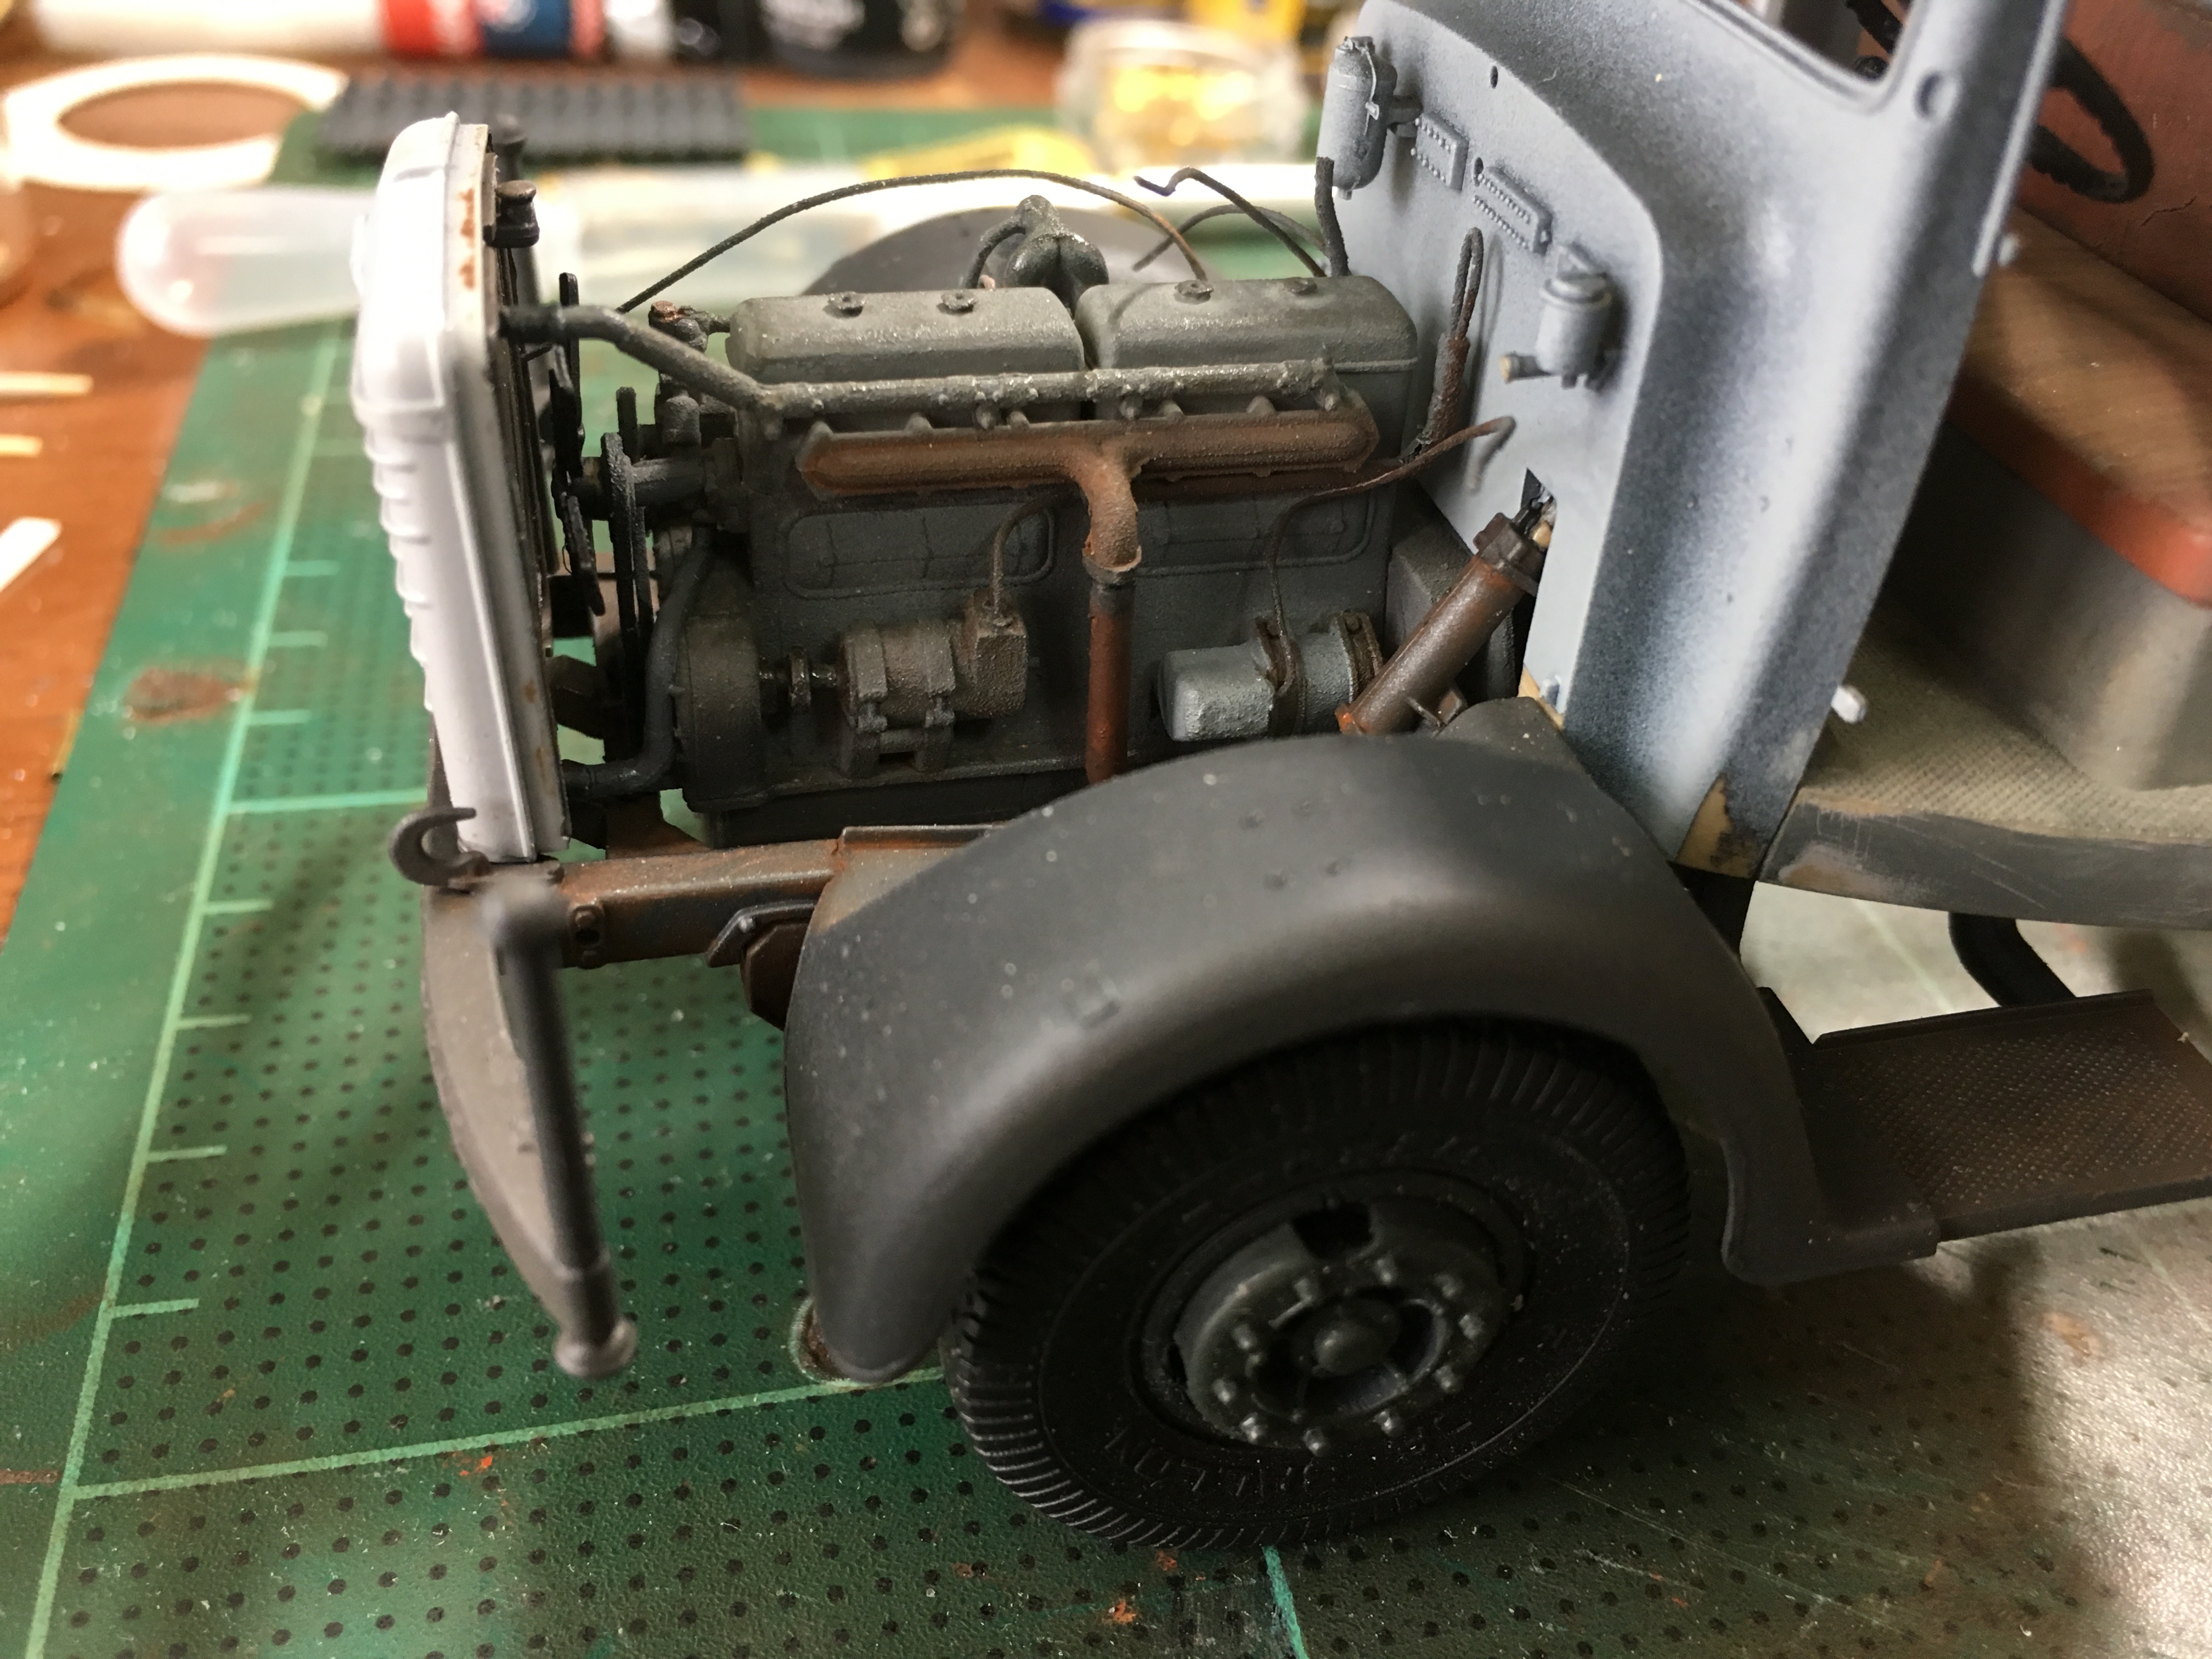
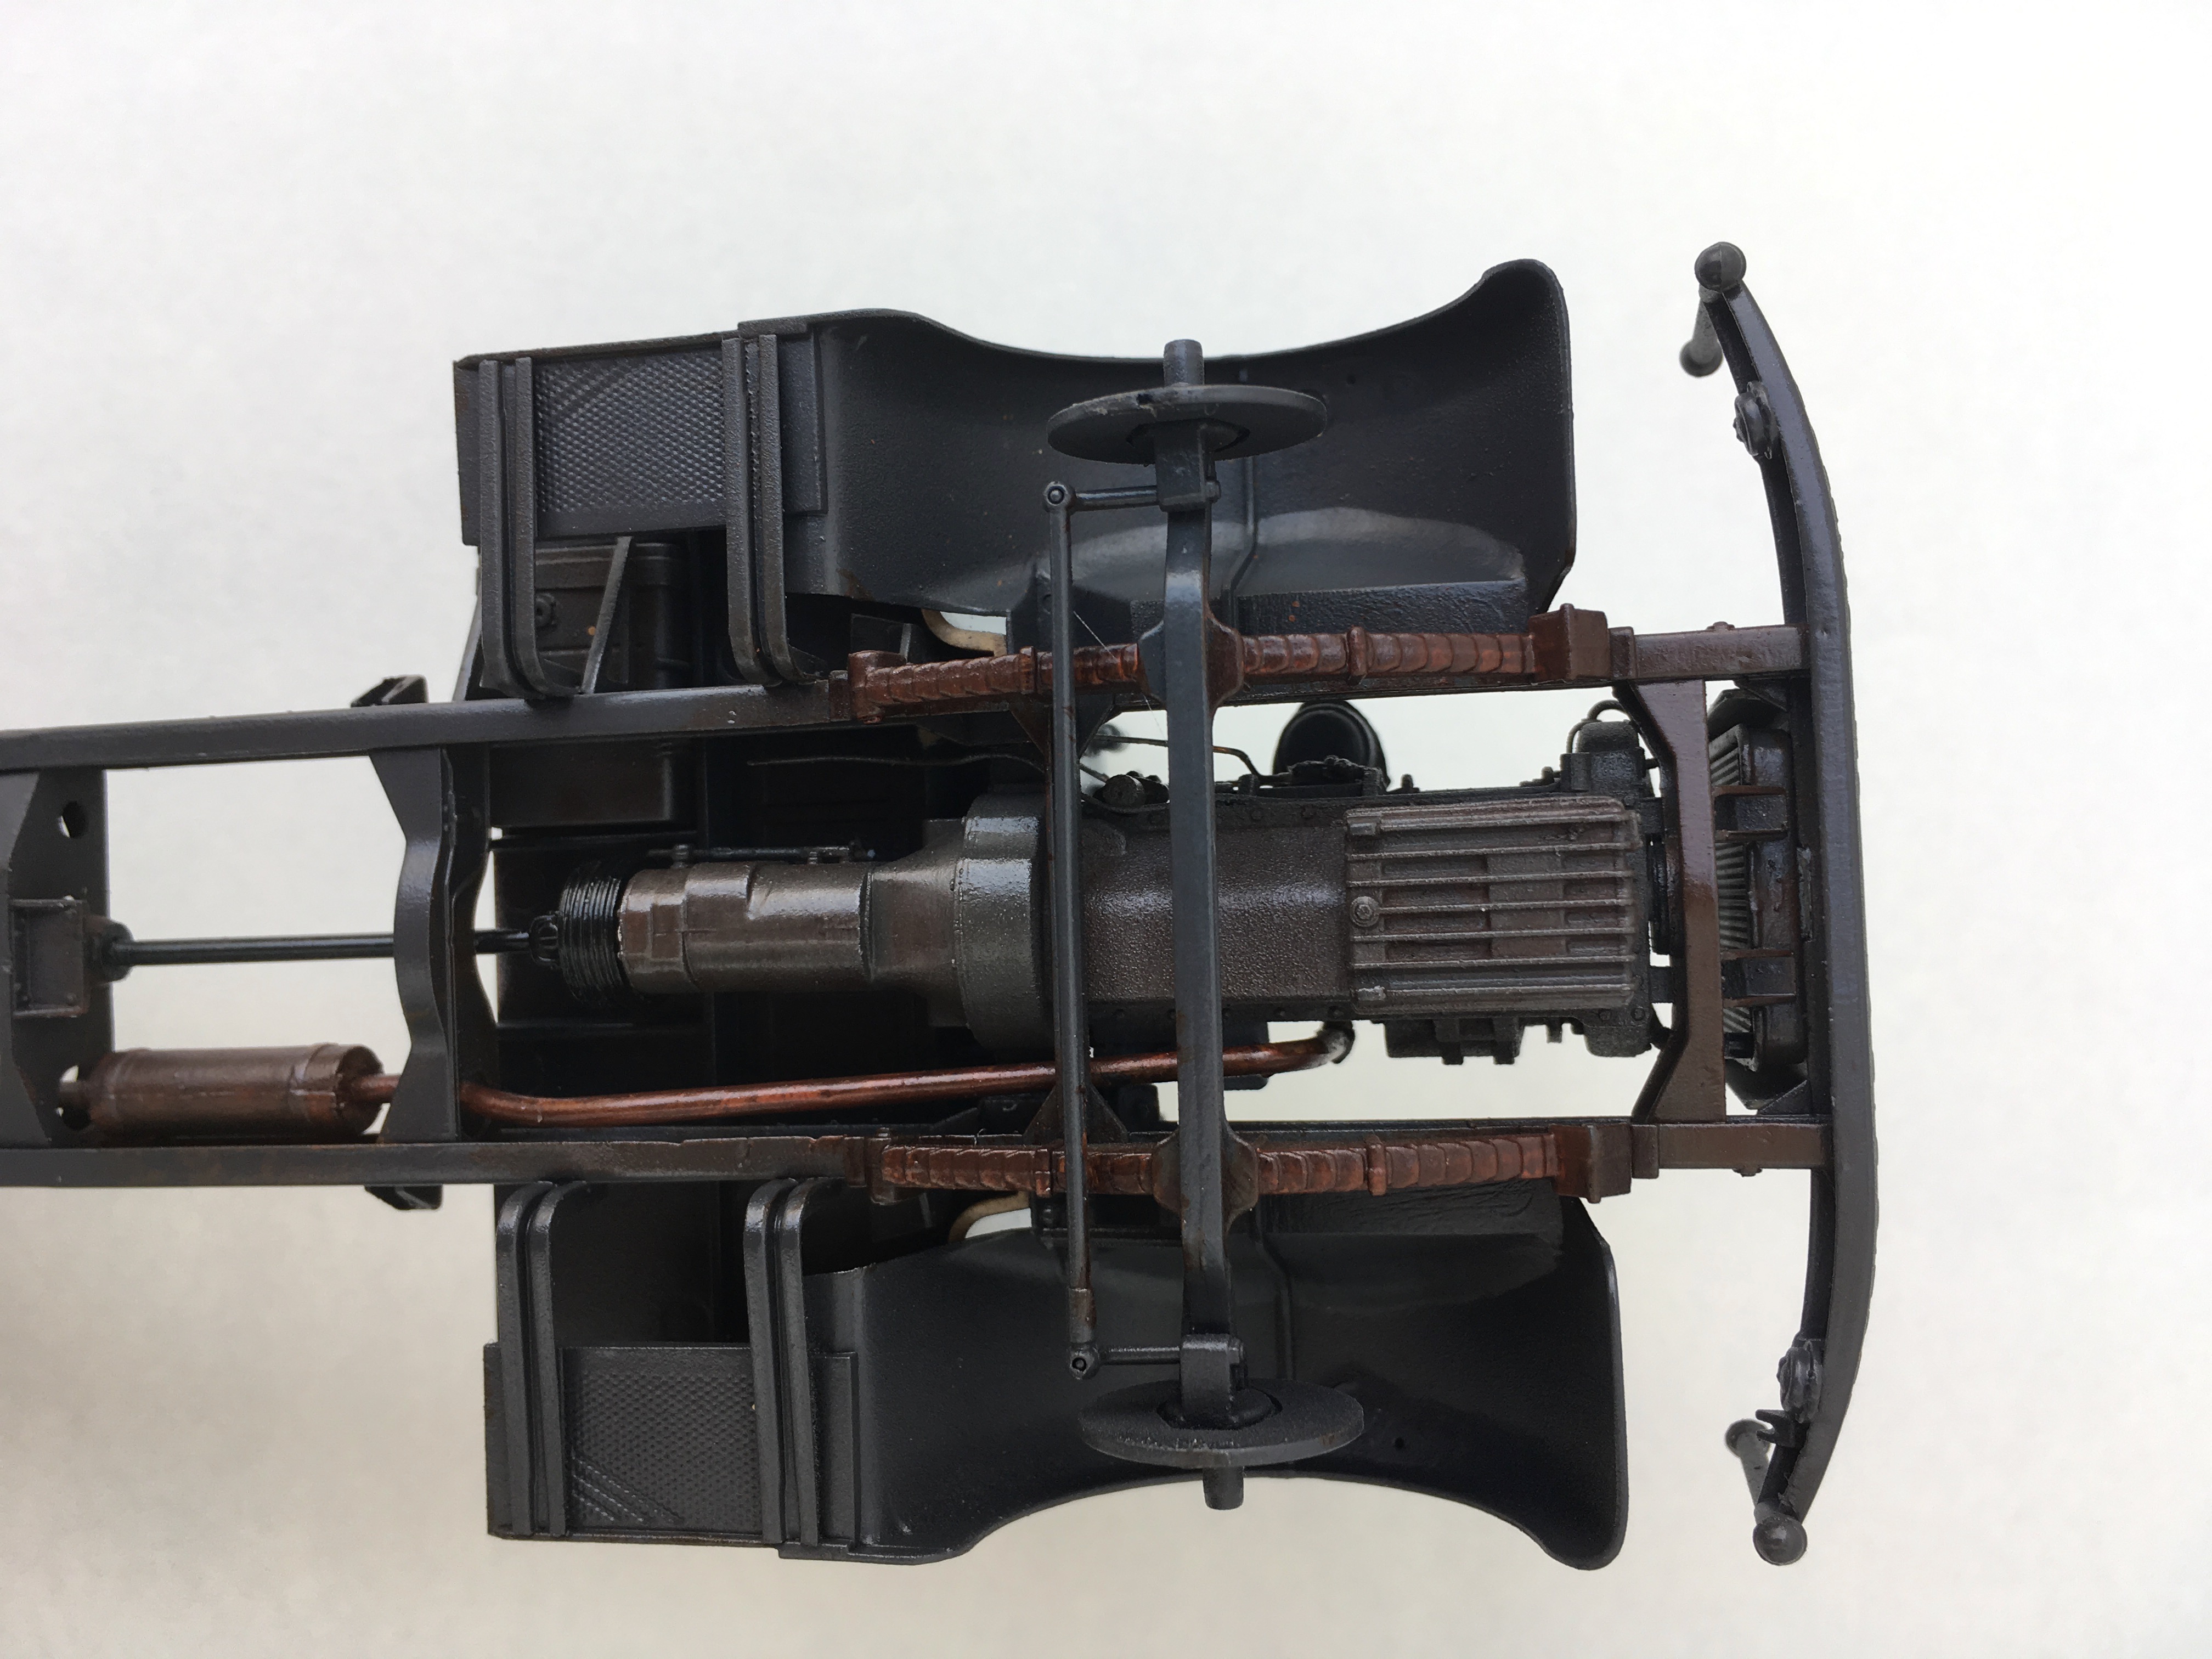
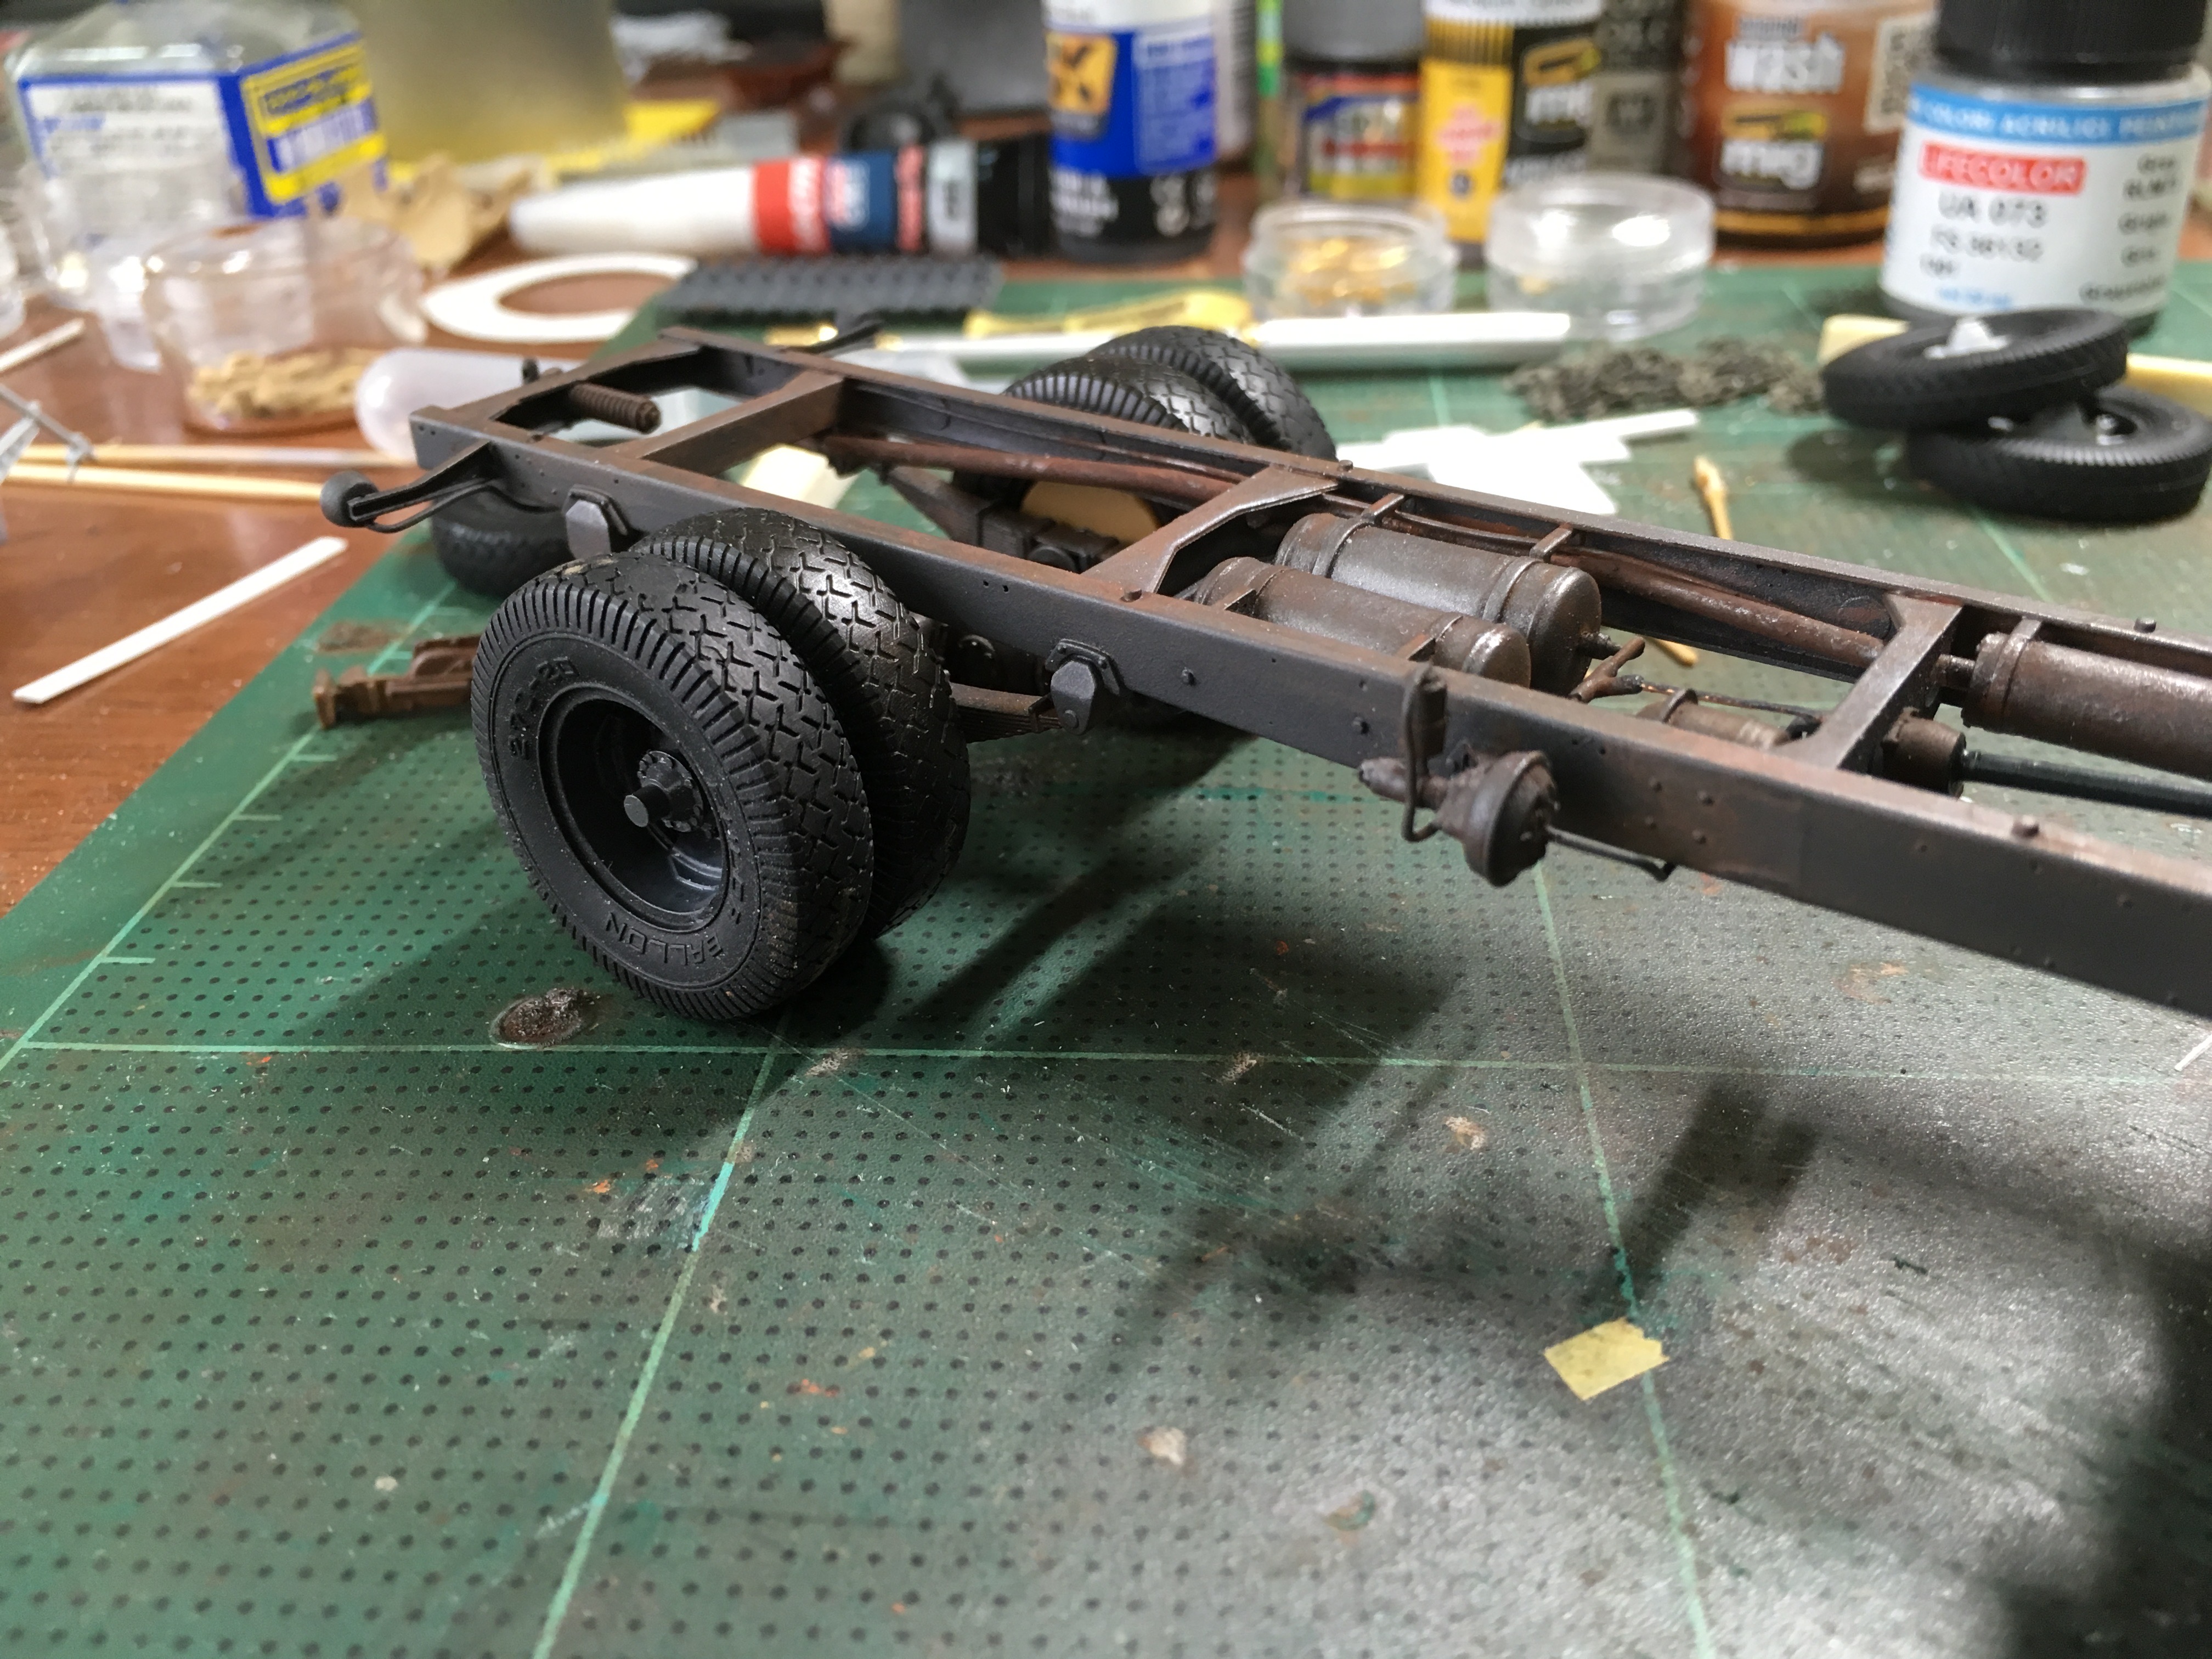
Details from the chassis
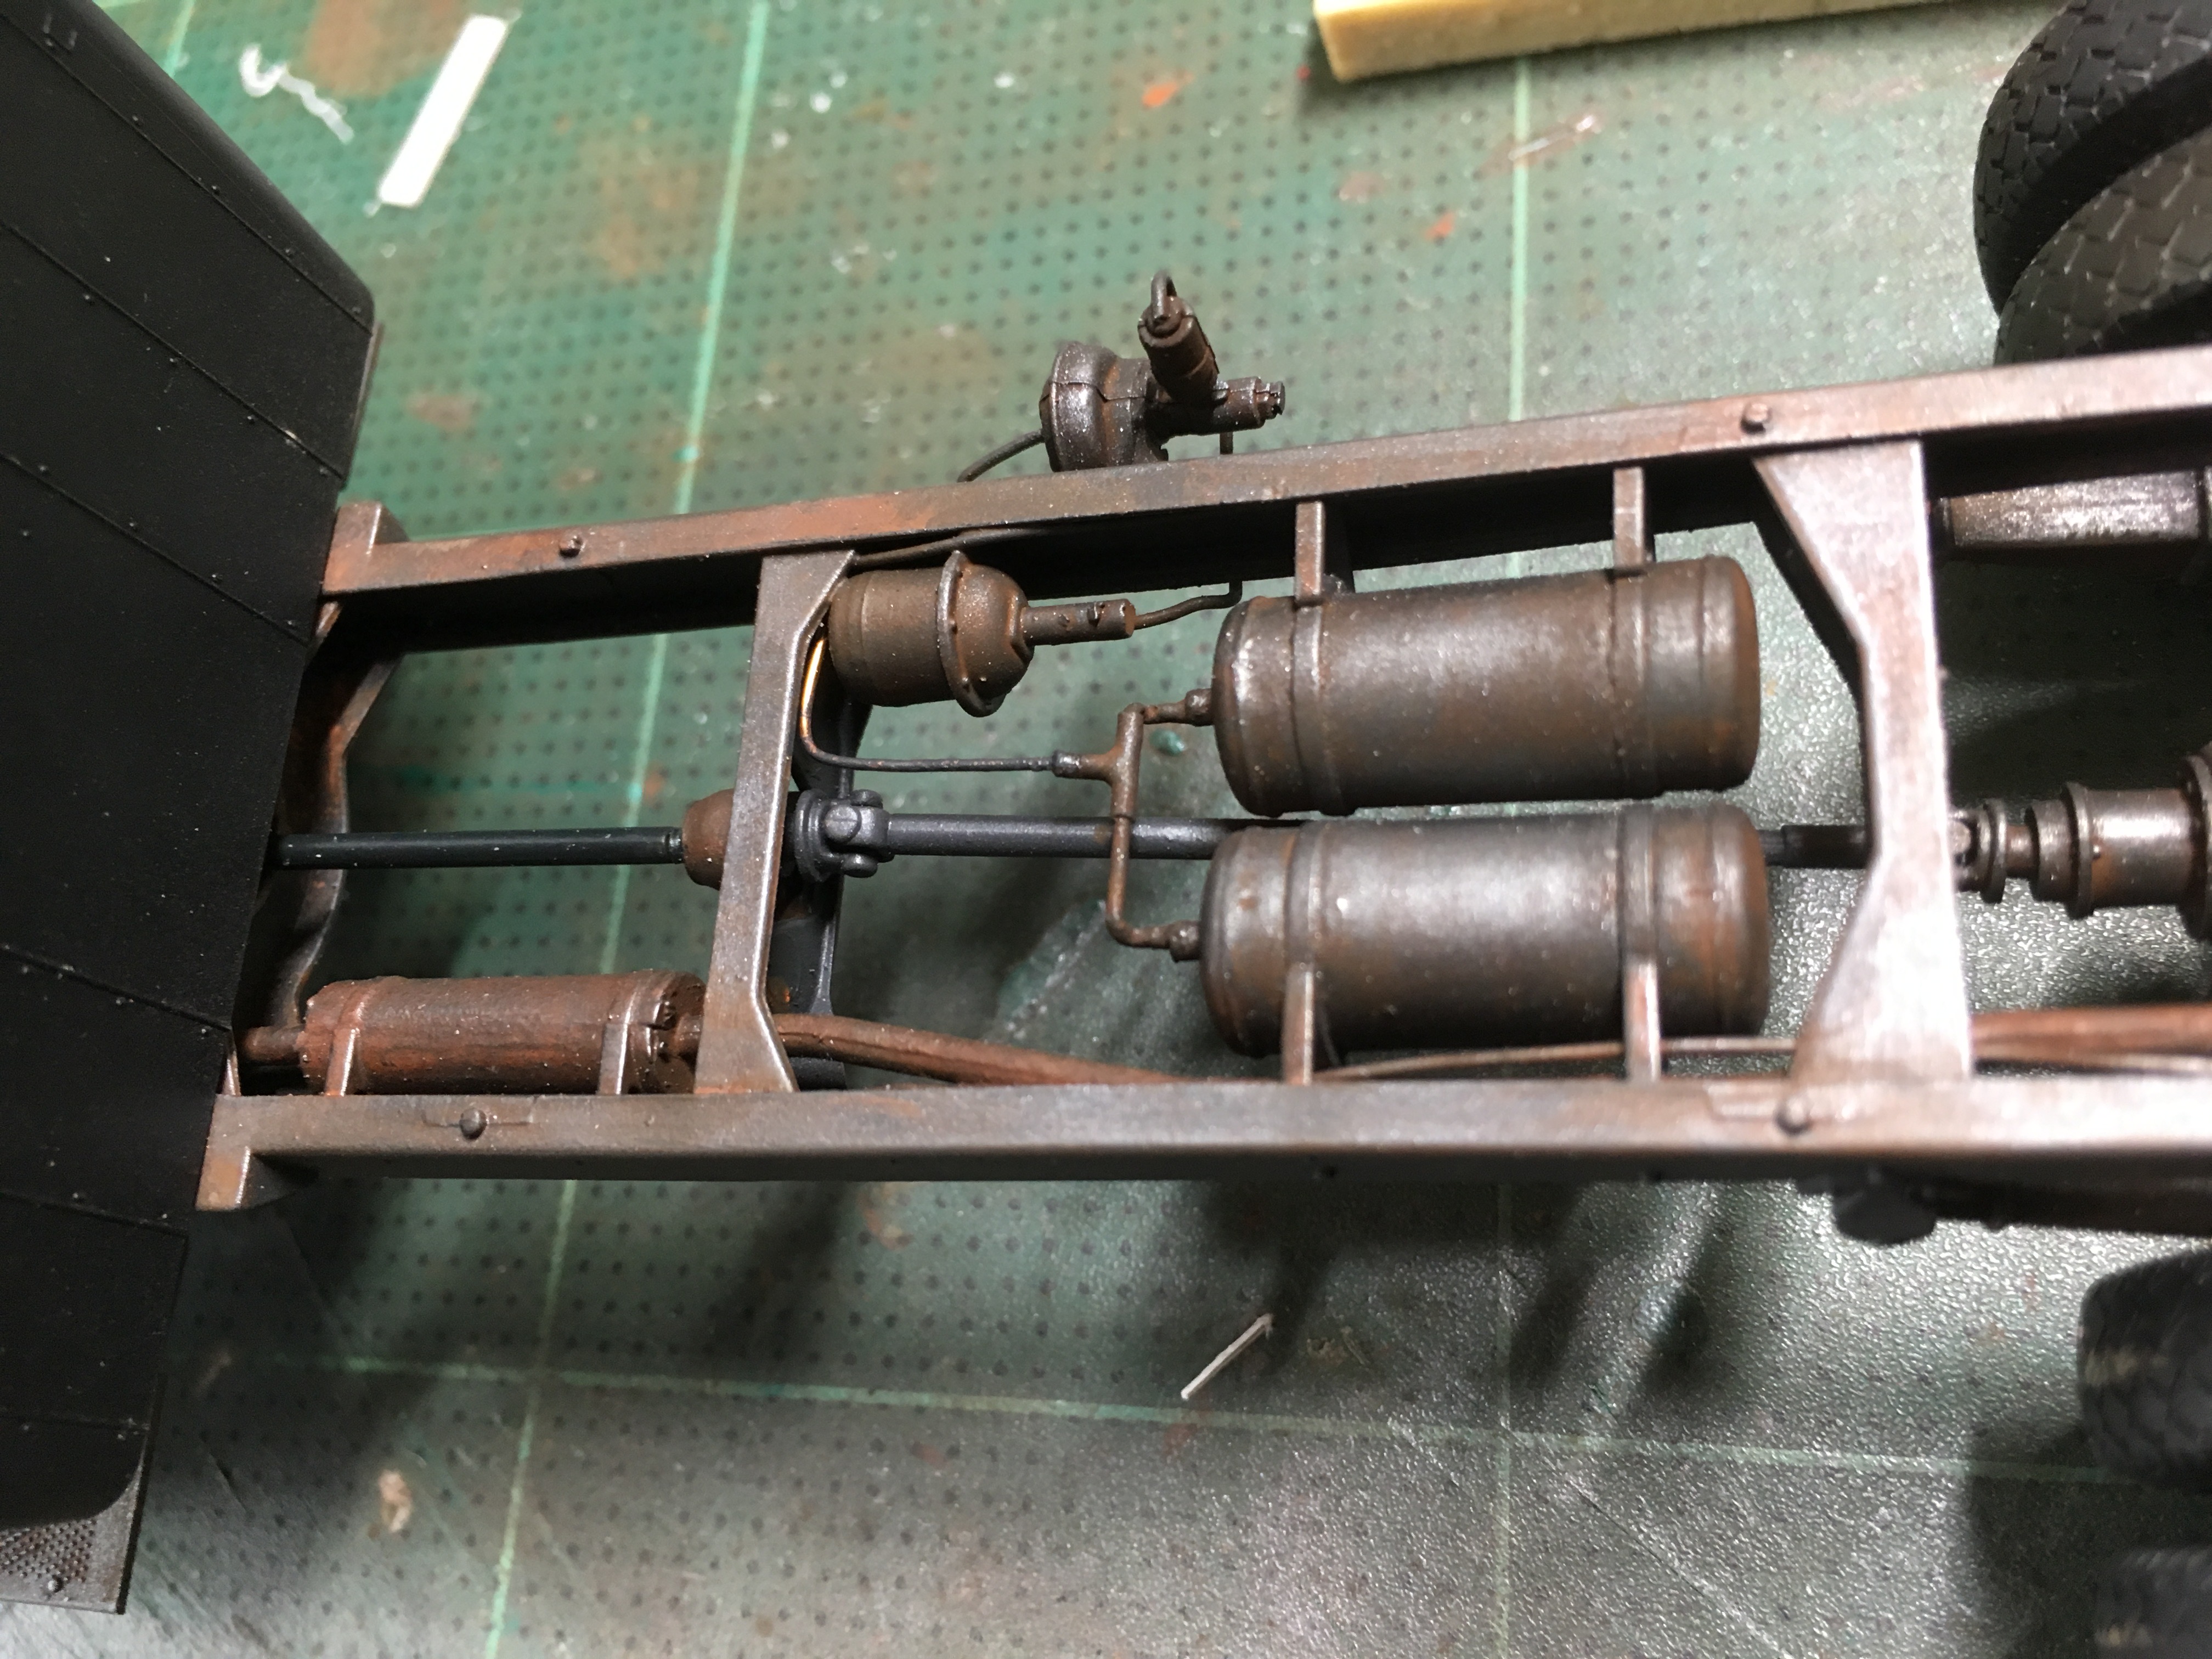
I used resin Tires from Tank Art to replace the gummy ones from AFV. Little extra work to get them positioned, but damn good resin.
Next up is to get some work done on the bogies, get that done to continue with the rest of the SSys.
Büssing however keeps me focused when the issues with bogies keep getting me headaches.
Kind regards,
Robert Jan

Bas-Rhin, France
Joined: June 08, 2017
KitMaker: 5 posts
Armorama: 4 posts
Posted: Saturday, January 05, 2019 - 08:13 AM UTC
Congratulation Robert Jan ! I really like your extra work on the Bussing.

I am building one and have difficulties to find reference about the frame details (cabling /wiring). Pictures of the motor compartment are possible to find on the Net but the other part of the frame not ...
Do you have some to share ?
Du to the quality of your build I am impatient to see the final result !
Michael

#521
Kentucky, United States
Joined: April 13, 2011
KitMaker: 9,465 posts
Armorama: 8,695 posts
Posted: Saturday, January 05, 2019 - 09:12 AM UTC
I definitely am liking the metallic tones you are achieving on the exhaust and on the truck frame in general.
Bangkok, Thailand / ไทย
Joined: September 17, 2013
KitMaker: 1,617 posts
Armorama: 1,150 posts
Posted: Saturday, January 05, 2019 - 01:12 PM UTC
There you go.
http://fahrzeuge-der-wehrmacht.de/Artikel/Buessing_4500.htmlNot that much and you have to be careful, there is a lot of restoration works, so that may be different from the real deal.
The metal effect I achieve on the chassis and other parts. I use Ushi von der Rosten metal powders / pigments(great stuff). Applied directly after the paint job, onto the fresh paint( when it's almost cured) with a brush. Like polishing.
Have a nice day,
Robert Jan

Bangkok, Thailand / ไทย
Joined: September 17, 2013
KitMaker: 1,617 posts
Armorama: 1,150 posts
Posted: Saturday, January 05, 2019 - 10:16 PM UTC

#521
Kentucky, United States
Joined: April 13, 2011
KitMaker: 9,465 posts
Armorama: 8,695 posts
Posted: Sunday, January 06, 2019 - 01:44 AM UTC
Have never, NEVER had a success with Archer rub downs - HOWEVER - if you will rub them first onto Archer's blank water slide decal material, then place them as a normal decal they work like an absolute charm !*!*!*!*!*!*!*!*!*!
Also Archer now offers two types of blank material: the water slide decal material and some sort of "transfer paper". With the transfer paper you rub the text onto the paper, place it in water and when you slide it off you are getting ONLY the rub down ink type itself with NO film what so ever! It is very delicate and does not work for blocks of lettering but for a single star it is amazing - but very fiddly!
Myself I don't use the transfer paper - way too risky!
Bangkok, Thailand / ไทย
Joined: September 17, 2013
KitMaker: 1,617 posts
Armorama: 1,150 posts
Posted: Sunday, January 06, 2019 - 02:01 AM UTC
What I did, rub them on a clear waterslide film provided. Not even 25% came off. Lucky me the big one did. So into the water and then it wrapped all over the place, not on it's destination however, no way. Cost me 5 minutes to come with the alternative(finding the old decals) and cut them to shape. You'll need a good view to see it's there. Maybe have to black the white spots, just to cover they are airplane dials.
Had a good diner tonight, so ready to get some rest now.
Thanks for looking in, much appreciated.
Robert Jan

Bangkok, Thailand / ไทย
Joined: September 17, 2013
KitMaker: 1,617 posts
Armorama: 1,150 posts
Posted: Saturday, January 12, 2019 - 11:09 PM UTC
Bangkok, Thailand / ไทย
Joined: September 17, 2013
KitMaker: 1,617 posts
Armorama: 1,150 posts
Posted: Sunday, January 13, 2019 - 02:33 AM UTC
For the planned diorama I look around at other topics, getting some ideas, particular one figures involved. This picture came up from the Bundesarchve. Just incredible what a detail one can get. Last week I ordered 2 Flak with the Sd.Ah.202, simply outstanding designs.. One is the latest Dragon 36 / 37, the other the Bronco 41, (with Dragon Sd.Ah. 202.) From LZ I'm waiting for new wagons that can carry some load.
For the replacement of SSys, that can not carry my Tigers, (for sure), a Panther is coming to get on the flatbed. Never build a Meng kit, so looking forward to see that one coming to my door.. Did some other purchase too, mostly detail etch and extra's. Looking forward to see the Büssing L4500A coming also, have some plans with that .mThe Opel Blitz is to follow the Büssing L4500S in my production line. Dragon kit v.s. AFV Club. Takes time, but worth it.
Very nice picture, there is so much detail...
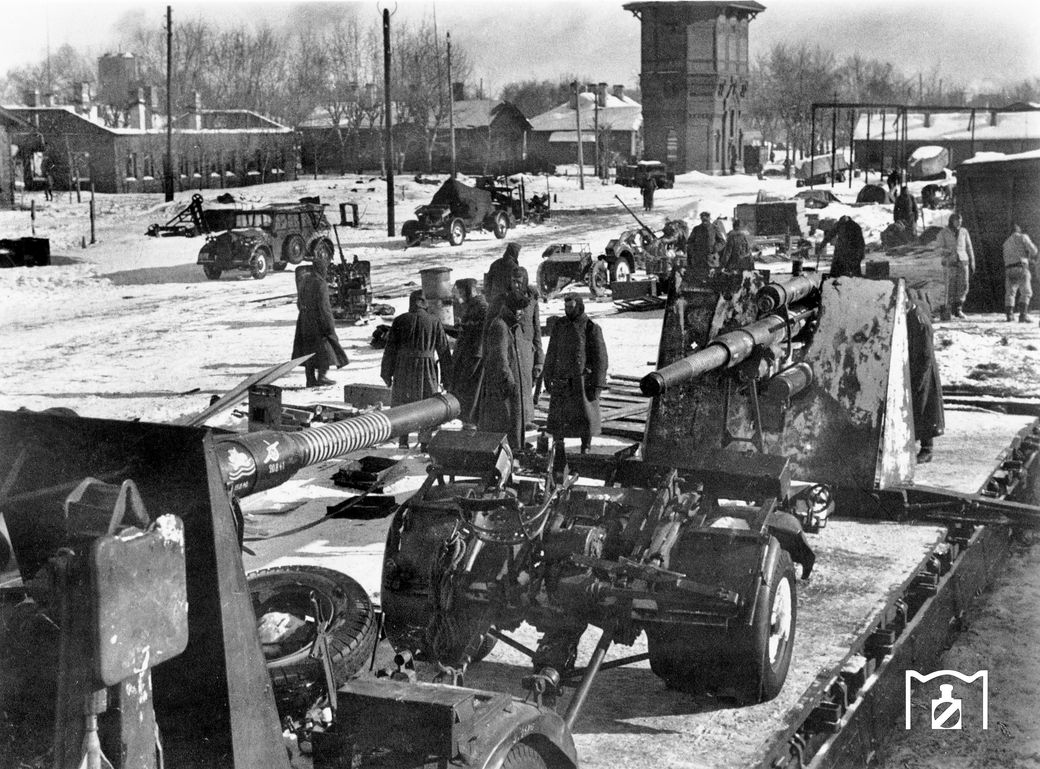
Will have to make decisions on time frame.
Cheers


Bangkok, Thailand / ไทย
Joined: September 17, 2013
KitMaker: 1,617 posts
Armorama: 1,150 posts
Posted: Monday, January 14, 2019 - 10:49 PM UTC
Guess what I just found on the Electronic Bay:
Pre-Order T-Model TK3501-I 1/35 WWII German 80ton SSYMS Flatcar Assembly Model
Have to do some research on that. T-Model TK3501 looks like a first release in 1/35. Almost sure it's from China, CADs look good to me.

New South Wales, Australia
Joined: May 04, 2016
KitMaker: 1,476 posts
Armorama: 1,463 posts
Posted: Monday, January 14, 2019 - 11:04 PM UTC
Sounds intriguing, but meanwhile the L4500 looks superb Robert – love that final pic peeking into the cab

Bangkok, Thailand / ไทย
Joined: September 17, 2013
KitMaker: 1,617 posts
Armorama: 1,150 posts
Posted: Monday, January 14, 2019 - 11:11 PM UTC
The kit provides a replacement 'wooden deck' when you make Pre-order. Will have to see if my Voyager set brings the extra detail to this one. Voyager set is for the Trumpeter. Very delicate set with Brass buffers and etched couplings. TK-3501 also includes PE for e.g. details on bogies and under the wooden deck. Ordered 2, with 2% price reduction on each item and Free shipping (hey, I'm Dutch). Did some earlier business with this seller, so have confidence.
Another purchase coming this weekend, my Faun L900 kits touched Thai soil. Have to pay some taxes however, but Oh my God I'm looking forward to this weekend.
Kind regards,
Robert Jan


Bangkok, Thailand / ไทย
Joined: September 17, 2013
KitMaker: 1,617 posts
Armorama: 1,150 posts
Posted: Tuesday, January 15, 2019 - 09:13 PM UTC
Thanks for looking in Tim, really appreciated. Progress is slow, but that's me.
Have a nice day,
Robert Jan


#521
Kentucky, United States
Joined: April 13, 2011
KitMaker: 9,465 posts
Armorama: 8,695 posts
Posted: Wednesday, January 16, 2019 - 11:19 AM UTC
Maybe it's time to get back to loading those Plattformwagons!(Just kidding around.)
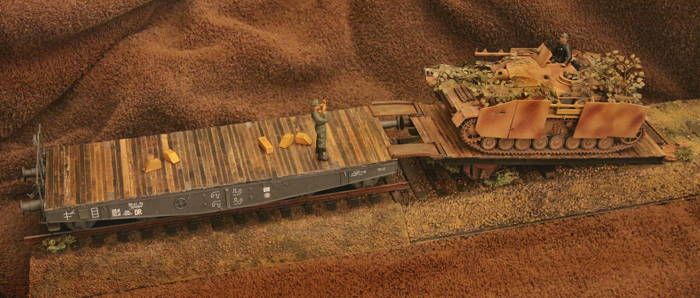
This is a modeling project I have been working on for a long time that came together just this past weekend. I think this might just have some slight connection to this thread.
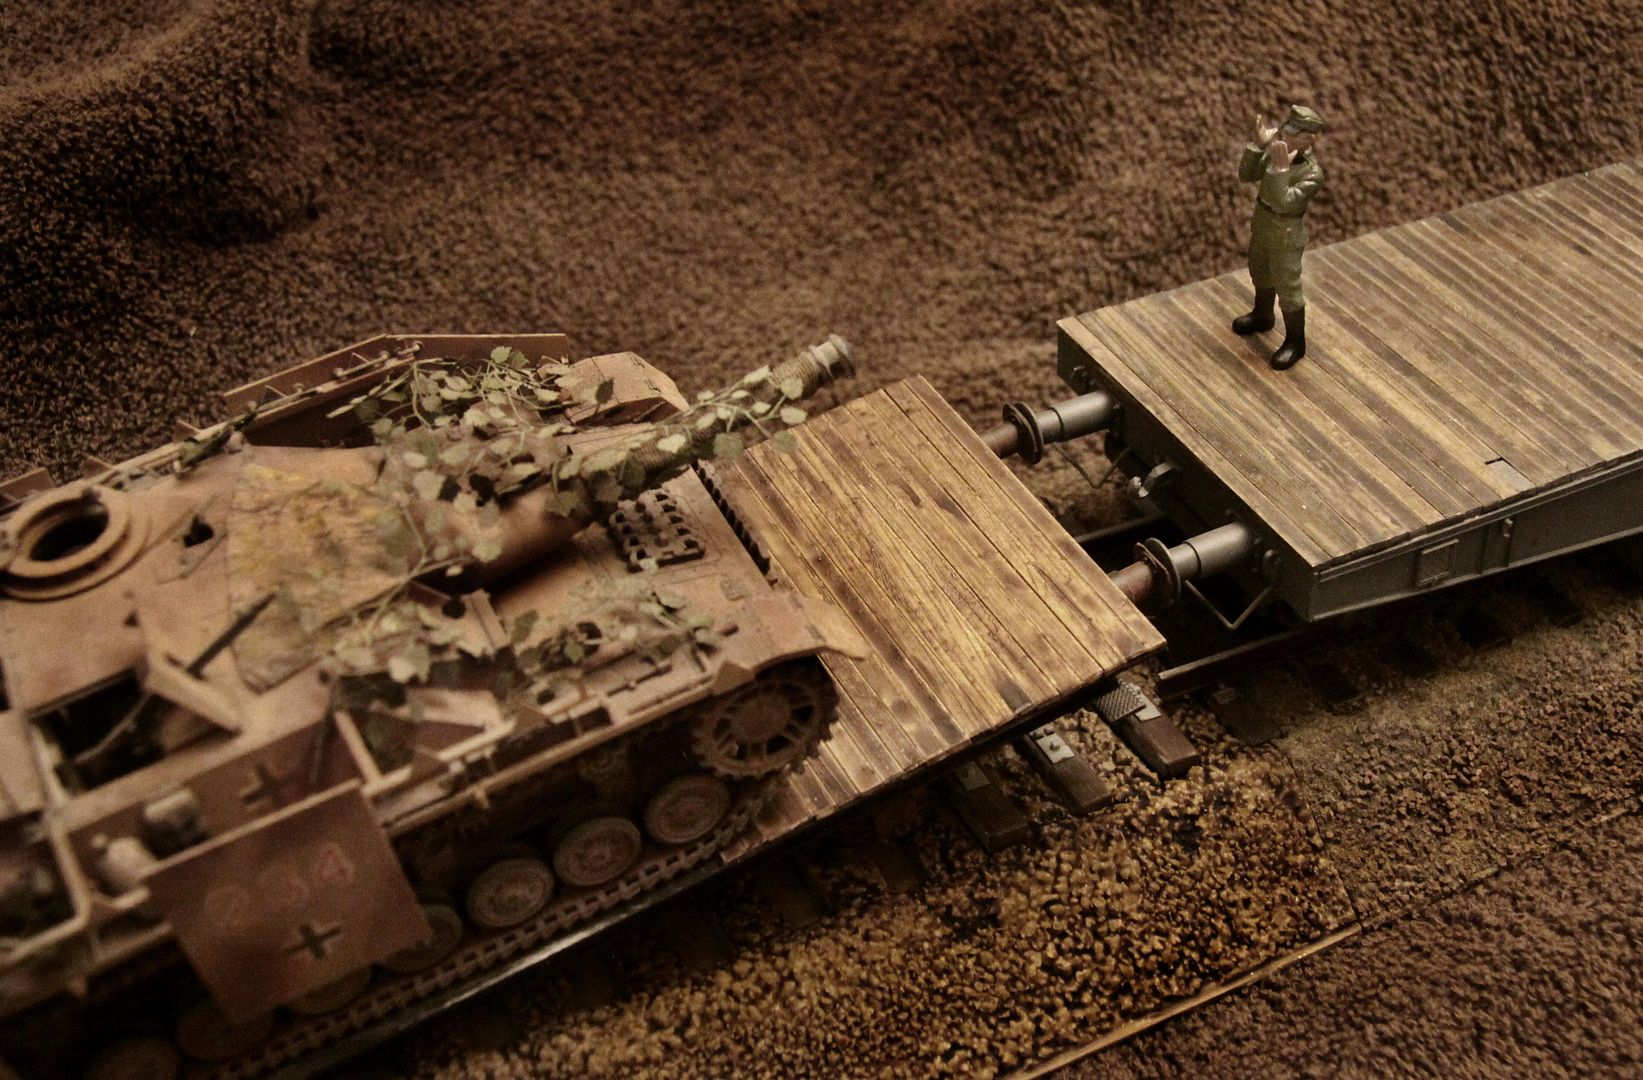
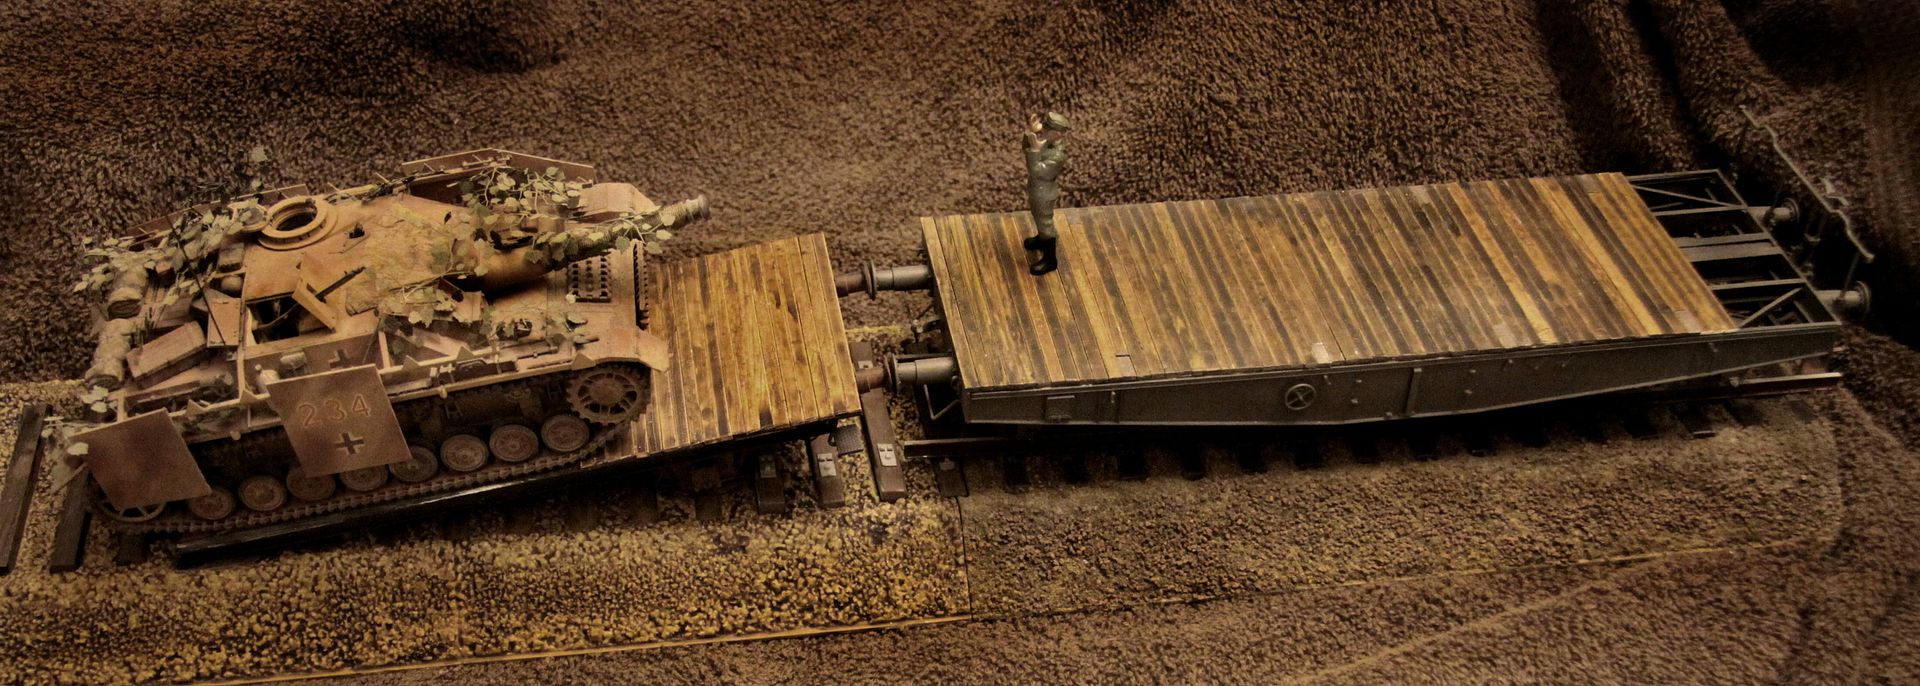
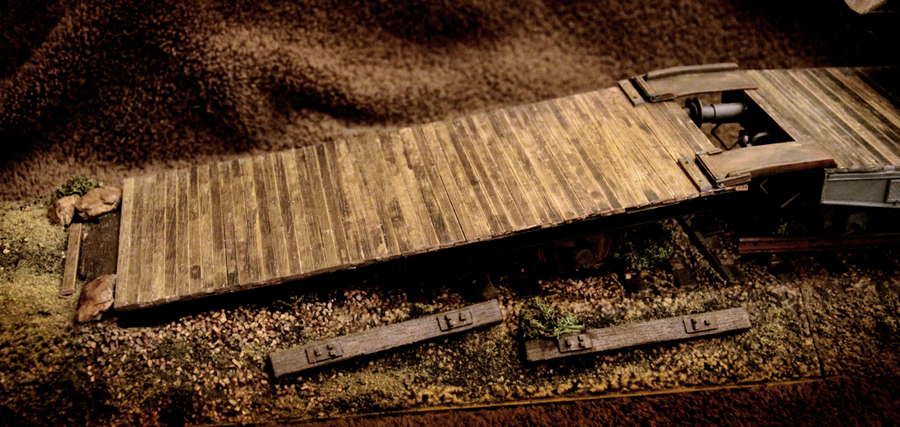
I am using a repurposed derlict 4-wheel flat car as both an end-of-track bumper and also an inclined loading ramp. (I have seen this done in a similar manor in the US in real life, so it is certainly possible they would have done some equivalent to this arrangement in Europe.)
Fritz is seen here serving as Ground Guide for the Stug crew to assist in loading the tracked equipment.
p.s. The railings at the end of the car fold down so in reality a long string of flatcars can be loaded using this method all at one time.
Bangkok, Thailand / ไทย
Joined: September 17, 2013
KitMaker: 1,617 posts
Armorama: 1,150 posts
Posted: Wednesday, January 16, 2019 - 01:08 PM UTC
I remember this one Michael. And yes it time to get on track again. Think I will split the loads from the platform wagons. A lot of kits came to my doorstep last weeks, platform wagons need to be finished to receive some of the loads I guess.
Kind regards,
Robert Jan


#521
Kentucky, United States
Joined: April 13, 2011
KitMaker: 9,465 posts
Armorama: 8,695 posts
Posted: Wednesday, January 16, 2019 - 01:48 PM UTC
I love it when new packages arrive at my door!
The individual board decking is now finished on both cars as are the drop ramps that bridge between the two. (In the above photo you can see the big car is still unfinished and the Stug hides the fact that the ramp car is also unfinished but now they are both complete.)

#521
Kentucky, United States
Joined: April 13, 2011
KitMaker: 9,465 posts
Armorama: 8,695 posts
Posted: Friday, January 18, 2019 - 07:50 PM UTC
Posting photo of my now finished railcars. (As much to bump this thread as anything - not trying to hijack Speedy J's thread.)
Bangkok, Thailand / ไทย
Joined: September 17, 2013
KitMaker: 1,617 posts
Armorama: 1,150 posts
Posted: Friday, January 18, 2019 - 08:58 PM UTC
Wait for the update on Sunday. Have sone tiny details to attach to the bogies, still... but the end is near. Then the flatbed is ready for decals and the real weathering can begin.
Have to prepare a showcase with a track on it, to get the wheel lined up. New load arrived today for the SSys. Tigers will go on the 80 tons SSyms. So don't worry this is ending. It has just started to get some shape.
Kind regards,
Robert Jan


Bangkok, Thailand / ไทย
Joined: September 17, 2013
KitMaker: 1,617 posts
Armorama: 1,150 posts
Posted: Friday, January 18, 2019 - 09:00 PM UTC
Cool. Like the wooden bed.


#521
Kentucky, United States
Joined: April 13, 2011
KitMaker: 9,465 posts
Armorama: 8,695 posts
Posted: Friday, January 18, 2019 - 10:24 PM UTC
Quoted Text
Cool. Like the wooden bed.


Thank you J, and looking forward to your next update!
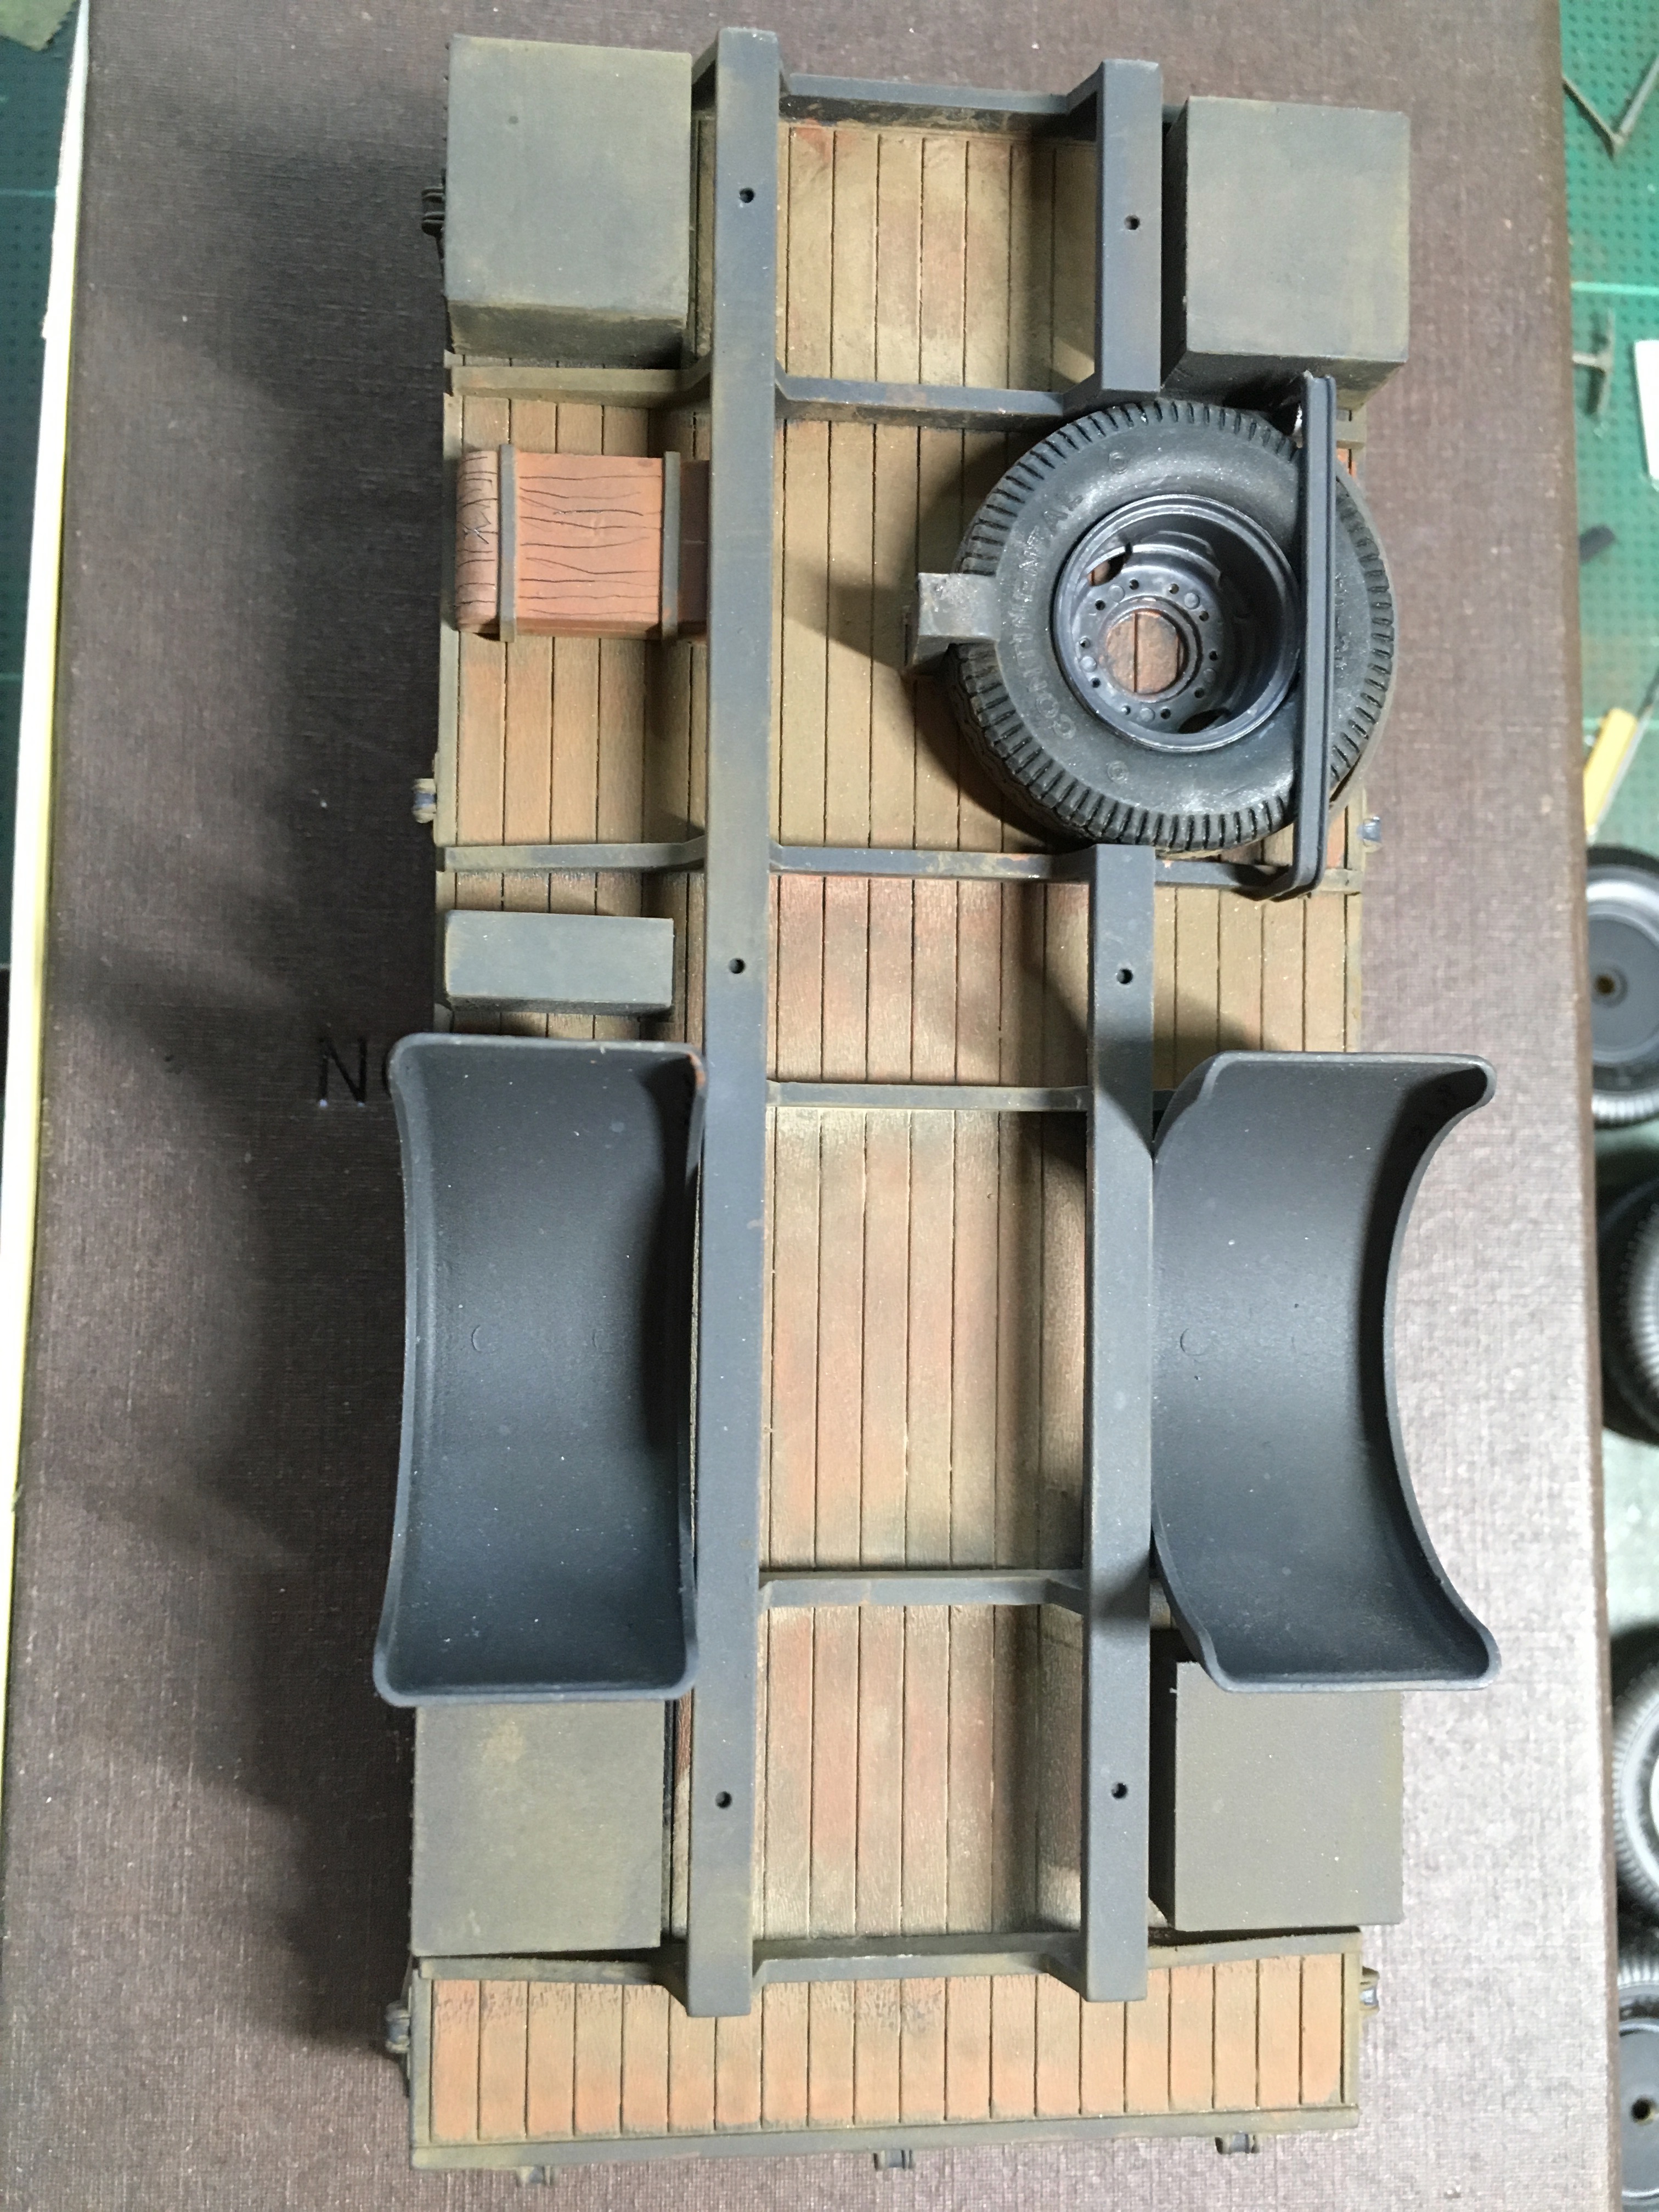
Decks are both made up of individual (plastic) boards. Used a small saw blade drawn across the boards to create the wood grain. For the ramp car I used a single color warm brown wash to give it that warm wood color. For the heavier car I wanted a different look so I used several different shades of wash from brown to deep black. Stained those boards in small batches using the different washes producing a variety of shades/colors. Then mixed the boards up in a big pile to guarantee a random pattern of wood shades on the deck as I laid the new flooring.
One aspect I enjoy very much is that you can see daylight through the cracks between the boards looking up through the car. This is something I did years ago to all my HO flatcars.
(Back in the days when I HAD a layout.)
Minnesota, United States
Joined: July 20, 2004
KitMaker: 1,513 posts
Armorama: 1,449 posts
Posted: Saturday, January 19, 2019 - 02:27 AM UTC
A fun blog here to watch!
Dan
Looking to meet other MN Armor modellers. I live in Buffalo.
Bangkok, Thailand / ไทย
Joined: September 17, 2013
KitMaker: 1,617 posts
Armorama: 1,150 posts
Posted: Saturday, January 19, 2019 - 02:58 AM UTC
Hi Michael. Building train layouts and later building my own, I had to give up when moving to Thailand, sad but true. I sold about a hundred pieces of moving stock, left only some hand build brass trains and passenger cars at my brothers house (5 years ago already). I still miss that hobby. But in the static scales of 1/35 I can do so much more with the scenes and materials, it is a step up in my modeling experience.
Kind regards,
Robert Jan


