_GOTOBOTTOM
Armor/AFV: Axis - WWII
Armor and ground forces of the Axis forces during World War II.
Hosted by Darren Baker
Beginners Guide to Photo Etch
retiredyank
Visit this Community
Arkansas, United States
Joined: June 29, 2009
KitMaker: 11,610 posts
Armorama: 7,843 posts
Posted: Monday, October 16, 2017 - 01:34 AM UTC

Quoted Text


Quoted Text

Richard: I find soldering etch together works much better than ca. If you want to go this route, I find leaving the main piece of etch attached to the fret is a great way to achieve stability. Just make sure you use plenty of flux. Speaking of; I apply flux over the entire assembly and remove it, at the planned joint using a microbrush(you can find these as "micro dental brushes" on Amazon). The difficult part is removing the chrome plating from the Eduard etch. You can do this, with your file. I understand that this is a lot to take in, but well worth the result. Oh, I should mention that I use a torch, rather than a soldering iron. And, I use solder paster, rather than solder wire.


I have been looking at soldering, Paul BudziK, did a video on soldering. https://www.youtube.com/watch?v=iBji-Oz3J7E Which I found useful, but I think some of it went over my head. I cannot find the supplies he talks about. I will look into the paster and see if we have any around, must have. Finding Flux is a real PITA, and of course that was the one thing I forgot to look for at my hobbyshop..


I ordered everything, off Amazon. I use Kester solder paste. The only thing I didn't order was the tile I solder on.
TopSmith
Visit this Community
Washington, United States
Joined: August 09, 2002
KitMaker: 1,742 posts
Armorama: 1,658 posts
Posted: Monday, October 16, 2017 - 06:29 AM UTC
Check an electric supply house for solder, paste and torch. Call ahead. Granger or another similar place.
Mortifa
#464
Visit this Community
British Columbia, Canada
Joined: December 02, 2016
KitMaker: 267 posts
Armorama: 196 posts
Posted: Monday, October 16, 2017 - 06:40 AM UTC
Any ideas on how these go together?

Here are the instructions.


And the actual pieces.


I cannot figure out how to put this together. Looked at some youtube video and these are not the same.

Mortifa
#464
Visit this Community
British Columbia, Canada
Joined: December 02, 2016
KitMaker: 267 posts
Armorama: 196 posts
Posted: Monday, October 16, 2017 - 07:00 AM UTC
Also when I attach these small parts I should try, I think, to make sure the surface they go on is smooth? The fenders are not smooth so I should sand, or carve, them smooth in the area I am attaching these to?
Mortifa
#464
Visit this Community
British Columbia, Canada
Joined: December 02, 2016
KitMaker: 267 posts
Armorama: 196 posts
Posted: Tuesday, October 17, 2017 - 04:49 AM UTC
So, this has been great and I have learned a lot.

If this is your first time with photo-etch, as this was mine, relax, it is not as bad as it may appear. There are somethings that you should be aware of. Photo-etch is fragile, try not to rebend it after the initial fold, having said that, the first few times it will probably happen.

For me the best glue is the gel type CA, still think it is a lack of practise that makes the regular stuff hard to work with.

Make sure you know when you need to work on a part, pre-plan you work, that will save you a lot of headaches.

I got the front pretty well done, just waiting on some tips on building the clamps, if anyone has any.


Mortifa
#464
Visit this Community
British Columbia, Canada
Joined: December 02, 2016
KitMaker: 267 posts
Armorama: 196 posts
Posted: Wednesday, October 18, 2017 - 02:04 AM UTC
Okay, so a quick look at the tools I have been using to get this done.


So let me start with the White Jar, Golden Medium, Light Moulding Paste, works great and water soluble, dries nicely and gets into really small spaces. Not as good as Tamiya Putty, but I like it as a go to.

Moving up we have the glues, with the gel type CA on the left above the cutting board. I have tried all three of these glues and Future and the gel works best for me, again I think there is operator error as I have not used these a lot, yet.

Sand paper, self explanatory, same with the dish with glue in it, don't use as much as I did.

Mirror, used that to try and cut pieces, the cutting board worked better for me. But the mirror is great for holding the pieces you are working on, much easier to see.

The little bender, works really well, but I should have bought the larger 5.5 inch model and from the looks of them the Small Shop one looks to be the most versatile.

Knives, I have two shown, the green handled one is great for carving and such, just fits in the hand nicely and I have great control with it. The Fiskar is my work horse, feels good and can do a lot, but I like the other better for carving.

The flat nose pliers, get a pair if you do not have one, they are wonderful and I find I use them more for folding than the actual folder. If you are nervous about photo-etch grab a pair of these and some photo-etch and just have fun. Try bending some big pieces at first to get comfortable and then move to smaller pieces. The more you handle photo-etch the better you will become.

Now if you read the posts on here there are some really good tips from some folks, such as a photo-copy of the photo-etch to practise your folds with first. Really good idea, as some of the folds are a little like puzzle solving, except if you mess up, well you messed up.

The number one thing I have found was getting used to using both hands for this. I found that I needed to hold a small piece of photo etch, but I also wanted to sand it, or use the diamond file, but switching the pliers, from my right hand to my left, was awkward. Well you actually do not have to. Just hold the piece in your right hand and the file in your left and then move the piece to the file and just file. That was weird for me at first because I like to control the pressure on the file, but after a little practise I was able to control the pressure with my right hand through the pliers. It felt, and feels, sort of counterintuitive but you get used to it and stop wishing you were related to an octopus.

The tools not shown are my Exacto saw or my razor saw, both got usage.

Things to remember, heating the photo-etch before you bend it and letting it cool, number one tip that I got from youtube. This will save you grief, if you remember.

Using a toothpick with some adhesive on it to grab and hold parts. This actually works better than tweezers. The wax pencil, I am still working on.

One thing I am looking for, and will add to my tools, is a small metal triangle, or square. I think this would be useful. Just after I wrote that last sentence I looked at the picture again and, lo and behold, the small folders fits the bill perfectly.
Mortifa
#464
Visit this Community
British Columbia, Canada
Joined: December 02, 2016
KitMaker: 267 posts
Armorama: 196 posts
Posted: Friday, October 20, 2017 - 10:29 PM UTC
Quick update.

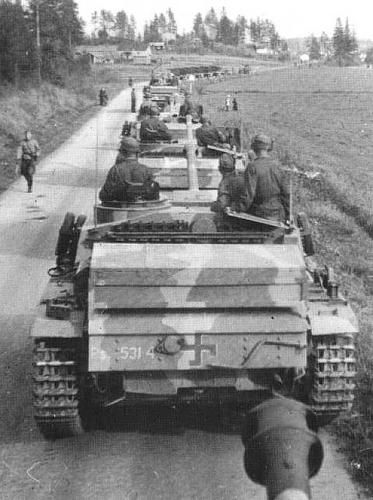
I am using the following photo for reference on this.


As you can see most of the tools on the side of the Stug are gone, but it looks like the clamps and such are still there.

Bearing that in mind, I went to work on the one side. I still need work, like how to get two pieces in a sort of line.


Still struggling with CA, apparently you should sand the surface of the photo-etch before applying glue just to give it something to hold onto?

Nearly done, been a great learning experience and I will be painting it and weathering it.


Sturmi
Visit this Community
Hame, Finland
Joined: August 14, 2006
KitMaker: 40 posts
Armorama: 35 posts
Posted: Saturday, October 21, 2017 - 01:03 PM UTC
Hello Richard

You may found these topics to help you. These are in Finnish but the images speak for themselves.
Follow the Dragon kit, that one is built to look 1943 style, and the Tamiya one should look like it was in 1966.
http://www.pienoismallit.net/galleria/malli_9875/

This link you will find how he finnished his dragon kit
http://www.pienoismallit.net/galleria/malli_9875/rakennusvaihe_1389/

By the way, he is actually built this tank
Mortifa
#464
Visit this Community
British Columbia, Canada
Joined: December 02, 2016
KitMaker: 267 posts
Armorama: 196 posts
Posted: Saturday, October 21, 2017 - 09:35 PM UTC
Thanks great resources, and nice work.
Mortifa
#464
Visit this Community
British Columbia, Canada
Joined: December 02, 2016
KitMaker: 267 posts
Armorama: 196 posts
Posted: Wednesday, November 08, 2017 - 01:30 AM UTC
First thank you to all who have contributed, I am paying attention.

After reading a recommendation for a video I grab Adam Wilder's video about Photo-etch, not bad.

Still it raised more questions for me, though it did answer a lot.

On photo etch I believe I am supposed to fold at the darker line so that it is not visible, but there are also other marks and on the video he seemed to know where to push on the metal to raise detail, but where does it say to do that?

BTW throwing a part into the freezer to get photo etch off works very well, better than trying to cut it off using a sharp knife.
Mortifa
#464
Visit this Community
British Columbia, Canada
Joined: December 02, 2016
KitMaker: 267 posts
Armorama: 196 posts
Posted: Tuesday, December 05, 2017 - 12:20 AM UTC
Alright, frustration level is escalating.

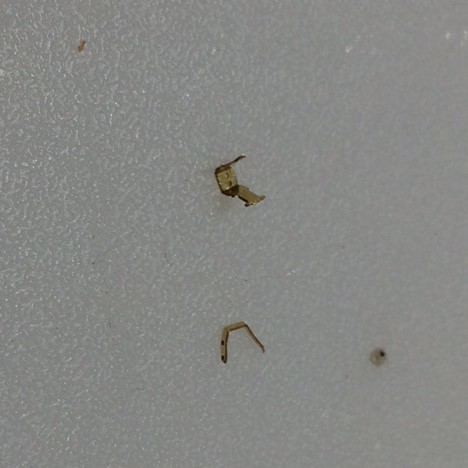
So now I have an issue with previously attached photo etch coming apart. These were glued on using CA, which I am getting much better at using.

I have an old soldering iron, Weber I believe, and may try soldering them together, going to take some work.

Trying to find that Boresight mag.
Mortifa
#464
Visit this Community
British Columbia, Canada
Joined: December 02, 2016
KitMaker: 267 posts
Armorama: 196 posts
Posted: Tuesday, January 02, 2018 - 11:50 PM UTC
Well that was an interesting experiment.

Not walking away, yet, but need to do some rethinking.

Photo-etch is different to work with. I got the Paul Wilder video and it isn't bad, once I have done more work with Photo-etch I will try some of the things I saw him do.

I really wish there was a reference for what the symbols on the photo etch mean. I thought the etching was just detail but apparently they are for you to manipulate in some form.

As another forumite put it, sometimes the photo-etch is just not as good as what is offered by the kit and I would agree, but man can it rock a kit, even from the little I have done so far it looks good, but those are wise words that deserve to be heeded.

Preplanning is another big step with photo-etch, though for now I am going to stick with stuff that I can deal with and venture forth only after I have a better understanding of the tools I have. CA glue is another learning curve.
 _GOTOTOP