_GOTOBOTTOM
Dioramas
Do you love dioramas & vignettes? We sure do.
Red Wings
SF-07-18D
Visit this Community
Madrid, Spain / España
Joined: December 19, 2016
KitMaker: 366 posts
Armorama: 300 posts
Posted: Sunday, October 22, 2017 - 04:50 PM UTC
Hi guys!

Now I´m working on a new dio. This time I´ll try to represent a mission well known by all of us, Red Wings.

This is what I already have for the dio, figures mainly.

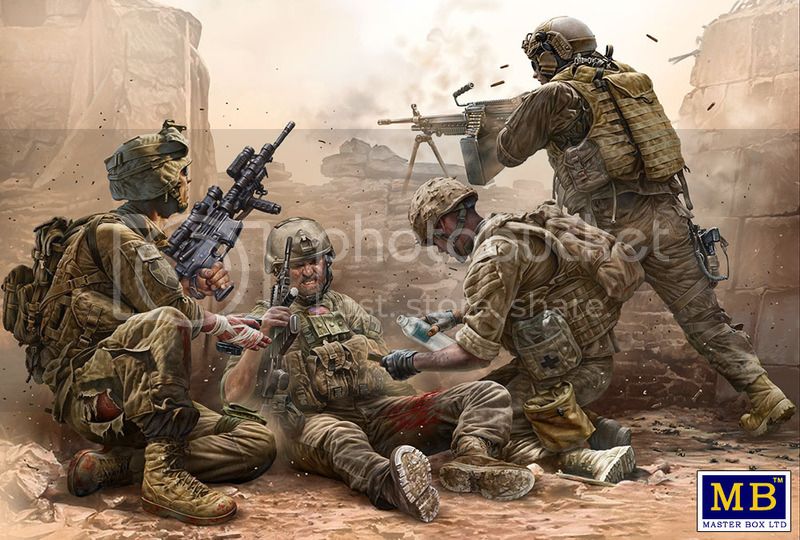
Not all in this box will be used:

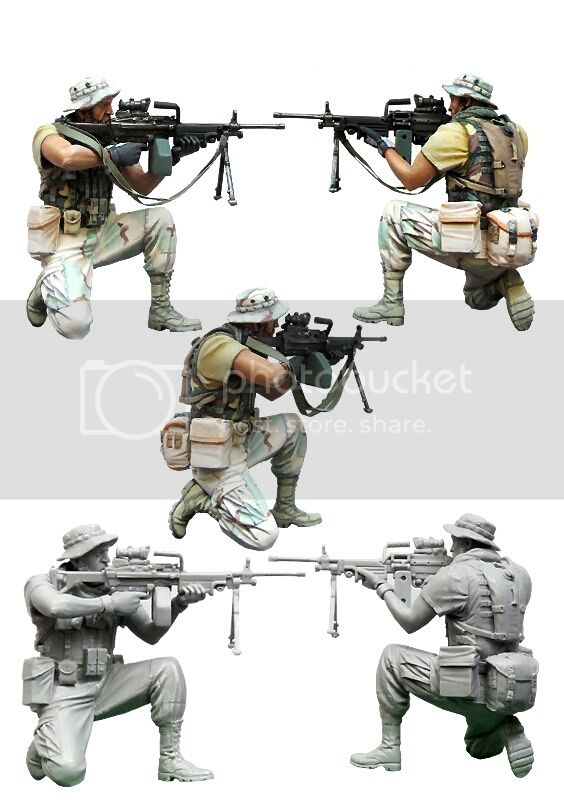
Maybe I´ll use this figure, removing the M249 mag pouches and the gun, of course.

I have to get some more US figures, I don´t know what to use yet.

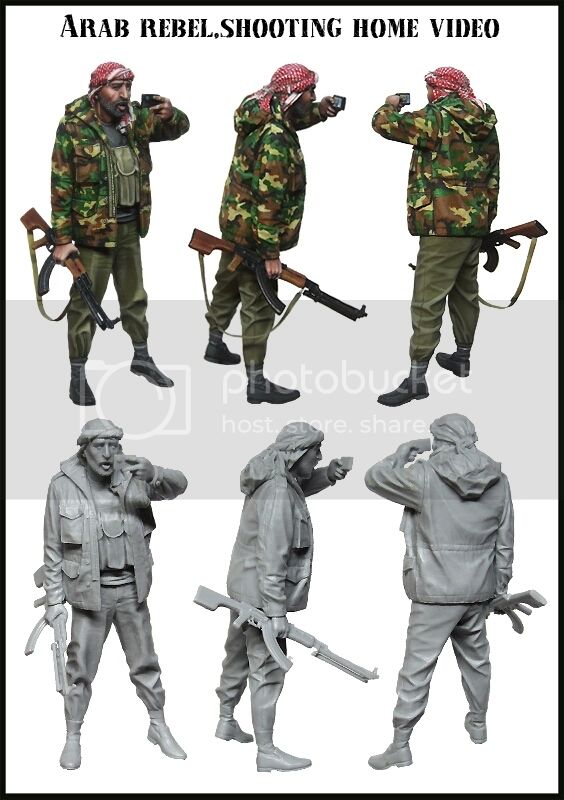
And the bad guys, some more still to come:


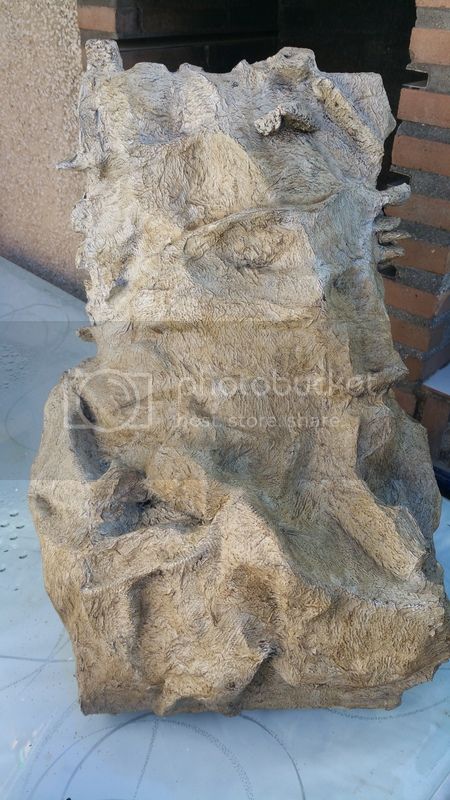
The mountain will be hand made, and this is what I have actually done:
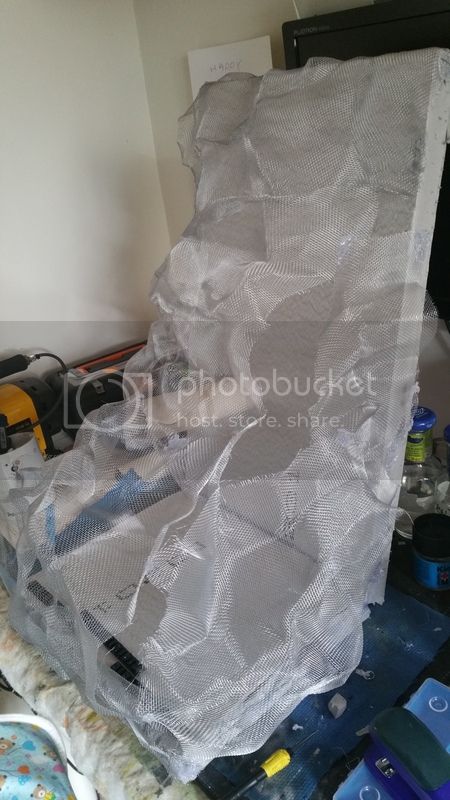


It´s made with 2 pieces of stryrofoam and metallic mesh for shaping.

Meshing completed:


Once the mesh is already set, next is to glue sheets of bog roll with white glue mixed with water (50-50)


And this is all for now. Covering with paper is quite boring, but necessary. I´ll post some advances.

Thanks for watching.
deerstalker36
Visit this Community
Queensland, Australia
Joined: May 16, 2010
KitMaker: 232 posts
Armorama: 218 posts
Posted: Sunday, October 22, 2017 - 05:39 PM UTC
nice mountainscape, might nick it for some gebirgsjagers i have.

Evolution mini figures are the bees knees
SF-07-18D
Visit this Community
Madrid, Spain / España
Joined: December 19, 2016
KitMaker: 366 posts
Armorama: 300 posts
Posted: Sunday, October 22, 2017 - 07:52 PM UTC
Hi again.

Looking for your advice:

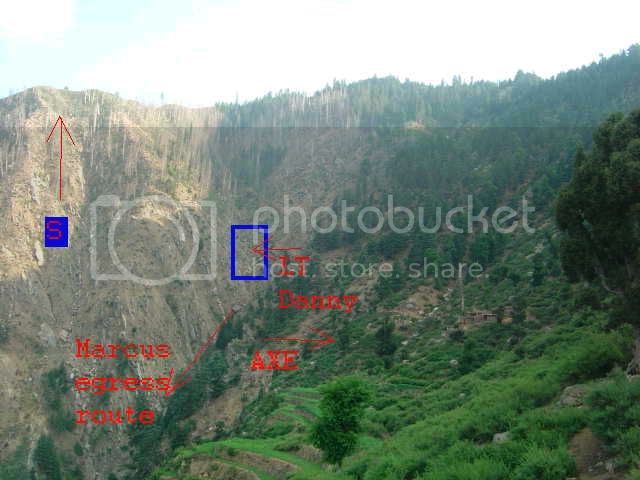
I´m not sure what colors use to paint the mountain. As I could see in this picture (thanks to Mike Murphy Foundation for emailing me) I see the most of the mountain in brown, light brown, some touches of grey..... But I don´t know which colour would match better.


I´ll make the lighter zone, marked as LT & Danny. I won´t mess with the greenish zone.

Thanks for any help!
SF-07-18D
Visit this Community
Madrid, Spain / España
Joined: December 19, 2016
KitMaker: 366 posts
Armorama: 300 posts
Posted: Saturday, November 04, 2017 - 08:06 PM UTC
Hi gents,

Hope you have a great weekend. I have made some advances on the mountain, so I post the pictures.

Once the covering of the metallic mesh was over, I started the painting process. I had to make some attemps to get the colour I wanted. Finally I made it mixing acrylic paint, white, black (5%) and ocre yellow (25%)

This is the mountain covered and an initial setup for some figures


Once I had the color base, I gave a wash with raw umber, and then dry brushed all the mountain, using acrylic paint. First I used burnt earth and then black on the edges. This is the result


With some figures. SEALs are the four in the lower side, from left to right Murph, Dietz, Axe and Lutrell.


Axe's figure won't be the one displayed. I have to look for another. Some more talibans to come yet, they will be 7/8.

For Lutrell's figure I use the machine gunner shown in the post above. But the figure came without arms, so I have to fix it with some spare pieces. I also have removed the 249's ammo pouches and added another ones.


Despite it's not shown neither in the movie nor the book, I'm not going to remove the camelback, so difficult for me.

This is how the figure looks right now


I know that figures are not 100% as described, but I can't find modern SEALs in greenside setup, so I'll work with the ones I have.

That's all for now. Regards!
jrutman
Visit this Community
Pennsylvania, United States
Joined: April 10, 2011
KitMaker: 7,941 posts
Armorama: 7,934 posts
Posted: Saturday, November 04, 2017 - 10:21 PM UTC
Nice progress here. That is an epic mountainside that you built. I would say the rocks are more brown than grey. I is also lightly shaded by some small green bushes and trees,which throws off the color perception.
This event and the movie "Lone Survivor" are very special to me as a soldier. Some of the scenes in the film brought back a lot of memories and were thoroughly accurate as far as I am concerned.
The part where they jumped/dove/slid down the cliff was so realistic it made me wince. I could feel my bones. The scene where the Seal died ,thinking about his family far far from home before the light went out in his eyes made me cry in the theater. I mean um ummm,I got some dirt in my eye.
J
J
SF-07-18D
Visit this Community
Madrid, Spain / España
Joined: December 19, 2016
KitMaker: 366 posts
Armorama: 300 posts
Posted: Sunday, November 05, 2017 - 12:21 AM UTC
Hi Jerry!

I'm glad you like it. Next step is what you say, add some green touches, some bushes and some trees also. Trees will be hand made, let's see what happens.

You're right about the movie, is very accurate, as described on Lutrell's book. I didn't like the 'dramatic' scene where Marcus' heart stops because is not true as far as I know. Same with the final scene on the village with Apaches everywhere. But it looks cool for the viewer.

The scenes you describe are so hard to watch. I don't even guess what they felt there.

Thanks for watching!

Regards.
Stickframe
#362
Visit this Community
California, United States
Joined: December 01, 2013
KitMaker: 1,661 posts
Armorama: 1,202 posts
Posted: Sunday, November 05, 2017 - 07:12 AM UTC
This looks like a great project you've got going! That mountainside is quite ambitious - and looking good!

Cheers
Nick
El_Patron
Visit this Community
Madrid, Spain / España
Joined: October 28, 2017
KitMaker: 30 posts
Armorama: 28 posts
Posted: Monday, November 06, 2017 - 10:31 PM UTC

Quoted Text

Nice progress here. That is an epic mountainside that you built. I would say the rocks are more brown than grey. I is also lightly shaded by some small green bushes and trees,which throws off the color perception.
This event and the movie "Lone Survivor" are very special to me as a soldier. Some of the scenes in the film brought back a lot of memories and were thoroughly accurate as far as I am concerned.
The part where they jumped/dove/slid down the cliff was so realistic it made me wince. I could feel my bones. The scene where the Seal died ,thinking about his family far far from home before the light went out in his eyes made me cry in the theater. I mean um ummm,I got some dirt in my eye.
J
J


Hi, I had a very bad feeling watching those movie scenes too, in fact I am quite attached to the book, for I am translating it into Spanish, sadly for free.

Way to go Nacho! I can´t wait to see it done
ti
Visit this Community
Dalarnas, Sweden
Joined: May 08, 2002
KitMaker: 2,264 posts
Armorama: 1,763 posts
Posted: Monday, November 06, 2017 - 11:11 PM UTC
Looking awesome! The rebel figures you intend on using, most of them(which I used) are very well made. It was a joy to paint.
SF-07-18D
Visit this Community
Madrid, Spain / España
Joined: December 19, 2016
KitMaker: 366 posts
Armorama: 300 posts
Posted: Tuesday, November 07, 2017 - 01:45 AM UTC

Quoted Text


Quoted Text

Nice progress here. That is an epic mountainside that you built. I would say the rocks are more brown than grey. I is also lightly shaded by some small green bushes and trees,which throws off the color perception.
This event and the movie "Lone Survivor" are very special to me as a soldier. Some of the scenes in the film brought back a lot of memories and were thoroughly accurate as far as I am concerned.
The part where they jumped/dove/slid down the cliff was so realistic it made me wince. I could feel my bones. The scene where the Seal died ,thinking about his family far far from home before the light went out in his eyes made me cry in the theater. I mean um ummm,I got some dirt in my eye.
J
J


Hi, I had a very bad feeling watching those movie scenes too, in fact I am quite attached to the book, for I am translating it into Spanish, sadly for free.

Way to go Nacho! I can´t wait to see it done


Patrón, you have to wait. And yoy know it. Next is making trees and bushes. Will post all the advances.
El_Patron
Visit this Community
Madrid, Spain / España
Joined: October 28, 2017
KitMaker: 30 posts
Armorama: 28 posts
Posted: Tuesday, November 07, 2017 - 01:47 AM UTC
Maybe I could help you with the trees and bushes, I have a plastic bag full of grass, not weed but grass.
SF-07-18D
Visit this Community
Madrid, Spain / España
Joined: December 19, 2016
KitMaker: 366 posts
Armorama: 300 posts
Posted: Tuesday, November 07, 2017 - 01:48 AM UTC

Quoted Text

Looking awesome! The rebel figures you intend on using, most of them(which I used) are very well made. It was a joy to paint.


Thanks Charles. I'm willing to start with the figures, but not yet. First is to finish the mountainside.

BTW, I 've just received today the Rebelds carrying the RPGS.

Thanks for watching!
SF-07-18D
Visit this Community
Madrid, Spain / España
Joined: December 19, 2016
KitMaker: 366 posts
Armorama: 300 posts
Posted: Thursday, November 09, 2017 - 02:16 AM UTC
Hi there!

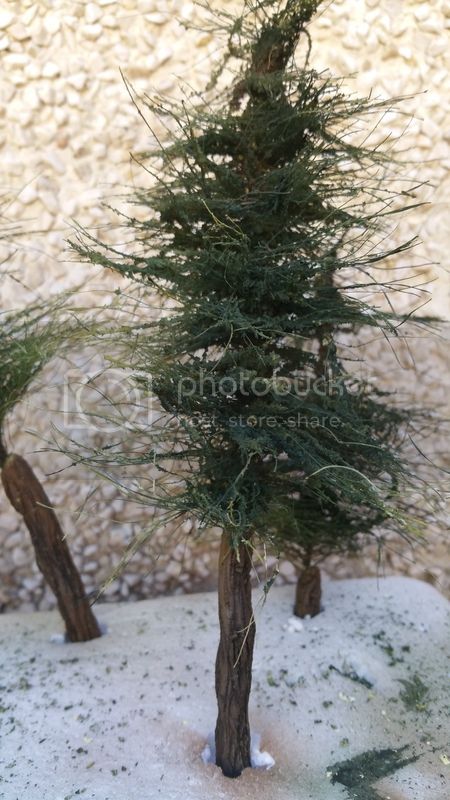
As it was day off in Madrid, I could make a new try: make trees. The initial idea is take a wire folded by its middle and putting rope strands between the wire. Once it's done, I twine the wire with the help of a dremel and a plier. This iswhat I've got for now


A first preview on the mountain


Now I have to get some sawdust and paint the trees. I hope the results improve with these next steps, I'm not fully satisfied with the tree's look. Maybe the weekend I'll try some new technics. Some advices will be welcomed anyway.

Regards!
MakiWawa
Visit this Community
Warszawa, Poland
Joined: December 17, 2014
KitMaker: 448 posts
Armorama: 448 posts
Posted: Thursday, November 09, 2017 - 03:57 PM UTC
Trees workshop
http://www.modelwork.pl/viewtopic.php?f=252&t=59315
SF-07-18D
Visit this Community
Madrid, Spain / España
Joined: December 19, 2016
KitMaker: 366 posts
Armorama: 300 posts
Posted: Thursday, November 09, 2017 - 08:30 PM UTC


Thanks!! It´s a very good tutorial!!
SF-07-18D
Visit this Community
Madrid, Spain / España
Joined: December 19, 2016
KitMaker: 366 posts
Armorama: 300 posts
Posted: Sunday, November 12, 2017 - 12:57 AM UTC
Well, I have made a new try for the trees. i've bought a new rope because the first one I tried didn't work.

So the steps were the same described above. The new result is this:


Once I've done the trees, next step is submege the trees into a bowl with water and white glue (3:1). Then I sprinkle sawdust on the trees.


Finally, painting work. First coat is green.


After green coat, time for lighting. First a bit of brown throught the log and some branches (dried effect). Finally a bit of light greenish yellow (I used Tamiya XF4) to light up the branches


And this is it. Next step is to try some bushes, made with steel wool and sawdust.


Regards!!
El_Patron
Visit this Community
Madrid, Spain / España
Joined: October 28, 2017
KitMaker: 30 posts
Armorama: 28 posts
Posted: Sunday, November 12, 2017 - 02:58 AM UTC
Nice trees you have made. Waiting to see how you made the logs.
SF-07-18D
Visit this Community
Madrid, Spain / España
Joined: December 19, 2016
KitMaker: 366 posts
Armorama: 300 posts
Posted: Saturday, November 25, 2017 - 08:03 PM UTC
Hi gents!!

I've been working this weekend and I've made some advances. I could finally finish the trees ( some minor fixes to do yet) but they are already finished. I have made the logs using milliput and scratching them with a screwdriver.


Asyou can see, this log is quite small. In fact, the first trees I made are out of scale, very small. So I have made 4 taller trees. In the next pic you can see the new trees finished with the log


I have to think about the joint between the log and branches and improve the look.

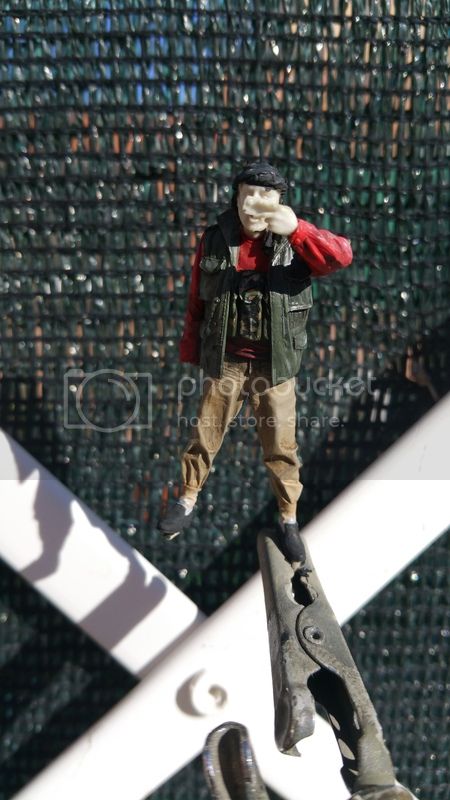
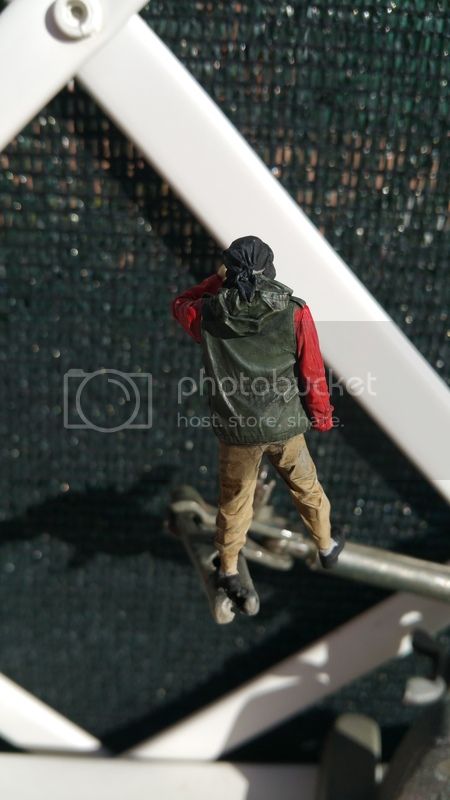
I've been also working on one figure, a taliban fighter recording video with his mobile. Not finished yet but this is what I've made by now.


That's all for now. I have to fix some trees (the smaller ones) because the cat throw it from the table and most of the sawdust has gone away.

Cheers!
SF-07-18D
Visit this Community
Madrid, Spain / España
Joined: December 19, 2016
KitMaker: 366 posts
Armorama: 300 posts
Posted: Wednesday, December 06, 2017 - 09:00 PM UTC
Hi again, gents!

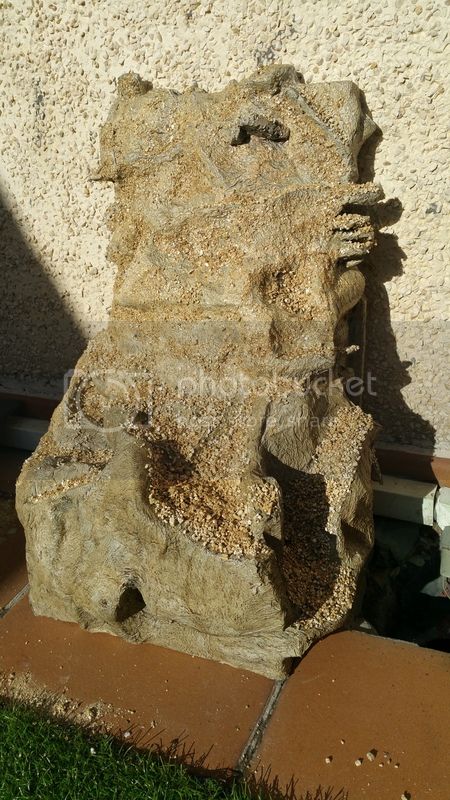
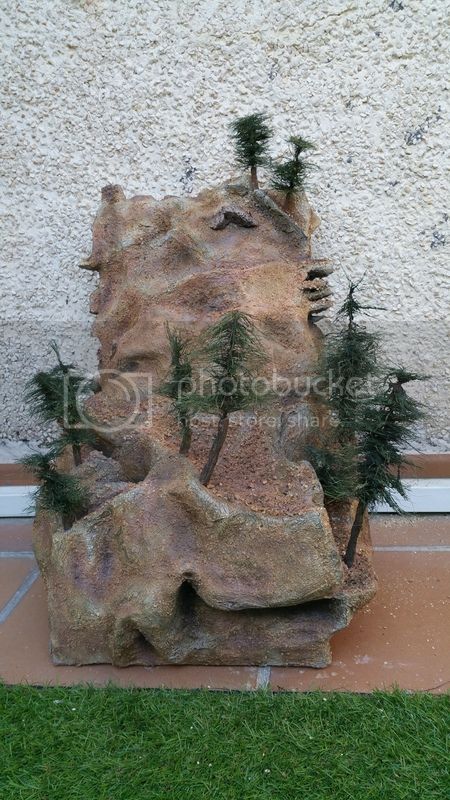
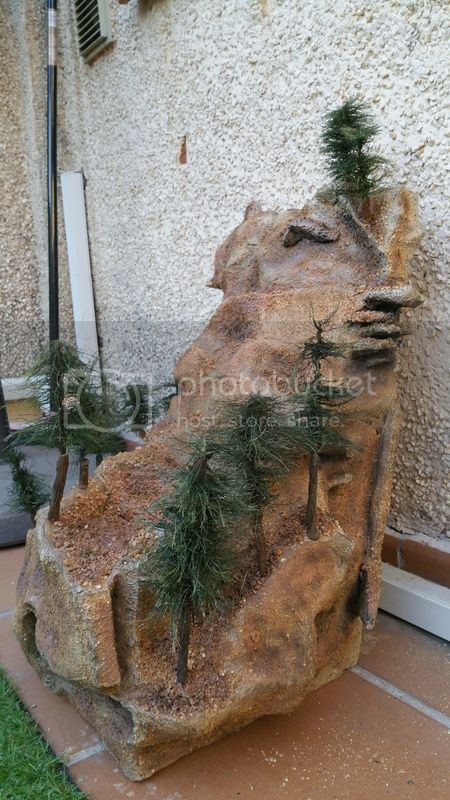
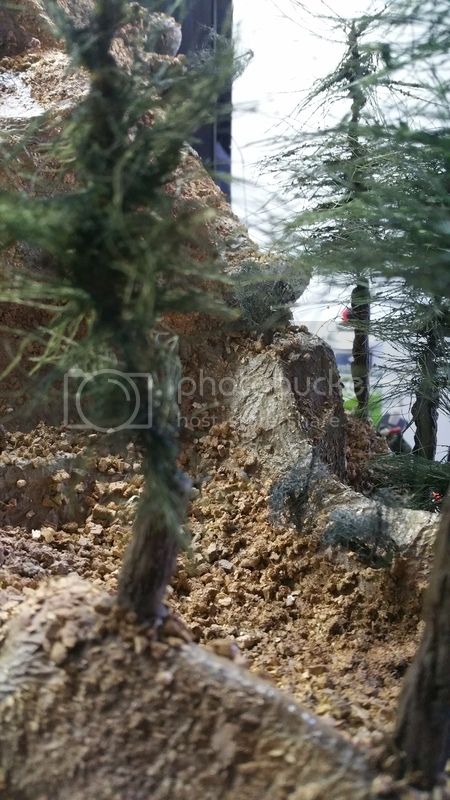
As I have 5 days off, I'll take that time to advance in some areas of the dio. First thing I have done is to finish the mountain putting some sand/rock/whatever all over the mountain.. Once I made it, I painted with some browns and then light it up and shadow it where needed.

Last thing I have had time to make was to fix the trees. Some pictures of the process:


This is all by now. I'm not sure how to continue. I don't know if make more trees (I think I don't need more) or make some bushes. Maybe I will place some rocks for the SEALs to cover but still doubting if place rocks or bushes.

Suggestions? Critics? Advices?

Thanks for taking time reading!!

Cheers.
Dioramartin
Visit this Community
New South Wales, Australia
Joined: May 04, 2016
KitMaker: 1,476 posts
Armorama: 1,463 posts
Posted: Friday, December 08, 2017 - 07:43 AM UTC
Bravo Nacho, looking really good - regarding next steps I think your Oct 23 reference photo gives the answer. The light/LT area you’re depicting actually shows a clump of trees outside the blue box at the top, but below that no trees at all & maybe not even proper bushes, it looks like light scrub. But I understand the need for some artistic licence to give the terrain more visual interest – maybe add one or two dead trees/old trunks & branches fallen down? Maybe the standing trees look too uniform, some lower branches could use a brownish tinge for variation.

I think you’ve got the colours very well and that was probably the most difficult challenge. Your ridge-edges look like they’re worn smooth - maybe that’s accurate (?) but I’d expect those edges to be more jagged in places, a few carefully placed sharp rocks along/near those edges might break it up enough.
SF-07-18D
Visit this Community
Madrid, Spain / España
Joined: December 19, 2016
KitMaker: 366 posts
Armorama: 300 posts
Posted: Friday, December 08, 2017 - 03:28 PM UTC

Quoted Text

Bravo Nacho, looking really good - regarding next steps I think your Oct 23 reference photo gives the answer. The light/LT area you’re depicting actually shows a clump of trees outside the blue box at the top, but below that no trees at all & maybe not even proper bushes, it looks like light scrub. But I understand the need for some artistic licence to give the terrain more visual interest – maybe add one or two dead trees/old trunks & branches fallen down? Maybe the standing trees look too uniform, some lower branches could use a brownish tinge for variation.

I think you’ve got the colours very well and that was probably the most difficult challenge. Your ridge-edges look like they’re worn smooth - maybe that’s accurate (?) but I’d expect those edges to be more jagged in places, a few carefully placed sharp rocks along/near those edges might break it up enough.


Hi Tim, thanks for taking time watching the post.

As you said, in the reference pic there's no trees in the lower side, it looks so steep. But I've been watching again the movie and got some ideas about trees and bushes. Maybe the landscape depicted in the movie is not as the real, but it's useful for the dio.

About the edges, I tried to make them more jagged, but I couldn't get it. I collected some rocks from a near playground that I'll use for what you say. But first, I'd like to place the figures, and then place the rocks in the right places.

Now I'm busy with the kids, but as soon as I can, I'll post some pics I shot with new bushes and some figures placed temporaly.

Regards!!
SF-07-18D
Visit this Community
Madrid, Spain / España
Joined: December 19, 2016
KitMaker: 366 posts
Armorama: 300 posts
Posted: Saturday, December 09, 2017 - 03:34 AM UTC
Here I go with the pics. Some are close ups and others of a general view.


This is a bottom-to-top view, from the site I'll place Murph and Dietz


Luttrell's firing position


And fnally, I could finish a figure and place it on its ridge. It's the man filming with a mobile and holding a rpk on the other hand.


That's all for now. Tomorrow I'll start another figure, a talban firing a Pecheneg.

Best regards!
Dioramartin
Visit this Community
New South Wales, Australia
Joined: May 04, 2016
KitMaker: 1,476 posts
Armorama: 1,463 posts
Posted: Saturday, December 09, 2017 - 05:21 PM UTC
Pow! These close-ups are completely convincing – and from what you say you haven’t changed anything apart from some scrub? Well...keep on not changing much! Great job, looking forward to the populating
SF-07-18D
Visit this Community
Madrid, Spain / España
Joined: December 19, 2016
KitMaker: 366 posts
Armorama: 300 posts
Posted: Sunday, December 10, 2017 - 01:43 AM UTC
Hi again, Tim!

Thanks again for watching. I have added some scrubs as you can see, but I think it's enough by now. What I'm going to add when the figures will be set is some stuff on the ground, like broken branches.

I have started with 2 figures (a taliban and Luttrell's) but will not work on them until next weekend.

Have a great week, gents!
SF-07-18D
Visit this Community
Madrid, Spain / España
Joined: December 19, 2016
KitMaker: 366 posts
Armorama: 300 posts
Posted: Monday, December 18, 2017 - 01:58 AM UTC
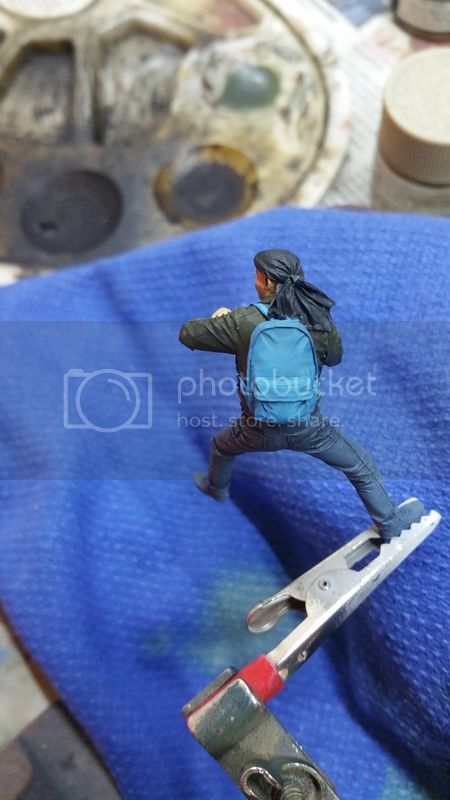
Small update. Pecheng shooter almost done. Face, bandana and sneakers to be finished yet. Quite happy with the jeans and backpack look.


Cheers!!
 _GOTOTOP