_GOTOBOTTOM
Constructive Feedback
For in-progress or completed build photos. Give and get contructive feedback!
Panzer I ausf. F
geirrosset
Visit this Community
Norway
Joined: June 15, 2017
KitMaker: 9 posts
Armorama: 9 posts
Posted: Tuesday, November 28, 2017 - 06:26 PM UTC
Here is my Panzer I ausf. F. Click the link below for a html5 viewer. Click and drag to rotate.


Panzer I F html5

Best regards
Geir Rosset
Oslo
Norway
Szmann
Visit this Community
Netherlands Antilles
Joined: September 02, 2014
KitMaker: 1,977 posts
Armorama: 305 posts
Posted: Tuesday, November 28, 2017 - 09:33 PM UTC
Hi, Geir!

I think it's a nice way to present your completed model. What editor did you use?

Good work!
Gabriel
JSSVIII
Visit this Community
Massachusetts, United States
Joined: March 28, 2007
KitMaker: 1,169 posts
Armorama: 1,067 posts
Posted: Wednesday, November 29, 2017 - 05:32 AM UTC
Nice build Geir, pretty neat way to view it also! which kit is that?
jasegreene
Visit this Community
Florida, United States
Joined: October 21, 2013
KitMaker: 751 posts
Armorama: 751 posts
Posted: Wednesday, November 29, 2017 - 06:54 AM UTC
It looks so great.Always loved the look of this version of the Panzer I.
geirrosset
Visit this Community
Norway
Joined: June 15, 2017
KitMaker: 9 posts
Armorama: 9 posts
Posted: Wednesday, November 29, 2017 - 01:43 PM UTC
Thank you all. The model was photographed in a PackShot Creator photo studio. Exported to html5.

The kit is the HobbyBoss Panzer I ausf. F early.

Best regards
Geir
RobinNilsson
Staff MemberTOS Moderator
KITMAKER NETWORK
Visit this Community
Stockholm, Sweden
Joined: November 29, 2006
KitMaker: 6,693 posts
Armorama: 5,562 posts
Posted: Wednesday, November 29, 2017 - 02:39 PM UTC
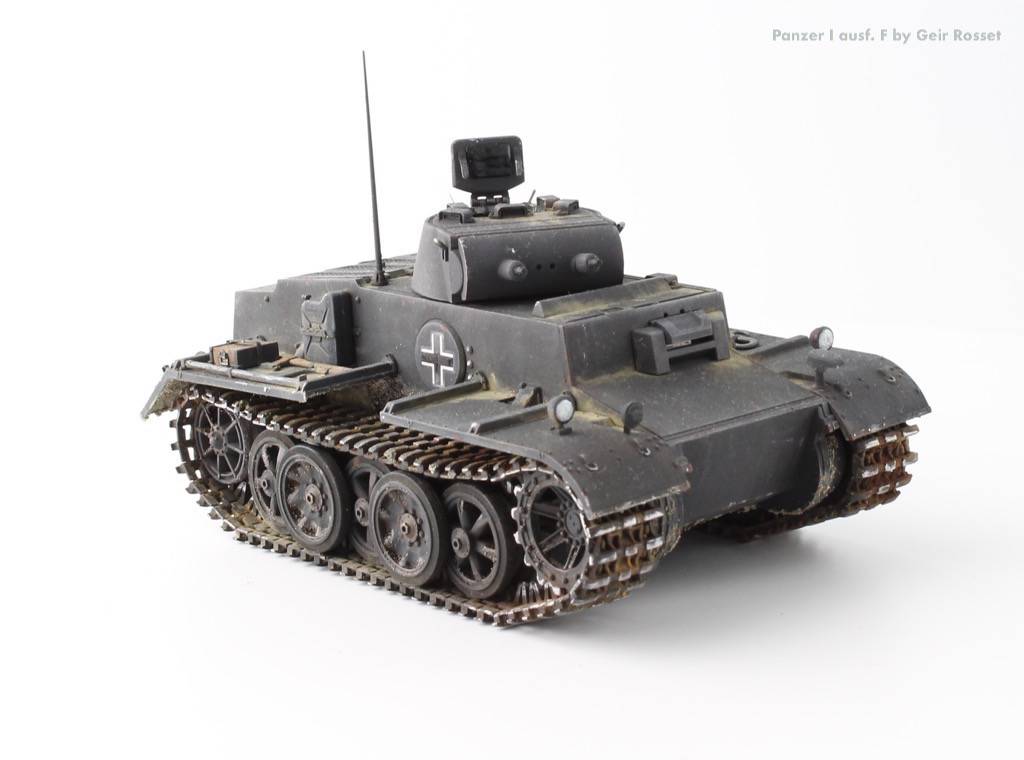
The painting/weathering was well done. I liked the dust effects.
Things to improve:
1. The jerry-can should have a handle. Very difficult to use otherwise

2. The tracks. The surfaces of the tracks that rub against the ground or the wheels should be polished metal. All of those surfaces, not small scratches. The inside of the track also gets polished by the rubber on the wheels (unless it is a rubber surface). The guide teeth also get polished in a uniform way. If the rubber on the wheels can reach all the way to the base of the guide teeth then they should be polished metal all the way. The polished area depends on the shape/profile of the tooth and the wheel and rubber so each combination of wheels and track will behave differently.

3. Sprocket wheel. All the polished areas should be the same size and shape. The teeth go into the holes in the track links and get polished in the same uniform way. The surface of the idler, if it is not covered by rubber, would also get polished by the track.

4. The fenders. Should be horizontal unless they have been damaged somehow. Could have gotten pushed upwards by something so this is just a minor point.

These are things that would be noticed and judged at contests

/ Robin
geirrosset
Visit this Community
Norway
Joined: June 15, 2017
KitMaker: 9 posts
Armorama: 9 posts
Posted: Wednesday, November 29, 2017 - 03:03 PM UTC
Thanks Robin! All valid points.

The gas can is from a resin set so I'll have to go back and check for a PE handle (being a man I obviously didn't read the manual).

I'll rub the tracks with something a little softer to get better coverage. A fingertip is good. I''ve got some silicone brushes on the way which are for just this kind of thing.

I'm gonna pretend it's damaged. Reading A. Wilder's books there is not a single straight fender to be seen so I'm not gonna spend a lot of time trying to make one either

Best regards
Geir
 _GOTOTOP