Campaigns: Active Campaigns
Campaigns that are either in planning or underway should be grouped here.
Campaigns that are either in planning or underway should be grouped here.
Hosted by Richard S.
Funnies
BogiBg

Joined: May 29, 2018
KitMaker: 397 posts
Armorama: 388 posts

Posted: Friday, January 11, 2019 - 11:42 AM UTC
Nice work Bill, especially considering scale. It's rare to see someone "frankensteining" 1/72 scale figures.
Posted: Friday, January 18, 2019 - 10:09 PM UTC
This is my build for this campaign. True one of a kind funny.


ColinEdm


Joined: October 15, 2013
KitMaker: 1,355 posts
Armorama: 1,229 posts

Posted: Saturday, January 19, 2019 - 03:40 AM UTC
Jesper, welcome aboard!
Bogi, great job on your 18 pounder Stuart!
Bill, you are a braver man than I to start modifying 1/72 scale figures! The roller Sherman is looking good.
Bogi, great job on your 18 pounder Stuart!
Bill, you are a braver man than I to start modifying 1/72 scale figures! The roller Sherman is looking good.
WWIIPac

Joined: January 23, 2019
KitMaker: 5 posts
Armorama: 5 posts
Posted: Wednesday, January 23, 2019 - 08:39 AM UTC
A bit late on the start but I find myself needing a push to get back into things.
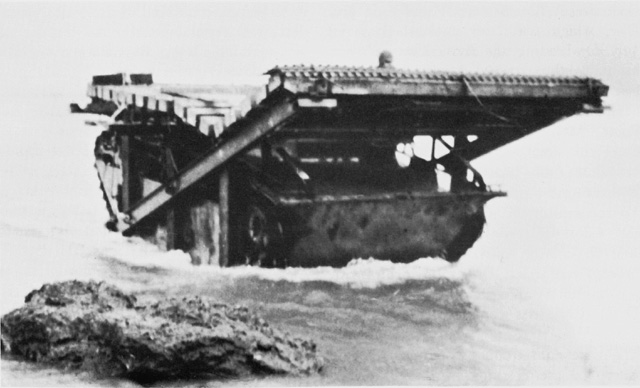
My build for this Campaign will be an LVT 2 1/35 scale, called the Doodlebug. Used at the invasion of Tinian. Basically In the assault, the Doodlebug was driven up to the base of the low cliff, and engineers scrambled up and attached the raised front of the ramp to the top of the soft rock/coral face with spikes and sledge hammers. When the vehicle backed away, the ramp dropped onto the H-frame, making a ramp. Troop carrying LVTs could then surmount the rock face and move to Phase Line One to drop the troops.
10 total were created and used.
Thanks,
Bob

petbat

Joined: August 06, 2005
KitMaker: 3,353 posts
Armorama: 3,121 posts

Posted: Wednesday, January 23, 2019 - 08:55 AM UTC
Very interesting Bob. This is a new vehicle mod to me. What will be the base kit/s you are using - the 1/35th Italeri LVT 2?
WWIIPac

Joined: January 23, 2019
KitMaker: 5 posts
Armorama: 5 posts
Posted: Wednesday, January 23, 2019 - 09:57 AM UTC
Yep on the LVT 2, the rest is all scratch build.
Bob
Bob
panzerman1

Joined: September 30, 2010
KitMaker: 430 posts
Armorama: 291 posts

Posted: Friday, January 25, 2019 - 05:02 AM UTC
Thanks Peter, BobiBg, and Colin.
Jesper, cool choice for the campaign. I almost picked this same subject, but in 1/72nd scale.
Jesper, cool choice for the campaign. I almost picked this same subject, but in 1/72nd scale.
panzerman1

Joined: September 30, 2010
KitMaker: 430 posts
Armorama: 291 posts

Posted: Friday, January 25, 2019 - 05:17 AM UTC
Update on the Sherman with mine roller.

As found through research, this Sherman needed a pushing plate attached at the rear. In soft terrain, a 2nd Sherman would assist the mine roller forward.

I detailed the blank sides of the hatches. I added handles, padding, and periscopes.
 The Sherman is painted. I also added some shading and highlighting. I also started prepping the tank tools for painting.

The pushing plate is attached and weathered.
That's it for now. Happy modeling.
Bill

As found through research, this Sherman needed a pushing plate attached at the rear. In soft terrain, a 2nd Sherman would assist the mine roller forward.

I detailed the blank sides of the hatches. I added handles, padding, and periscopes.
 The Sherman is painted. I also added some shading and highlighting. I also started prepping the tank tools for painting.
The pushing plate is attached and weathered.
That's it for now. Happy modeling.
Bill
WWIIPac

Joined: January 23, 2019
KitMaker: 5 posts
Armorama: 5 posts
Posted: Friday, January 25, 2019 - 05:39 AM UTC
Wow, great details Bill.
Well after research and checking details I sure bit off a chunk. I have modifications to the LVT 2 base kit also I need to figure out, not much but enough. I have a lot of the construction items on the top coming in so I will actively start the base kit this weekend, and I'll remember to take Pics.
Bob
petbat

Joined: August 06, 2005
KitMaker: 3,353 posts
Armorama: 3,121 posts

Posted: Friday, January 25, 2019 - 10:09 AM UTC
Quoted Text
Wow, great details Bill.
Well after research and checking details I sure bit off a chunk. Bob
I bet you have Bob. After the teaser you posted I did a bit of googling. Not much photographic info out there.


Posted: Friday, January 25, 2019 - 10:28 AM UTC
Quoted Text
Quoted TextWow, great details Bill.
Well after research and checking details I sure bit off a chunk. Bob
I bet you have Bob. After the teaser you posted I did a bit of googling. Not much photographic info out there.
But that leaves plenty of room for educated guesswork, I suppose

Bob-I see a promising build taking shape!
Bill- your 'Aunt Jemima' looks terrific!Kudos for the scratchbuild pushing plate.
I finally overcame my reluctance to deal with the old Academy Pz.IVH.
Spent a whole day working on it-filing,sanding, drilling holes by hand(over 200).
Then did some major surgery on the turret to fit the ZiS-3 gun.
This is where I am now:


Bottomline-I like how the Hybrid comes out,

petbat

Joined: August 06, 2005
KitMaker: 3,353 posts
Armorama: 3,121 posts

Posted: Saturday, January 26, 2019 - 09:21 AM UTC
So far, so Good Angel. I didn't realise the fit issues the Academy kit had like the visor gaps, etc.
Normal people would have just stuck this hull down in a Dio, but a scratch builder just has to show off his skills
Are you depicting the partially restored example you posted a pic of?
Normal people would have just stuck this hull down in a Dio, but a scratch builder just has to show off his skills

Are you depicting the partially restored example you posted a pic of?
Posted: Saturday, January 26, 2019 - 07:58 PM UTC
Quoted Text
...
Normal people would have just stuck this hull down in a Dio, but a scratch builder just has to show off his skills
Are you depicting the partially restored example you posted a pic of?
Or throw it right away, Peter!
Guess I'm a bit stingy-I paid the kit with hard earned money

There are bigger fit issues than visor gaps-like lower hull warped towards inside while the upper is bent towards outside.
But-it is an old "motorisation" offering, thus accuracy had lower priority over accomodating batteries and motor in the hull.
Intent to represent the partly restored vehicle.
Advance is quite fast, soon will finish construction.

Posted: Monday, January 28, 2019 - 07:48 AM UTC
Construction on my Hybrid is finished:


k_mero4

Joined: November 26, 2017
KitMaker: 393 posts
Armorama: 369 posts

Posted: Tuesday, January 29, 2019 - 01:08 AM UTC
Come on, paint it, I find it interesting to see it finished.
Good work, I look forward to the next stage.
Kalin


Good work, I look forward to the next stage.
Kalin


WWIIPac

Joined: January 23, 2019
KitMaker: 5 posts
Armorama: 5 posts
Posted: Tuesday, January 29, 2019 - 05:48 AM UTC
Thanks for the Pics Peter, had them all but more important I have the PDF that has the actual scale drawings for each part. I’ll be printing those out today.
Angel, really nice build, plenty of details.
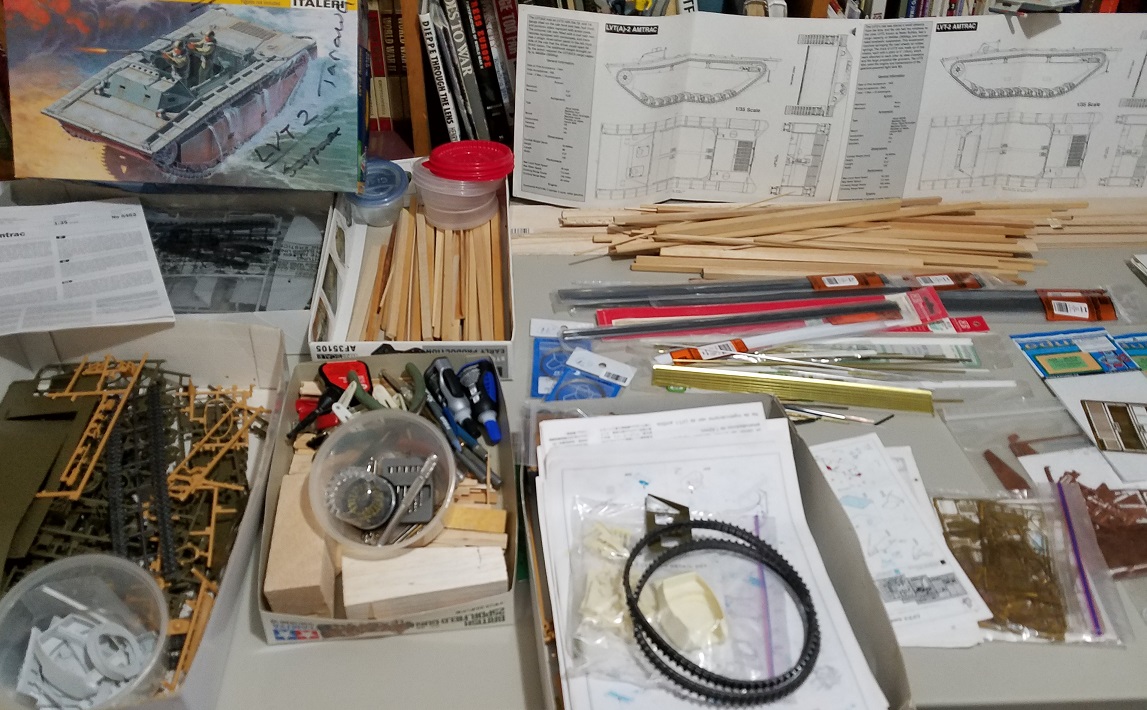
Pics for update;
All my parts, Main kit in the upper left, the other boxes are left over parts from other builds, never know what you might need.
Start construction
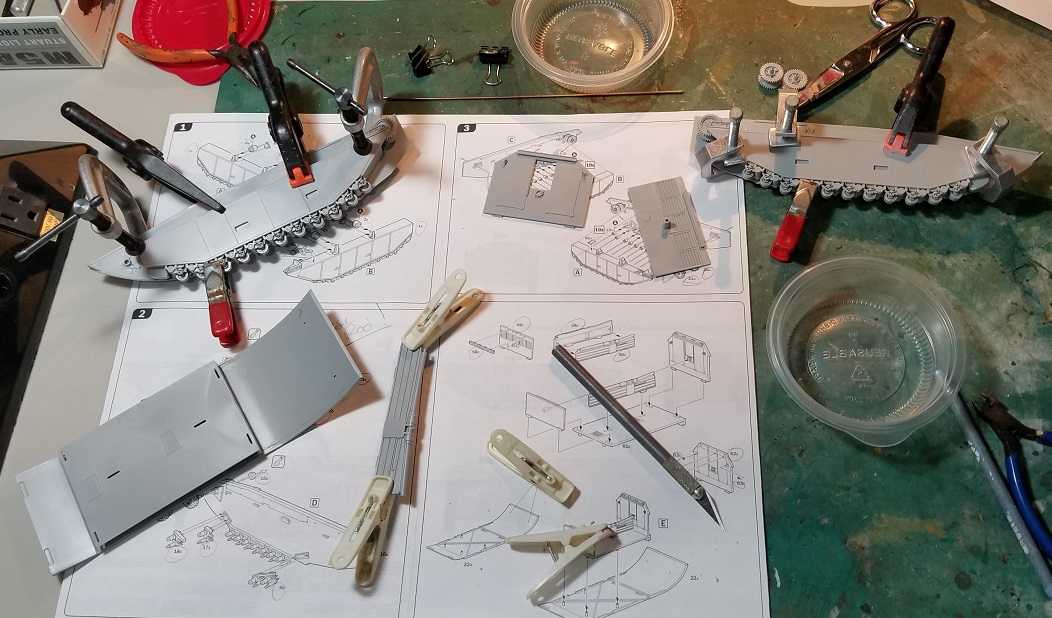
First group put together
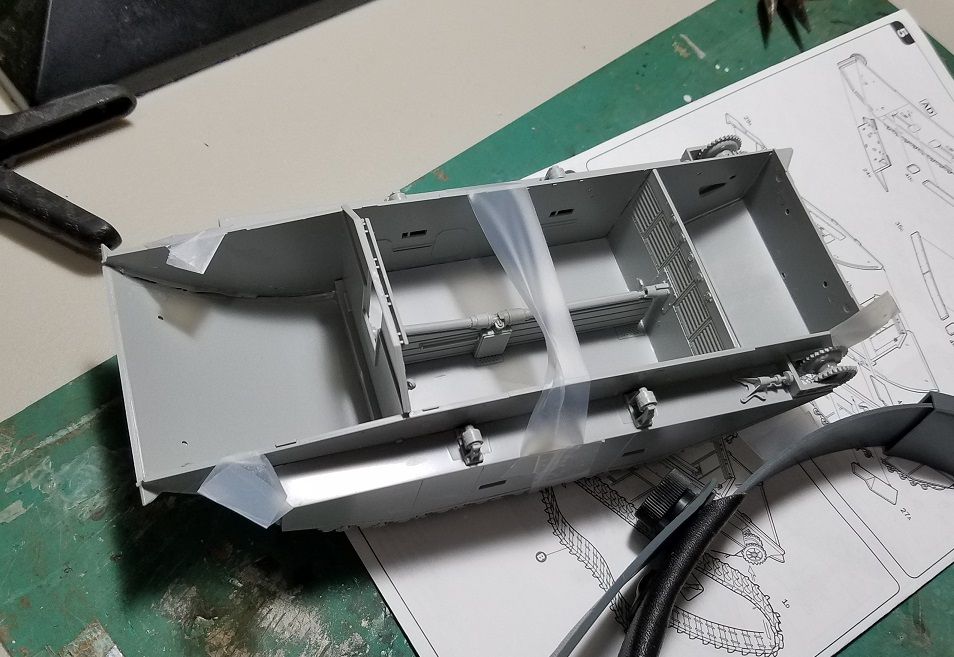
Rod installed for front sprockets
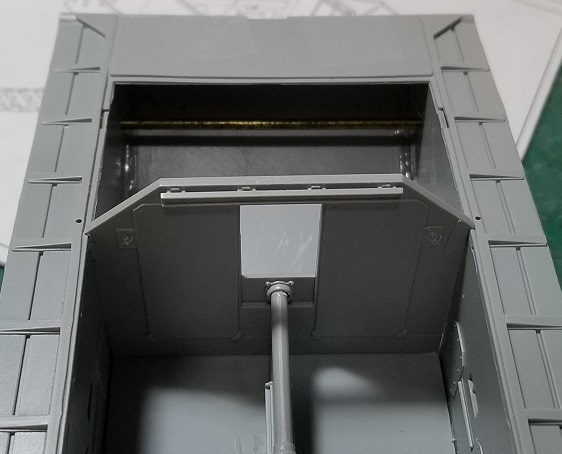
Awaiting for it to dry so I can keep going
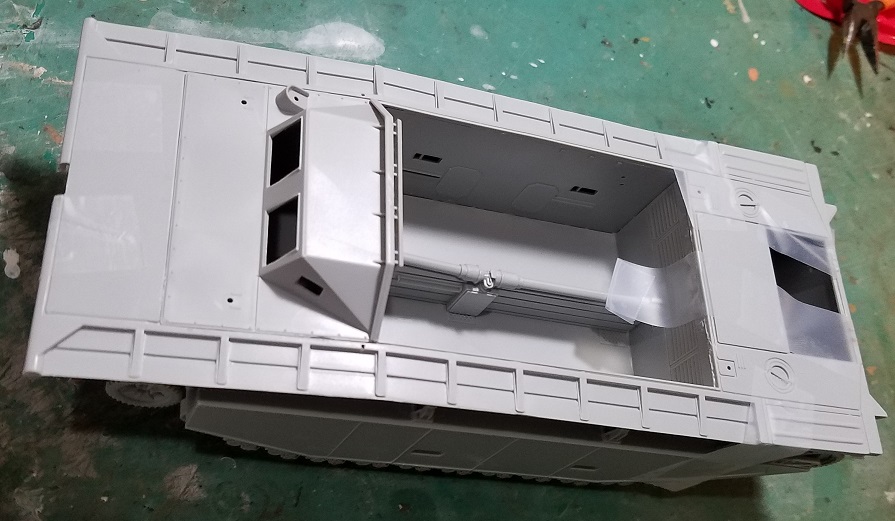
Feels good building again!
Bob
Angel, really nice build, plenty of details.
Pics for update;
All my parts, Main kit in the upper left, the other boxes are left over parts from other builds, never know what you might need.

Start construction

First group put together

Rod installed for front sprockets

Awaiting for it to dry so I can keep going

Feels good building again!
Bob

KoSprueOne

Joined: March 05, 2004
KitMaker: 4,011 posts
Armorama: 1,498 posts

Posted: Tuesday, January 29, 2019 - 04:18 PM UTC
Quoted Text
CALLSIGN:
WWIIPac
A bit late on the start but I find myself needing a push to get back into things.
My build for this Campaign will be an LVT 2 1/35 scale, called the Doodlebug. Used at the invasion of Tinian. Basically In the assault, the Doodlebug was driven up to the base of the low cliff, and engineers scrambled up and attached the raised front of the ramp to the top of the soft rock/coral face with spikes and sledge hammers. When the vehicle backed away, the ramp dropped onto the H-frame, making a ramp. Troop carrying LVTs could then surmount the rock face and move to Phase Line One to drop the troops.
10 total were created and used.
Thanks,
Bob

Very interesting project. I've wanted to build this too but could not yet figure out how certain parts were put together. I'll be watching this build

Posted: Saturday, February 02, 2019 - 03:00 AM UTC
Thanks Kalin and Bob!
My Funny is finished:


Asphalt painting was done by Kalin(k_mero4).
Thanks for the funny Campaign and
Enjoy your modelling!

My Funny is finished:


Asphalt painting was done by Kalin(k_mero4).
Thanks for the funny Campaign and
Enjoy your modelling!

petbat

Joined: August 06, 2005
KitMaker: 3,353 posts
Armorama: 3,121 posts

Posted: Saturday, February 02, 2019 - 07:47 AM UTC
Certainly has the essence of a rough and ready modification Angel. Very nicely done
Mech

Joined: July 20, 2002
KitMaker: 281 posts
Armorama: 226 posts

Posted: Sunday, February 10, 2019 - 04:30 AM UTC
Great job everyone on the Funnies.
Cheers,
Ralph
Cheers,
Ralph
Mech

Joined: July 20, 2002
KitMaker: 281 posts
Armorama: 226 posts

Posted: Sunday, February 10, 2019 - 04:50 AM UTC
Hi Bob
I have a soft spot for LVT,s and the Experimental ones.
I will be following this campaign and your build of the LVT Doodlebug progress, hope you keep posting pictures.
I started to scratch built one around 2010 but there was not enough pictures and description about it on the internet. The only pictures that I used to start the build was 5 pictures that David Harper email me back then.
If you or anyone else wants to see it or other scratch builds check my web page.
http://s1301.photobucket.com/user/scratch-builder/library/?sort=2&page=6
Cheers,
Ralph
panzerman1

Joined: September 30, 2010
KitMaker: 430 posts
Armorama: 291 posts

Posted: Sunday, February 10, 2019 - 01:22 PM UTC
Thanks Bob, Angel, Ralph, and Mech.
Petbat: Good luck with the challenging build. I like the LVT variant.
Angel: Very cool hybrid tank. Great work bashing the 2 kits together.
Good luck everyone with your builds.
Bill
Petbat: Good luck with the challenging build. I like the LVT variant.
Angel: Very cool hybrid tank. Great work bashing the 2 kits together.
Good luck everyone with your builds.
Bill
panzerman1

Joined: September 30, 2010
KitMaker: 430 posts
Armorama: 291 posts

Posted: Sunday, February 10, 2019 - 01:32 PM UTC
Update on my Sherman with Mine Roller.

Decal time. The kit decals worked very well. The Aunt Jemima logo is beautifully rendered.

Started painting the tank crewmen. Base coat applied first.

The crew are finished. The Millicast figures turned out very well.

The final details are prepped for installation. The tank tools and mine wheel drives are painted up.
That's it for now. Thanks for viewing. Good luck everyone with your projects. Bill

Decal time. The kit decals worked very well. The Aunt Jemima logo is beautifully rendered.

Started painting the tank crewmen. Base coat applied first.

The crew are finished. The Millicast figures turned out very well.

The final details are prepped for installation. The tank tools and mine wheel drives are painted up.
That's it for now. Thanks for viewing. Good luck everyone with your projects. Bill
petbat

Joined: August 06, 2005
KitMaker: 3,353 posts
Armorama: 3,121 posts

Posted: Monday, February 11, 2019 - 07:56 AM UTC
Sweet as Bill. Looks fantastic
WWIIPac

Joined: January 23, 2019
KitMaker: 5 posts
Armorama: 5 posts
Posted: Thursday, February 21, 2019 - 05:14 AM UTC
Sorry last 2 weeks have been murder.
I finished the 2 major I beams but after the 2 week wait I went back to it and the glue didn't hold so I have to re glue them both.
Ralph, I'll make you a deal, or anyone else that is interested, if you send me those 5 pics from David Harper, I'll send you the PDF file I have that has the actual construction drawings for the Doddle Bugs.
Well here's hoping work will settle down and I can get back into it.
Bob
 |


