Thanks Tim and Greg,nope,no Piats here. Fire and maneuver.
J
Dioramas
Do you love dioramas & vignettes? We sure do.
Do you love dioramas & vignettes? We sure do.
Hosted by Darren Baker, Mario Matijasic
Operation Epsem-The Scottish Corridor.
jrutman

Joined: April 10, 2011
KitMaker: 7,941 posts
Armorama: 7,934 posts

Posted: Wednesday, February 21, 2018 - 11:51 PM UTC
DG0542

Joined: March 04, 2015
KitMaker: 125 posts
Armorama: 125 posts

Posted: Thursday, February 22, 2018 - 12:28 AM UTC
Jerry,
Masterbox makes a Scottish Set with a Piper in it.
Derek
Masterbox makes a Scottish Set with a Piper in it.
Derek
jrutman

Joined: April 10, 2011
KitMaker: 7,941 posts
Armorama: 7,934 posts

Posted: Thursday, February 22, 2018 - 12:59 AM UTC
Quoted Text
Jerry,
Masterbox makes a Scottish Set with a Piper in it.
Derek
Thanks Derek,I have it !
J
maartenboersma

Joined: October 10, 2010
KitMaker: 764 posts
Armorama: 742 posts

Posted: Thursday, February 22, 2018 - 03:10 AM UTC
Subscribed !


panzerconor

Joined: February 08, 2012
KitMaker: 1,271 posts
Armorama: 1,253 posts

Posted: Thursday, February 22, 2018 - 09:40 AM UTC
And you've talked about how it's quiet on the site now? Seems this has got quite a peanut gallery already!!
Absolutely love the figures J, but you already know that.
I gotta post here more often... I've turned into a lurker...
-Conor
Absolutely love the figures J, but you already know that.
I gotta post here more often... I've turned into a lurker...
-Conor

jrutman

Joined: April 10, 2011
KitMaker: 7,941 posts
Armorama: 7,934 posts

Posted: Friday, February 23, 2018 - 12:17 AM UTC
Maarten and Conor,thanks men for tuning in here ! The more the merrier !
For those that want to check out the various stuff offered for this one topic and one scale here is a little side by side I took a pic of.
For your consideration Gents,
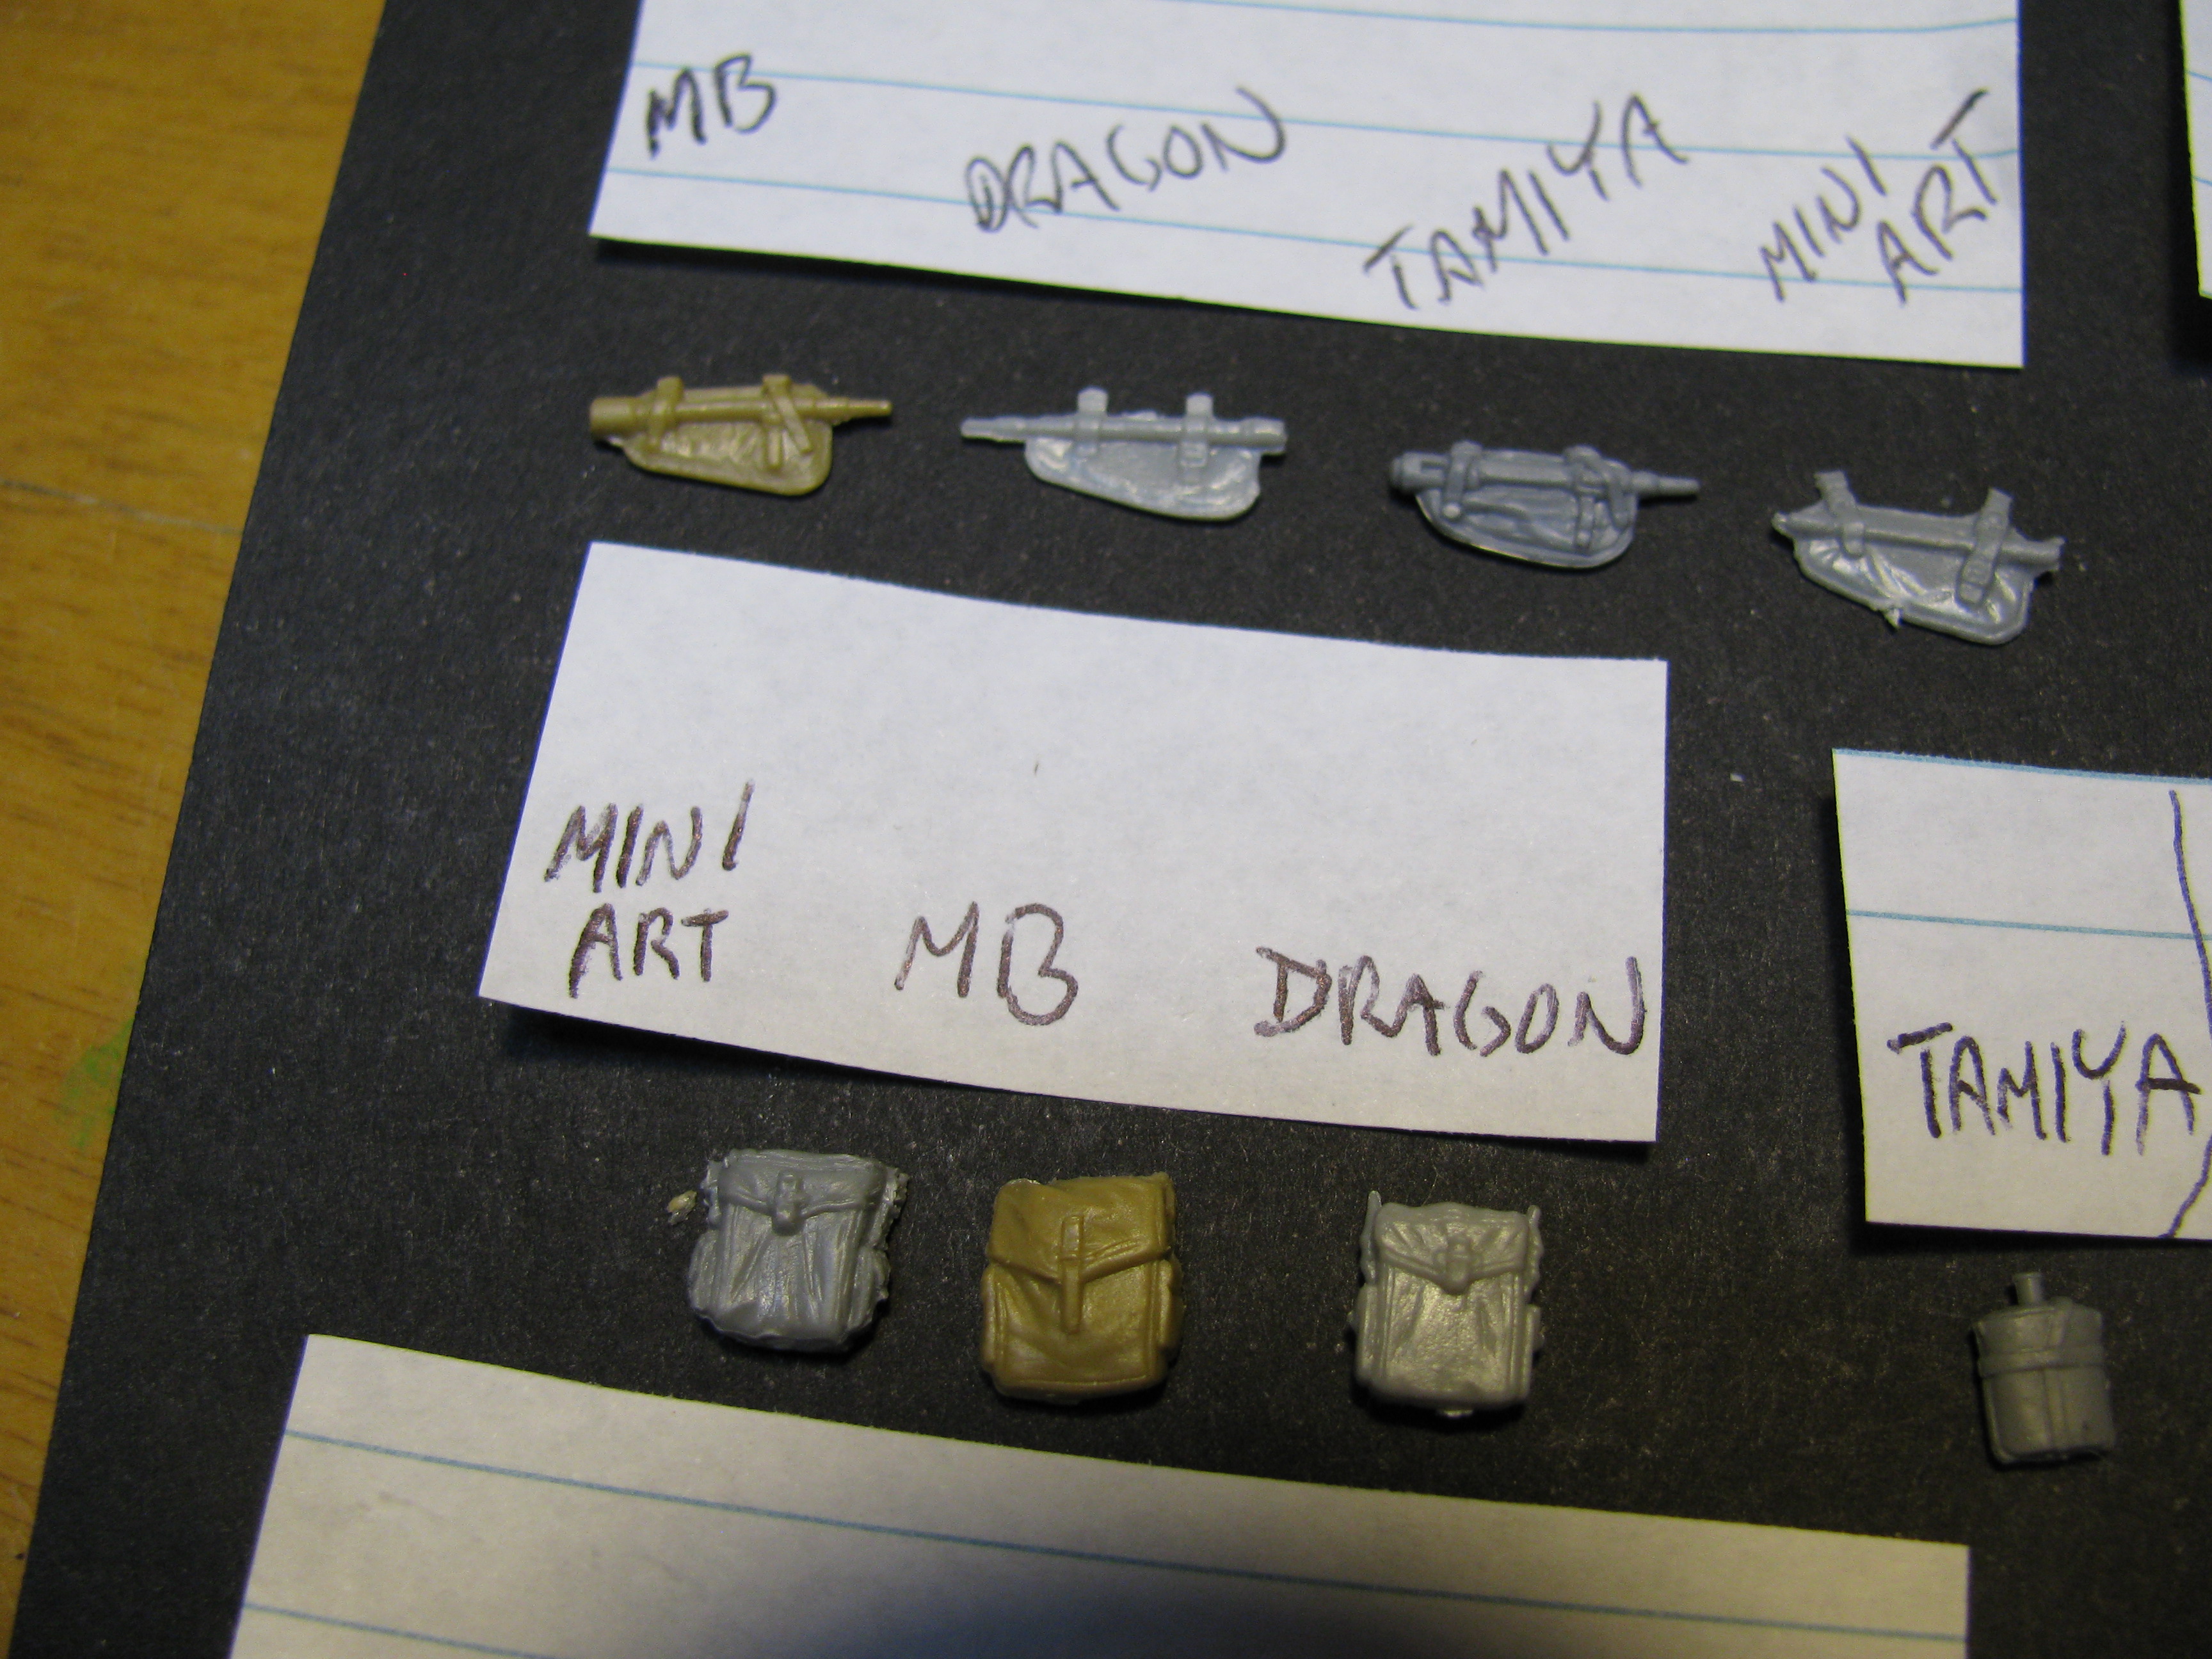
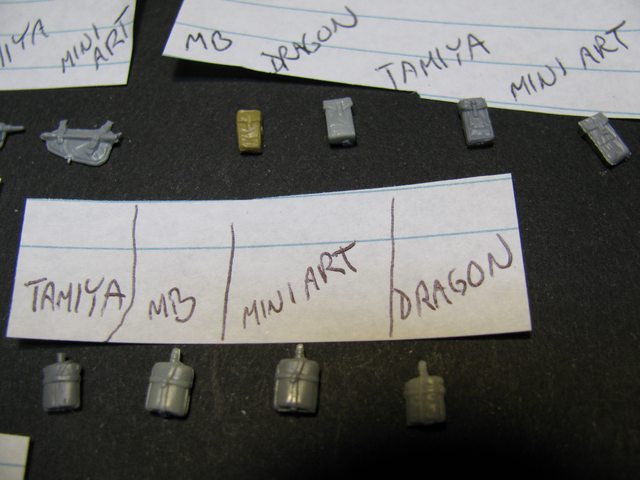
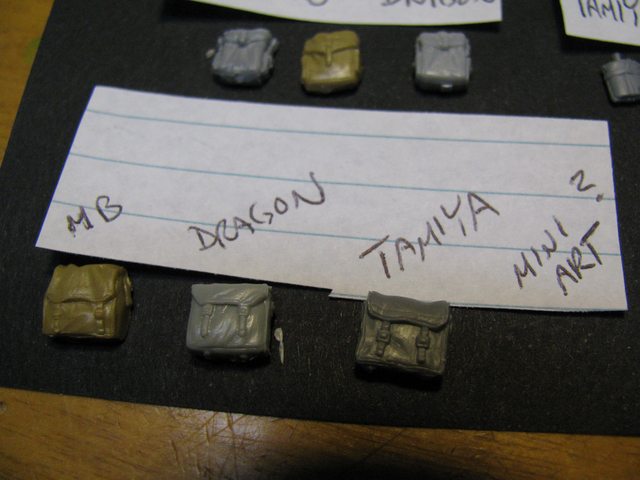
I ill leave it to the individual to decide what they like better. I am in the same boat here as I am with the GI or German gear. Each company makes a few items I prefer to replicate the real things. What I should do is make a mold of all the particular gear I like and then just use my own castings.
Thoughts?
J
For those that want to check out the various stuff offered for this one topic and one scale here is a little side by side I took a pic of.
For your consideration Gents,


I ill leave it to the individual to decide what they like better. I am in the same boat here as I am with the GI or German gear. Each company makes a few items I prefer to replicate the real things. What I should do is make a mold of all the particular gear I like and then just use my own castings.
Thoughts?
J
WillysJeep

Joined: February 21, 2018
KitMaker: 7 posts
Armorama: 6 posts

Posted: Friday, February 23, 2018 - 12:26 AM UTC
Some Operation Epsom reference images from the Imperial War Museum Collection. https://www.iwm.org.uk/collections/search?query=Epsom&filters%5BwebCategory%5D%5Bphotographs%5D=on&filters%5BperiodString%5D%5BSecond%20World%20War%5D=on&page=1
Use the controls on the right side to go full screen and zoom in.
Use the controls on the right side to go full screen and zoom in.
jrutman

Joined: April 10, 2011
KitMaker: 7,941 posts
Armorama: 7,934 posts

Posted: Friday, February 23, 2018 - 08:44 PM UTC
Quoted Text
Some Operation Epsom reference images from the Imperial War Museum Collection. https://www.iwm.org.uk/collections/search?query=Epsom&filters%5BwebCategory%5D%5Bphotographs%5D=on&filters%5BperiodString%5D%5BSecond%20World%20War%5D=on&page=1
Use the controls on the right side to go full screen and zoom in.
Thanks for the linky. This will come into great use I think !
J
jrutman

Joined: April 10, 2011
KitMaker: 7,941 posts
Armorama: 7,934 posts

Posted: Saturday, February 24, 2018 - 12:19 AM UTC
A few days work produced this result. I tried using a Passion Model PE mesh made for GI helmets and it isn't bad ! I had the hidden bonus of using the excess for shoelaces !
Without primer
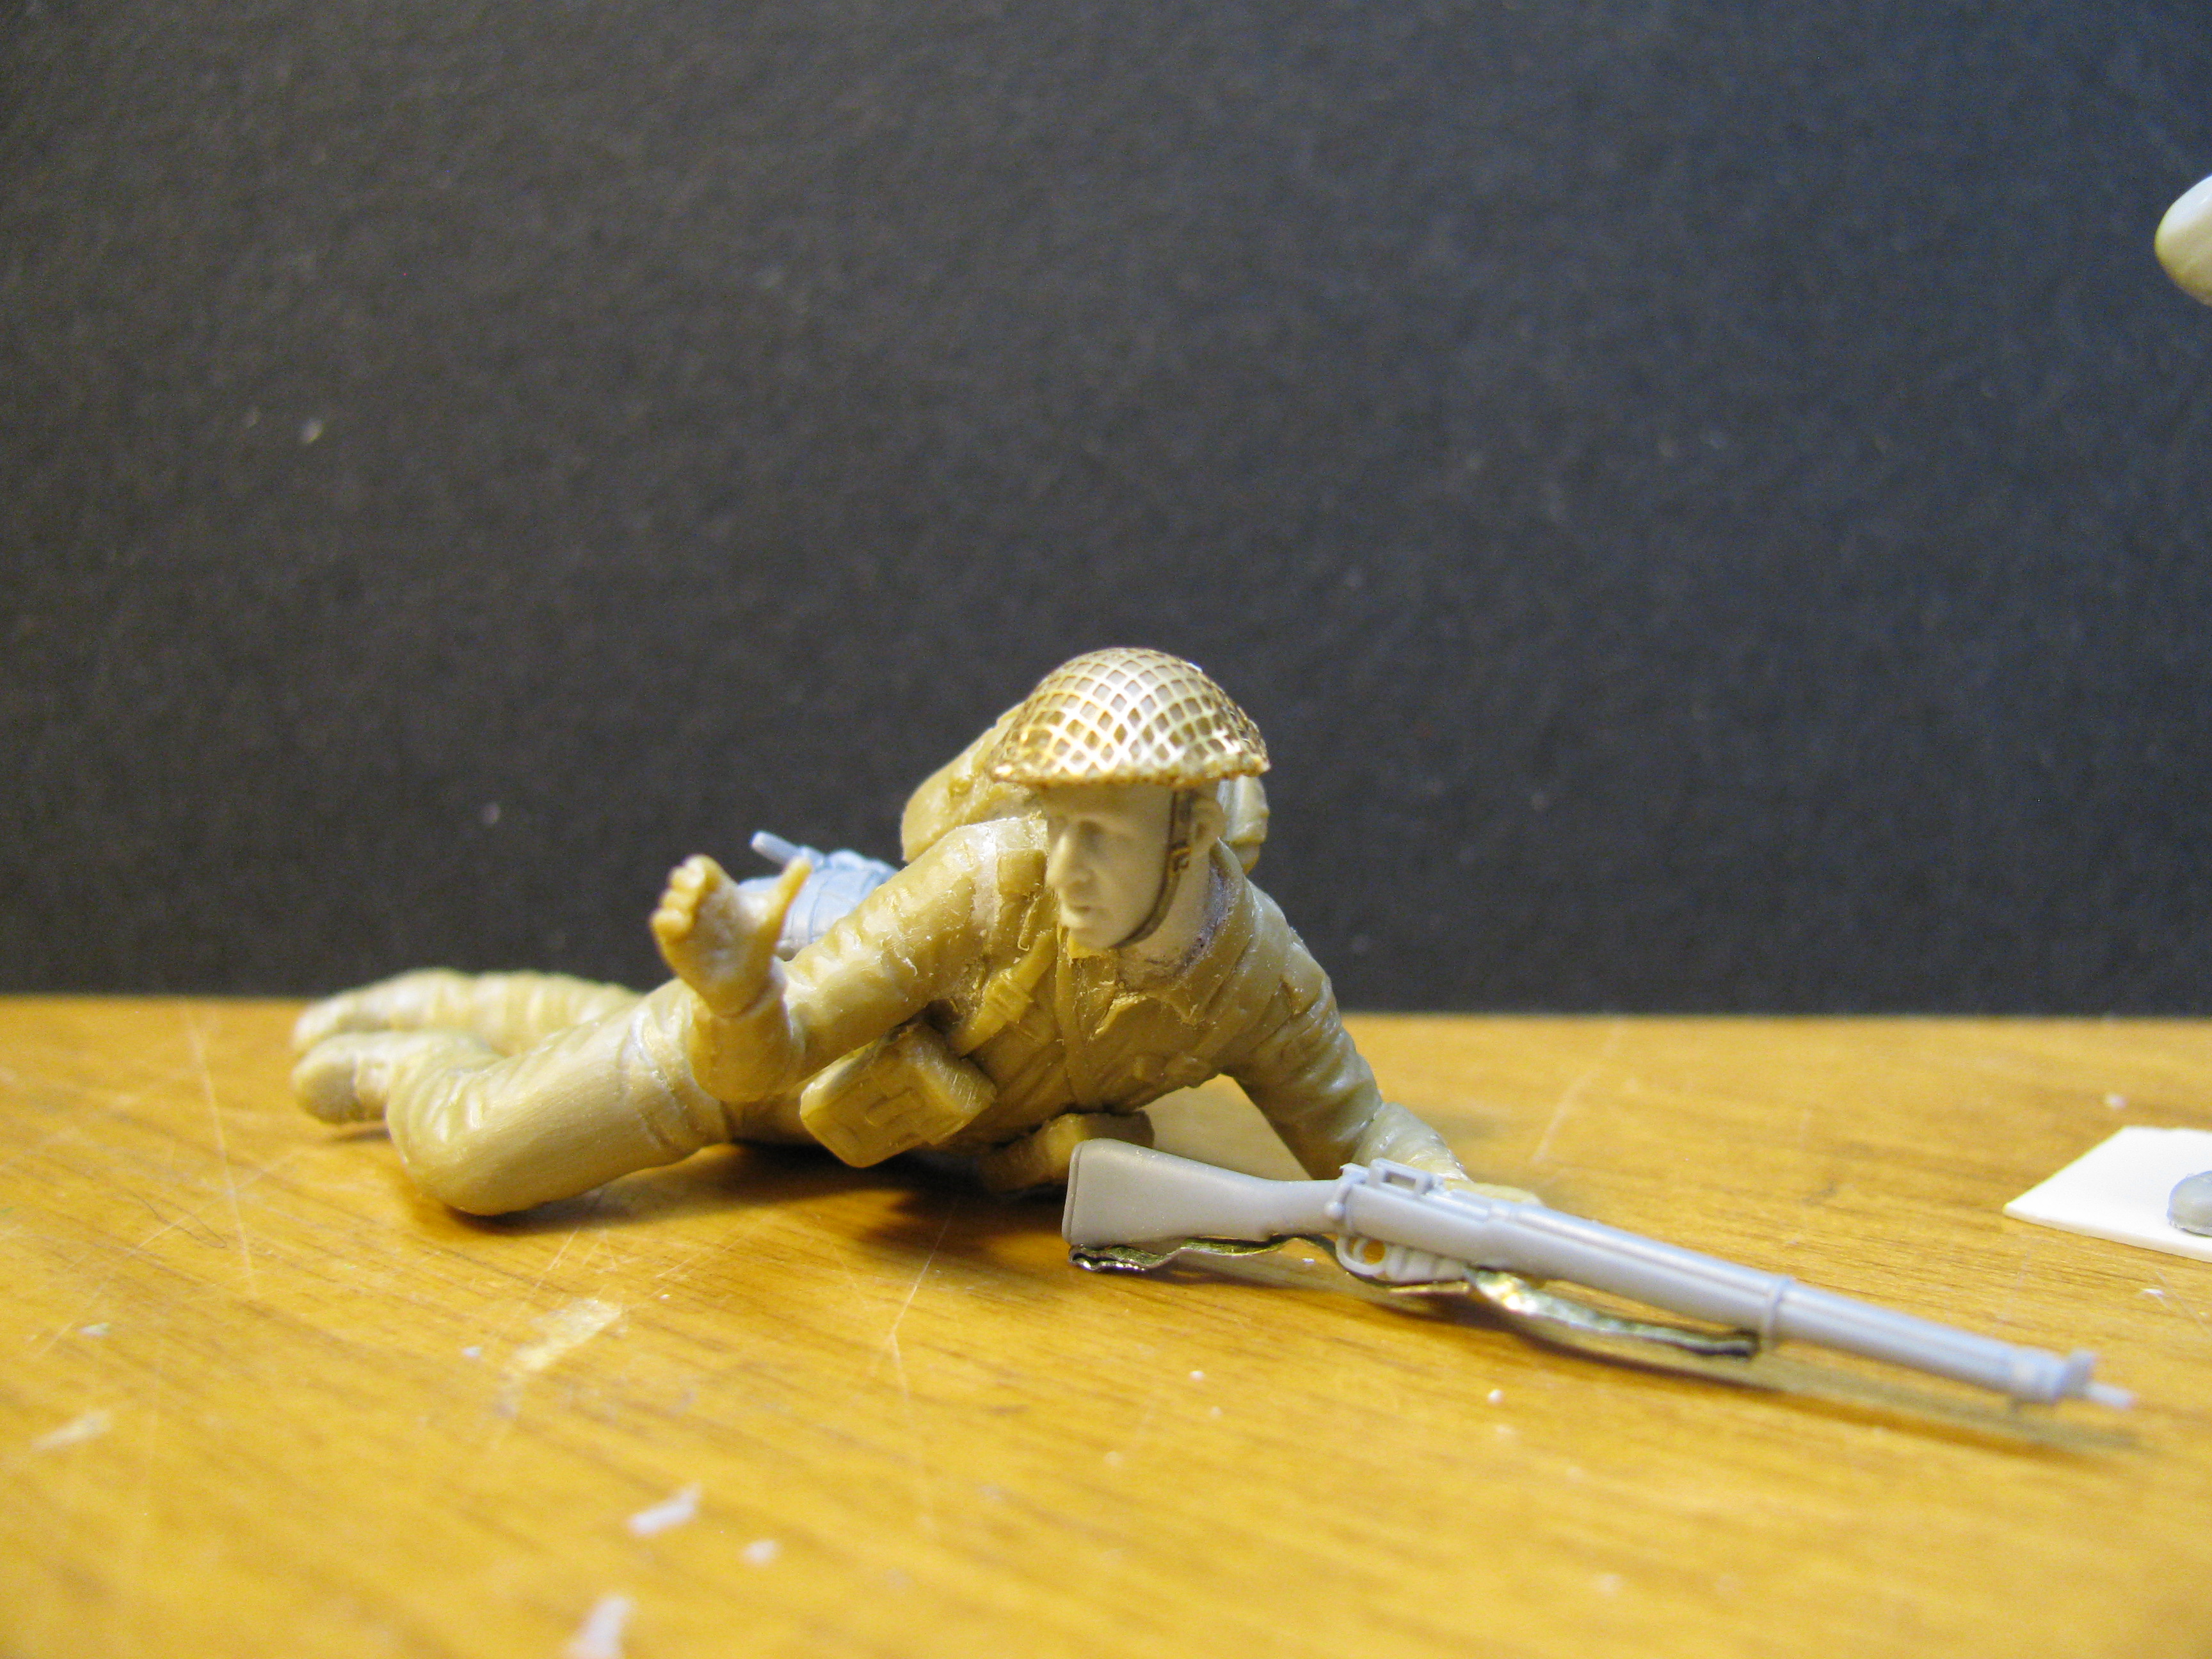
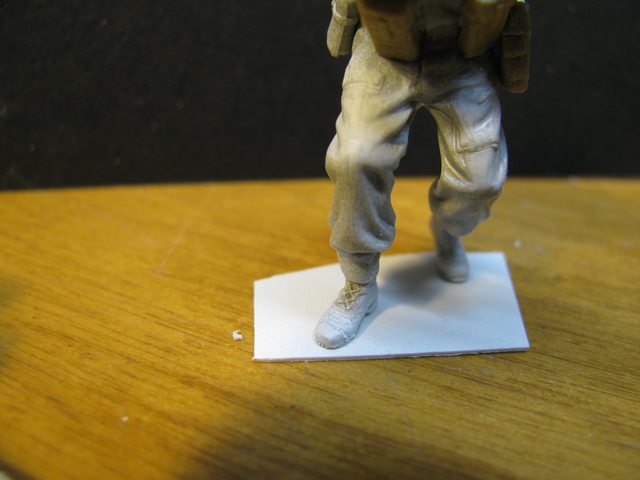
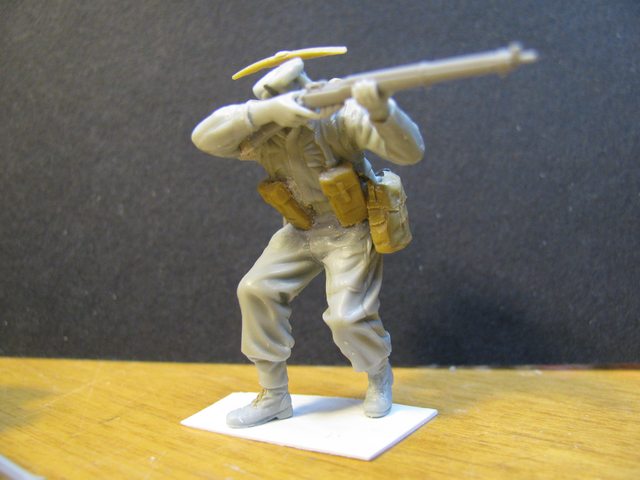

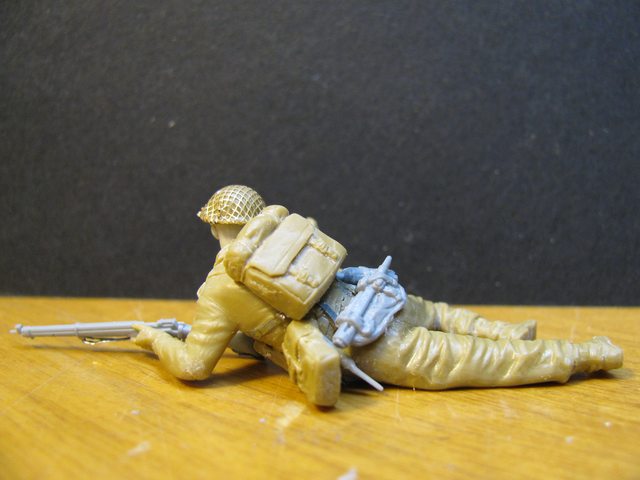
With a very very light mist of primer. I found too much makes the figs too shiny and hard to accept paint. I made the chin straps from lead foil with PE buckles as well as the attachment straps for the gasmask bags,etc. If I wasn't lazy I would replace all the kit straps with PE buckles but....getting old maybe ?

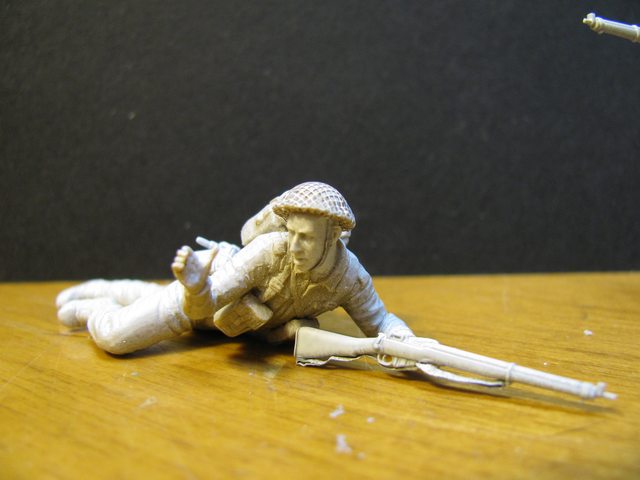
The helmet will get pushed down more after painting the face. The shovel is straight !! I checked it 5 ways. It must be the camera lens distorting it.
J
Without primer


With a very very light mist of primer. I found too much makes the figs too shiny and hard to accept paint. I made the chin straps from lead foil with PE buckles as well as the attachment straps for the gasmask bags,etc. If I wasn't lazy I would replace all the kit straps with PE buckles but....getting old maybe ?


The helmet will get pushed down more after painting the face. The shovel is straight !! I checked it 5 ways. It must be the camera lens distorting it.
J
BootsDMS

Joined: February 08, 2012
KitMaker: 978 posts
Armorama: 965 posts

Posted: Saturday, February 24, 2018 - 02:54 AM UTC
Quoted Text
A few days work produced this result. I tried using a Lucky Model PE mesh made for GI helmets and it isn't bad ! I had the hidden bonus of using the excess for shoelaces !
Without primer
With a very very light mist of primer. I found too much makes the figs too shiny and hard to accept paint. I made the chin straps from lead foil with PE buckles as well as the attachment straps for the gasmask bags,etc. If I wasn't lazy I would replace all the kit straps with PE buckles but....getting old maybe ?
The helmet will get pushed down more after painting the face. The shovel is straight !! I checked it 5 ways. It must be the camera lens distorting it.
J
jerry,
Sorry to present as a duty pedant but the British Army didn't lace its boots in a criss-cross pattern; a knot was tied in one end of a lace, threaded through an eyelet then laced to the top, then wrapped around the ankle and tucked in. Some may have used a lace with two ends at the top like a normal shoe then tie it off, but the effect was always to present the laces as sort of horizontal "bars" for want of a better description.
I must also point out that the respirator haversack on your figures appear to be somewhat over-sized; the haversack in use at that time was quite small and "boxy".
Sorry to be a pain.
Brian
jrutman

Joined: April 10, 2011
KitMaker: 7,941 posts
Armorama: 7,934 posts

Posted: Saturday, February 24, 2018 - 07:19 PM UTC
Quoted Text
Quoted TextA few days work produced this result. I tried using a Lucky Model PE mesh made for GI helmets and it isn't bad ! I had the hidden bonus of using the excess for shoelaces !
Without primer
With a very very light mist of primer. I found too much makes the figs too shiny and hard to accept paint. I made the chin straps from lead foil with PE buckles as well as the attachment straps for the gasmask bags,etc. If I wasn't lazy I would replace all the kit straps with PE buckles but....getting old maybe ?
The helmet will get pushed down more after painting the face. The shovel is straight !! I checked it 5 ways. It must be the camera lens distorting it.
J
jerry,
Sorry to present as a duty pedant but the British Army didn't lace its boots in a criss-cross pattern; a knot was tied in one end of a lace, threaded through an eyelet then laced to the top, then wrapped around the ankle and tucked in. Some may have used a lace with two ends at the top like a normal shoe then tie it off, but the effect was always to present the laces as sort of horizontal "bars" for want of a better description.
I must also point out that the respirator haversack on your figures appear to be somewhat over-sized; the haversack in use at that time was quite small and "boxy".
Sorry to be a pain.
Brian
Yessir,thanks,
I was already squared away by a few folks on FB about the shoe lace deal. I removed the offending crosses! I will have to figure out a suitable replacement that won't drive me mad making.
The gas mask bags. They are pretty much the same in all 3 different companies' kits I have. So I assumed they were OK. I do have pics of the smaller ones you mention so now what ?
OK,maybe I got this right??
I reviewed a series of excellent pics taken of Scotsmen during Op Epsom and they were all sporting the pig sticker on their 303's.
So I came up with this:
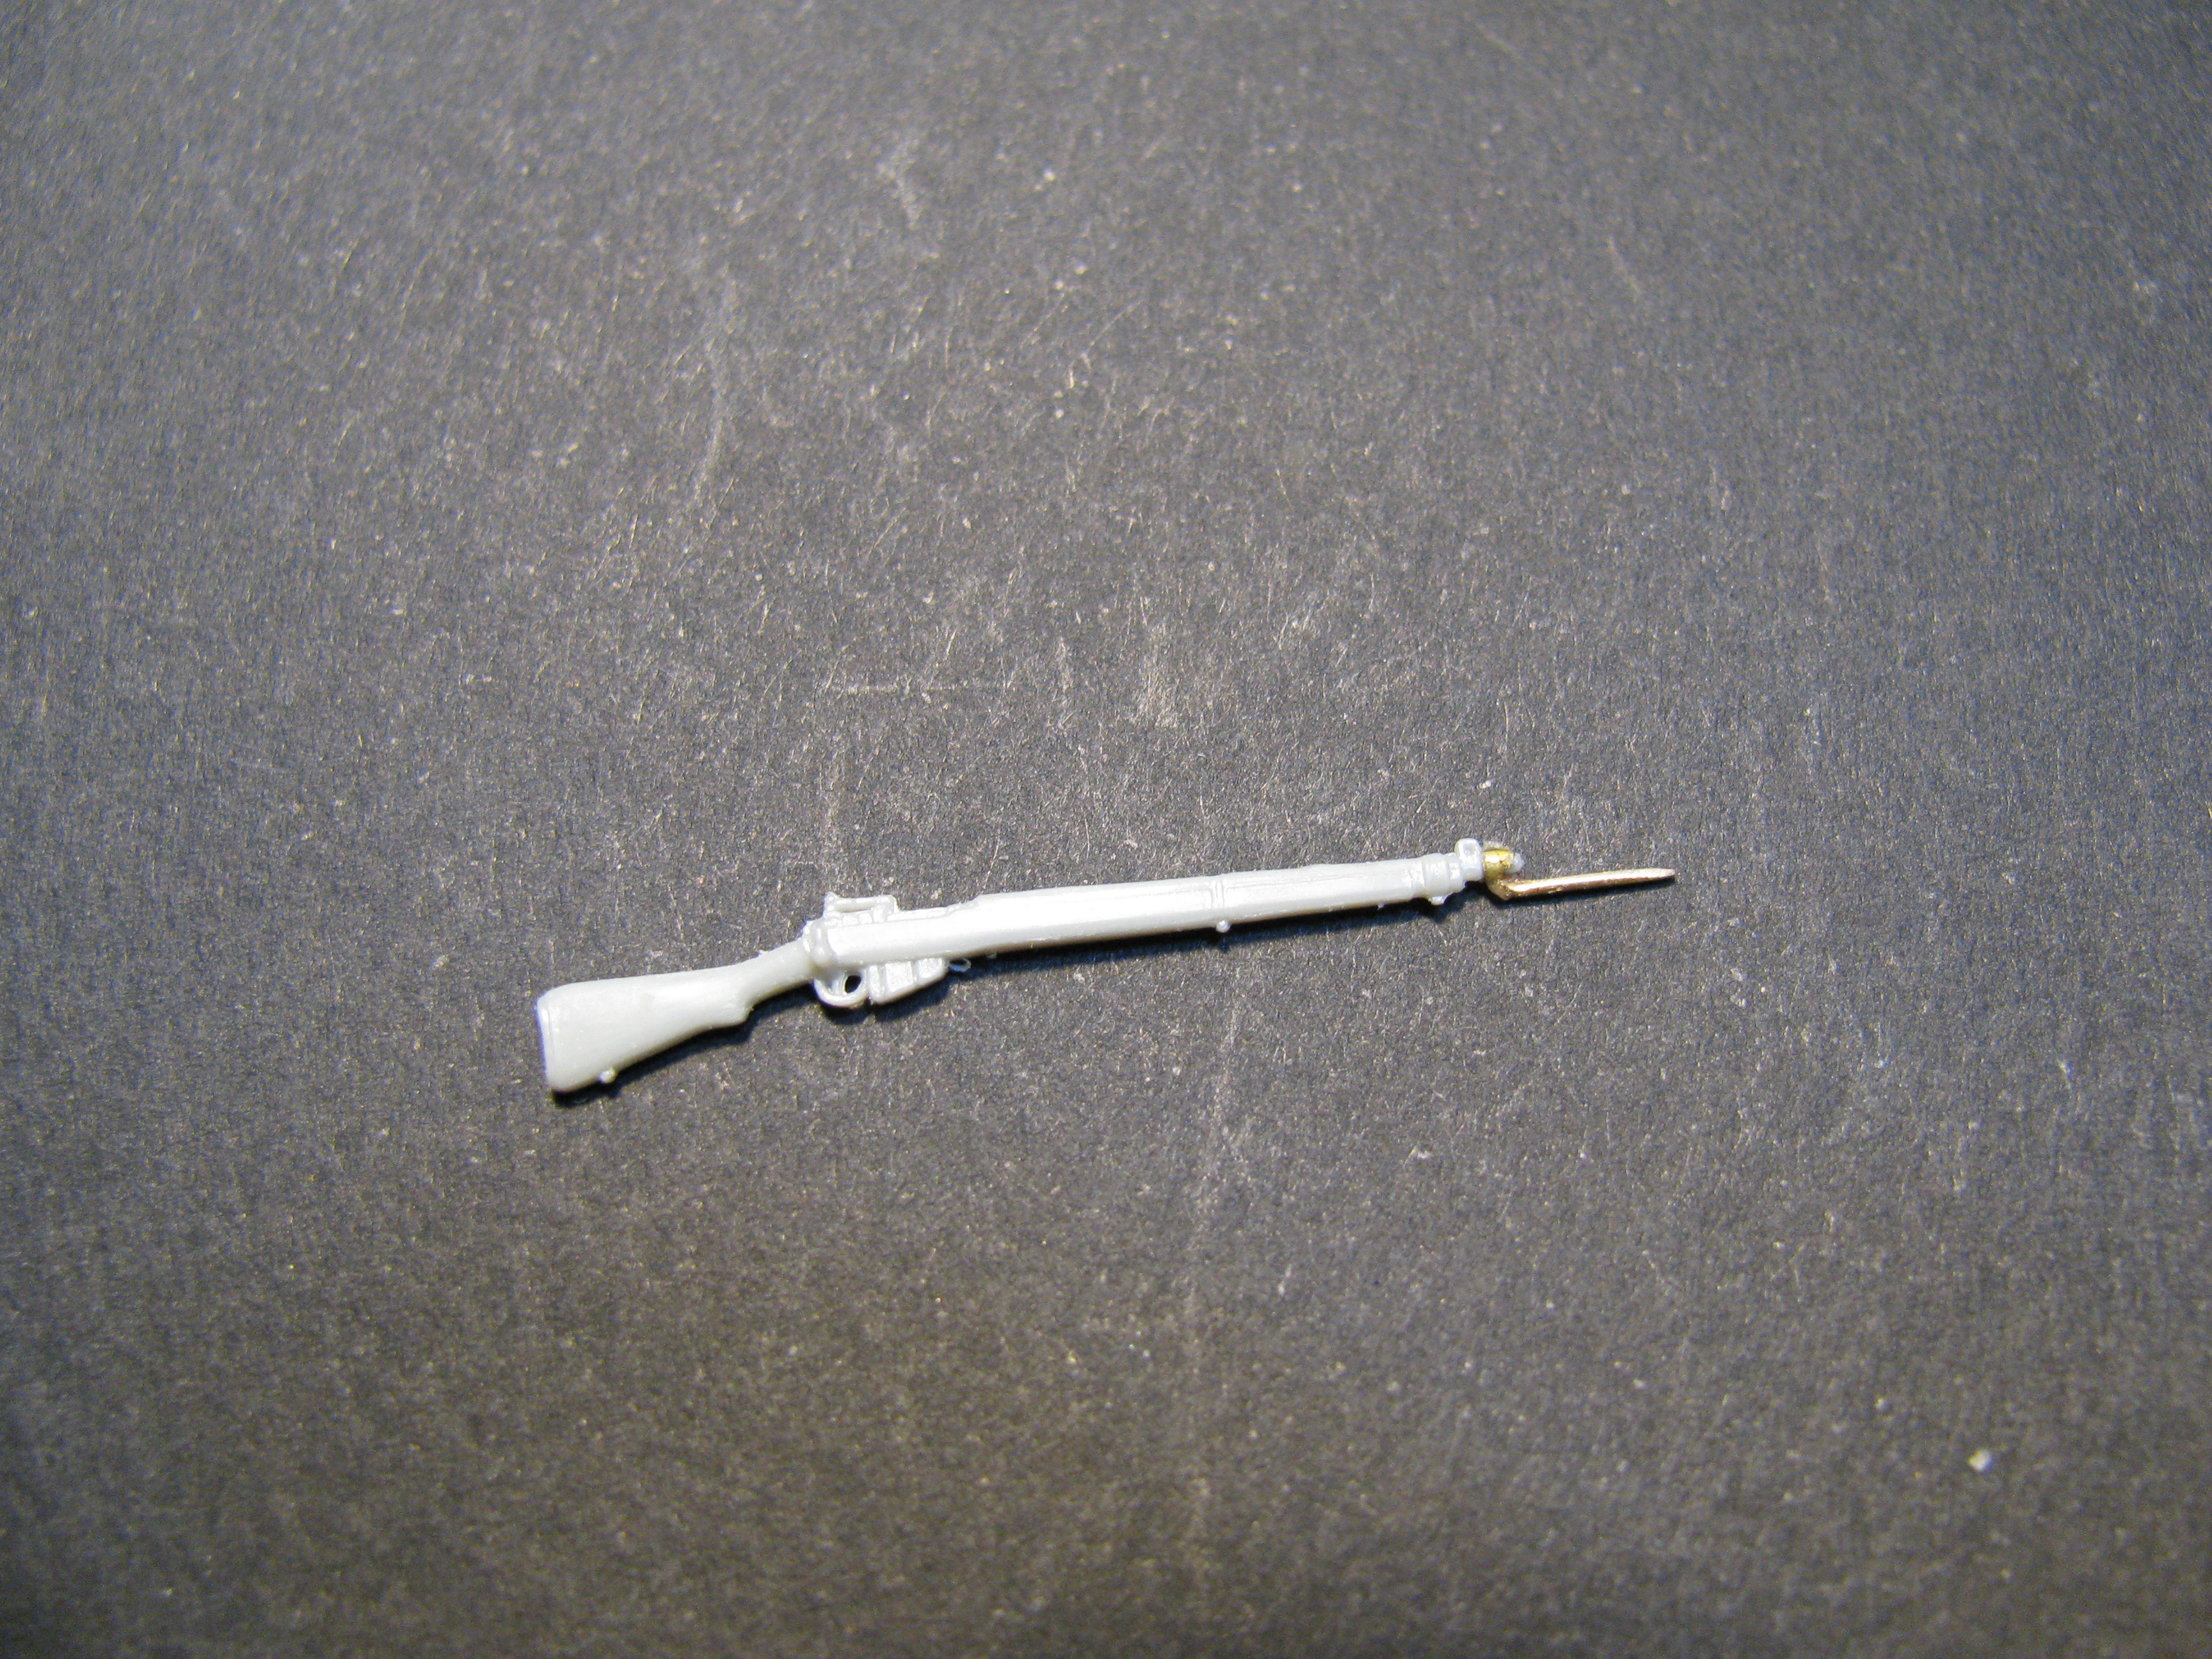
Gold alloy sewing wire ,filed and sanded then glued to a socket made from brass tube manufactures by(suitable) Albion metals.
Thoughts ?
J
BootsDMS

Joined: February 08, 2012
KitMaker: 978 posts
Armorama: 965 posts

Posted: Saturday, February 24, 2018 - 09:16 PM UTC
Quoted Text
Quoted TextQuoted TextA few days work produced this result. I tried using a Lucky Model PE mesh made for GI helmets and it isn't bad ! I had the hidden bonus of using the excess for shoelaces !
Without primer
With a very very light mist of primer. I found too much makes the figs too shiny and hard to accept paint. I made the chin straps from lead foil with PE buckles as well as the attachment straps for the gasmask bags,etc. If I wasn't lazy I would replace all the kit straps with PE buckles but....getting old maybe ?
The helmet will get pushed down more after painting the face. The shovel is straight !! I checked it 5 ways. It must be the camera lens distorting it.
J
jerry,
Sorry to present as a duty pedant but the British Army didn't lace its boots in a criss-cross pattern; a knot was tied in one end of a lace, threaded through an eyelet then laced to the top, then wrapped around the ankle and tucked in. Some may have used a lace with two ends at the top like a normal shoe then tie it off, but the effect was always to present the laces as sort of horizontal "bars" for want of a better description.
I must also point out that the respirator haversack on your figures appear to be somewhat over-sized; the haversack in use at that time was quite small and "boxy".
Sorry to be a pain.
Brian
Yessir,thanks,
I was already squared away by a few folks on FB about the shoe lace deal. I removed the offending crosses! I will have to figure out a suitable replacement that won't drive me mad making.
The gas mask bags. They are pretty much the same in all 3 different companies' kits I have. So I assumed they were OK. I do have pics of the smaller ones you mention so now what ?
OK,maybe I got this right??
I reviewed a series of excellent pics taken of Scotsmen during Op Epsom and they were all sporting the pig sticker on their 303's.
So I came up with this:
Gold alloy sewing wire ,filed and sanded then glued to a socket made from brass tube manufactures by(suitable) Albion metals.
Thoughts ?
J
Jerry,
The boot had 6 rows of eyelets so with the top row covered by the web Anklet, you'd need to replicate 5 rows of laces. I imagine good old stretched sprue would be the best bet but with 10 x pieces required for each figure, your sanity would indeed probably suffer.
As for the Respirator Haversacks; sadly, it looks like the manufacturing companies have all got it wrong; that said - and I admit I haven't researched as much as you re images from Epsom, it seems to me that the Haversack was often left off the fighting order of webbing. Water bottle would normally be suspended on the right, the bayonet frog on the e left and the entrenching tool appended to the straps that crossed over from the ammunition pouches - and is actually quite complex, but I'm sure you have a handle on all that. Whilst the Haversack had fittings for the belt is was usually (when worn) suspended from a strap like a satchel; there wasn't that much room left on the belt, dependent on the wearer's girth of course..
Subject to further research, perhaps you could omit the respirators? Just a thought.
As for the pig-sticker bayonet, looks about right but it was indeed quite slender.
I hope this is of some use, but I'm glad it's not me doing the bootlaces!
Brian
jrutman

Joined: April 10, 2011
KitMaker: 7,941 posts
Armorama: 7,934 posts

Posted: Saturday, February 24, 2018 - 10:05 PM UTC
I already made the laces out of sprue,stretched and flattened,but only 4 laces showing ! So,great mind think alike maybe ?
The pigsticker ain't gettin any thinner,sorry. Is is made of metal for strength and is just too small for me to get any thinner.
After reviewing my excellent pics of the Scots during Eprom,I will remove the gas mask bags/haversacks and repair the empty spaces.
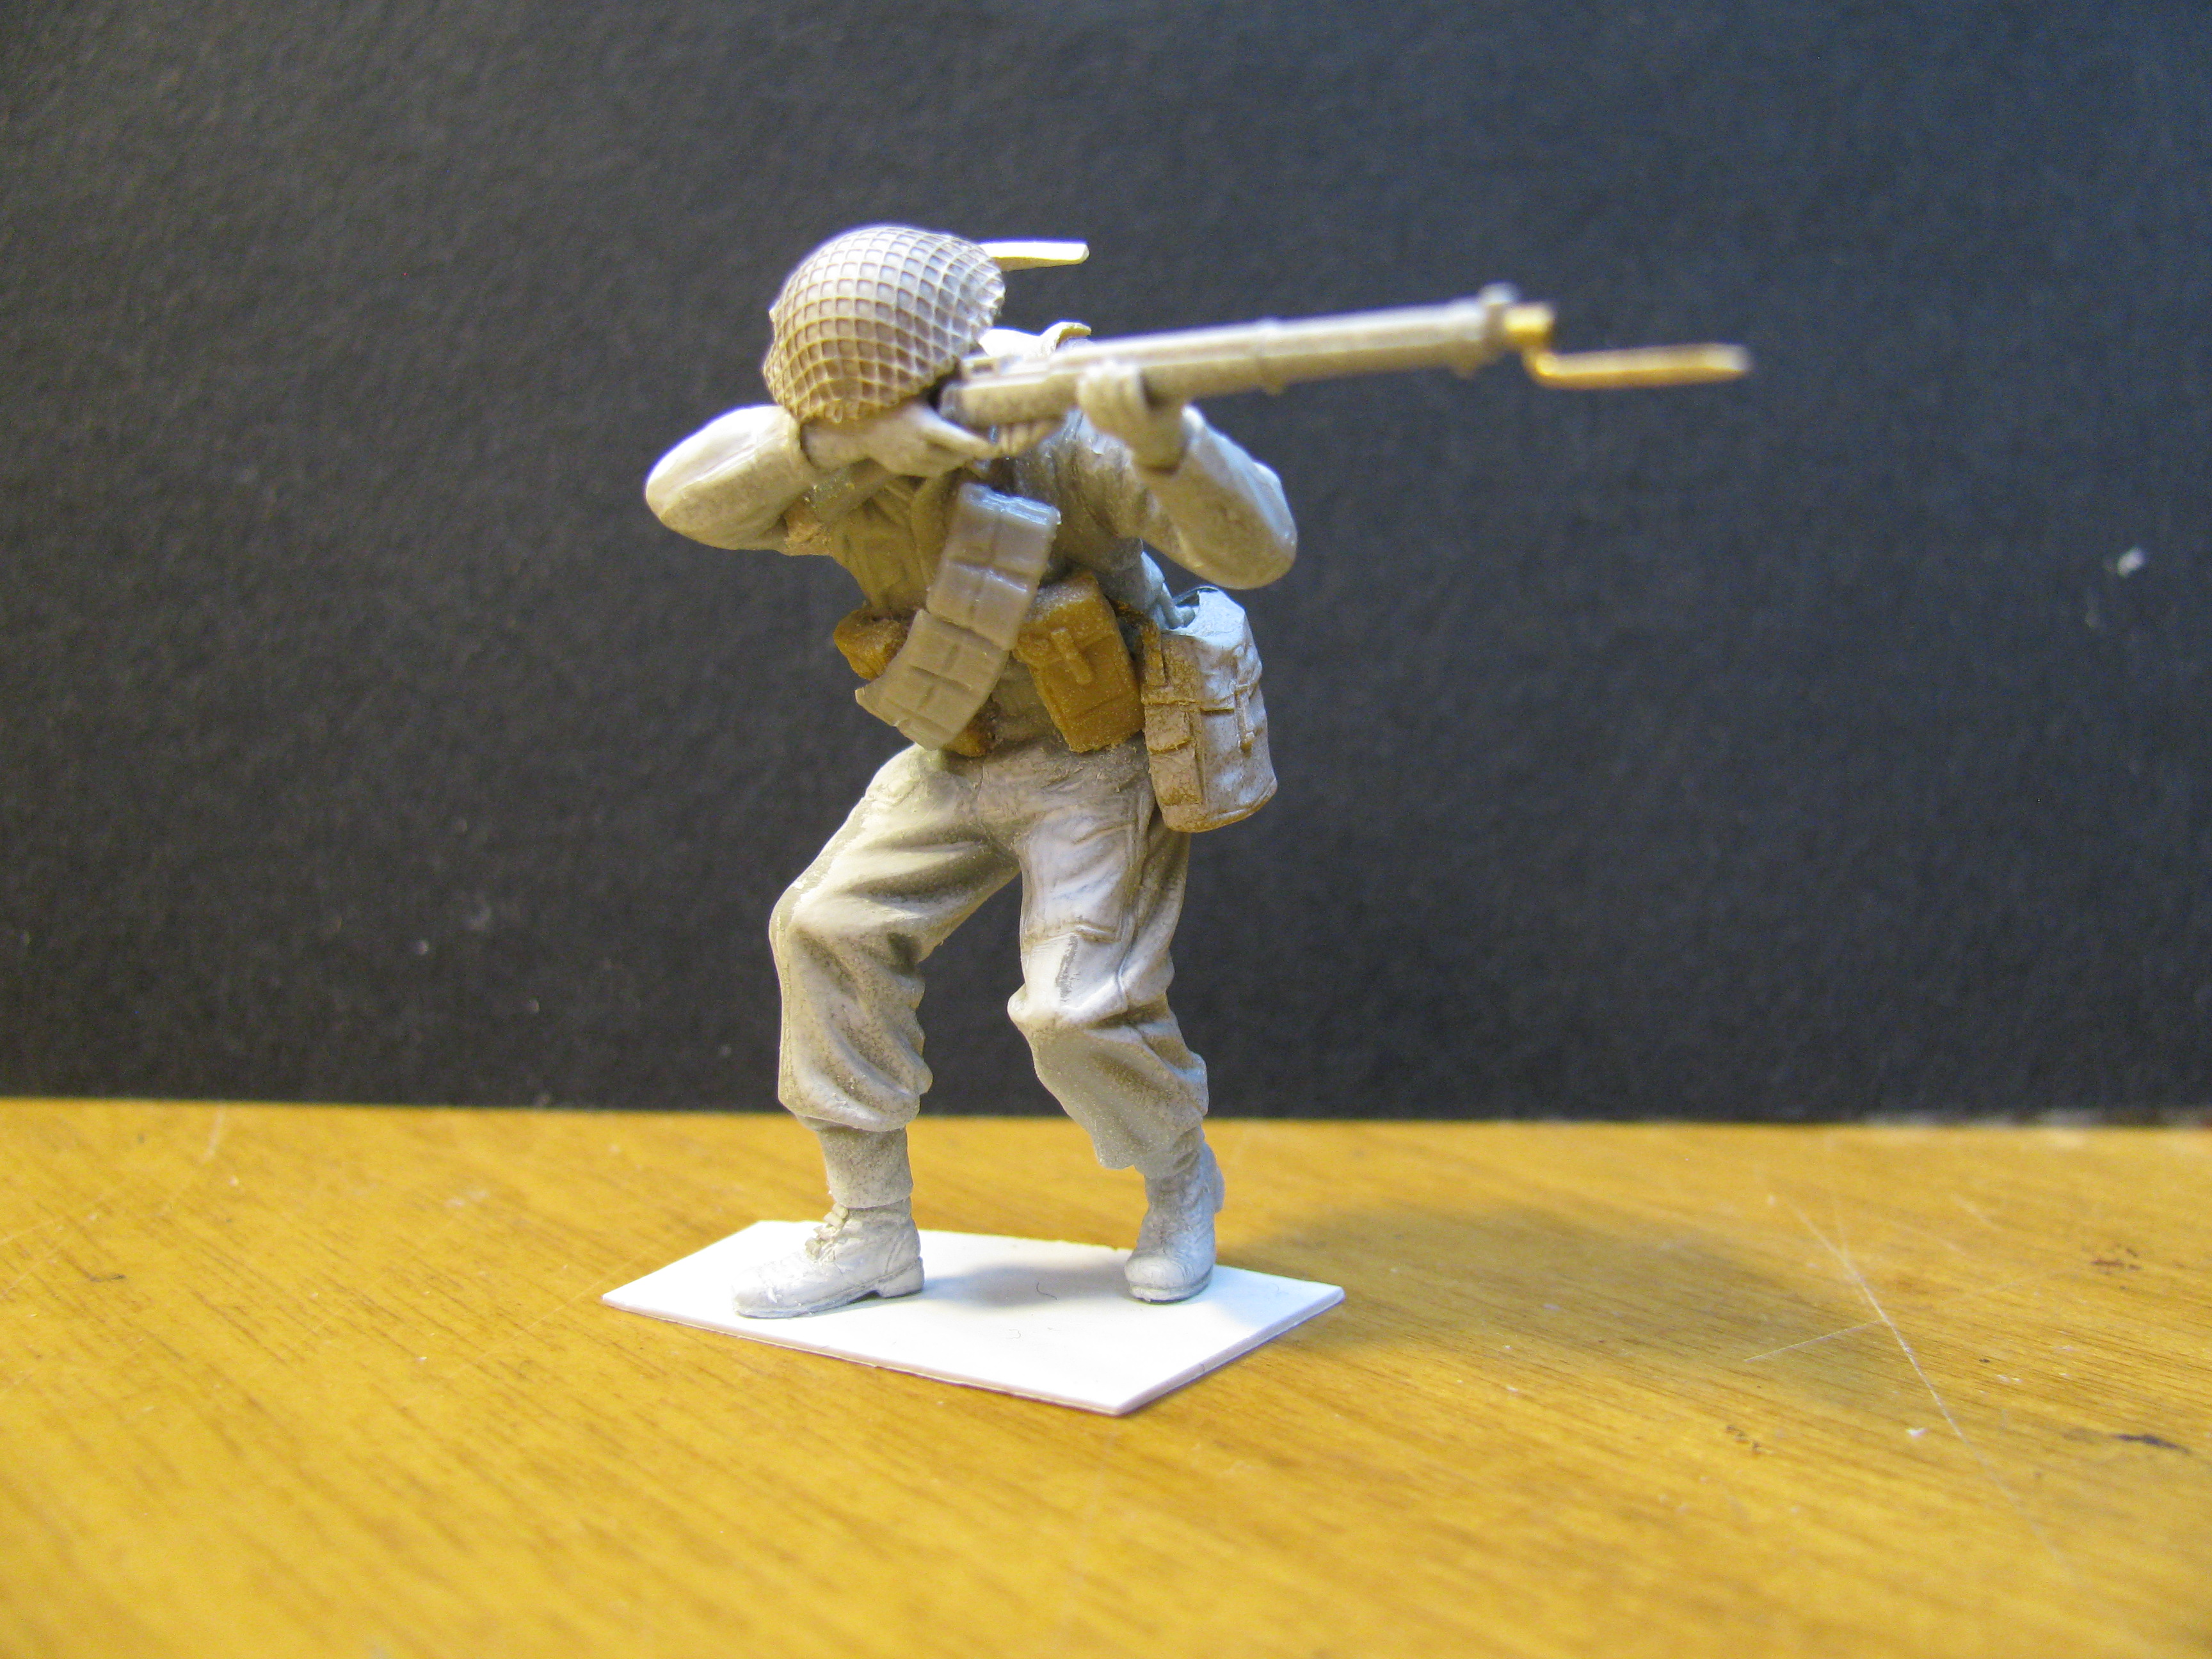

Onward and hopefully upward. Thanks for the input and interest !
J
The pigsticker ain't gettin any thinner,sorry. Is is made of metal for strength and is just too small for me to get any thinner.
After reviewing my excellent pics of the Scots during Eprom,I will remove the gas mask bags/haversacks and repair the empty spaces.


Onward and hopefully upward. Thanks for the input and interest !
J

Sean50

Joined: March 20, 2007
KitMaker: 340 posts
Armorama: 328 posts

Posted: Saturday, February 24, 2018 - 10:43 PM UTC
Hello Jerry
Looking promising so far
Re equipment, Brian is correct I think in that all the gas mask bags are off. Assuming they're trying to replicate the MKII Lightweight Gasmask Bag, which in "real life" is roughly 9"×6"×5".
There are quite a few Epsom era photos showing a decent amount of gear being carried. Consider where these guys were going and what they were doing....
Just thin down the gas mask bags (which didn't always contain gas masks...) and I think you'll be ok.
Cheers
Sean
Looking promising so far

Re equipment, Brian is correct I think in that all the gas mask bags are off. Assuming they're trying to replicate the MKII Lightweight Gasmask Bag, which in "real life" is roughly 9"×6"×5".
There are quite a few Epsom era photos showing a decent amount of gear being carried. Consider where these guys were going and what they were doing....
Just thin down the gas mask bags (which didn't always contain gas masks...) and I think you'll be ok.
Cheers
Sean
jrutman

Joined: April 10, 2011
KitMaker: 7,941 posts
Armorama: 7,934 posts

Posted: Saturday, February 24, 2018 - 11:45 PM UTC
[quote]Hello Jerry
Looking promising so far
Re equipment, Brian is correct I think in that all the gas mask bags are off. Assuming they're trying to replicate the MKII Lightweight Gasmask Bag, which in "real life" is roughly 9"×6"×5".
There are quite a few Epsom era photos showing a decent amount of gear being carried. Consider where these guys were going and what they were doing....
Just thin down the gas mask bags (which didn't always contain gas masks...) and I think you'll be ok.
Cheers
Sean
I may revisit the offending bags for the next 2 figs but for the first 2,I am satisfied with traumatic amputation !
Shooting guy. I hollowed out the end of his e-tool handle,cleaned up the glue marks from removing the bag,and removed the bayonet end from the frog (sort of). I also adjusted the bandoleer to make it more in conformation to gravity vs weight.
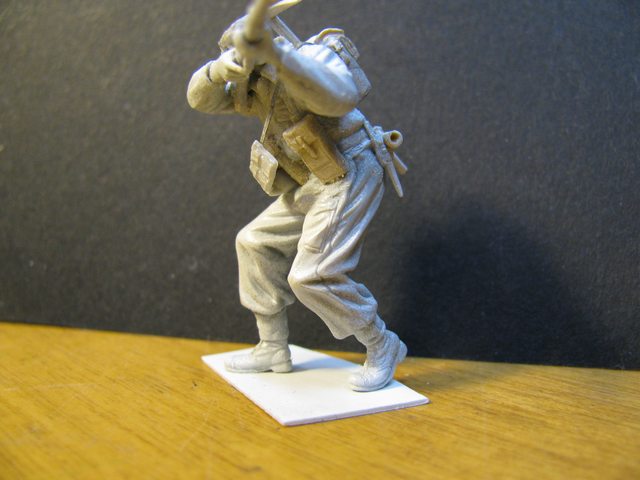
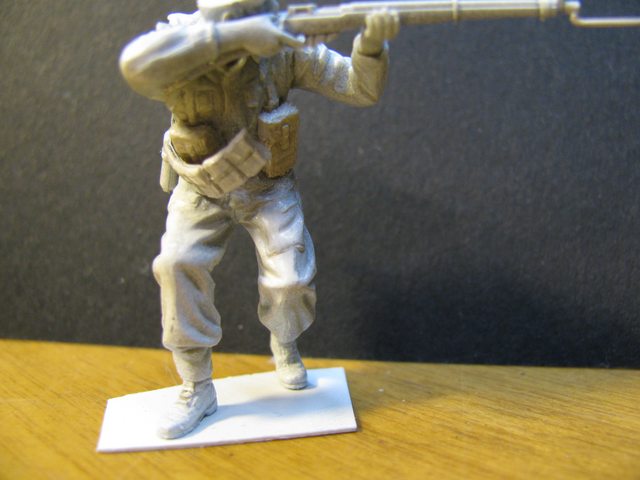
Also the ladder style laces can be seen!
The laying down guy got the same deal,but I also removed the side straps on the rucksack and replaced them with PE buckles and lead foil. Put some creases and dents in the rucksack as well.
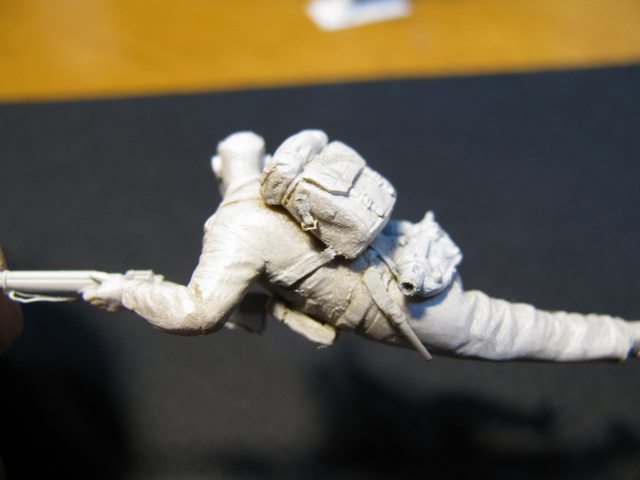
Looking promising so far

Re equipment, Brian is correct I think in that all the gas mask bags are off. Assuming they're trying to replicate the MKII Lightweight Gasmask Bag, which in "real life" is roughly 9"×6"×5".
There are quite a few Epsom era photos showing a decent amount of gear being carried. Consider where these guys were going and what they were doing....
Just thin down the gas mask bags (which didn't always contain gas masks...) and I think you'll be ok.
Cheers
Sean
I may revisit the offending bags for the next 2 figs but for the first 2,I am satisfied with traumatic amputation !
Shooting guy. I hollowed out the end of his e-tool handle,cleaned up the glue marks from removing the bag,and removed the bayonet end from the frog (sort of). I also adjusted the bandoleer to make it more in conformation to gravity vs weight.


Also the ladder style laces can be seen!
The laying down guy got the same deal,but I also removed the side straps on the rucksack and replaced them with PE buckles and lead foil. Put some creases and dents in the rucksack as well.

BootsDMS

Joined: February 08, 2012
KitMaker: 978 posts
Armorama: 965 posts

Posted: Sunday, February 25, 2018 - 12:13 AM UTC
Jerry,
I do hope our/my comments and input don't end up dissuading you too much; your animation skills are truly fantastic and I only wish I could adapt figures to the standard you have.
However (there's always a "however"): the end of the entrenching tool haft is solid I'm pretty sure. It was just designed to be a socket for the mattock/spade-like tool itself. This means it was slipped over the haft at the narrow end and moved up the tool until it could go no further - ie the metal wide end. Therefore, there was no need for that end to be hollowed out, indeed, it had to be firm enough for the tool to work. That said, digging out anything with a tool that small must have been absolutely back-breaking work (which is why of course proper shovels were carried as shown on one of your figures).
The pig sticker bayonet could be fitted to the other end of the haft to enable its use as a mine probe.
Just one thing re the Small Pack (ie the pack on the back of the Infantryman) the side buckles were really on a very short strap, no more really than was required to enable the buckle to be affixed. The idea being that the Small Pack could be modified with one of the shoulder straps and turned into a sort of satchel as and when required.
Please do keep up the good work - this will be another show stopper I'm sure.
Brian
jrutman

Joined: April 10, 2011
KitMaker: 7,941 posts
Armorama: 7,934 posts

Posted: Sunday, February 25, 2018 - 12:19 AM UTC
See,this is what happens when ever I guess ! I saw a pic of a guy with something stuck into rucksack and it looked like it was hollowed out on the end. I assumed ! Never good.
I thought my straps were short ? I made them the same length as the originals molded onto the packs ?
J
I thought my straps were short ? I made them the same length as the originals molded onto the packs ?
J

Sean50

Joined: March 20, 2007
KitMaker: 340 posts
Armorama: 328 posts

Posted: Sunday, February 25, 2018 - 12:39 AM UTC
Quoted Text
I thought my straps were short ? I made them the same length as the originals molded onto the packs ?
J
About 2" from the base of the strap where it's stitched to the bag itself to the top of the buckle. Short enough that they cannot "hang".
Around half the length of the strap is stitched to the bag.
The world of 37 pattern webbing is a funhouse indeed.

Sean50

Joined: March 20, 2007
KitMaker: 340 posts
Armorama: 328 posts

Posted: Sunday, February 25, 2018 - 12:48 AM UTC
Quoted Text
Jerry,
Please do keep up the good work - this will be another show stopper I'm sure
I concur 100%.
Annoying as it is, it's better to do this now than after paint....

WillysJeep

Joined: February 21, 2018
KitMaker: 7 posts
Armorama: 6 posts

Posted: Sunday, February 25, 2018 - 01:38 AM UTC
Looking good Jerry, nice work on the bayonets.
The respirator bags are way too big!
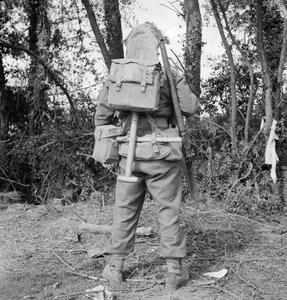
https://www.iwm.org.uk/collections/item/object/205206234
Looks like the Accurate Armour ones are a much better size.

https://accurate-armour.com/aa-products/135th-accessories/a054
The respirator bags are way too big!

https://www.iwm.org.uk/collections/item/object/205206234
Looks like the Accurate Armour ones are a much better size.

https://accurate-armour.com/aa-products/135th-accessories/a054
jrutman

Joined: April 10, 2011
KitMaker: 7,941 posts
Armorama: 7,934 posts

Posted: Sunday, February 25, 2018 - 01:52 AM UTC
Quoted Text
Looking good Jerry, nice work on the bayonets.
The respirator bags are way too big!
https://www.iwm.org.uk/collections/item/object/205206234
Looks like the Accurate Armour ones are a much better size.
https://accurate-armour.com/aa-products/135th-accessories/a054
Thanks buddy. I decided to bin the bags altogether as the pics I have during this op show them missing ! That resin rucksack is beautiful but it is the large ruck and not the one I need. I do need to sort the e-tool I am using though. Looks wonky. Plus the side straps on the ruck and the side buckles,as I have them upside down and too long. Sigh.
J
Posted: Sunday, February 25, 2018 - 02:11 AM UTC
Hey Jerry -
I'm not sure how much I like seeing your figures...you get so much out of each one! I am wrestling with the balance of inspiration and frustration! Haha - great to see as always, and as always, I really appreciate the WIP photos - nice!
Cheers
Nick
I'm not sure how much I like seeing your figures...you get so much out of each one! I am wrestling with the balance of inspiration and frustration! Haha - great to see as always, and as always, I really appreciate the WIP photos - nice!
Cheers
Nick
jrutman

Joined: April 10, 2011
KitMaker: 7,941 posts
Armorama: 7,934 posts

Posted: Sunday, February 25, 2018 - 11:17 PM UTC
Quoted Text
Hey Jerry -
I'm not sure how much I like seeing your figures...you get so much out of each one! I am wrestling with the balance of inspiration and frustration! Haha - great to see as always, and as always, I really appreciate the WIP photos - nice!
Cheers
Nick
Pretty much how I feel about your vehicles and groundwork !
Thanks buddy,
J
jrutman

Joined: April 10, 2011
KitMaker: 7,941 posts
Armorama: 7,934 posts

Posted: Monday, February 26, 2018 - 12:35 AM UTC
OK,I have googled and googled and in fact,maybe it was too much ! I still have not found the proper shoulder patch for the 2/Argyll & Sutherland Highlanders worn during Op Epsom 1944.
Anyone ??
J
Anyone ??
J
BootsDMS

Joined: February 08, 2012
KitMaker: 978 posts
Armorama: 965 posts

Posted: Monday, February 26, 2018 - 02:46 AM UTC
Quoted Text
OK,I have googled and googled and in fact,maybe it was too much ! I still have not found the proper shoulder patch for the 2/Argyll & Sutherland Highlanders worn during Op Epsom 1944.
Anyone ??
J
Jerry,
I'm afraid I haven't a complete answer but I might be able to give you some pointers; I hope I'm not teaching you to suck eggs.
The soldiers would have sported the Divisional flash of the Scottish Lion (probably described as rampant or similar but I'm not a heraldic expert); this was a red lion on a yellow circle, outlined in white within a black square. Although the Division consisted of 3 x Brigades, the Brigades did not sport their own emblem - as far as I am aware.
The composite Brigades were 44th (Lowland), 46th (Highland), and 227th (Highland) and that reflects the order of seniority established by either historical or date of formation criteria. Each Brigade was therefore designated on the uniform by a thin red horizontal stripe ergo 44th would sport 1 x stripe, 46th x 2, and 227 x 3.
2 A & SH were part of 227 so beneath the Divisional badge they would have 3 x horizontal red stripes. These would be above any rank stripes etc.
Most British units wore an abbreviated title in a curved strip following the curve of the shoulder below the epaulette. This would be red for infantry but in Scottish units this was replaced by a small flash of tartan material above the Div badge - which would reflect the respective (historical) tartan of that particular regiment.
So, to sort of recap (and perhaps this will prompt some of my more knowledgeable countryman to respond)from the top of the battledress sleeve - both sides:
Tartan flash
Div flash - the Scottish Lion
Brigade strips (x 3)
Rank stripes or not
Further down above the cuff:
Warrant Officer badges of rank
Wound stripes (unsure of which sleeve)
Long service stripes - dependent on of course, the soldier's career (again, unsure of which sleeve).
And of course, dependent on the type of qualification, various trade badges either further up the sleeve or above the cuff.
This all sounds quite busy and photographic evidence may not support all of it.
The answer could be quite easily found (and indeed, all the fiendish machinations of 37 pattern webbing) in the excellent Histoire & Collection volumes 1 and 2 "From D Day to VE Day - the British Soldier"; sadly I lent mine a long time ago and lost them.
Sorry for this long-winded and ultimately incomplete response; in principle the uniforms could look quite colourful!
Brian
 |


