I've been a long time lurker, and have learned so much from this forum and site that I felt I should contribute!
I'm currently in the middle of a build, which is not really the ideal time to make a thread, but hopefully its all good haha.
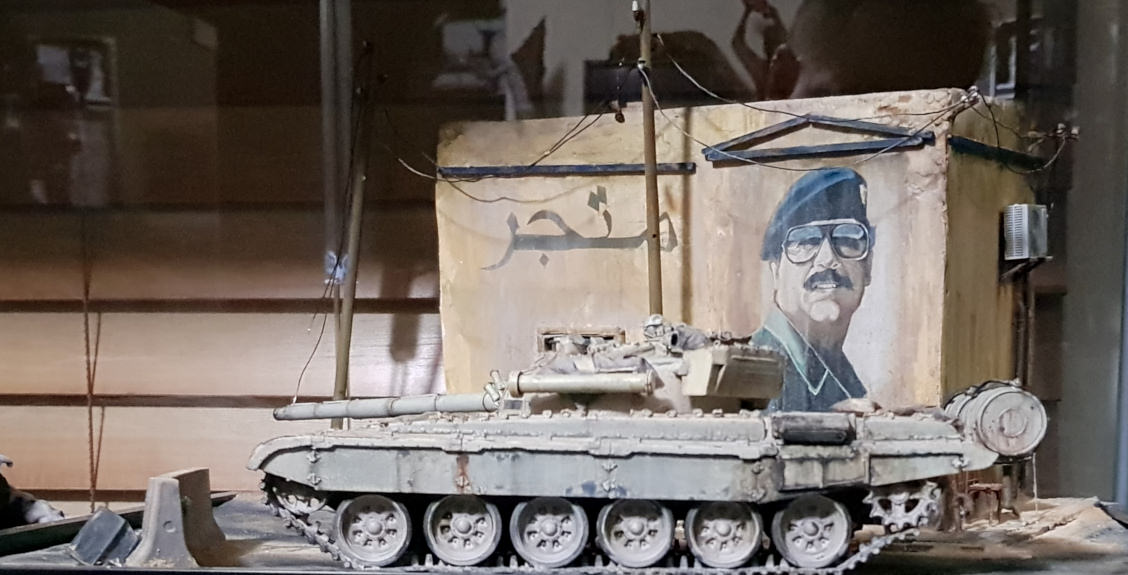
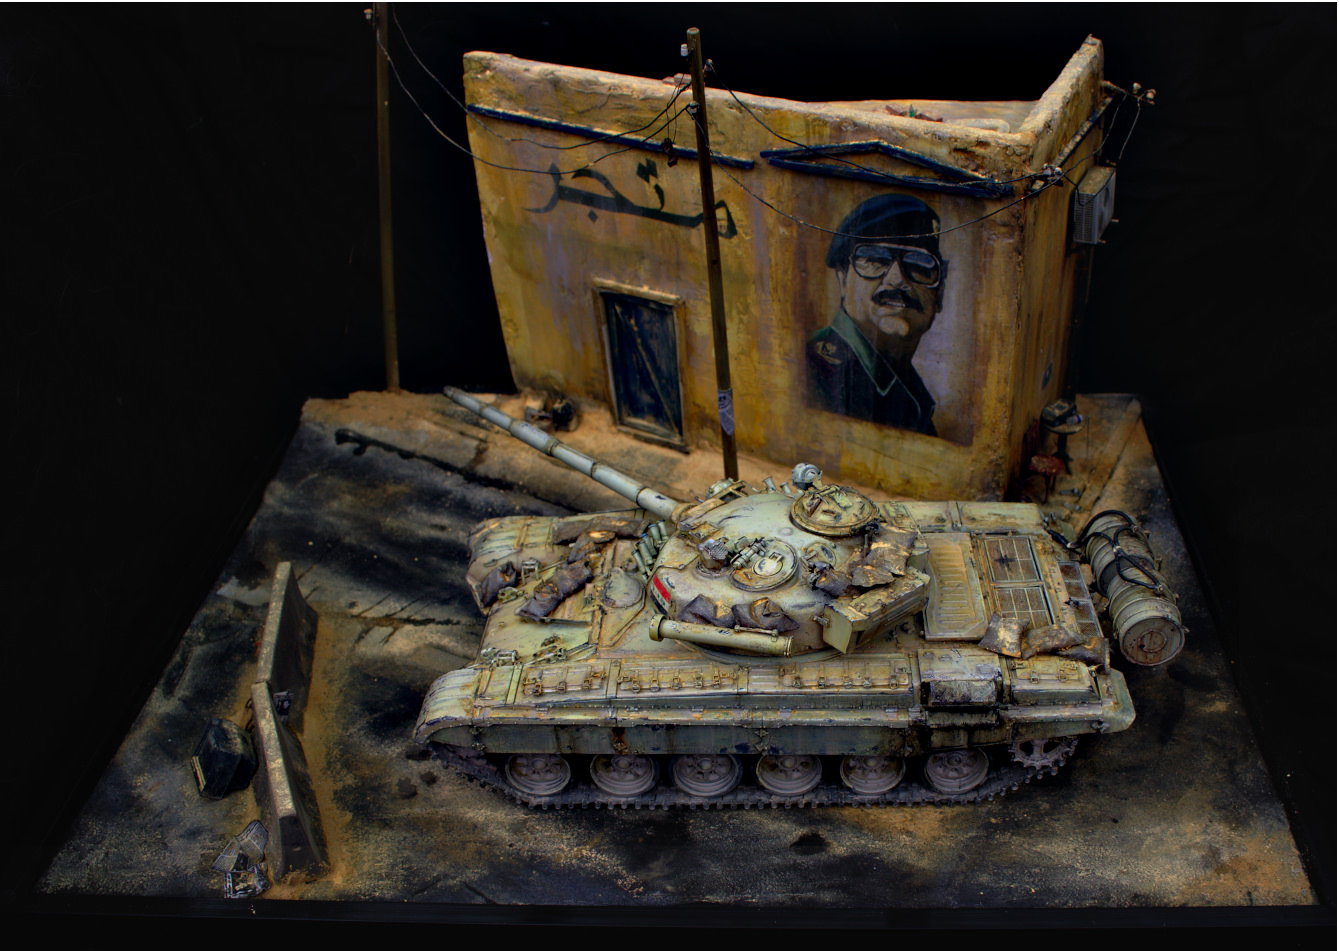
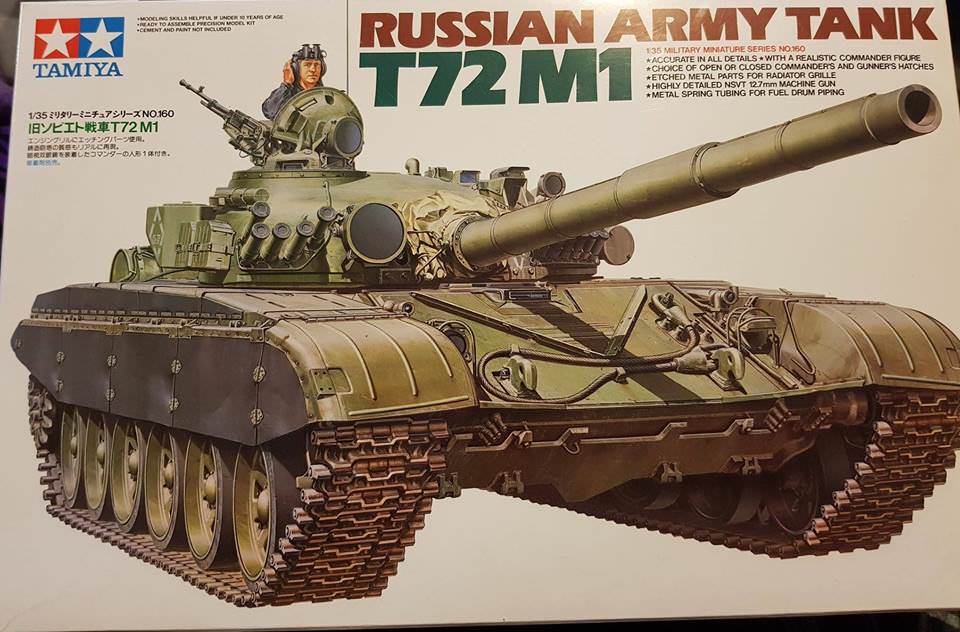
I'm doing an Iraqi T-72M1 (Lion of Babylon). When I was starting the build I was looking at some of the newer T-72 kits on the market from Meng, but in the end I settled on the Tamiya M1. It was designed to be the correct model, and it was cheaper. I also intended to add a huge amount of PE and upgrades so I wasn't too worried about lack of detail on some parts.
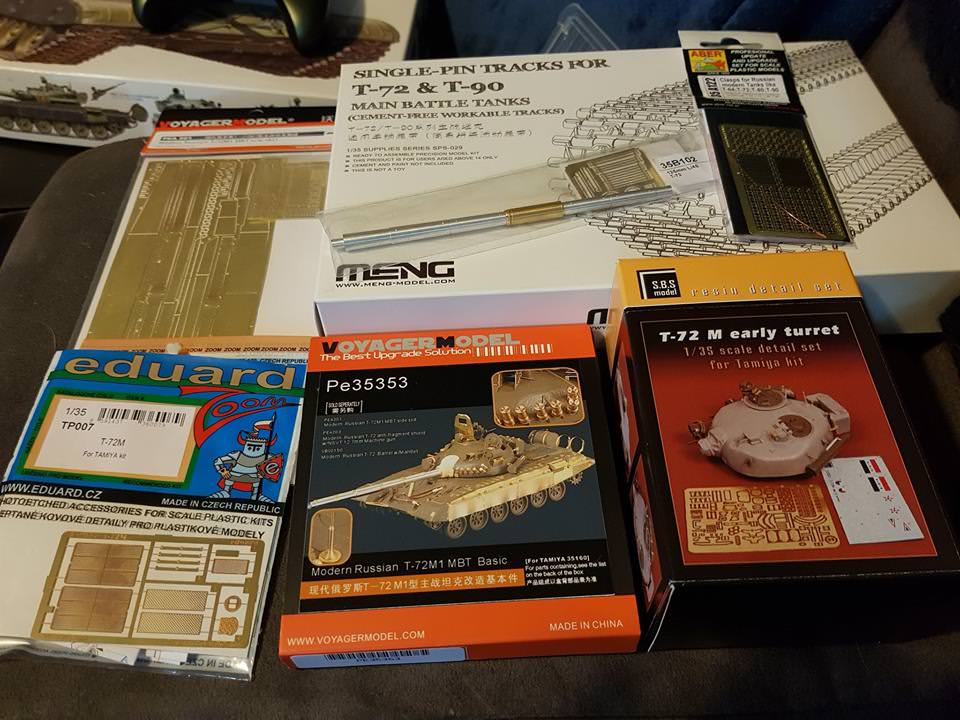
By far the biggest complaint is the turret shape, which is way off, but I found there was a resin upgrade kit by S.B.S. models. It wasn't cheap, but necessary for this particular version of the T-72.
Here's the kit, and the upgrade stash:
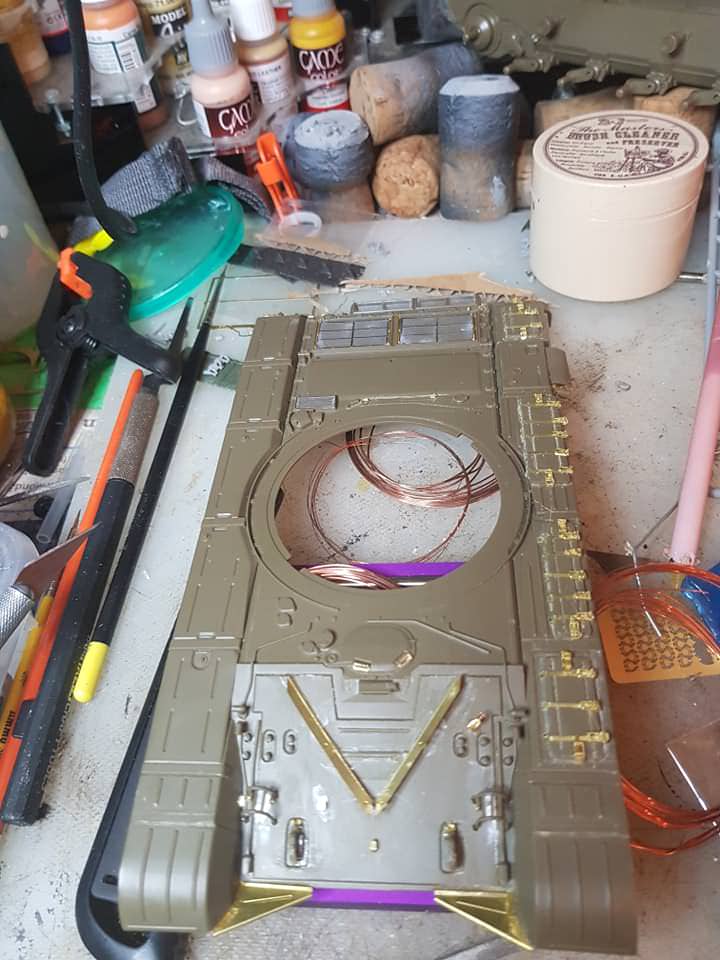
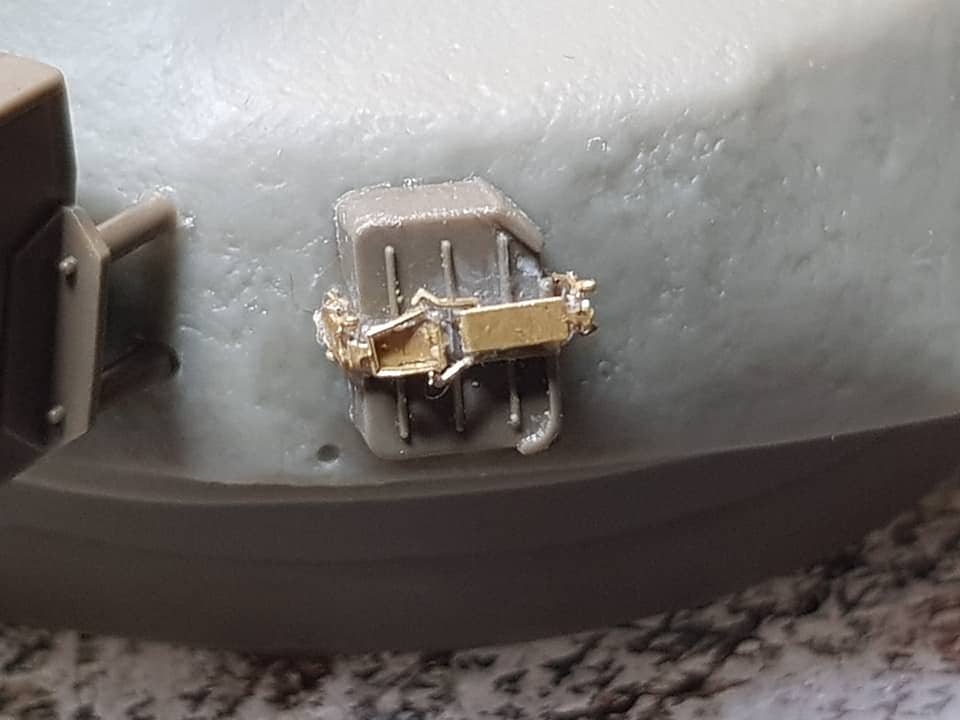
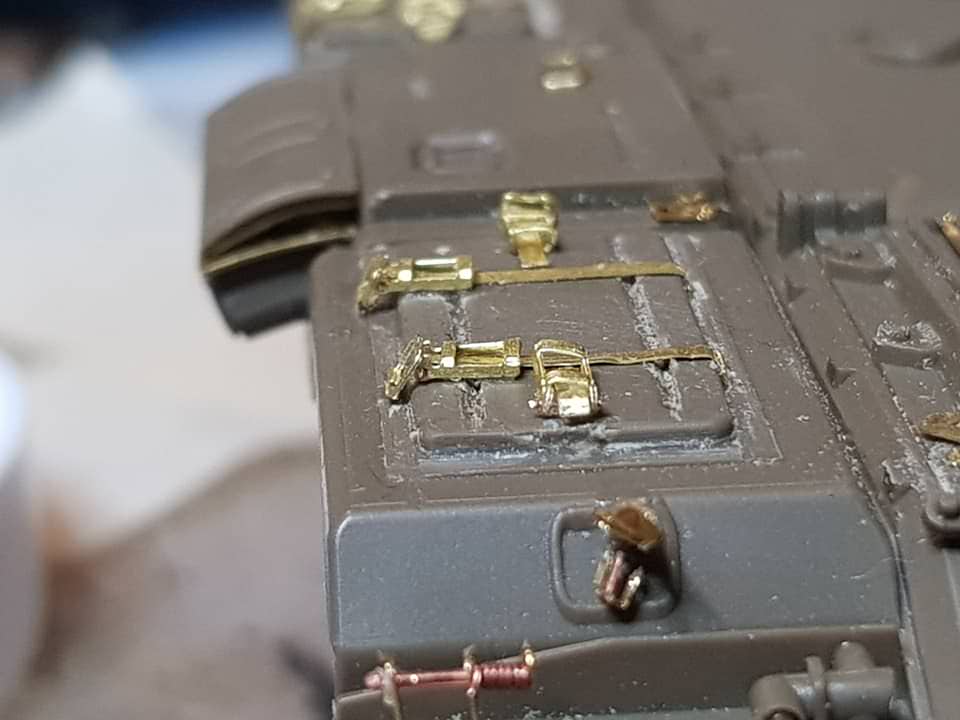
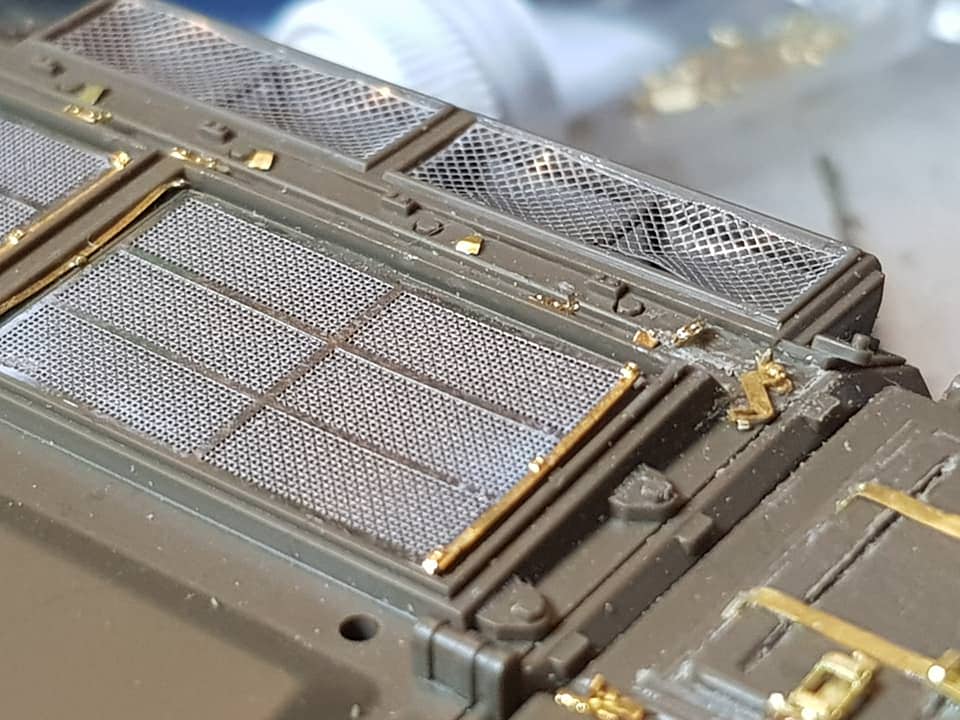
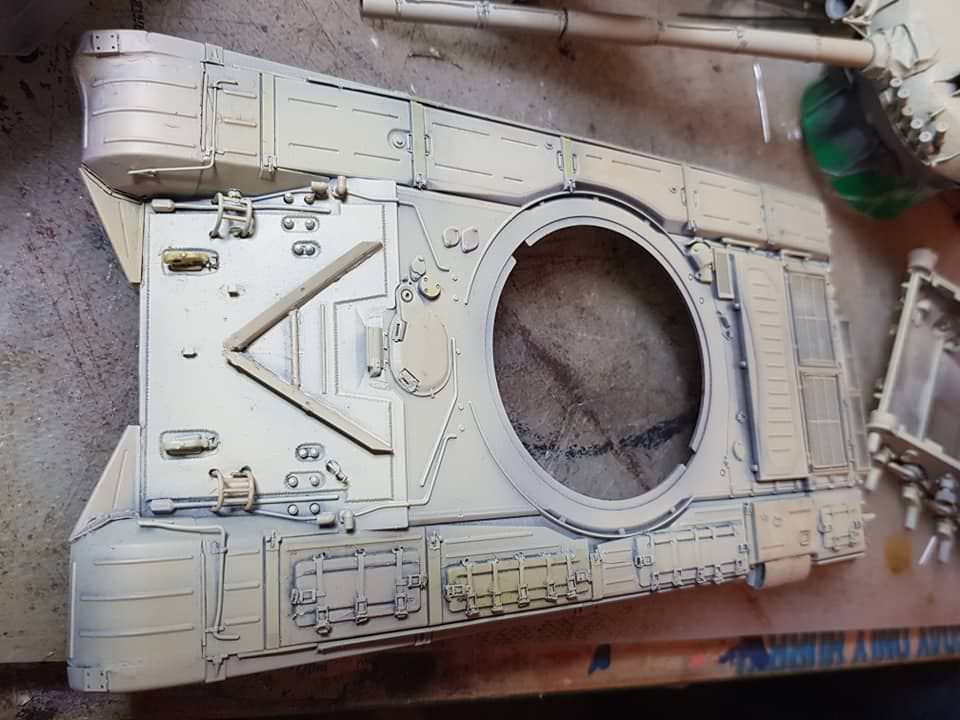
This is the start of construction. I have removed all of the moulded on clasps, and rescribed the lost detail. I've also started on the PE, adding the PE clasps and some grills and other bits and pieces.
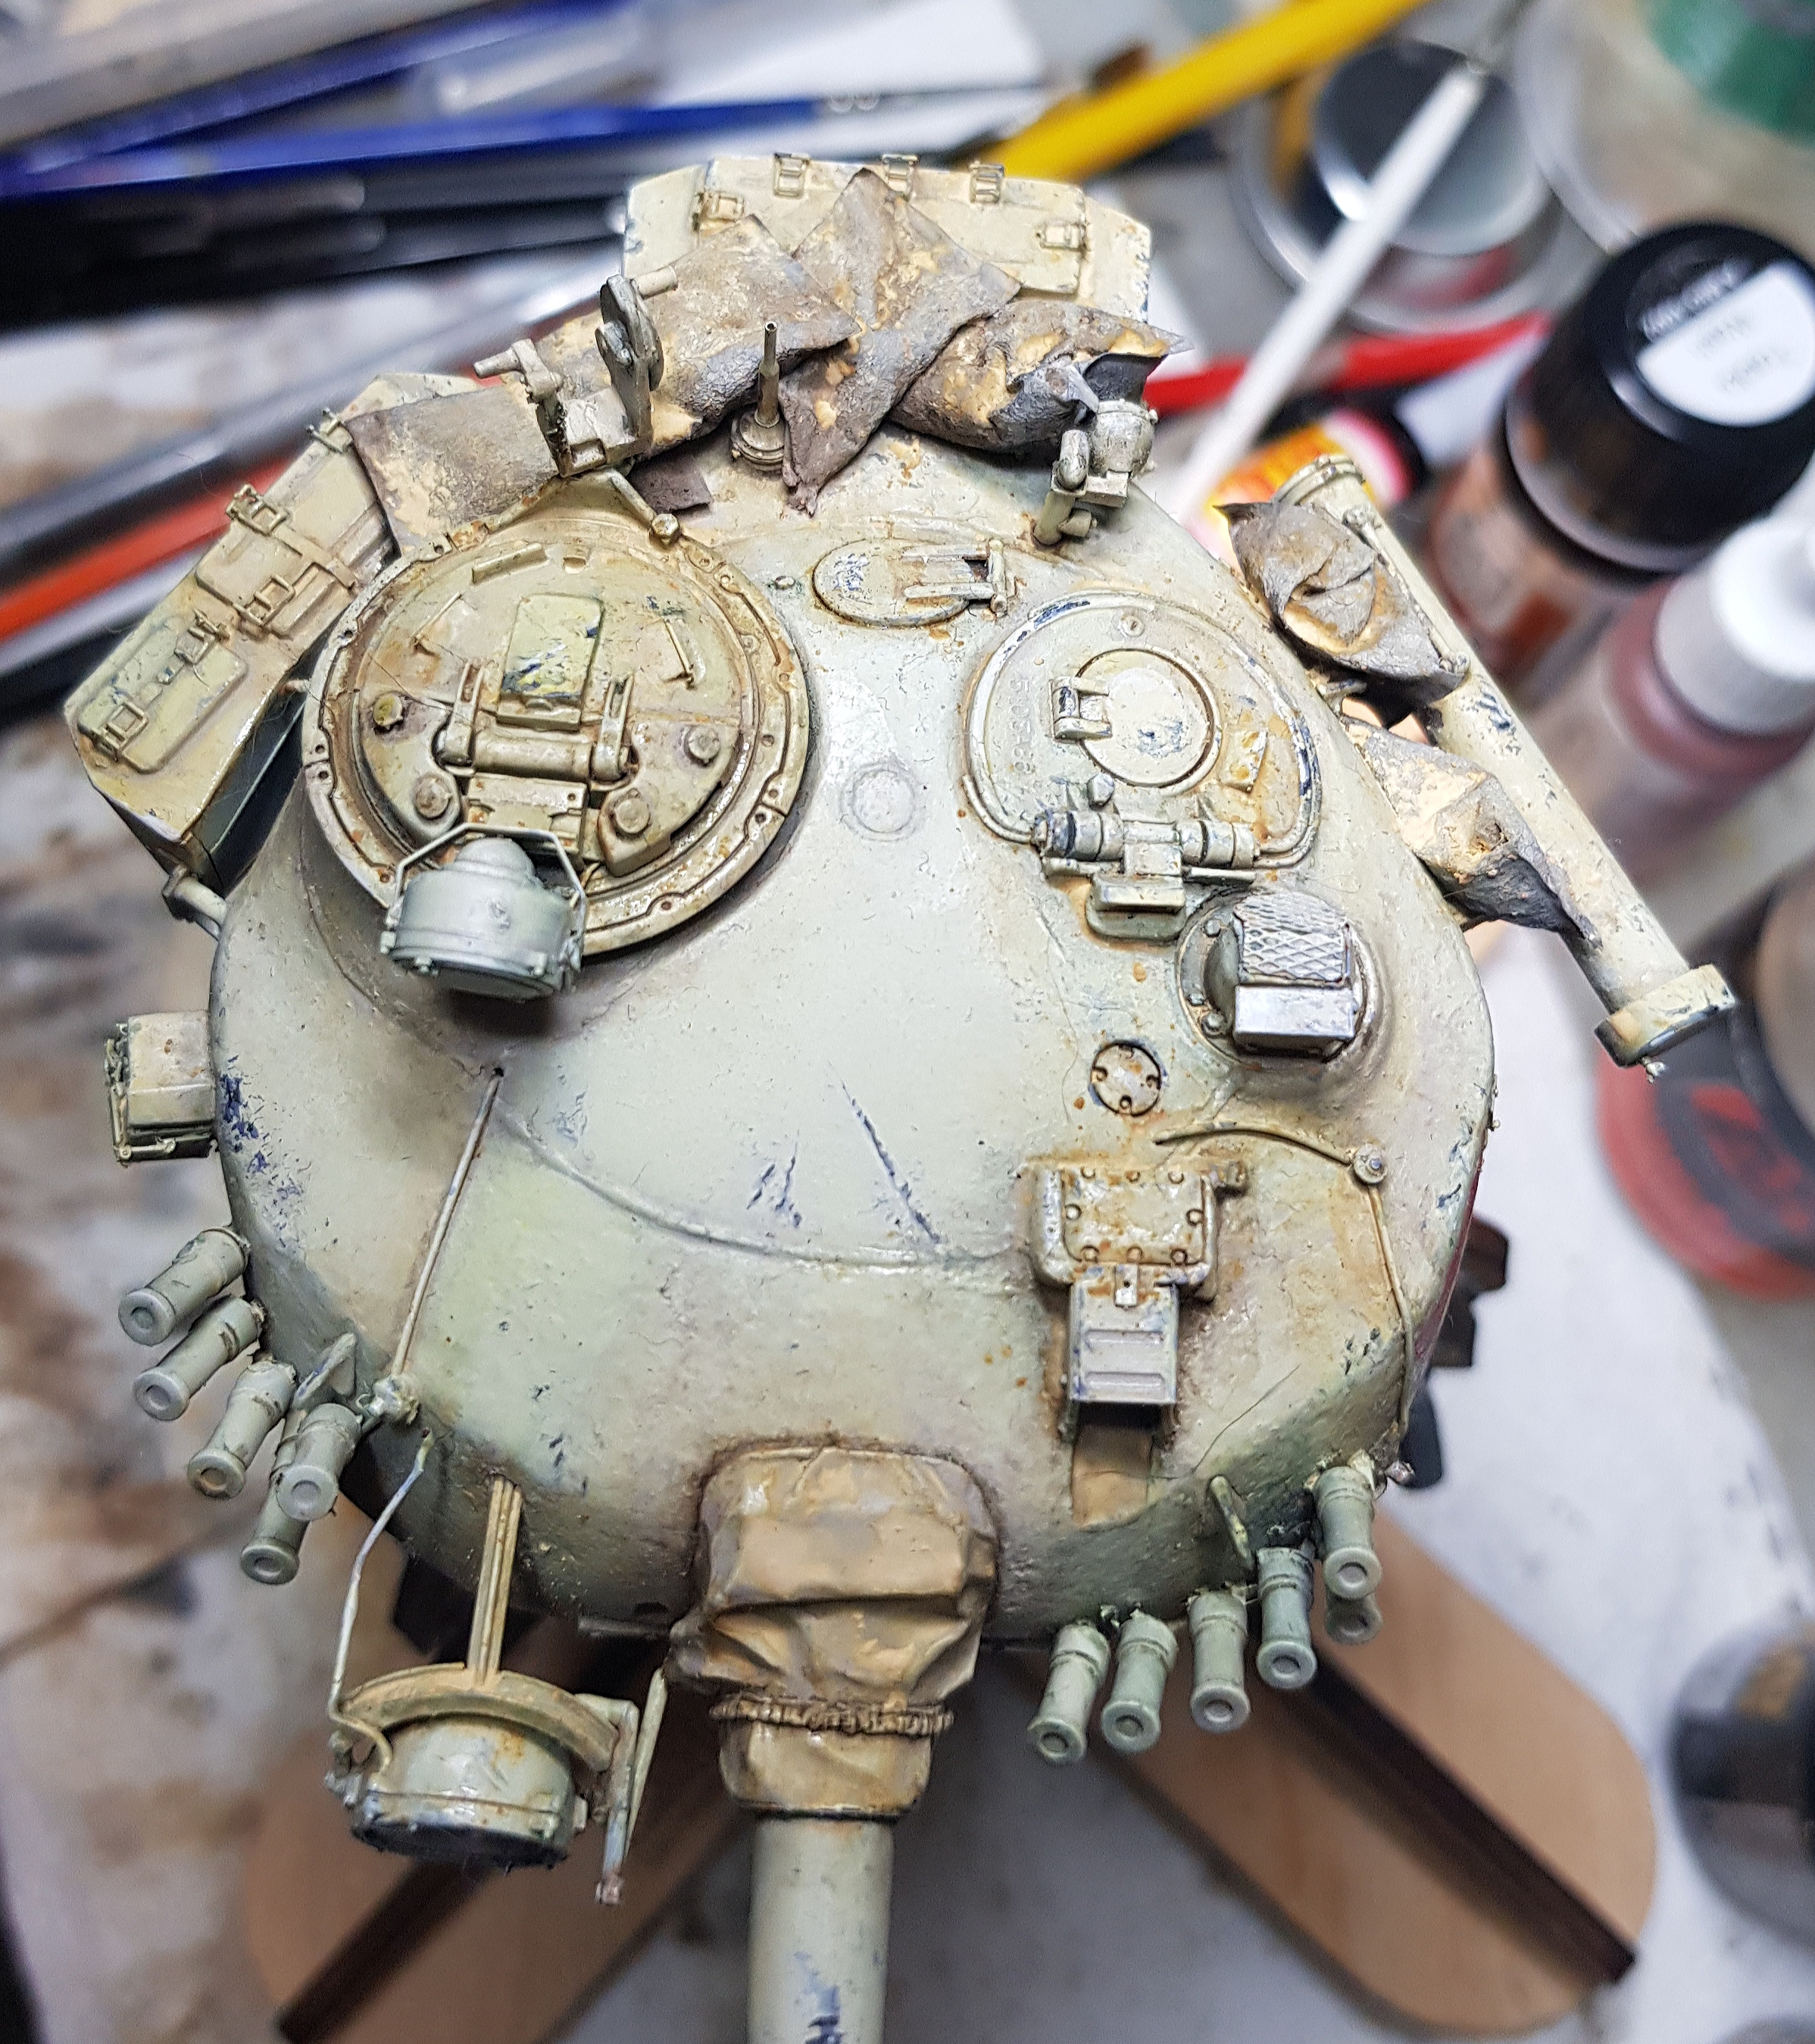
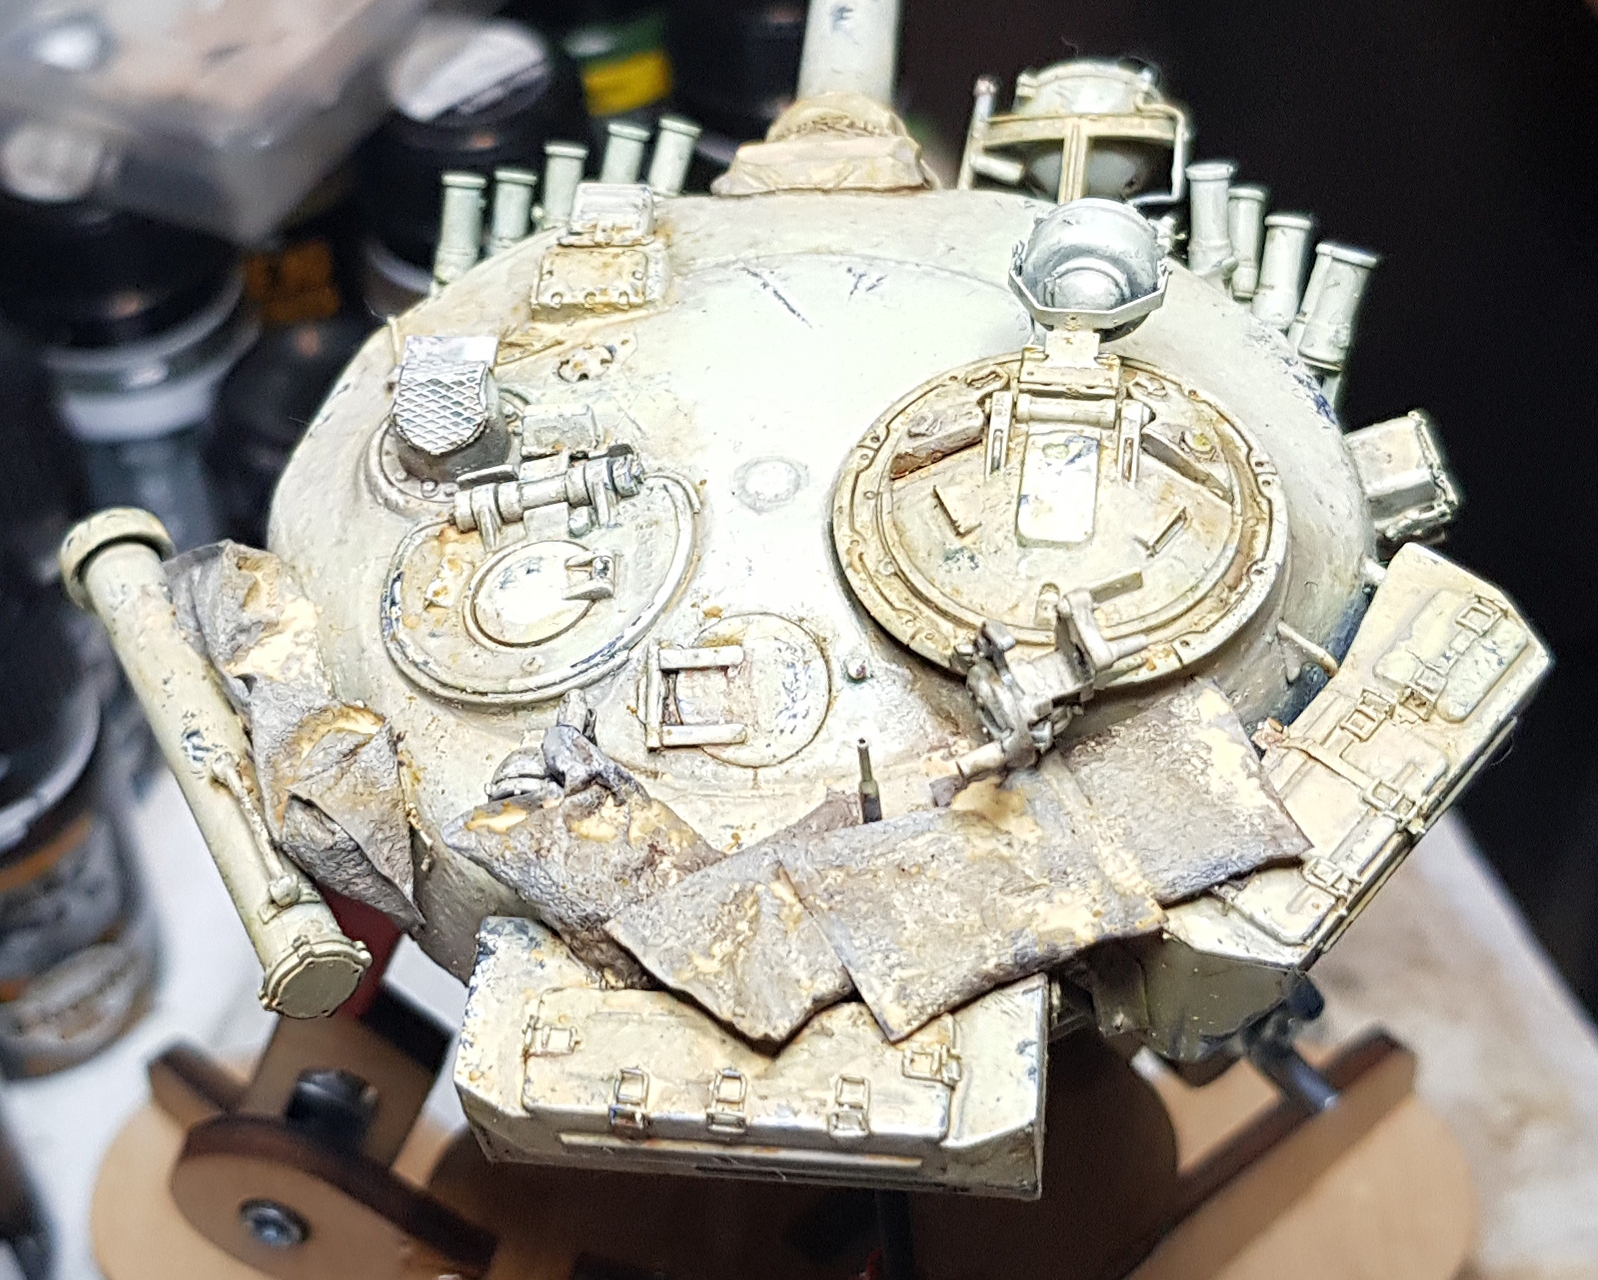
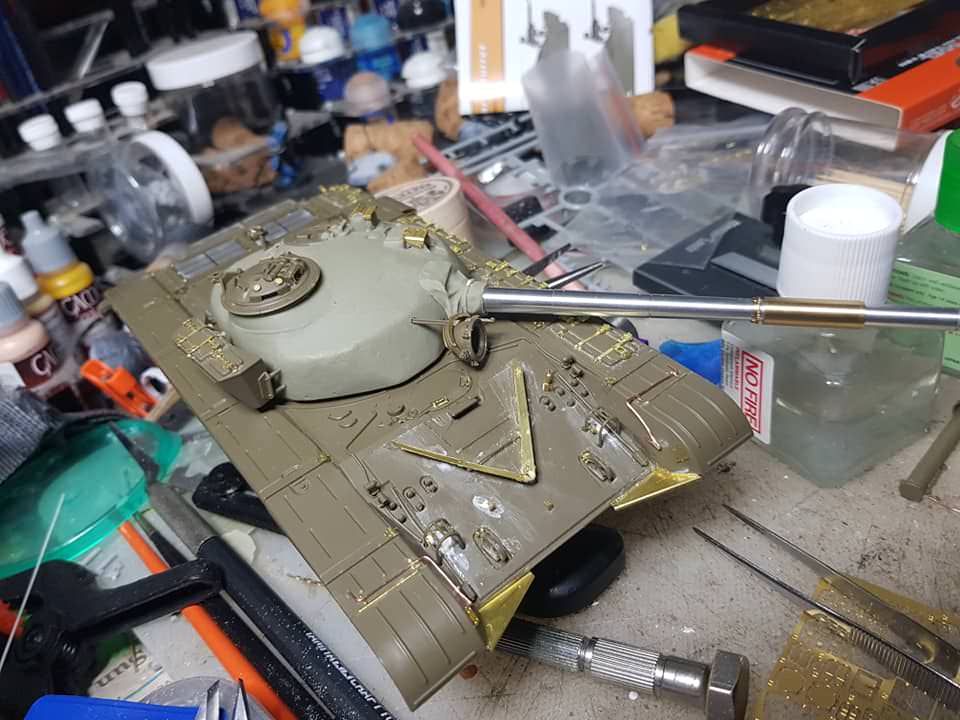
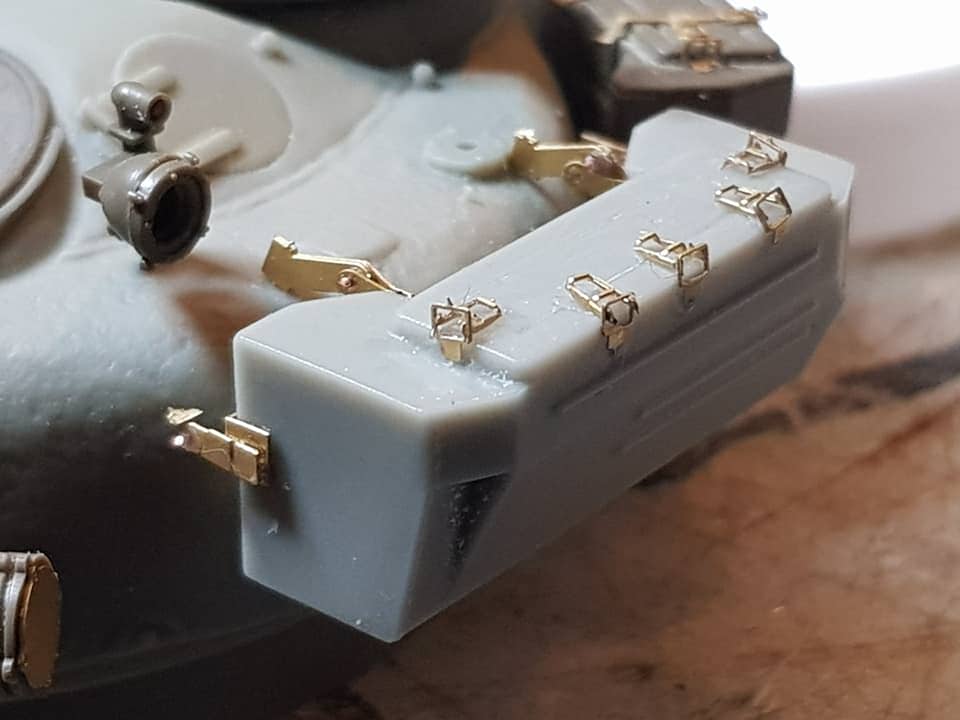
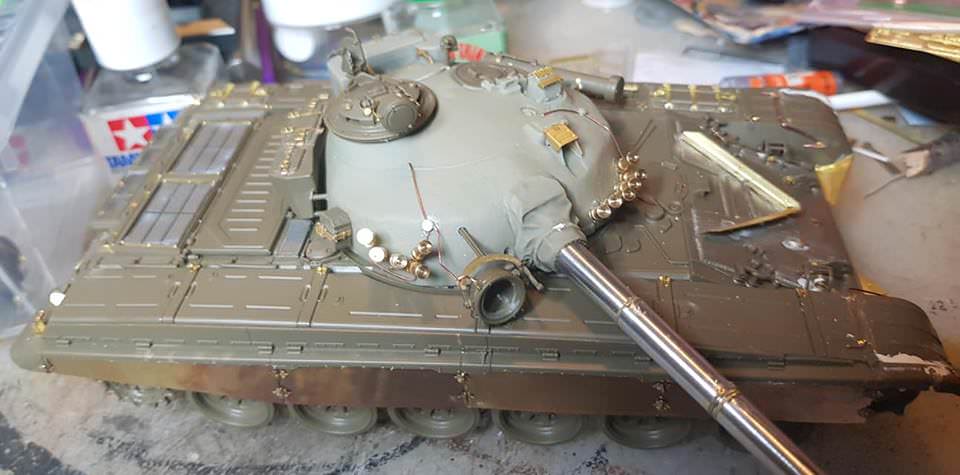
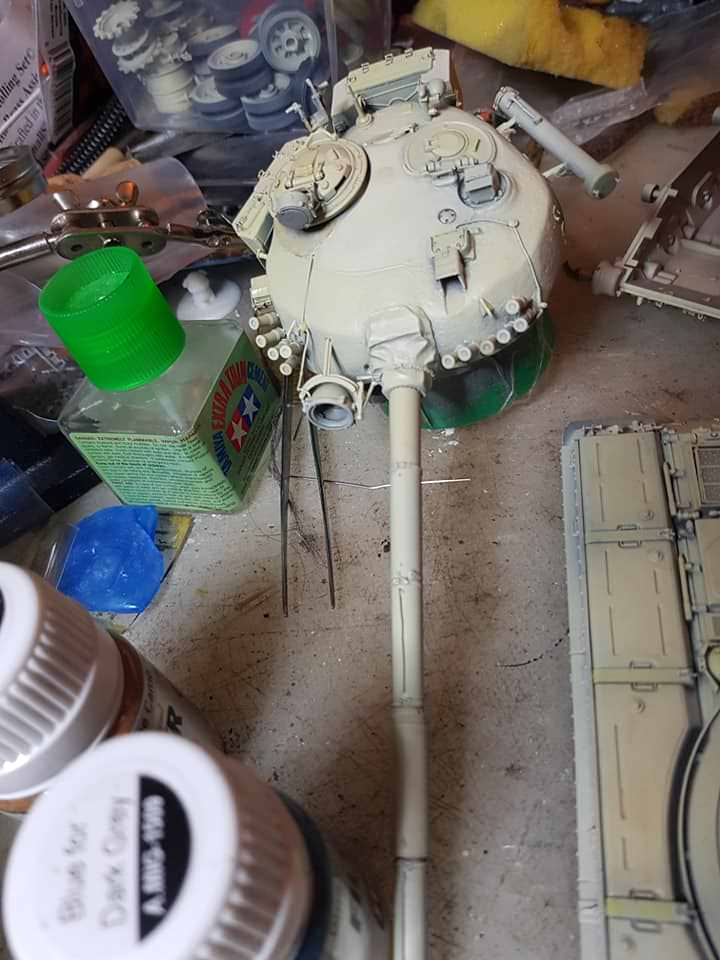
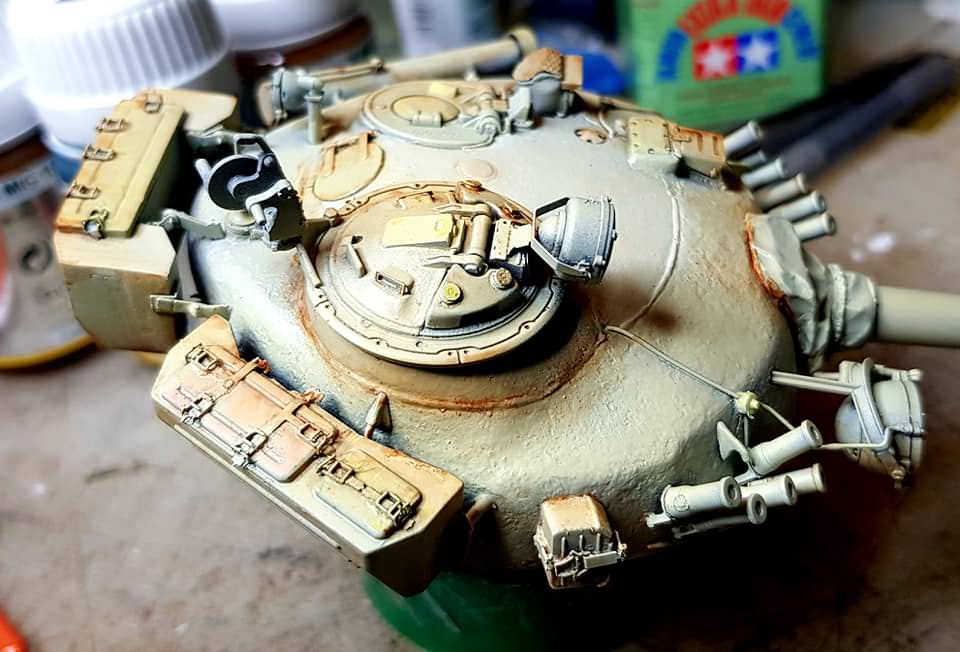
Here is where I started on the turret. The main hull and wheels arent finished, but I wanted to get all of the major sub-assemblies started.
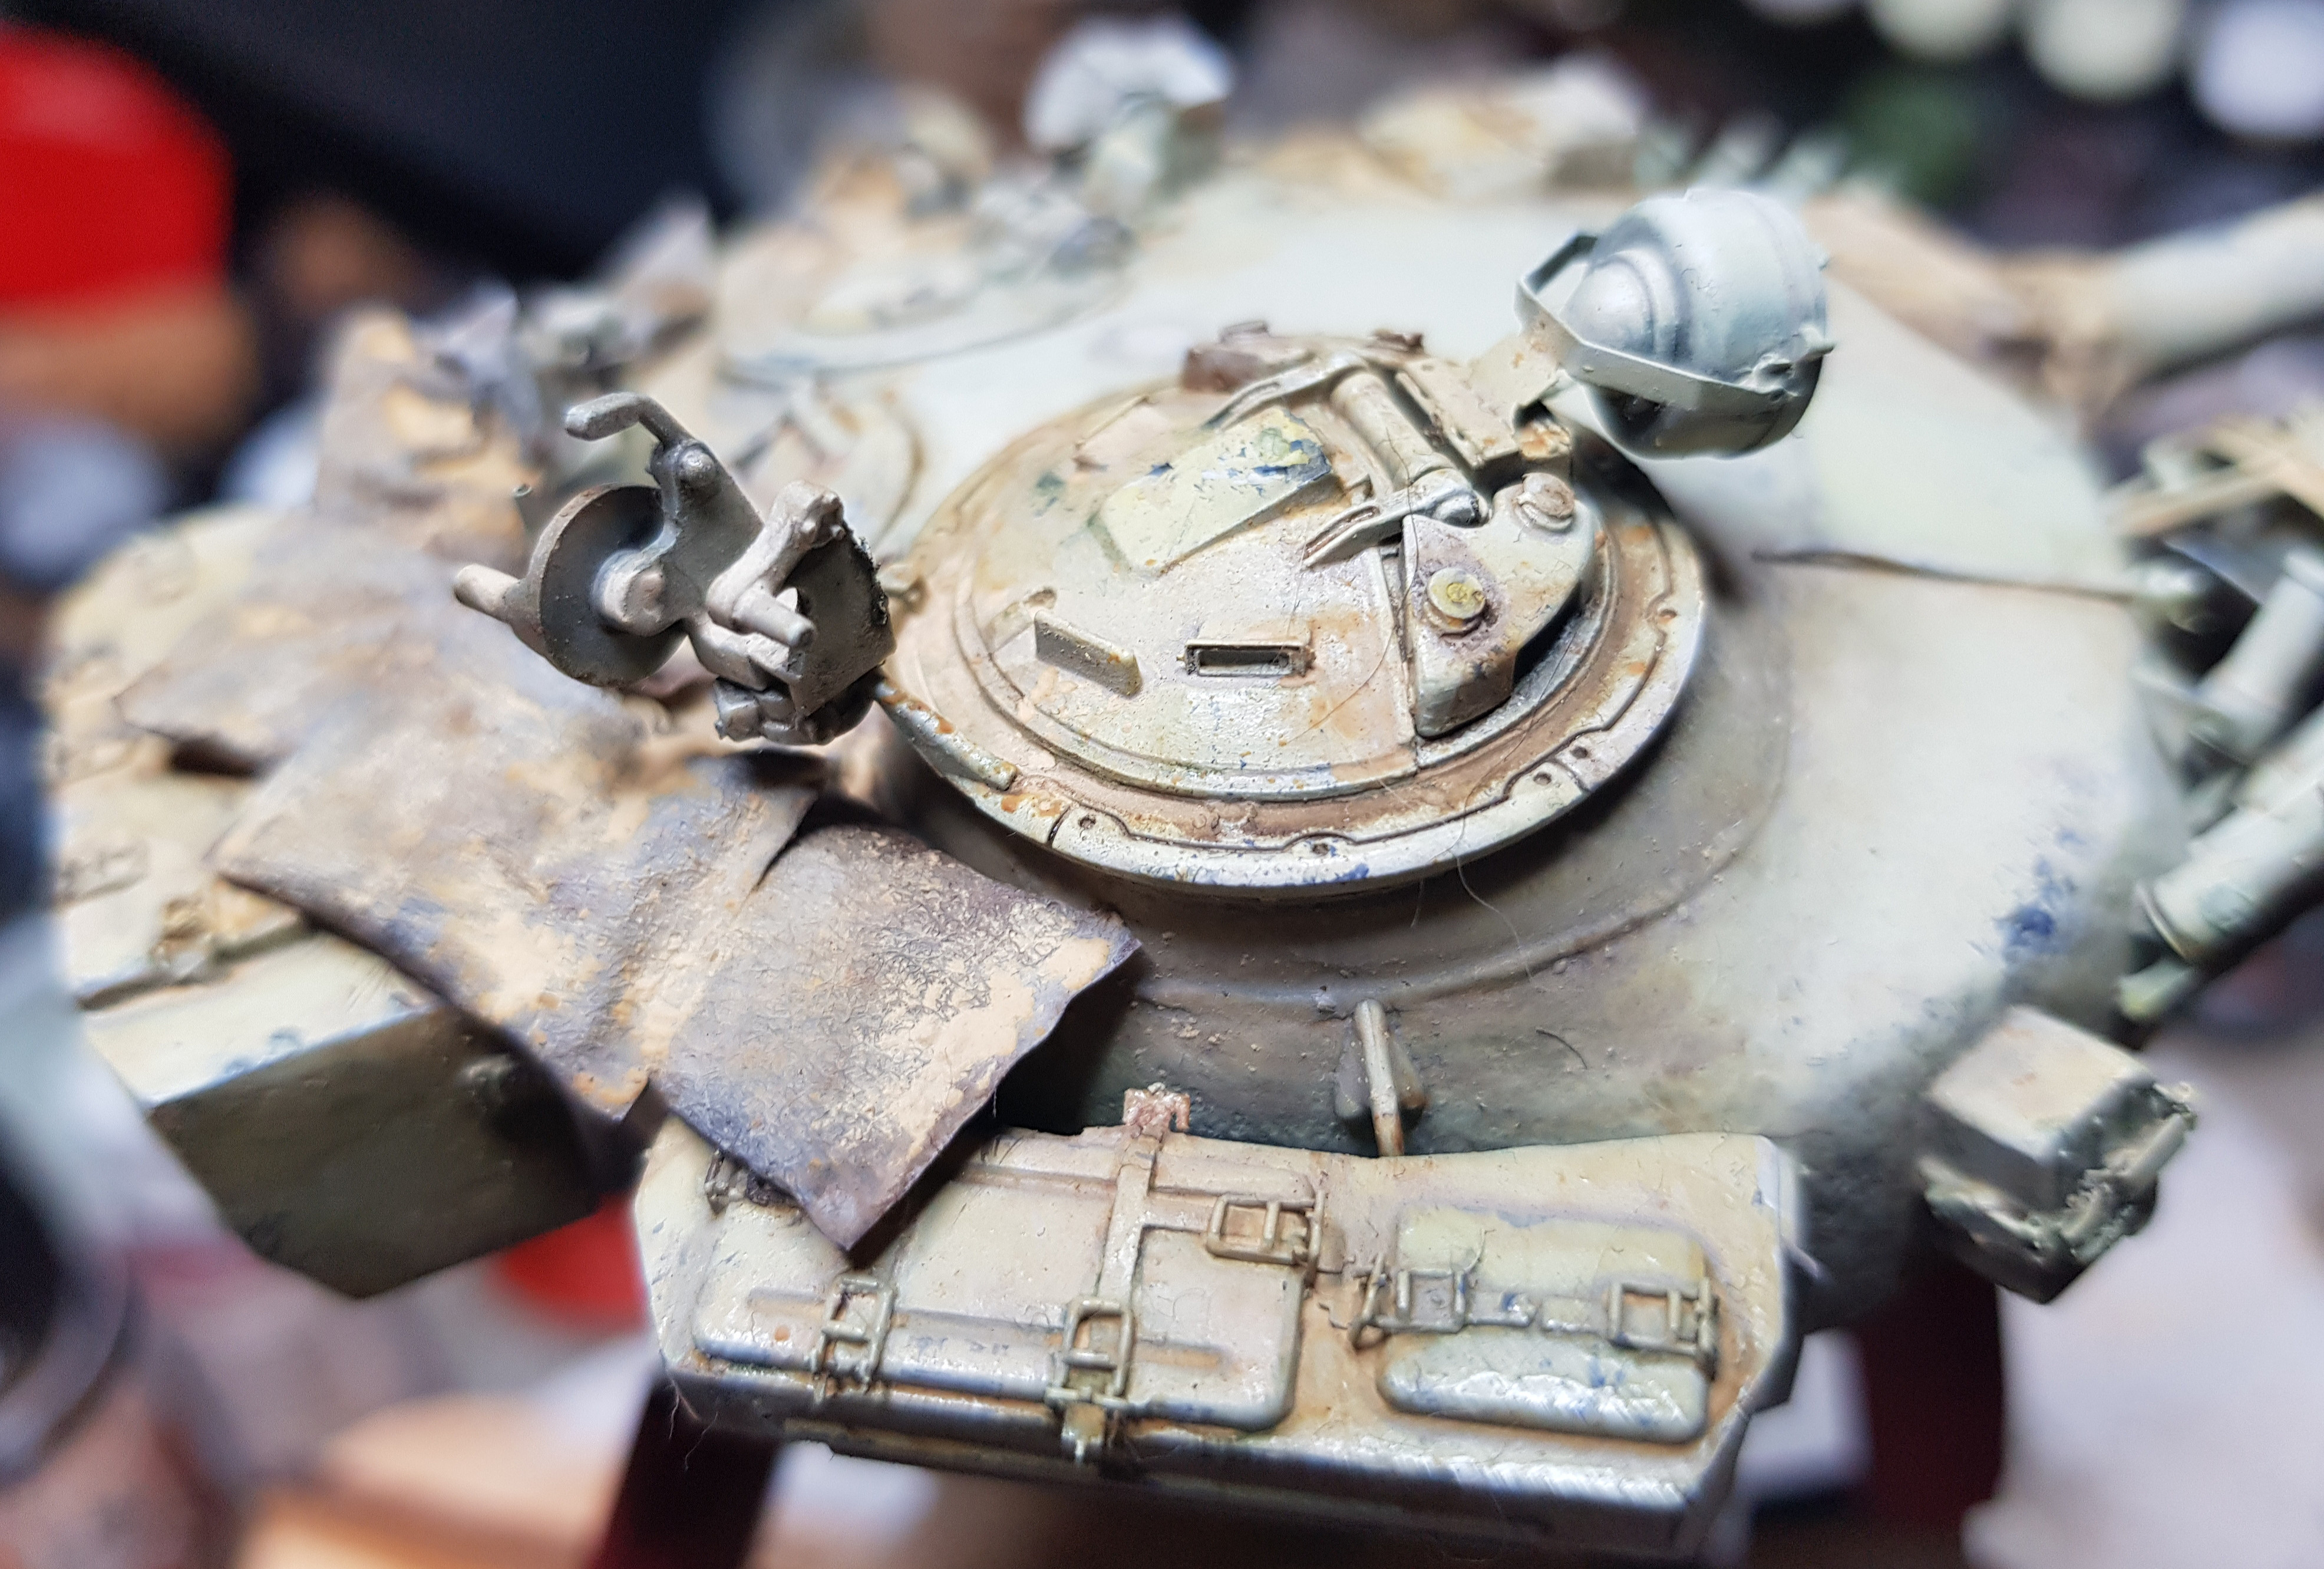
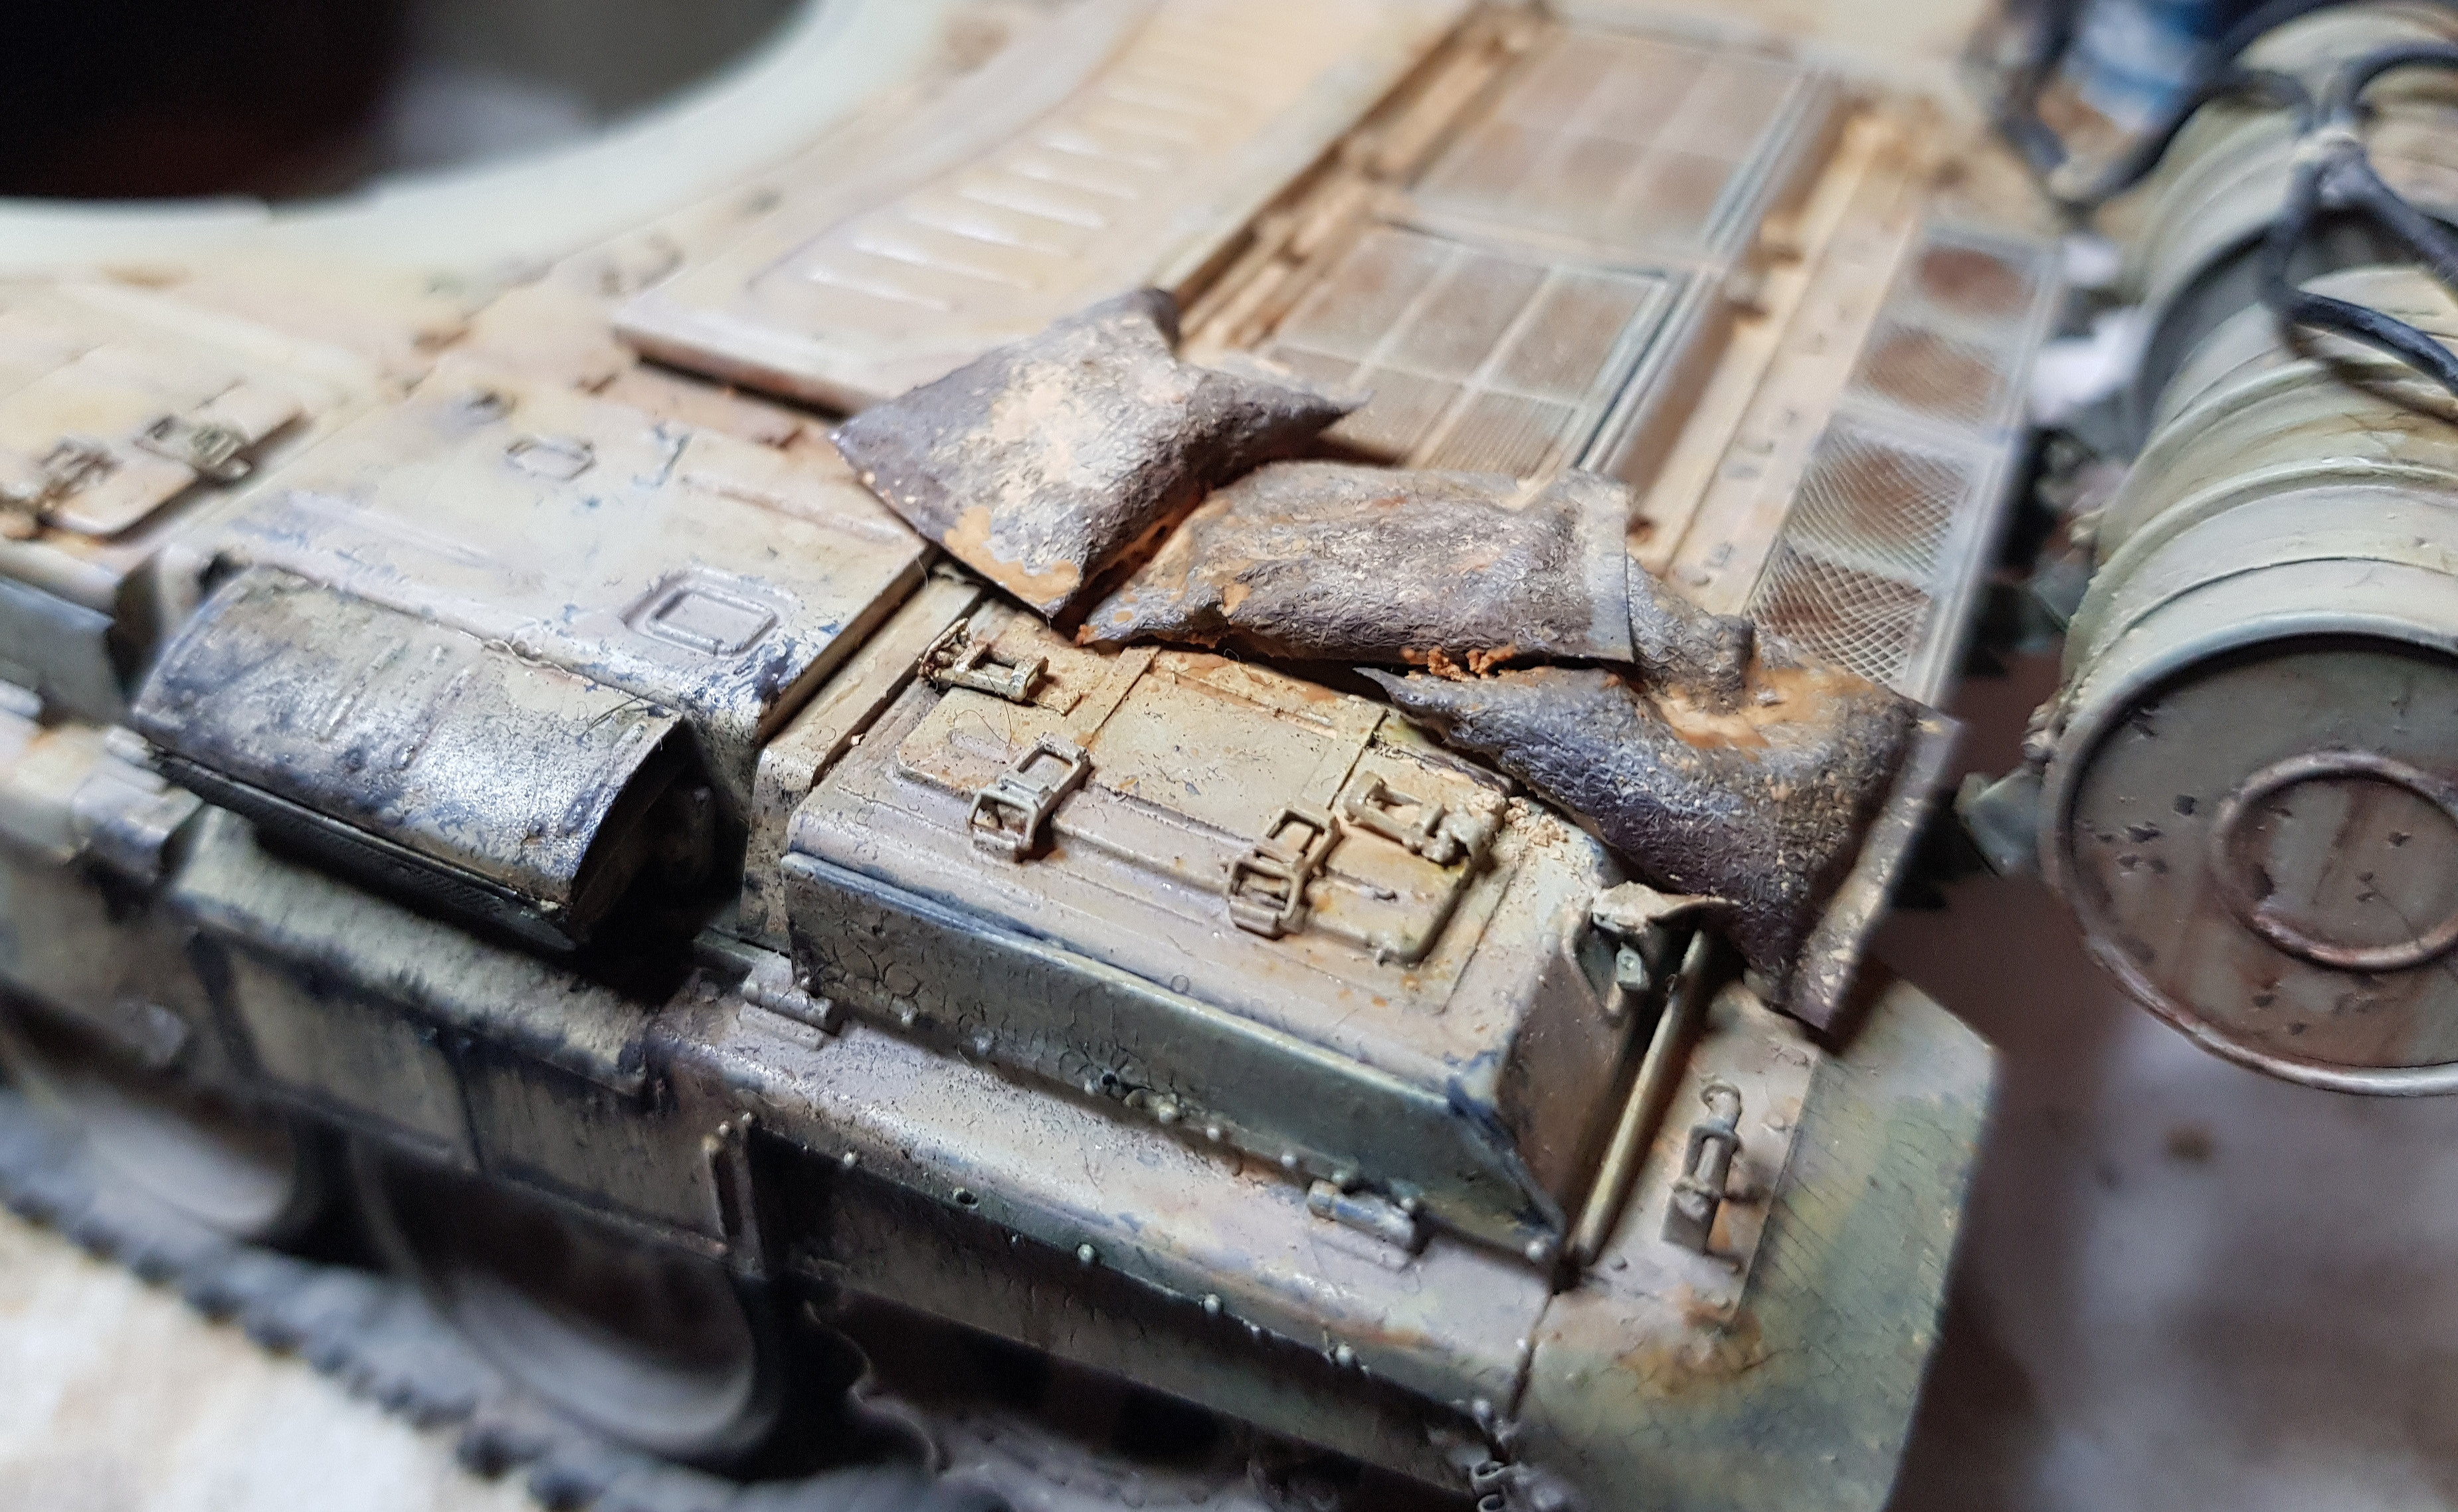
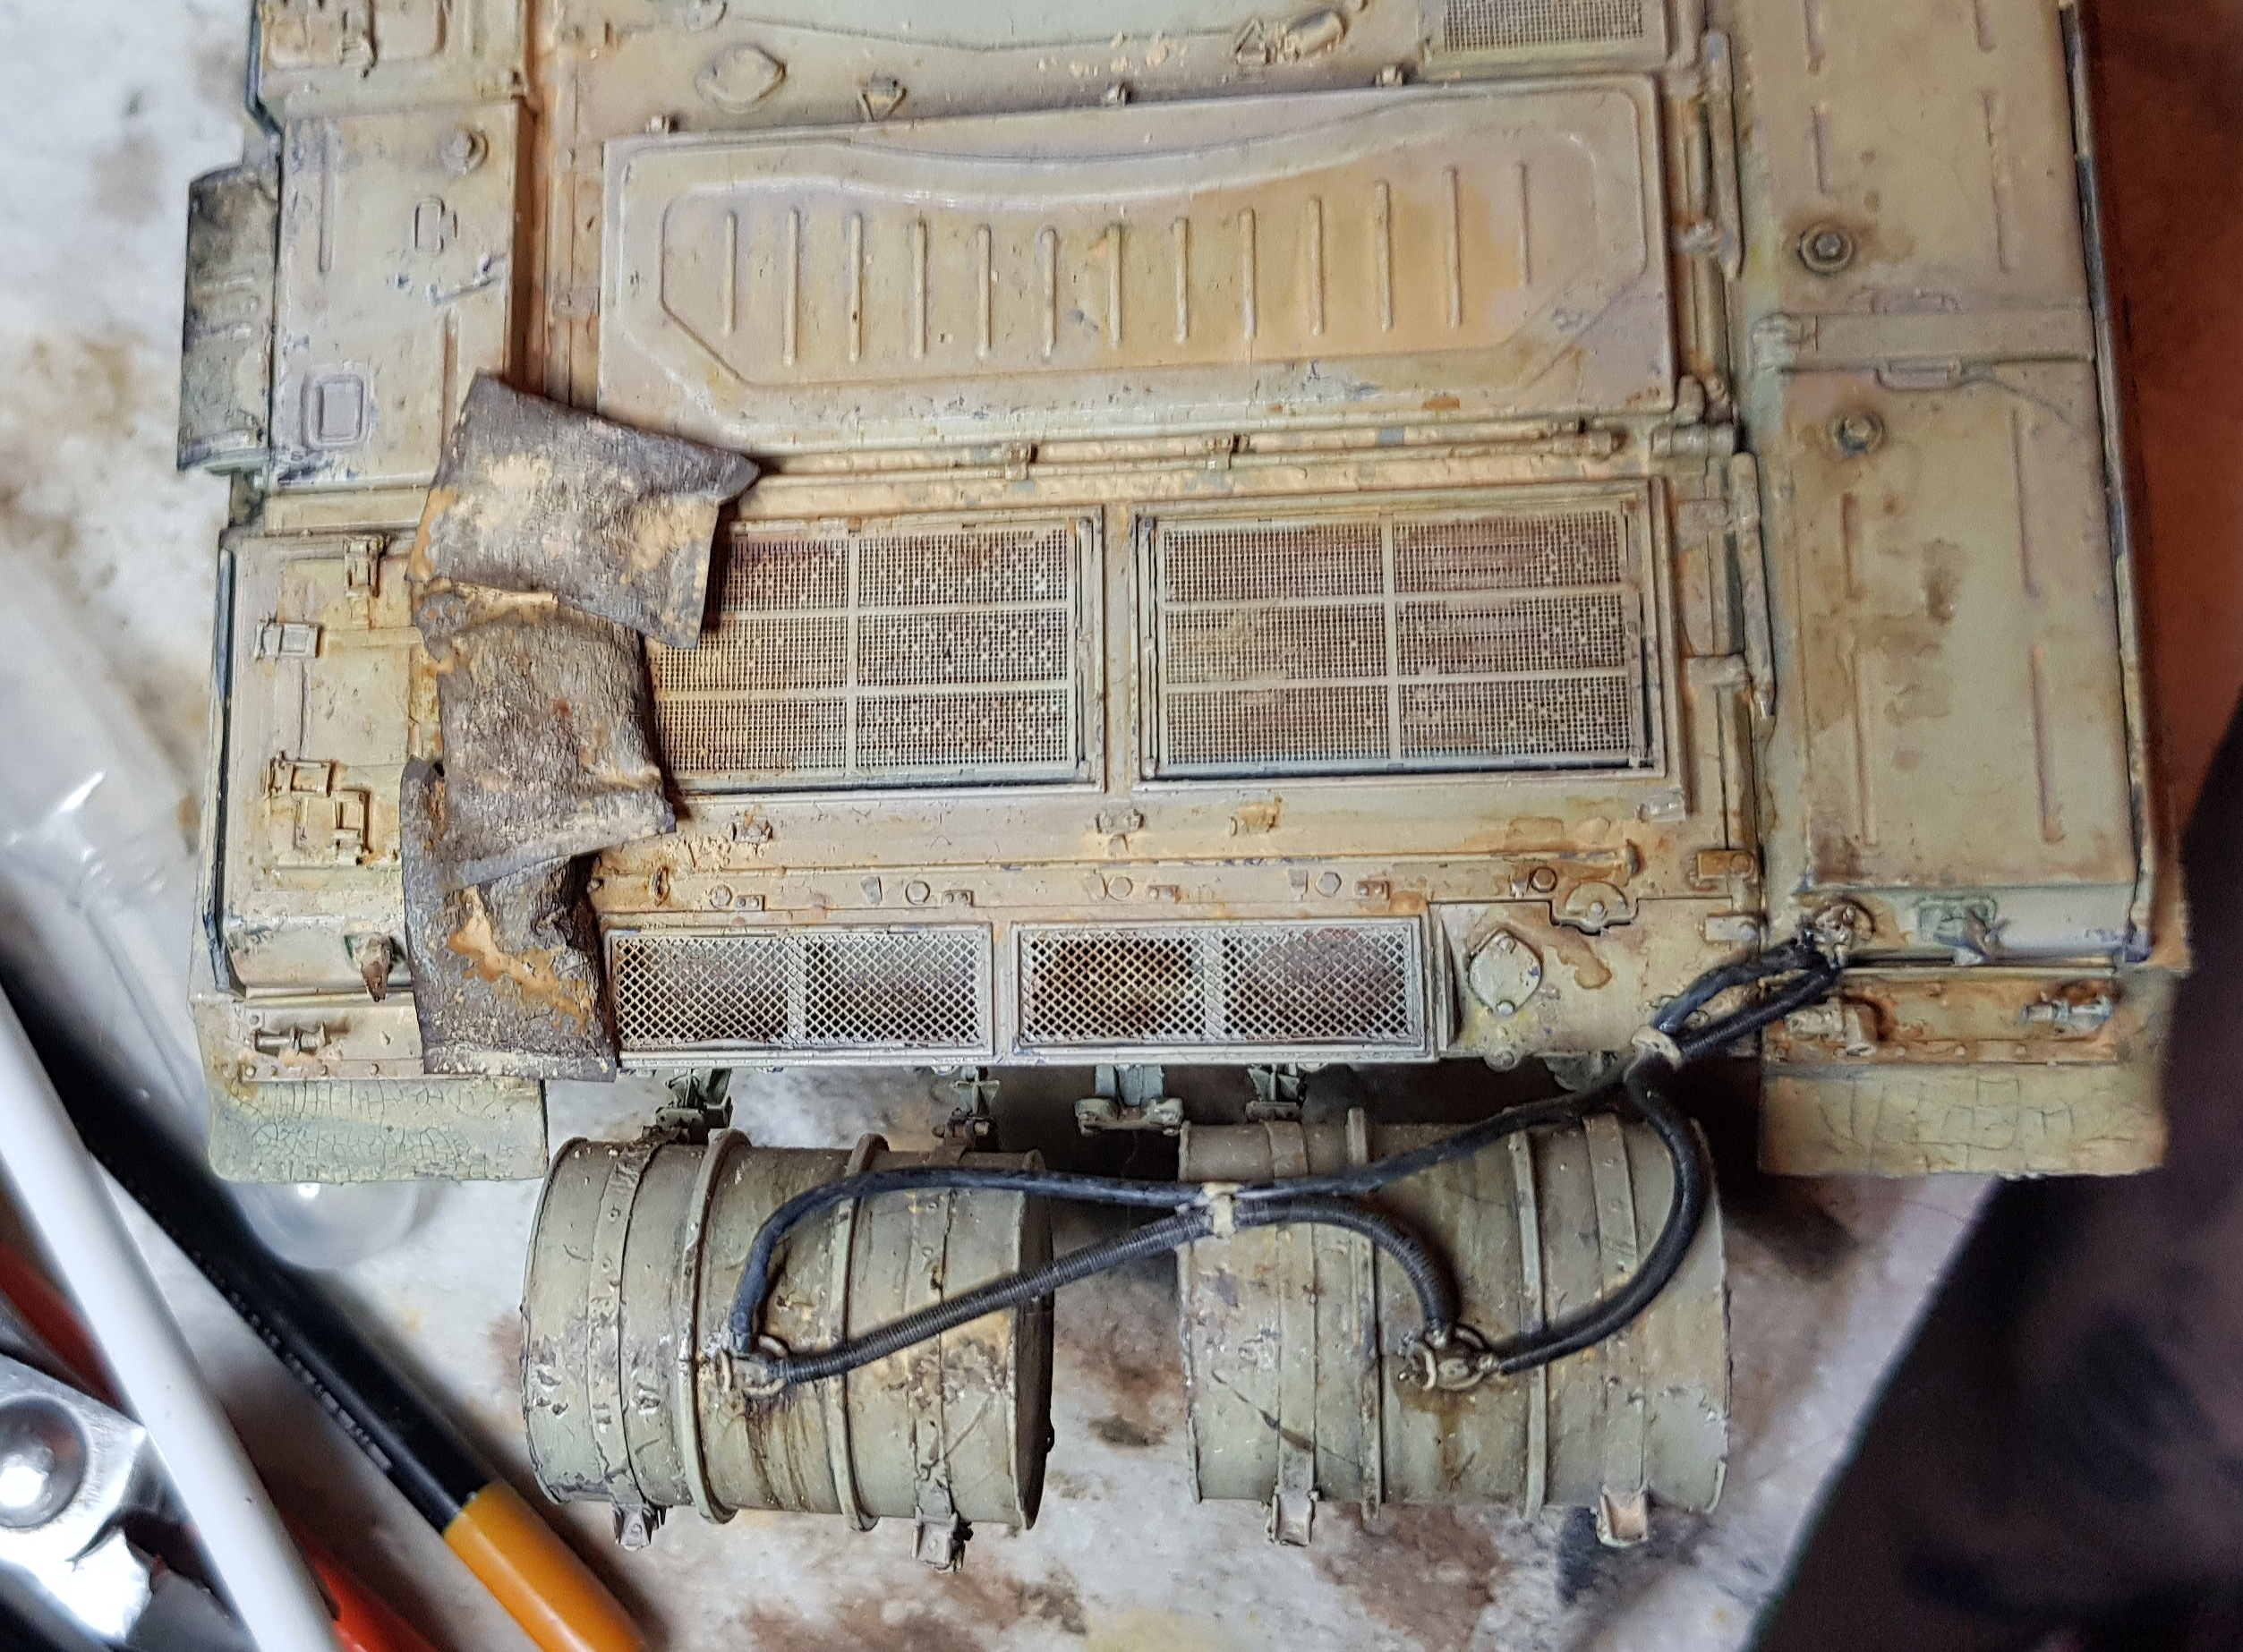
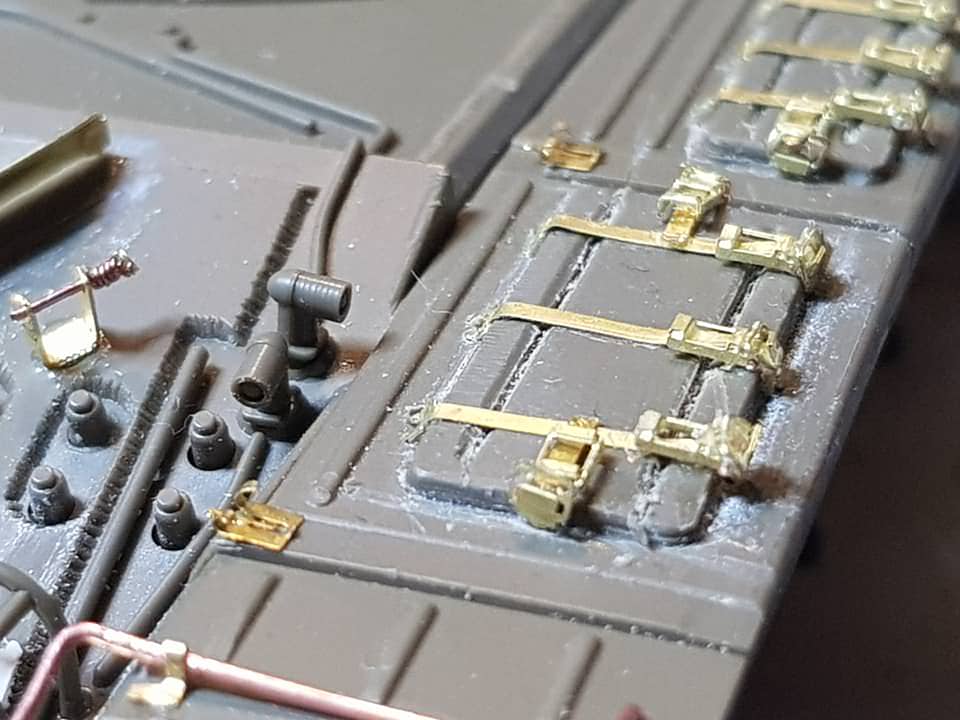
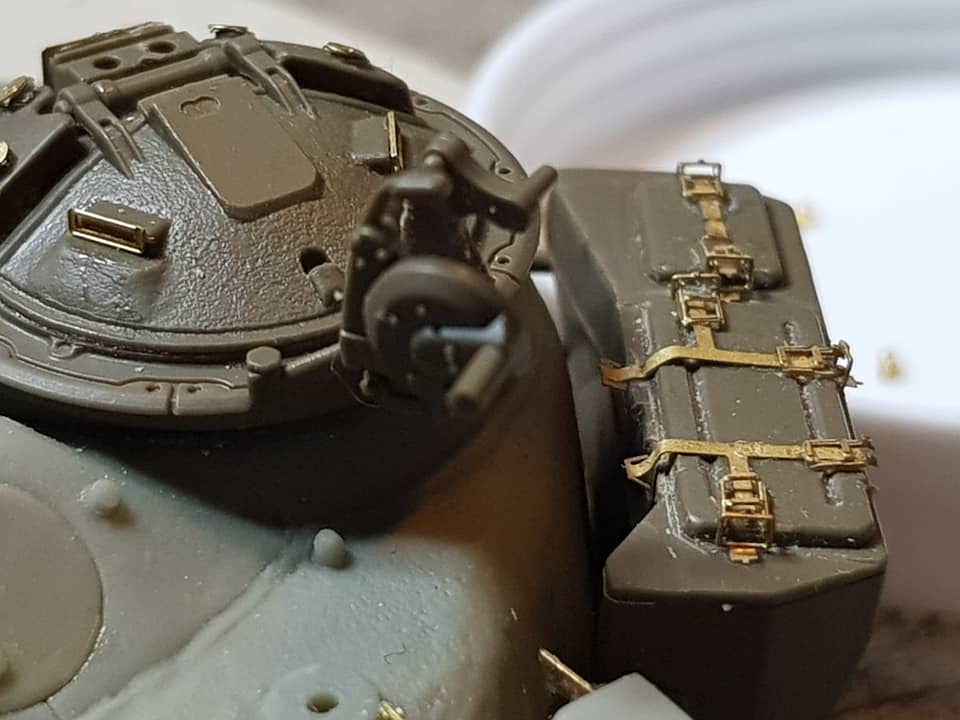
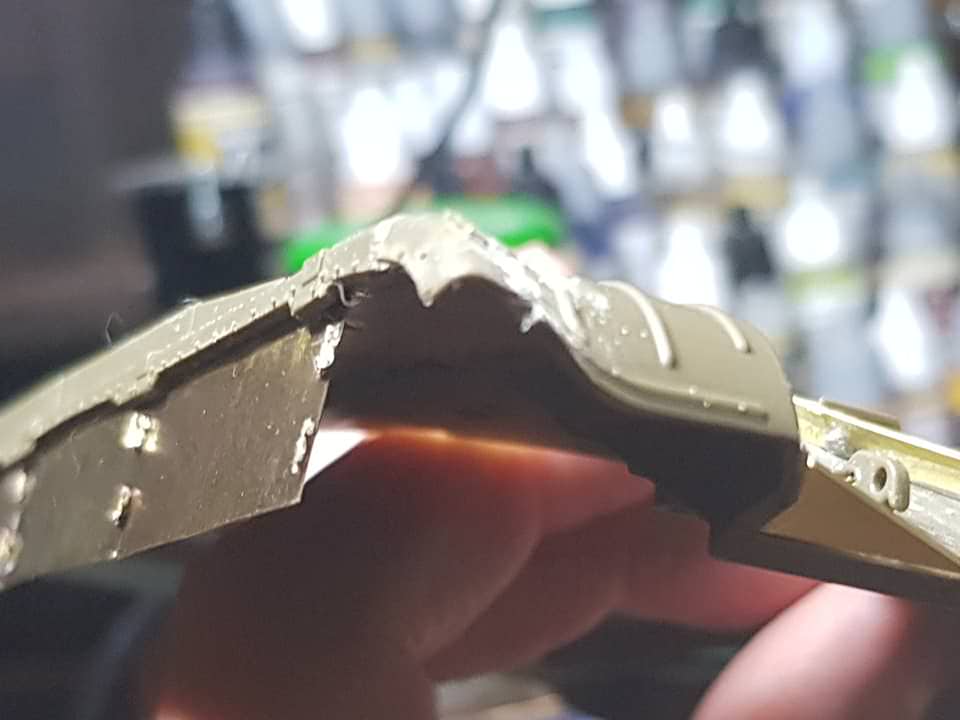
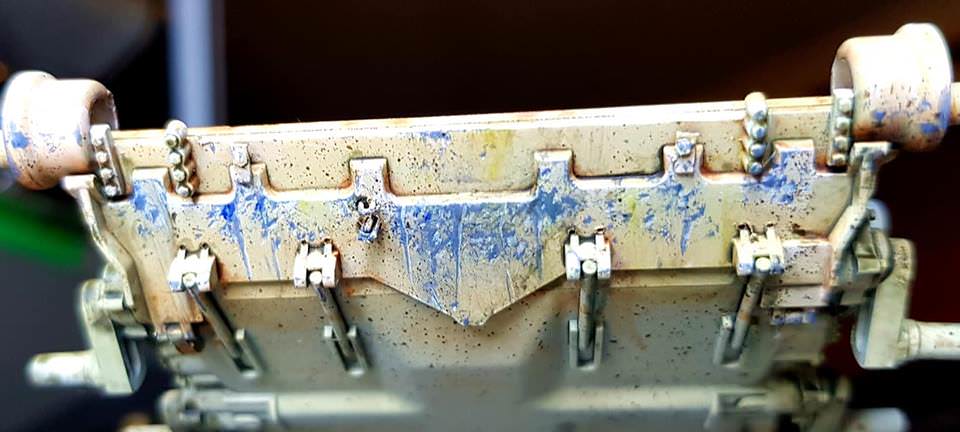
PE is not my strongest skill, but I am enjoying it, and learning heaps! Here's some close ups. The bent and twisted clasps were not intentional, but do work for a subject like this (the bent fender, and missing dust-guard are intentional
 )
)
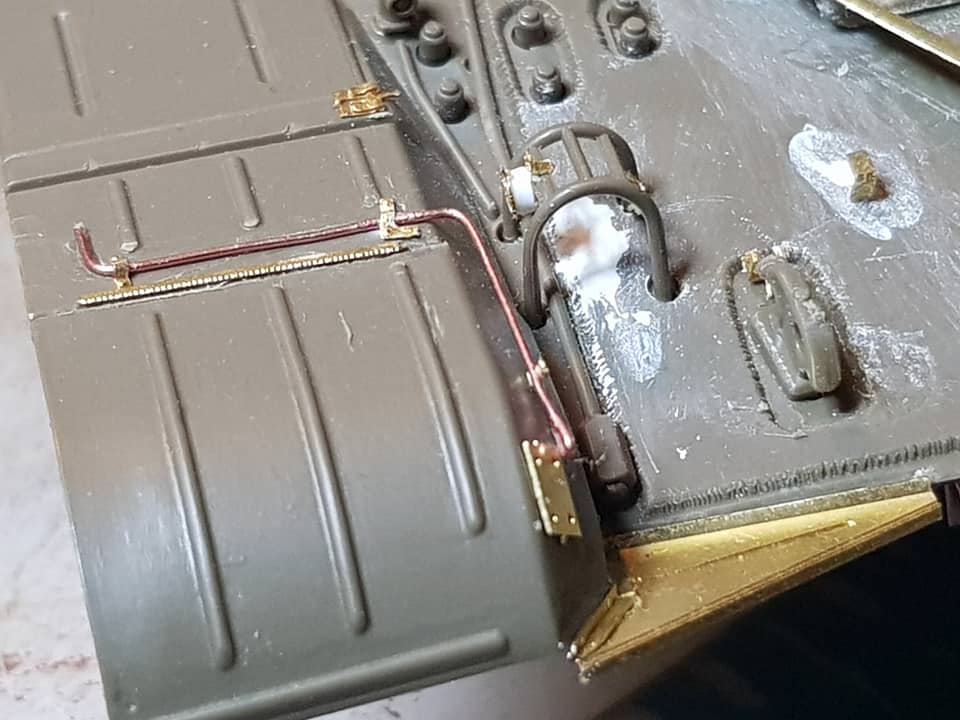
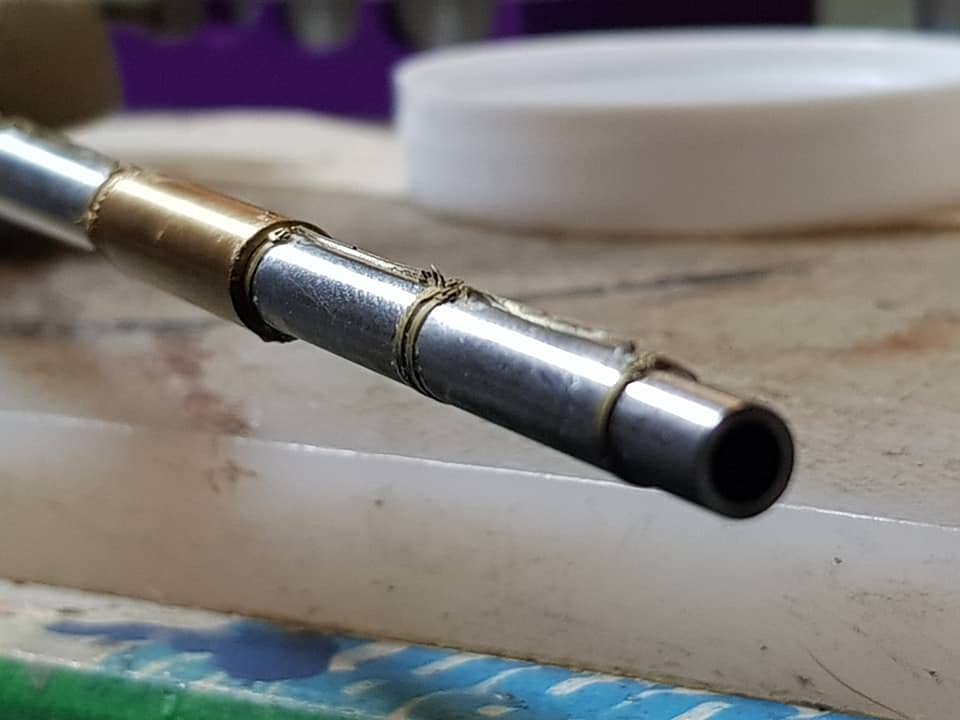
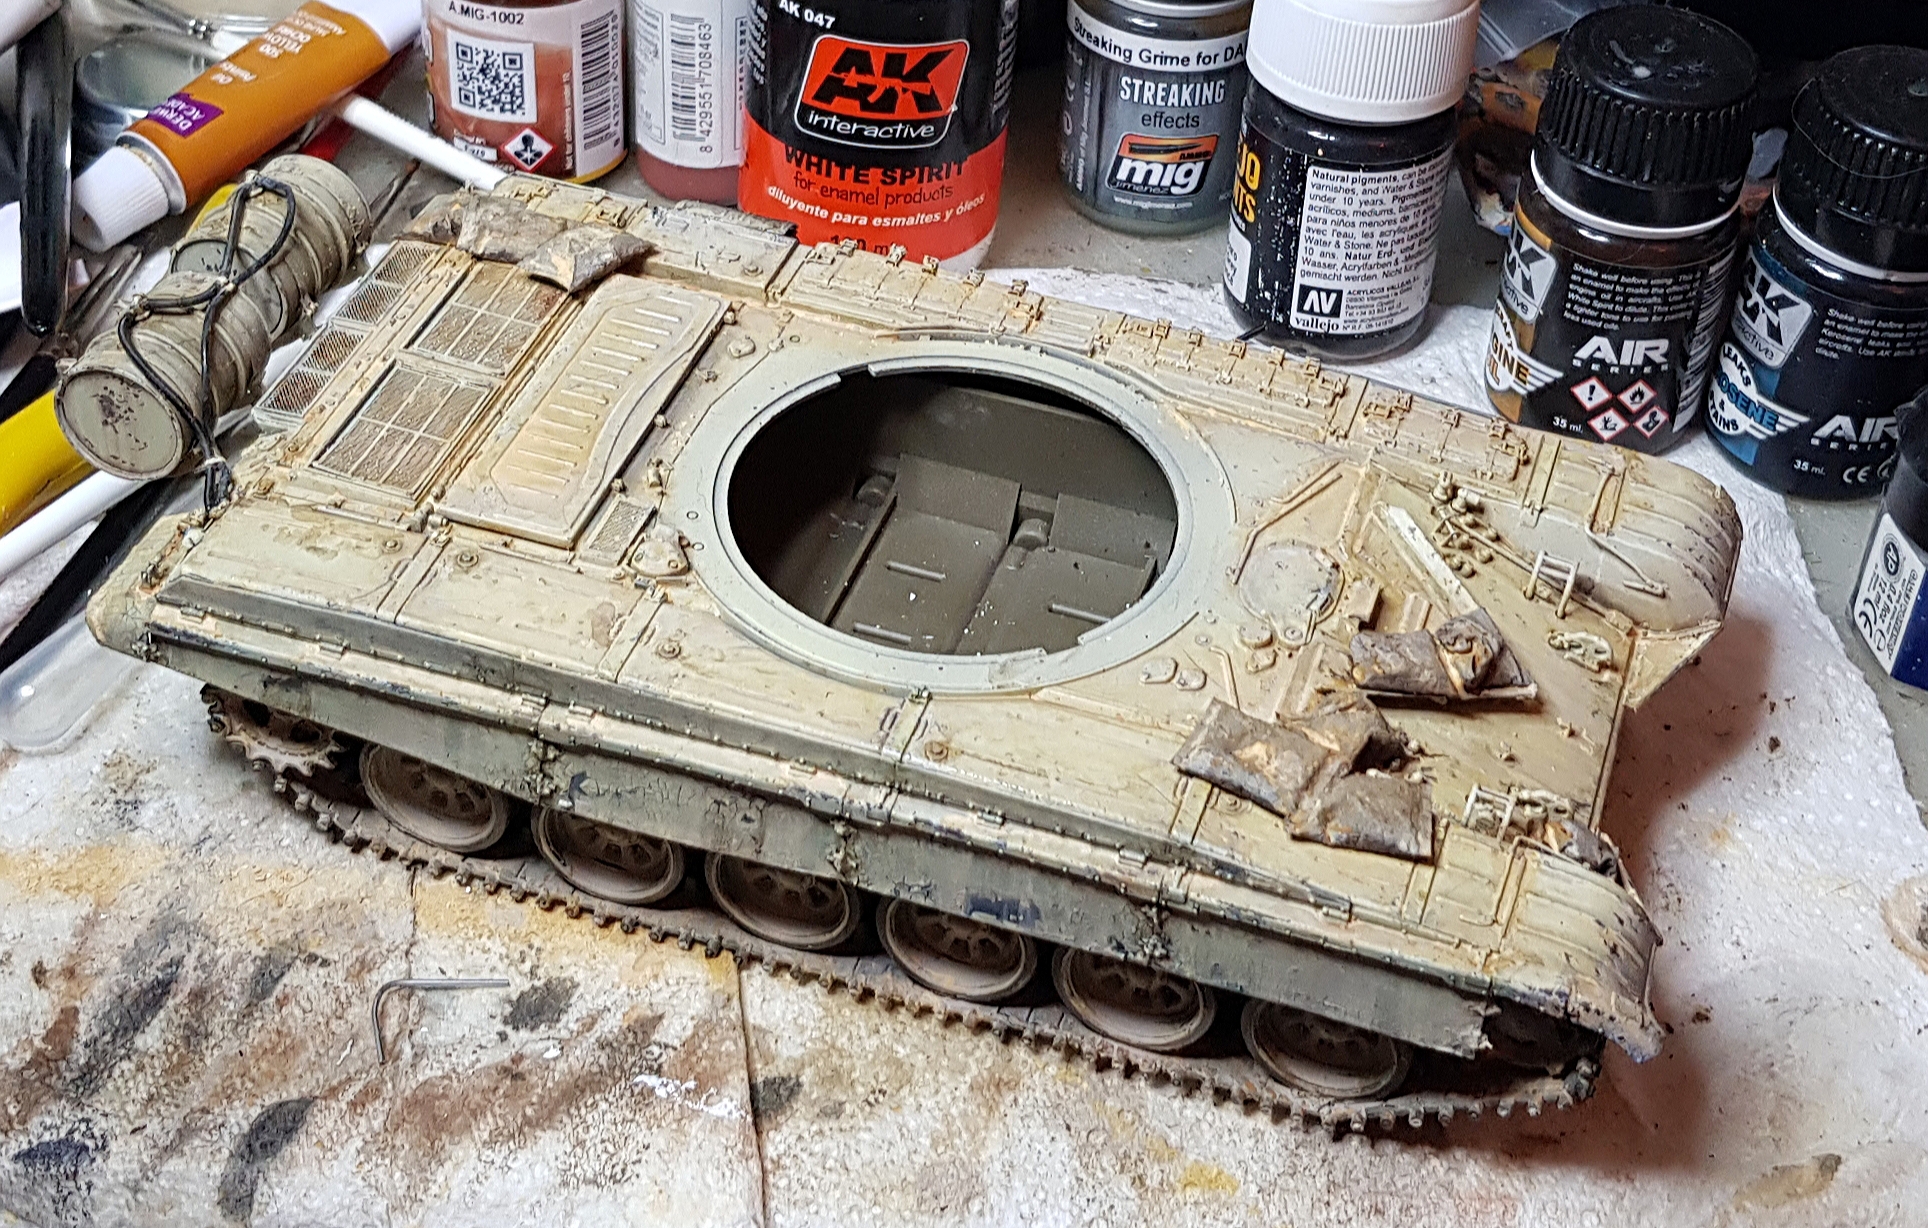
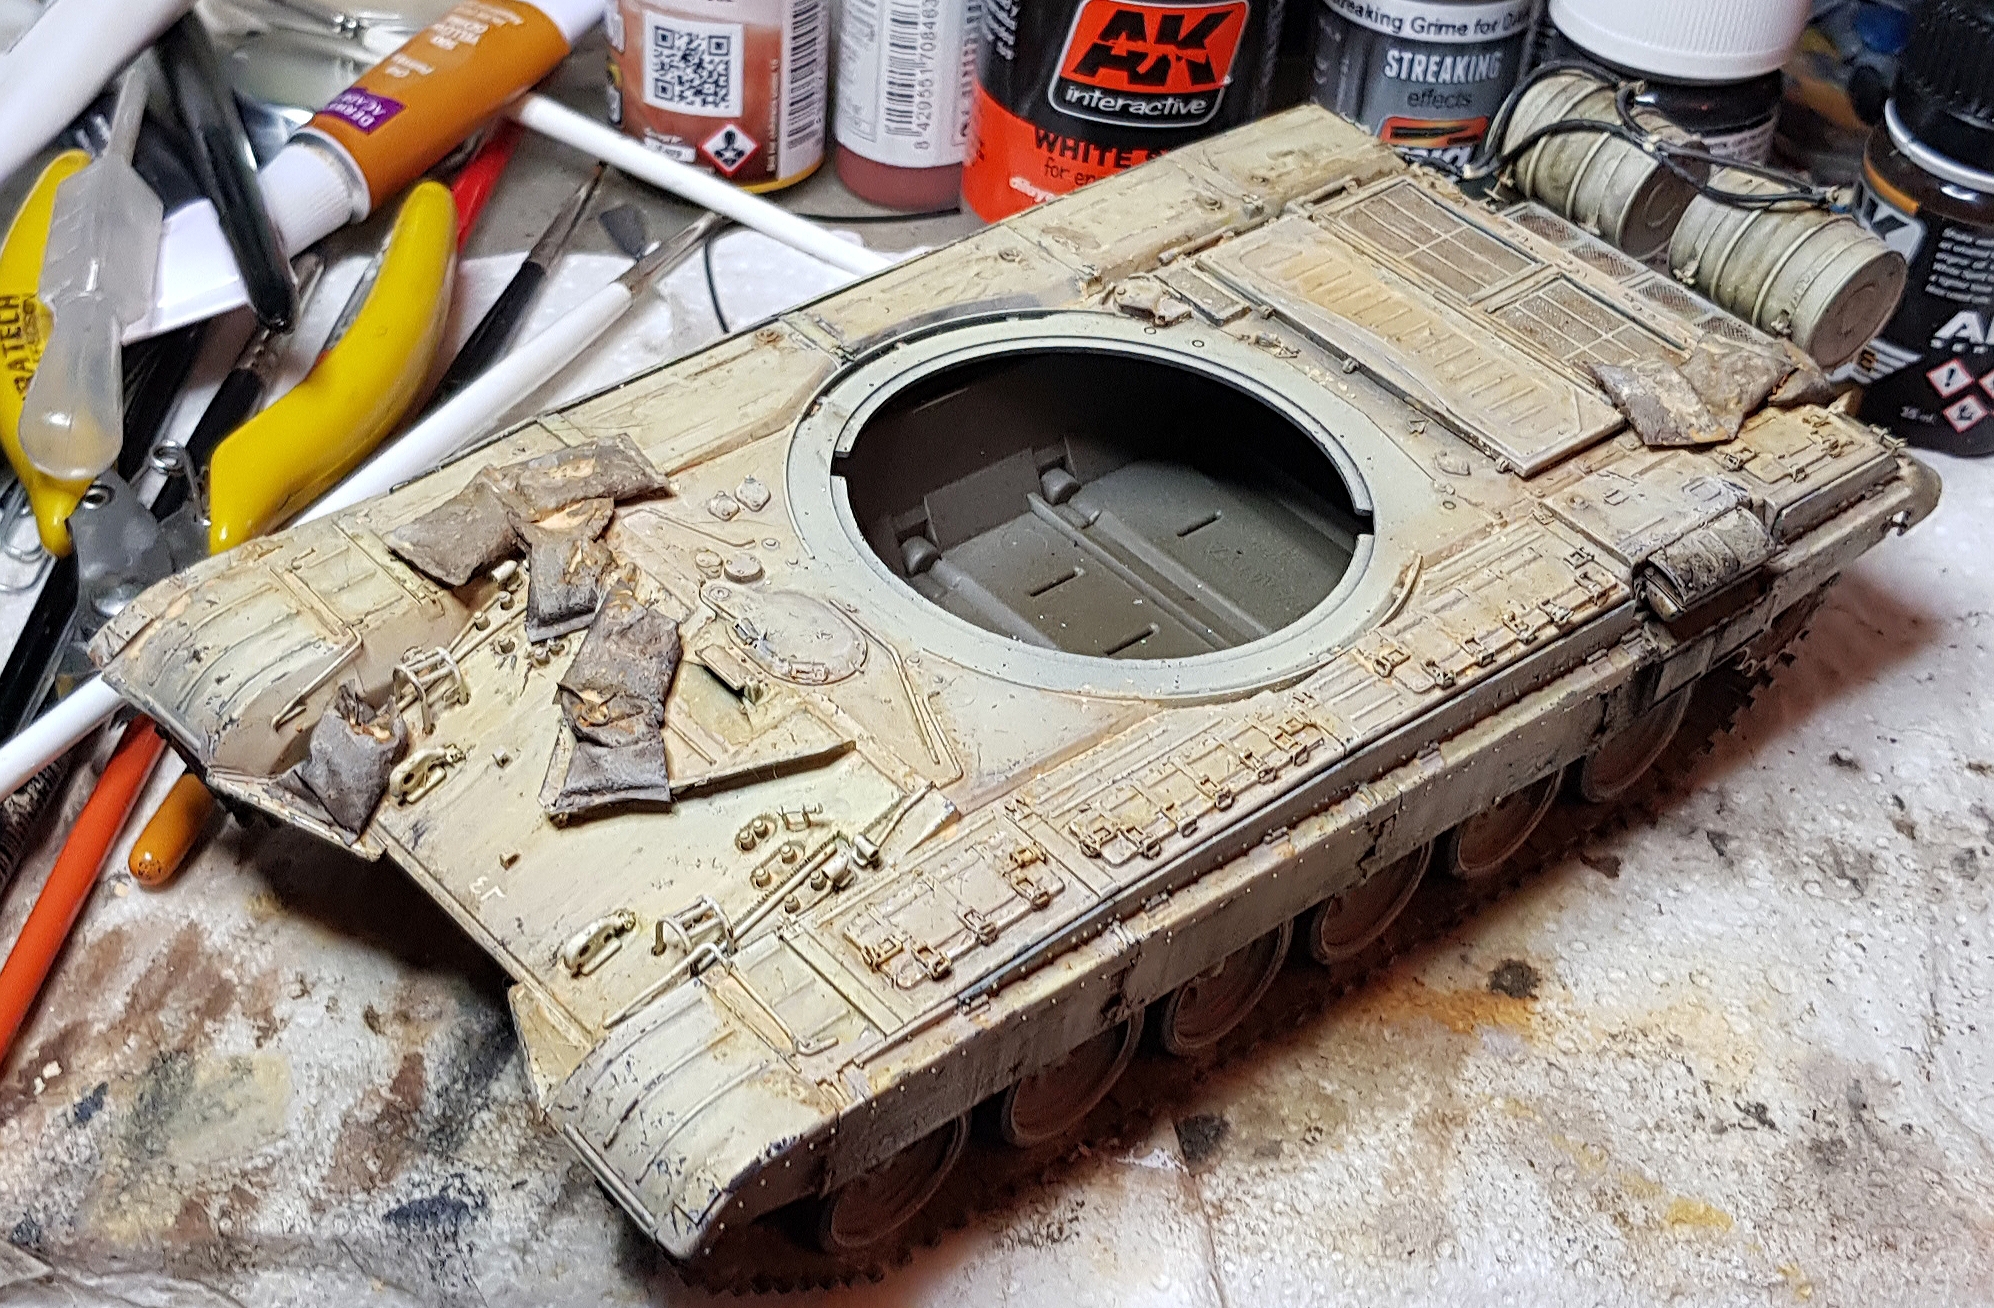
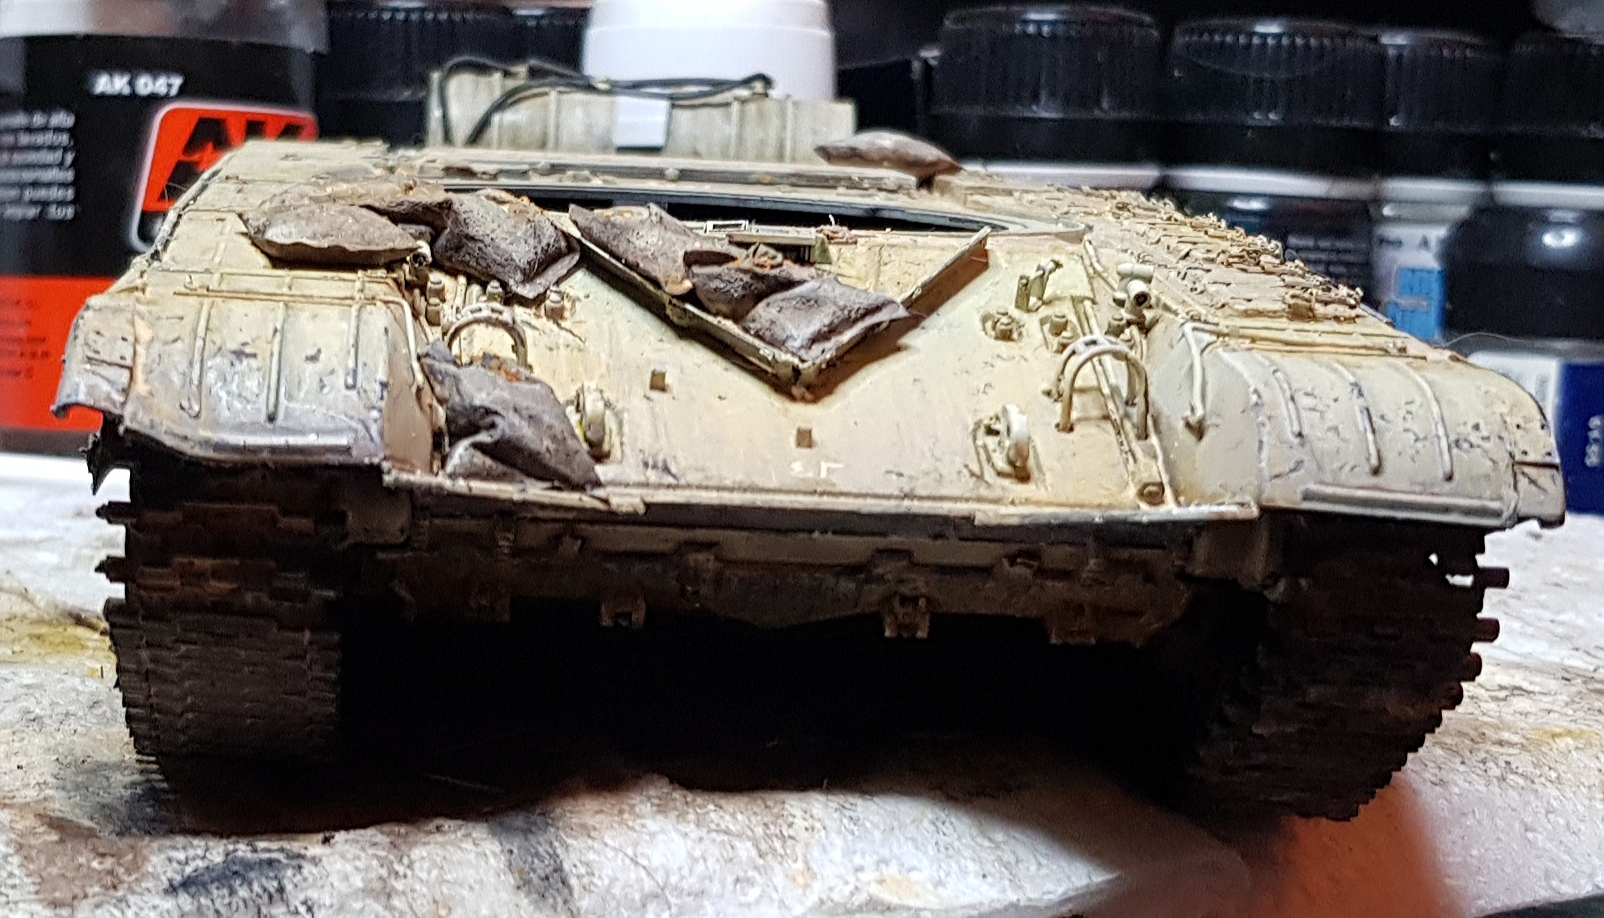
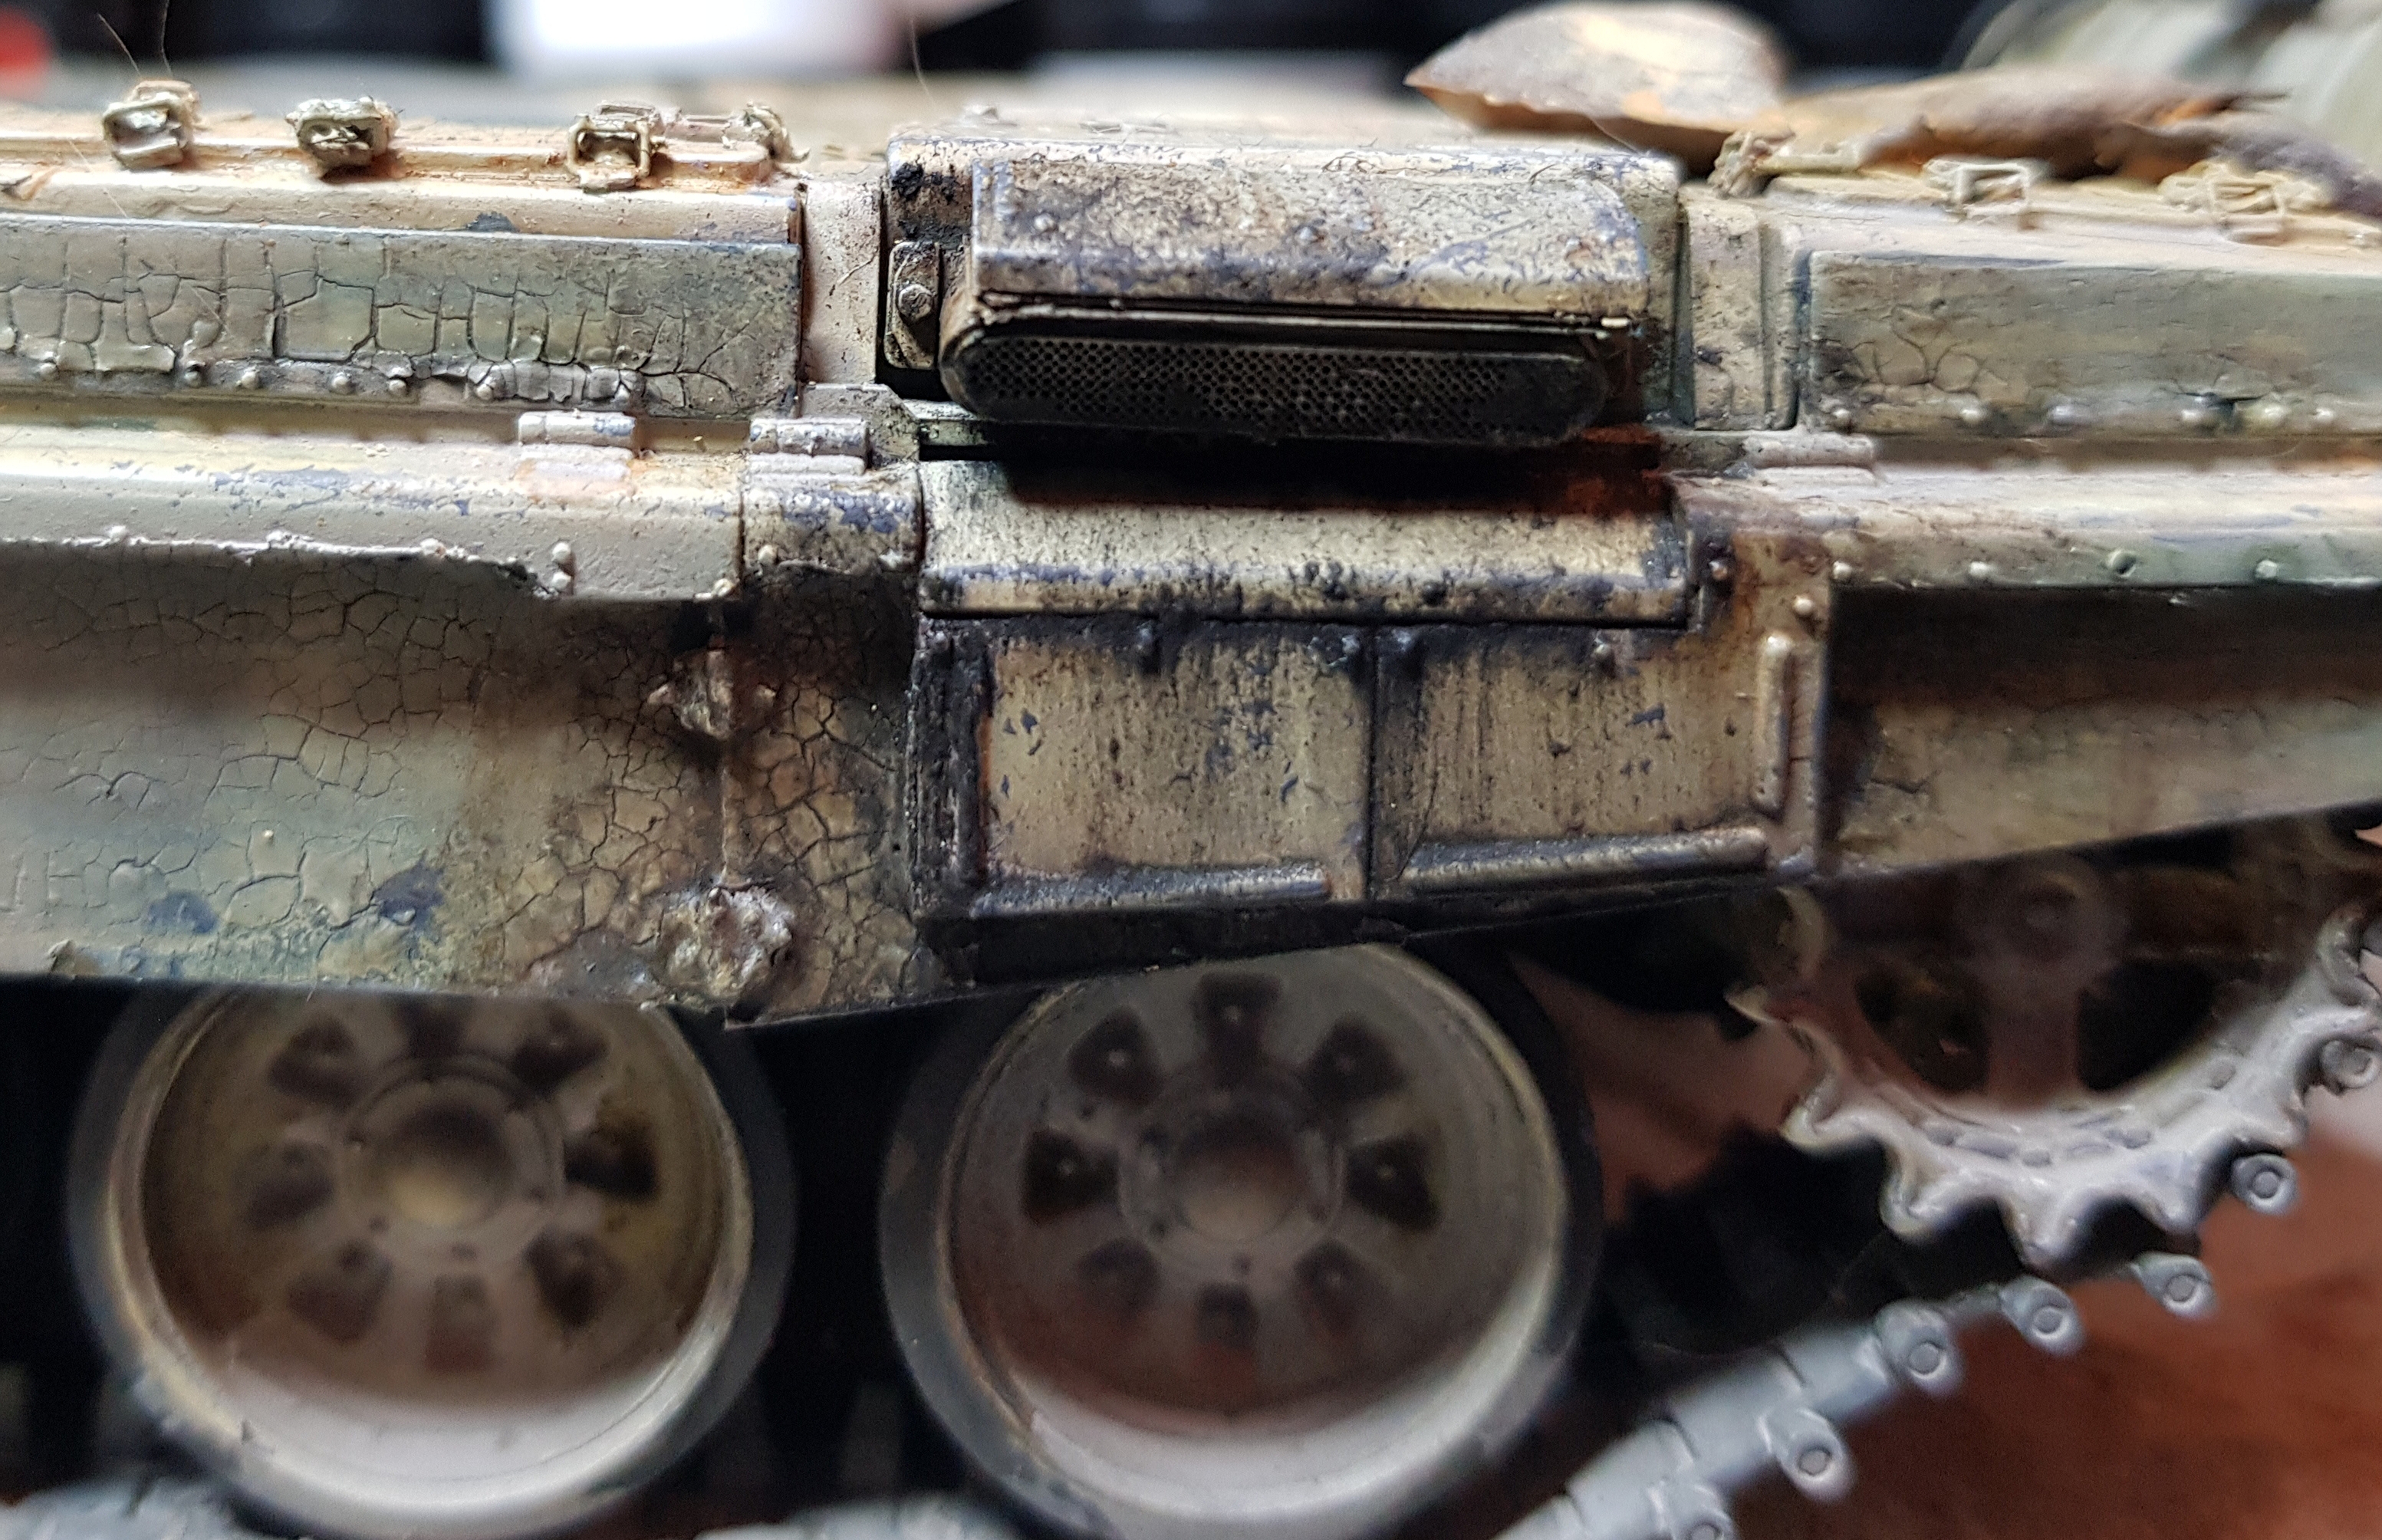
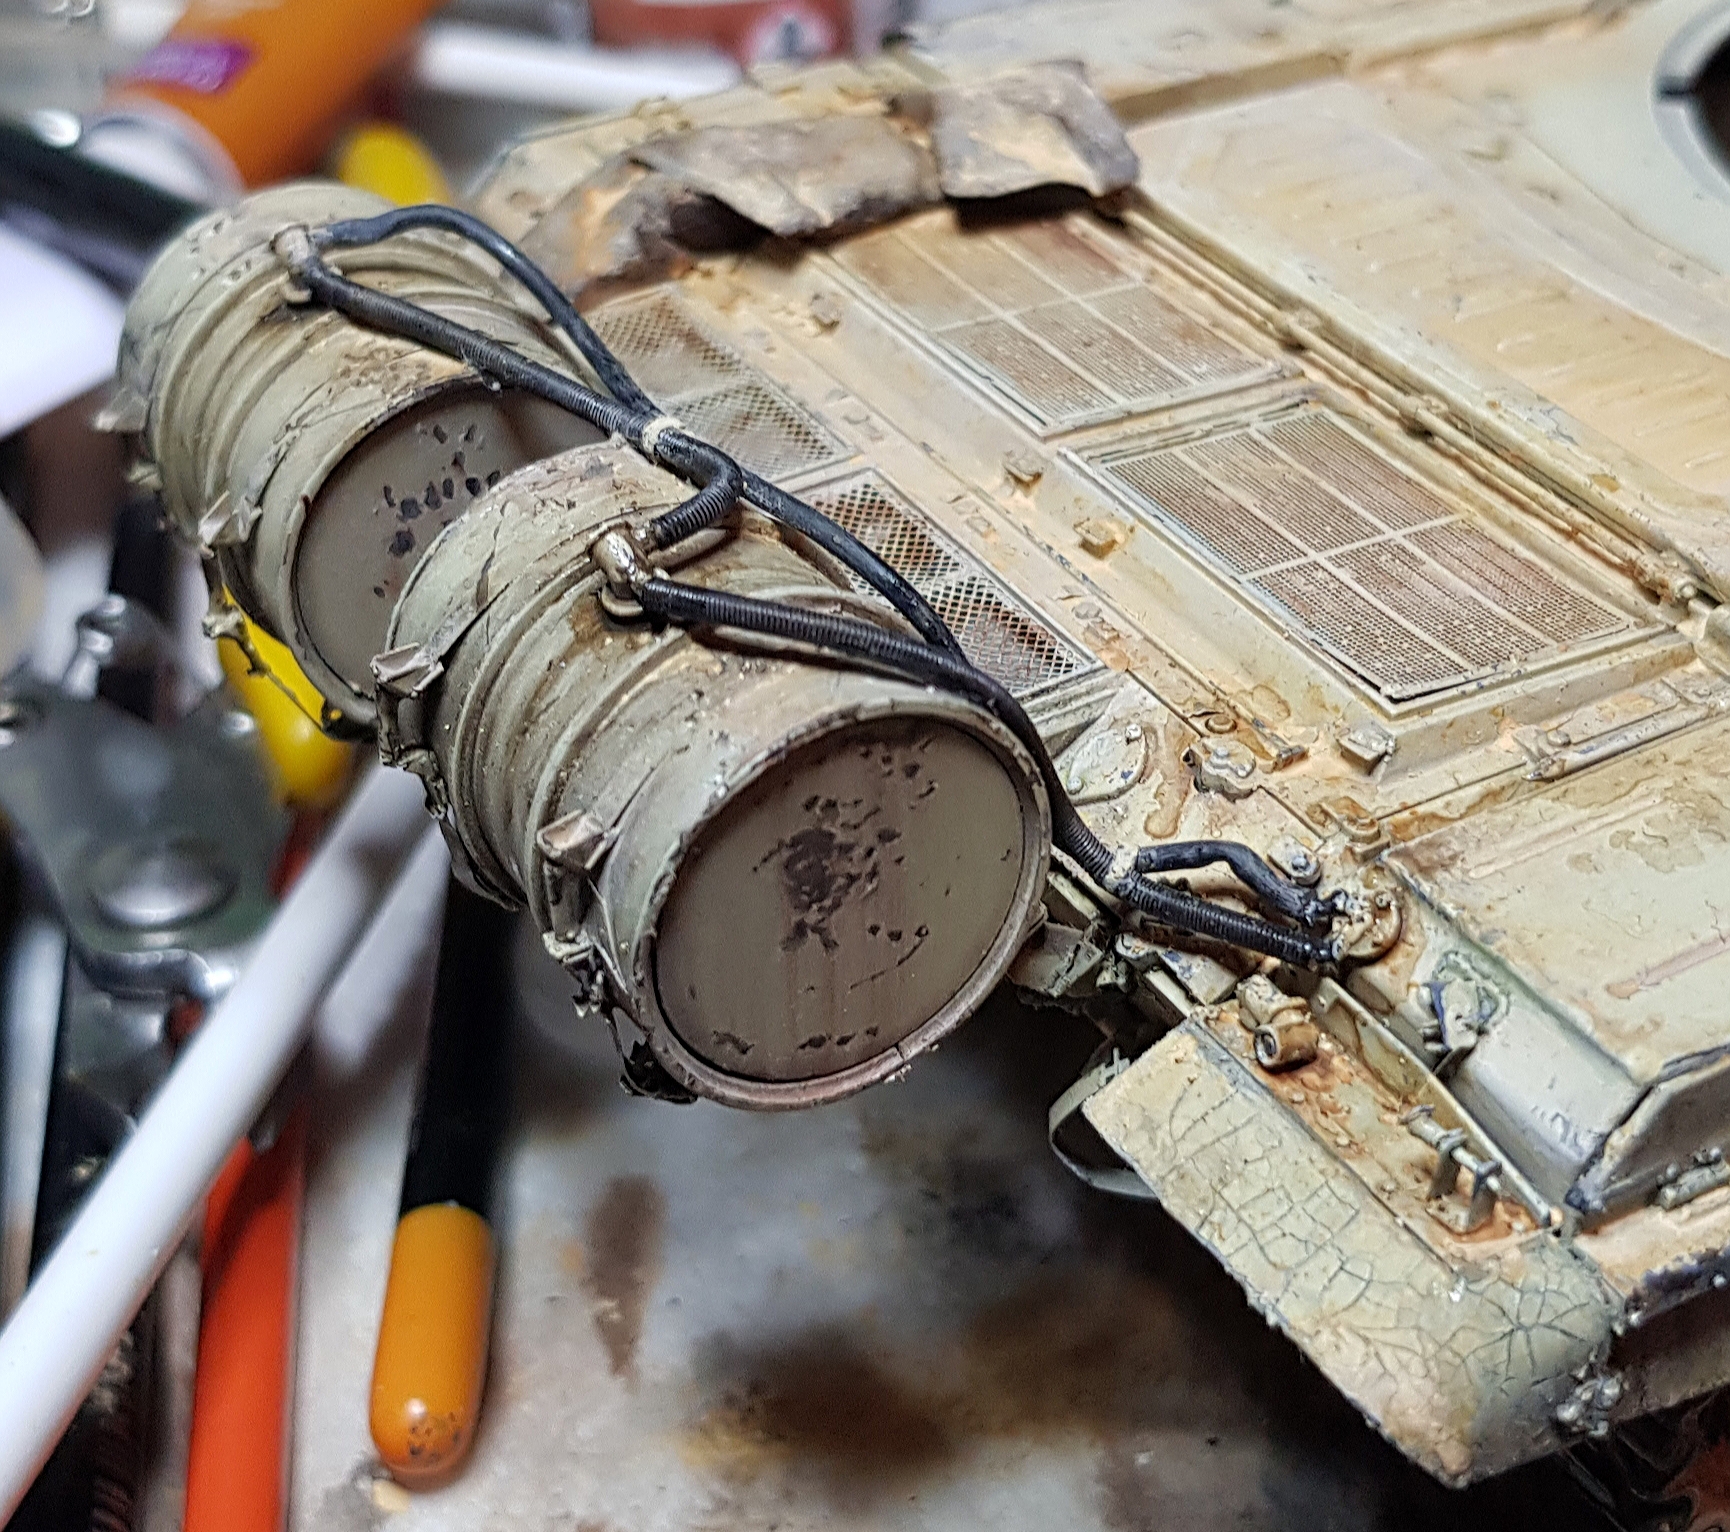
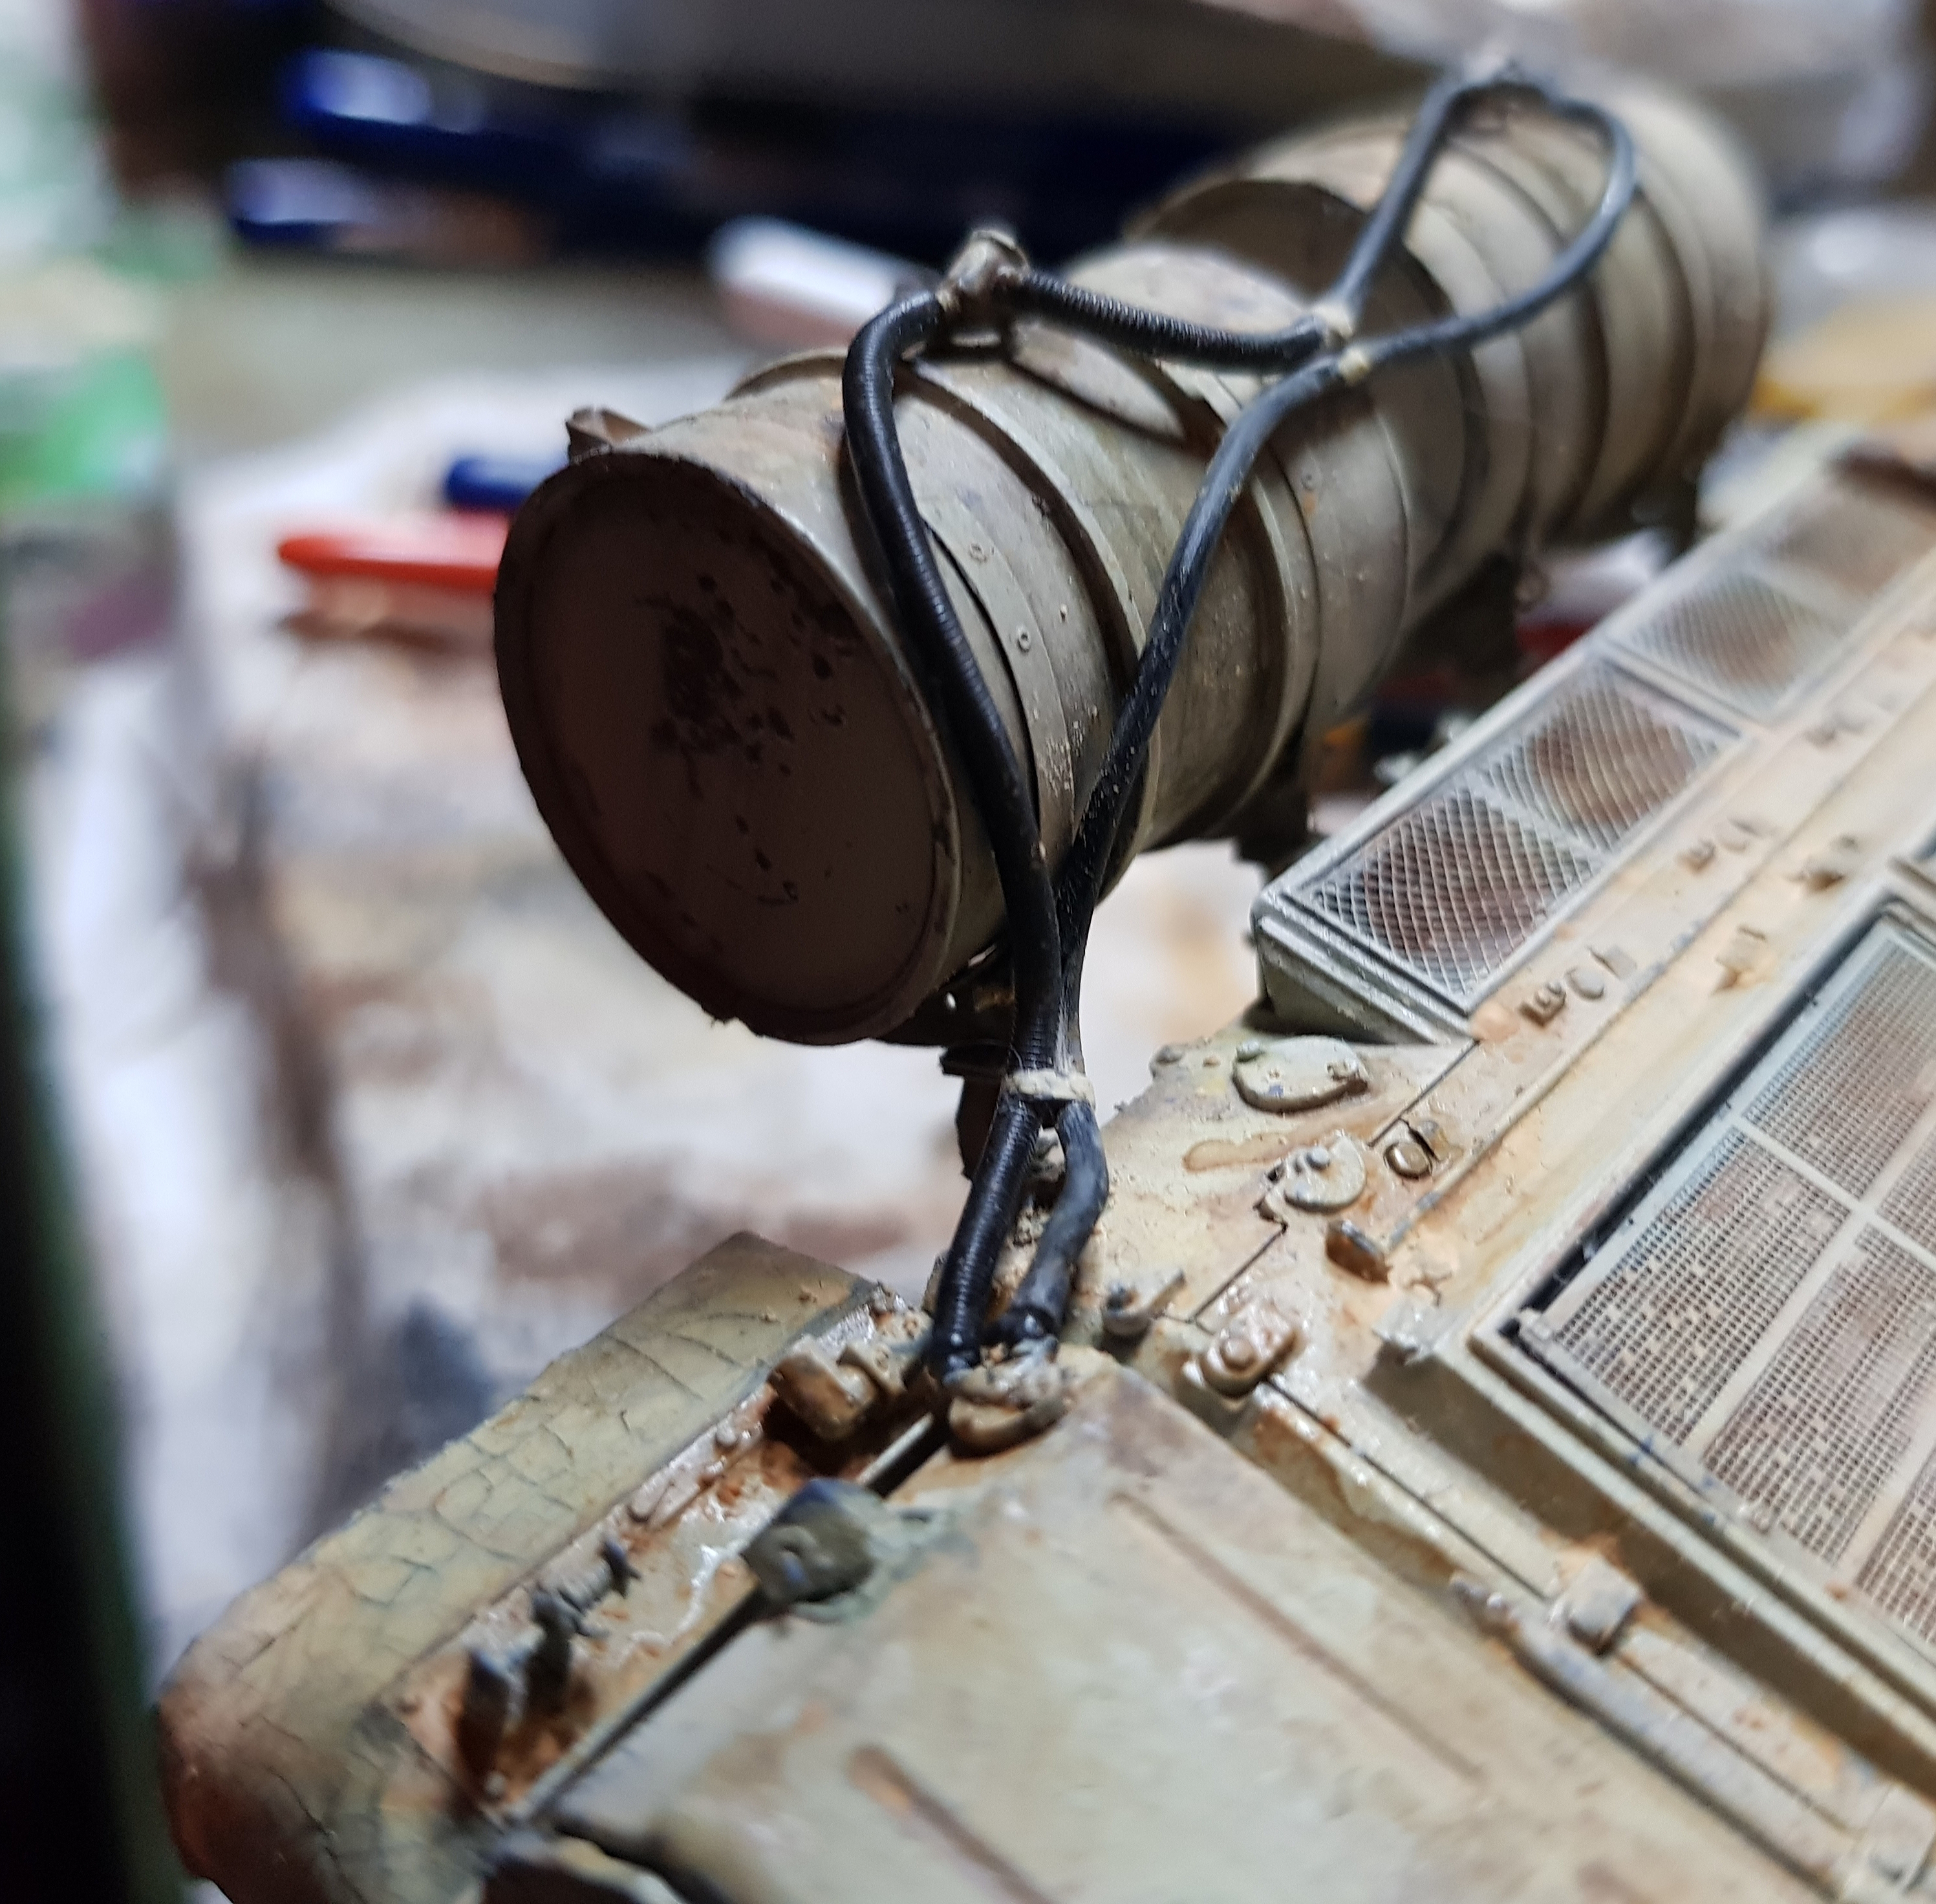
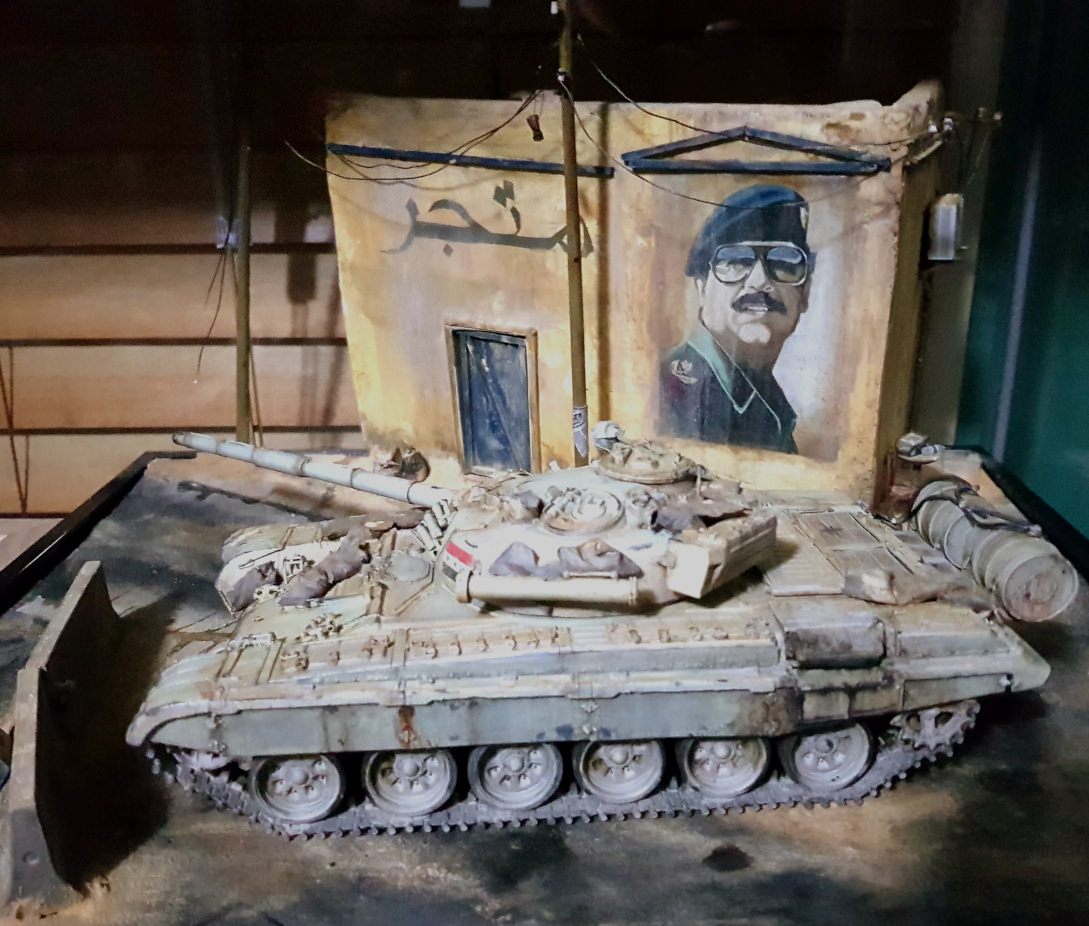
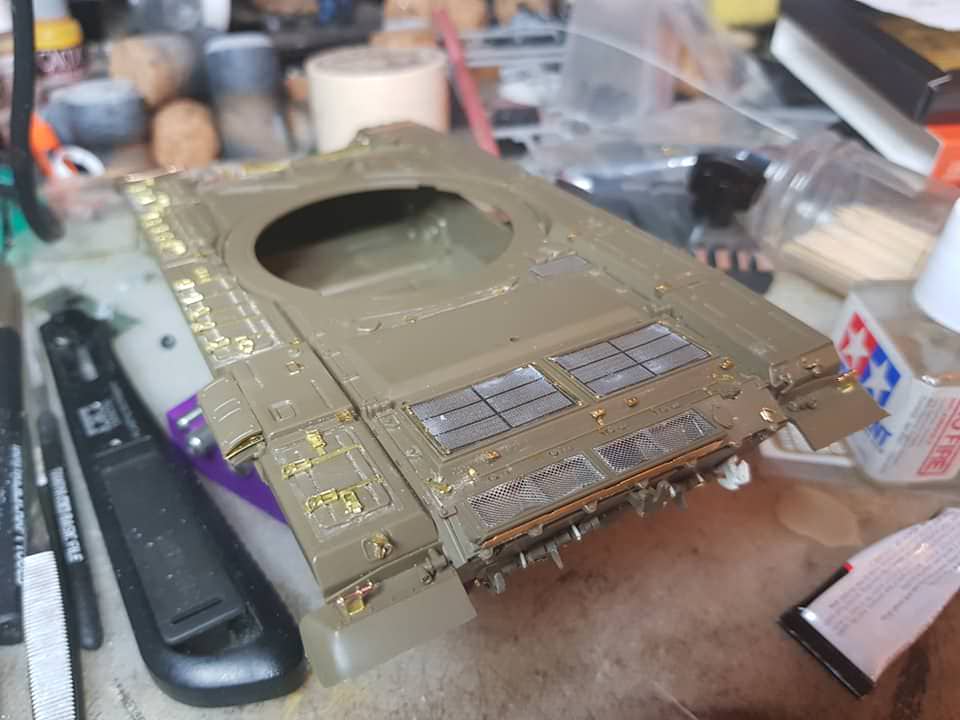
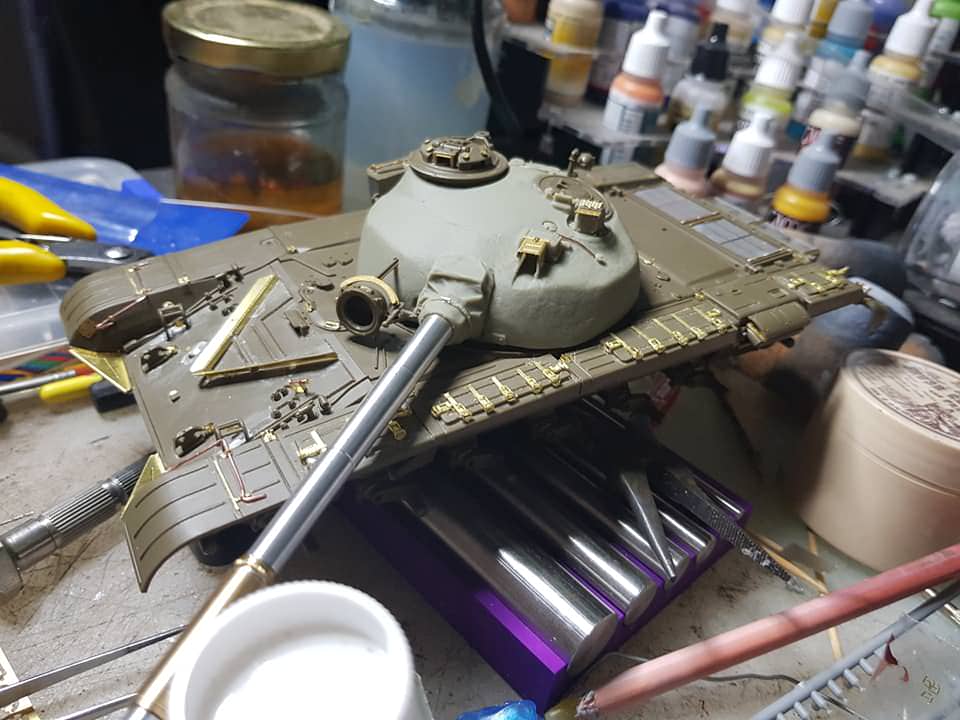
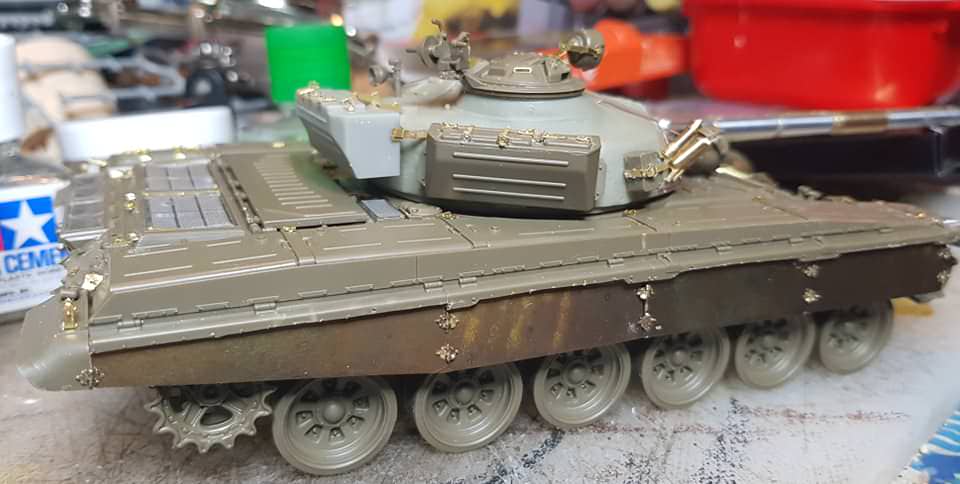
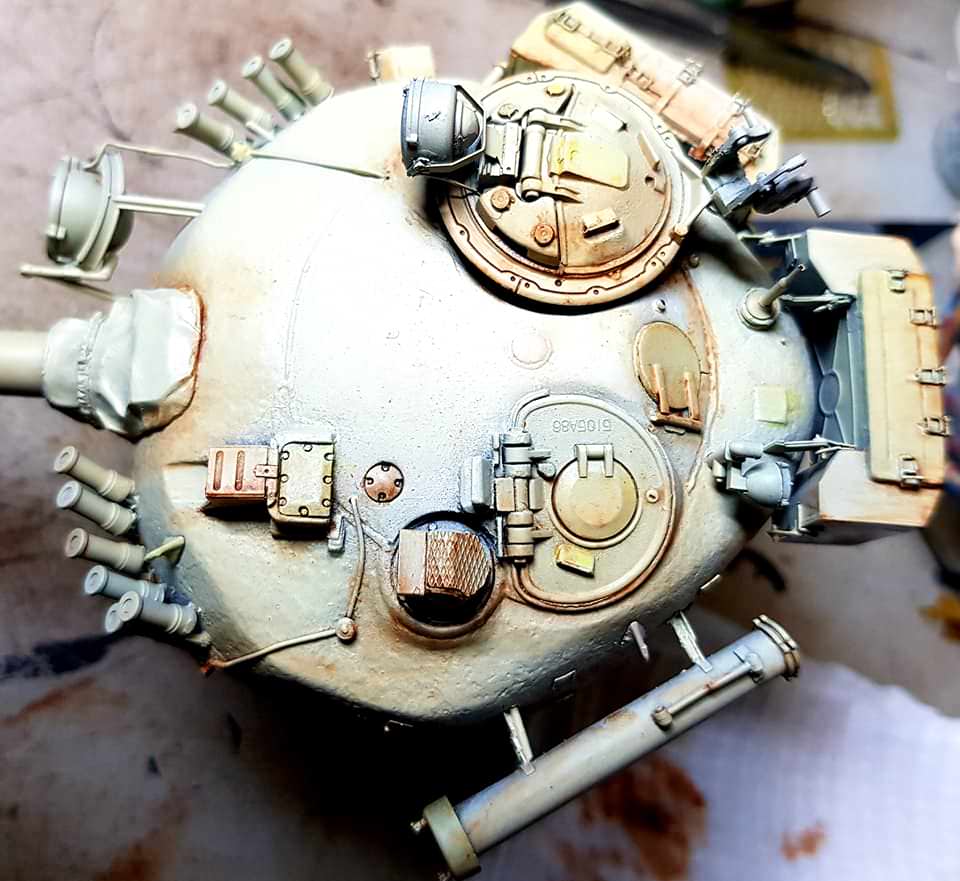
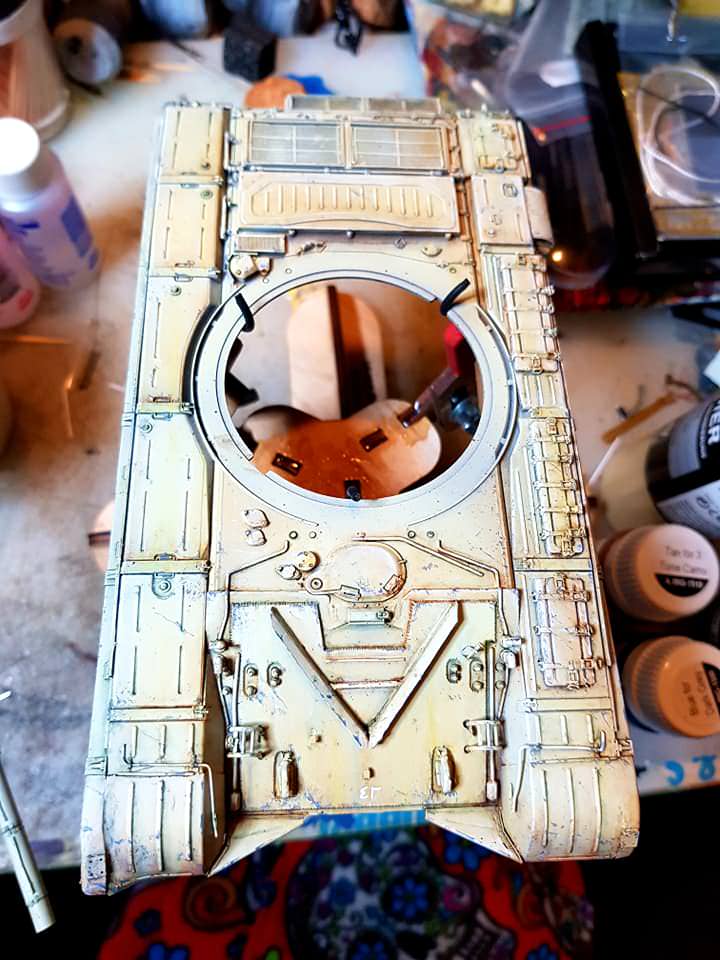
Heres some pics of the completed hull and turret. It has all of the PE installed and some VERY minor scratch building on the power conduits.
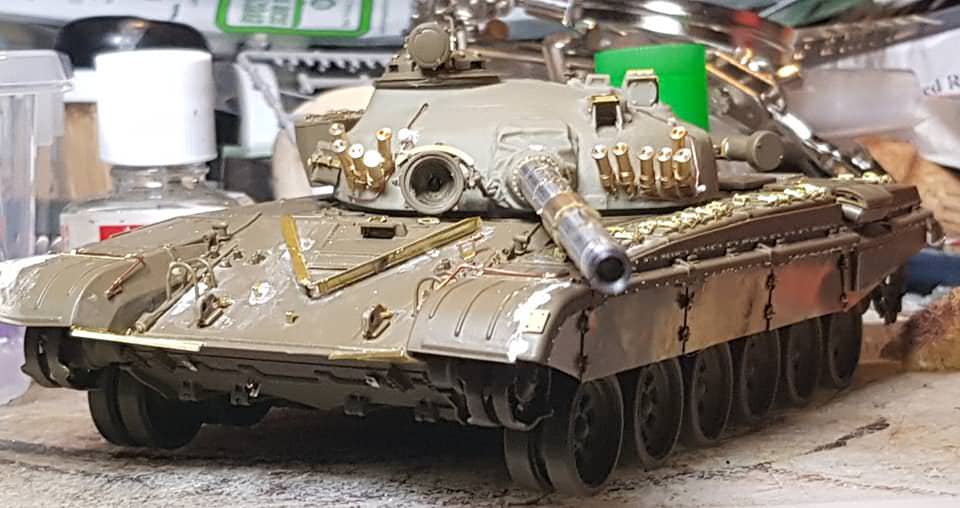
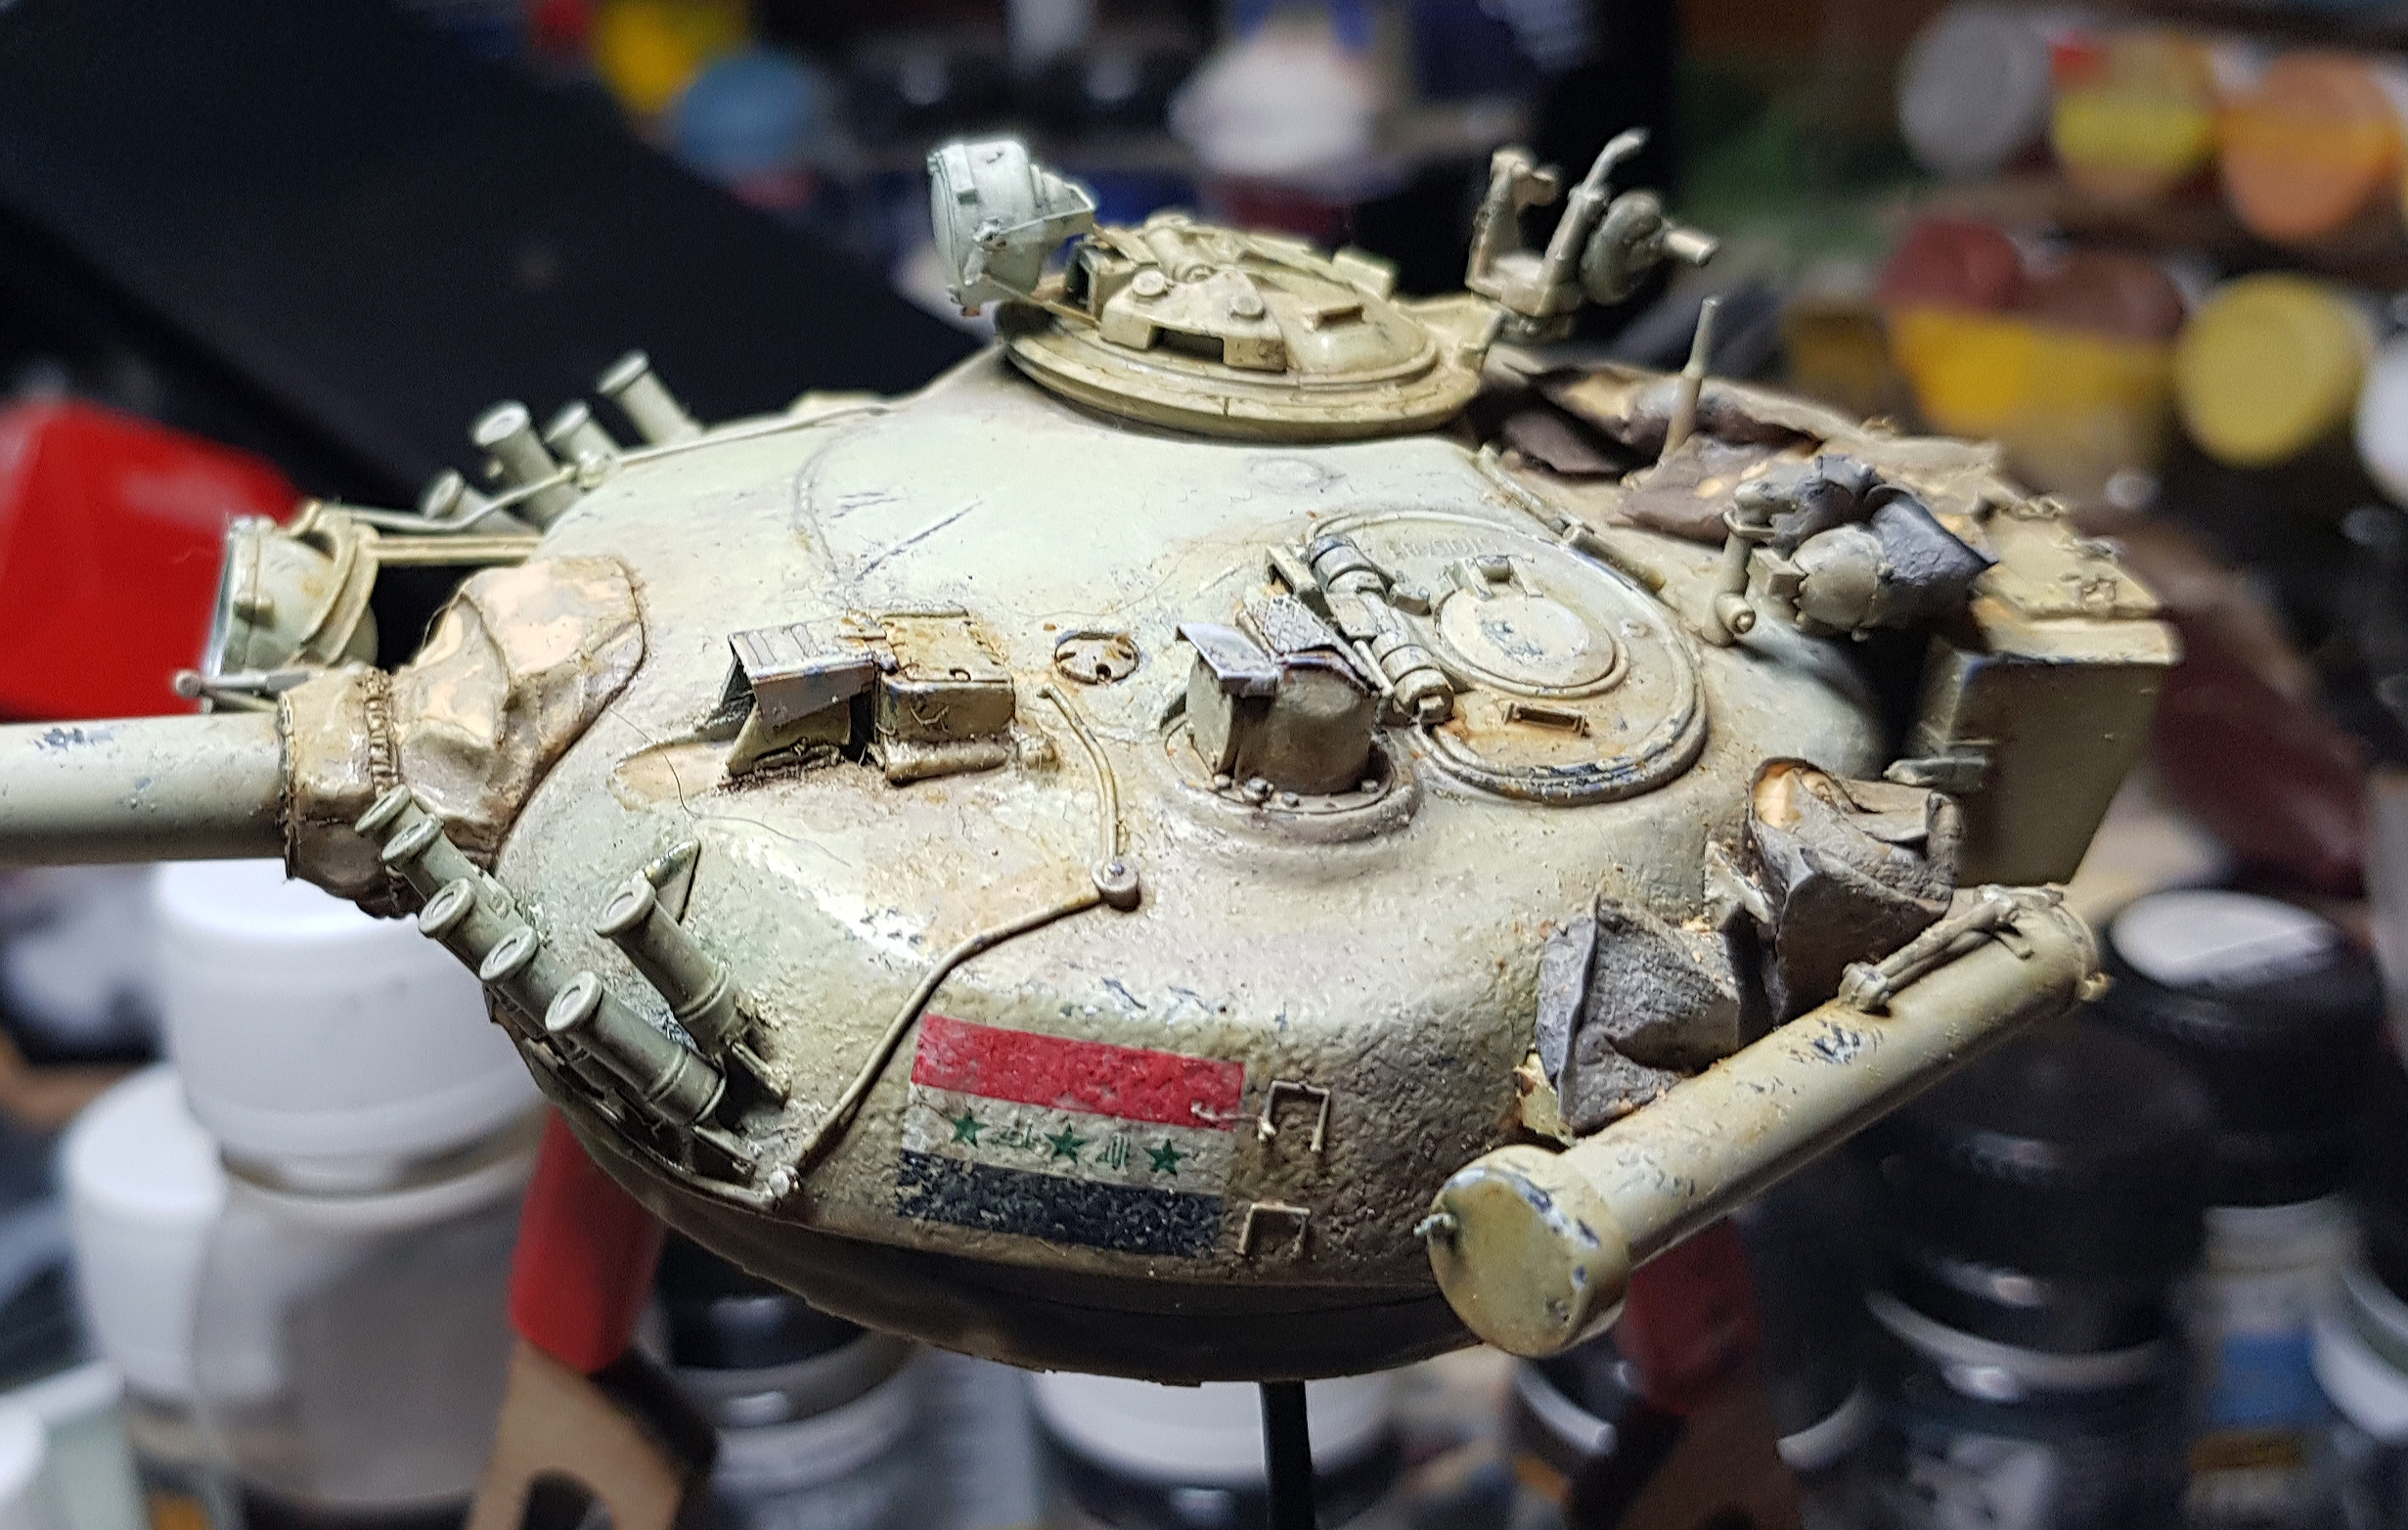
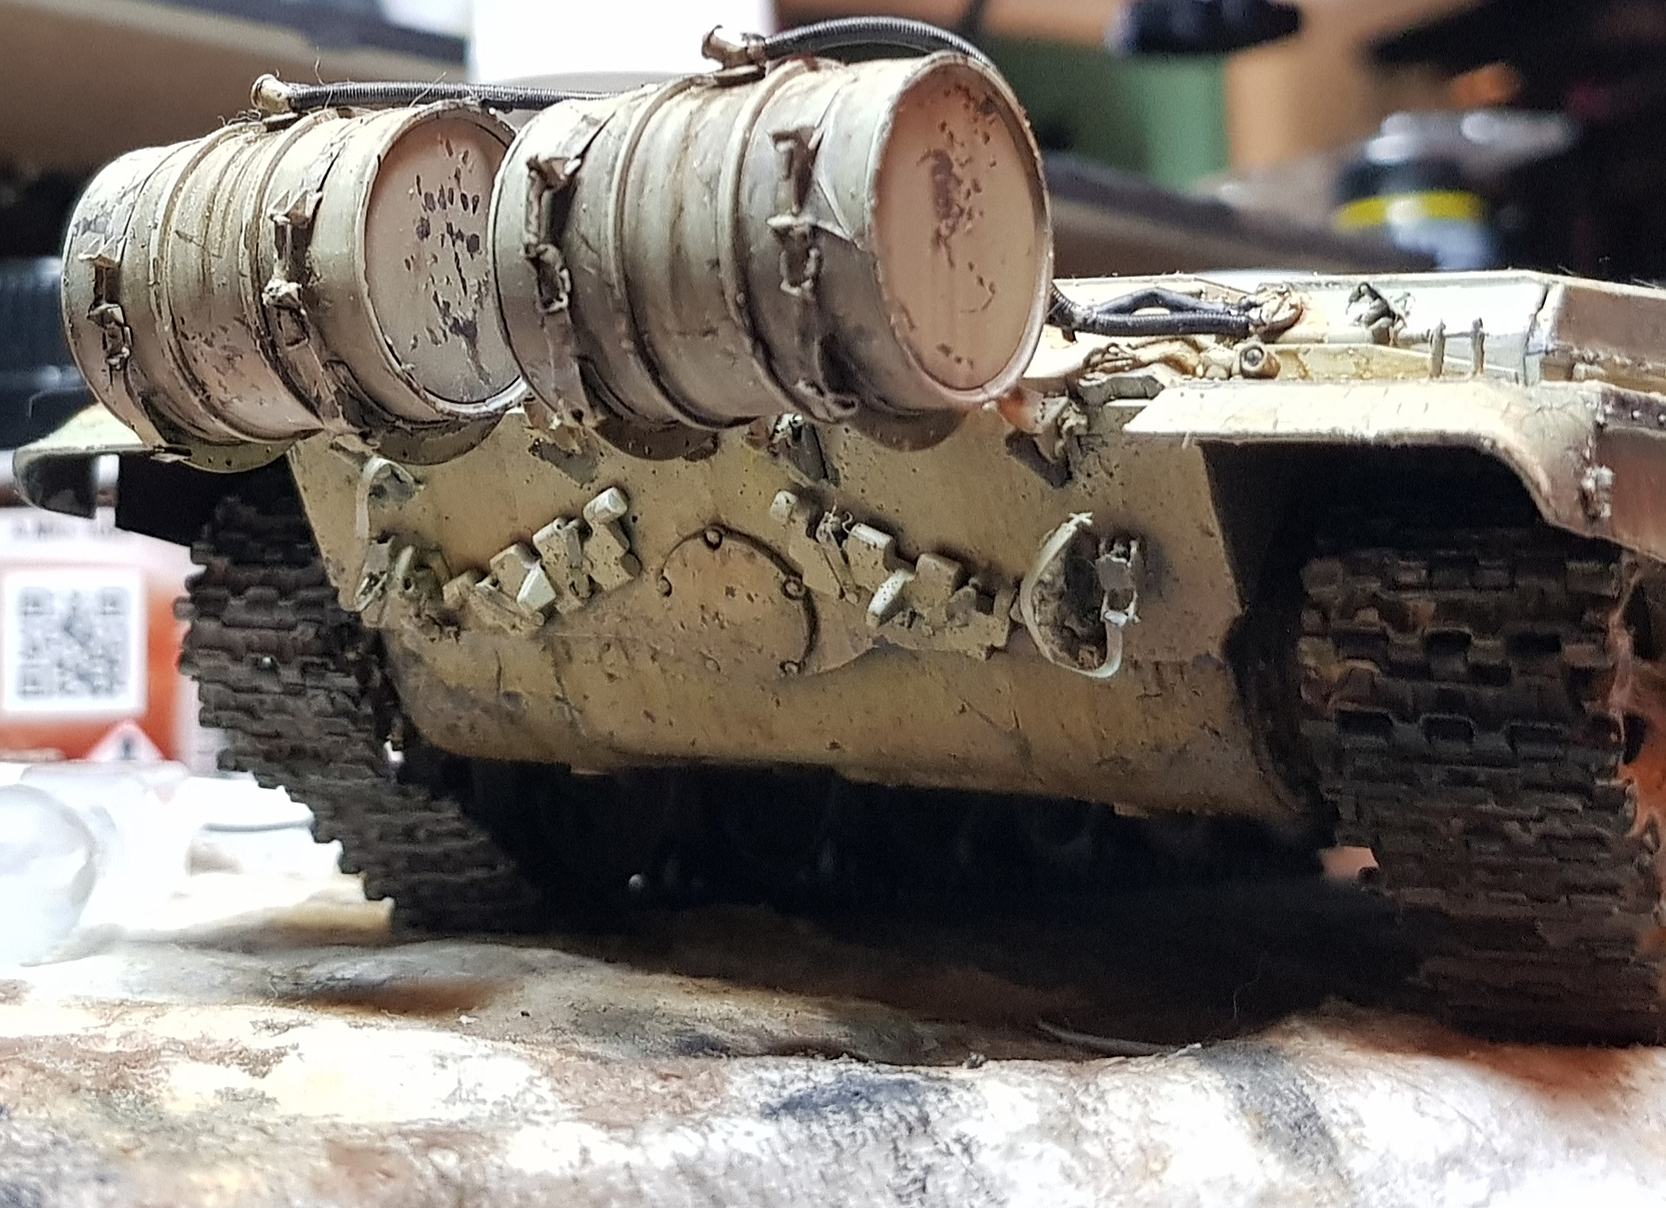
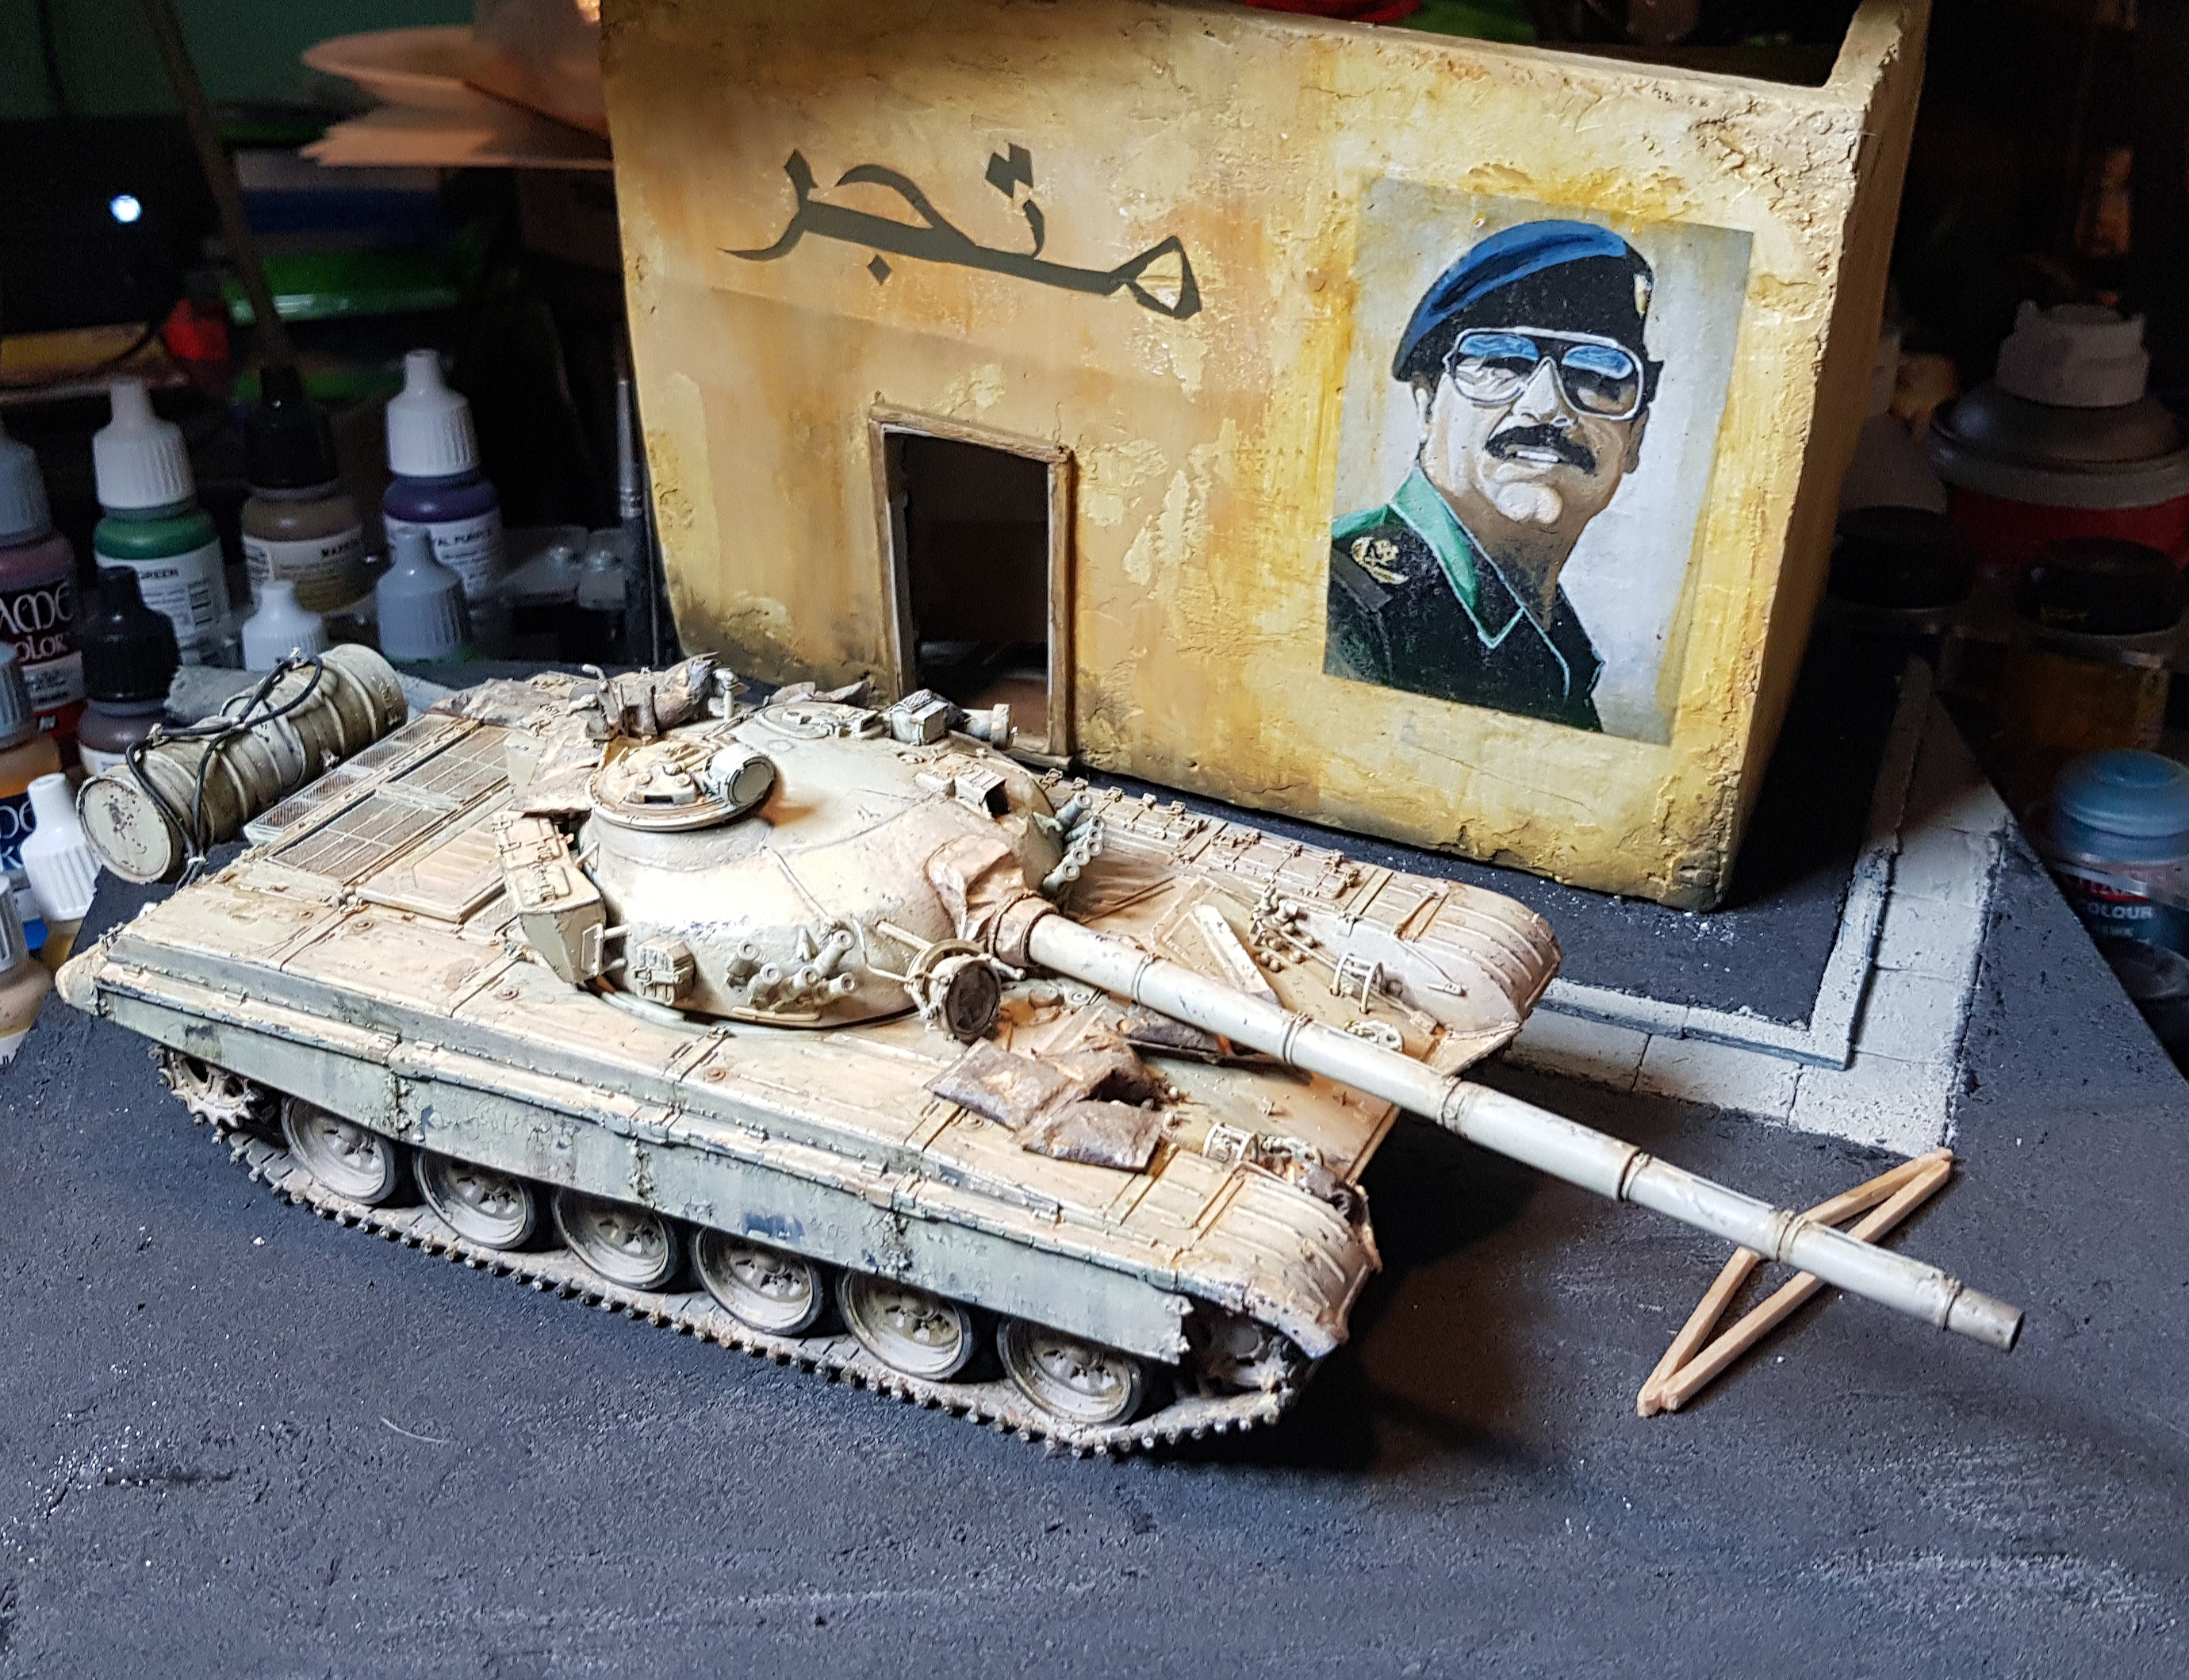
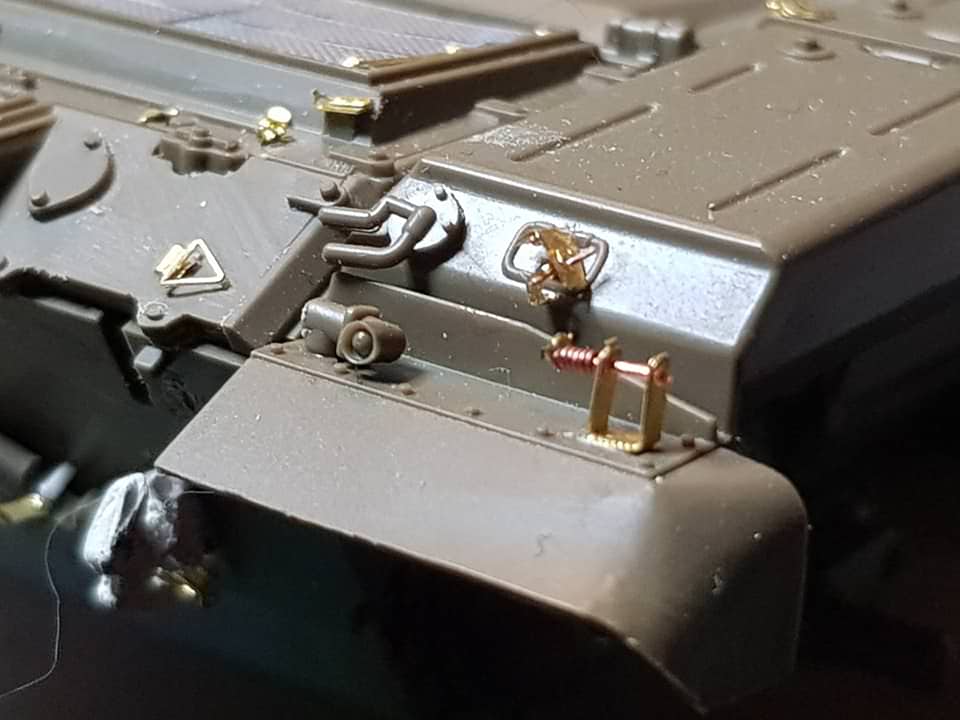
Started on the paint! I knocked one of the PE parts off the barrel, and just before I went to glue it back on, I found a great pic of a Lion with that exact part missing, and the two locator holes look to be present on the real barrel!
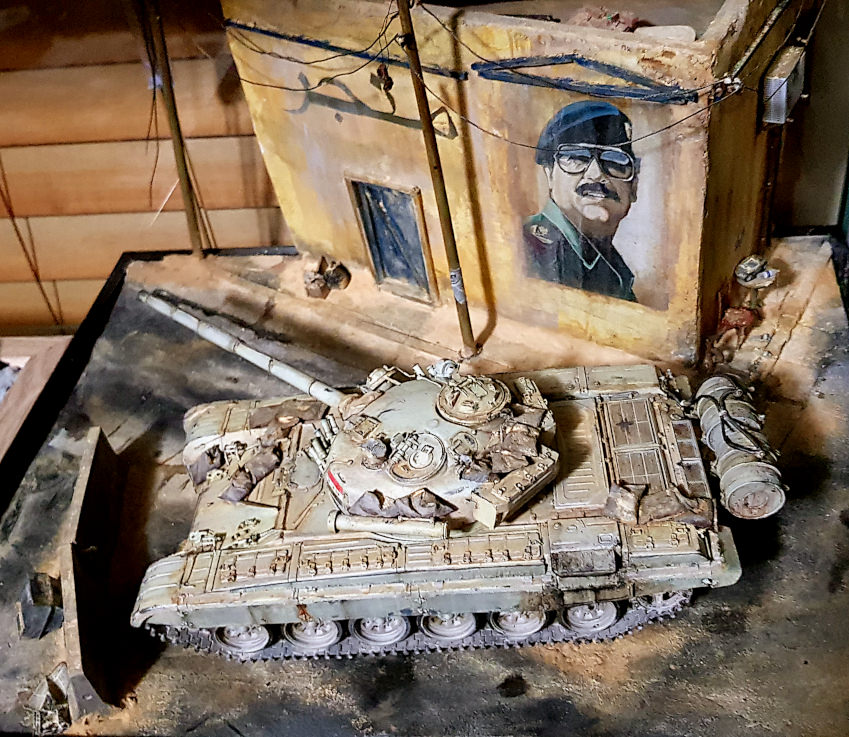
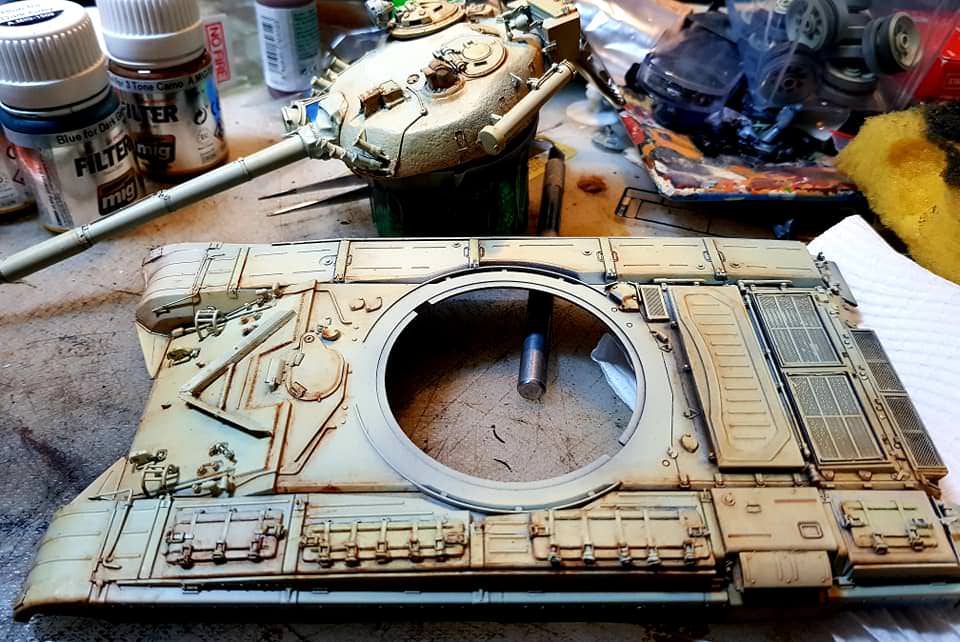
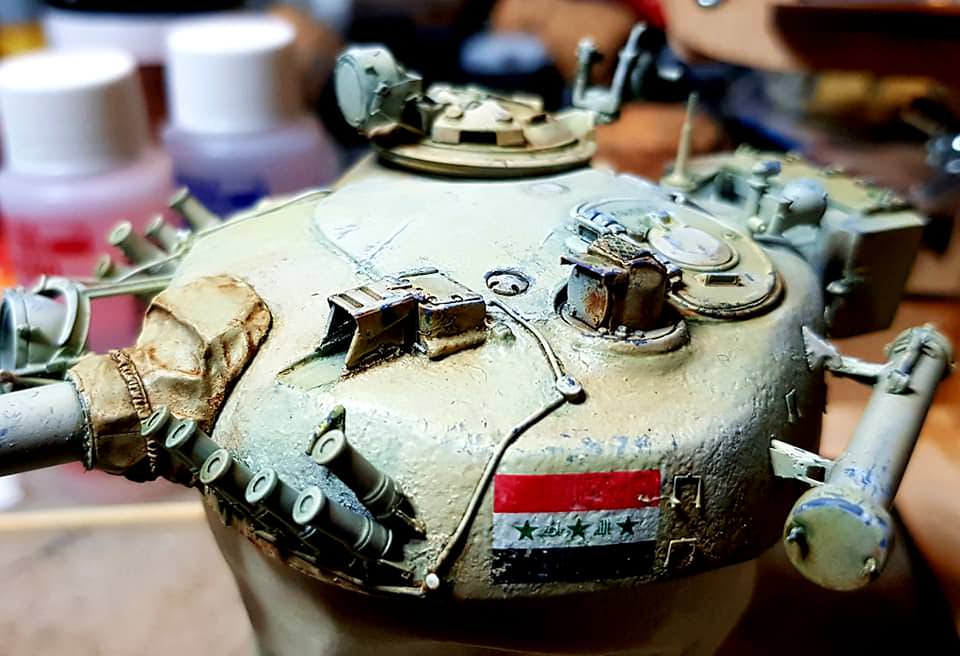
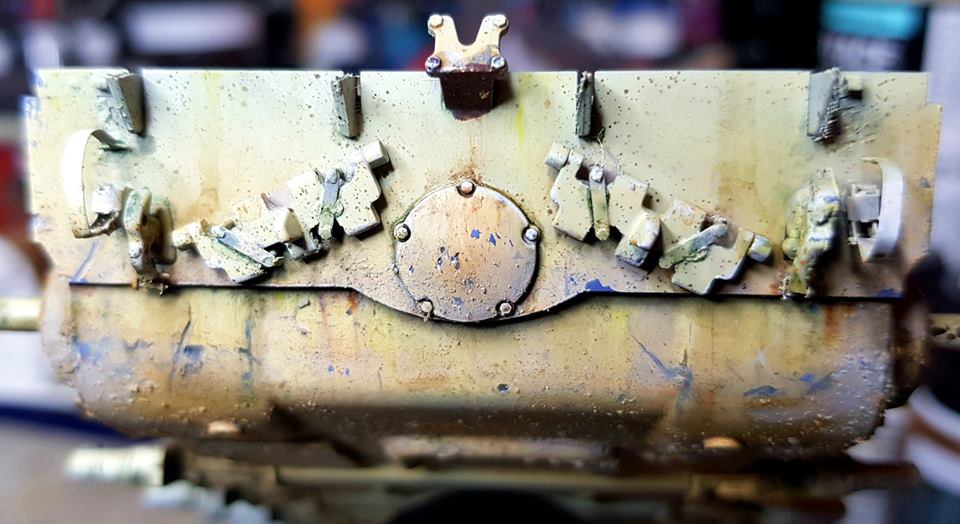
I'd like to point out that in this pic, I had done the basecoat, and then started on the filters in mostly warm tones like red, pink and yellow.
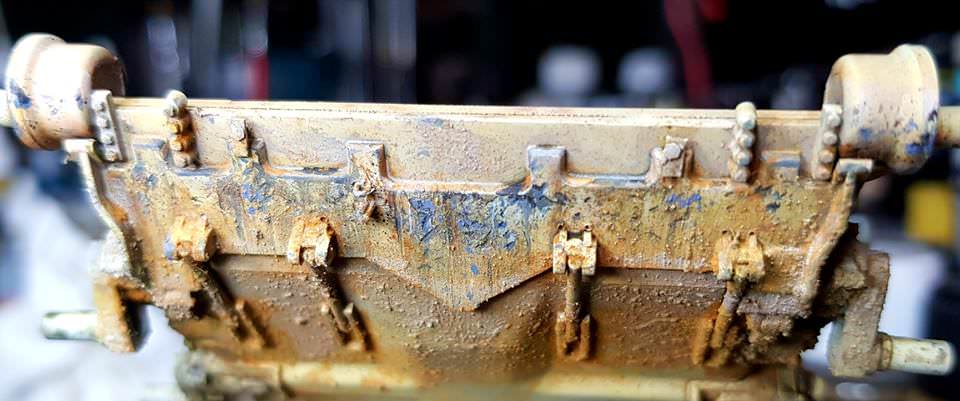
I had done a little pre-shading, but most of it got lost with the basecoat, so I decided to use oils to get a little modulation and hopefully mimic shading as well as built up sand and dirt.
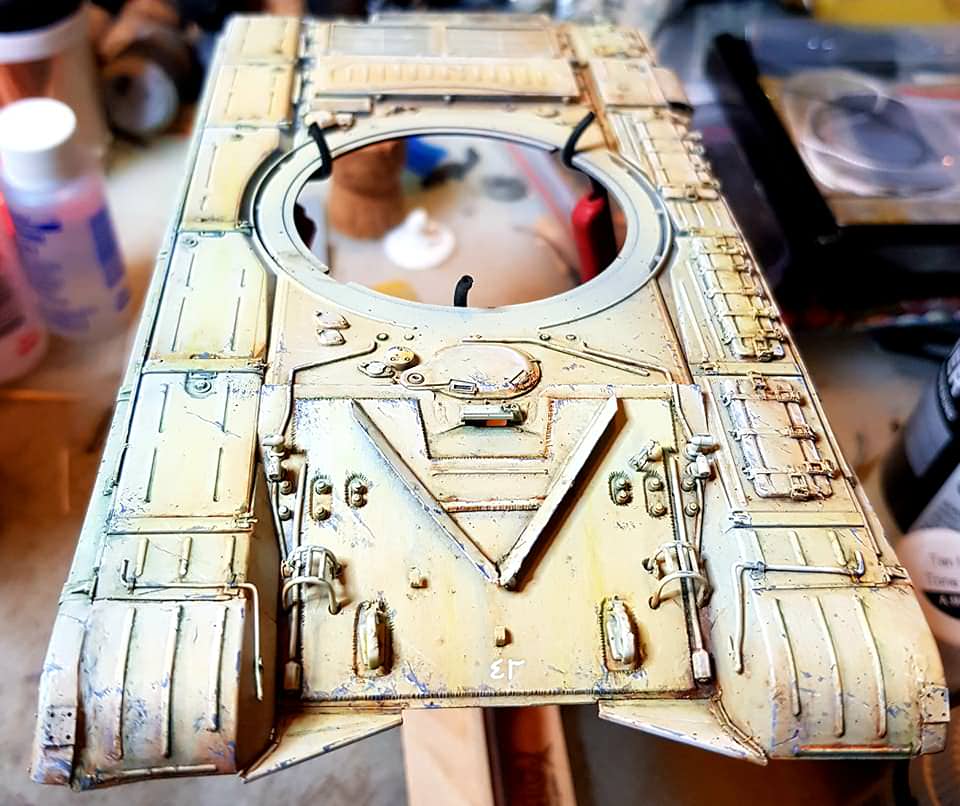
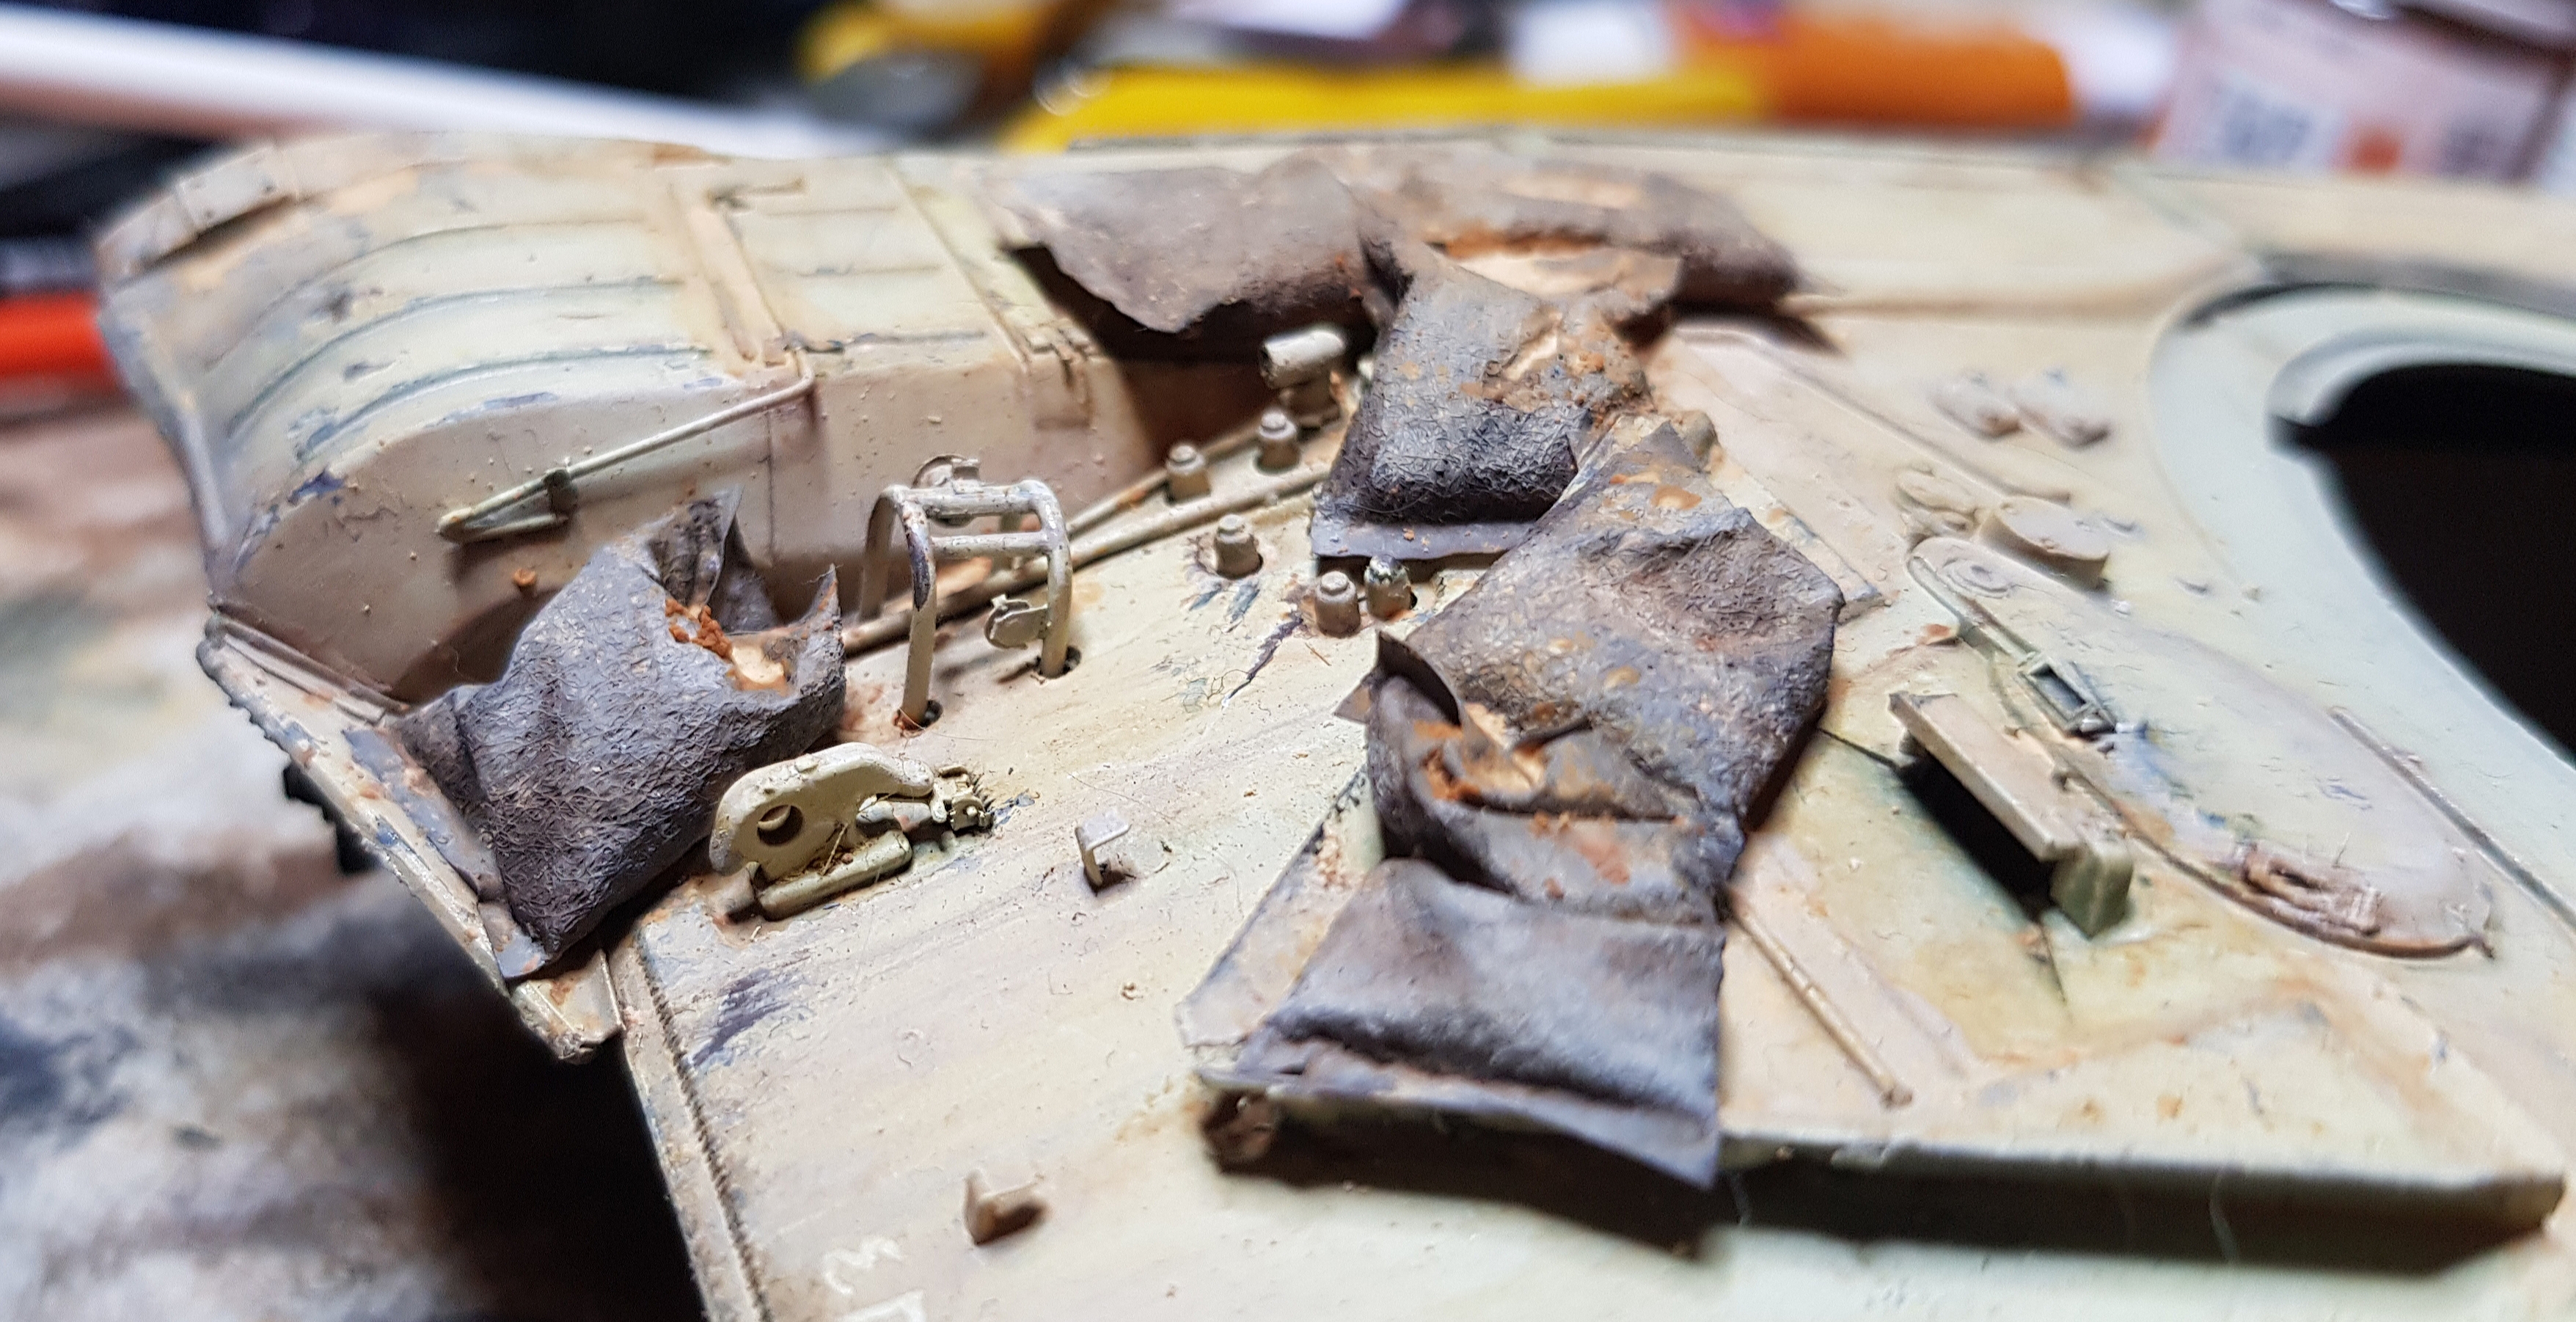
Chipping was also done at this stage. I went for a light blue/gray as I wanted to use graphite power on the larger chips, so was intending for a small gradient from the dark metal of the graphite, to the lighter gray.
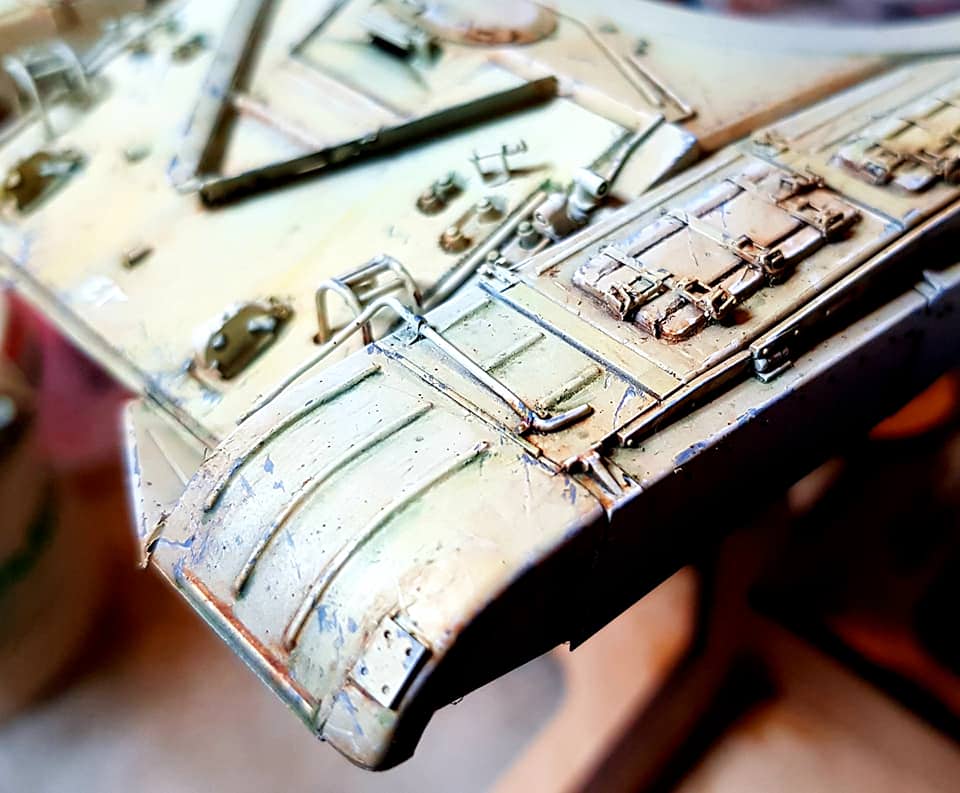
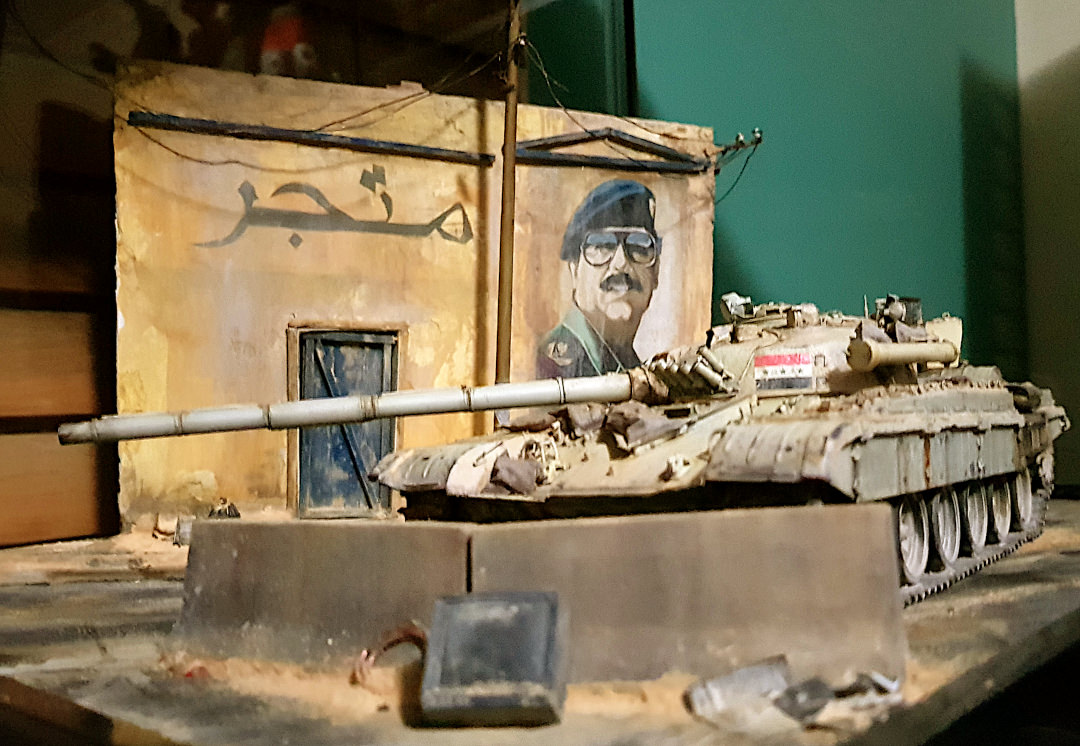
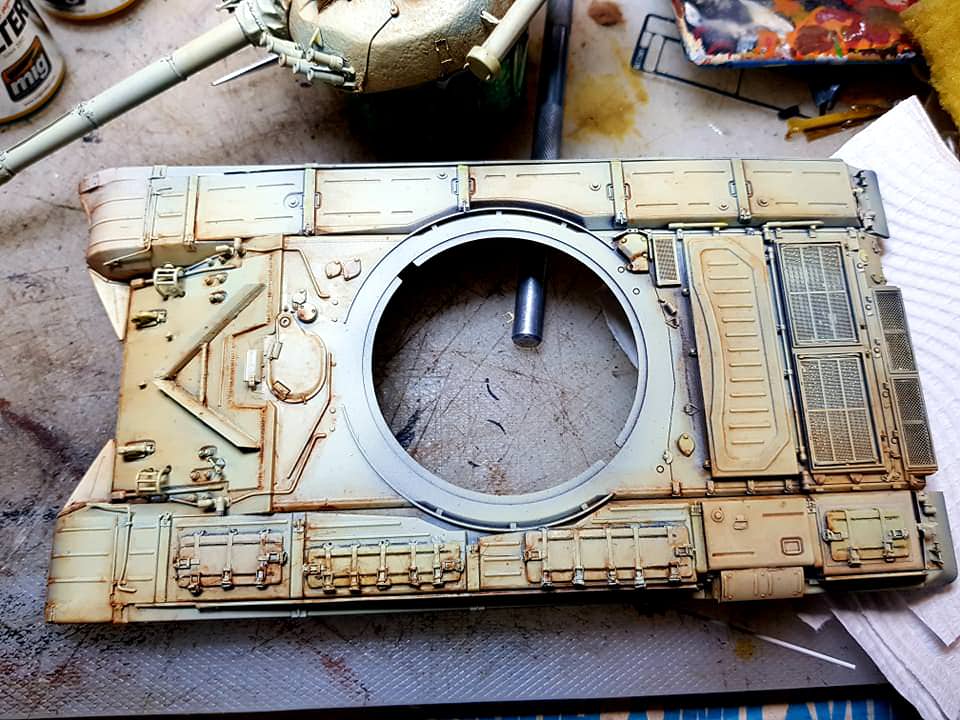
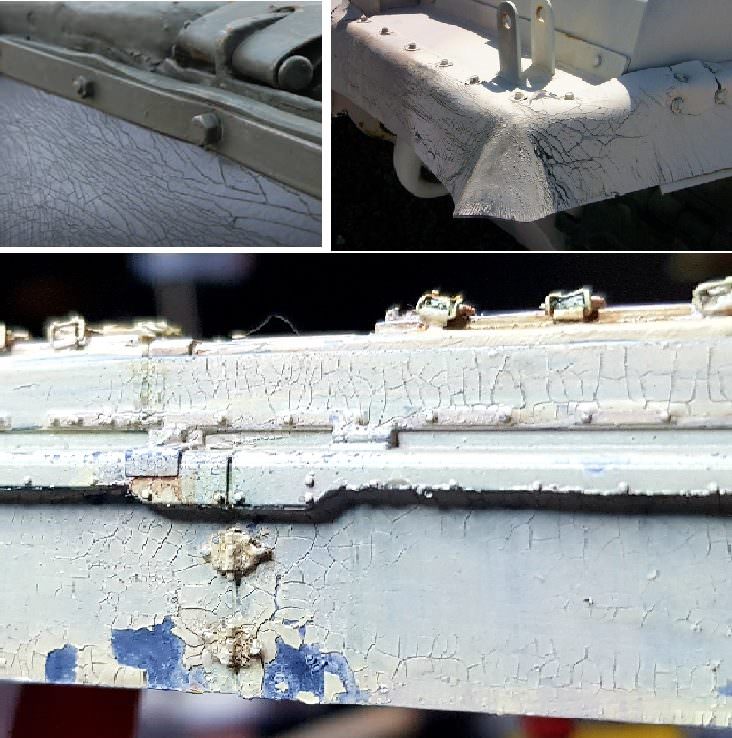
The sideskitrs or dust flaps are made from heavy rubber, and are either kept black or painted the same colour as the tank. In the reference pics I'd seen, any time these are painted the flexible rubber and dry conditions cause the paint to crack and peel. It was an interesting effect that I attempted to replicate.
Thanks for sticking with me this far, its much appreciated!
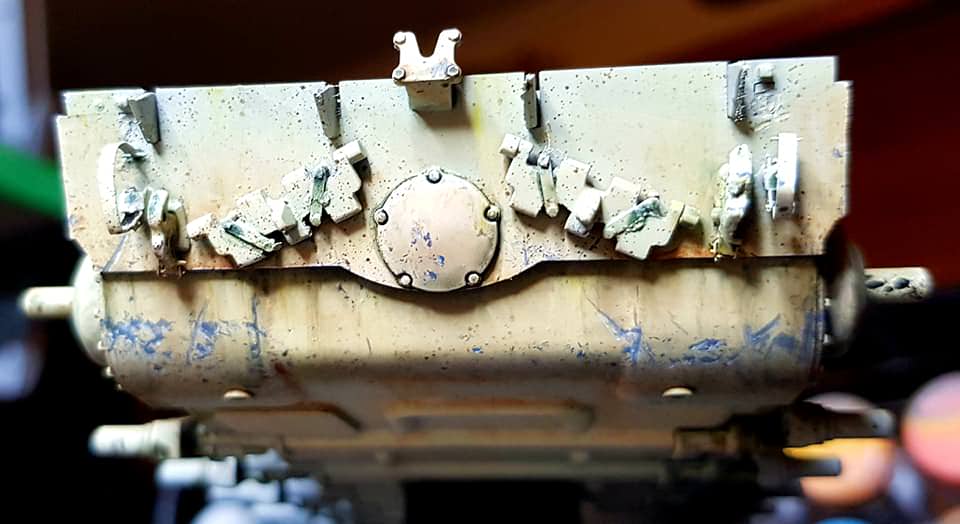
This is where I am at now (well, Ive progressed a little more, but not got pics yet). I've added some dry pigments, streaking effects and dust effects.
Thank you very much for taking the time to look at my work, any comments or criticism will be greatly appreciated!
~ DrChopp