Chubut, Argentina
Joined: August 15, 2010
KitMaker: 593 posts
Armorama: 548 posts
Posted: Sunday, December 30, 2018 - 12:32 PM UTC
Utah, United States
Joined: December 14, 2007
KitMaker: 3,389 posts
Armorama: 2,054 posts
Posted: Sunday, December 30, 2018 - 02:53 PM UTC
I'll watch. Japanese subjects interest me and I haven't built this kit yet.
Great nations do not fall because of external aggression; they first erode and decay inwardly, so that, like rotten fruit, they fall of themselves. The strength of a country is the sum total of the moral strength of the individuals in that country.
Ezr
Illinois, United States
Joined: September 01, 2014
KitMaker: 332 posts
Armorama: 328 posts
Posted: Monday, December 31, 2018 - 03:12 AM UTC
Got two of these so I could do one as a French Indochina holdover. Will be watching. Wayne
Chubut, Argentina
Joined: August 15, 2010
KitMaker: 593 posts
Armorama: 548 posts
Posted: Wednesday, January 02, 2019 - 12:44 PM UTC

#026
Pennsylvania, United States
Joined: June 08, 2002
KitMaker: 1,744 posts
Armorama: 1,359 posts
Posted: Wednesday, January 02, 2019 - 03:28 PM UTC
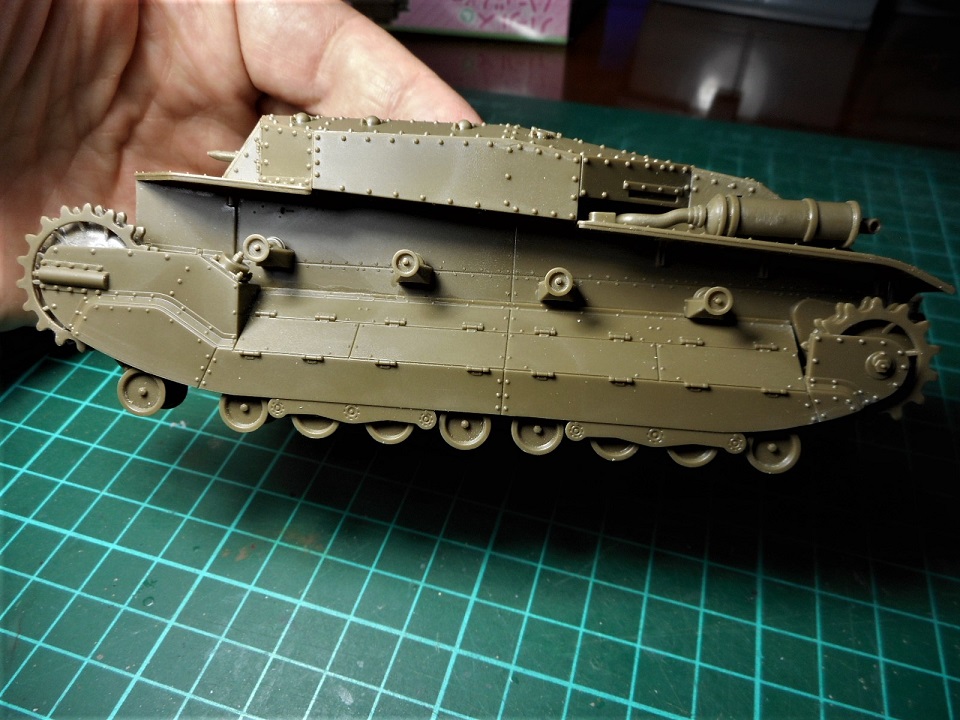
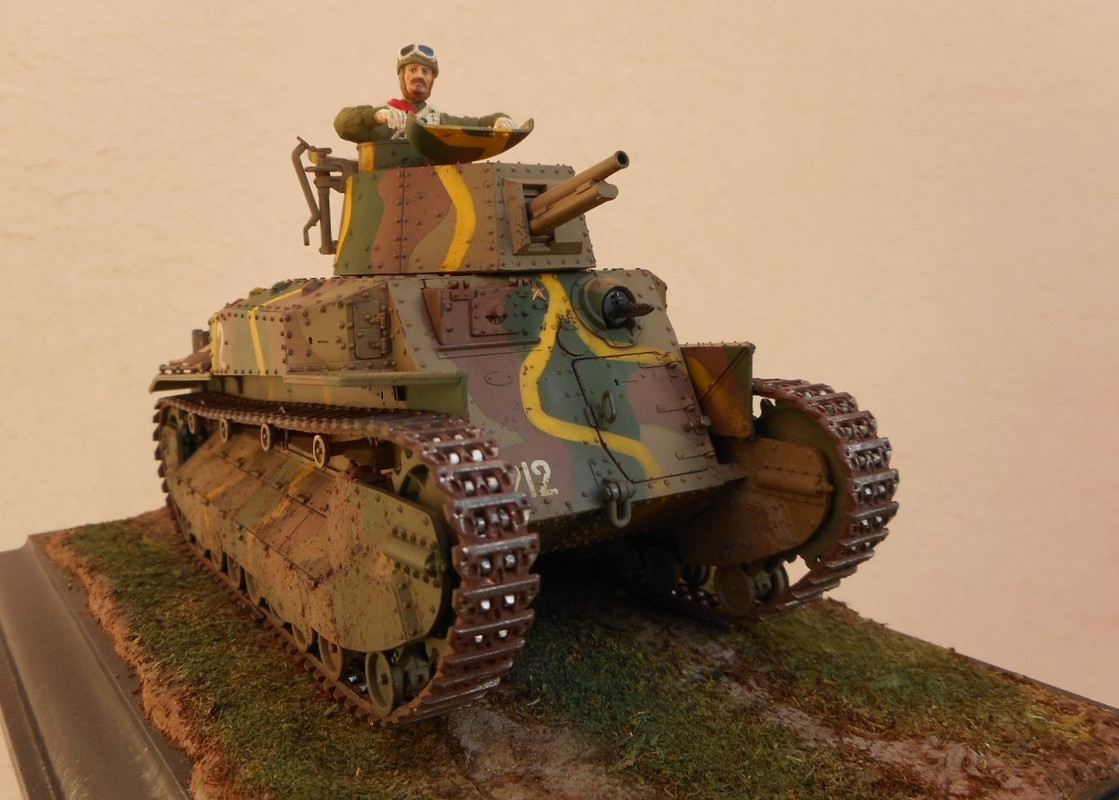
Awesome. I love the primitive look of the WWII Japanese tanks.
Bodeen
What a long strange trip it's been!
New York, United States
Joined: May 02, 2013
KitMaker: 4,403 posts
Armorama: 4,078 posts
Posted: Wednesday, January 02, 2019 - 06:30 PM UTC
Quoted Text
Awesome. I love the primitive look of the WWII Japanese tanks.
I do too! Unfortunately for the Japanese, the technical aspects of their armor were just as primitive as their looks, and in some cases, they were downright sad. The Japanese did make great use of their aluminum-alloy Isuzu engines, though...
Florida, United States
Joined: March 30, 2006
KitMaker: 3,736 posts
Armorama: 3,697 posts
Posted: Wednesday, January 02, 2019 - 07:46 PM UTC
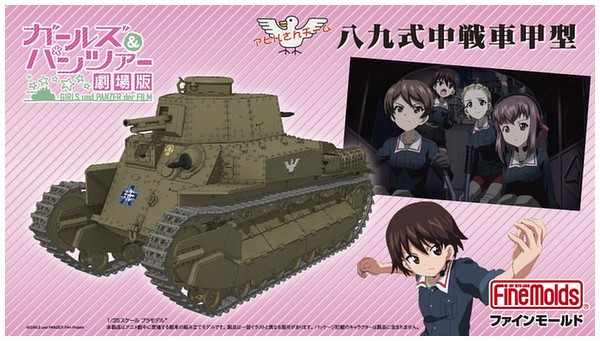
Now that you've got the Girls und Panzer version, Fine Molds has finally rereleased the kit as a conventional armor kit in their own box.
Illinois, United States
Joined: September 01, 2014
KitMaker: 332 posts
Armorama: 328 posts
Posted: Thursday, January 03, 2019 - 03:11 AM UTC
There are a few pictures floating around on the internet. The French used a lot of different vehicles when they first went back after WW2. Wayne
Rhone, France
Joined: December 02, 2002
KitMaker: 12,719 posts
Armorama: 12,507 posts
Posted: Thursday, January 03, 2019 - 03:28 AM UTC
Quoted Text
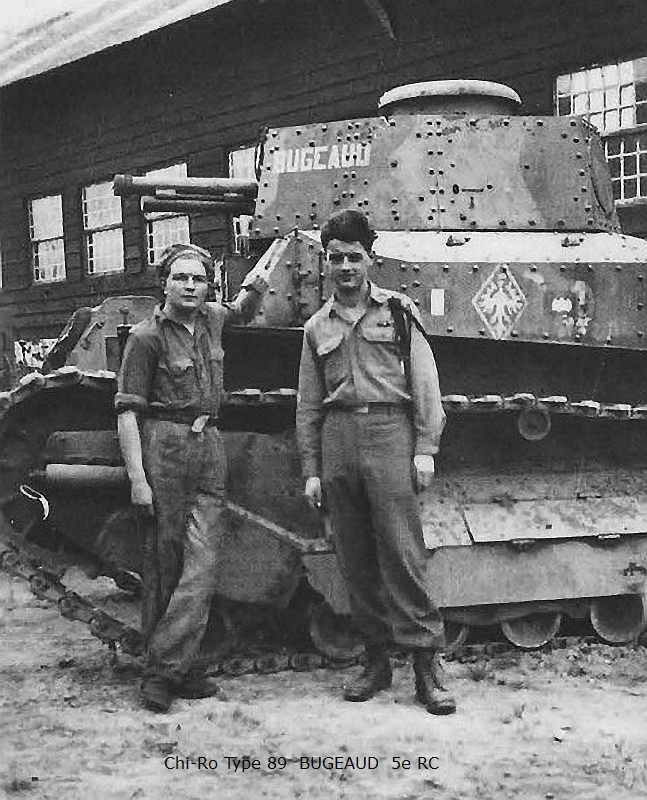
I would like to see some pictures in French hands in Indochina.
From
Chars-francais.net :
Tanks of the
Commando blindé du Cambodge from the "Corps expéditionnaire français en Extrême-Orient" (CEFEO) 1945/1946 :
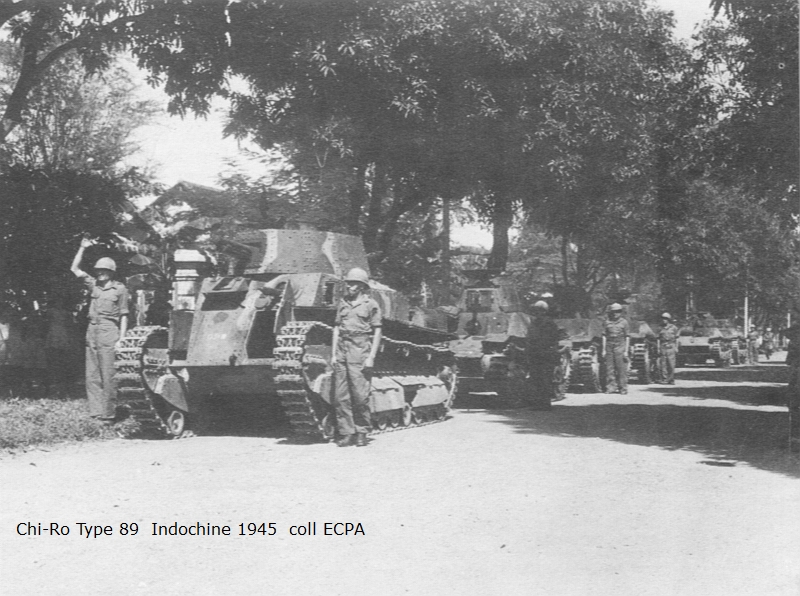
5e Régiment de Cuirassiers :
H.P.
"Find the Bastards, then Pile On"
Col. George W.Patton III 's standing order for the troopers of the 11th Armoured Cavalry Regiment
Chubut, Argentina
Joined: August 15, 2010
KitMaker: 593 posts
Armorama: 548 posts
Posted: Thursday, January 03, 2019 - 01:48 PM UTC
Now that you've got the Girls und Panzer version, Fine Molds has finally rereleased the kit as a conventional armor kit in their own box.[/quote]
Luck was not with me ... snif ...

Chubut, Argentina
Joined: August 15, 2010
KitMaker: 593 posts
Armorama: 548 posts
Posted: Thursday, January 03, 2019 - 01:49 PM UTC
Quoted Text
Quoted Text
I would like to see some pictures in French hands in Indochina.
From Chars-francais.net :
Tanks of the Commando blindé du Cambodge from the "Corps expéditionnaire français en Extrême-Orient" (CEFEO) 1945/1946 :
5e Régiment de Cuirassiers :
H.P.
Excelent photos, I had not seen them, thanks for sharing them.
New York, United States
Joined: May 02, 2013
KitMaker: 4,403 posts
Armorama: 4,078 posts
Posted: Thursday, January 03, 2019 - 08:48 PM UTC
Quoted Text
Now that you've got the Girls und Panzer version, Fine Molds has finally rereleased the kit as a conventional armor kit in their own box.
Luck was not with me ... snif ...
[/quote]
Don't sweat it... This kind of thing happens to me ALL the time, especially after I've done an extensive conversion or scratch-build project...

Chubut, Argentina
Joined: August 15, 2010
KitMaker: 593 posts
Armorama: 548 posts
Posted: Monday, January 07, 2019 - 01:22 PM UTC
Chubut, Argentina
Joined: August 15, 2010
KitMaker: 593 posts
Armorama: 548 posts
Posted: Sunday, January 13, 2019 - 08:20 AM UTC
New York, United States
Joined: May 02, 2013
KitMaker: 4,403 posts
Armorama: 4,078 posts
Posted: Sunday, January 13, 2019 - 07:27 PM UTC
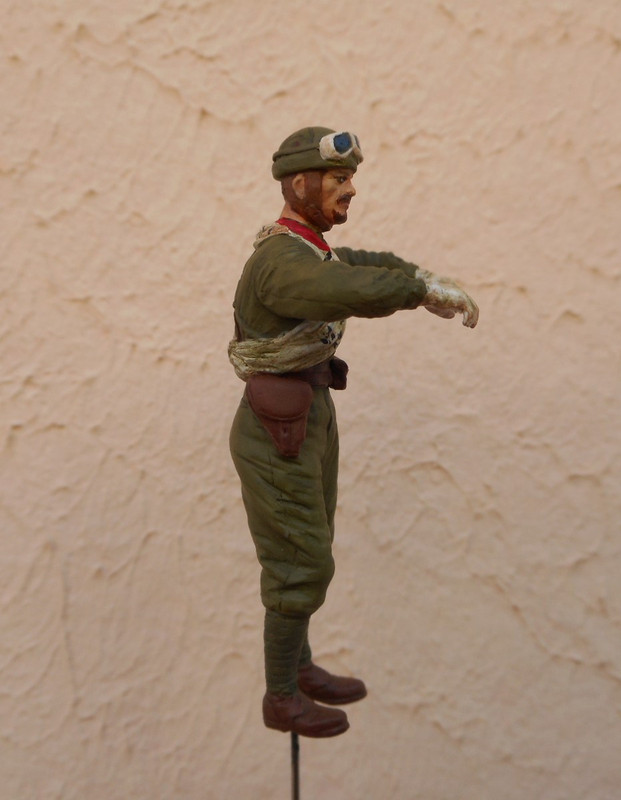
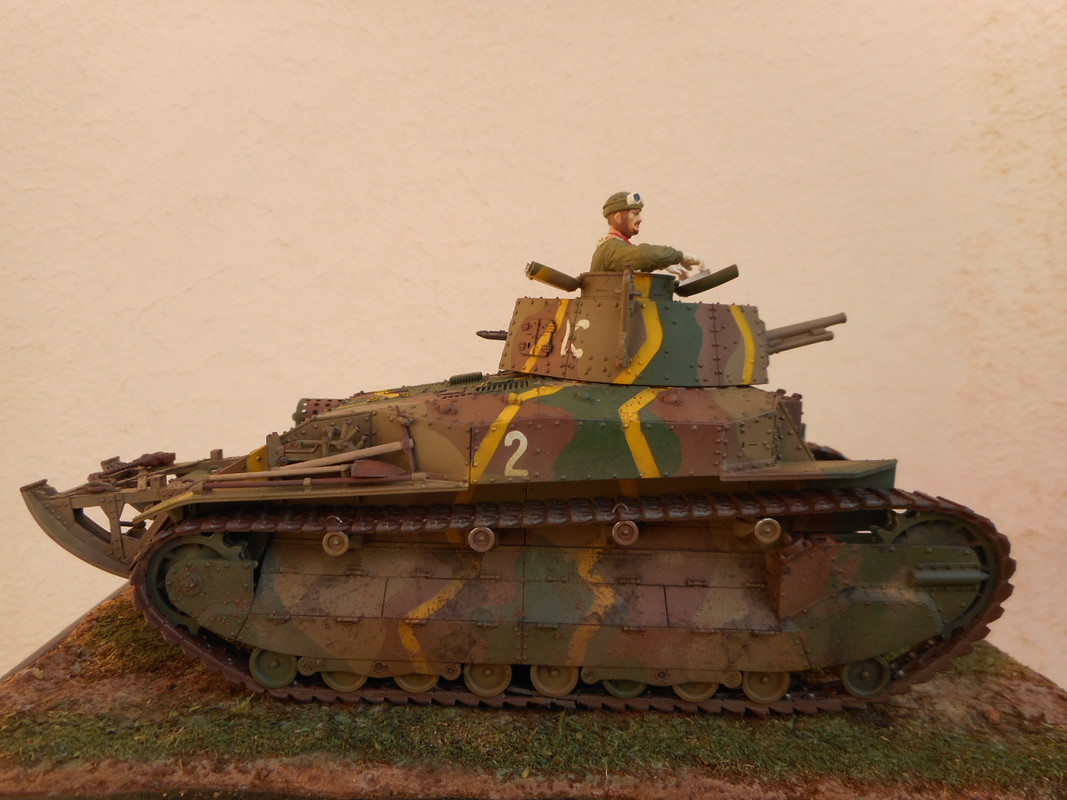
VERY NICE, Omar!!!

It will be very interesting to see your end result!!!
Chubut, Argentina
Joined: August 15, 2010
KitMaker: 593 posts
Armorama: 548 posts
Posted: Saturday, January 19, 2019 - 11:34 AM UTC
Florida, United States
Joined: March 30, 2006
KitMaker: 3,736 posts
Armorama: 3,697 posts
Posted: Saturday, January 19, 2019 - 01:49 PM UTC
North Carolina, United States
Joined: September 16, 2004
KitMaker: 1,281 posts
Armorama: 1,222 posts
Posted: Saturday, January 19, 2019 - 02:41 PM UTC
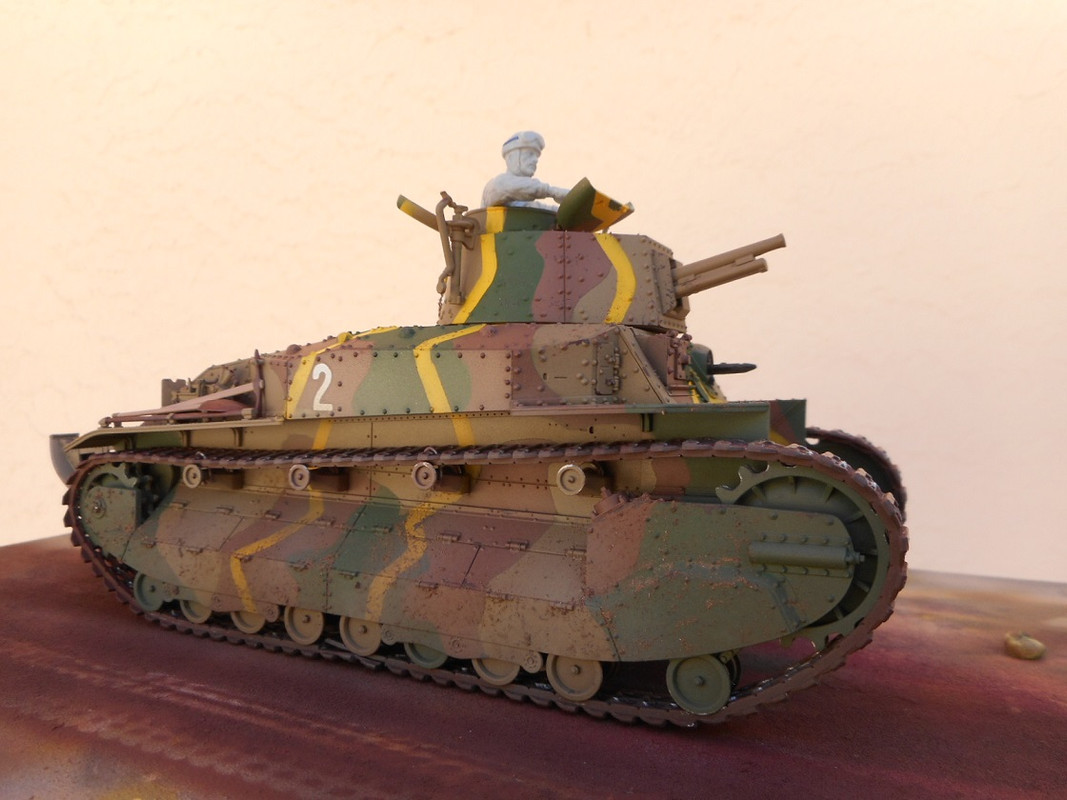
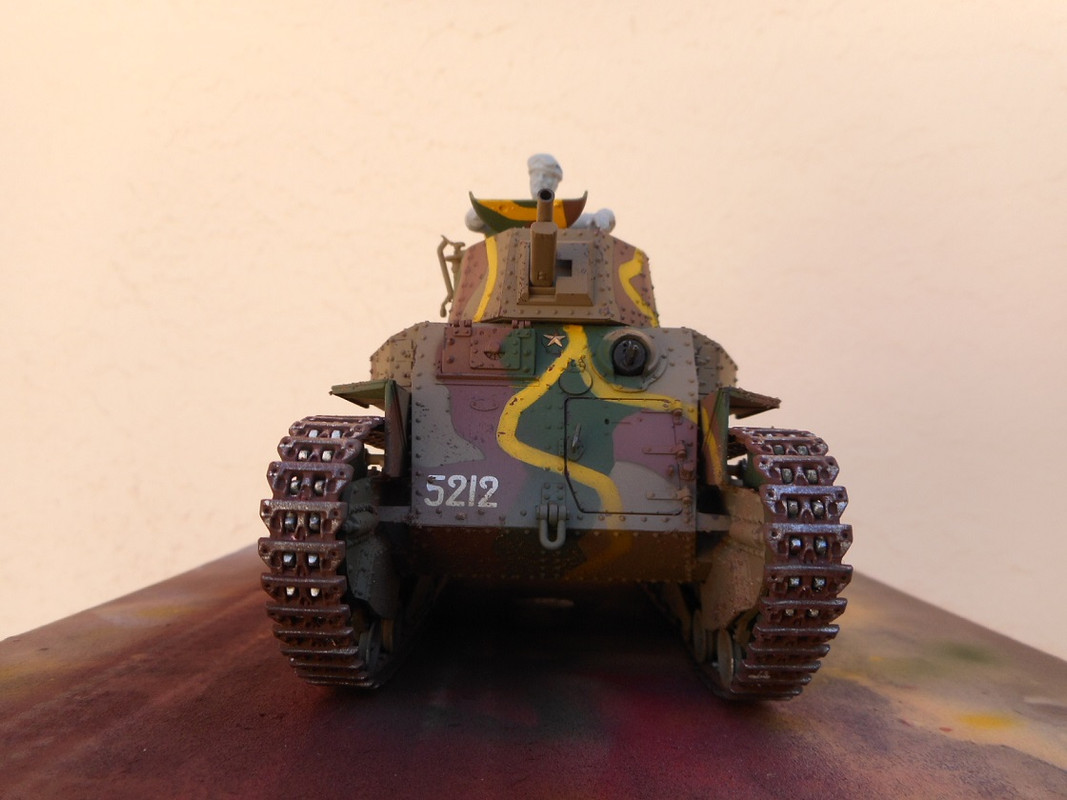
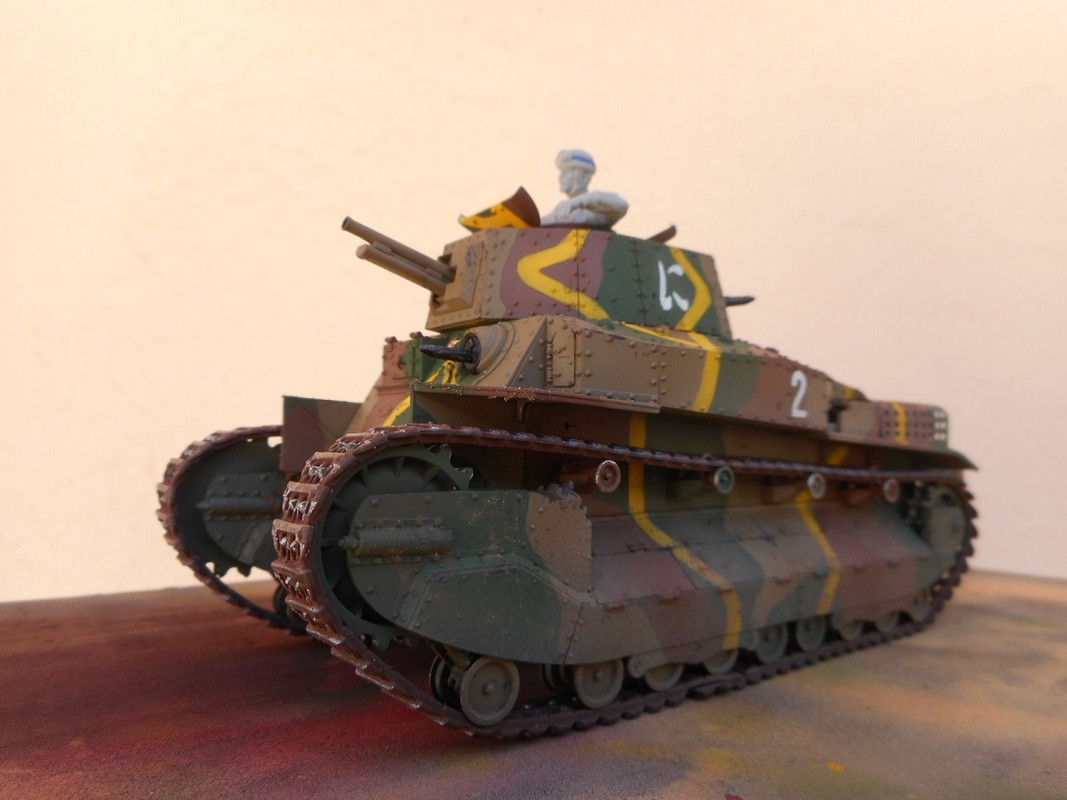
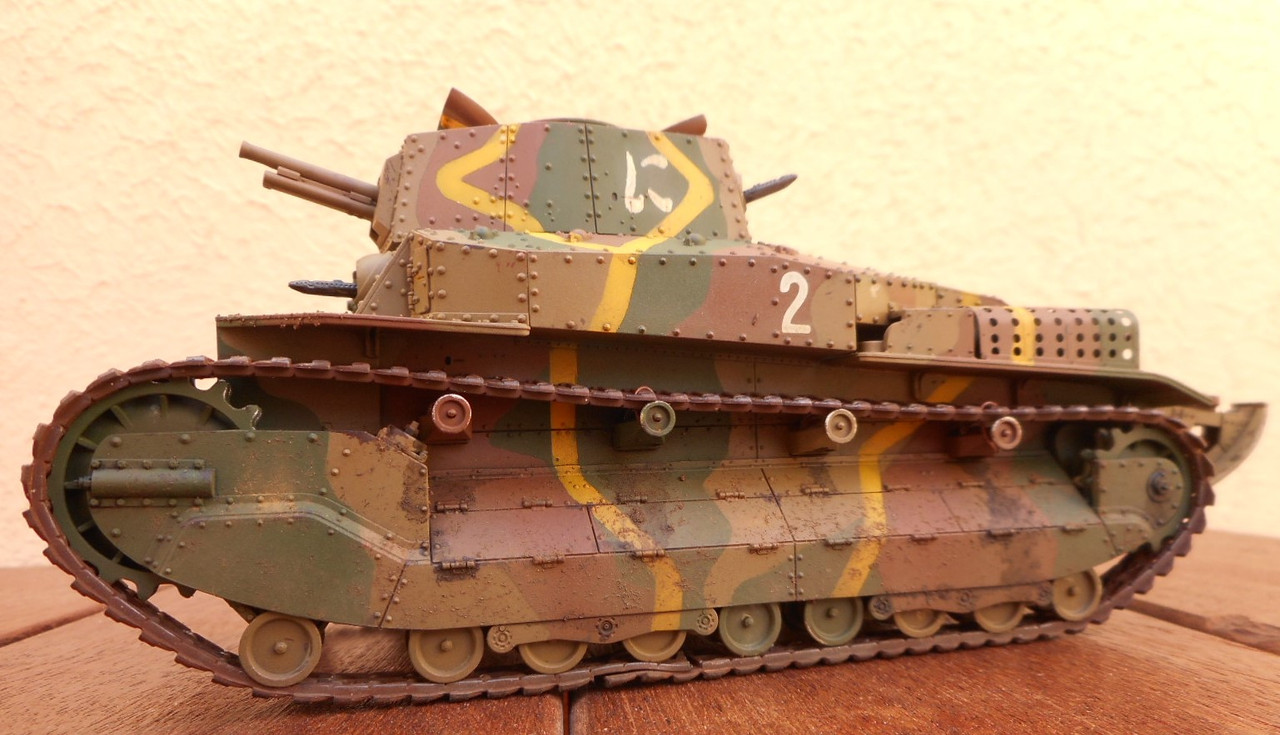
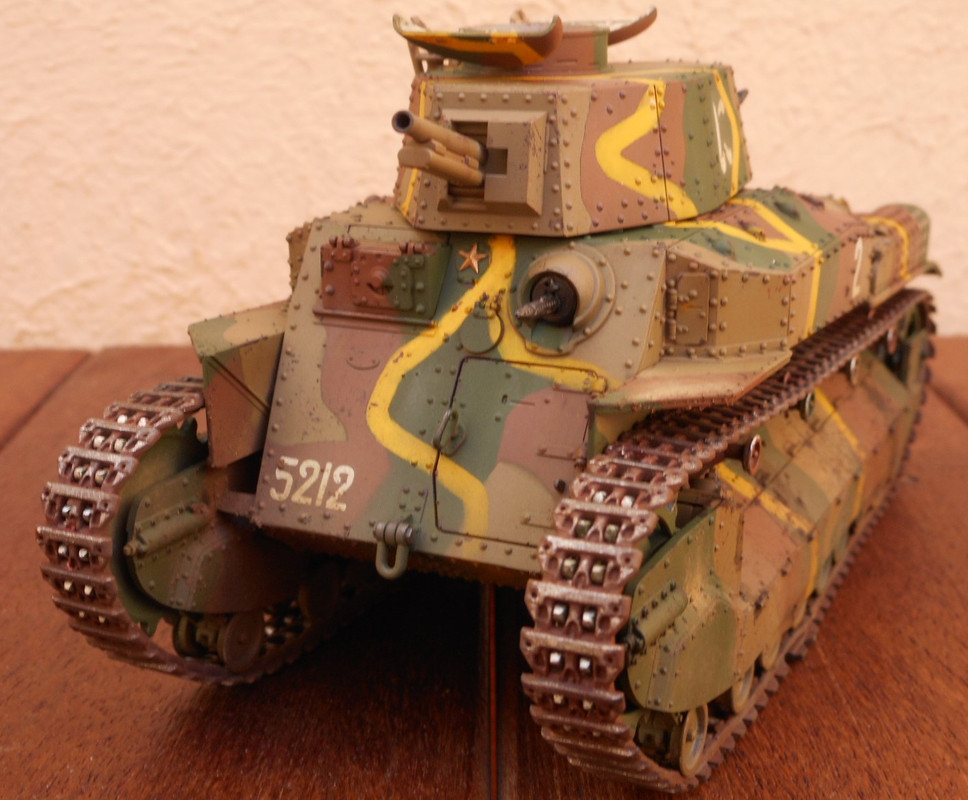
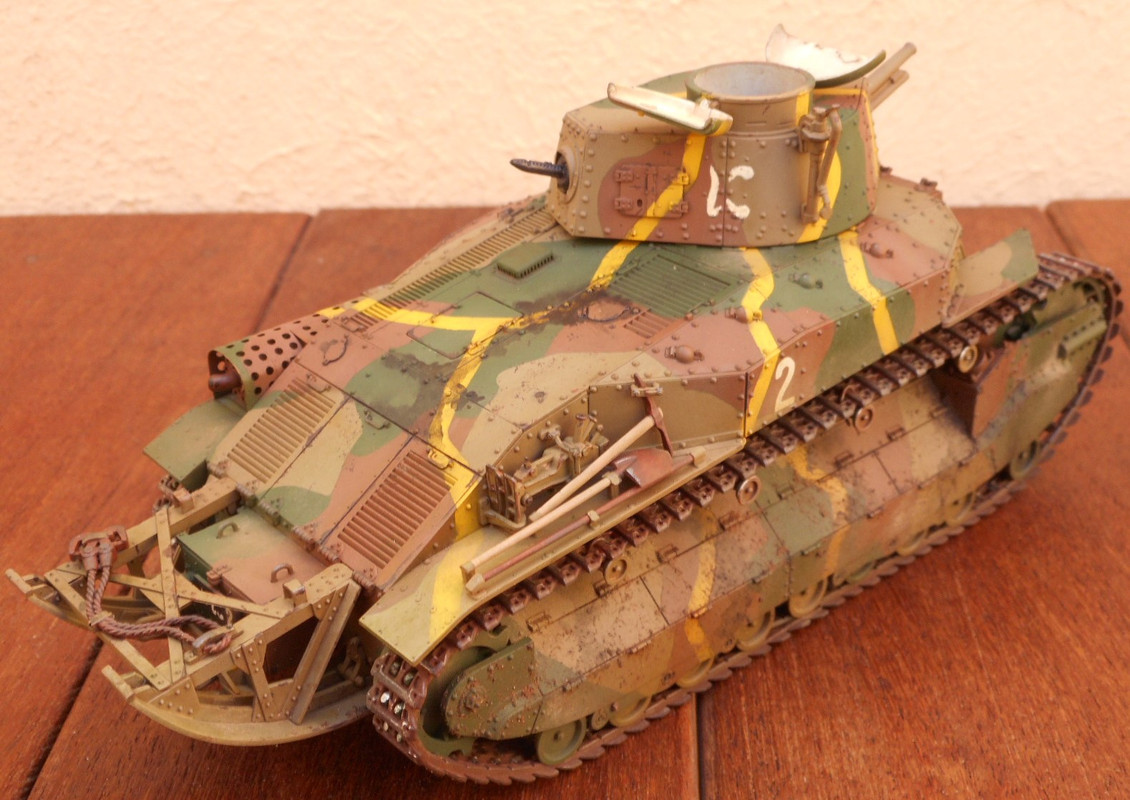
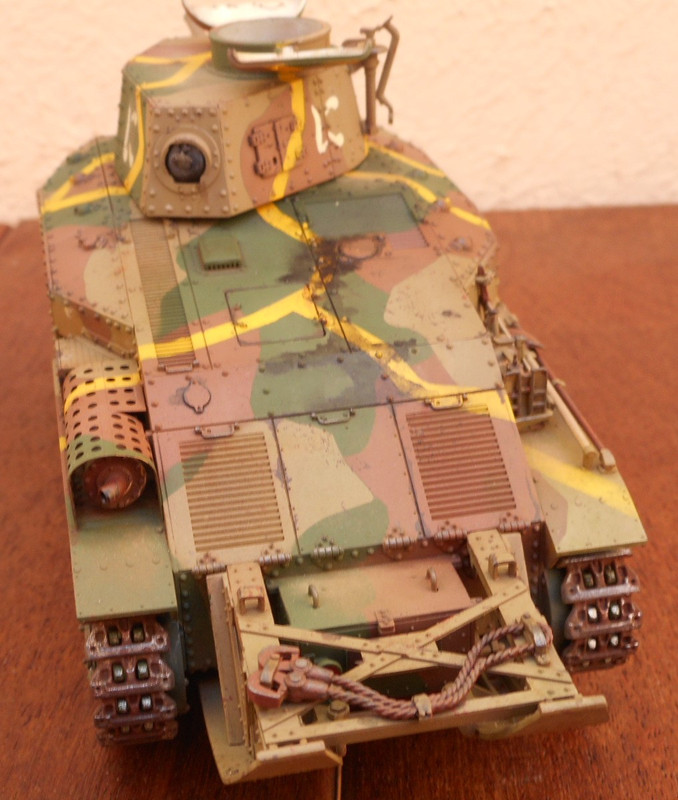
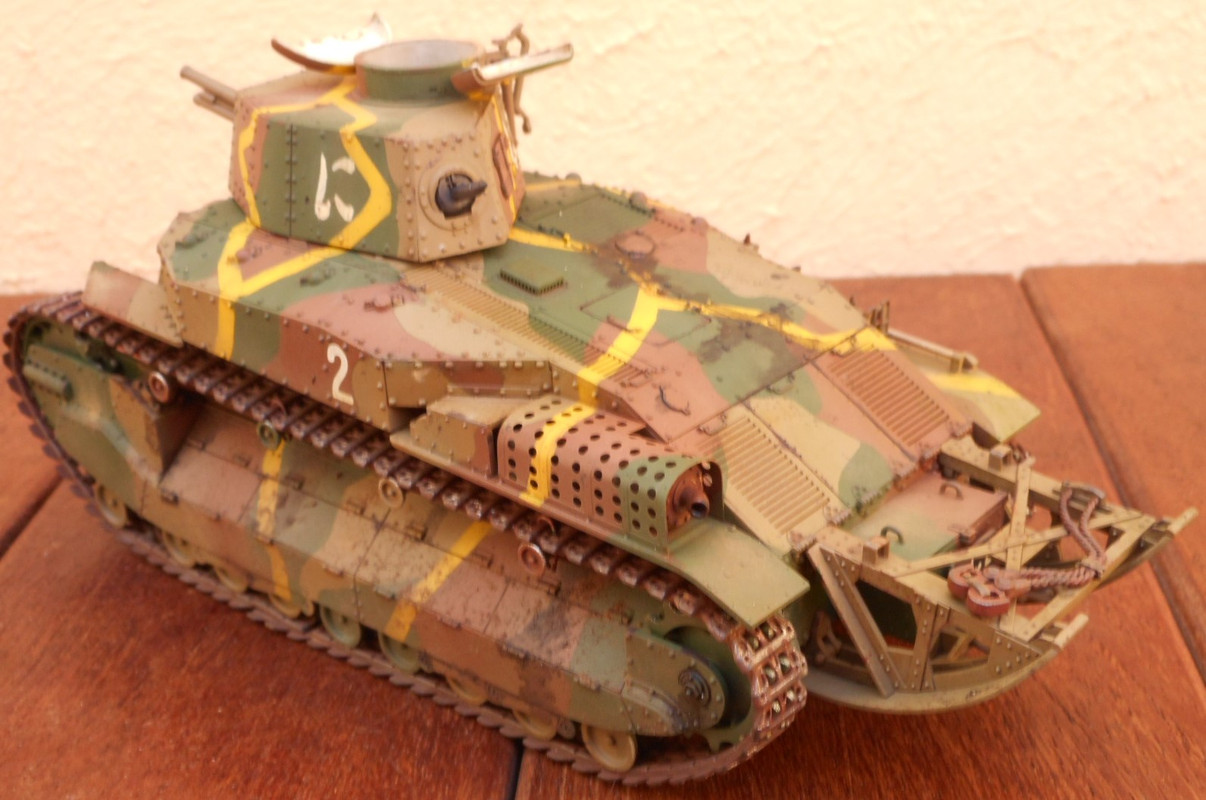
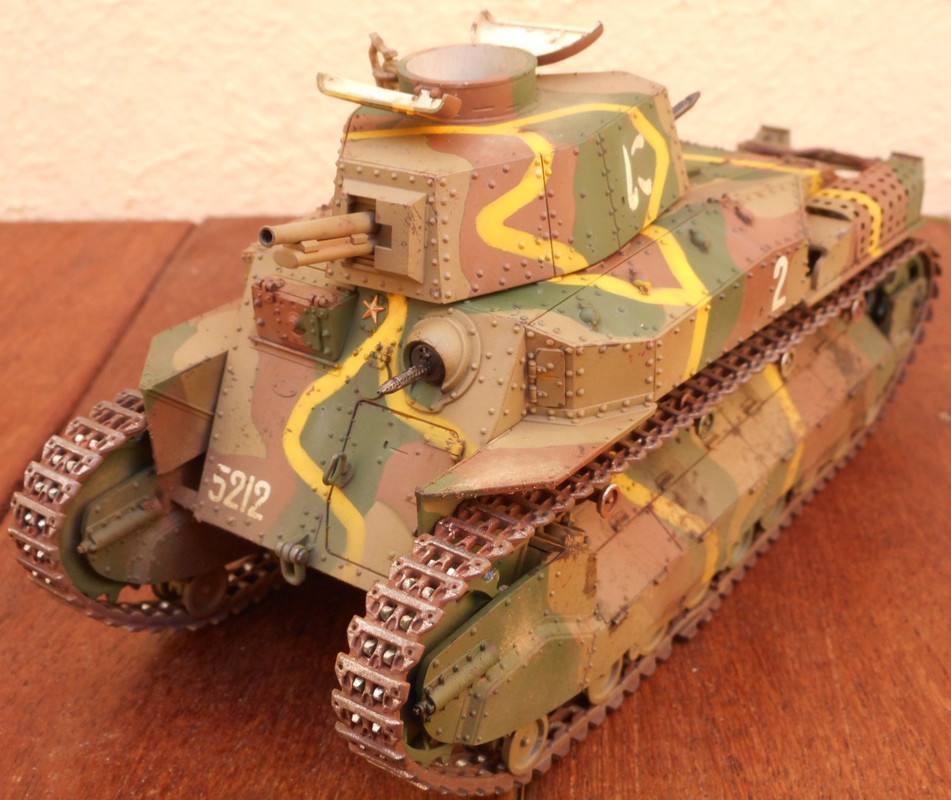
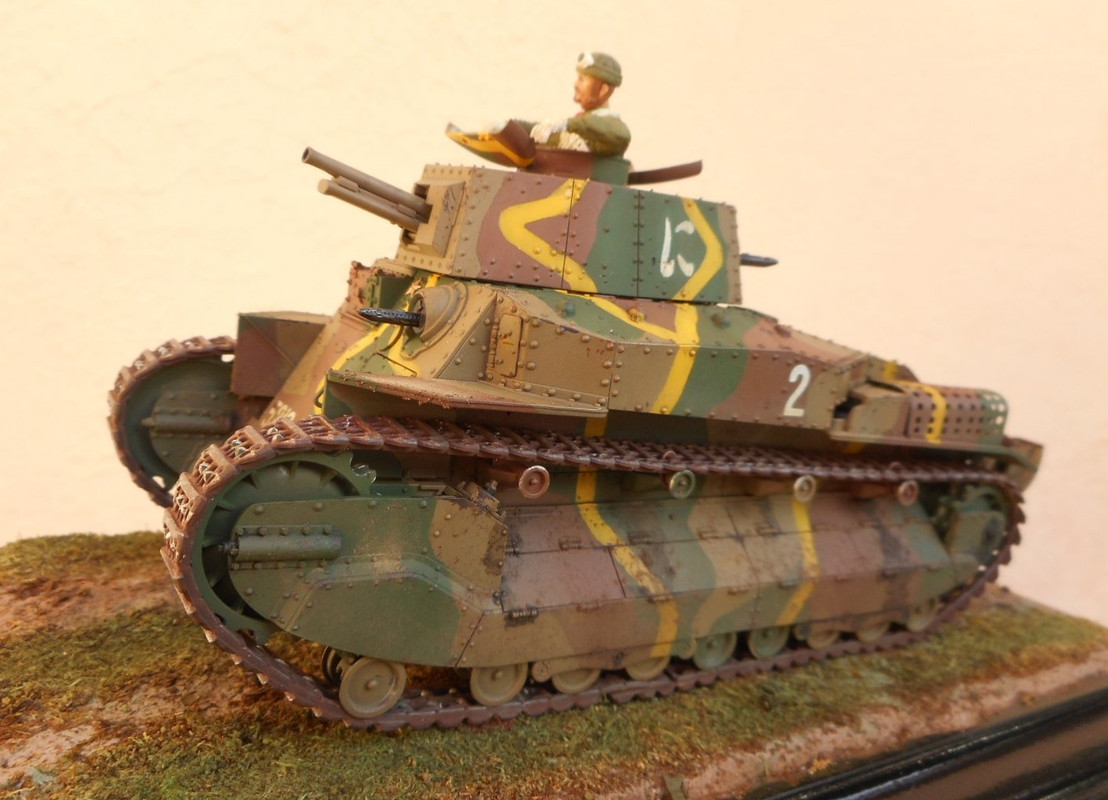
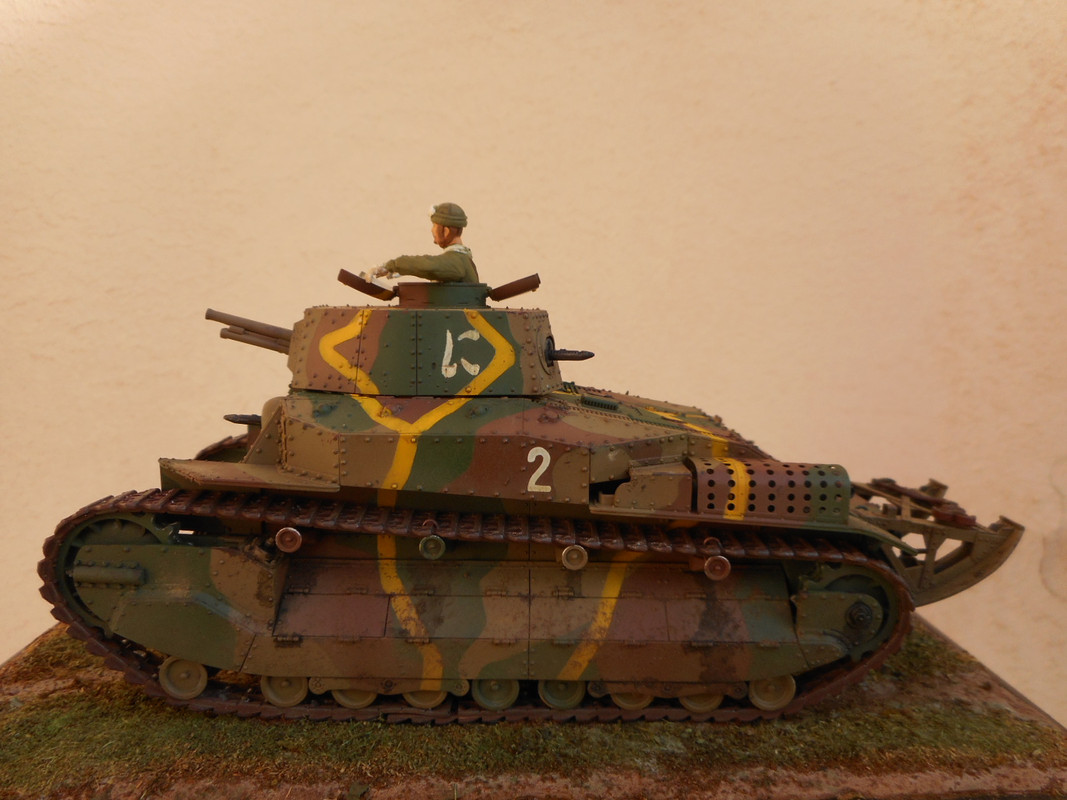
Beautiful work on this. One question; what paints did you use to get such good coverage with the yellow stripes?
New York, United States
Joined: May 02, 2013
KitMaker: 4,403 posts
Armorama: 4,078 posts
Posted: Saturday, January 19, 2019 - 08:30 PM UTC
Absolutely much appreciated! THIS is what I like to see- So different from the endless WWII GERMAN stuff that dominates this, and other model-building sites.
Omar, THIS is VERY REFRESHING!!!
Concur with Gerald: "Well Done"!!!
New York, United States
Joined: May 02, 2013
KitMaker: 4,403 posts
Armorama: 4,078 posts
Posted: Saturday, January 19, 2019 - 08:40 PM UTC
Quoted Text
Beautiful work on this. One question; what paints did you use to get such good coverage with the yellow stripes?
Hi, Chris! Just a quick note:
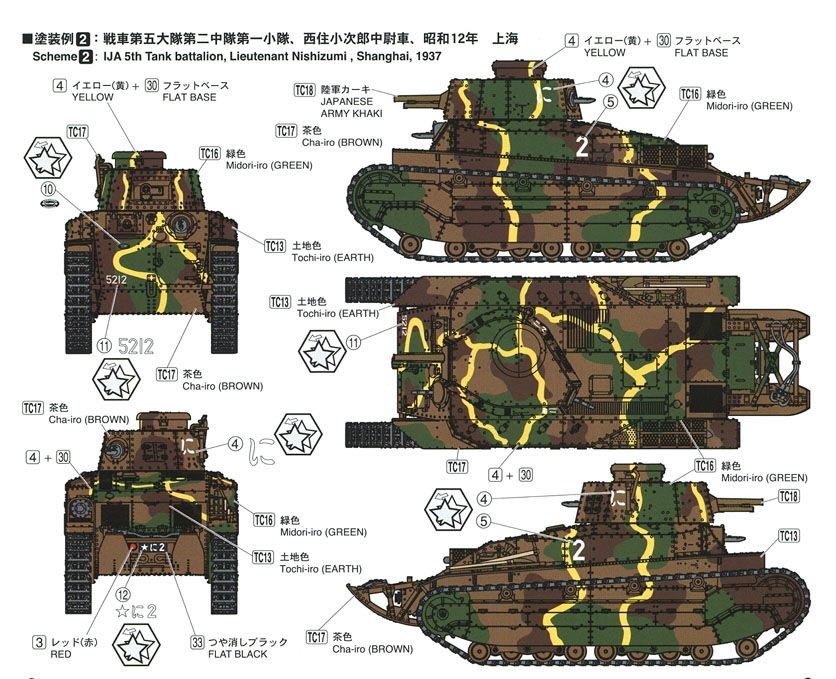
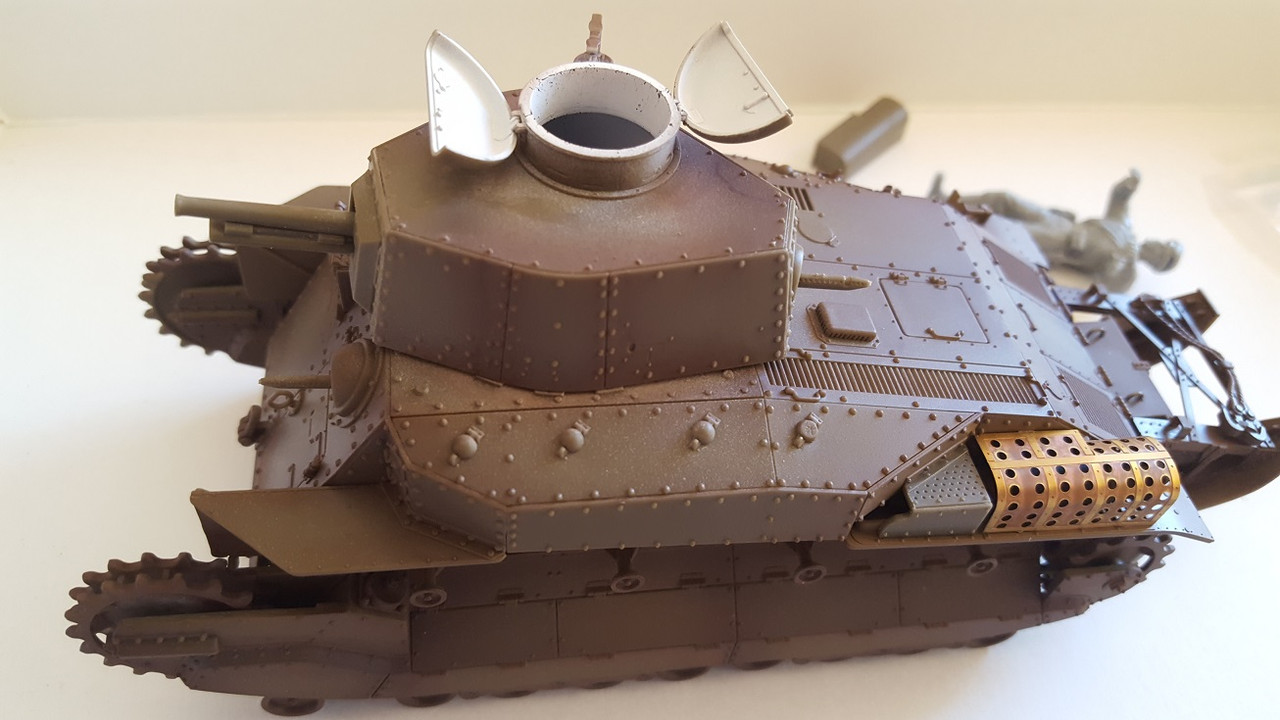
From my own personal experience, I like to airbrush the YELLOW AREAS FIRST. After the yellow dries THOROUGHLY, I will mask the potential "STRIPES" off with any suitable low tack "flex tape", and then I will airbrush the J.A. Green over the entire tank. Letting the Green dry thoroughly, I will then mask the Green areas off and proceed to airbrush the J.A. Brown onto the tank. Once the J.A. Brown has dried, I will gently peel all of the masking tape off. Invariably, painting my Japanese subject in this way yields great results. You can then go on to your favorite "weathering" processes...
You can use any of your favorite paints in this process. It all sounds rather elementary, but the above method works best for me...
Thanks for reading...
North Carolina, United States
Joined: September 16, 2004
KitMaker: 1,281 posts
Armorama: 1,222 posts
Posted: Sunday, January 20, 2019 - 02:42 AM UTC
Quoted Text
Quoted Text
Beautiful work on this. One question; what paints did you use to get such good coverage with the yellow stripes?
Hi, Chris! Just a quick note:
From my own personal experience, I like to airbrush the YELLOW AREAS FIRST. After the yellow dries THOROUGHLY, I will mask the potential "STRIPES" off with any suitable low tack "flex tape", and then I will airbrush the J.A. Green over the entire tank. Letting the Green dry thoroughly, I will then mask the Green areas off and proceed to airbrush the J.A. Brown onto the tank. Once the J.A. Brown has dried, I will gently peel all of the masking tape off. Invariably, painting my Japanese subject in this way yields great results. You can then go on to your favorite "weathering" processes...
You can use any of your favorite paints in this process. It all sounds rather elementary, but the above method works best for me...
Thanks for reading...
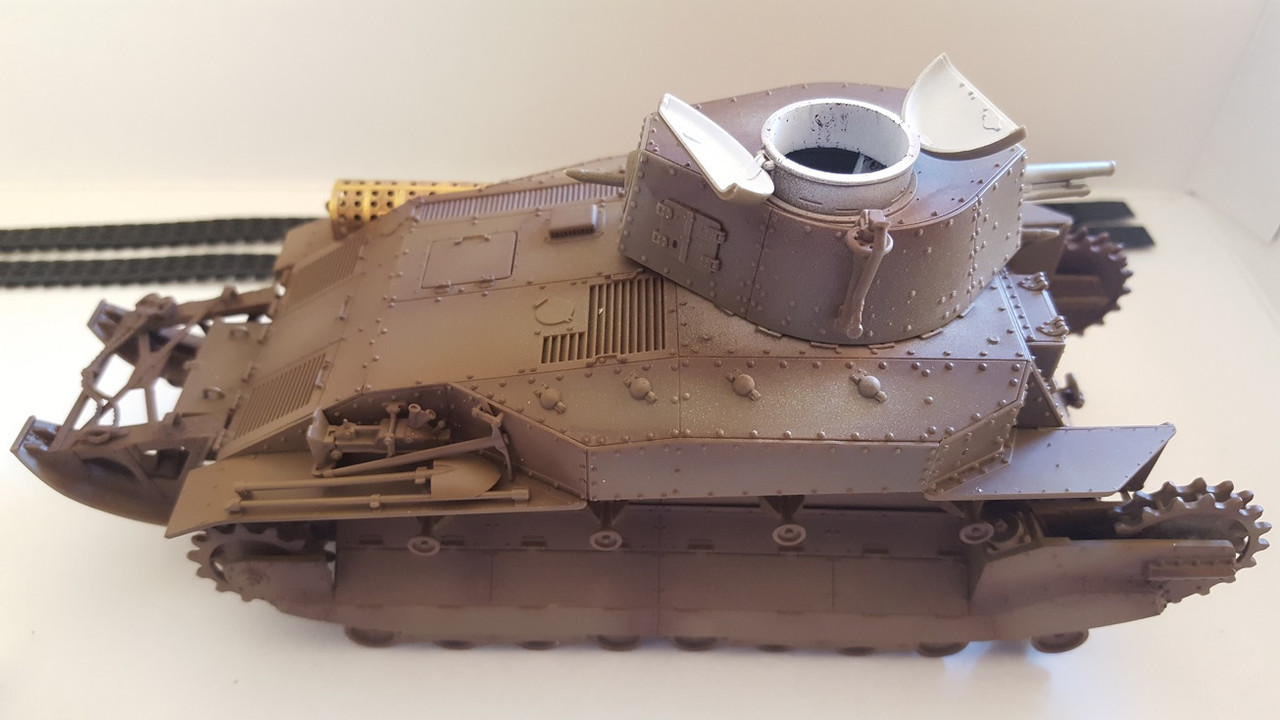
This is mine waiting to be stripped and repainted. I painted the yellow first but tried using masking fluid - big mistake. Need to try the flex tape route.

Chubut, Argentina
Joined: August 15, 2010
KitMaker: 593 posts
Armorama: 548 posts
Posted: Sunday, January 20, 2019 - 04:05 AM UTC
Thank you guys for the comments, the technique you use is as described by Dennis. The alternative that Chris shows is another interesting variant, which I see that achieves a very similar result and very pleasing to the eye, I see that it comes very well.
Regarding the colors uses all Tamiya
Khaki (80%) Dark Red Brown (20%)
Dark Red Brown
Dark Green
Flat Yellow
Greetings, Omar
Chubut, Argentina
Joined: August 15, 2010
KitMaker: 593 posts
Armorama: 548 posts
Posted: Sunday, January 20, 2019 - 09:21 AM UTC
ColinEdm
 Associate Editor
Alberta, Canada
Joined: October 15, 2013
KitMaker: 1,355 posts
Armorama: 1,229 posts
Posted: Sunday, January 20, 2019 - 01:18 PM UTC
The voices are back.....excellent....
Chubut, Argentina
Joined: August 15, 2010
KitMaker: 593 posts
Armorama: 548 posts
Posted: Sunday, January 27, 2019 - 10:30 AM UTC


