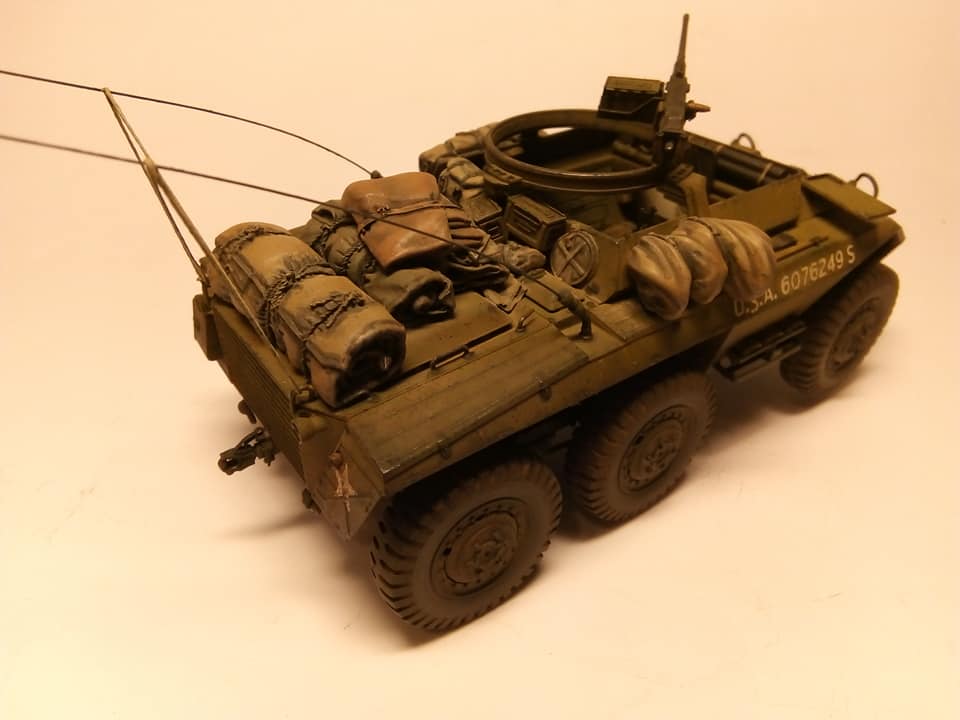
Hi all
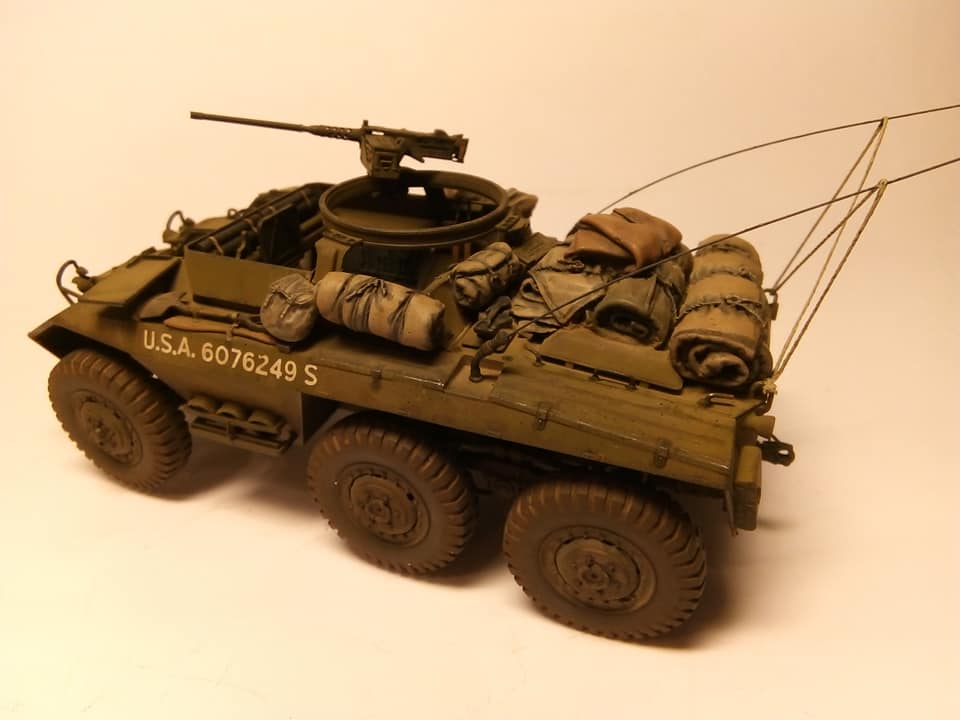
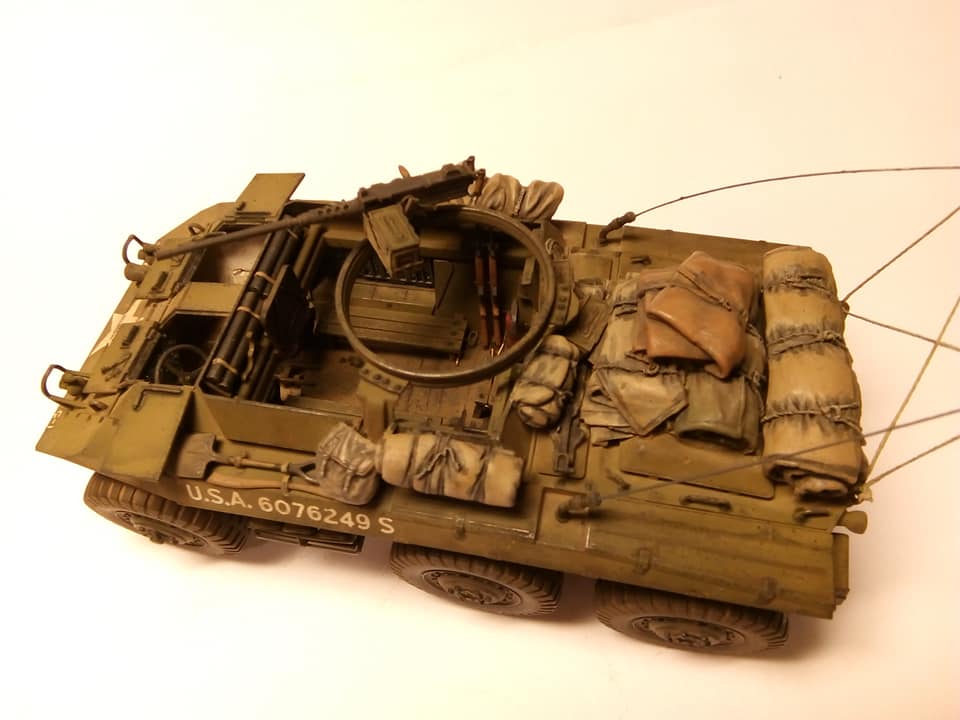
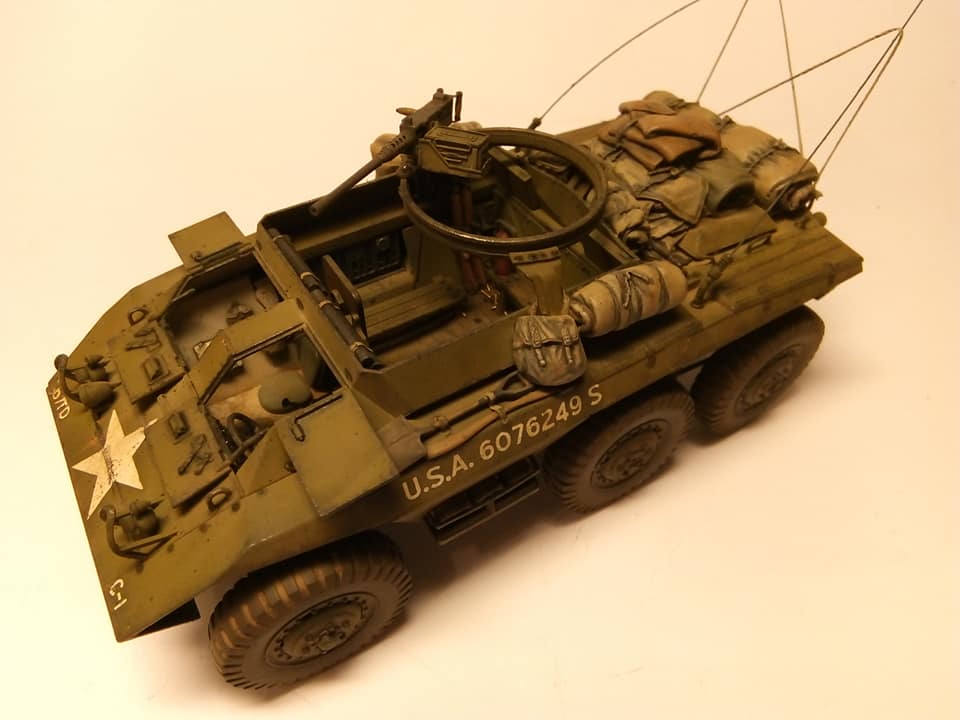
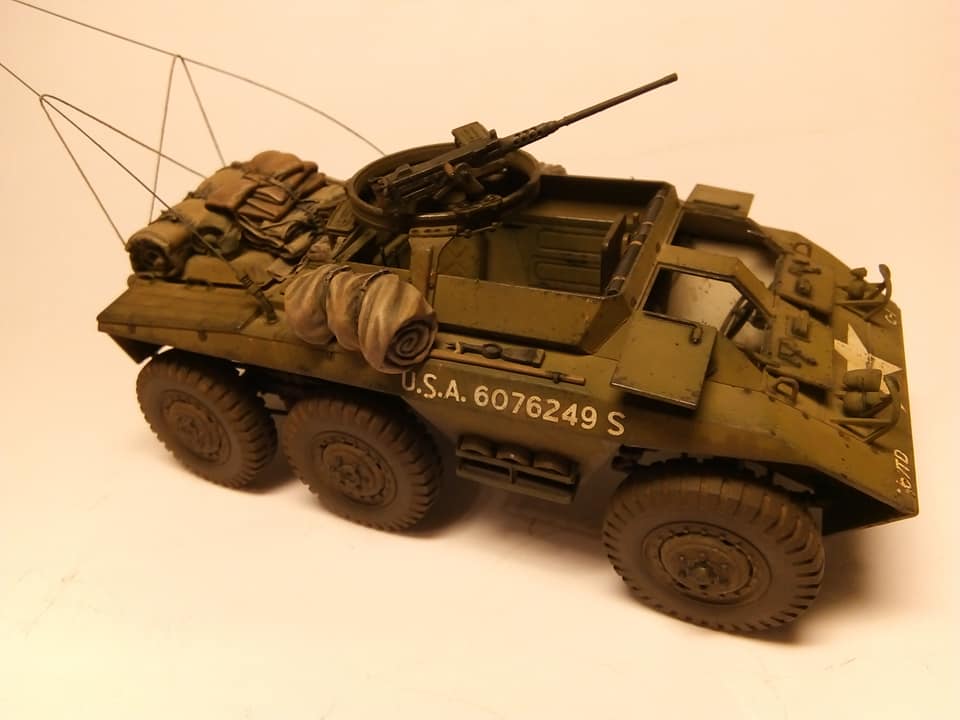
Here's my latest finished project. It's the Tamiya kit, with a lot of extras from various AM sets, such as Legend and Black Dog.
Hope you like it and do feel free to comment.
Jacob
Hosted by Darren Baker
M20 Armored Car finished
Posted: Monday, February 25, 2019 - 01:35 AM UTC
berwickj
Fyn, Denmark
Joined: April 16, 2007
KitMaker: 352 posts
Armorama: 342 posts
Joined: April 16, 2007
KitMaker: 352 posts
Armorama: 342 posts
Posted: Monday, February 25, 2019 - 02:58 AM UTC
Great job Jacob!
Love the stowage too.
John
Love the stowage too.
John
alchemymike
Texas, United States
Joined: December 14, 2011
KitMaker: 208 posts
Armorama: 192 posts
Joined: December 14, 2011
KitMaker: 208 posts
Armorama: 192 posts
Posted: Monday, February 25, 2019 - 05:34 AM UTC
like it !
Posted: Monday, February 25, 2019 - 09:23 AM UTC
Thanks guys
Jacob
Jacob
bat_213
Canada
Joined: January 07, 2019
KitMaker: 110 posts
Armorama: 95 posts
Joined: January 07, 2019
KitMaker: 110 posts
Armorama: 95 posts
Posted: Monday, February 25, 2019 - 12:54 PM UTC
great build the paint and the adons realy ad to the build ,very nice .
ericadeane
Michigan, United States
Joined: October 28, 2002
KitMaker: 4,021 posts
Armorama: 3,947 posts
Joined: October 28, 2002
KitMaker: 4,021 posts
Armorama: 3,947 posts
Posted: Wednesday, February 27, 2019 - 04:56 PM UTC
Beautiful work! May I make two comments?
1) maybe look at your lighting rig? Your pics have a strong yellowish hue. I use "true" light bulbs. I forget their technical description
2) Totally feel free to ignore this nitpick: the front armor slabs for the driver's compartment laid flat against the glacis when open. See how yours sit a little proud? And see that rectangular cross beam between them? That's actually the lock that keeps them in place. Have a look here: http://svsm.org/albums/M8_Greyhound/IMG_3479.jpg
Posted: Wednesday, February 27, 2019 - 06:56 PM UTC
Thanks Roy for the comments. You're right about the lighting, it's really not the best "glow" in the color. The pictures was taken with my cheap cell phone, which probably didn't add to the value of the quality either
And I do see what you mean about the angle of the open hatches. I really wasn't aware of this, but I think the molded on beam, might be on the rather large side of what it should have been, when comparing to the nice photo you've send, I actually think, that the hacthes are resting on this beam, insted of being held in place by it. I'll keep this in mind, when I have a go on the M8, which is already in my stash
Thanks again
Jacob
robw_uk
England - North East, United Kingdom
Joined: June 22, 2010
KitMaker: 1,224 posts
Armorama: 1,207 posts
Joined: June 22, 2010
KitMaker: 1,224 posts
Armorama: 1,207 posts
Posted: Sunday, May 12, 2019 - 07:31 AM UTC
great finish. am really tempted by the 2 versions Tamiya do. Think there is scope for lots of scratchbuilding and detailing for a longer build
Posted: Sunday, May 12, 2019 - 07:46 AM UTC
Jacob,
Thank you for sharing your build. I like how the antennae bend, look like they're ready to whip back up if there wasn't something tying them down. Very realistic.
I also like how you've seemed to have gotten the amount of chipping just right-not too much, not too little.
Great build!
Take care,
Don "Lakota"
b2nhvi
Nevada, United States
Joined: June 17, 2016
KitMaker: 1,124 posts
Armorama: 1,014 posts
Joined: June 17, 2016
KitMaker: 1,124 posts
Armorama: 1,014 posts
Posted: Sunday, May 12, 2019 - 09:02 AM UTC
Sorta off topic, but.... seeing the open top on the M20 popped the question in my mind .... Was there ever an M20 modified as a mortar carrier? Looks like if you remove the frame / .50 mount an 81mm might fit. (if the frame would handle the recoil. I heard that was an issue with the early mortar half tracks.) It'd give the recce units a bit of a punch.
Frenchy
Rhone, France
Joined: December 02, 2002
KitMaker: 12,719 posts
Armorama: 12,507 posts
Joined: December 02, 2002
KitMaker: 12,719 posts
Armorama: 12,507 posts
Posted: Sunday, May 12, 2019 - 09:12 AM UTC
Quoted Text
Sorta off topic, but.... seeing the open top on the M20 popped the question in my mind .... Was there ever an M20 modified as a mortar carrier?
In the what-if world, everything's possible
http://alliedarmor.blogspot.com/2012/04/m20a1-81mm-mortar-carrier-eto.html
H.P.