_GOTOBOTTOM
Constructive Feedback
For in-progress or completed build photos. Give and get contructive feedback!
Binge Build: Patton Tanks!
BravoTwoZero
Visit this Community
California, United States
Joined: June 11, 2009
KitMaker: 461 posts
Armorama: 370 posts
Posted: Monday, February 25, 2019 - 08:41 AM UTC
Hi, I'm Joseph. You may remember me from such threads as "Binge Build: Takom T-55s" or "Trumpeter 1/35 ASU-85 Mod.1970". Well, I am back at it with another Binge Build. This time the Tank Du Jour is any tank in the Patton Family. From M46 through M60. I have four builds that I am con-currently working on and maybe three more in line.

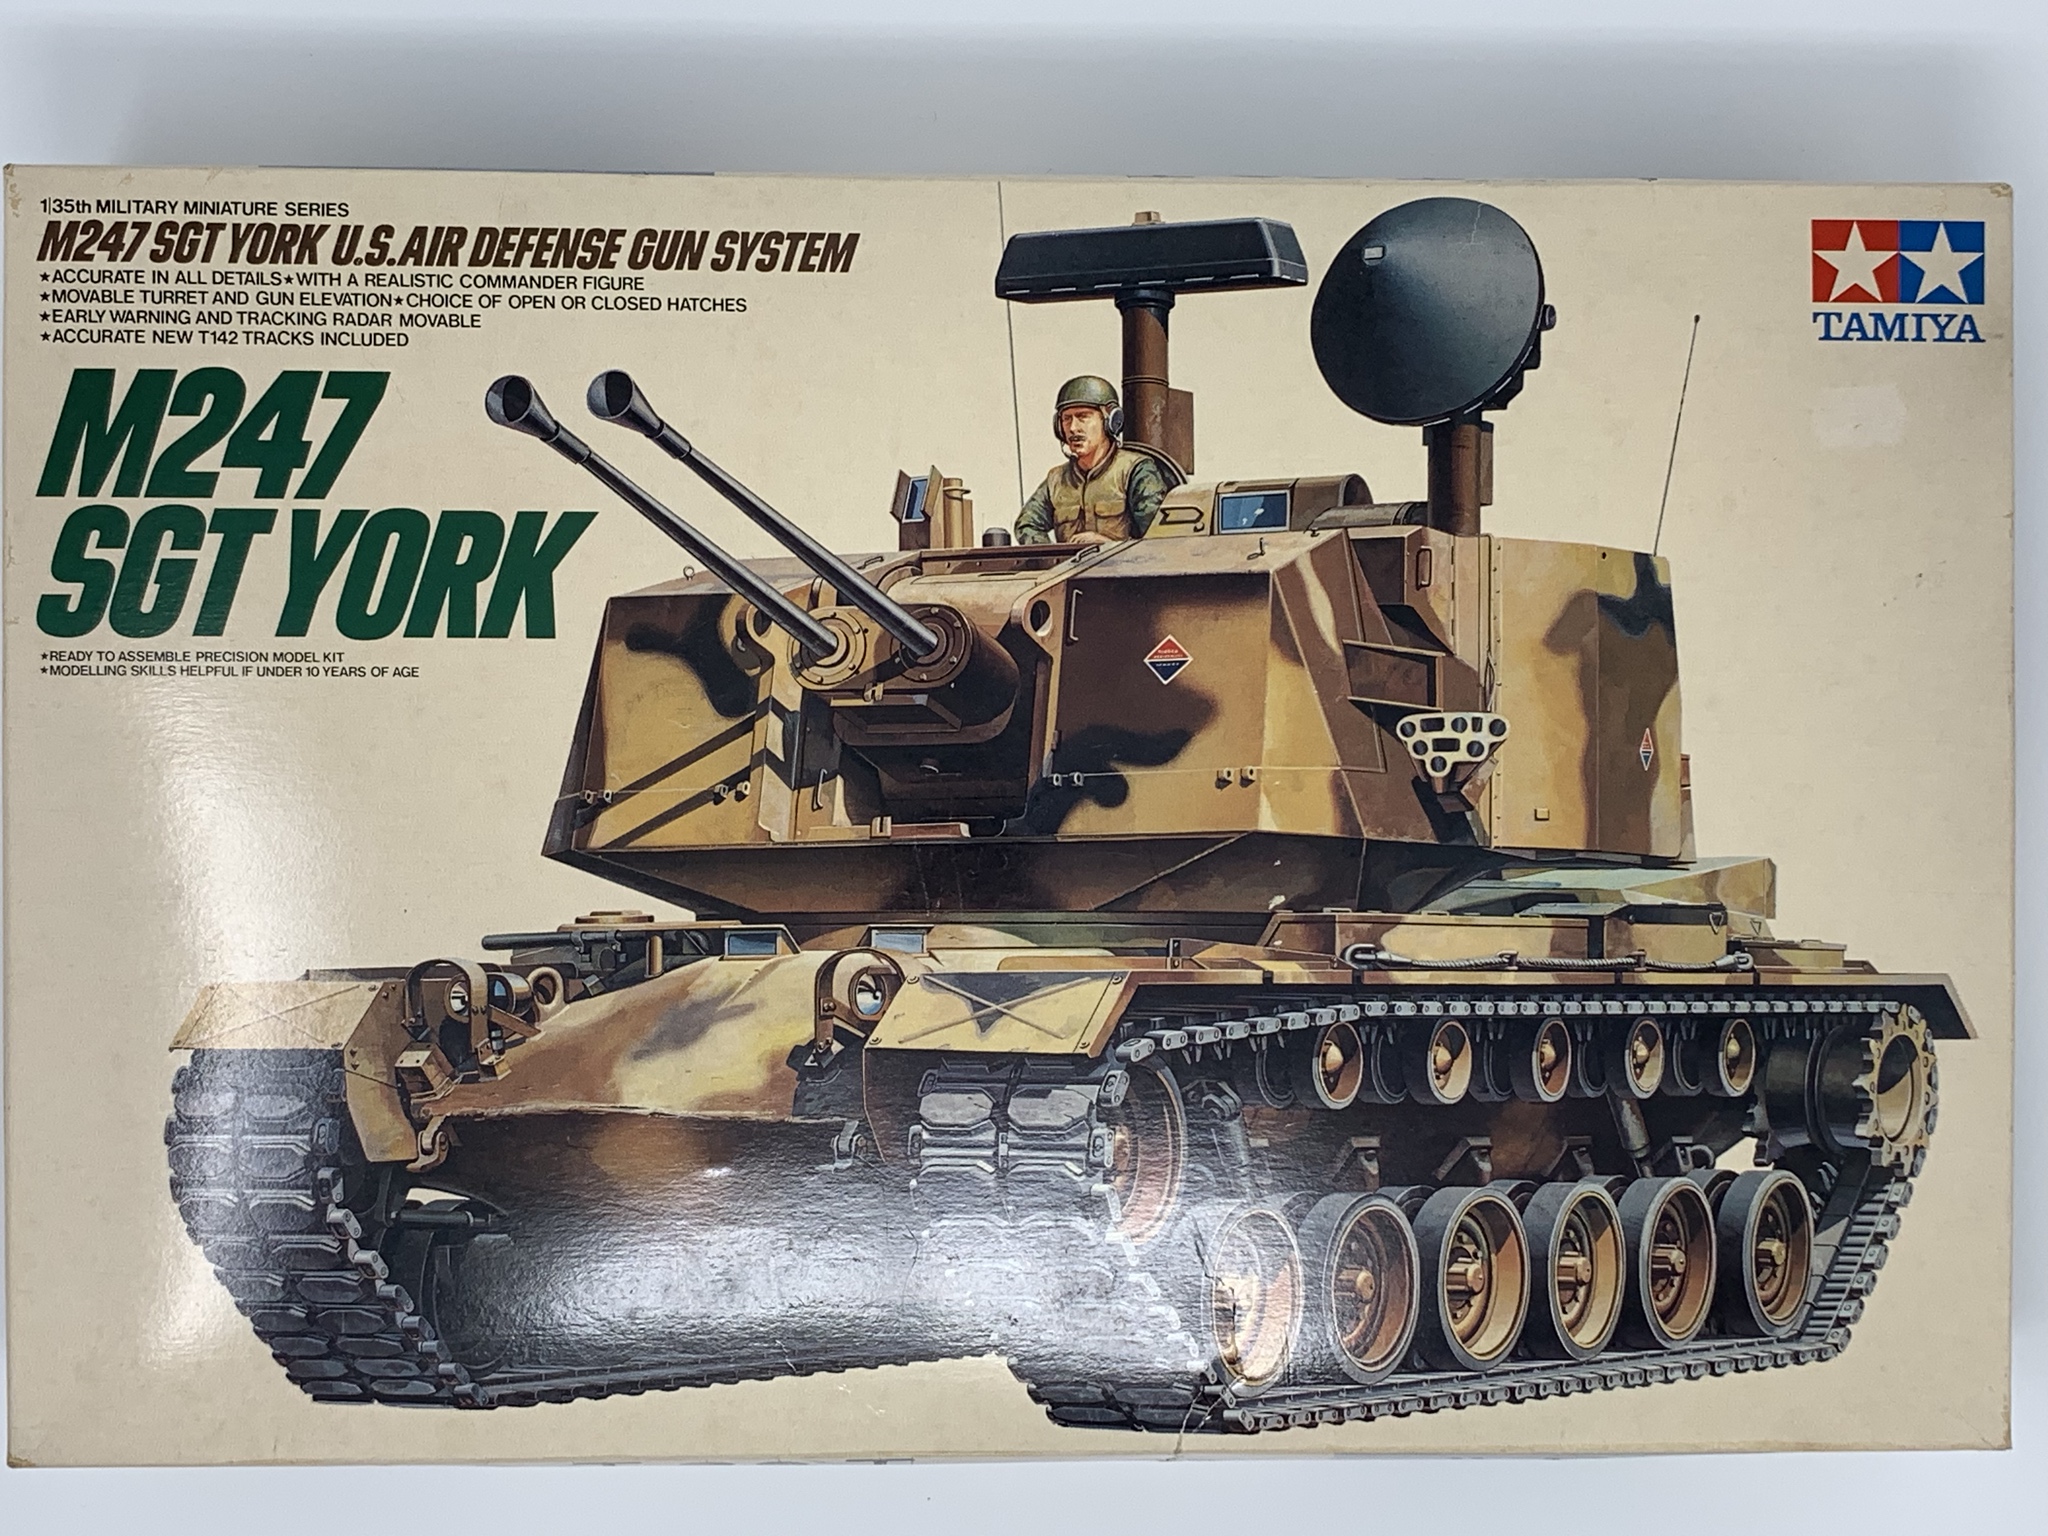
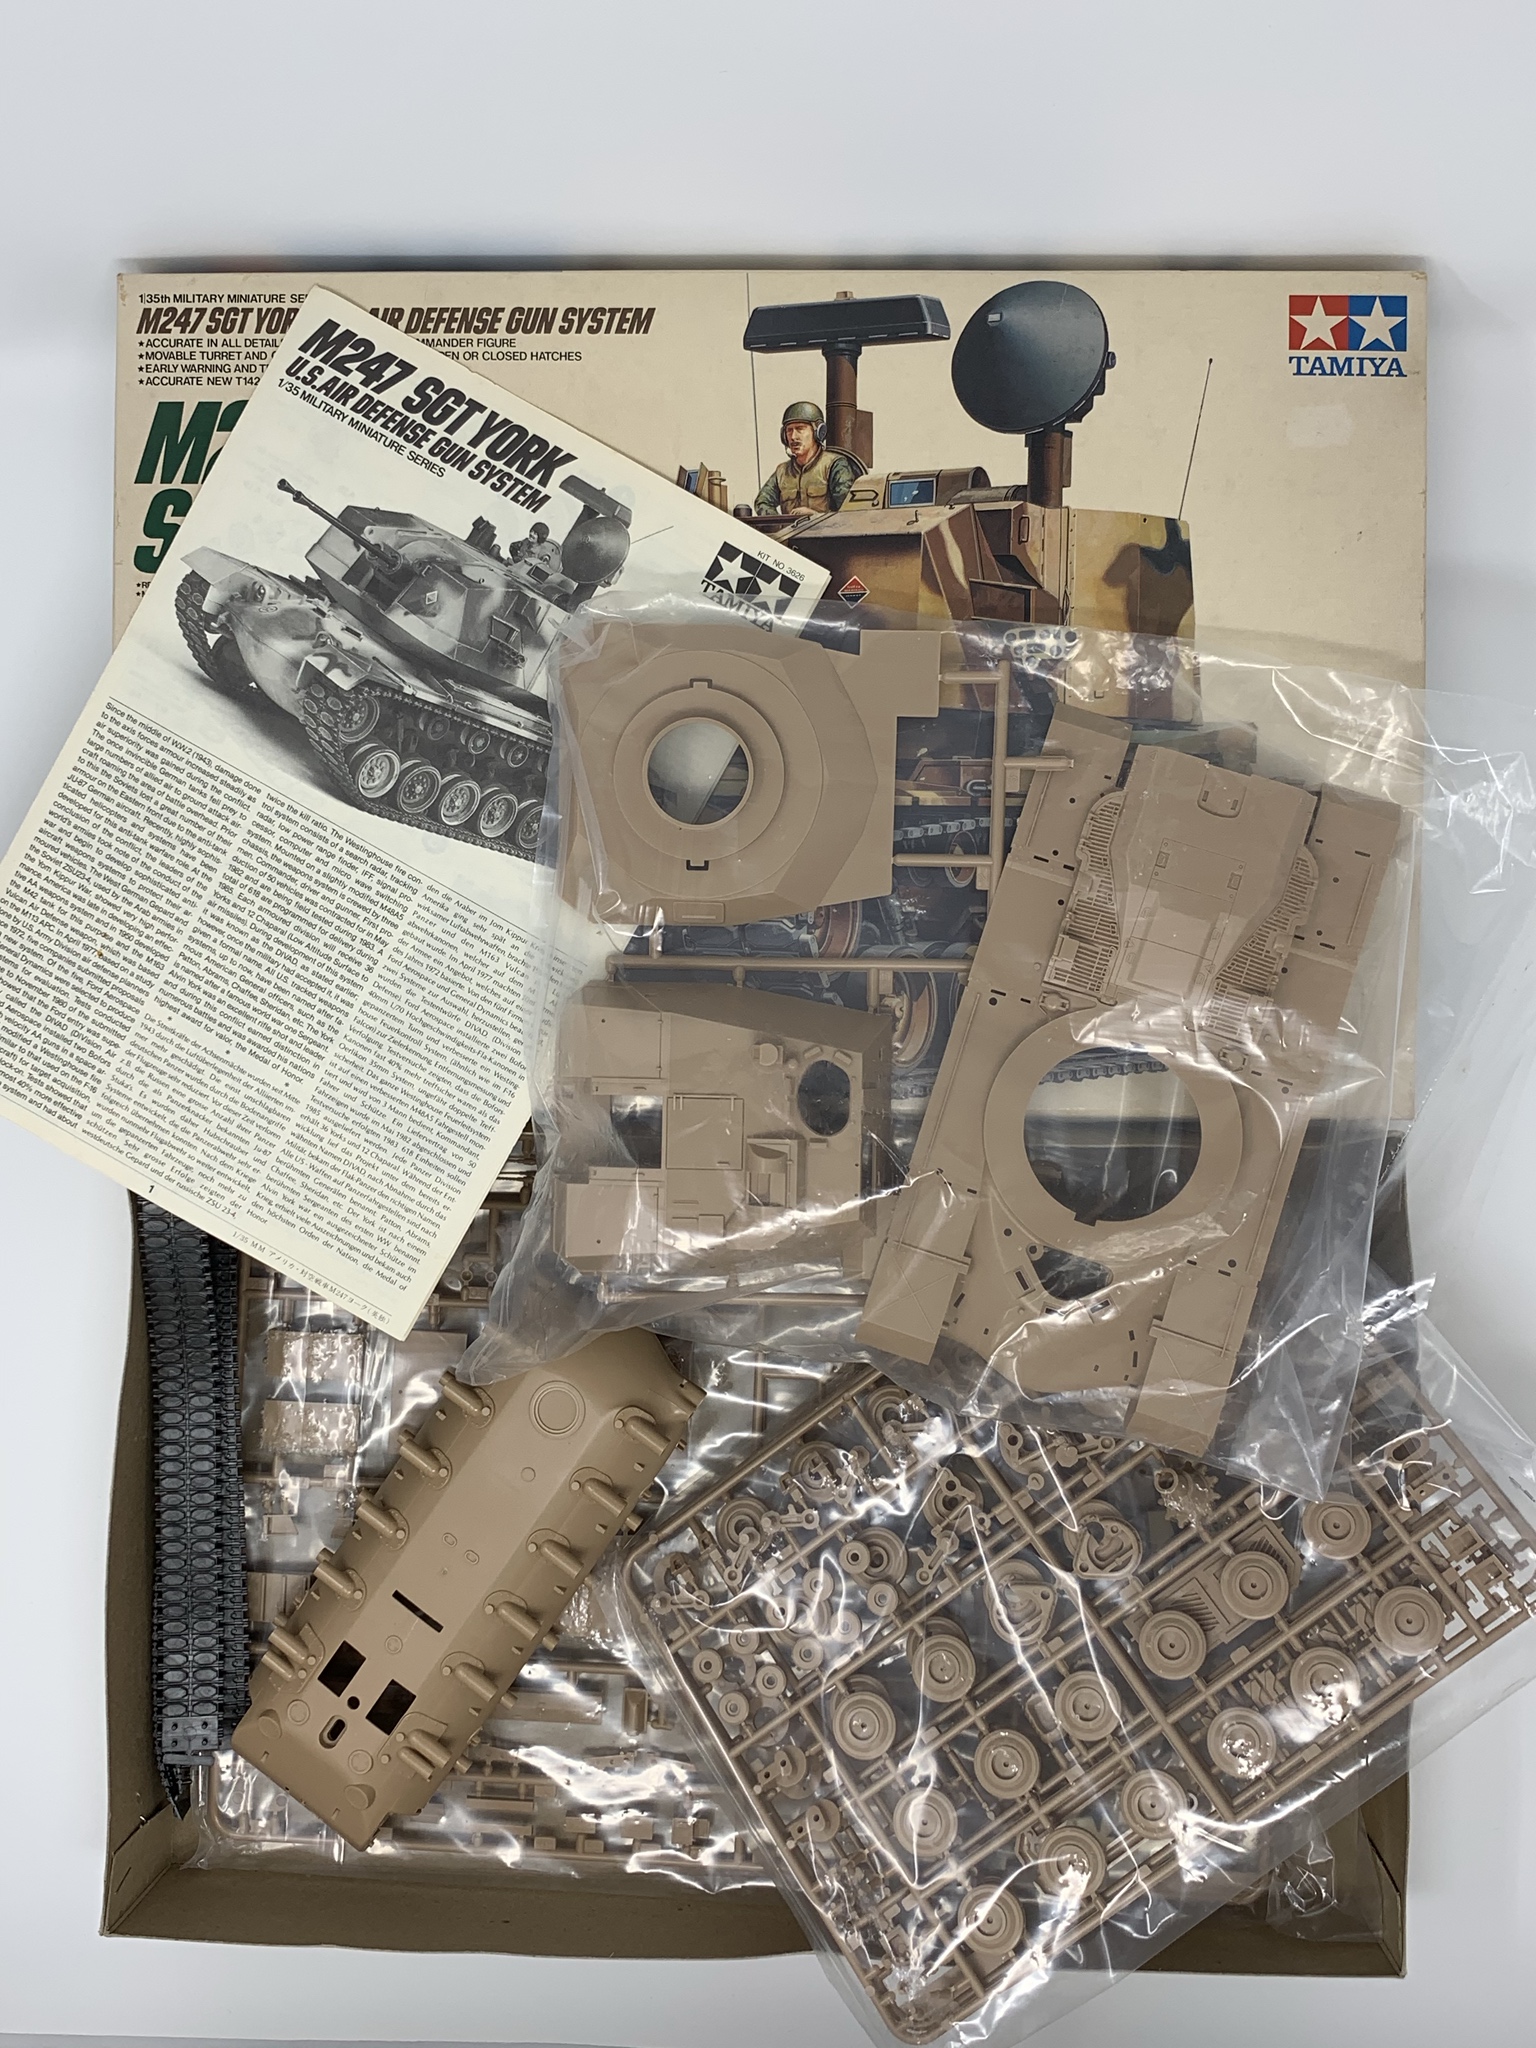
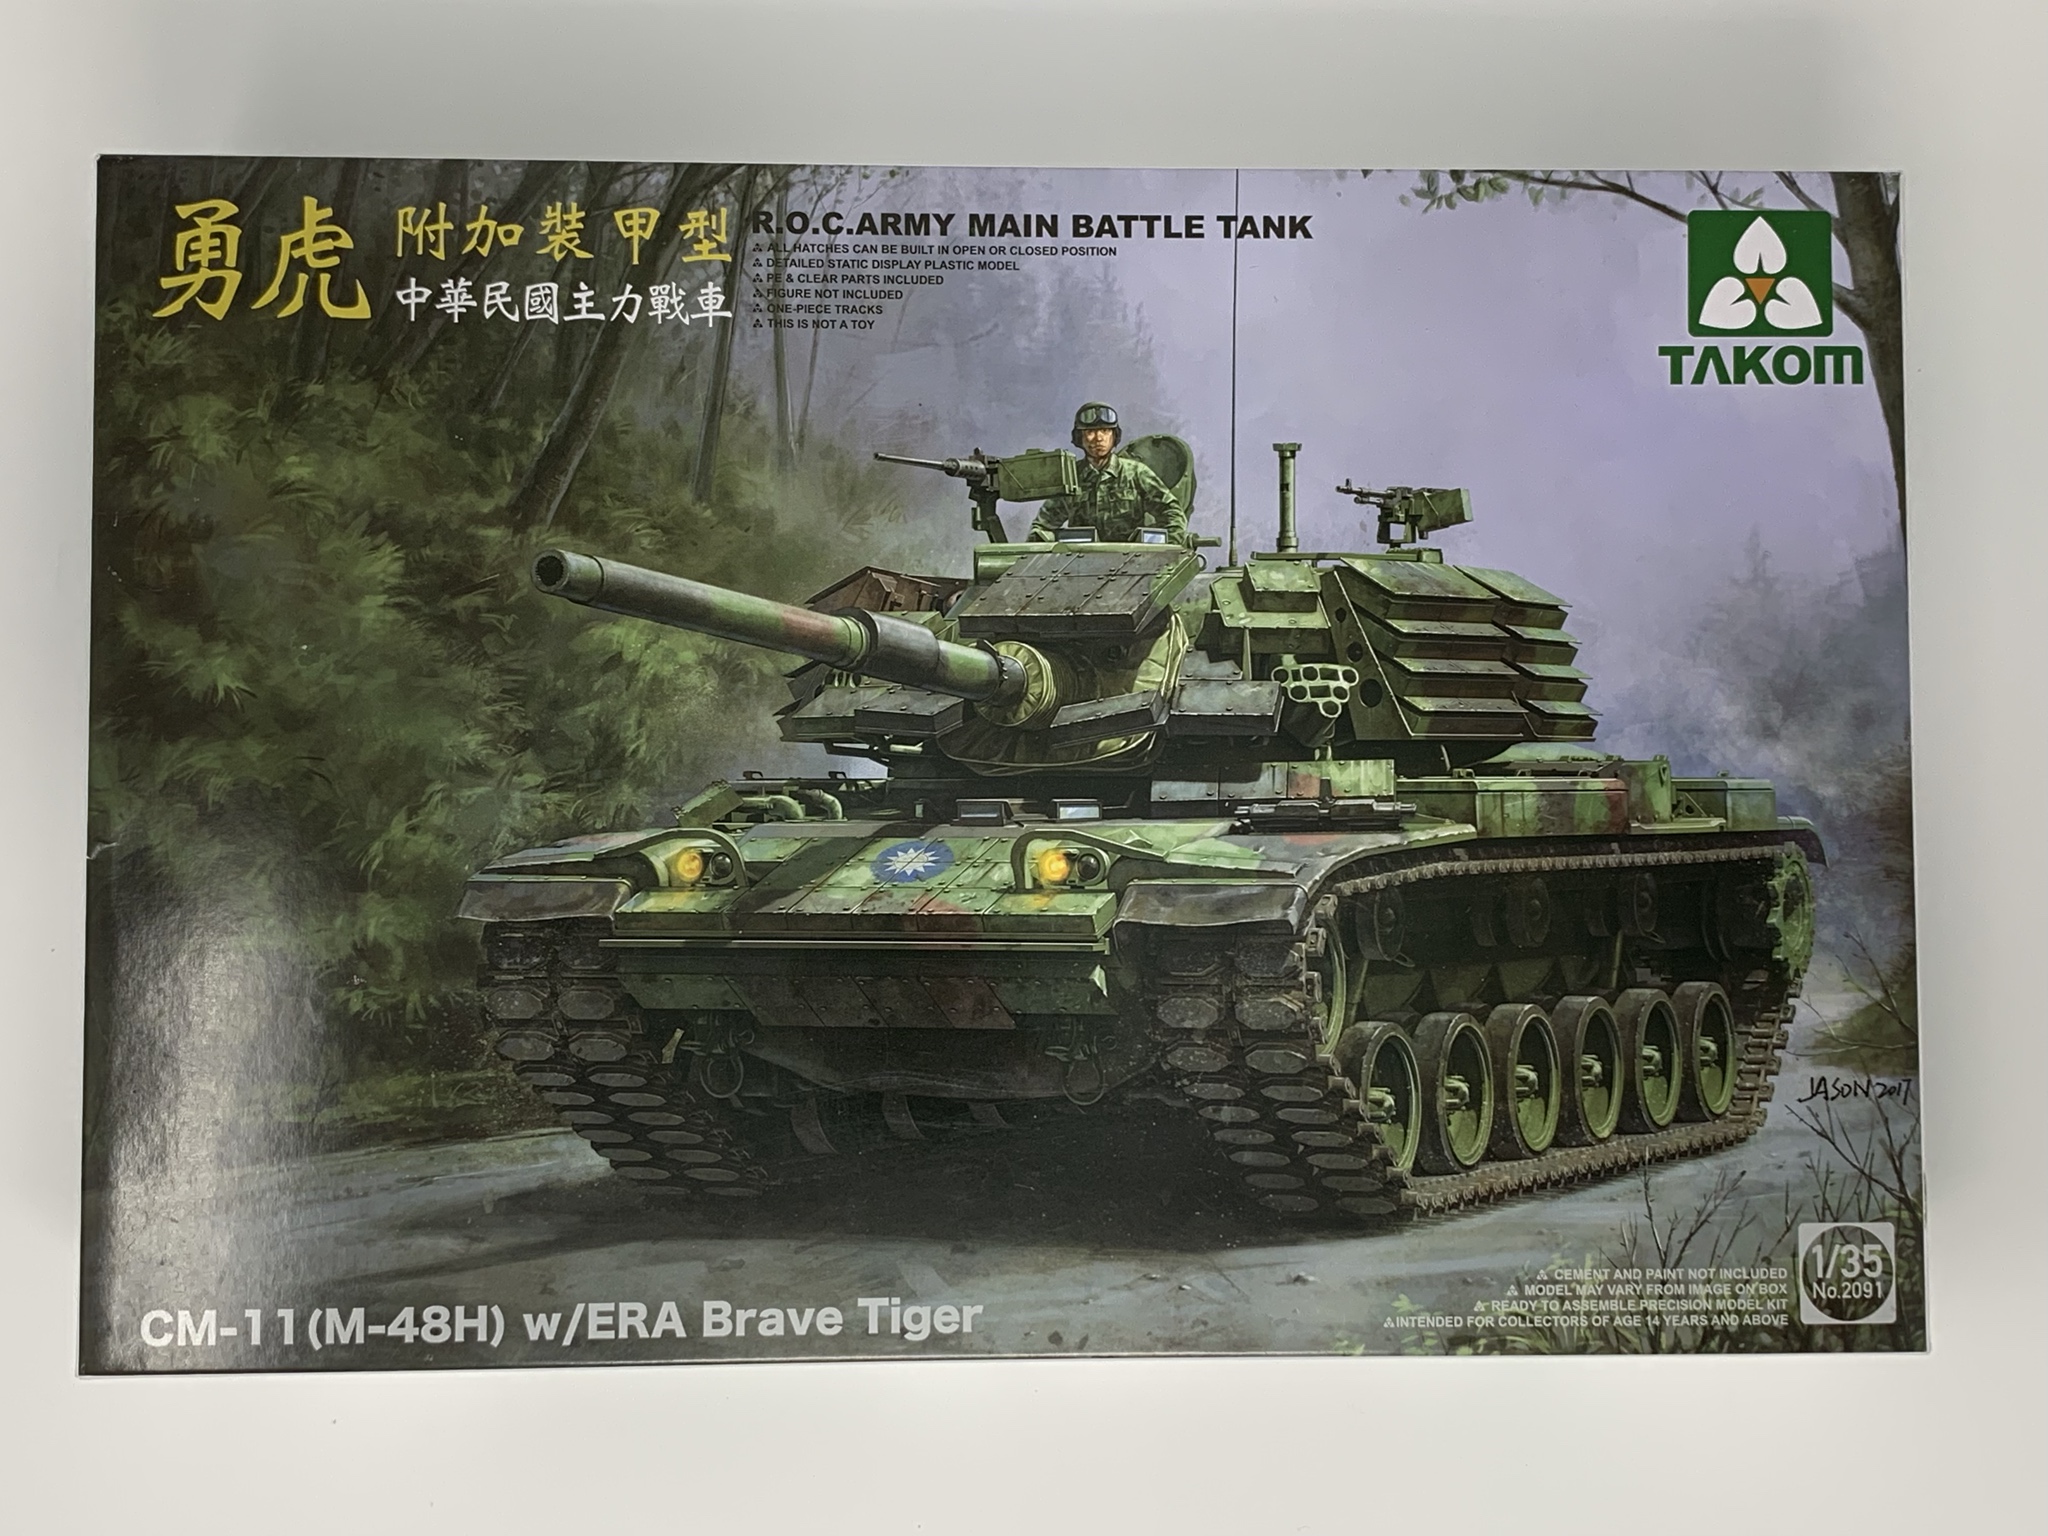
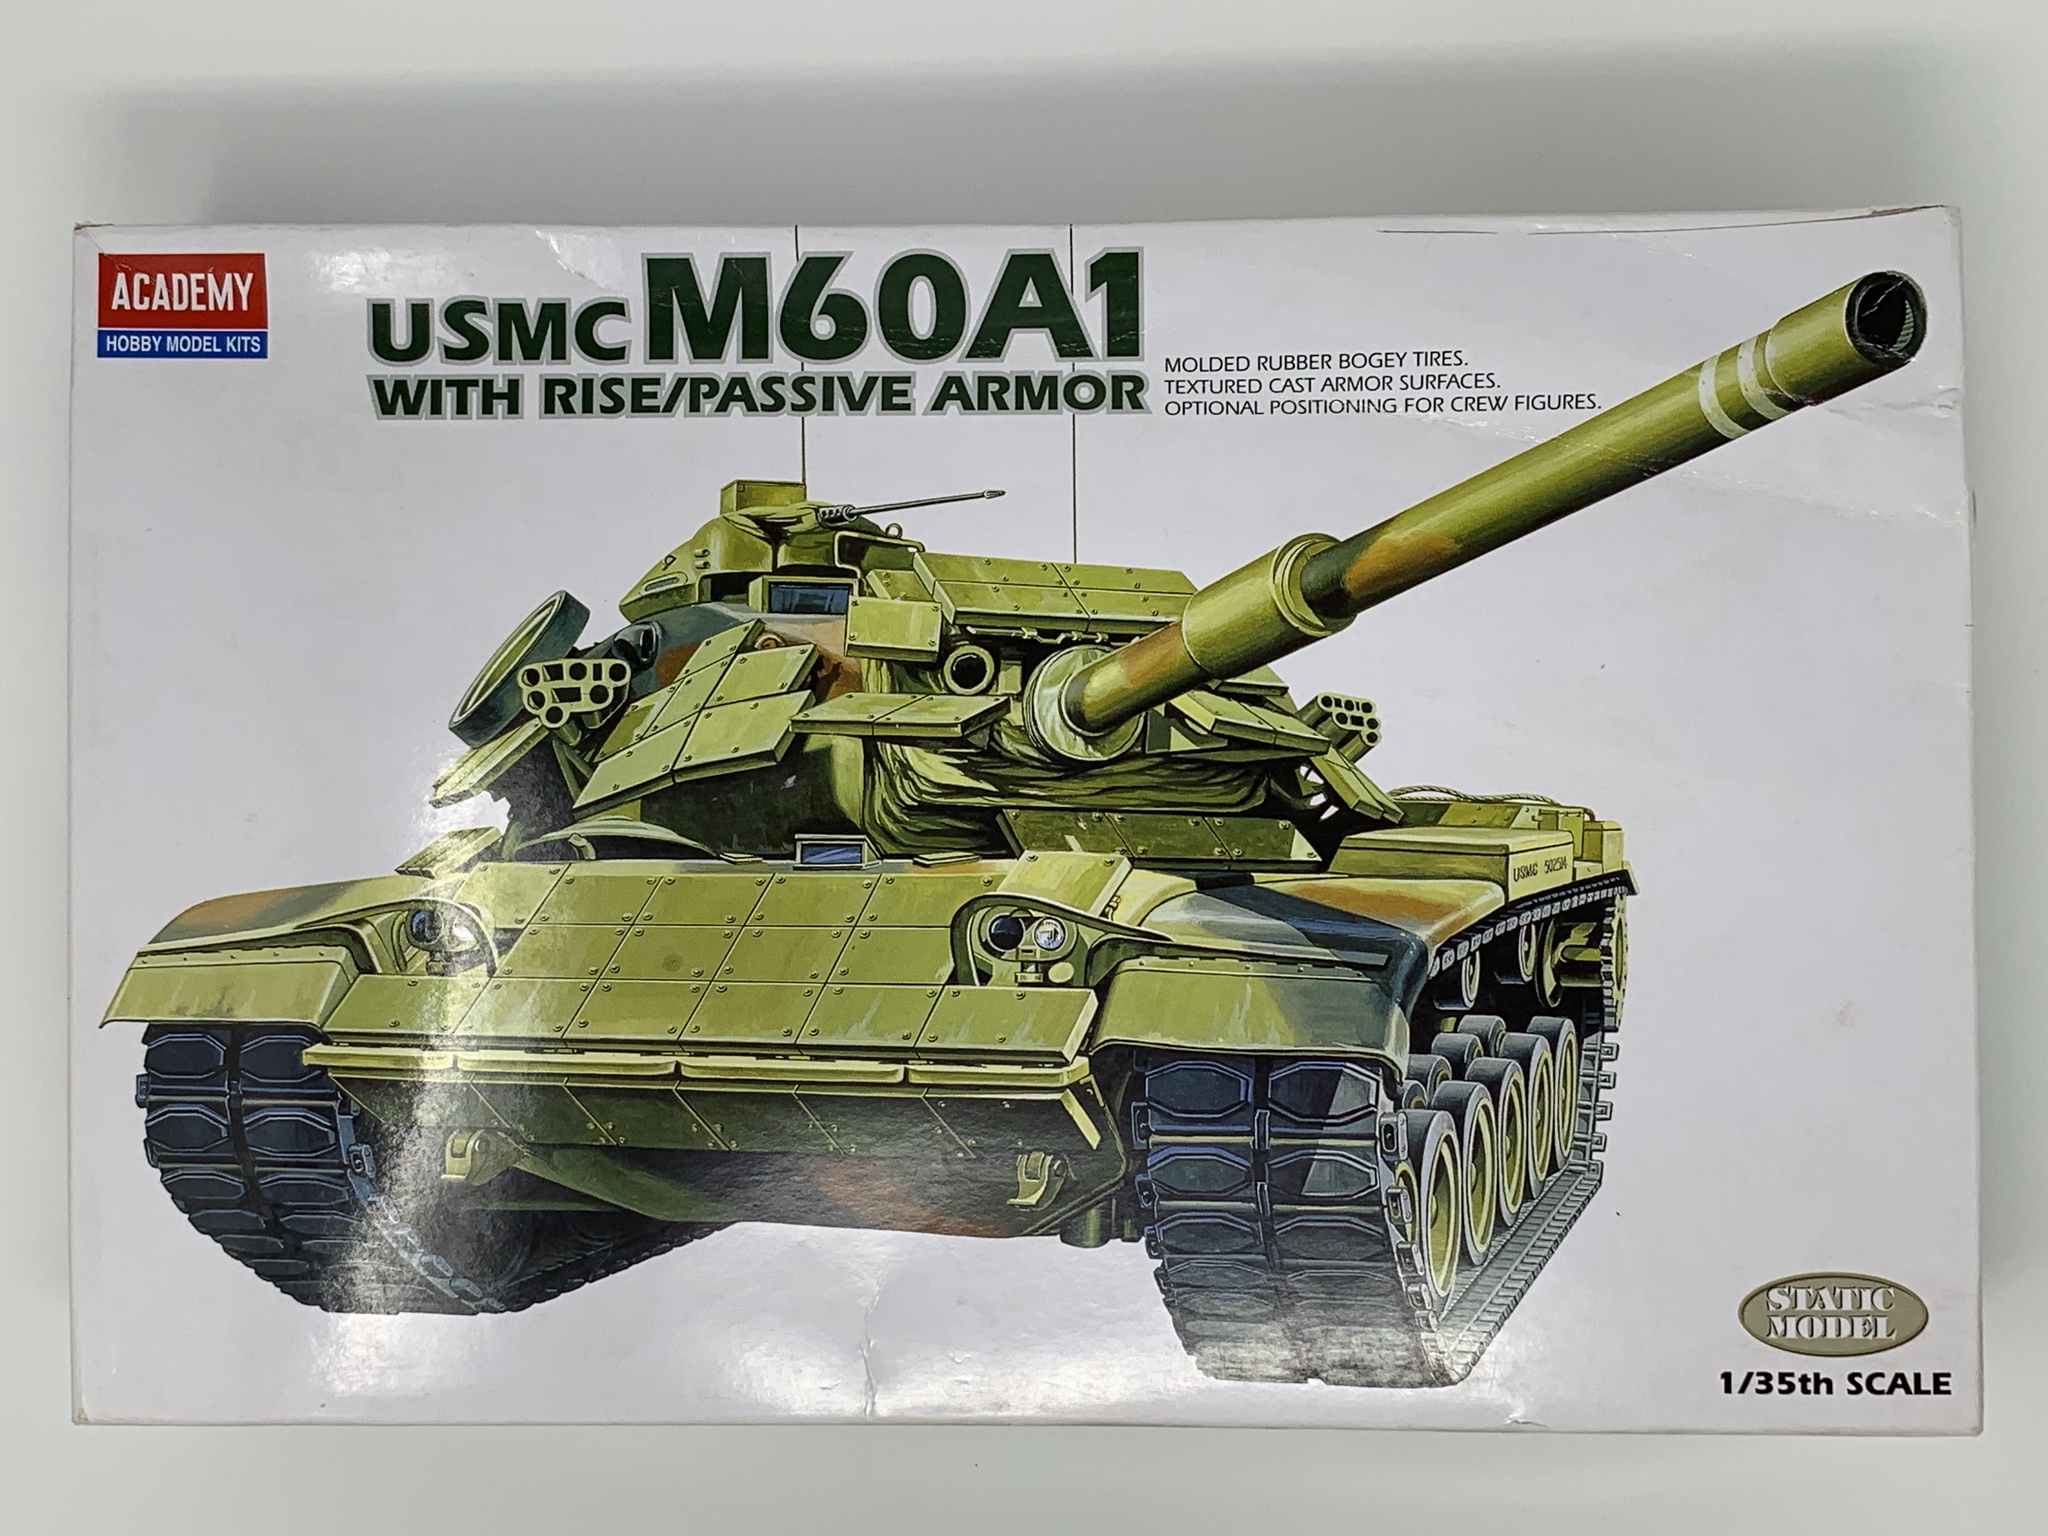
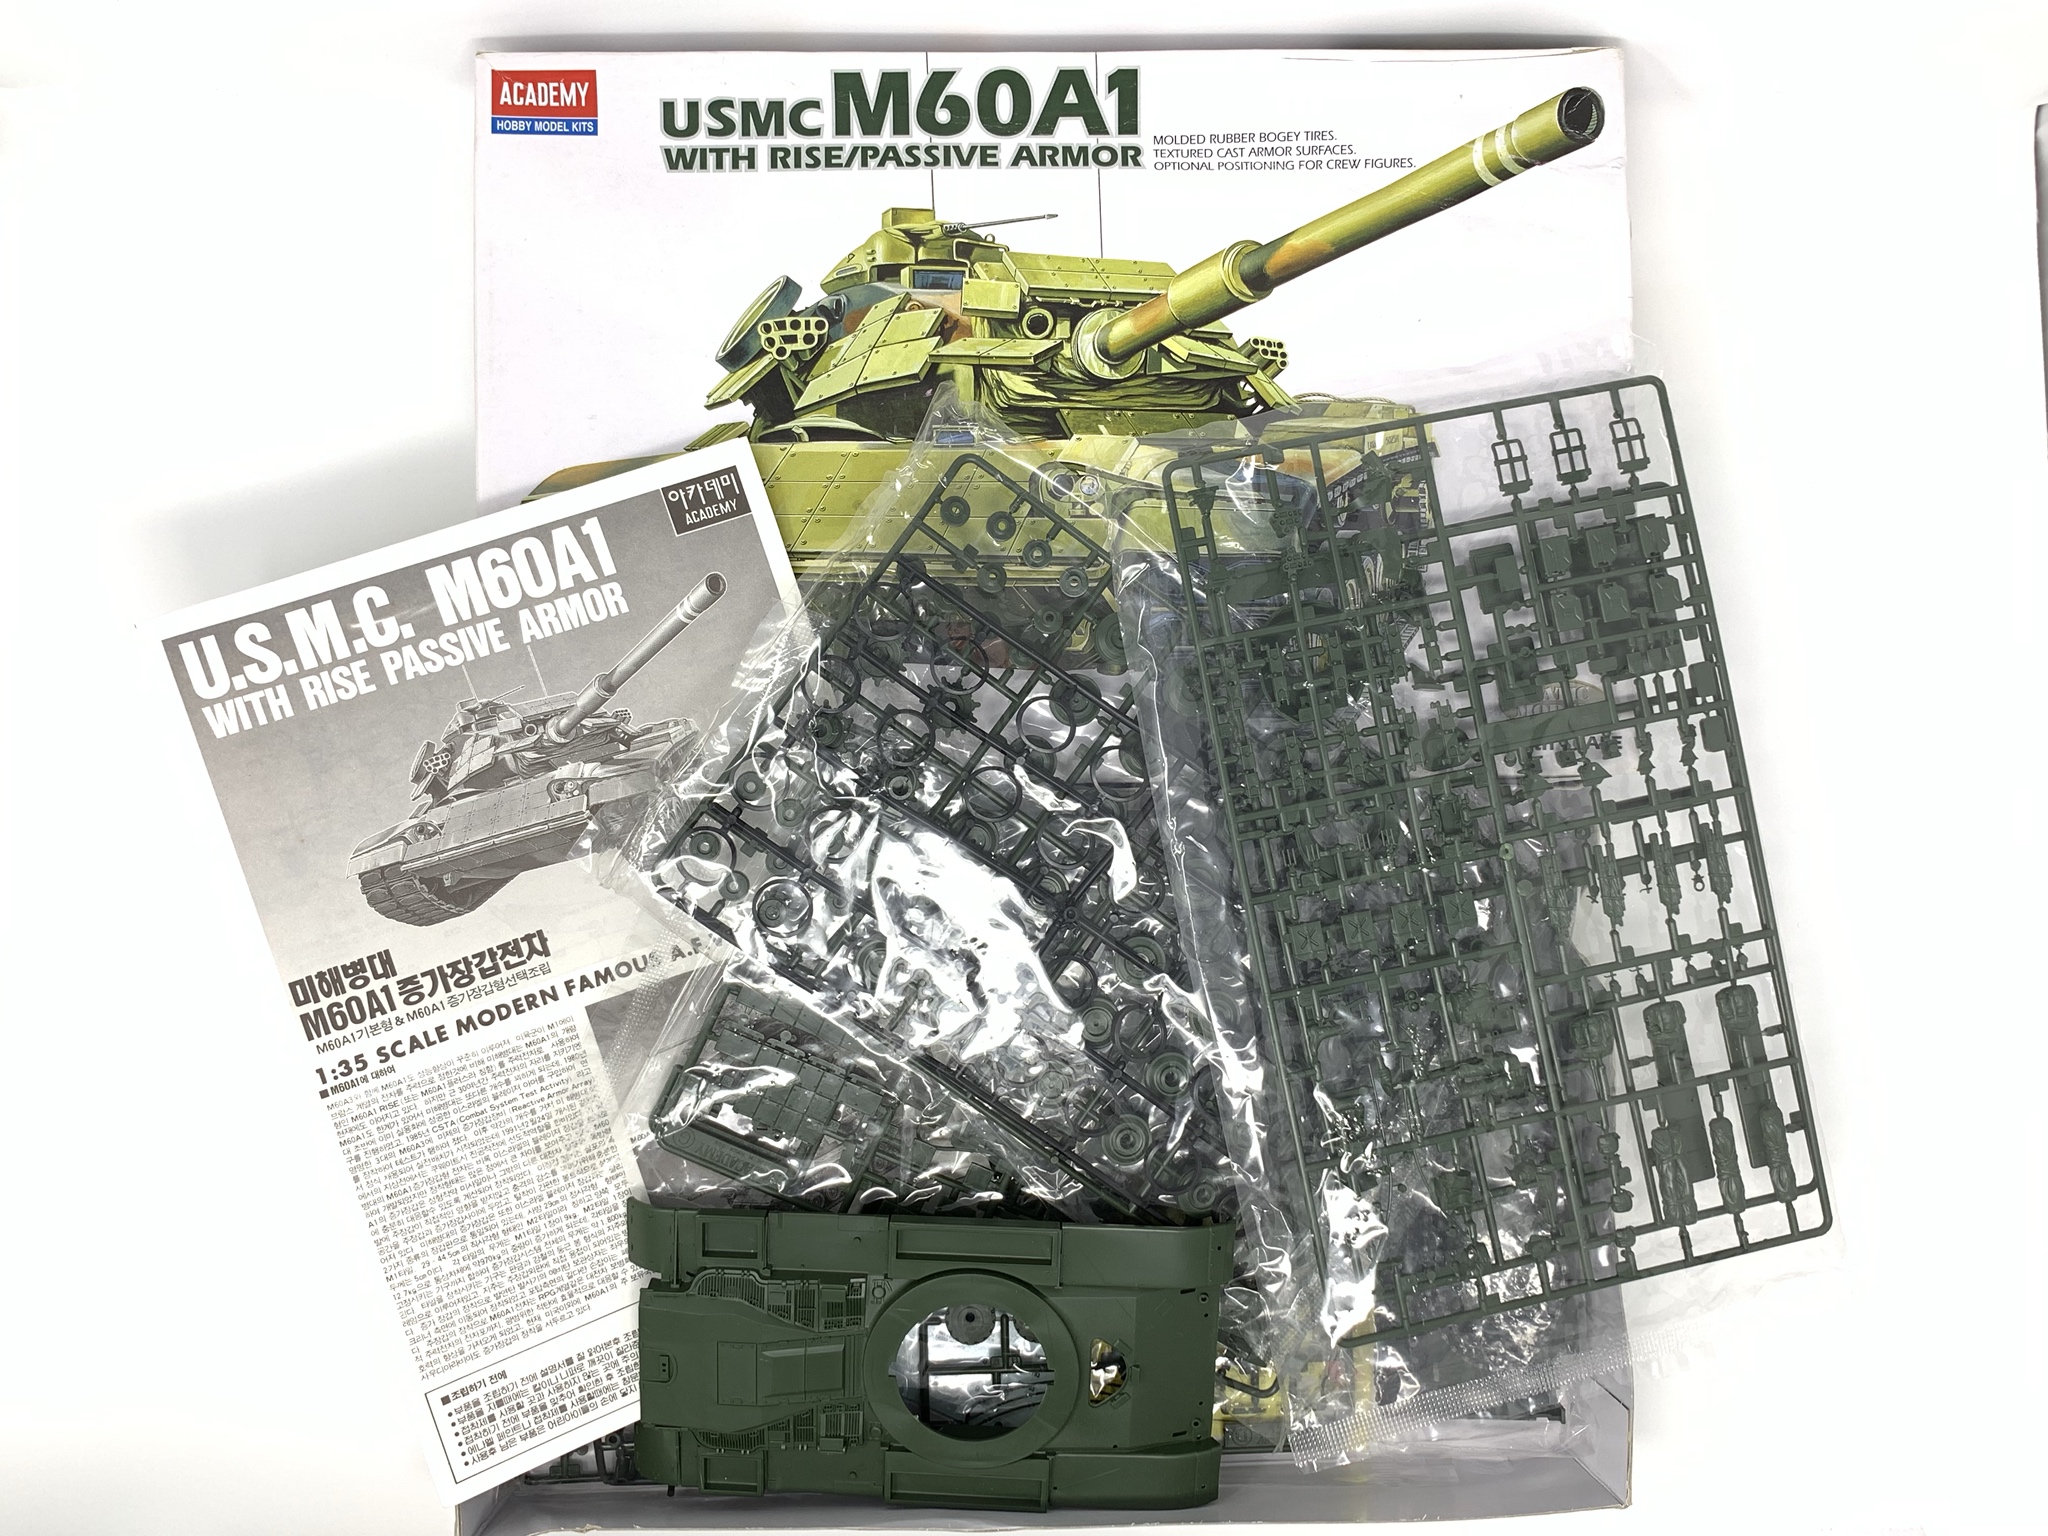
The first one in my lineup is the Dragon M60A2 Starship. Kit DRA-3562. Gotta love them $24 sales that they have every now and then. I plan to build this out of the box.


When I reviewed the instruction. I noticed that there are a lot of parts that will not be used. I have marked them down with a red marker.


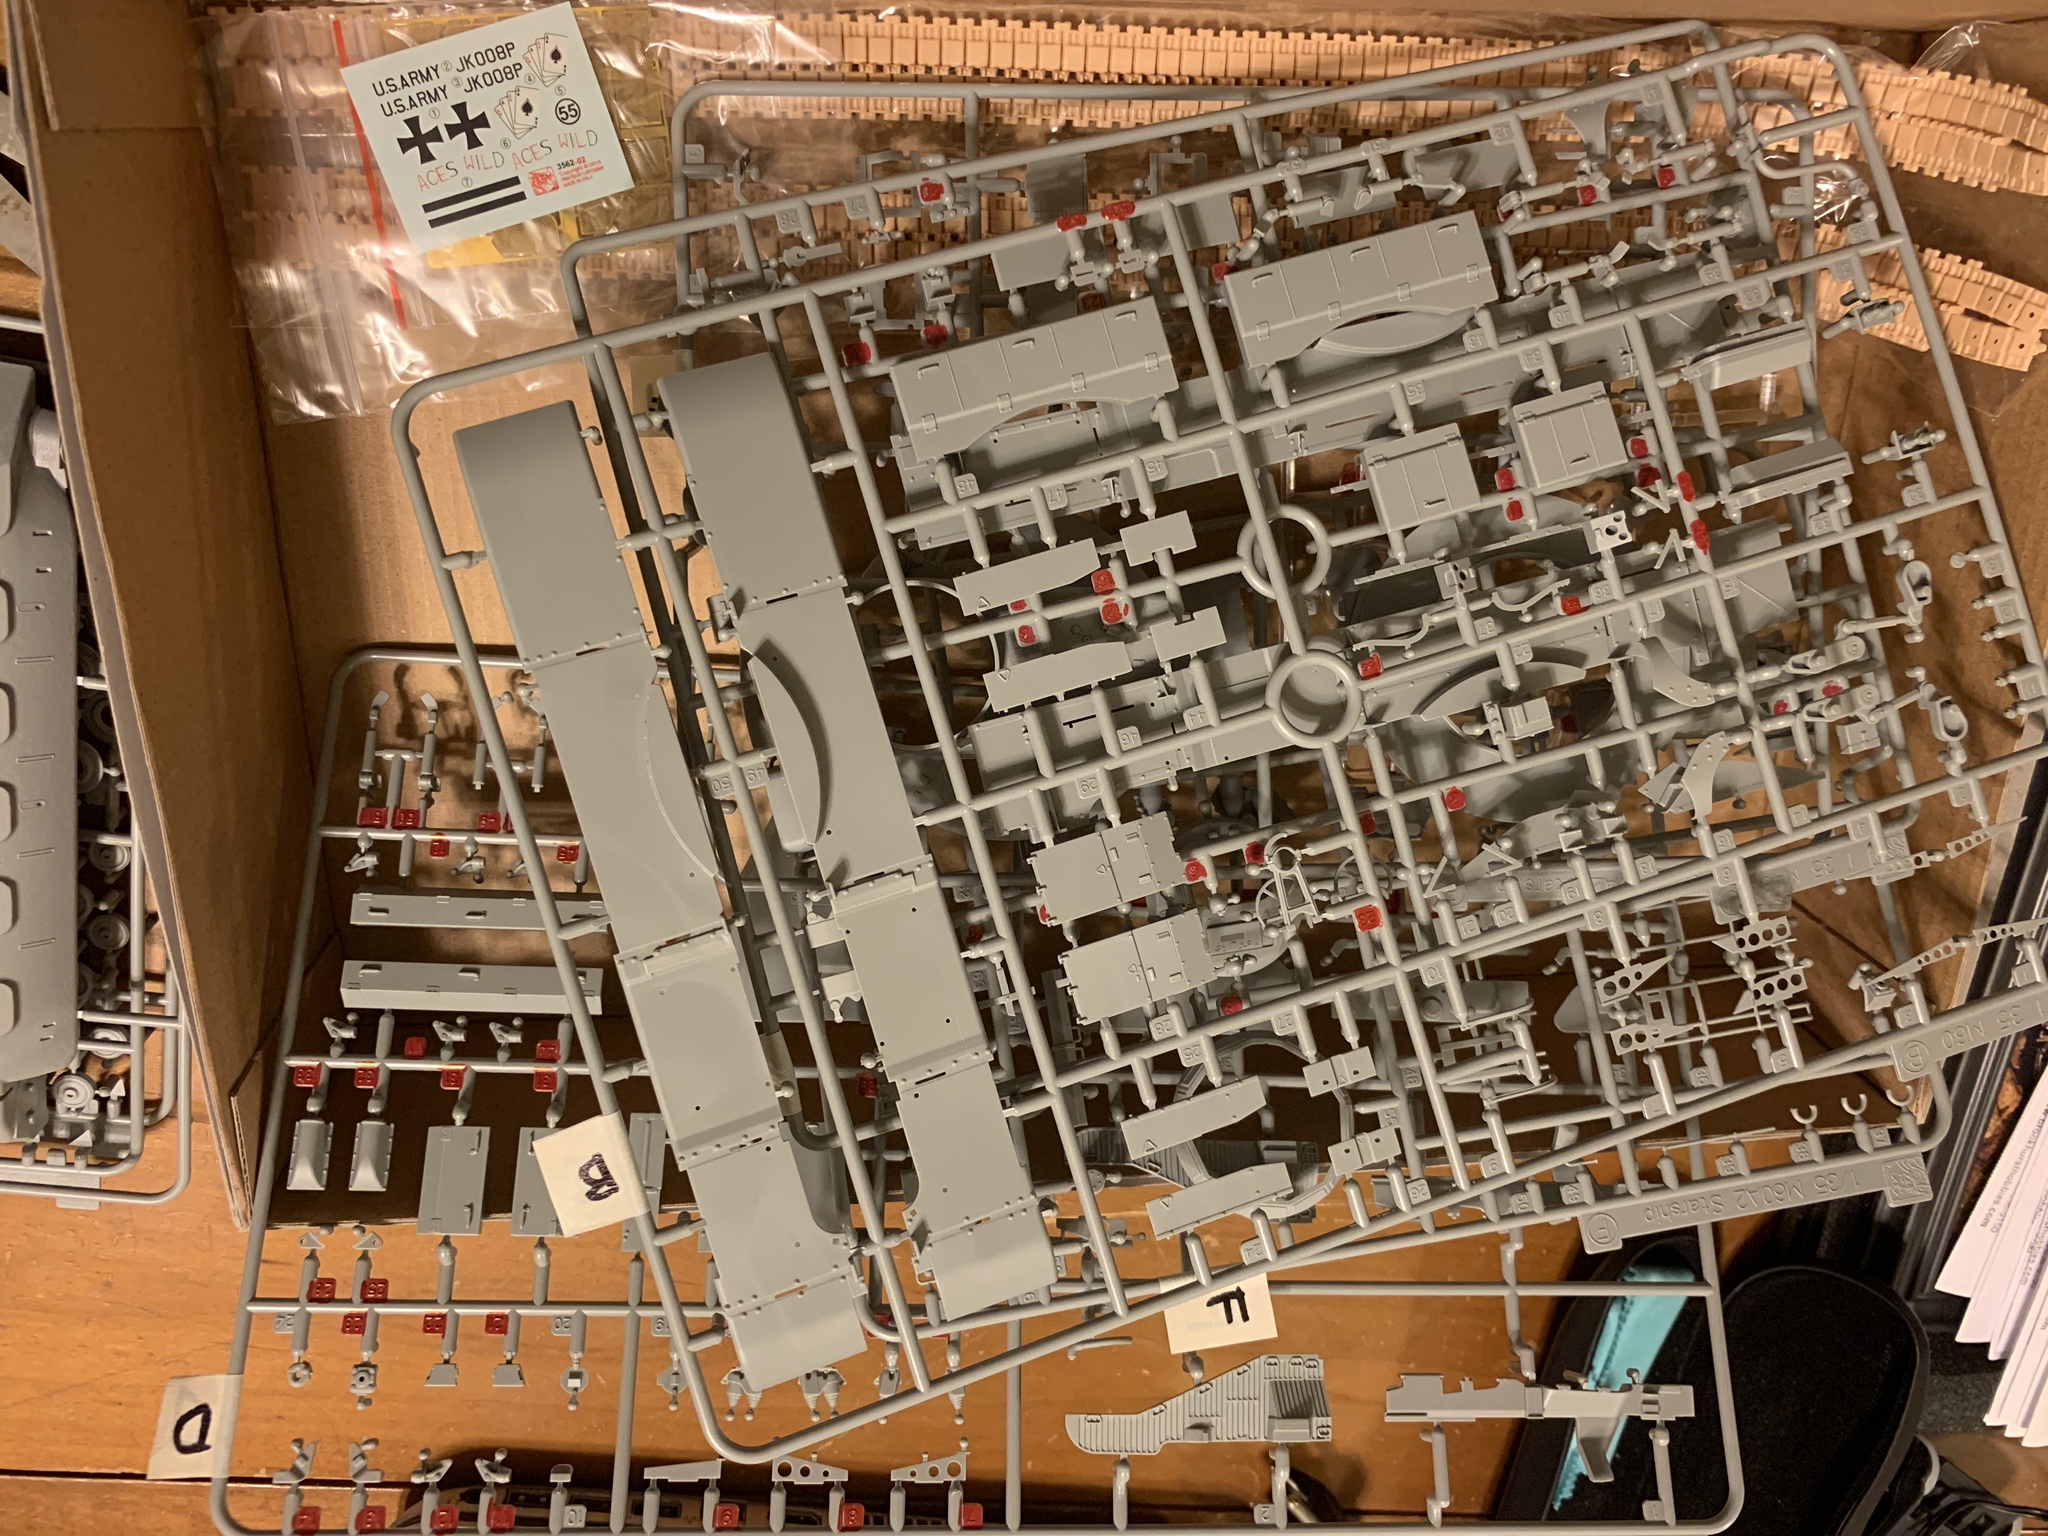
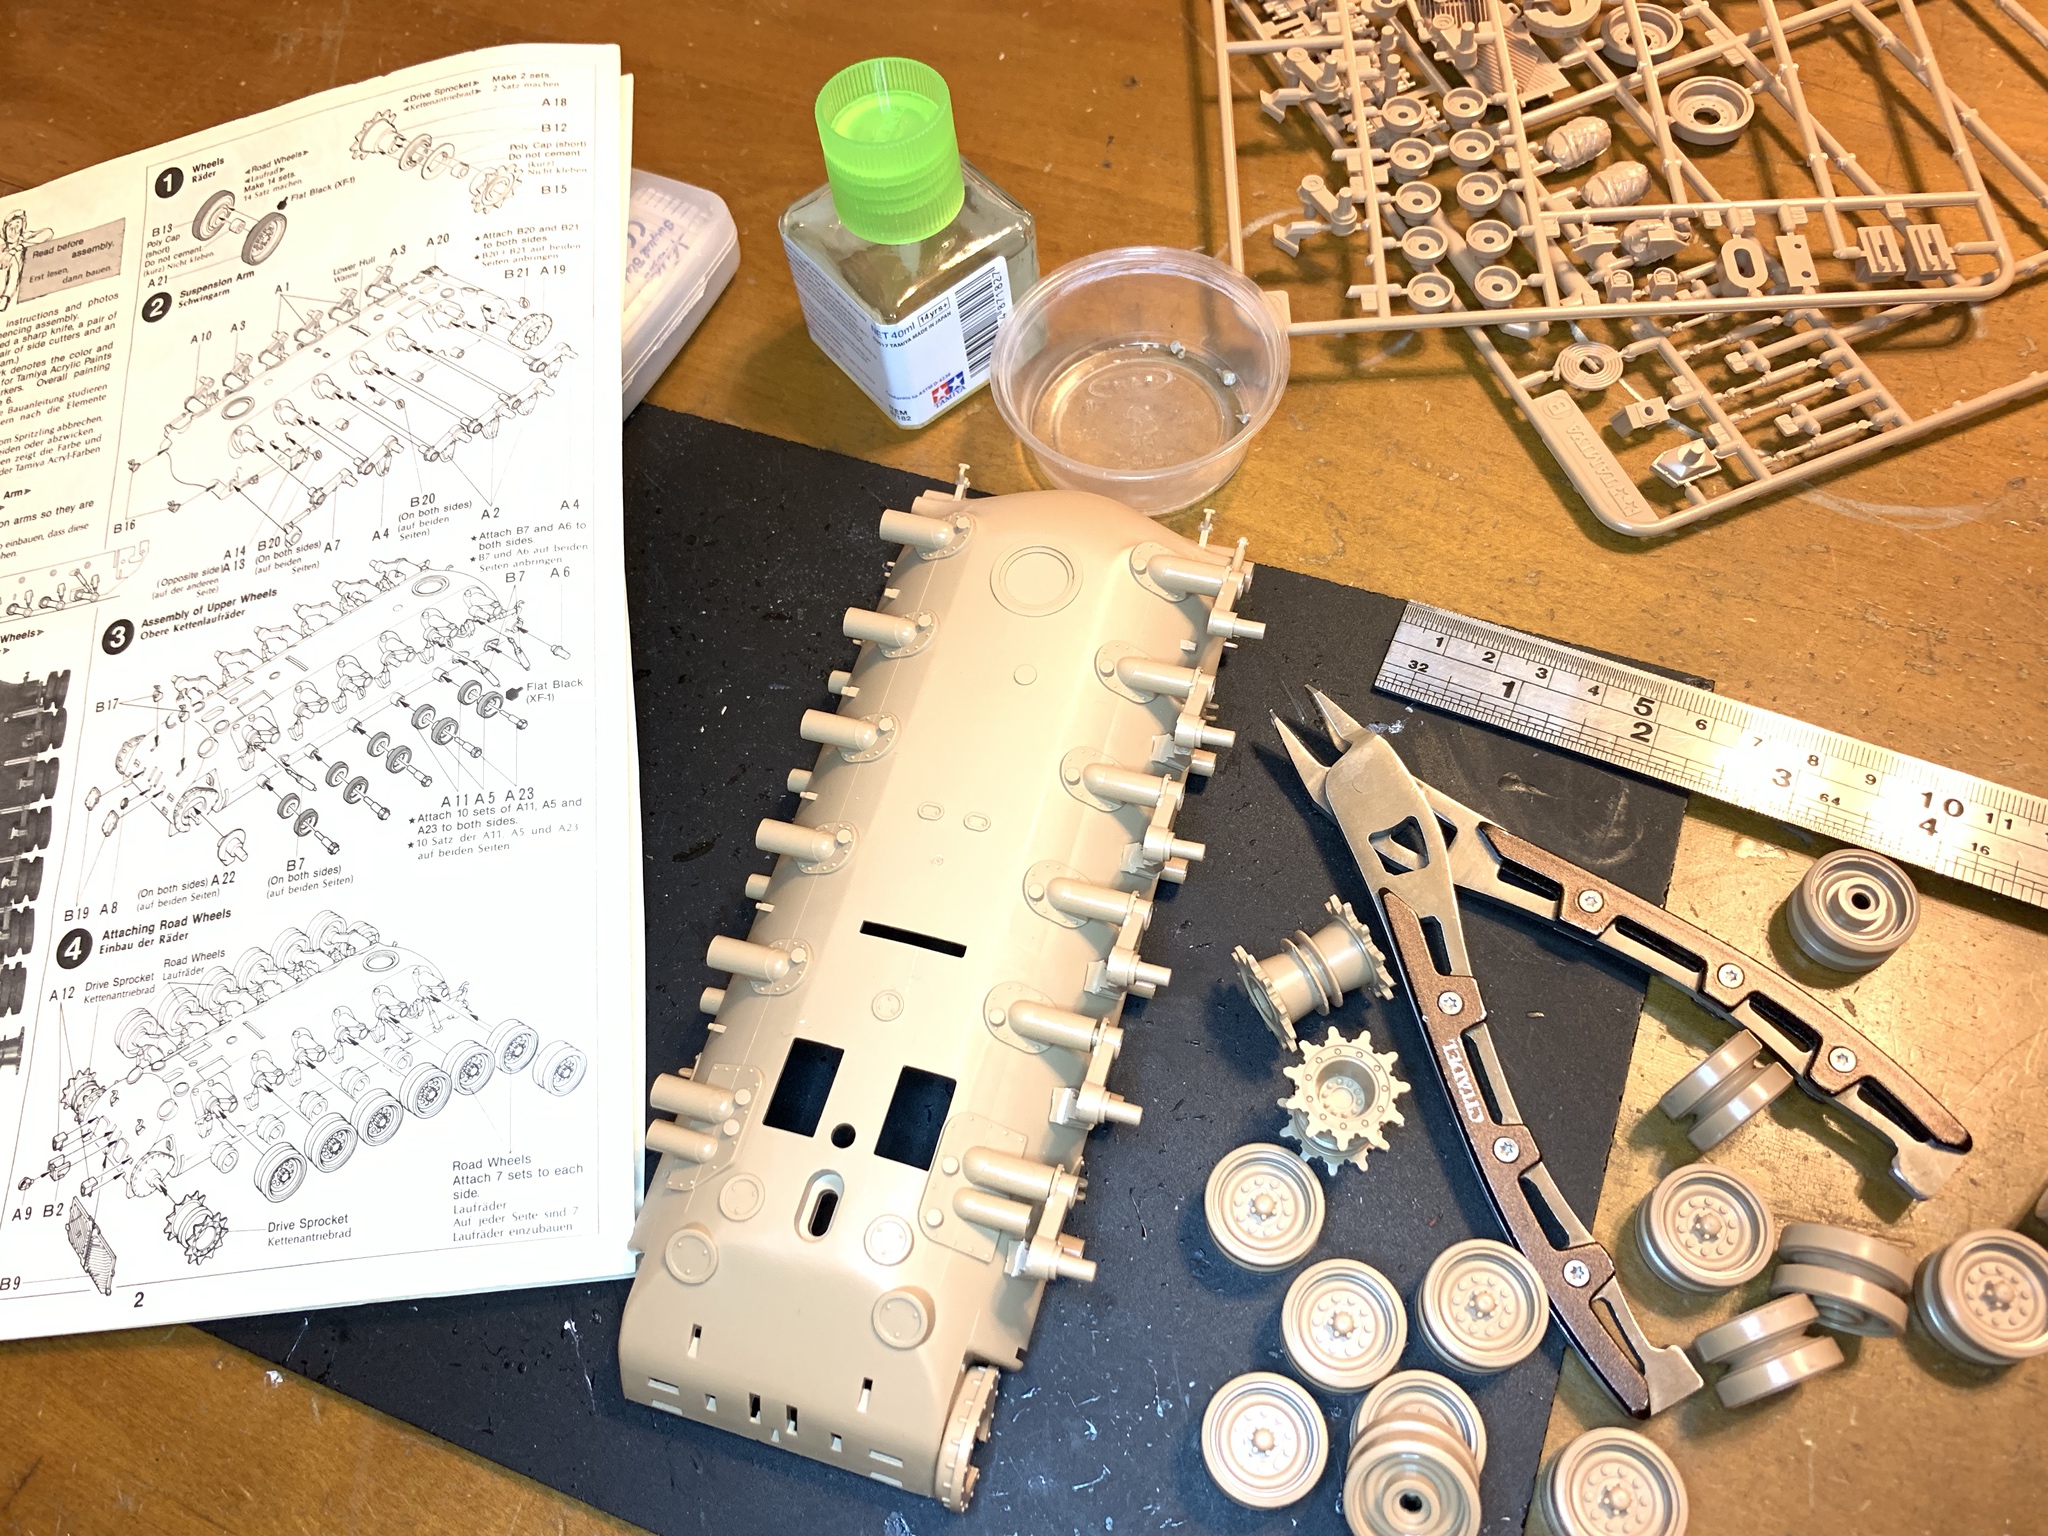
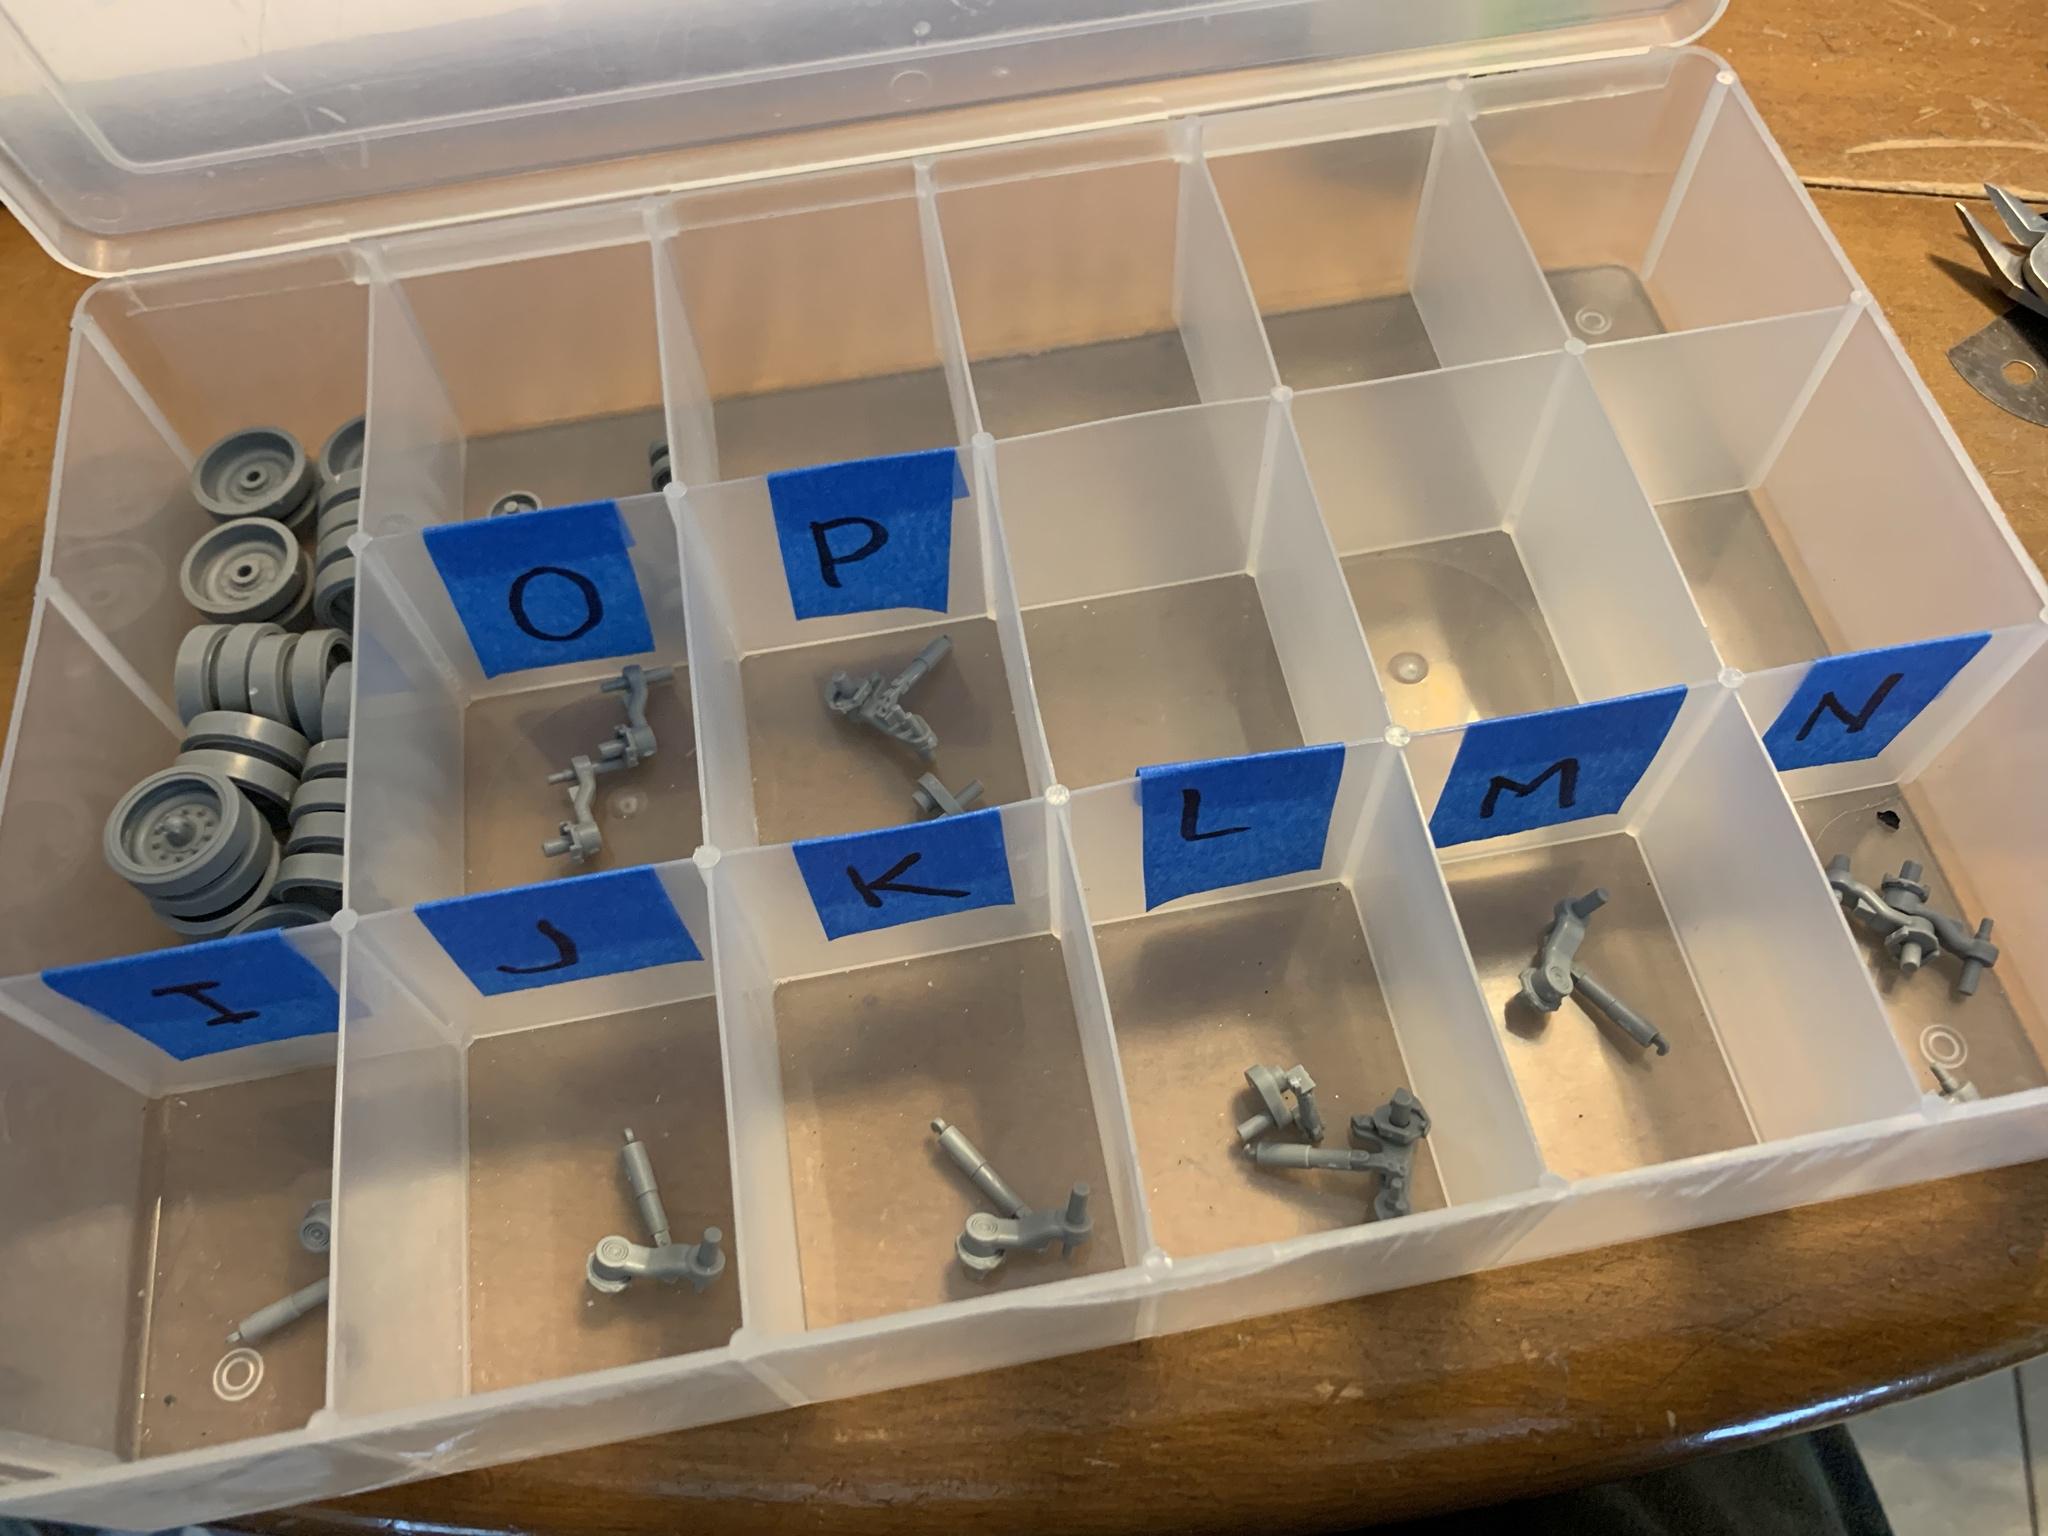
A technique I learned from Sergio Solo's Youtube video is to label the sprues with masking tape. It does make it easy to locate as I am building.


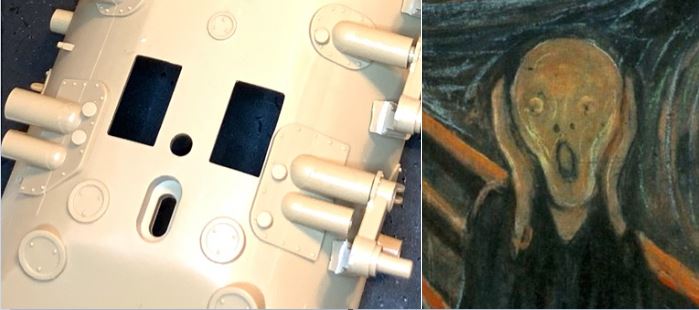
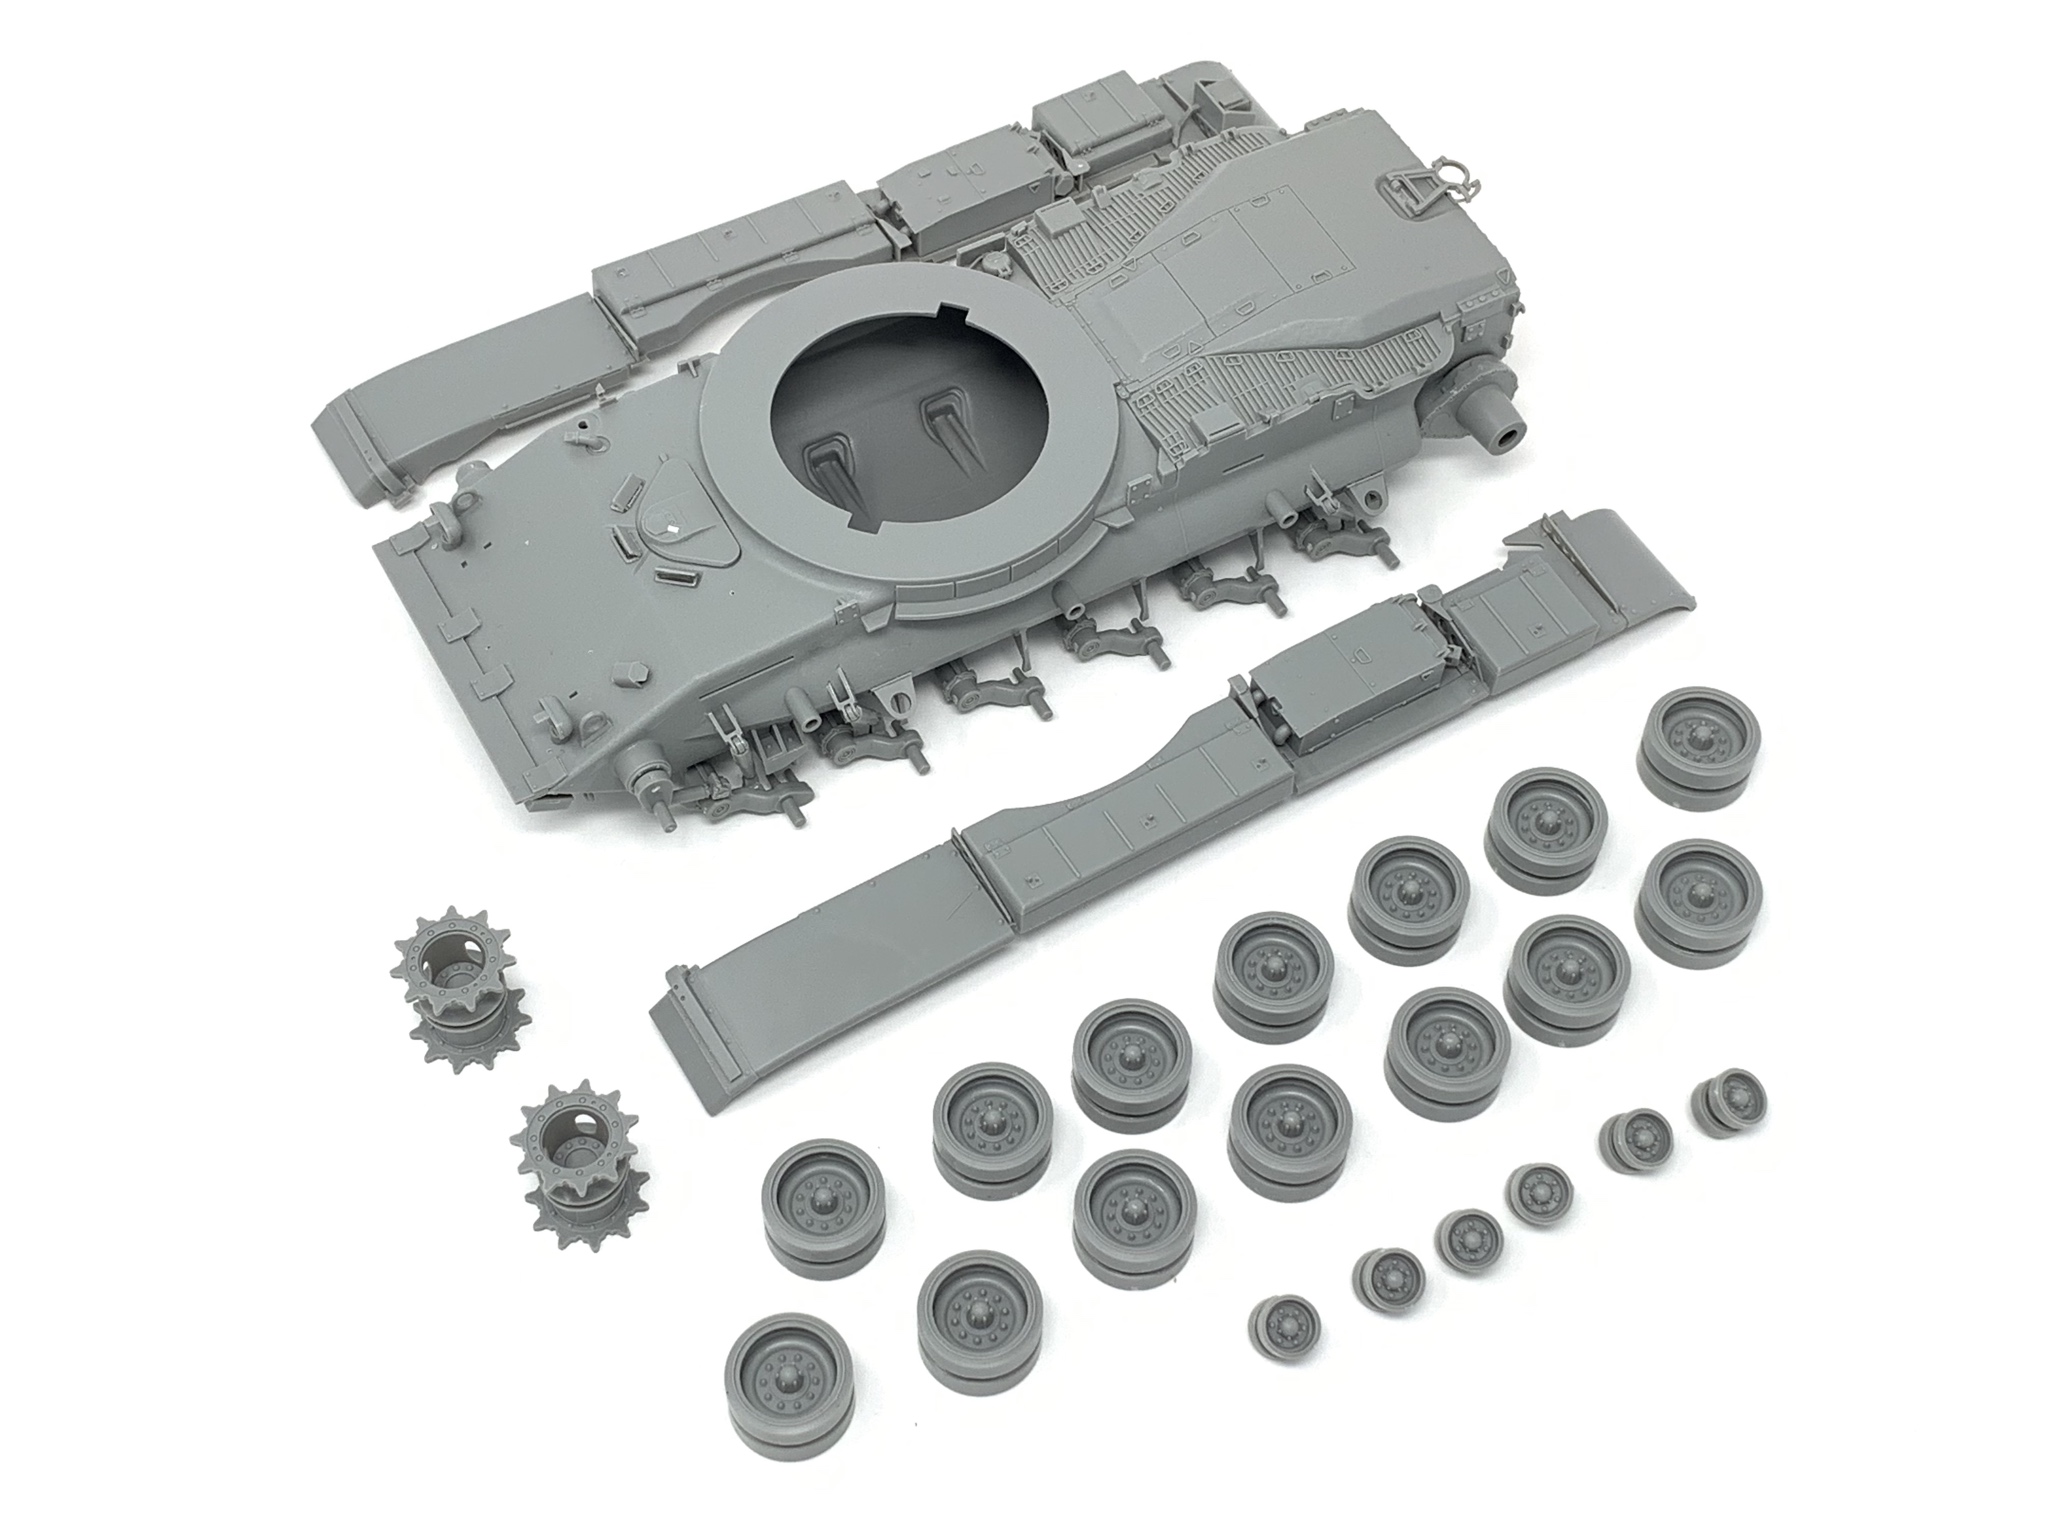
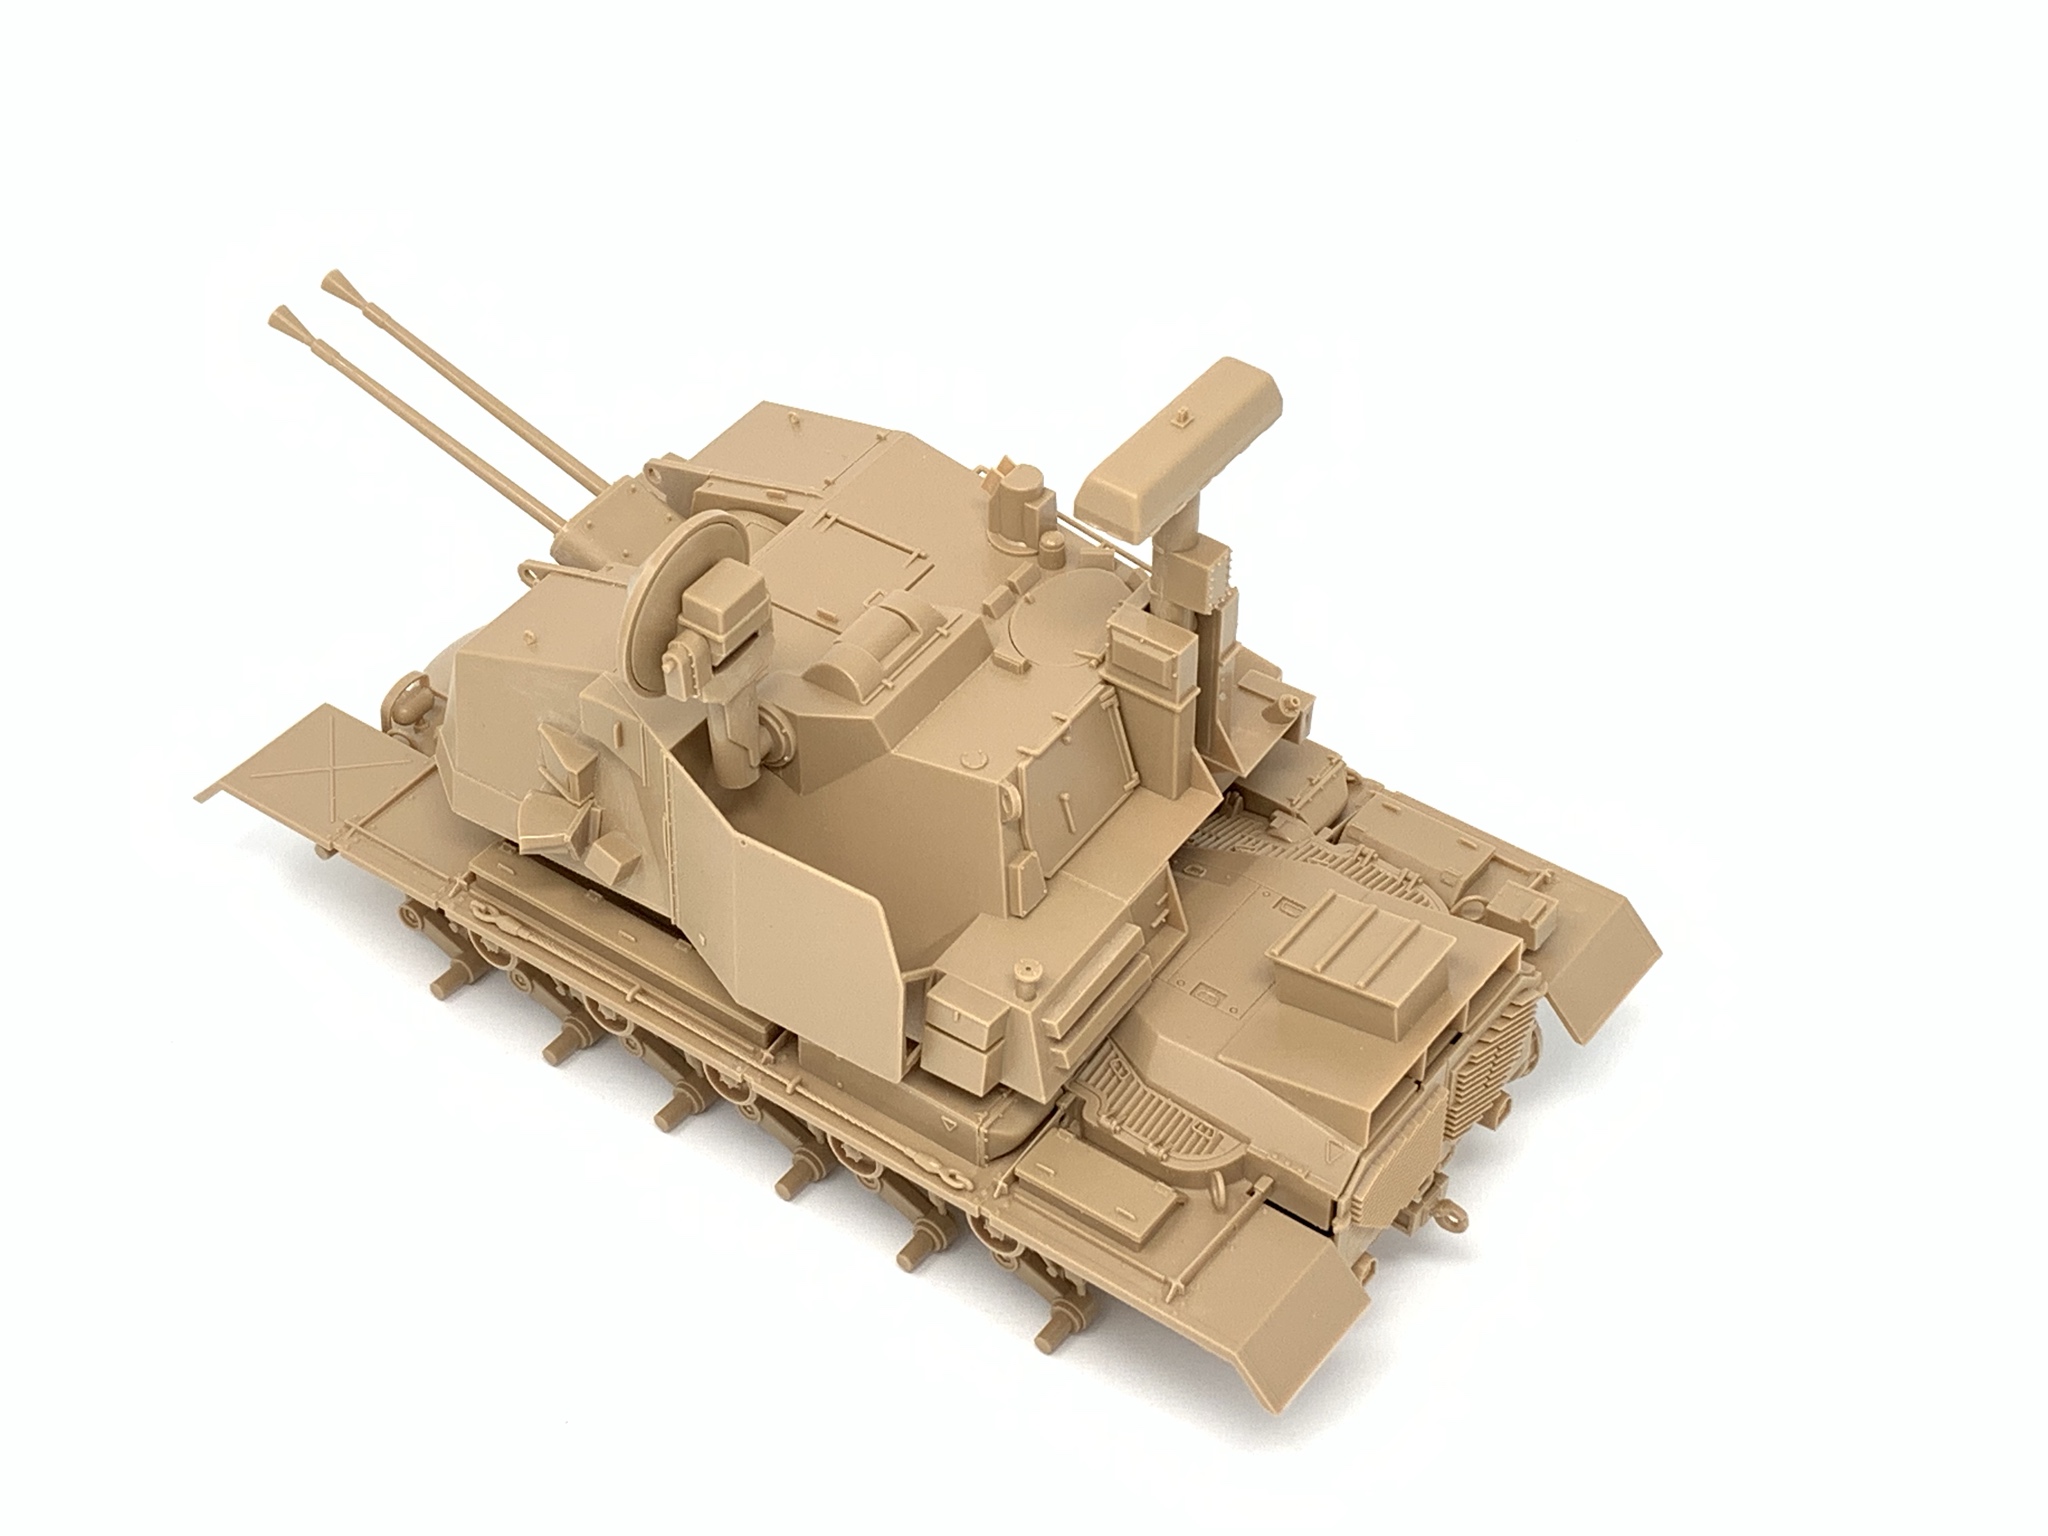
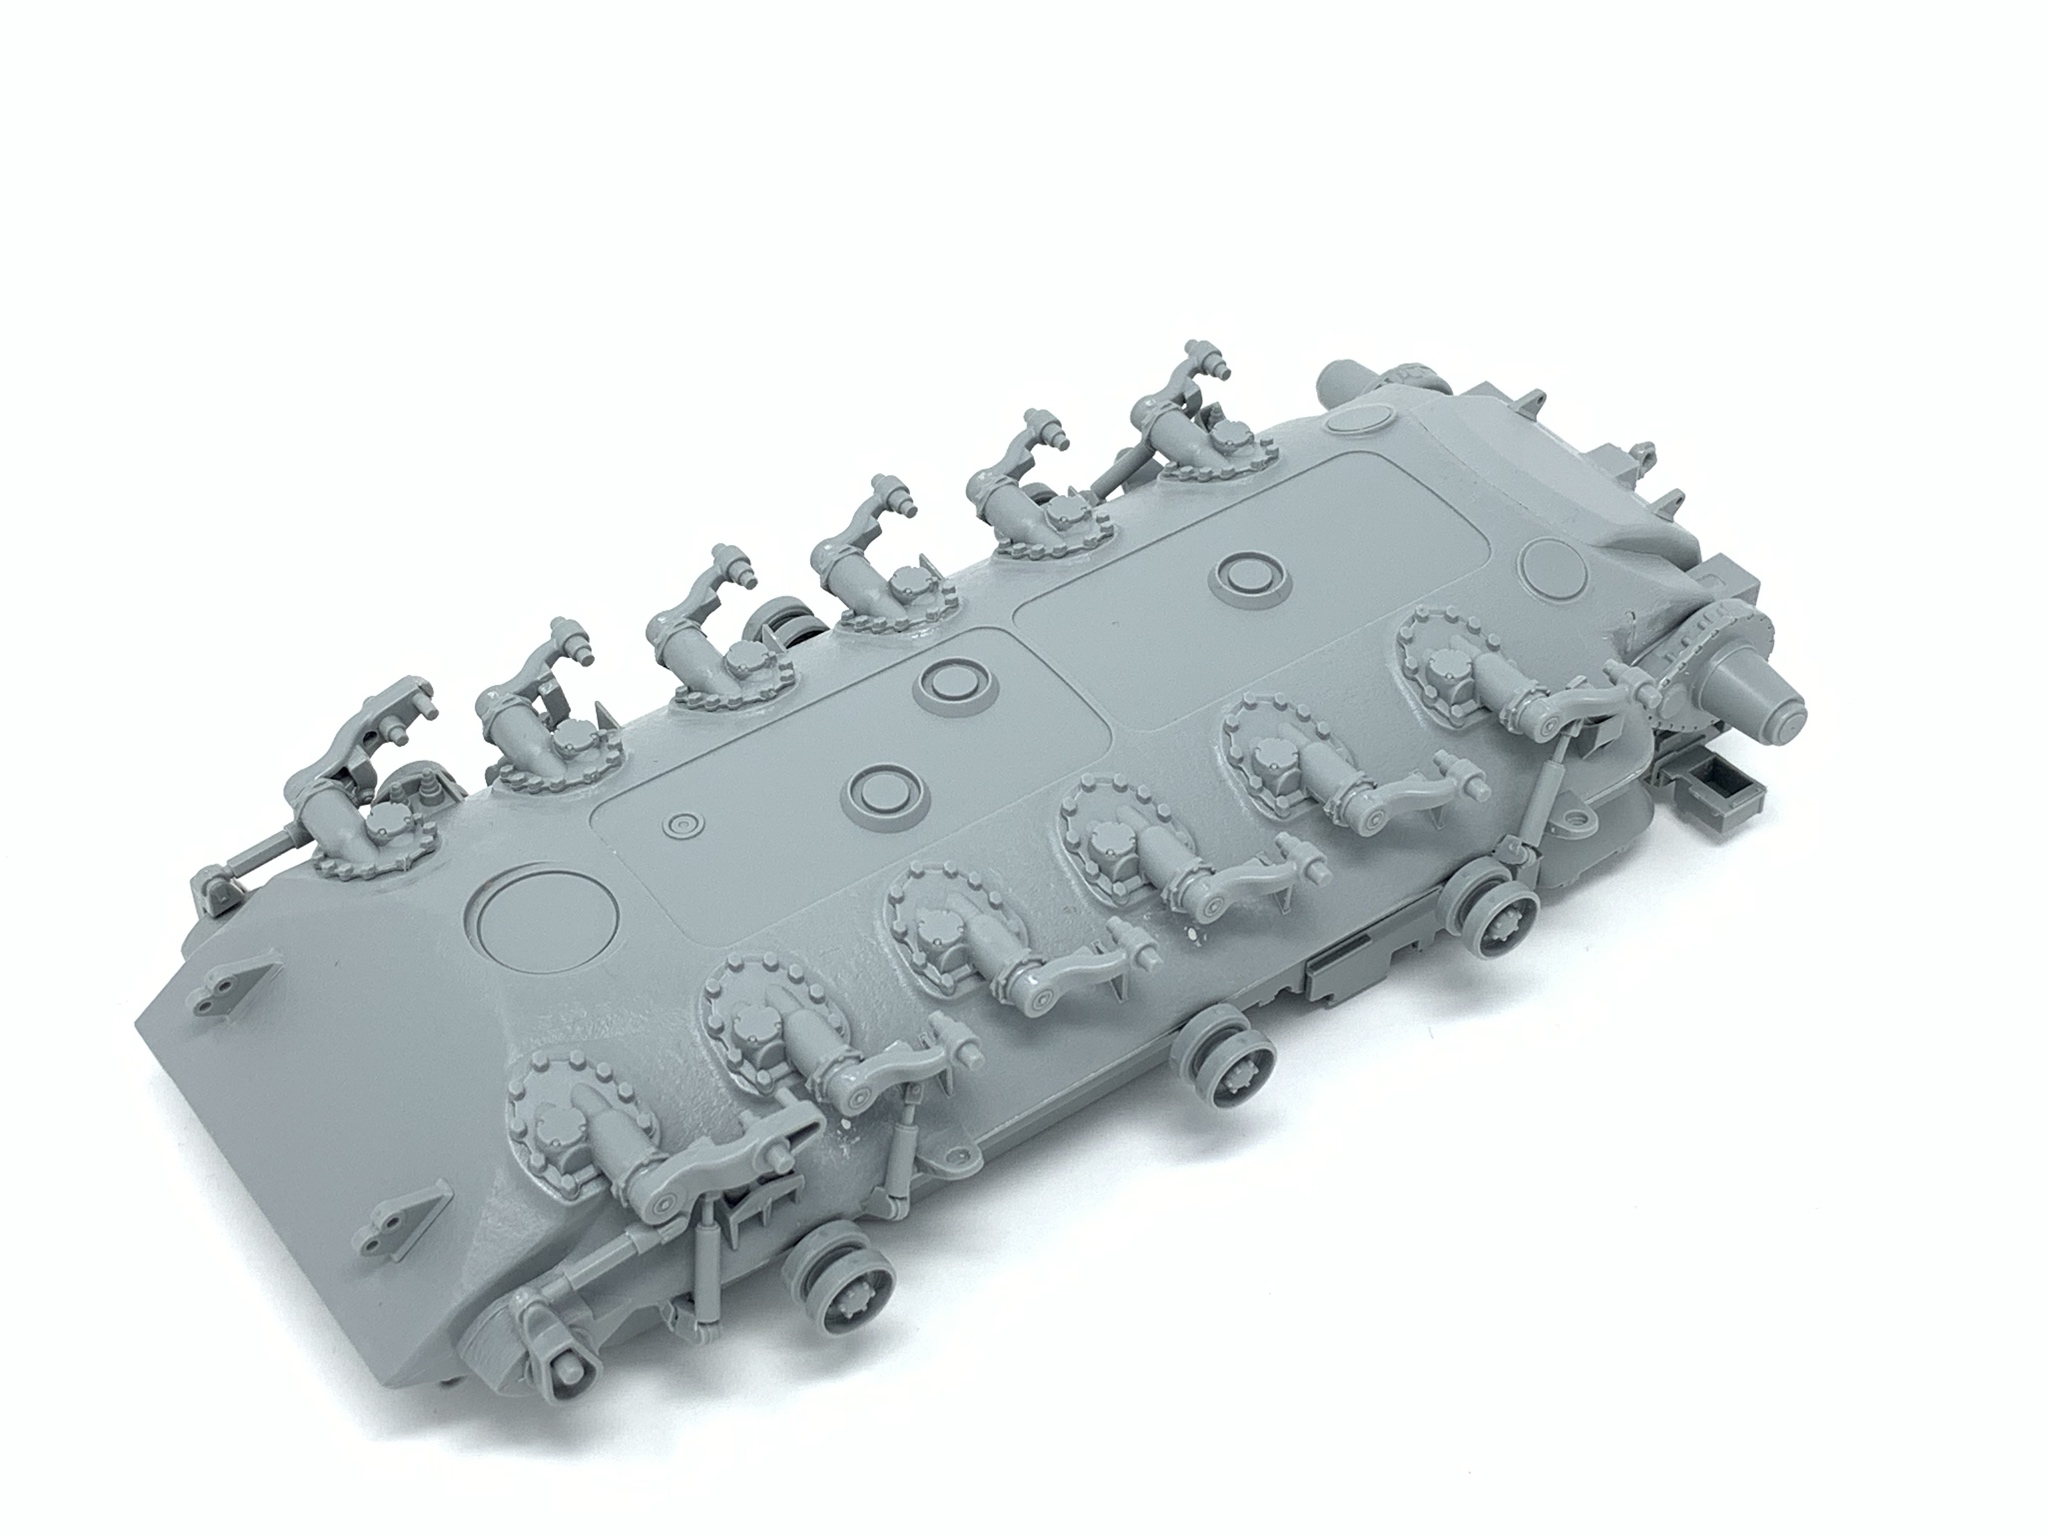
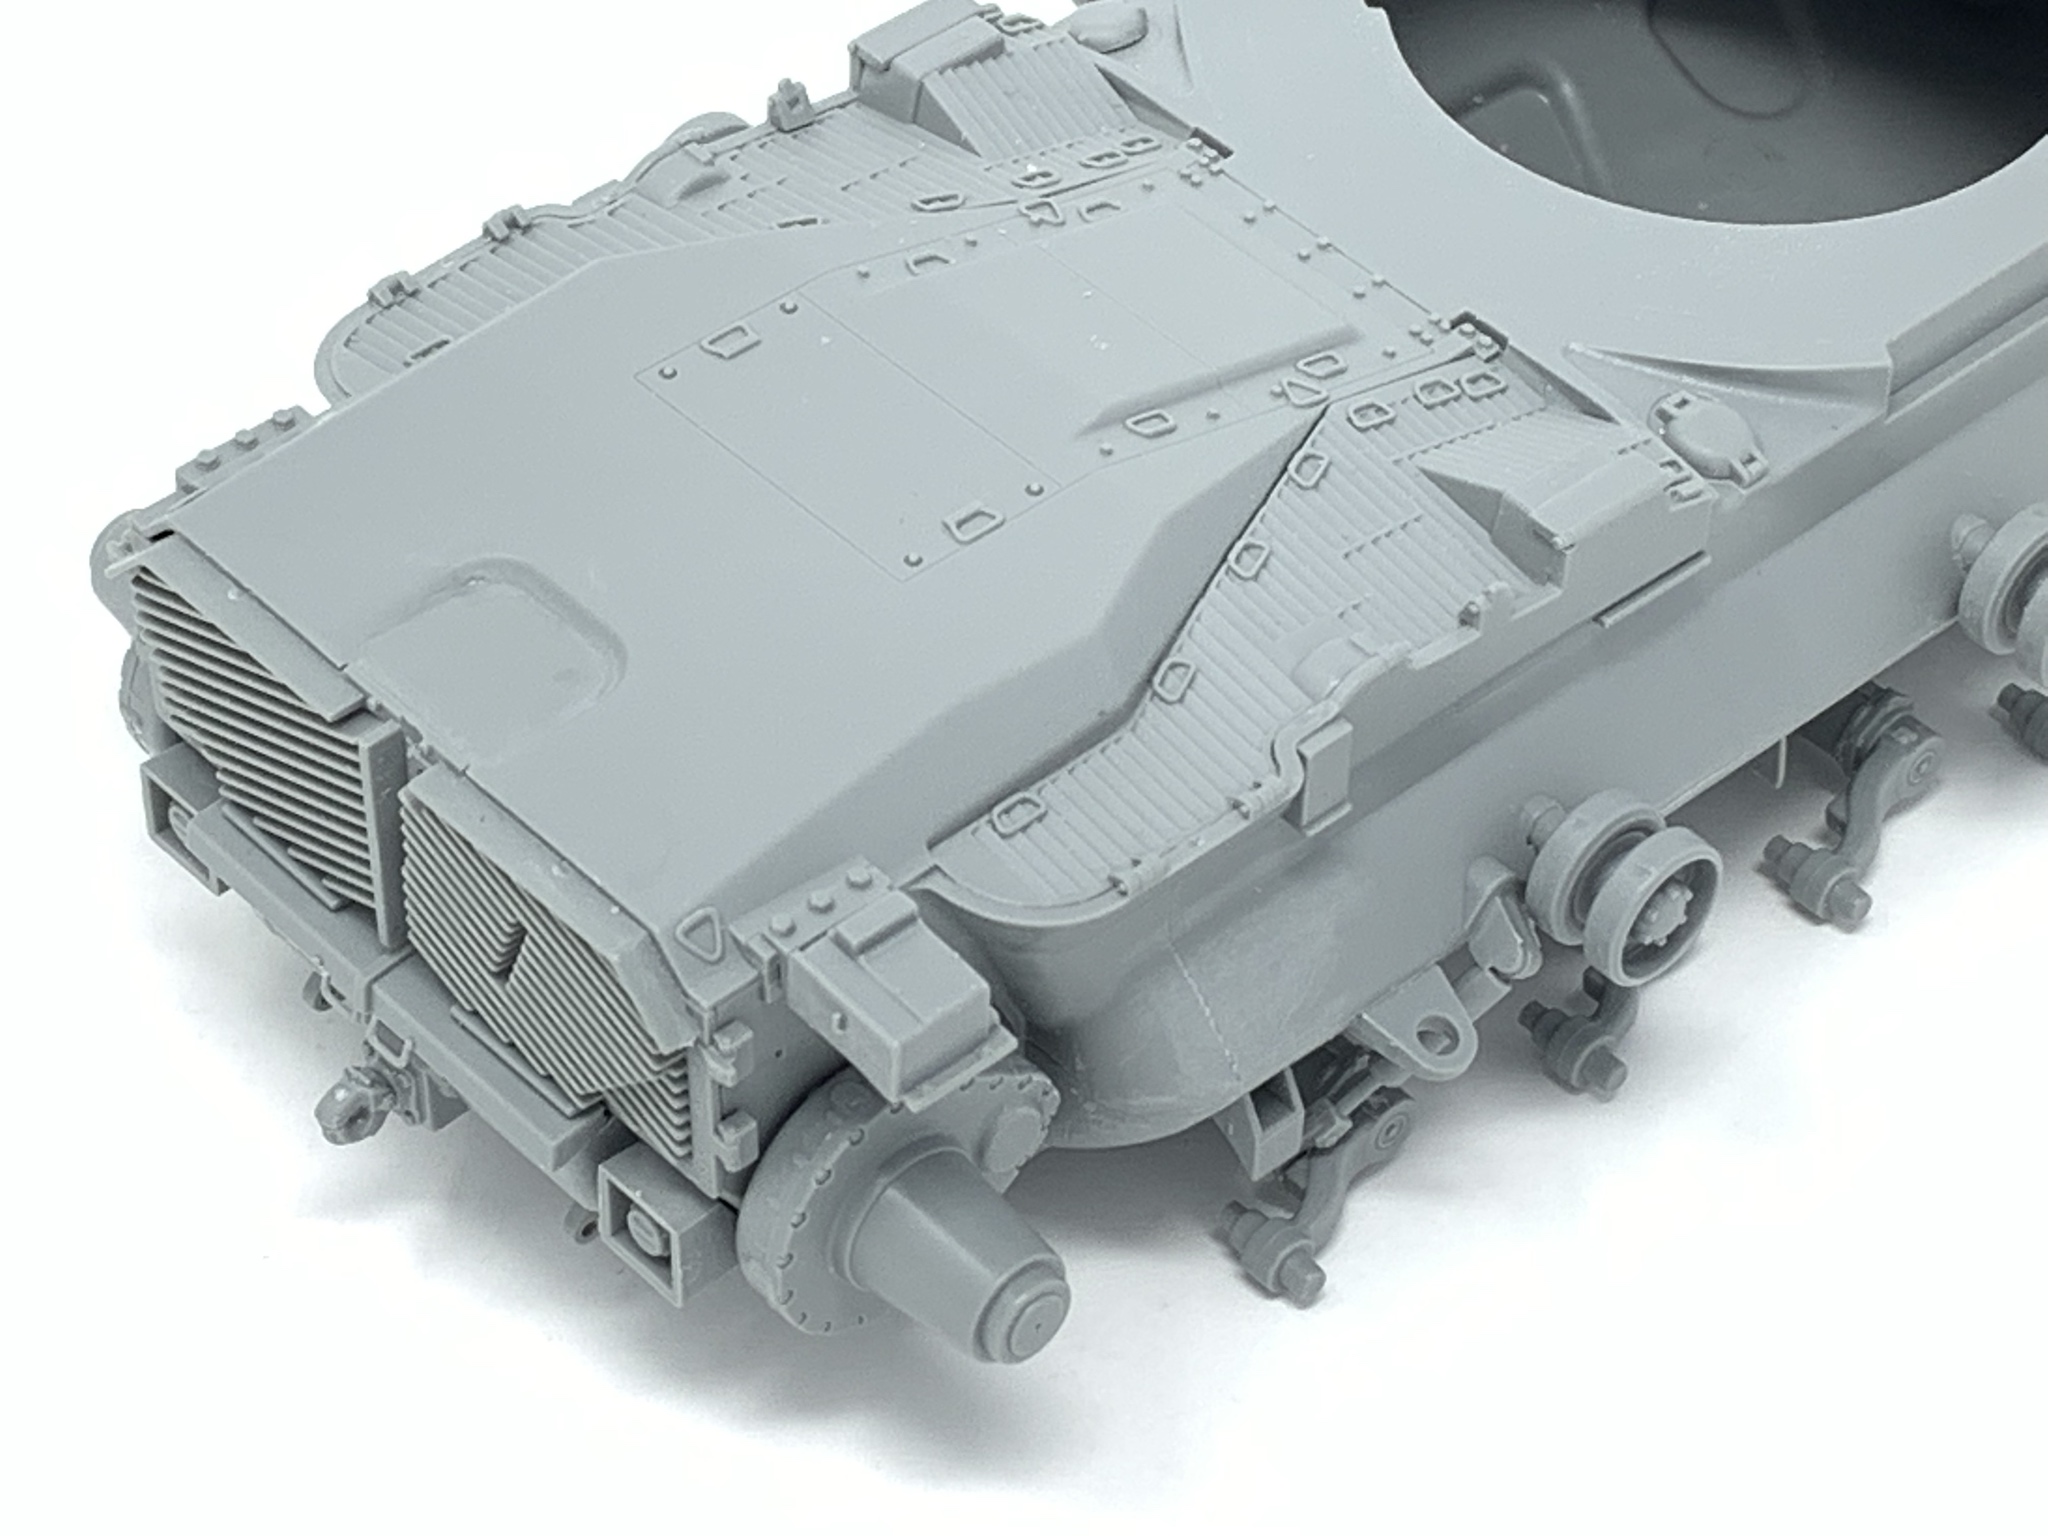
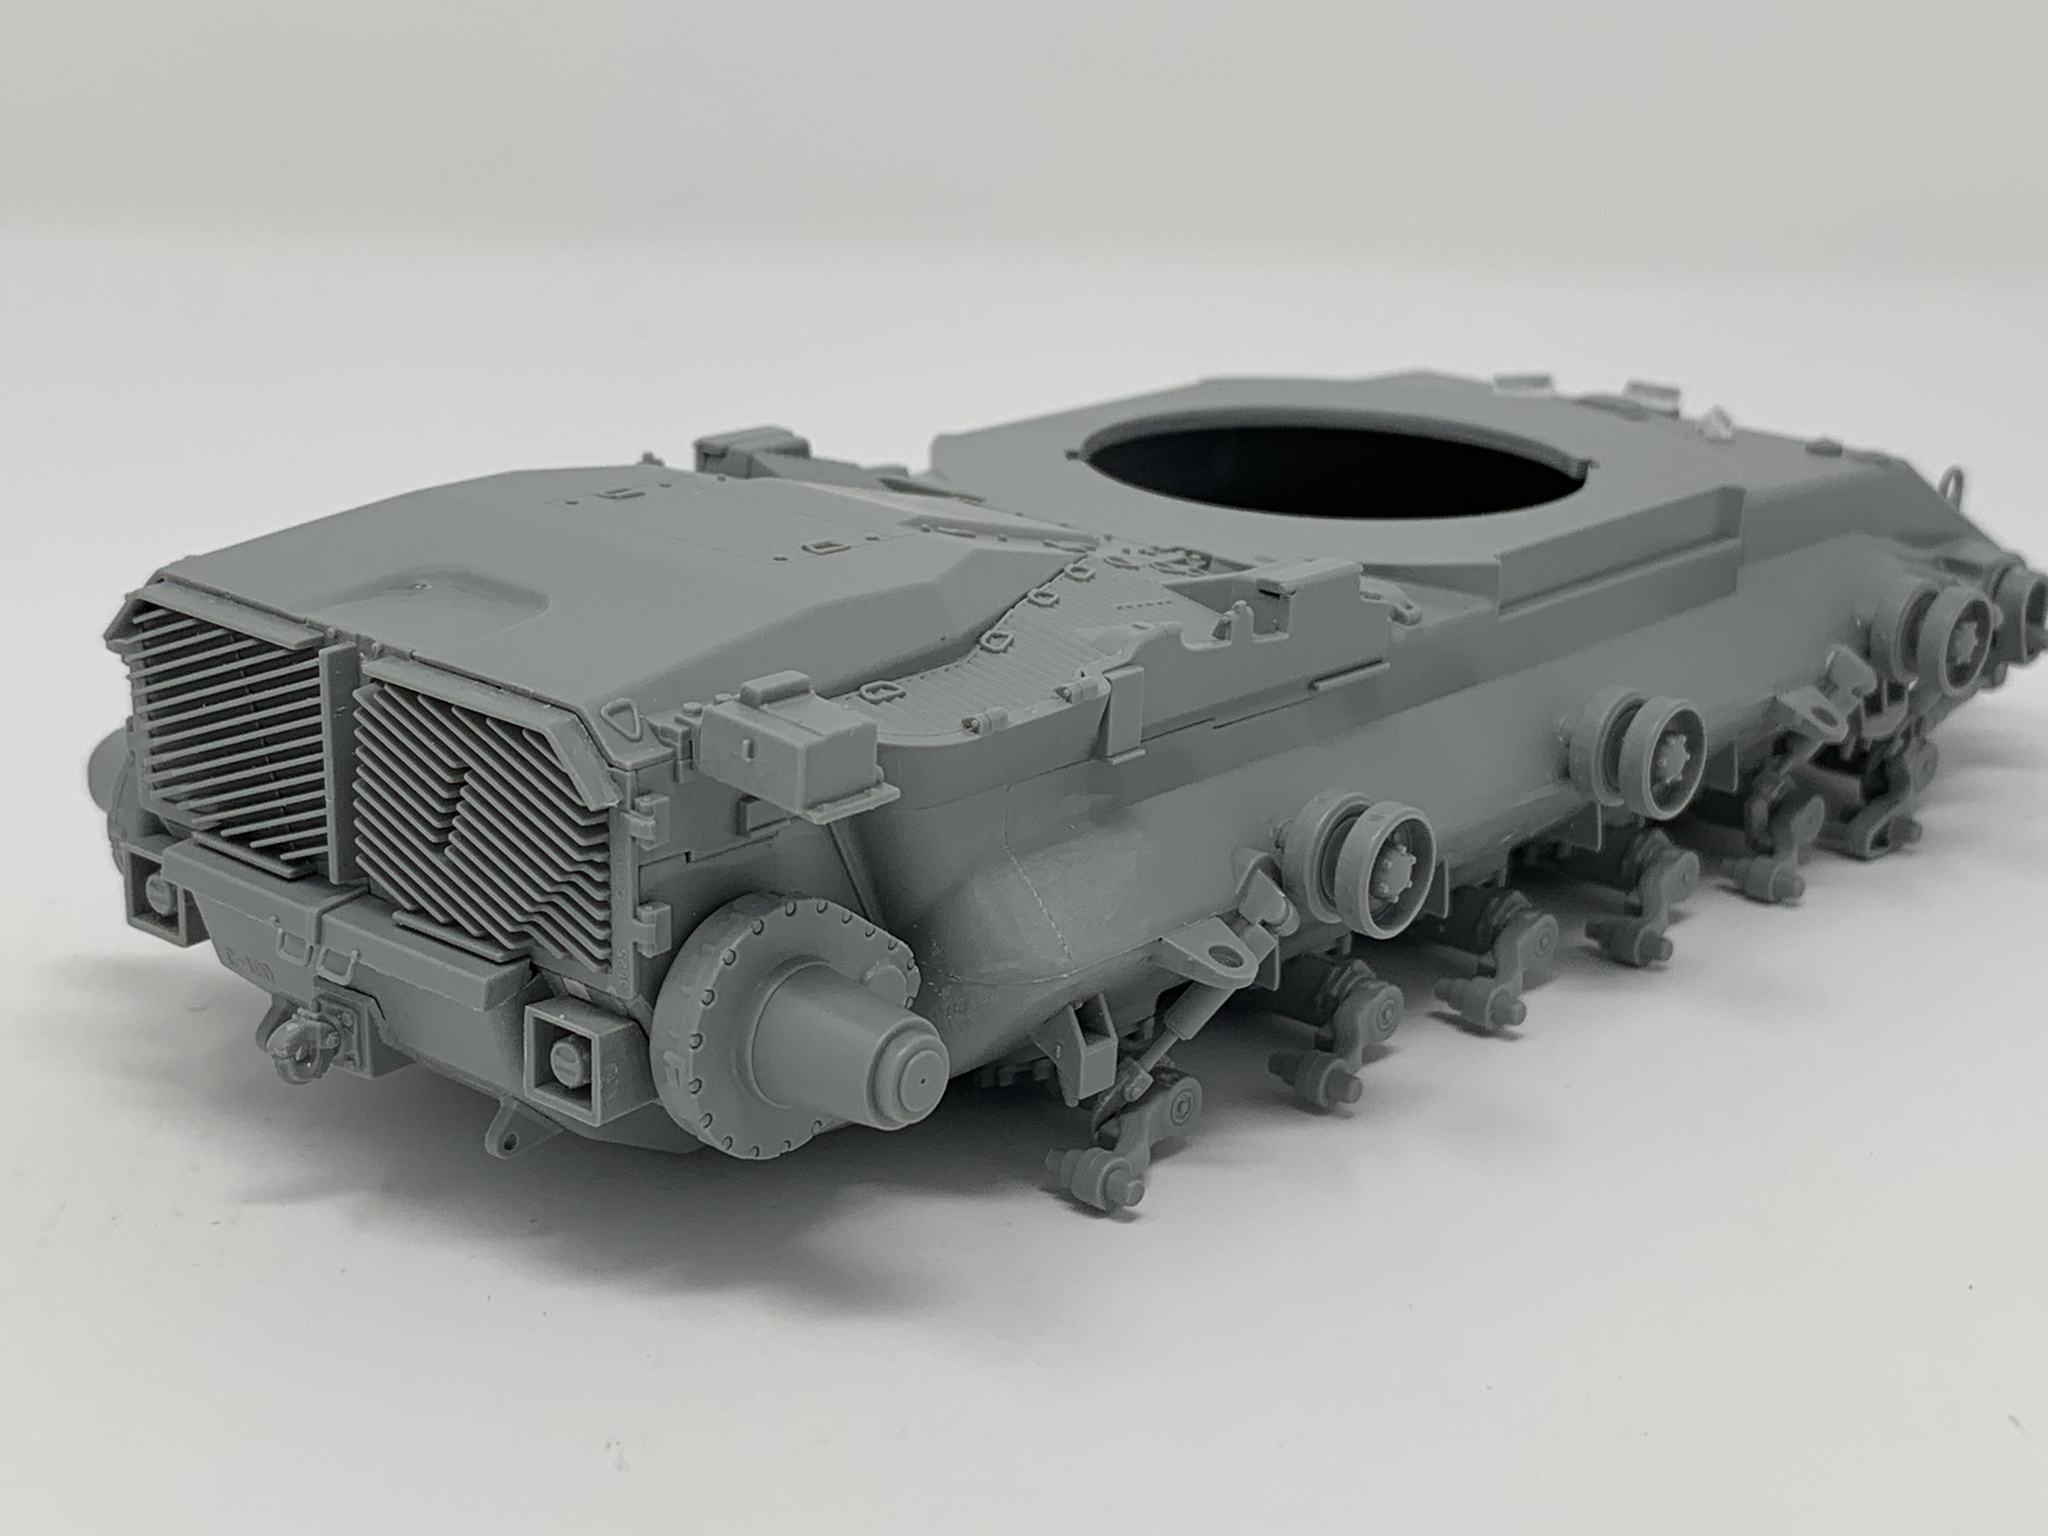
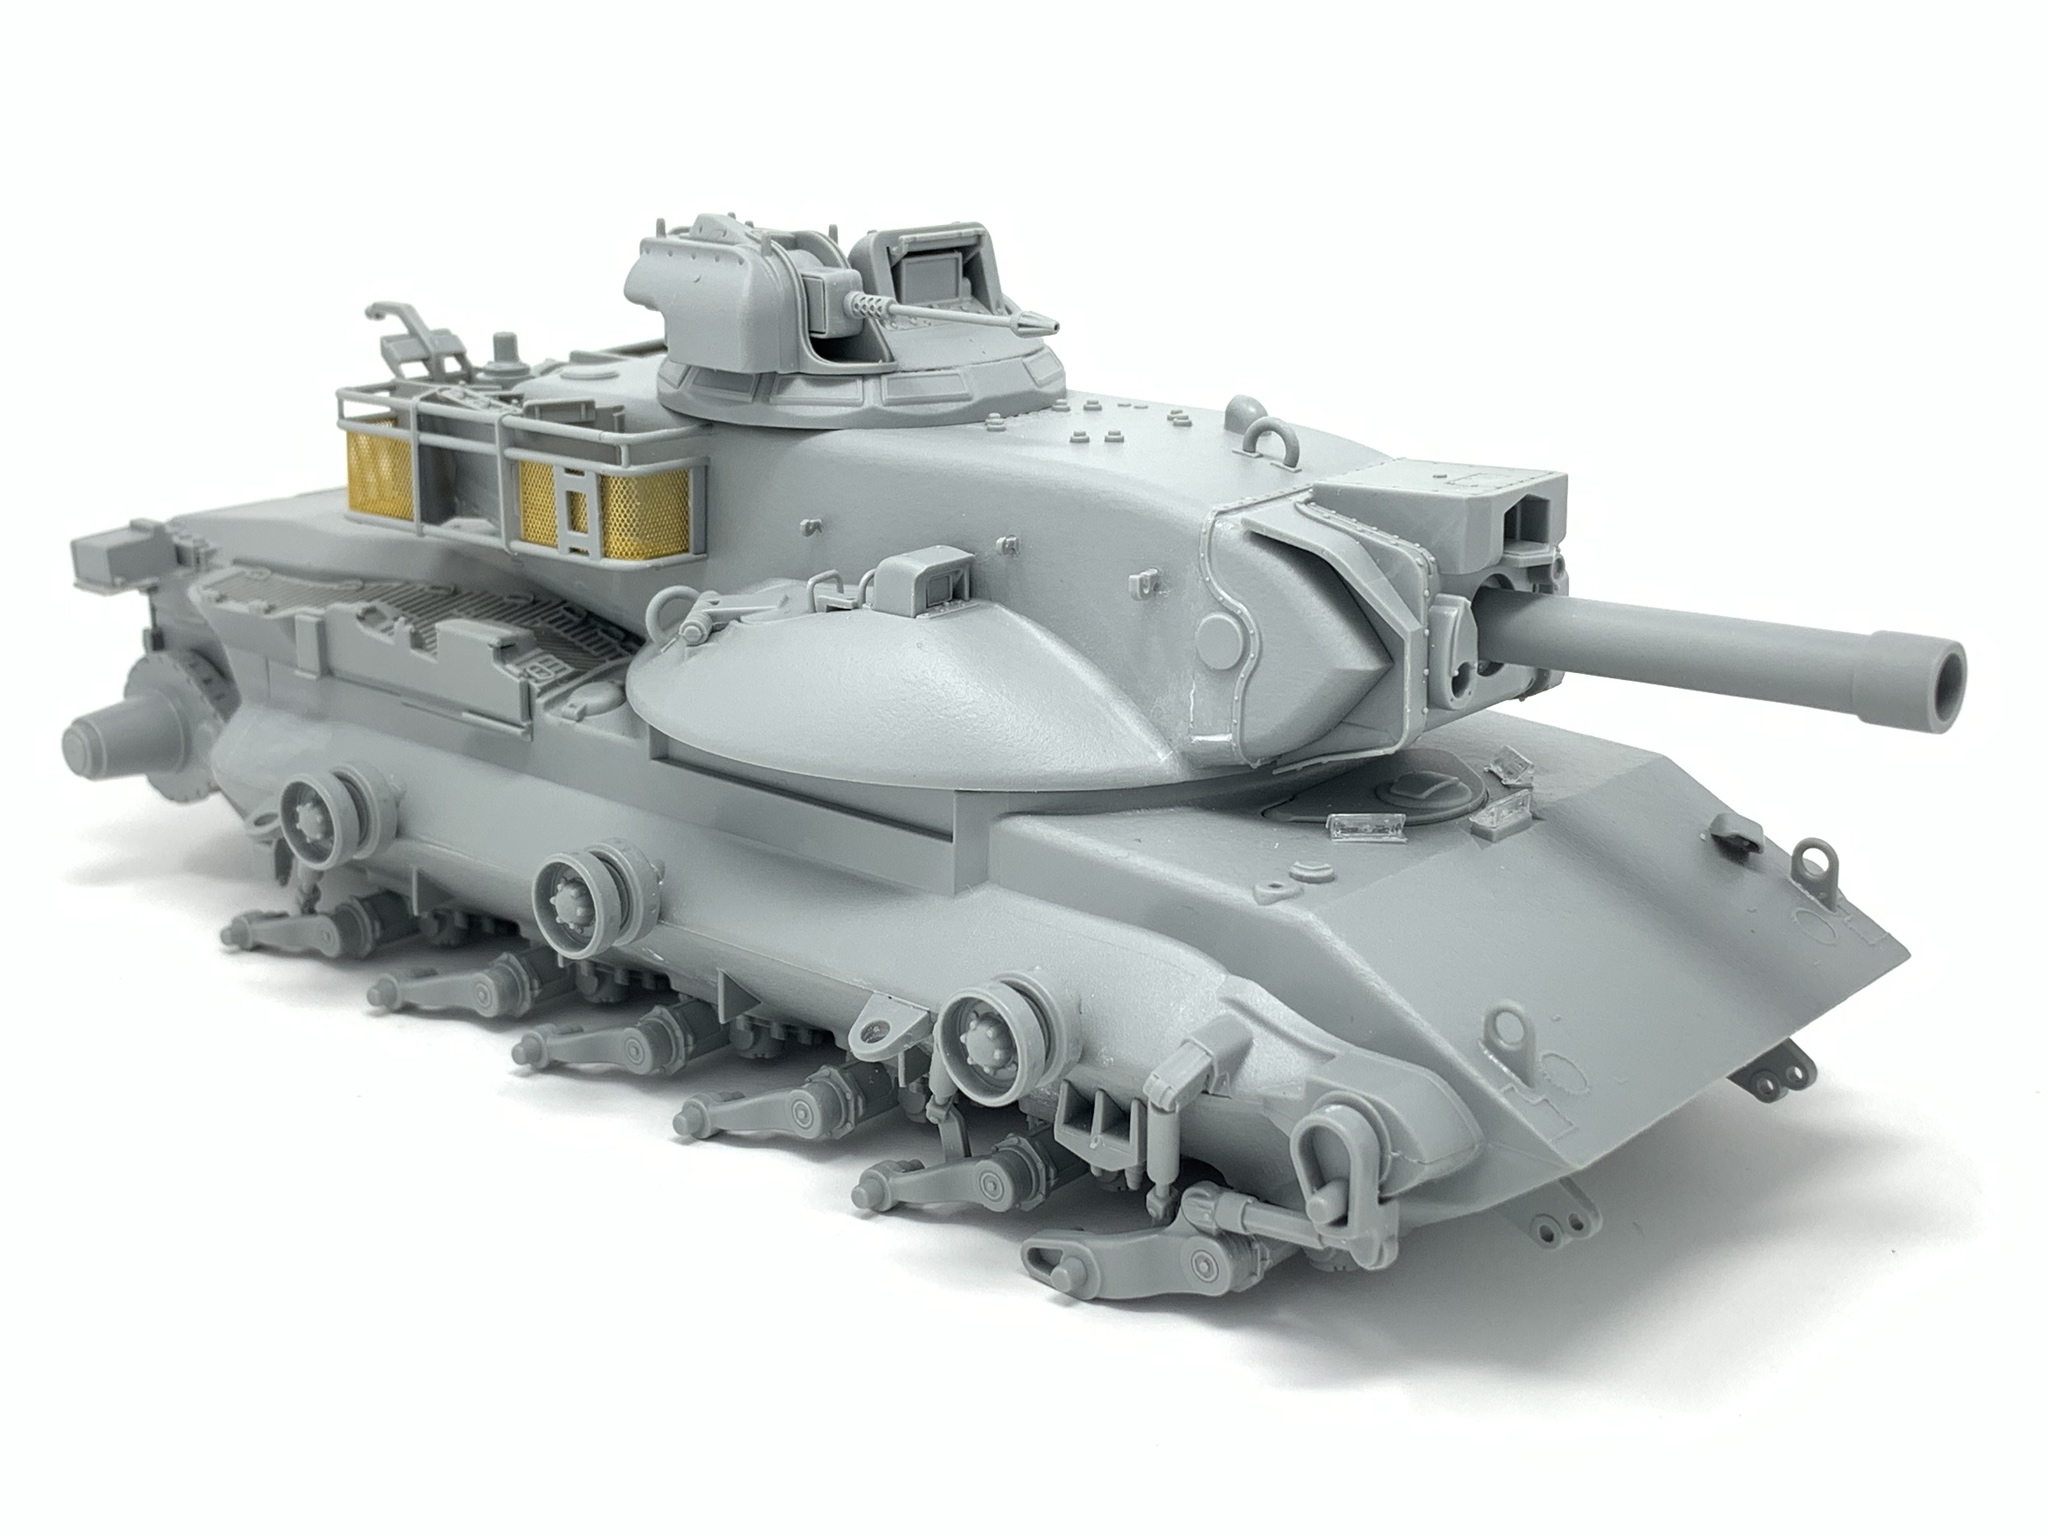
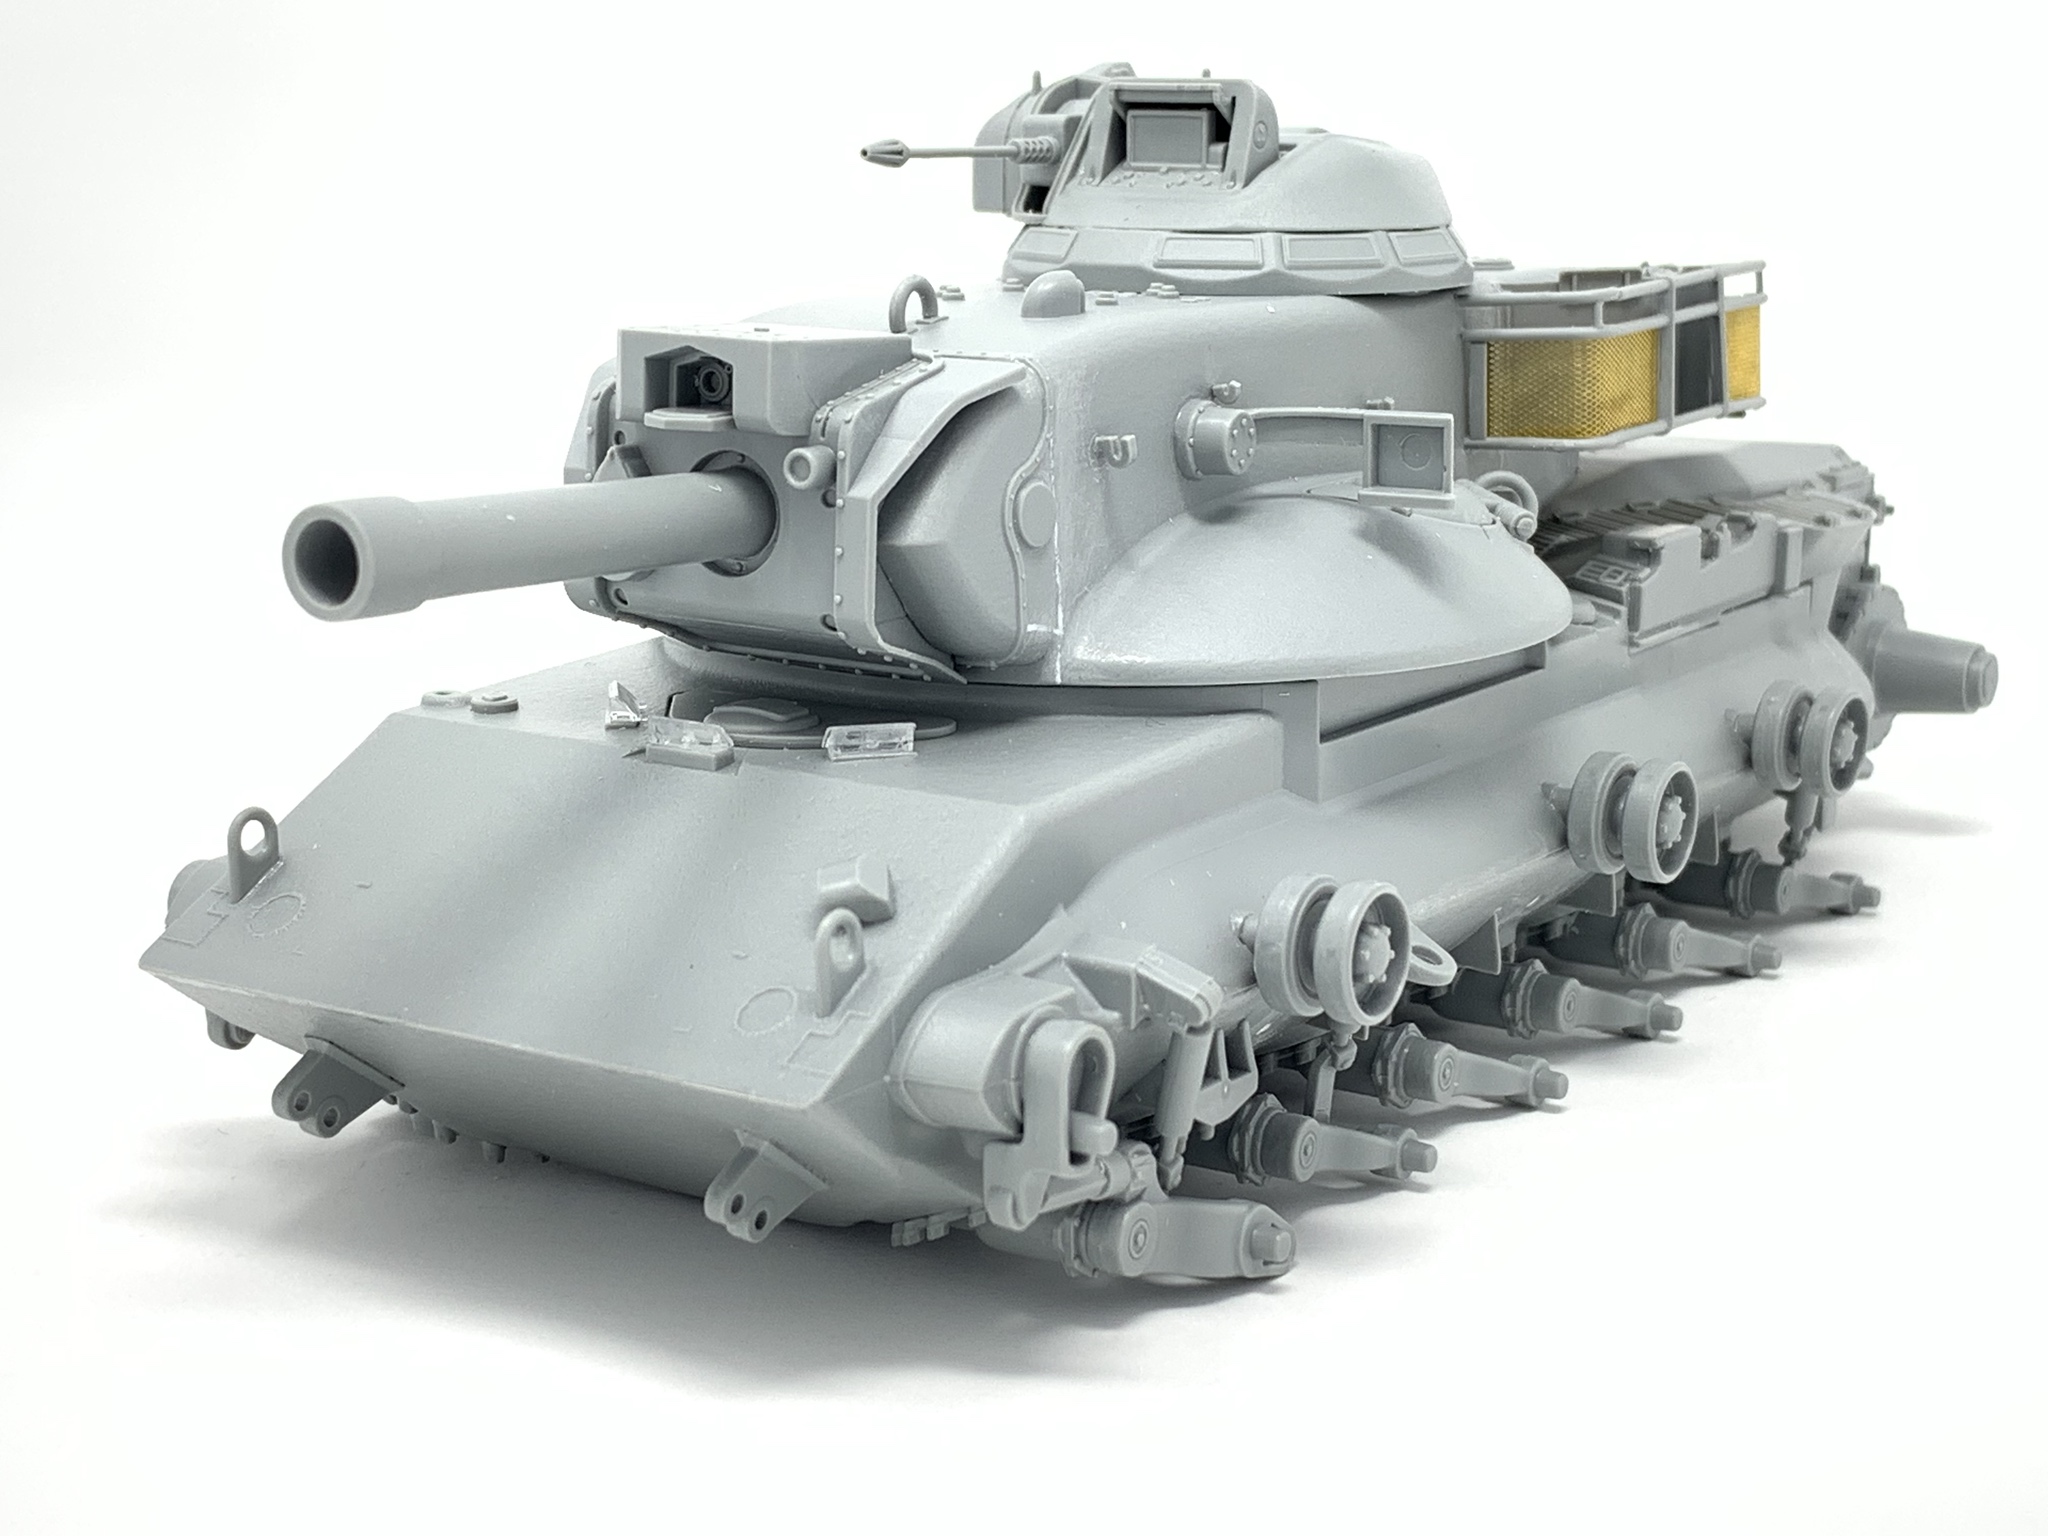
This was a fast build. I will build this as OOB. After a week's work, it is about 95% complete. Detail is pretty good. Check out the hull bottom.


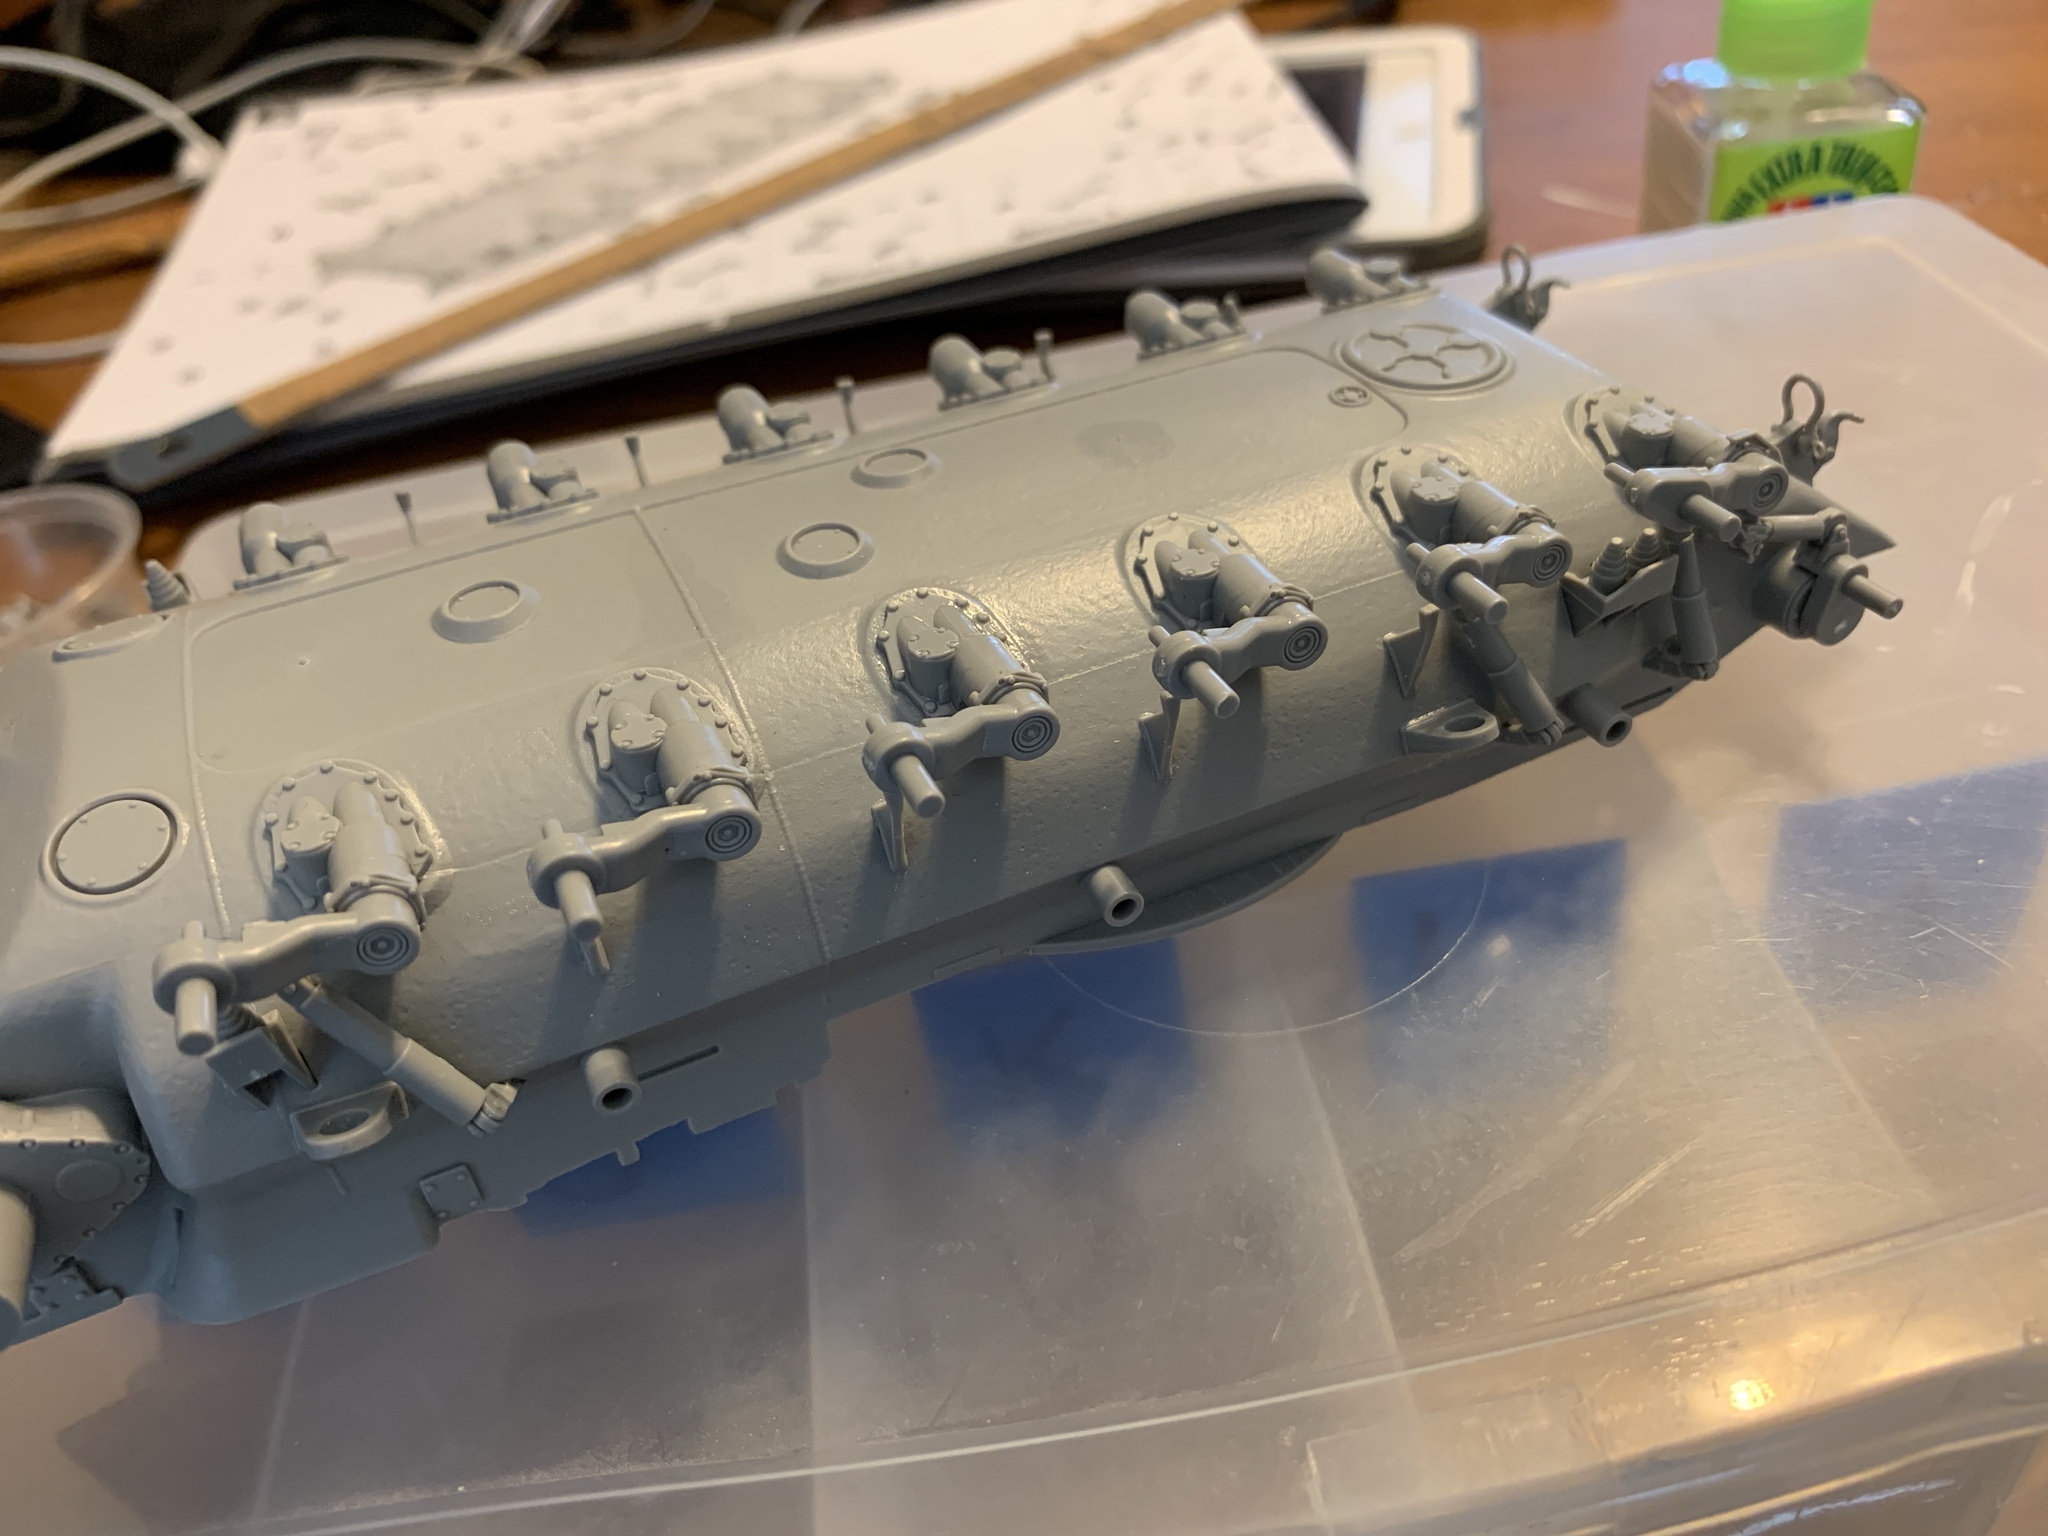
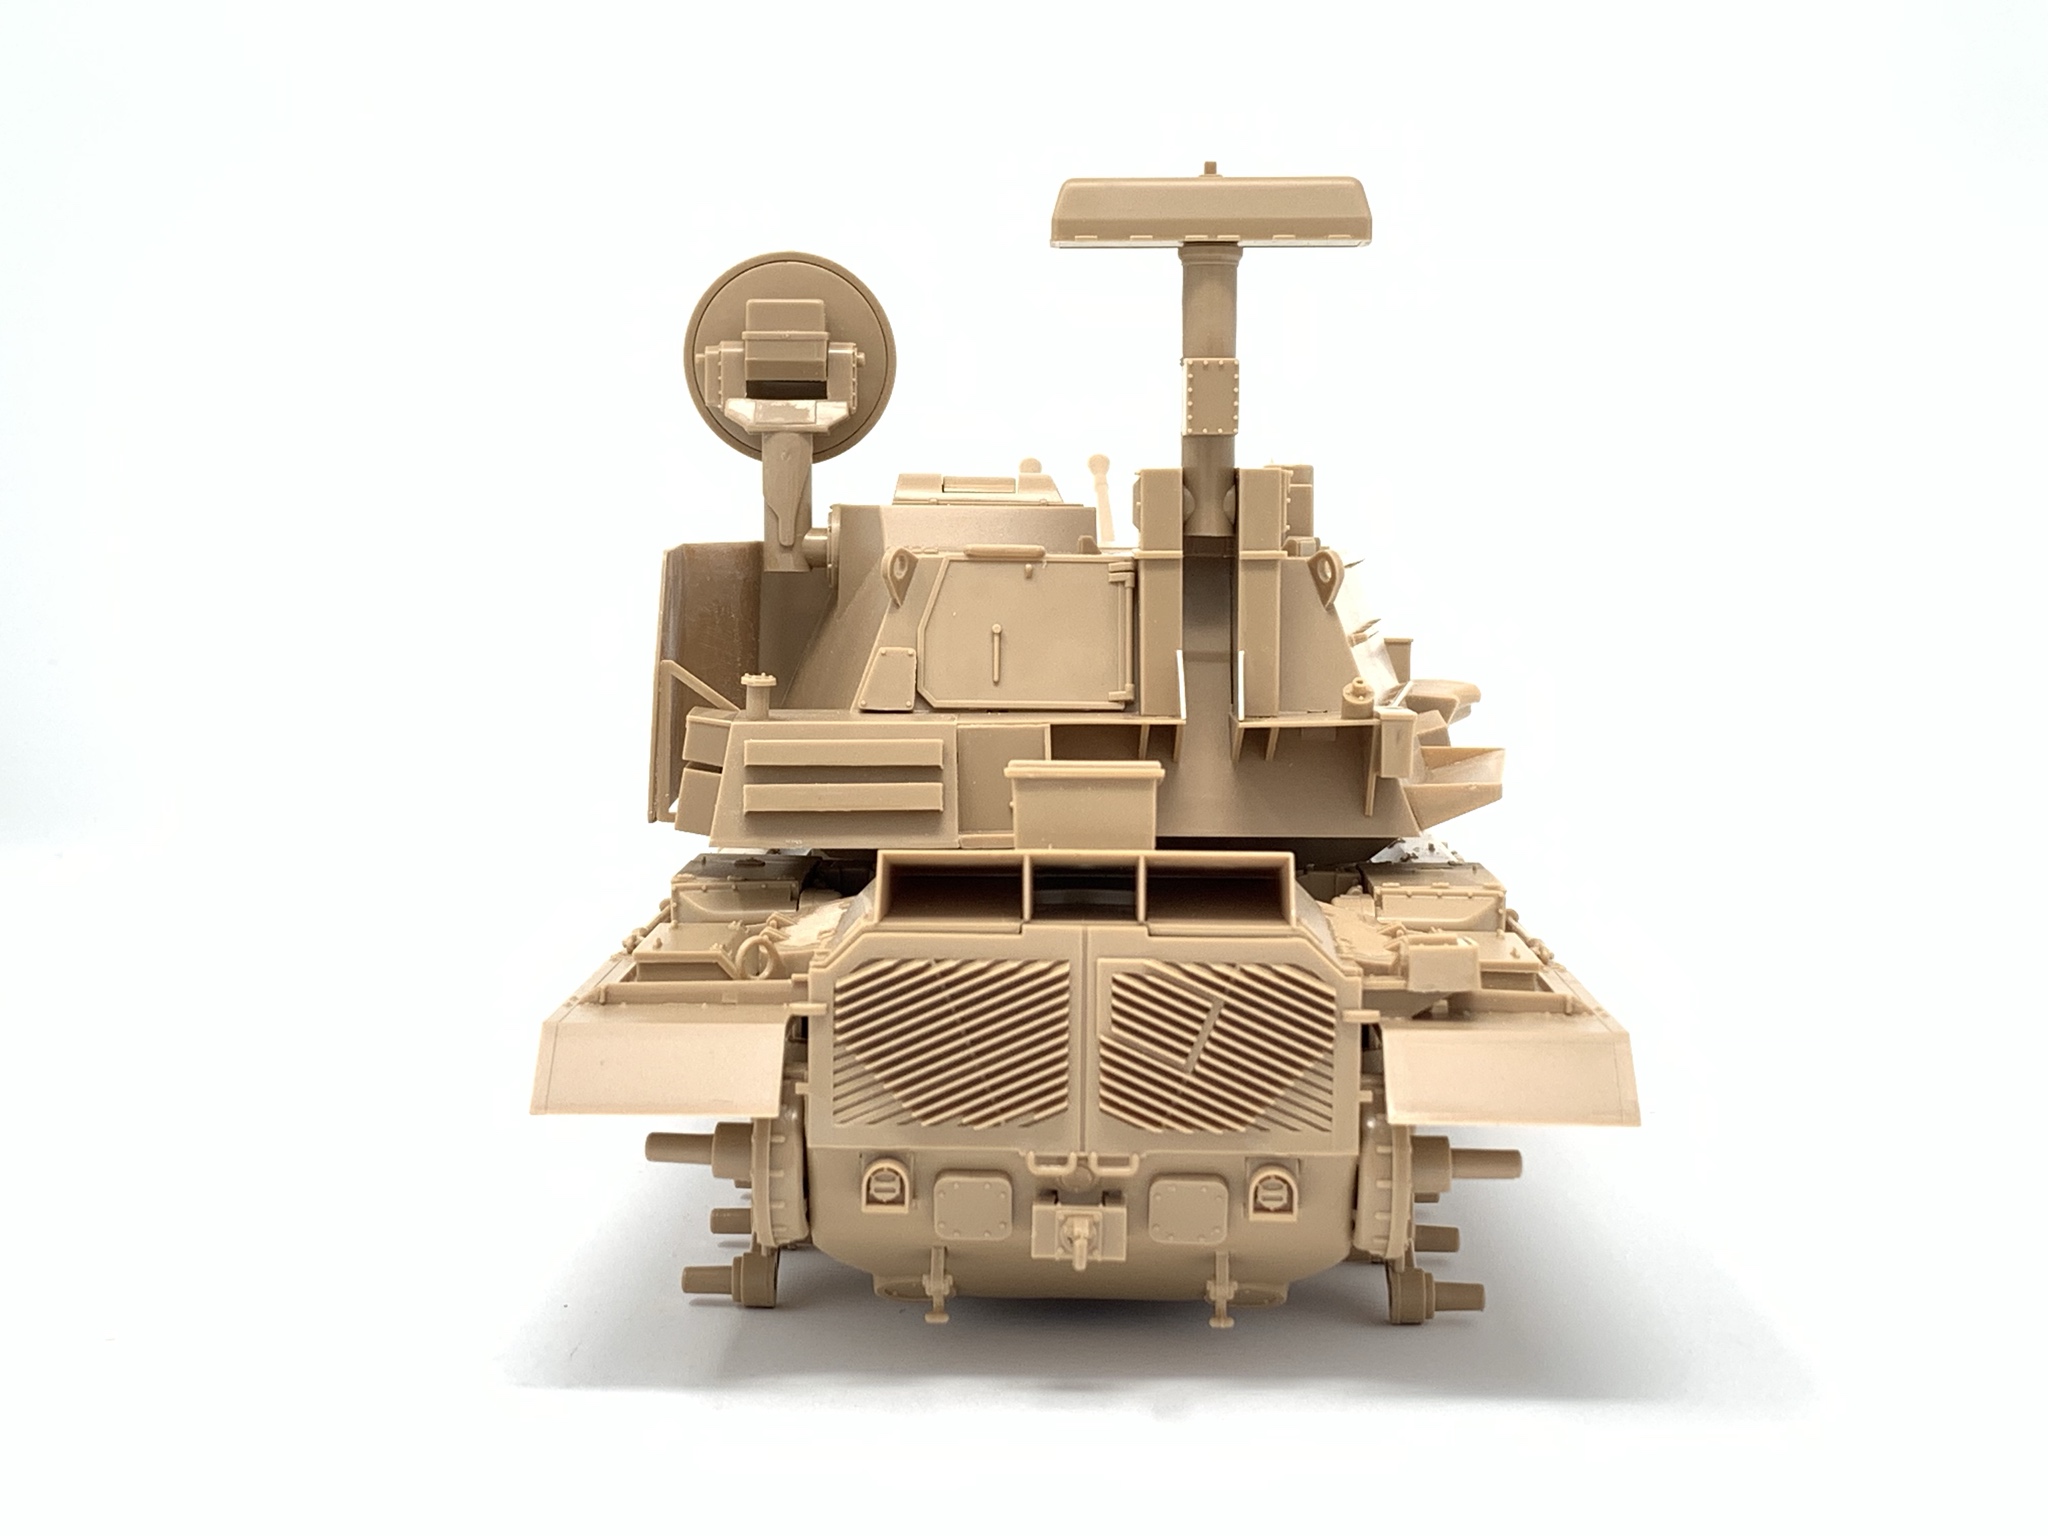
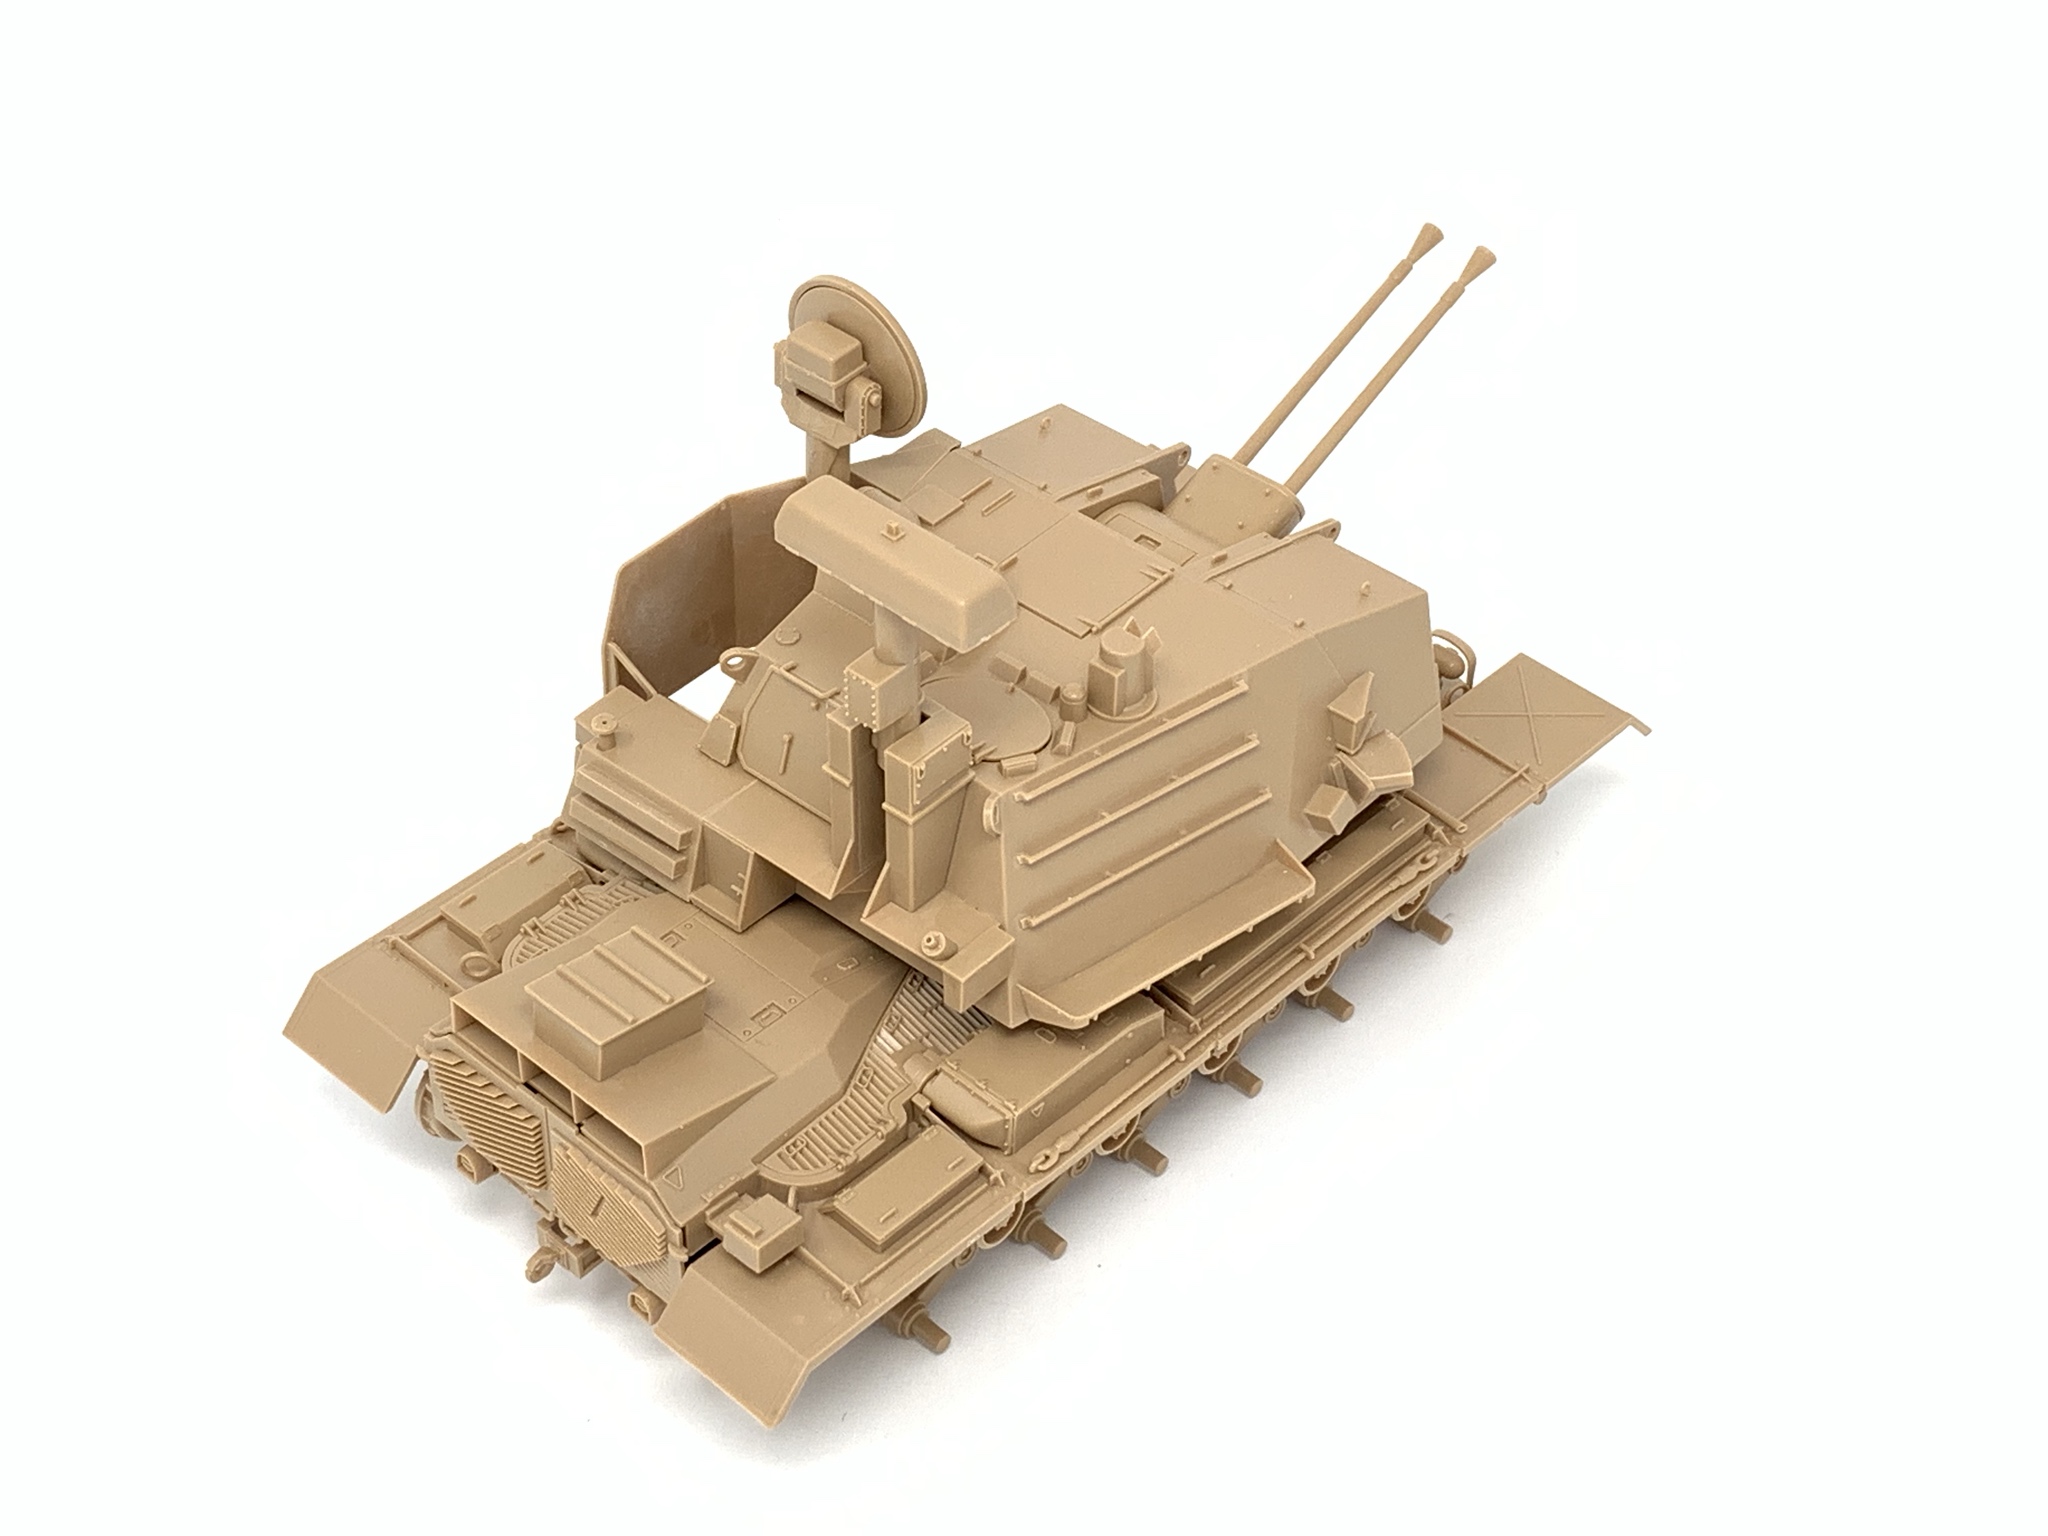
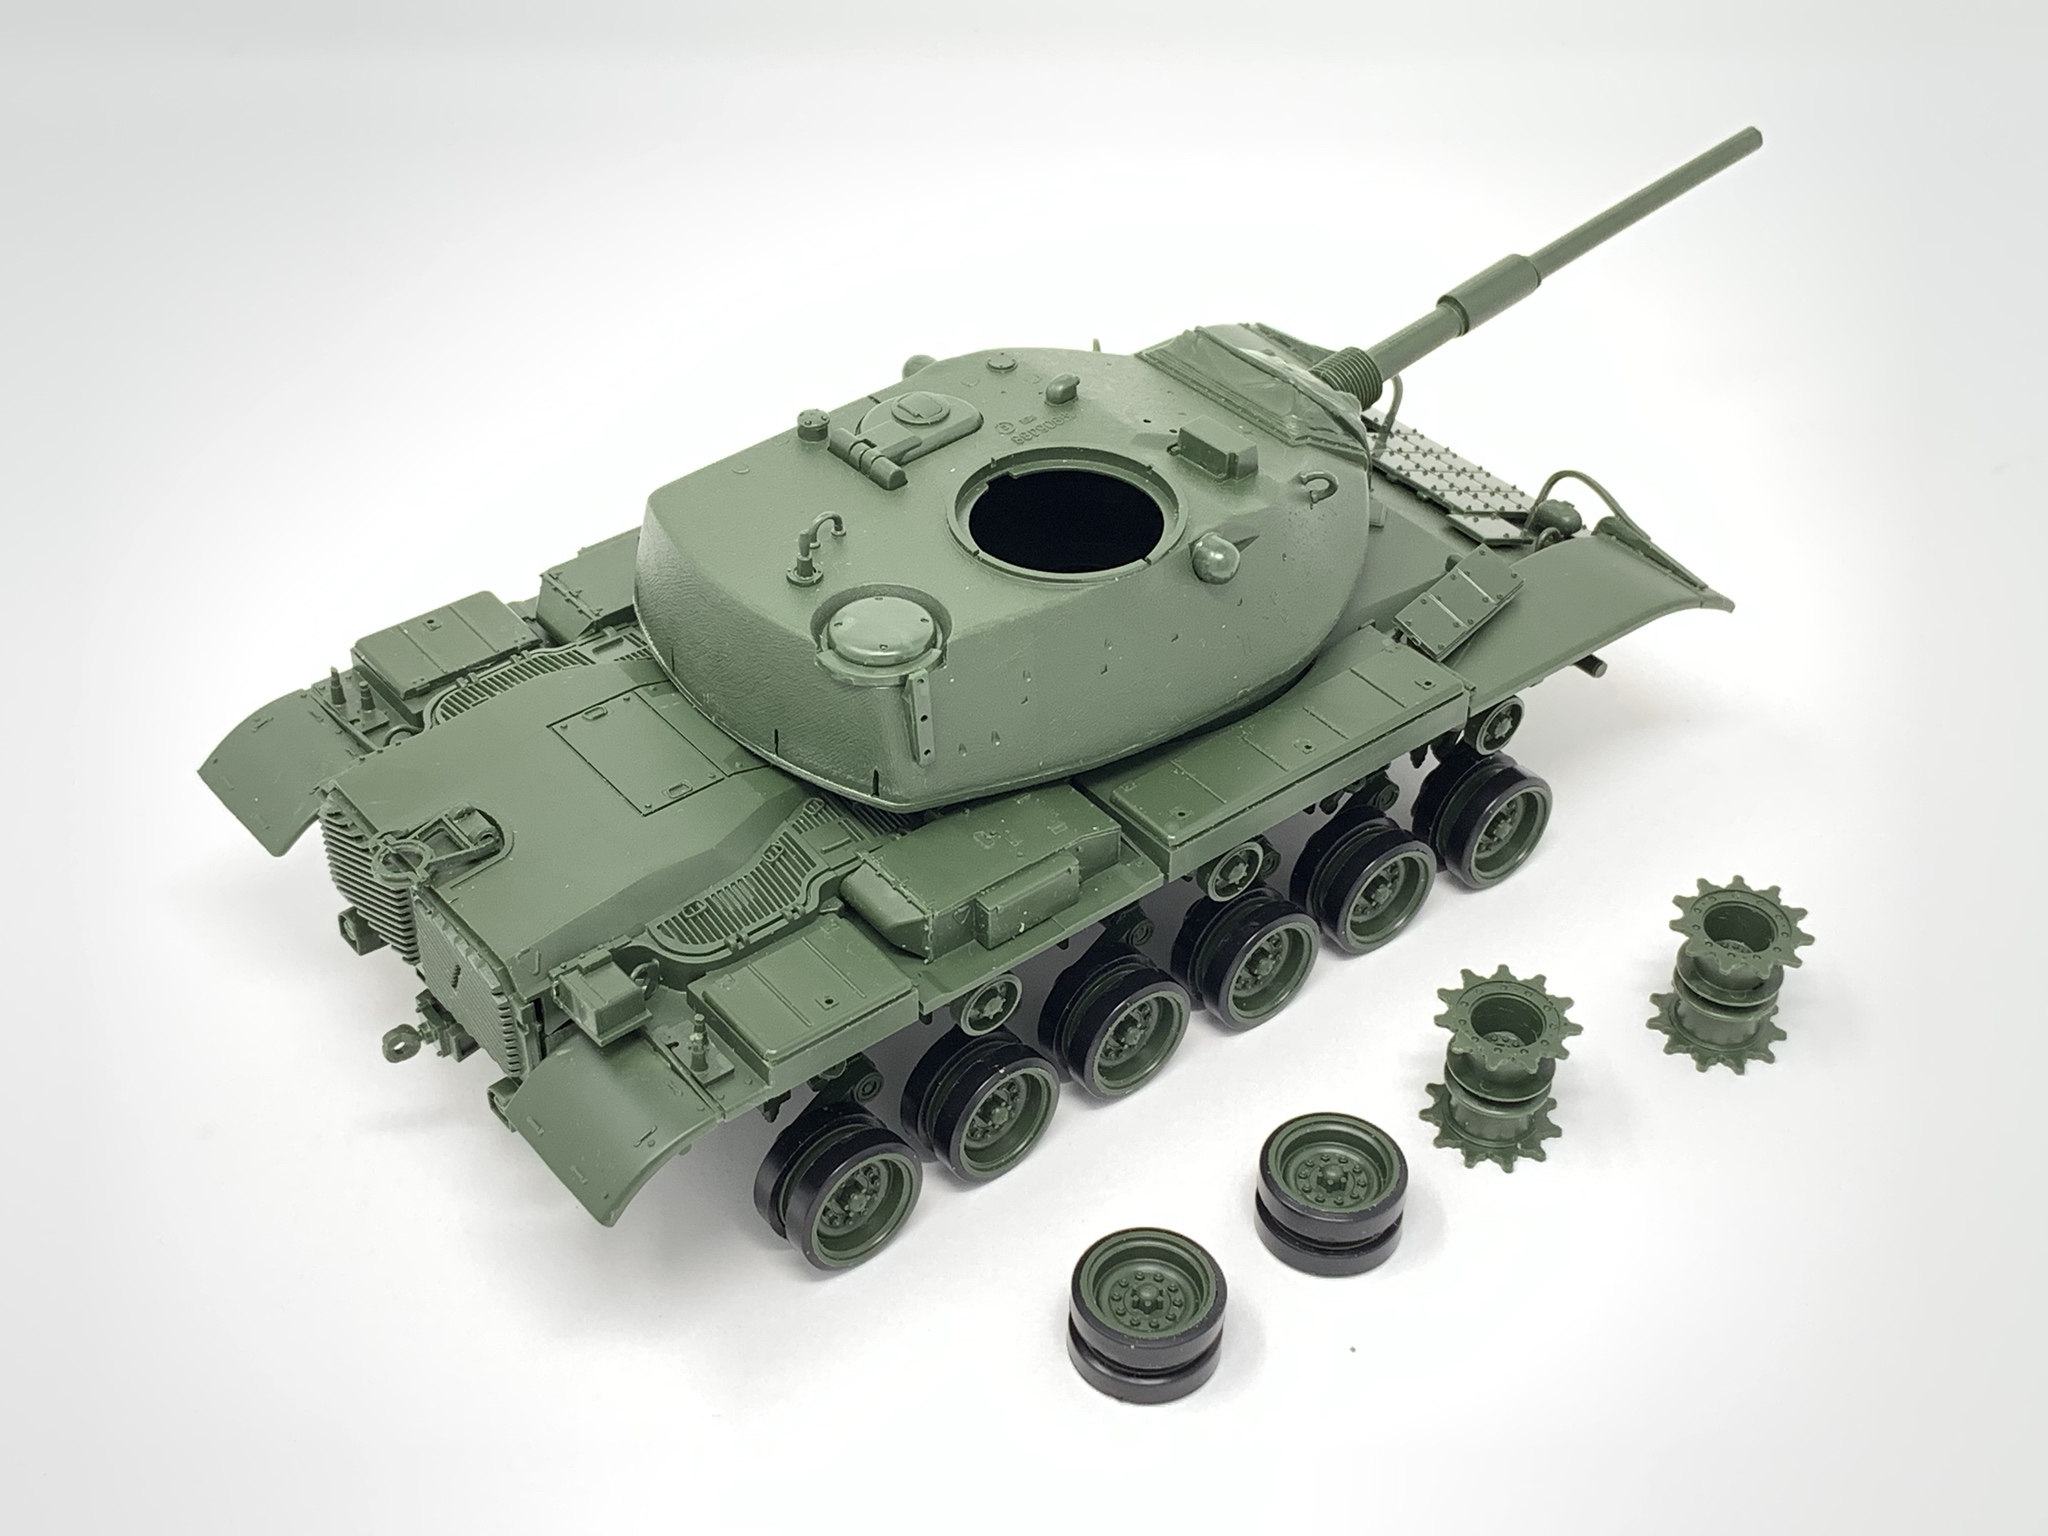
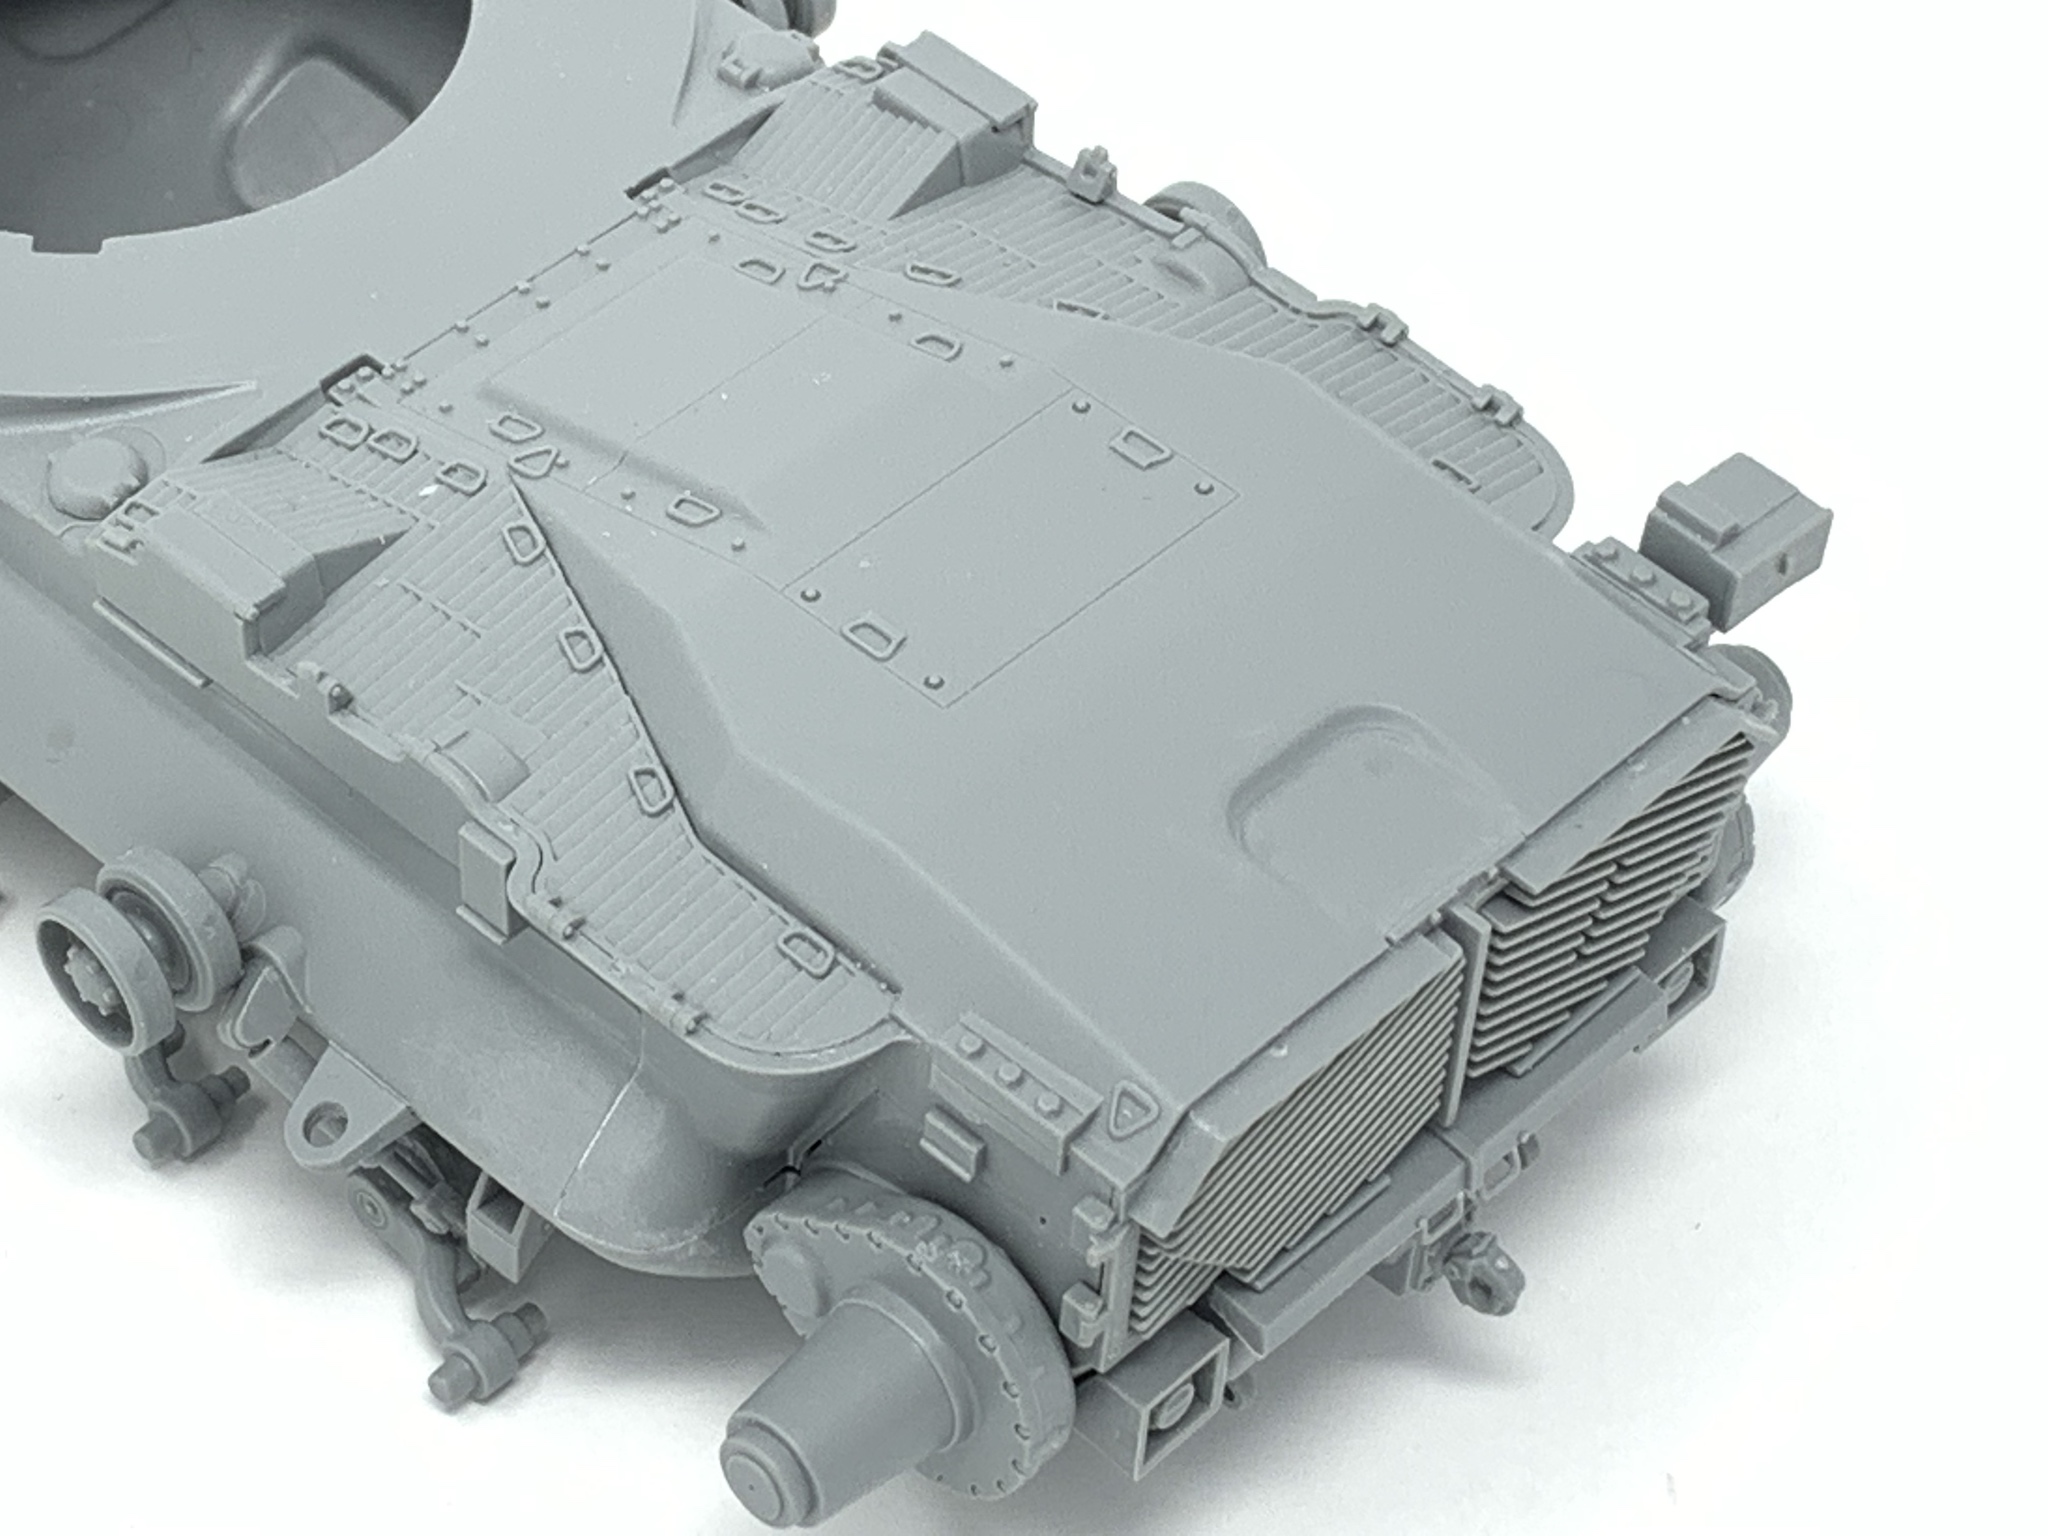
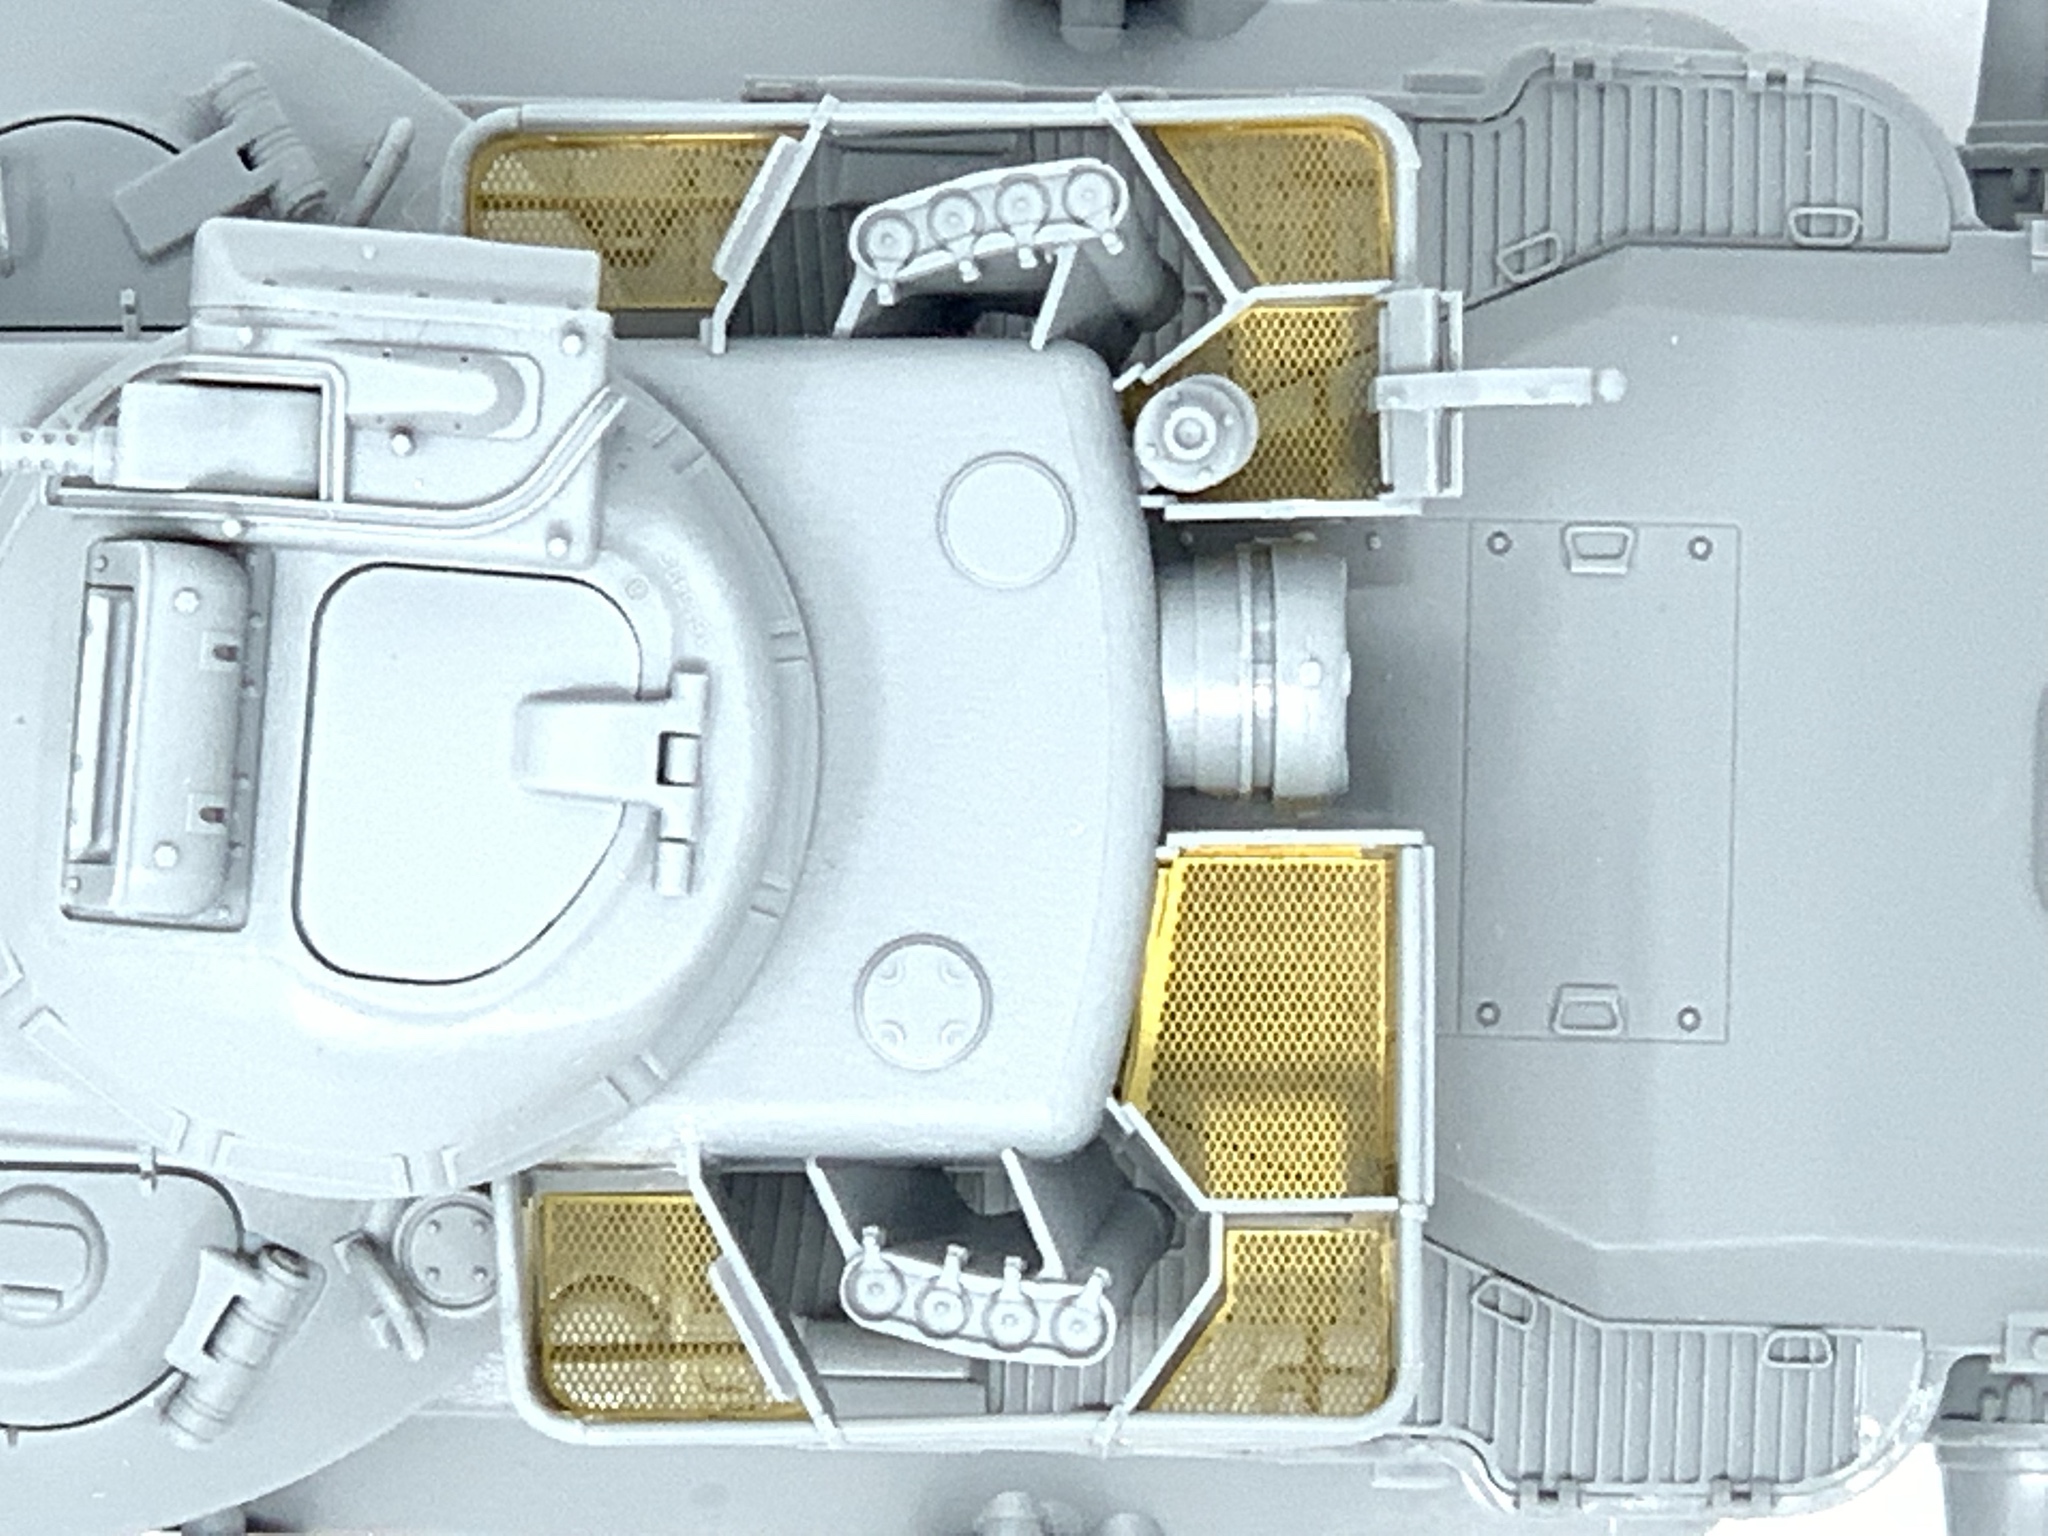
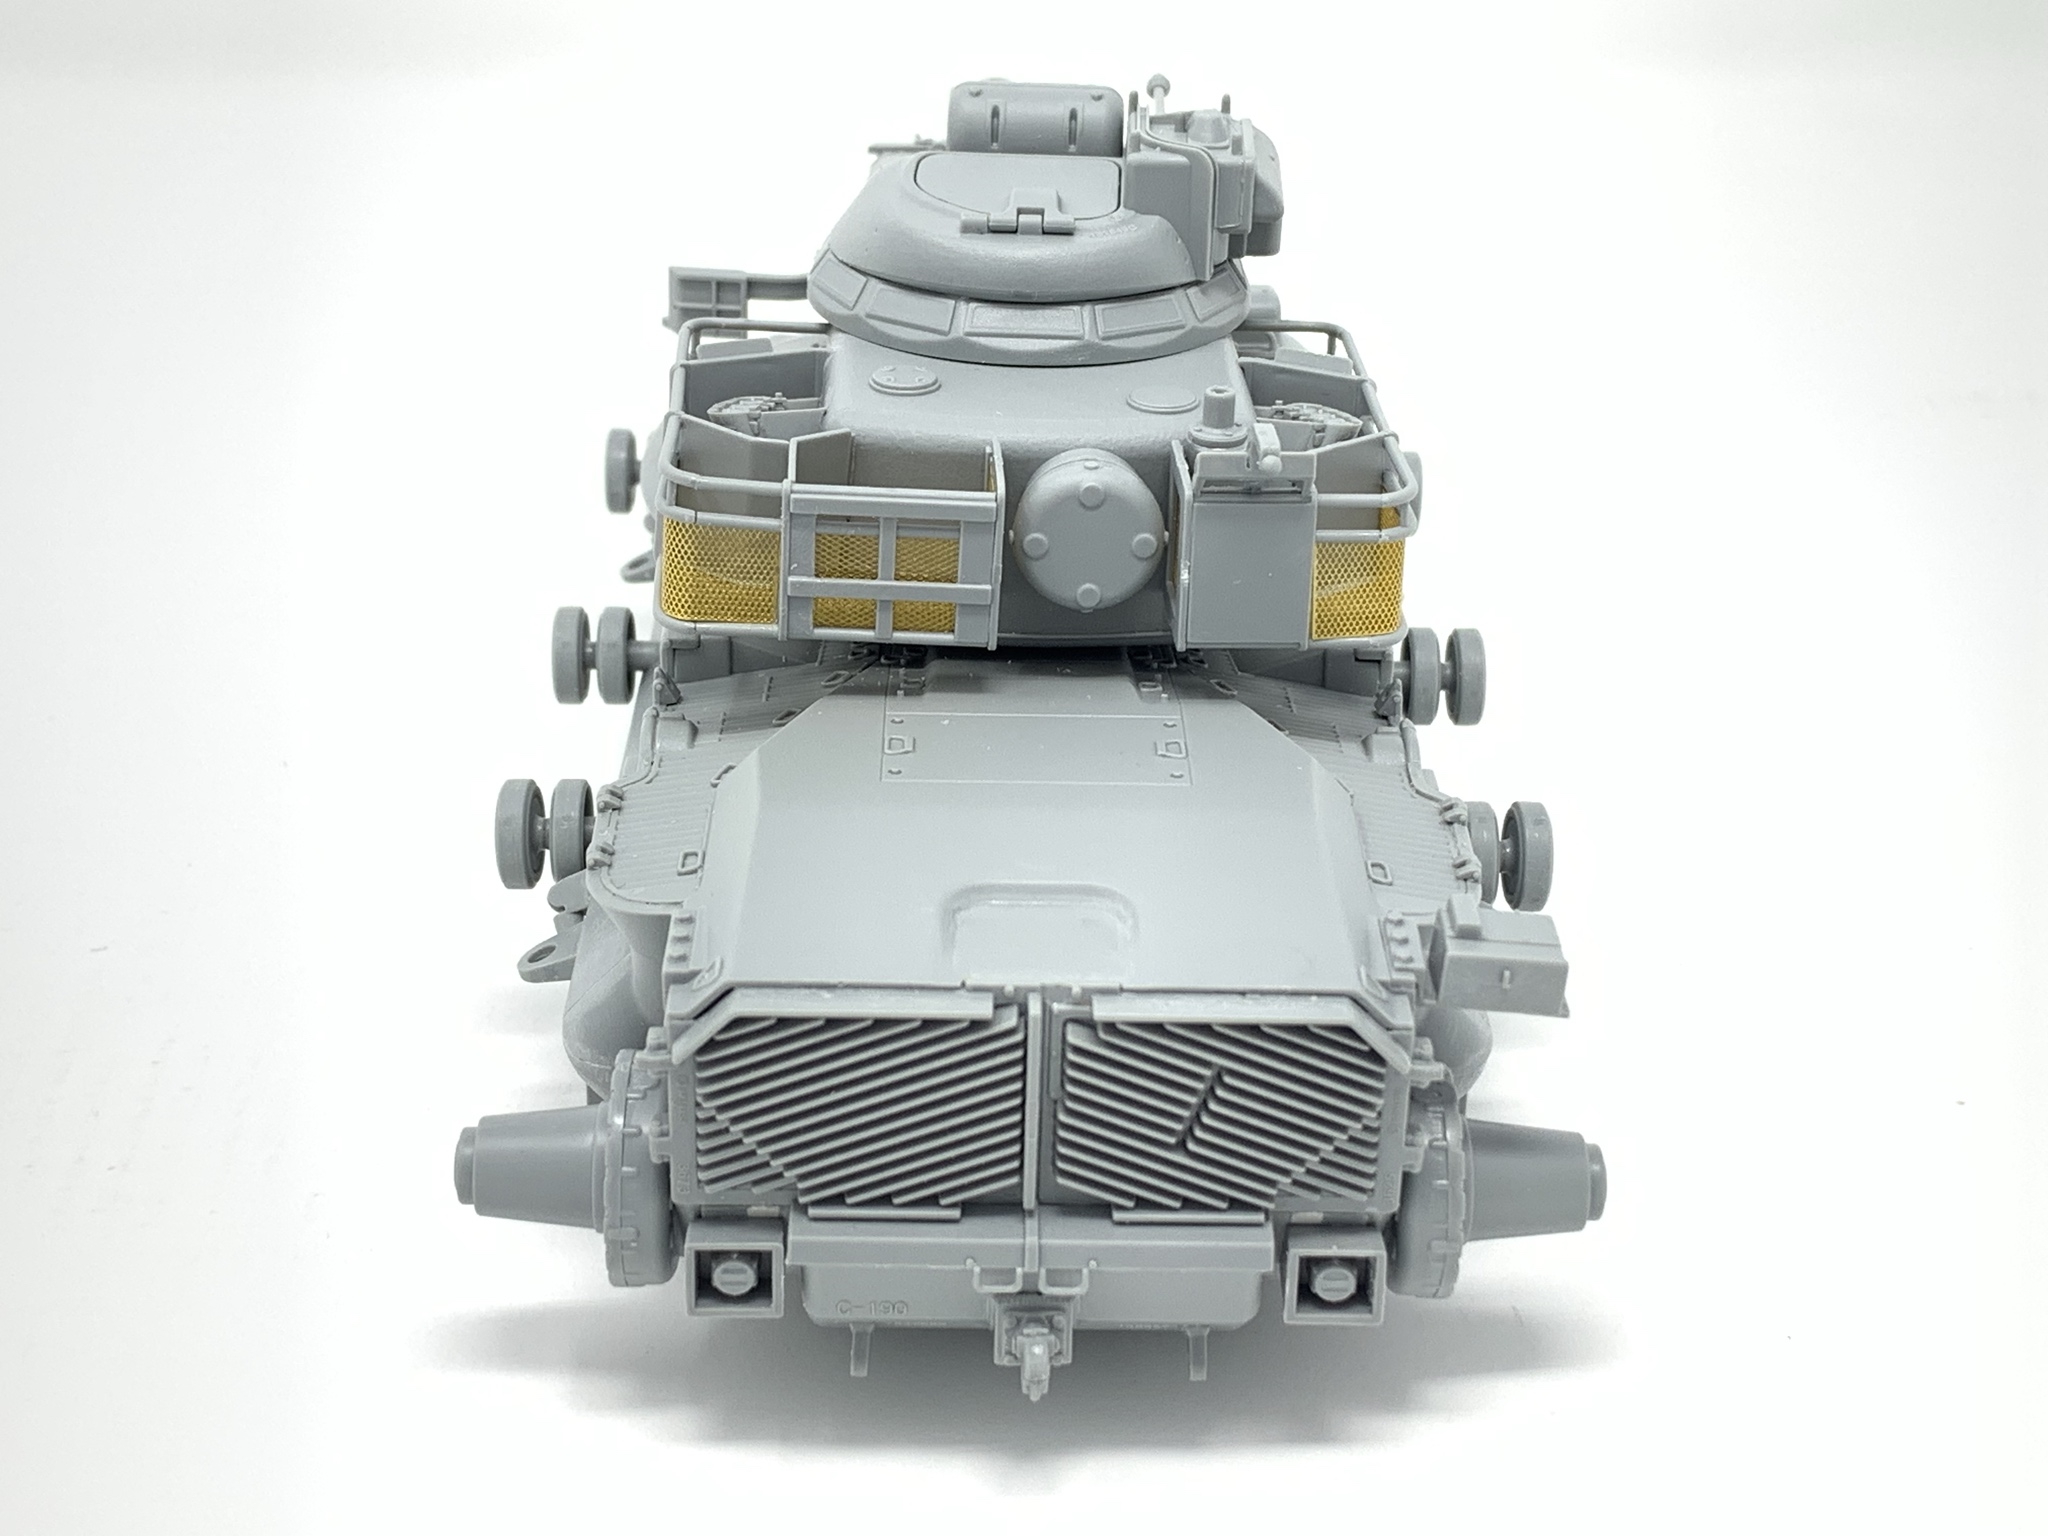
And the engine deck.


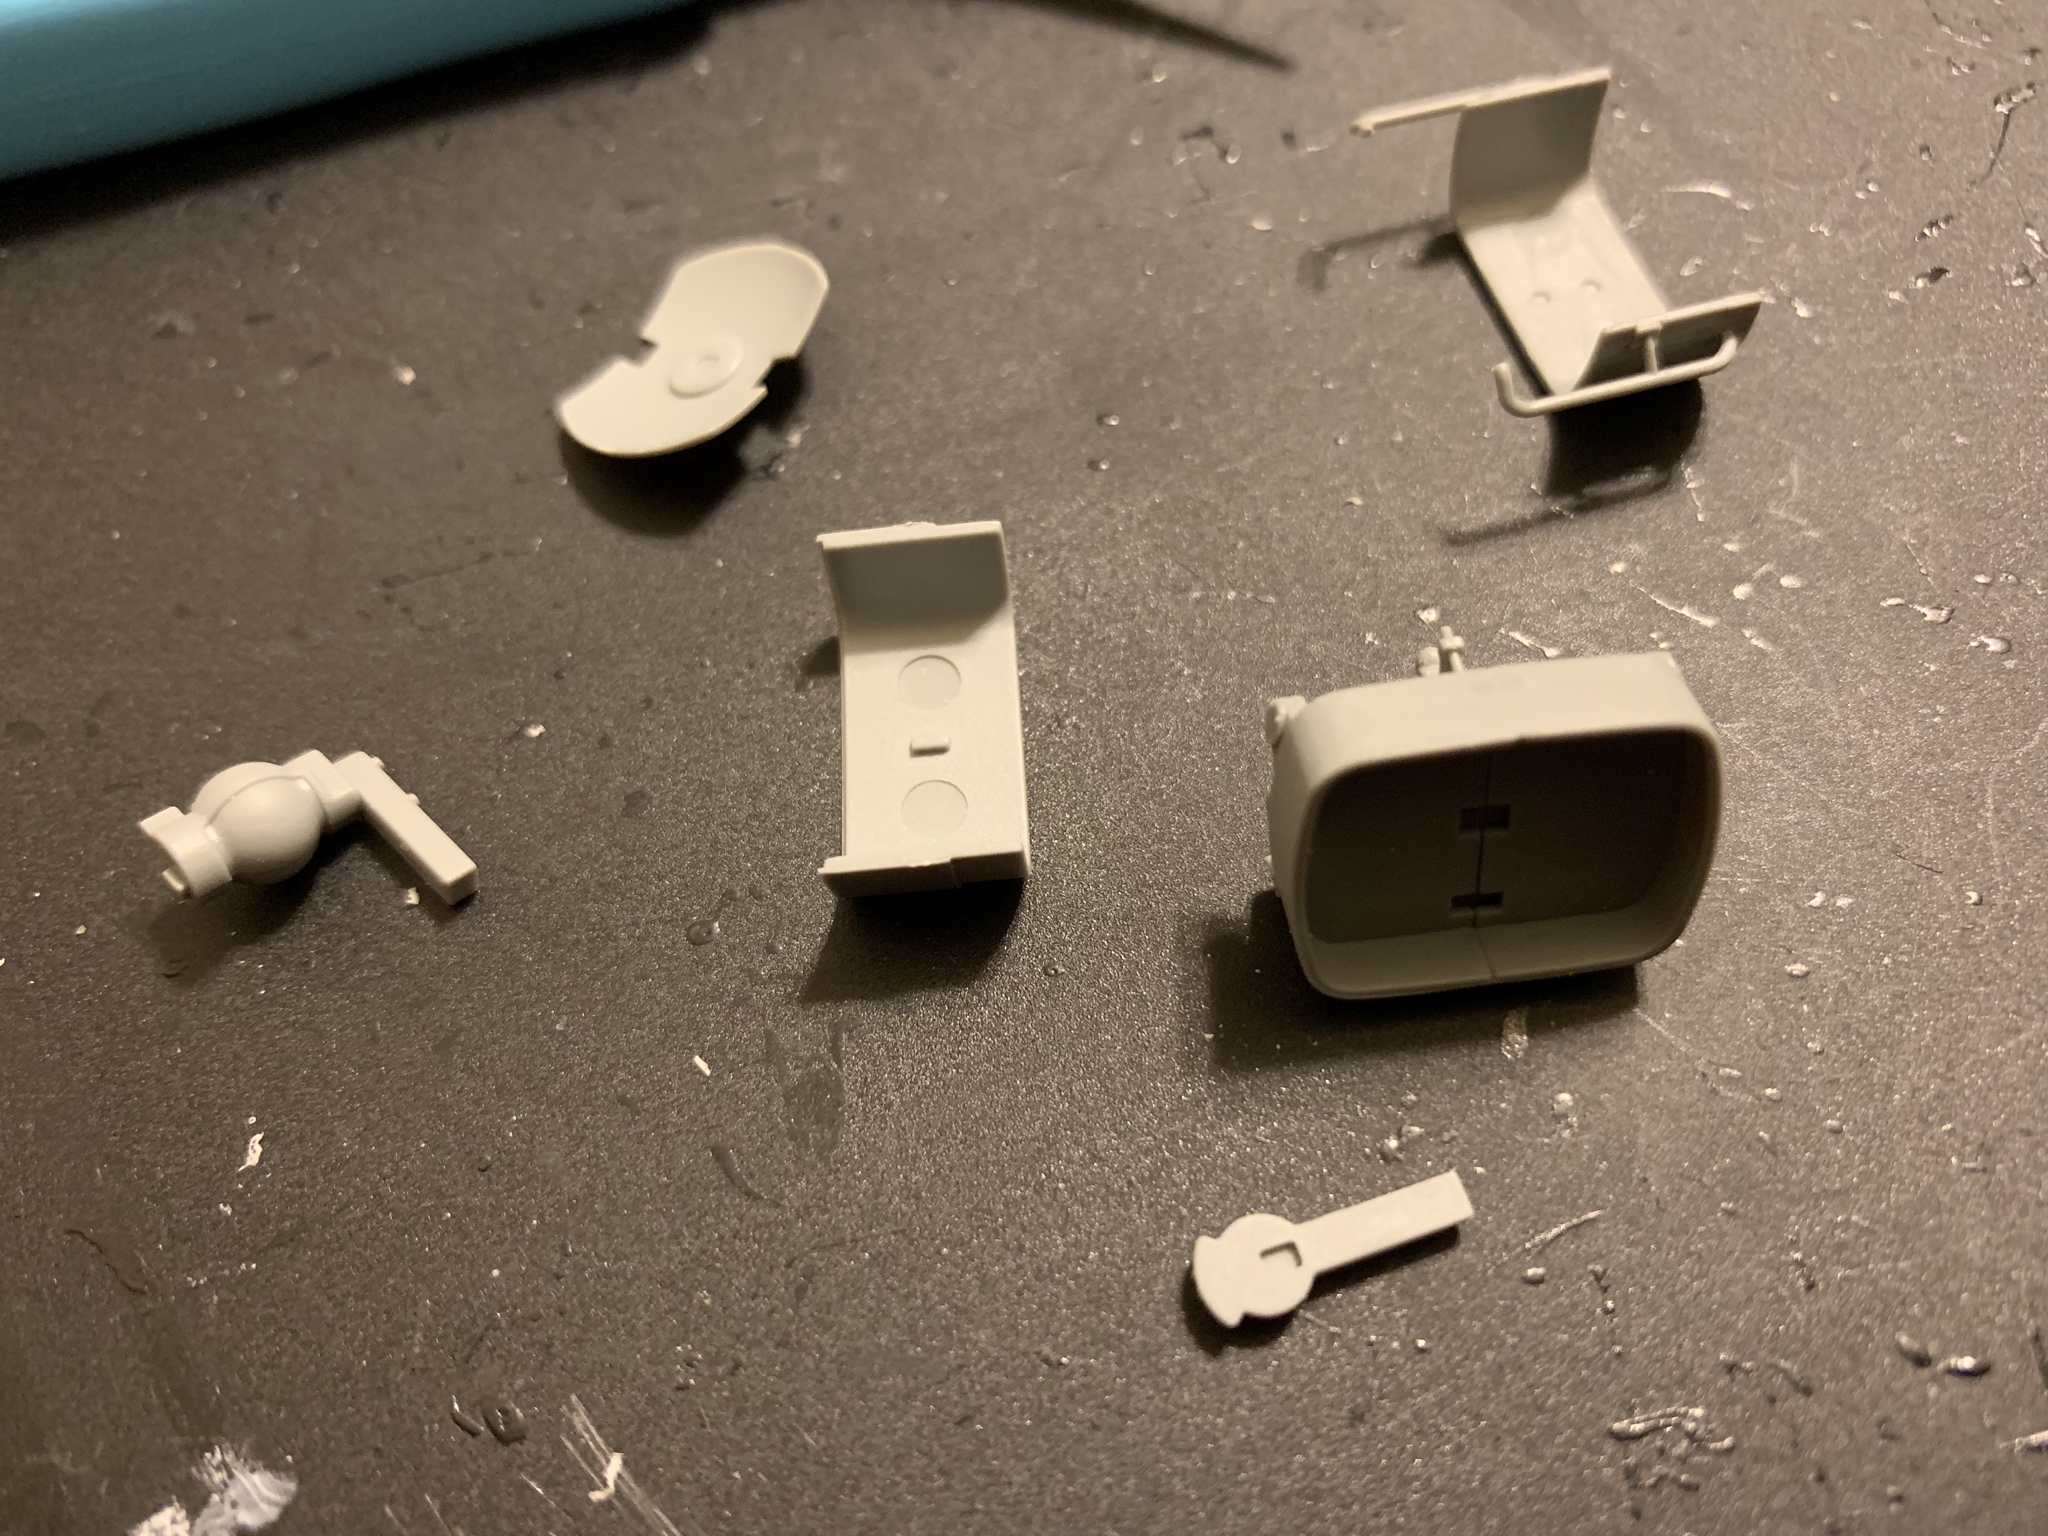
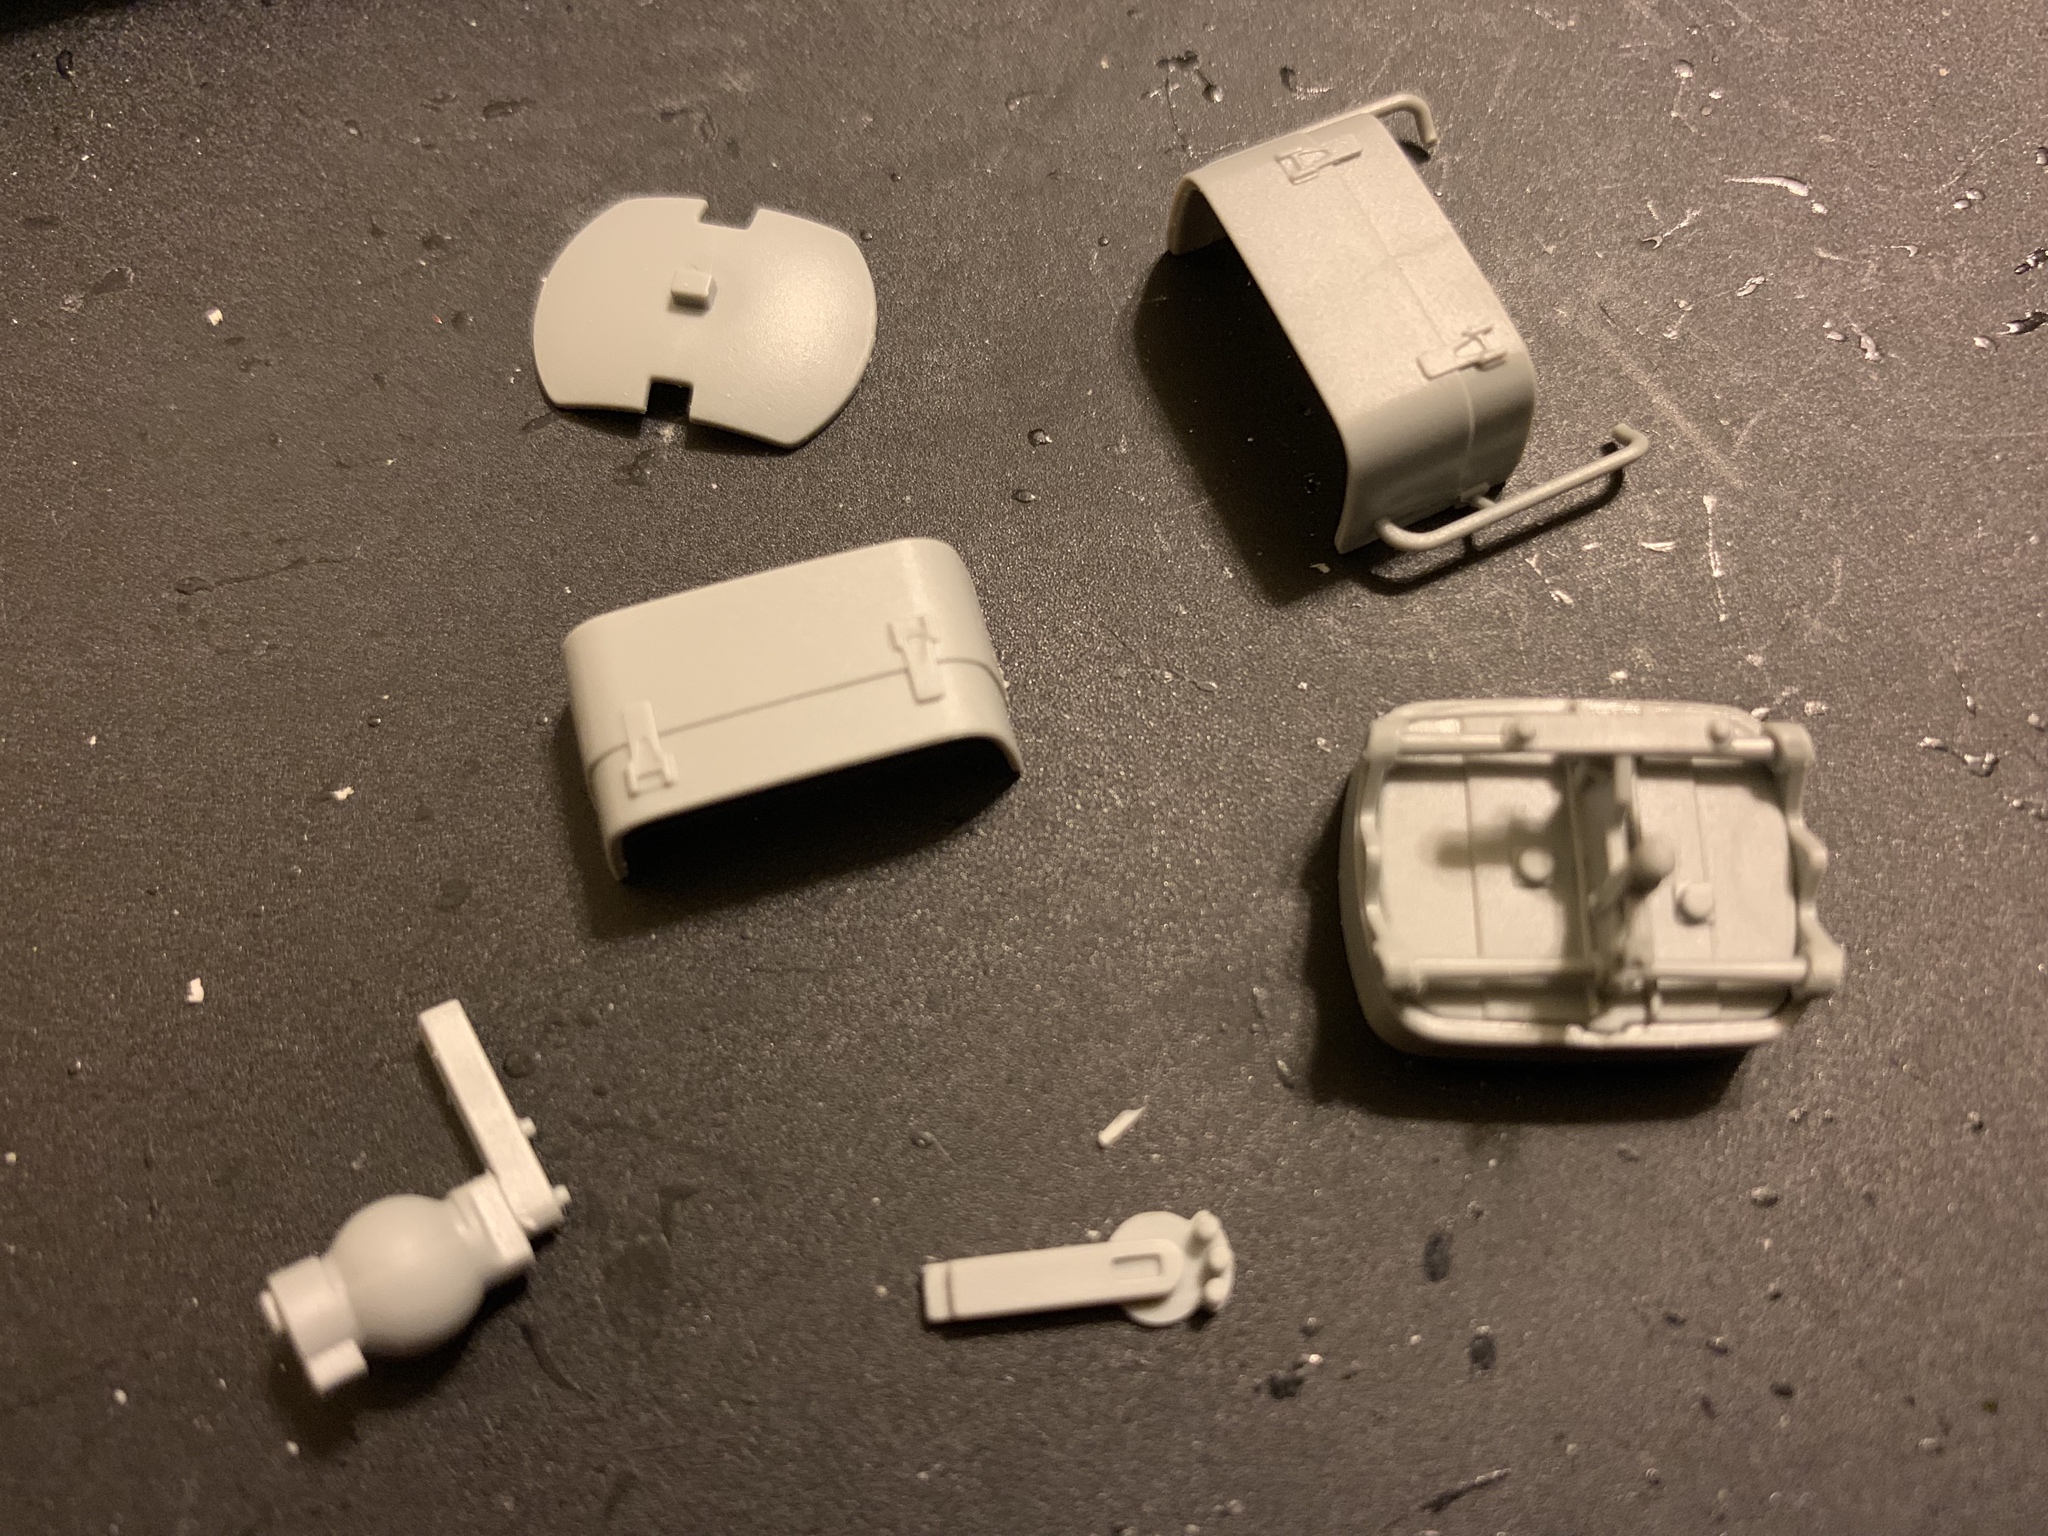
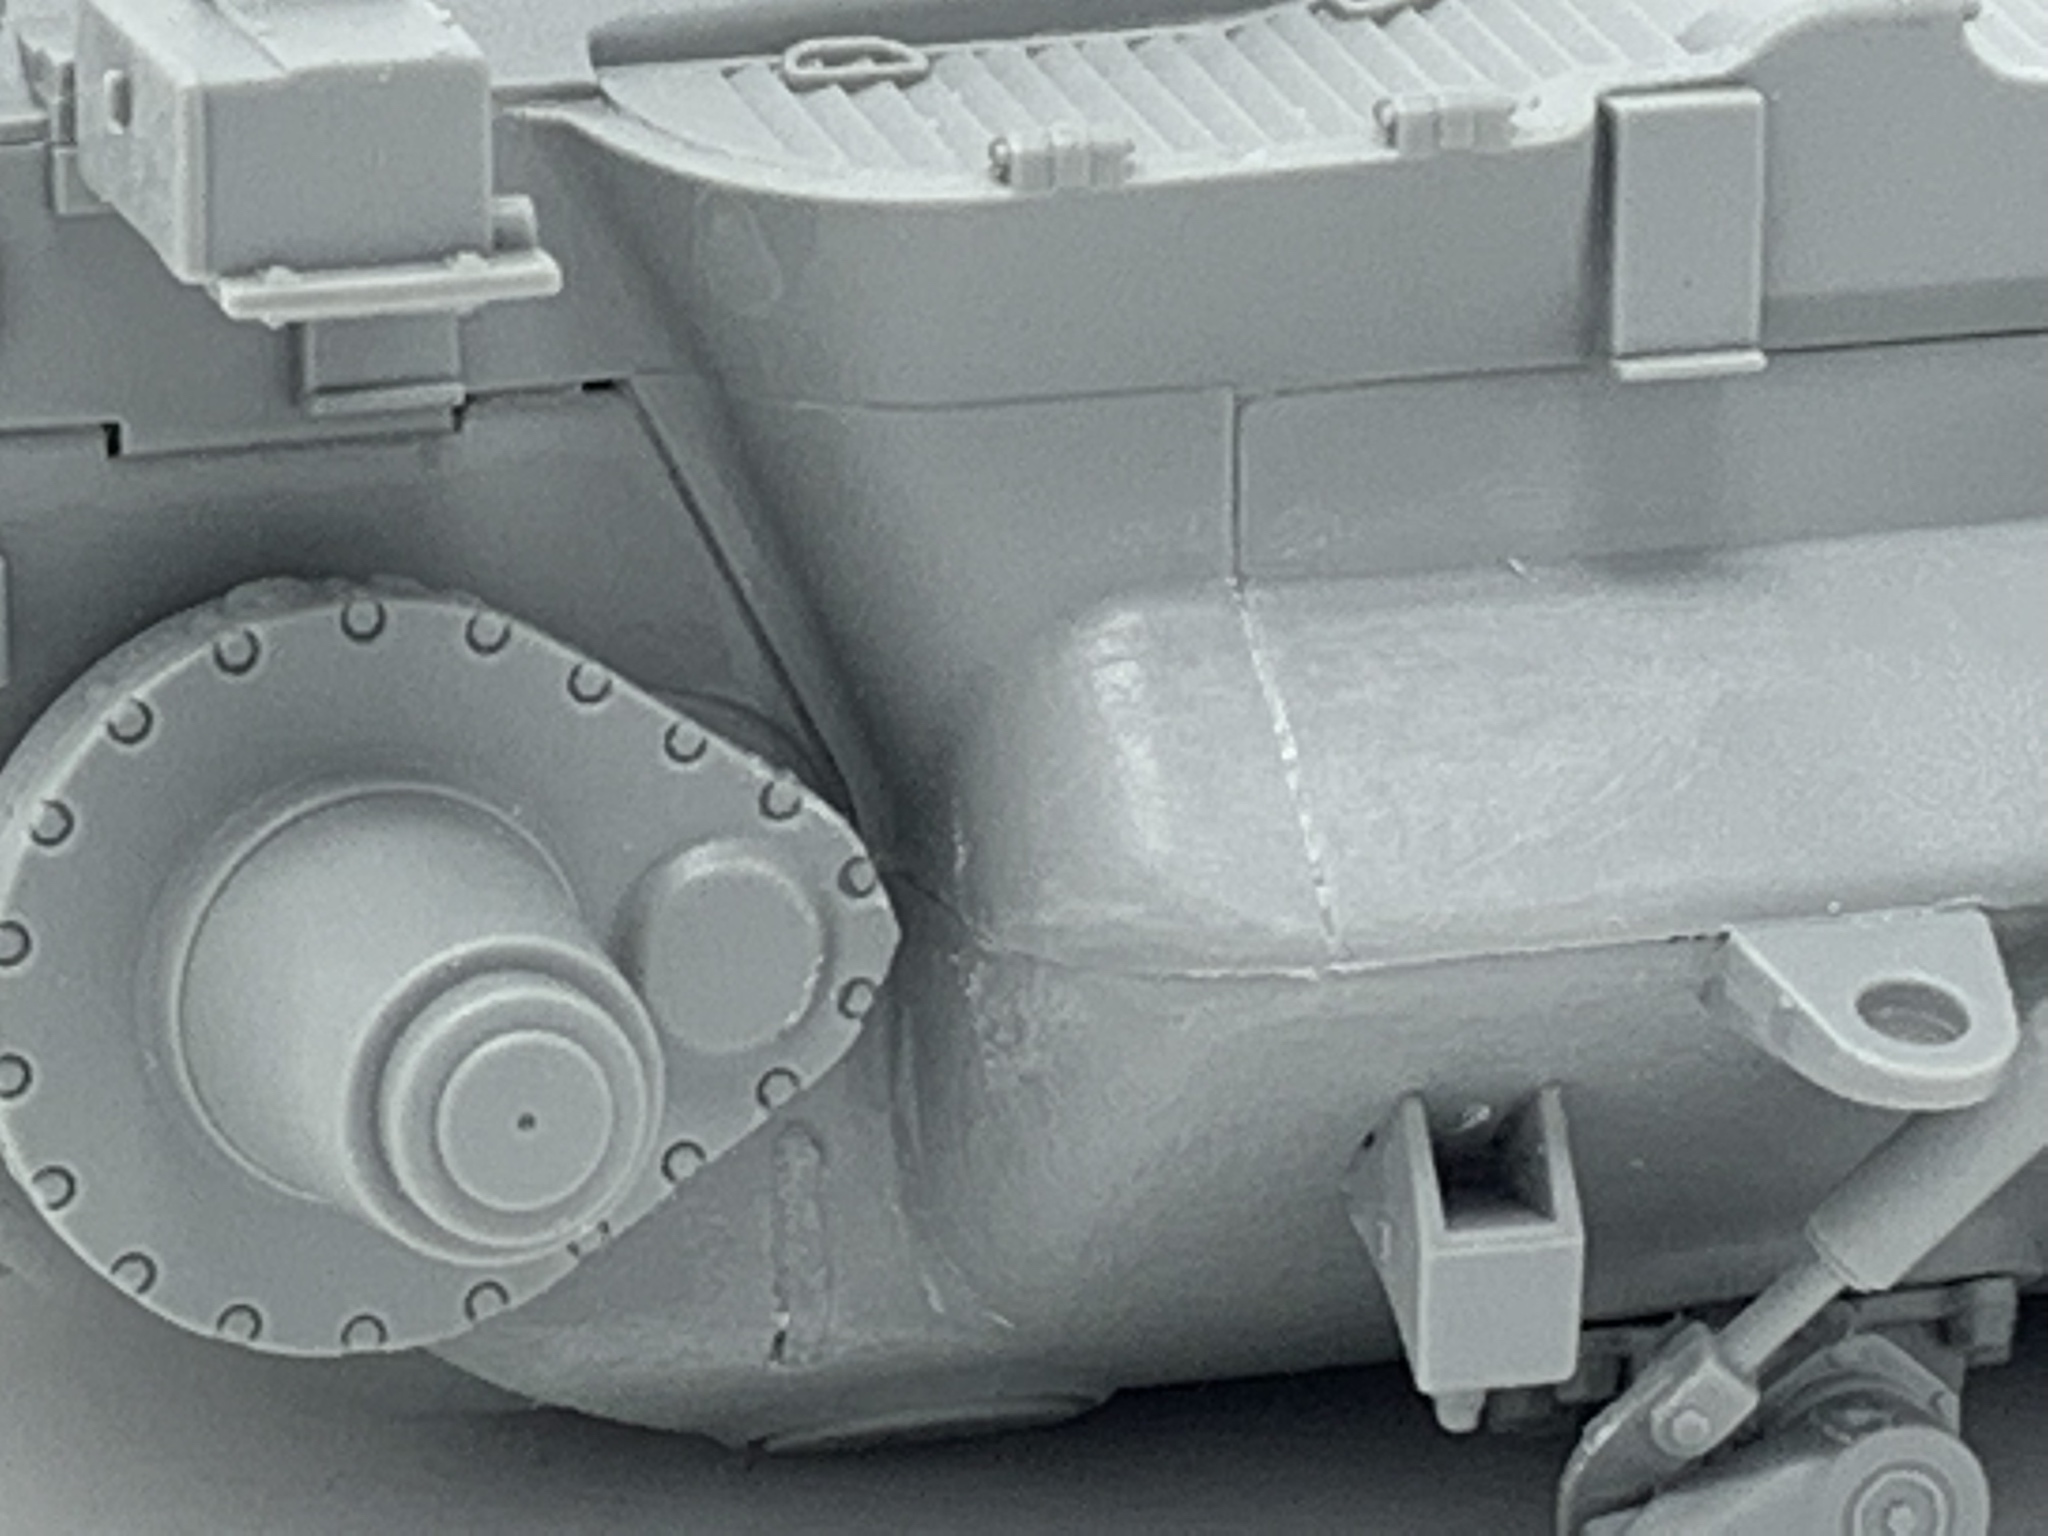
As mentioned in other build logs/reviews, there are a lot of fitting problems. Here's one of them.


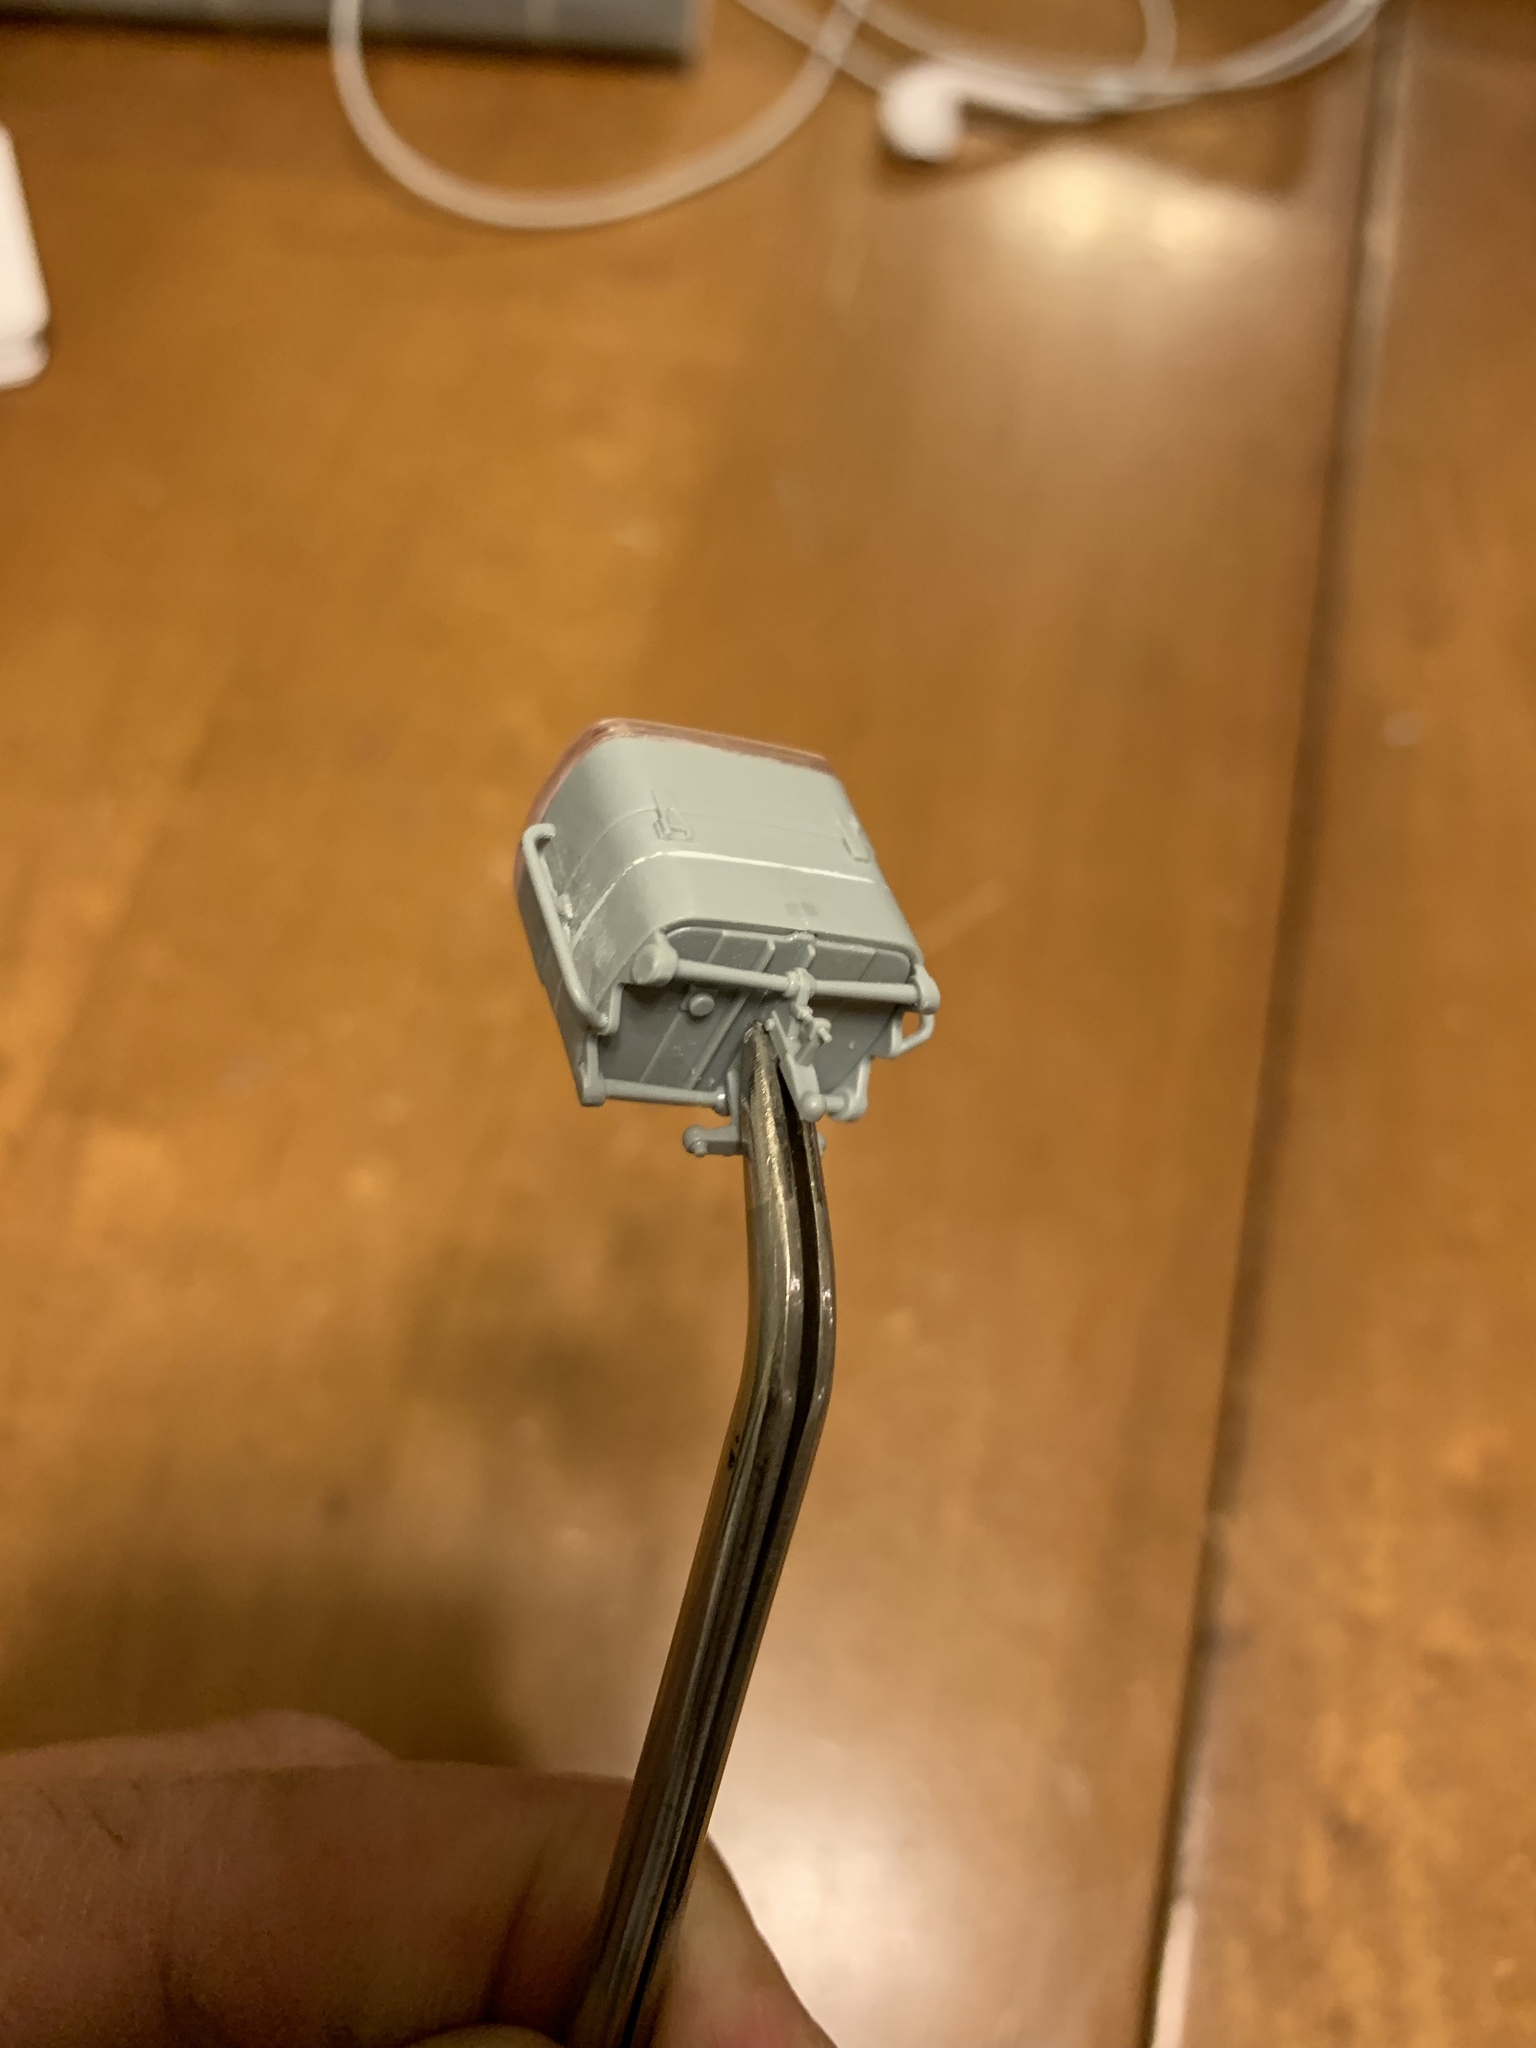
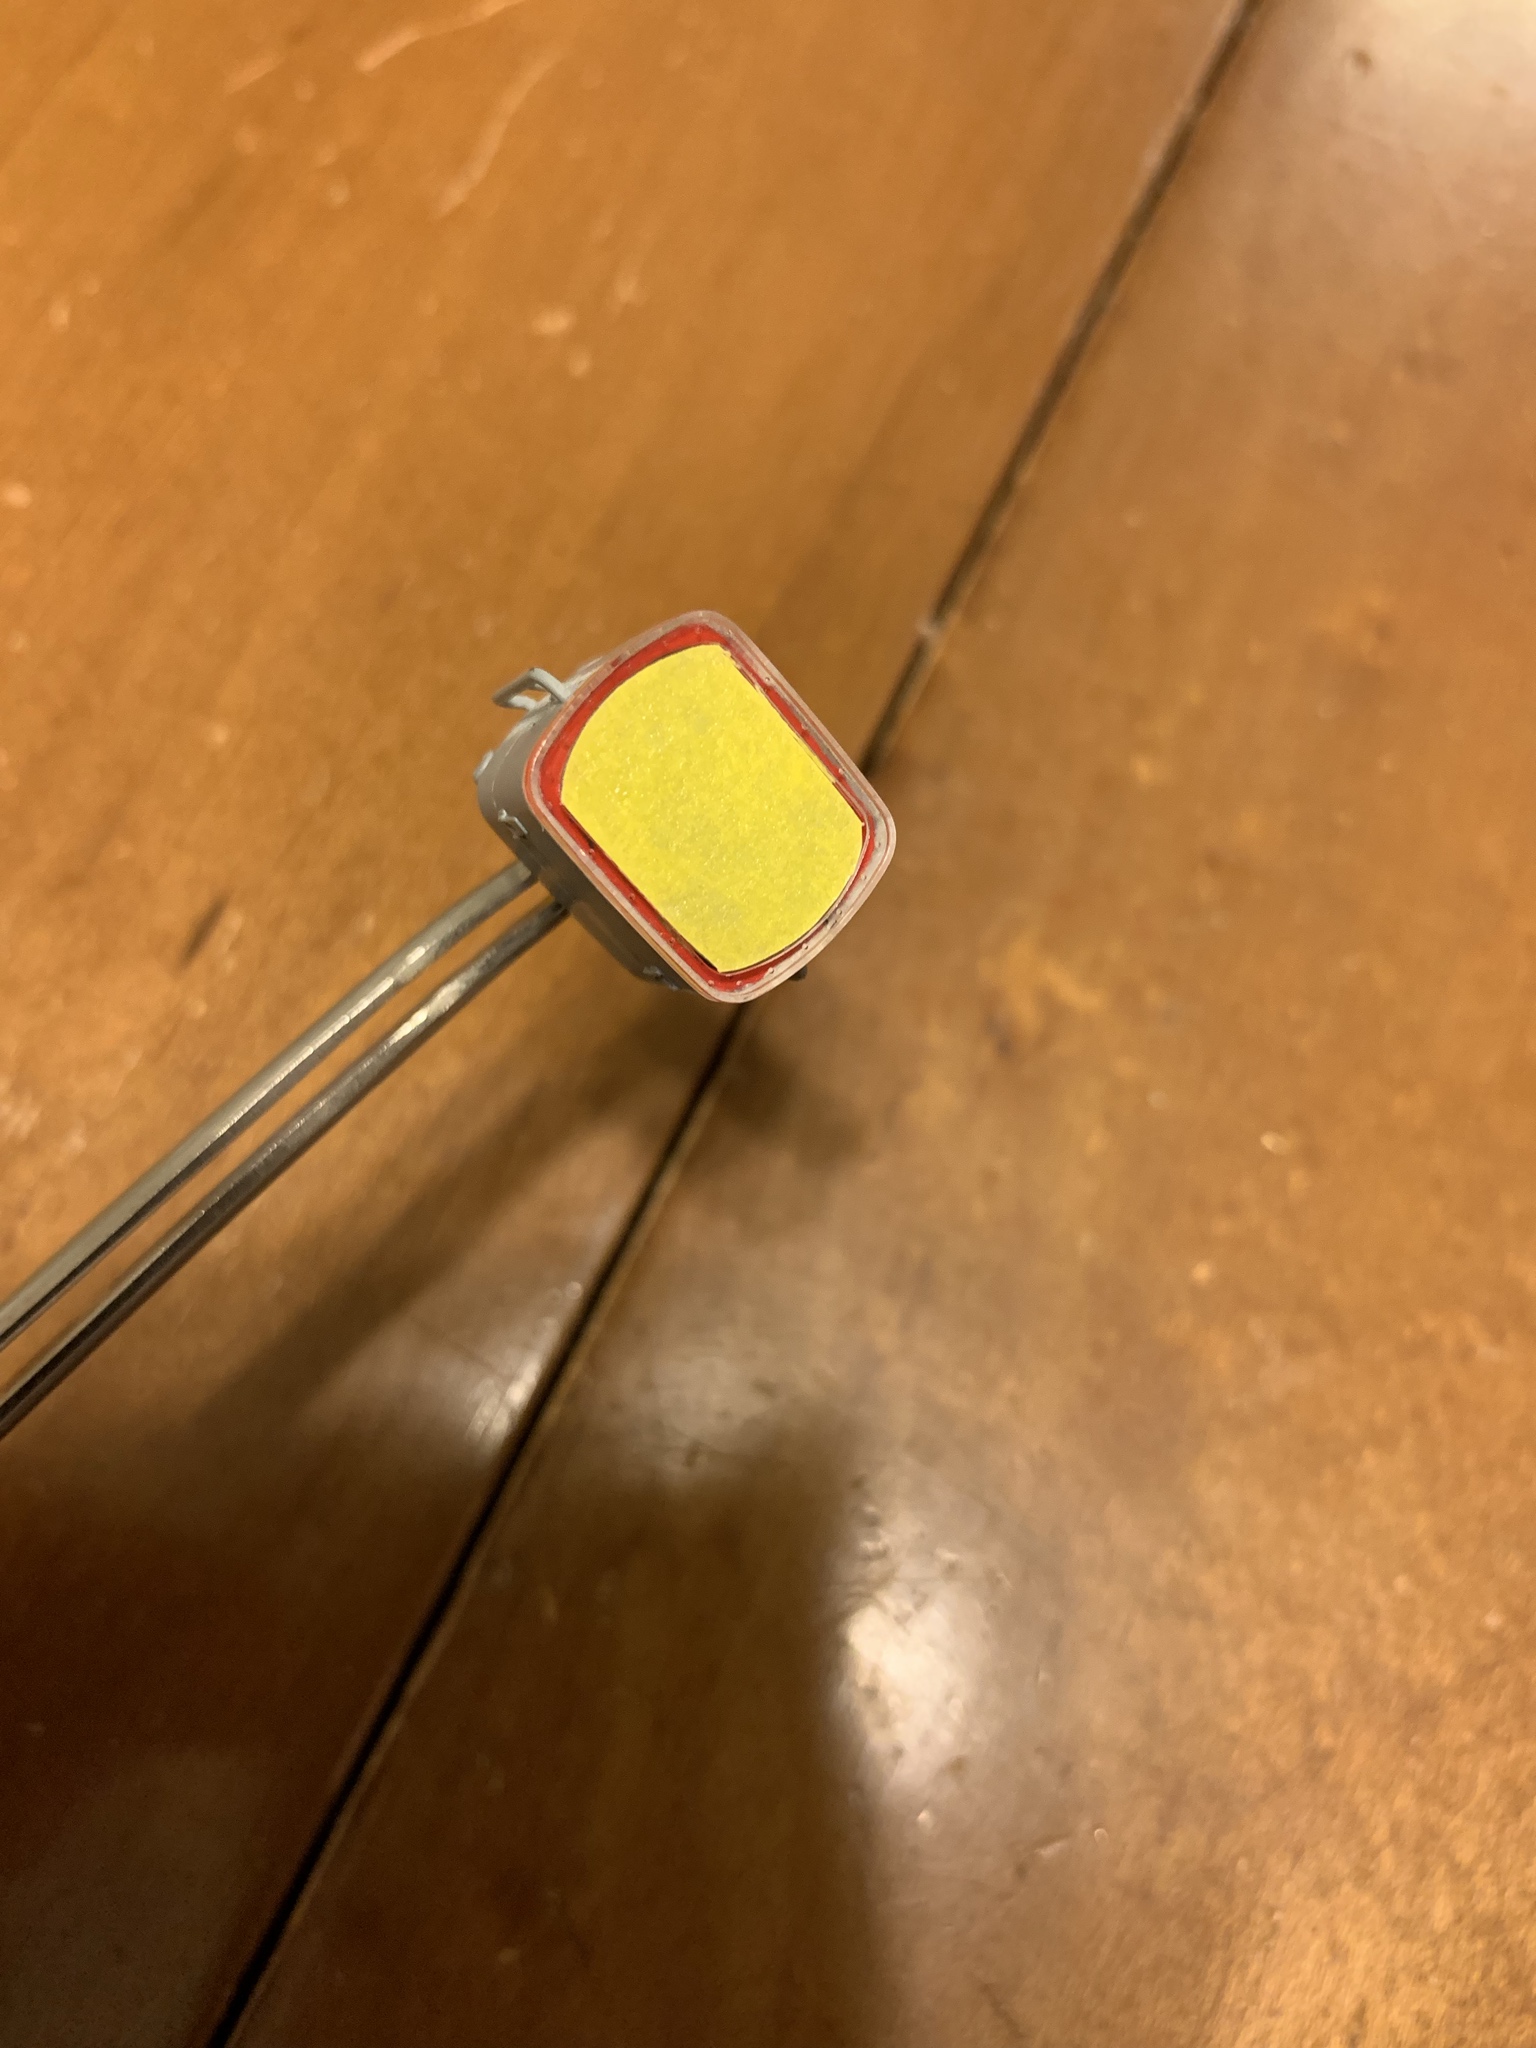
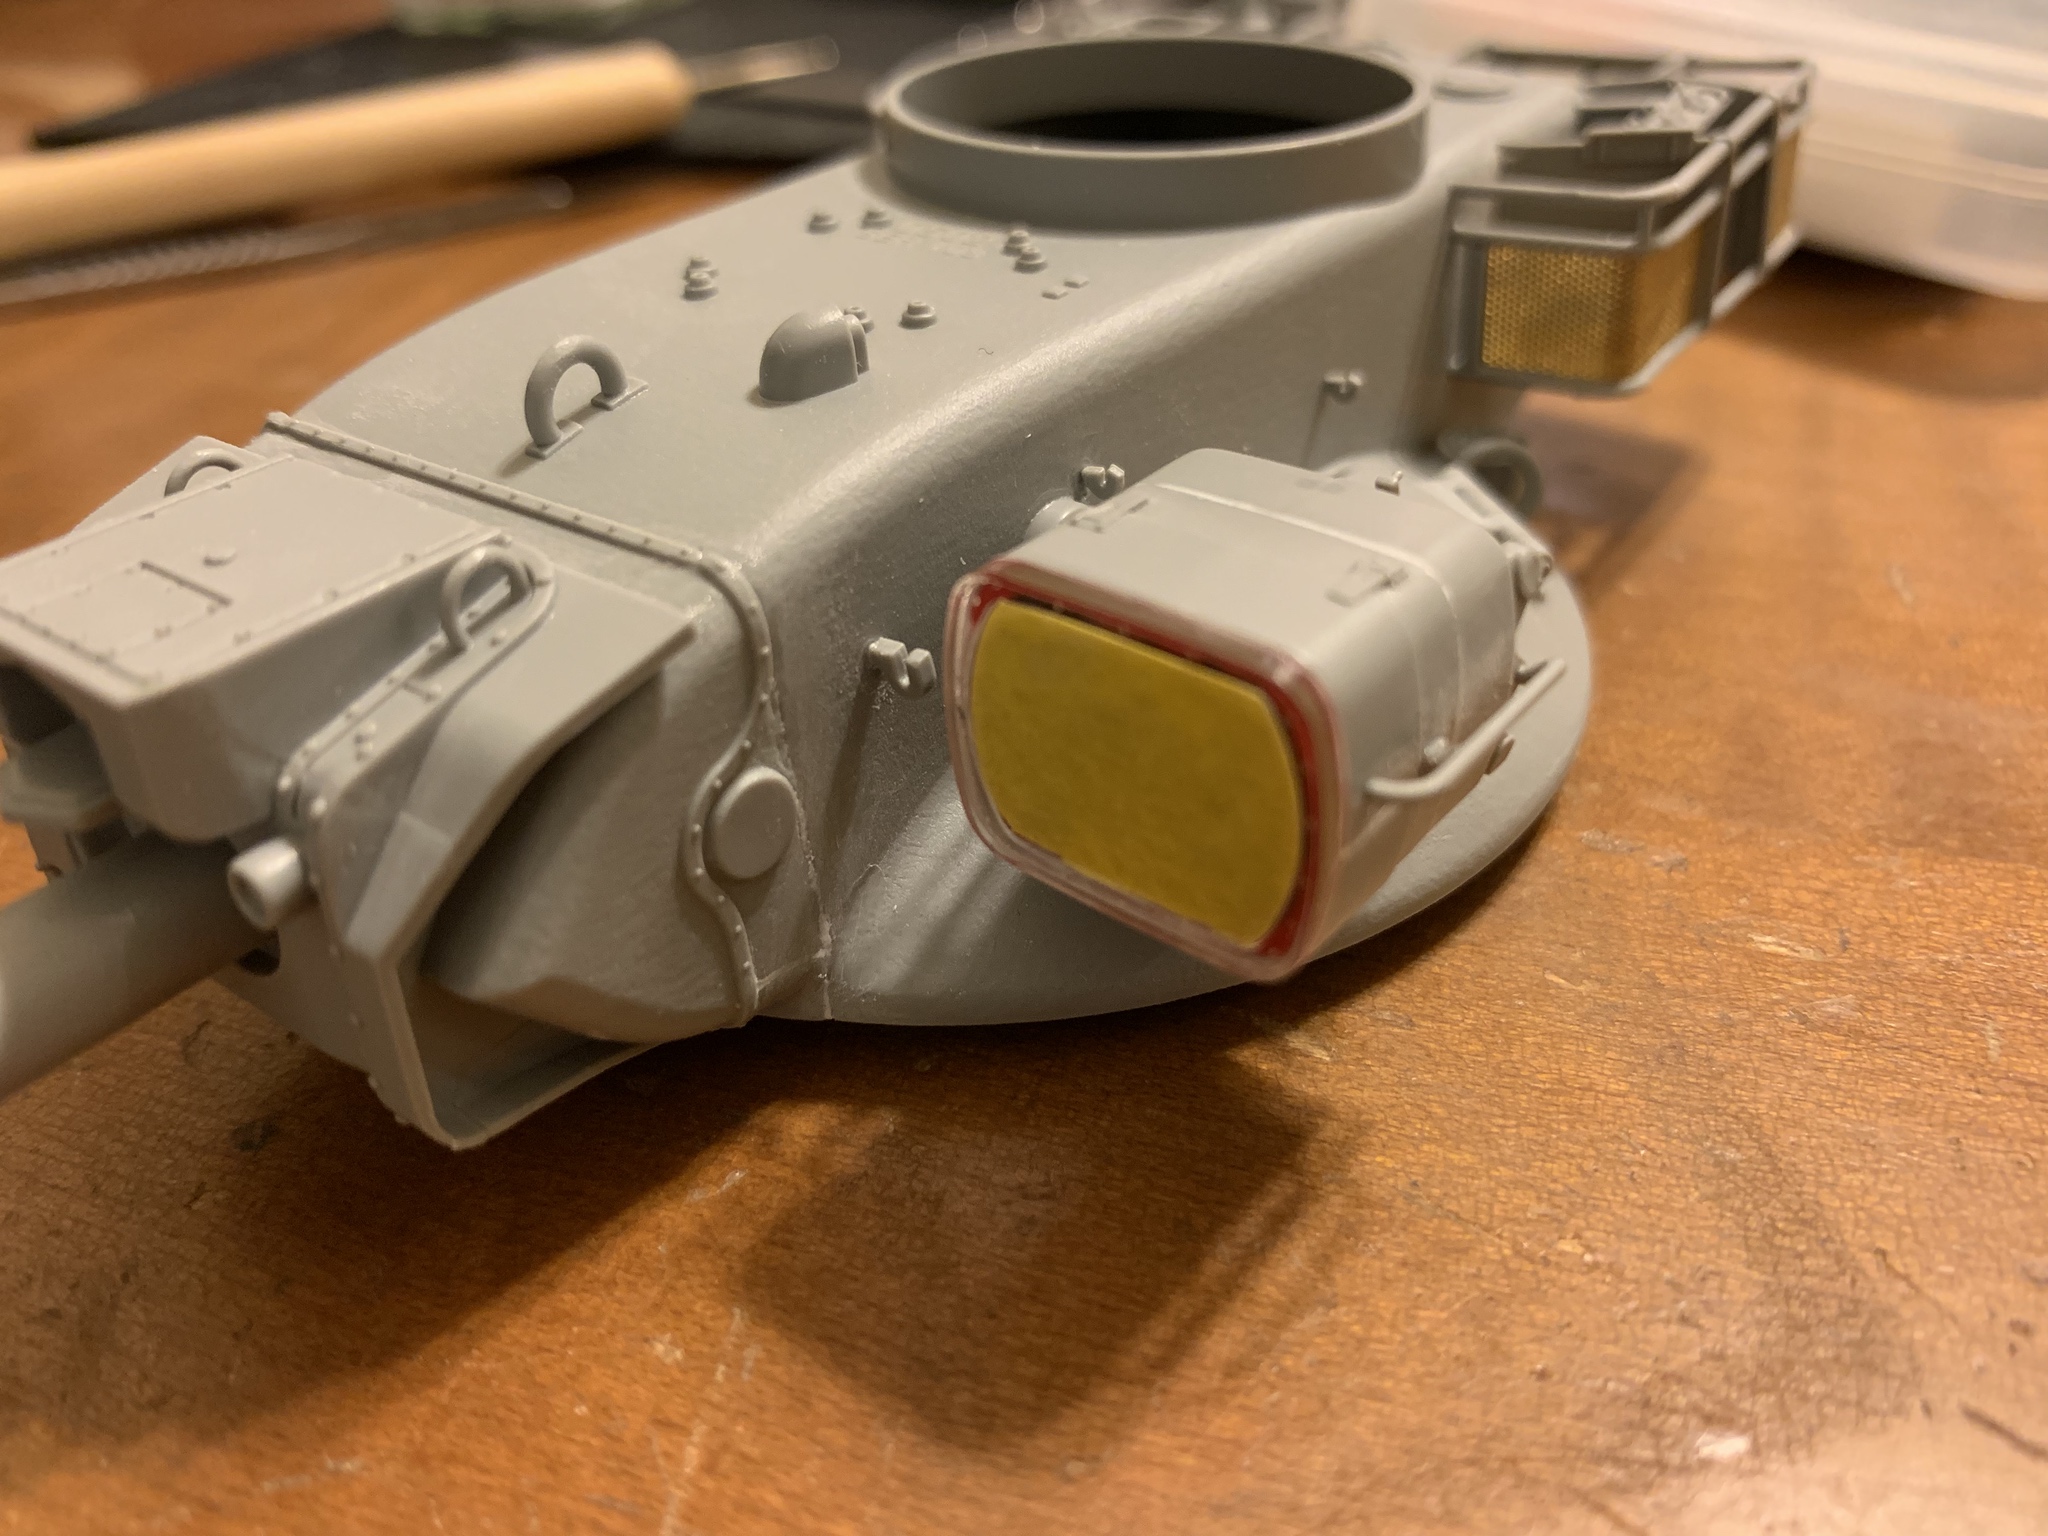
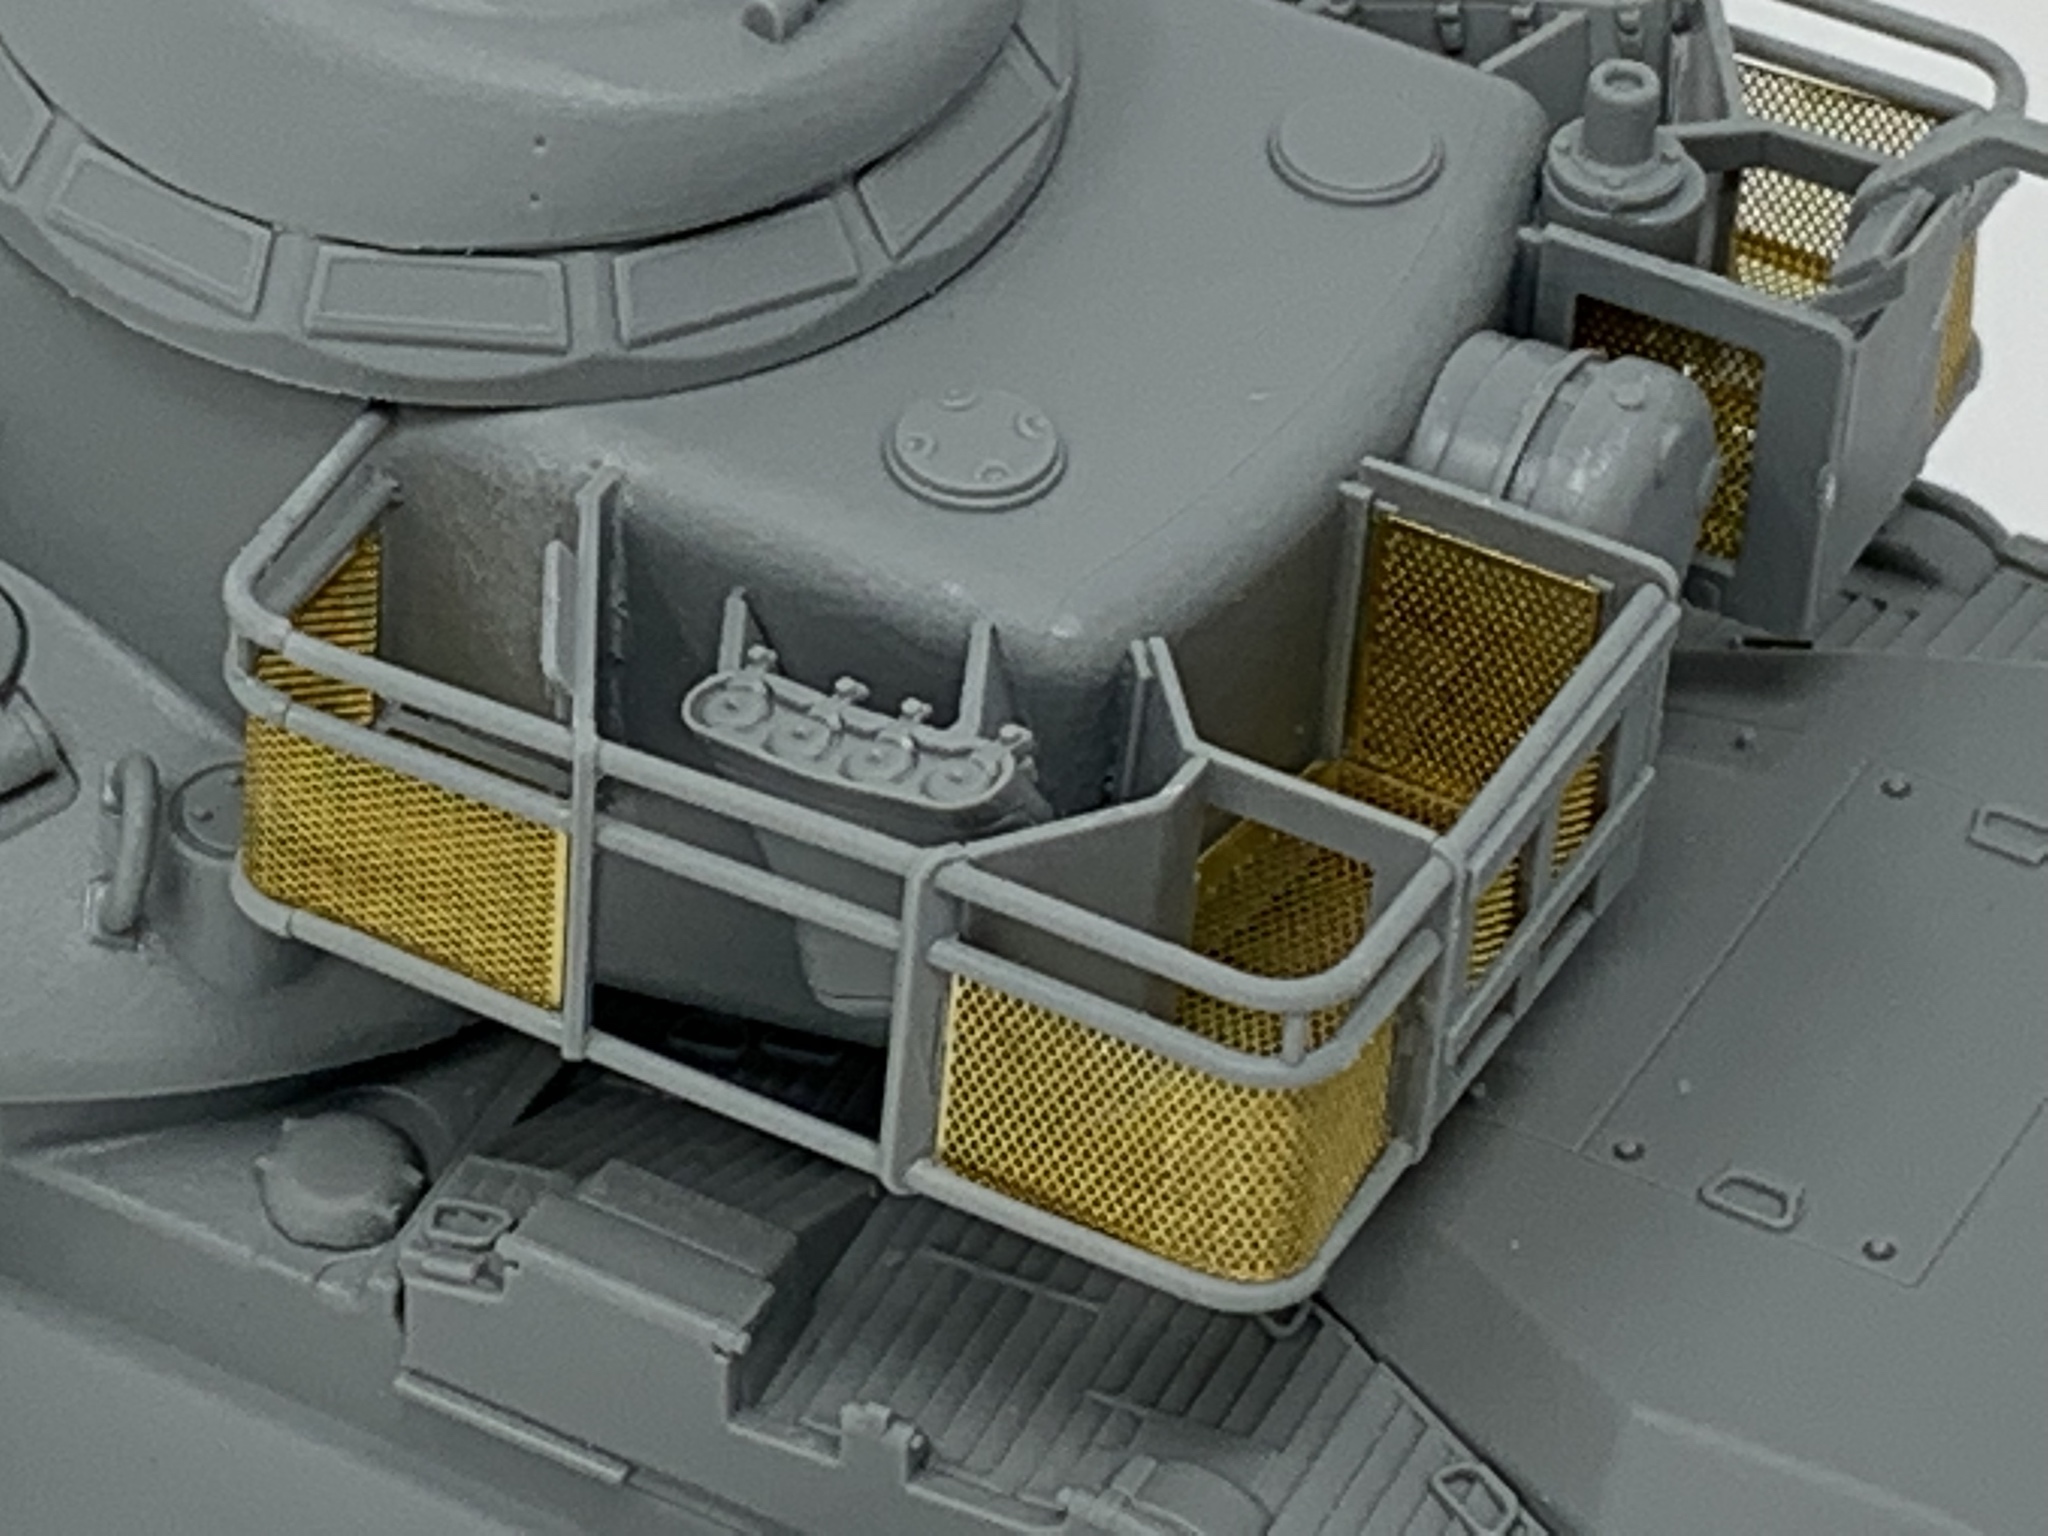
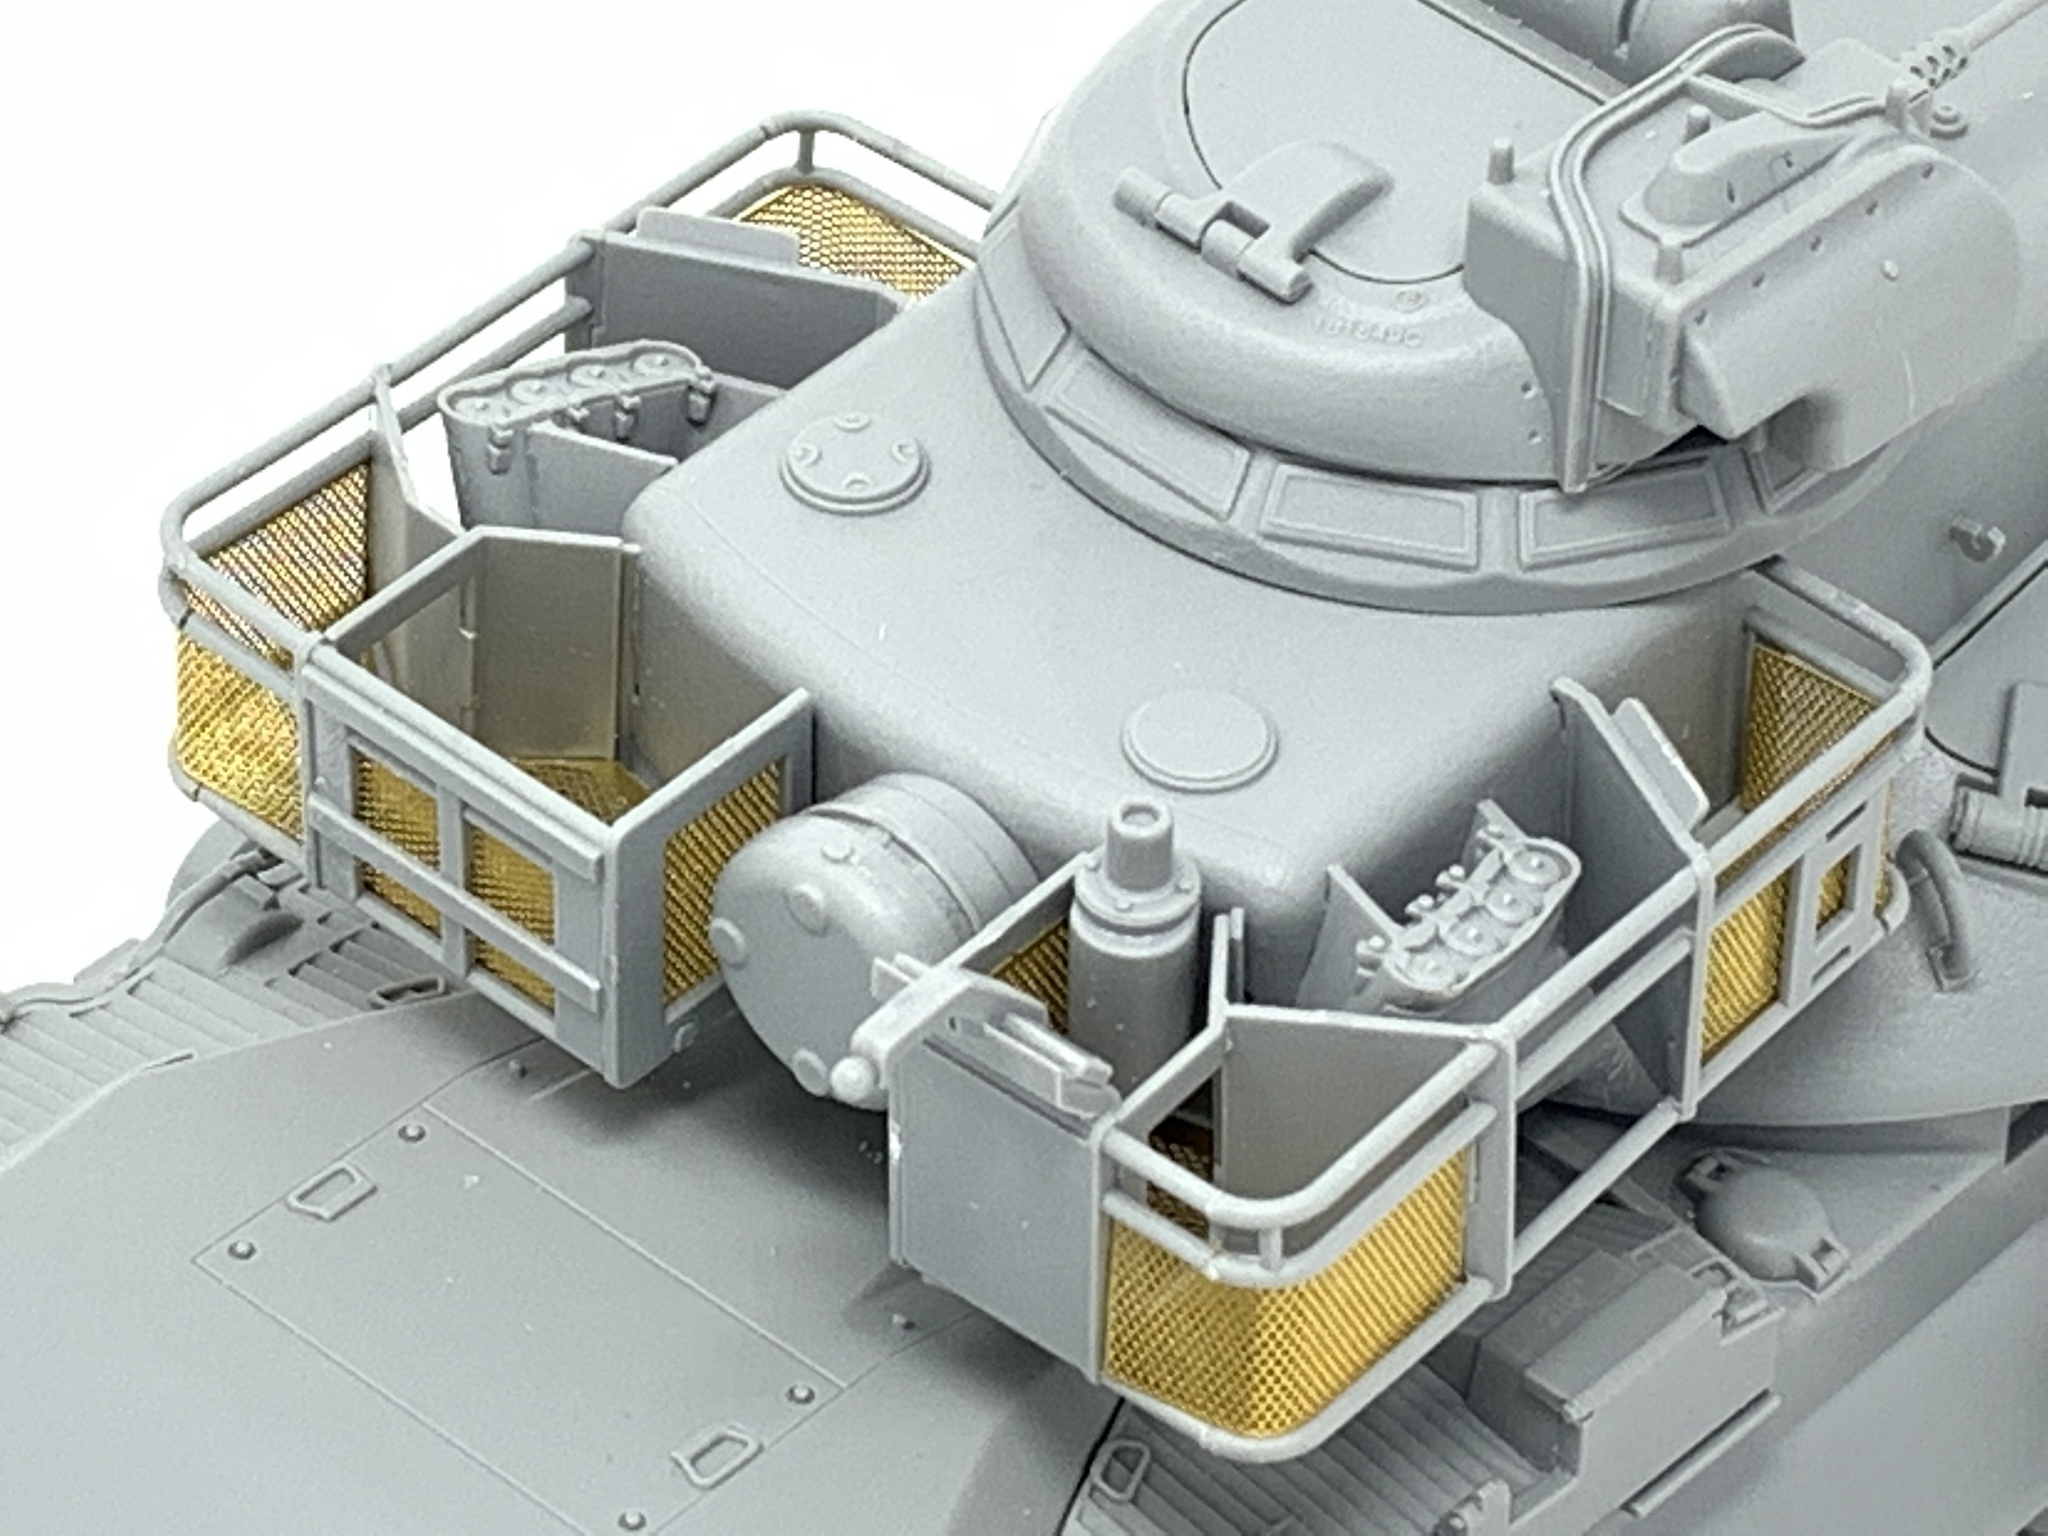
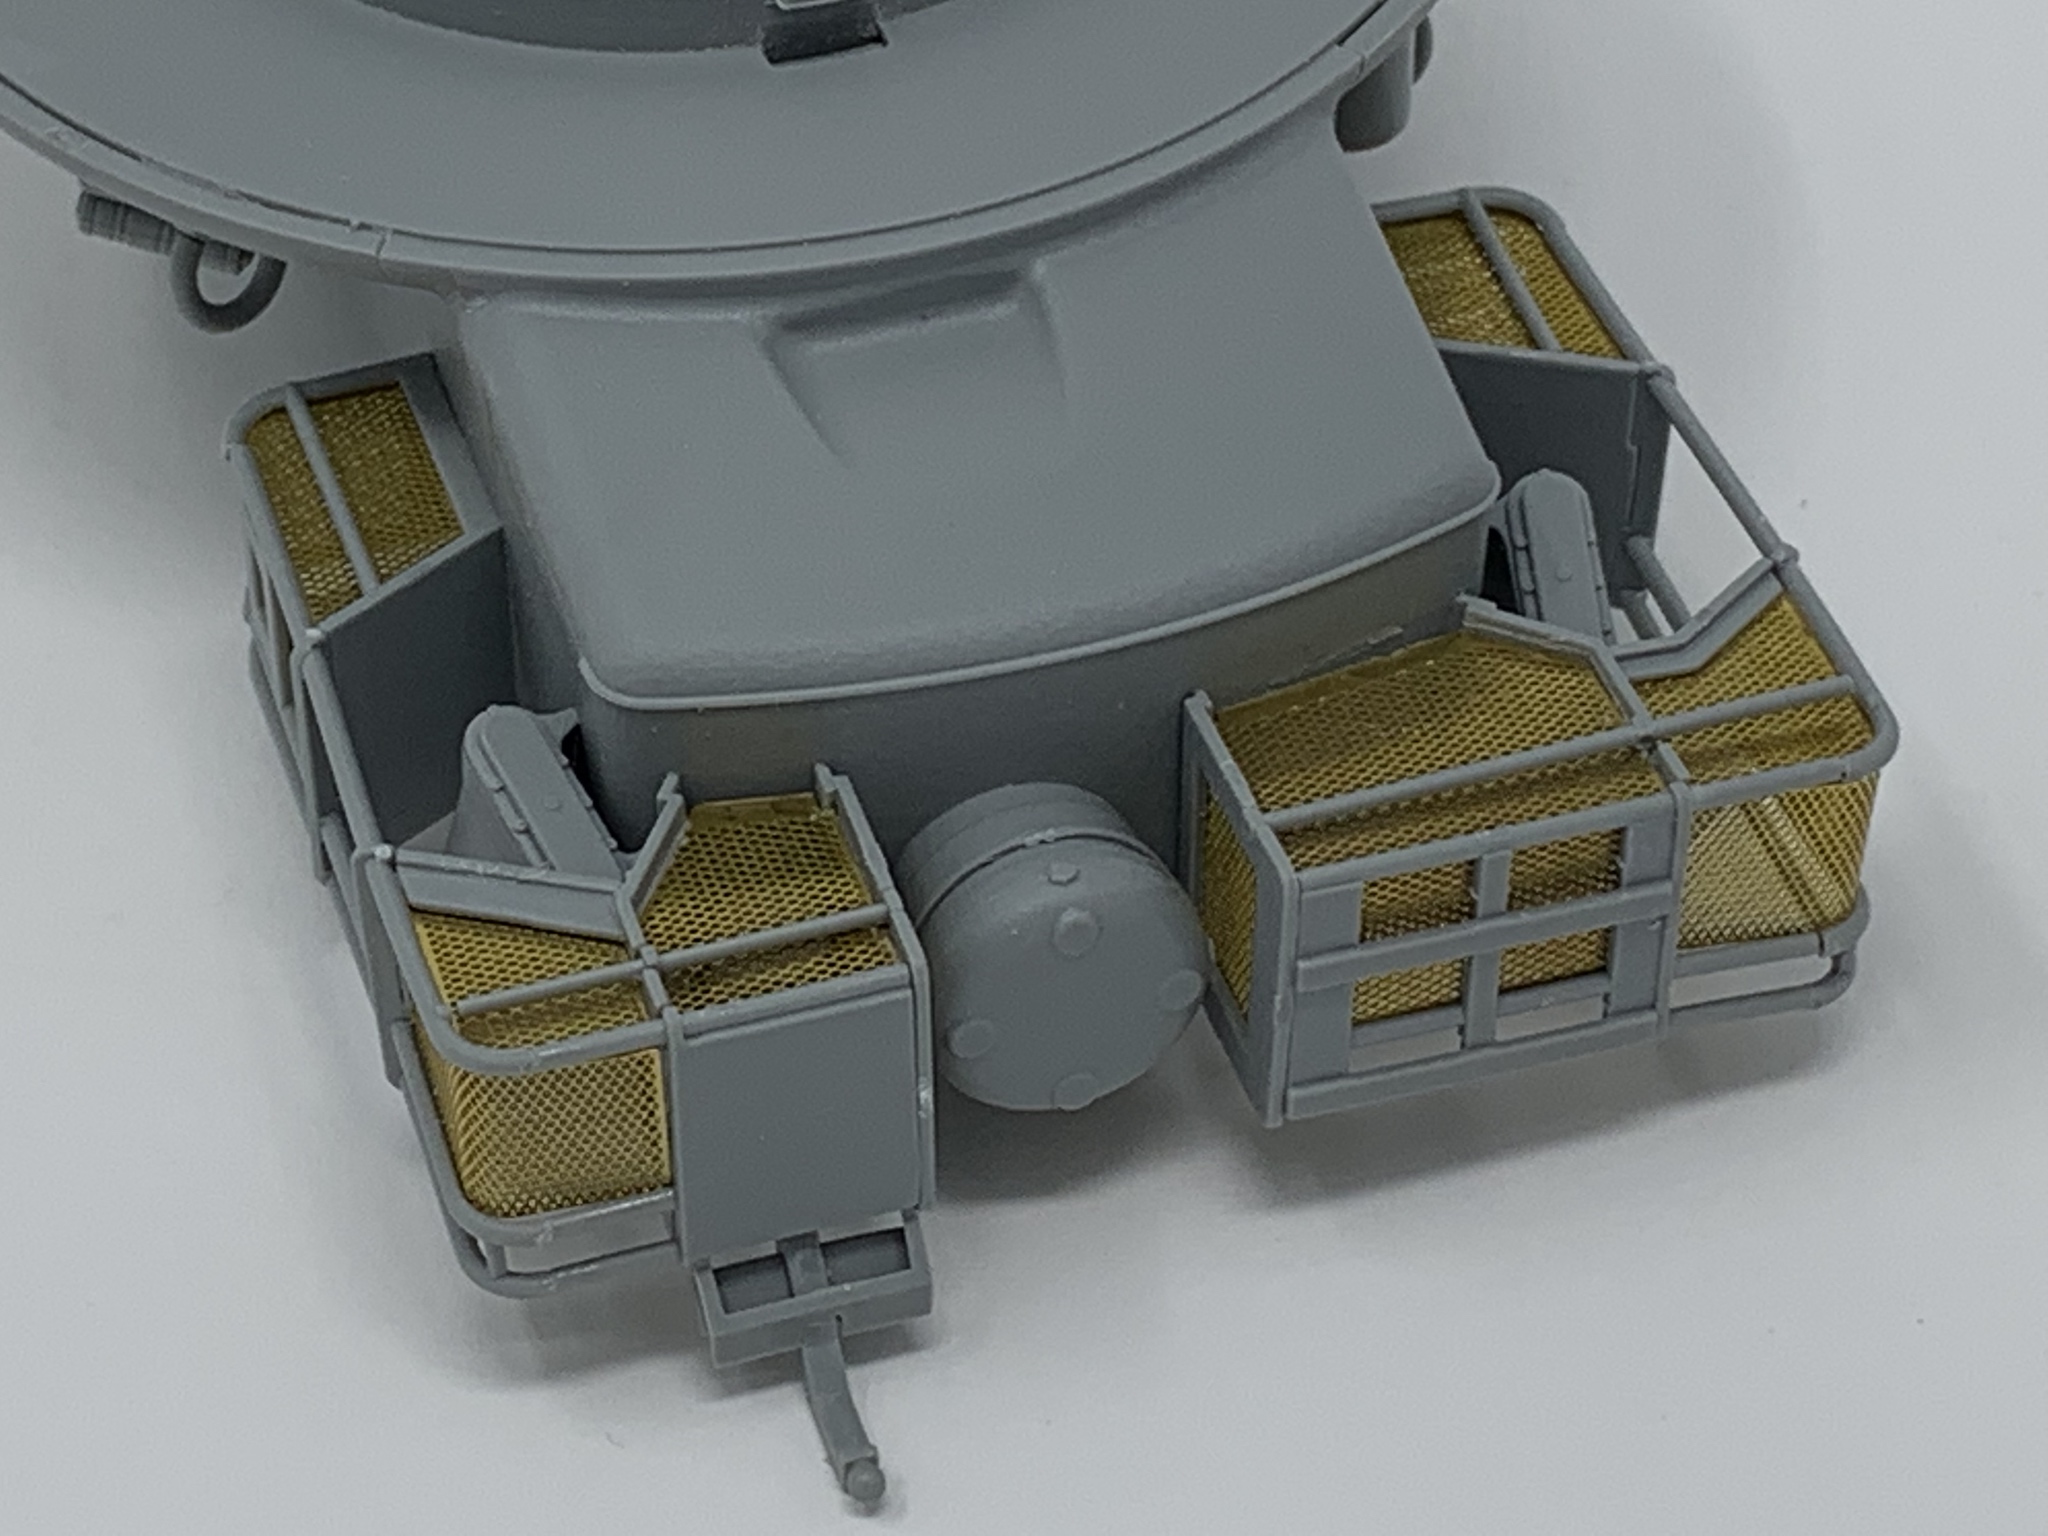
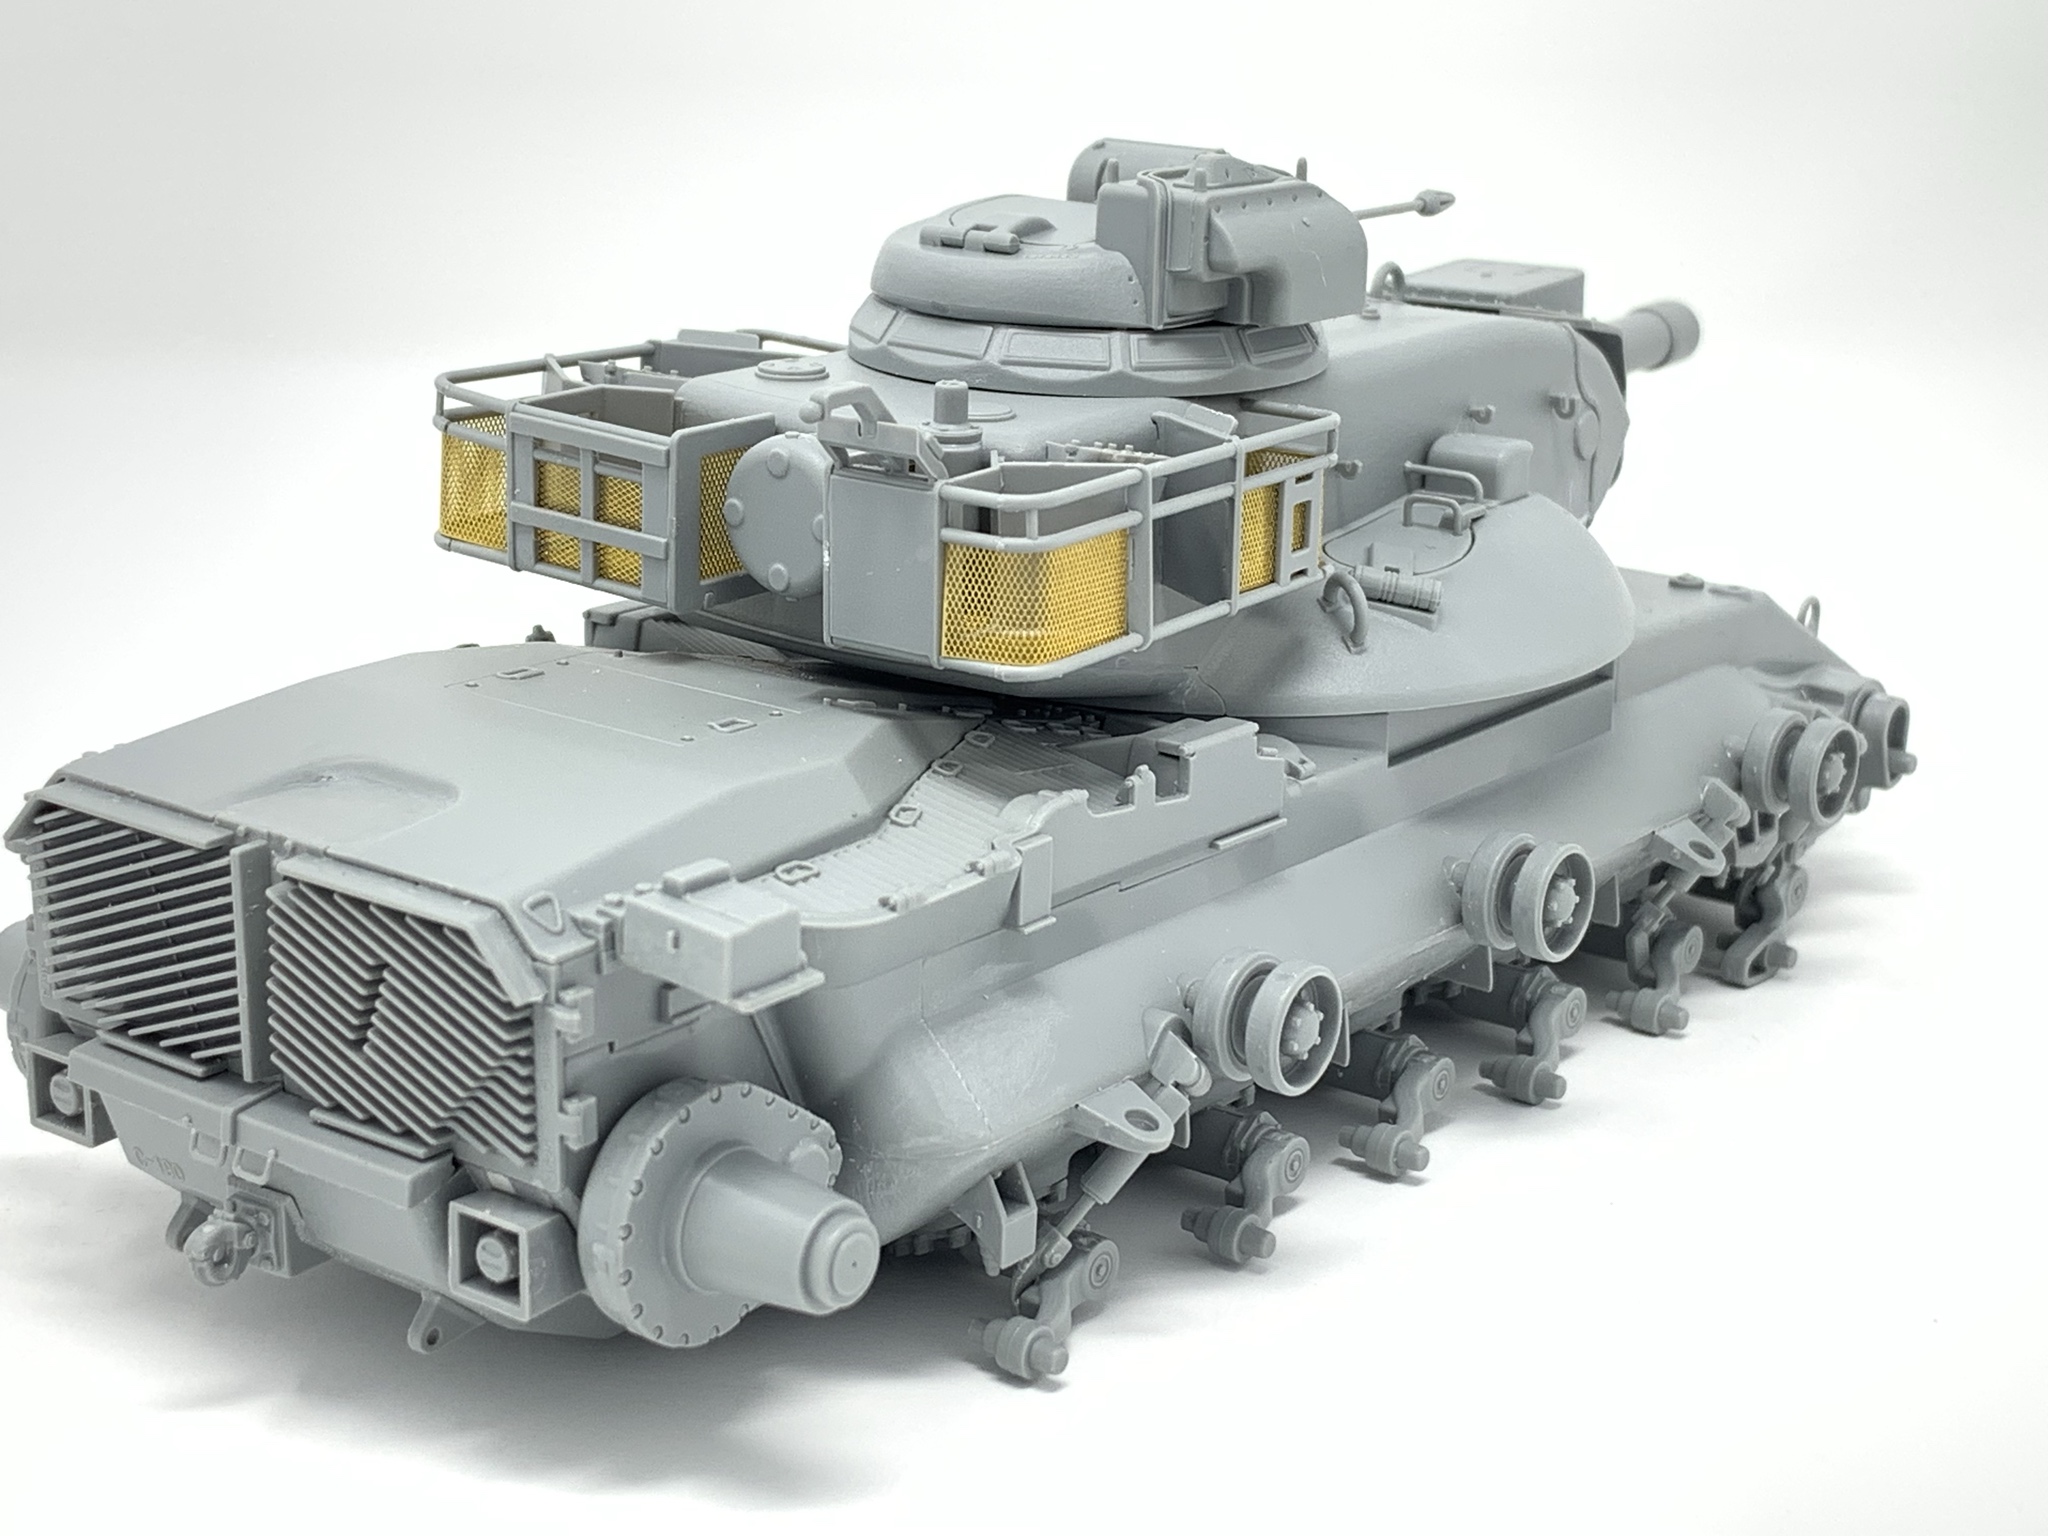
The turret basket was very tedious. But, the end result looks good.


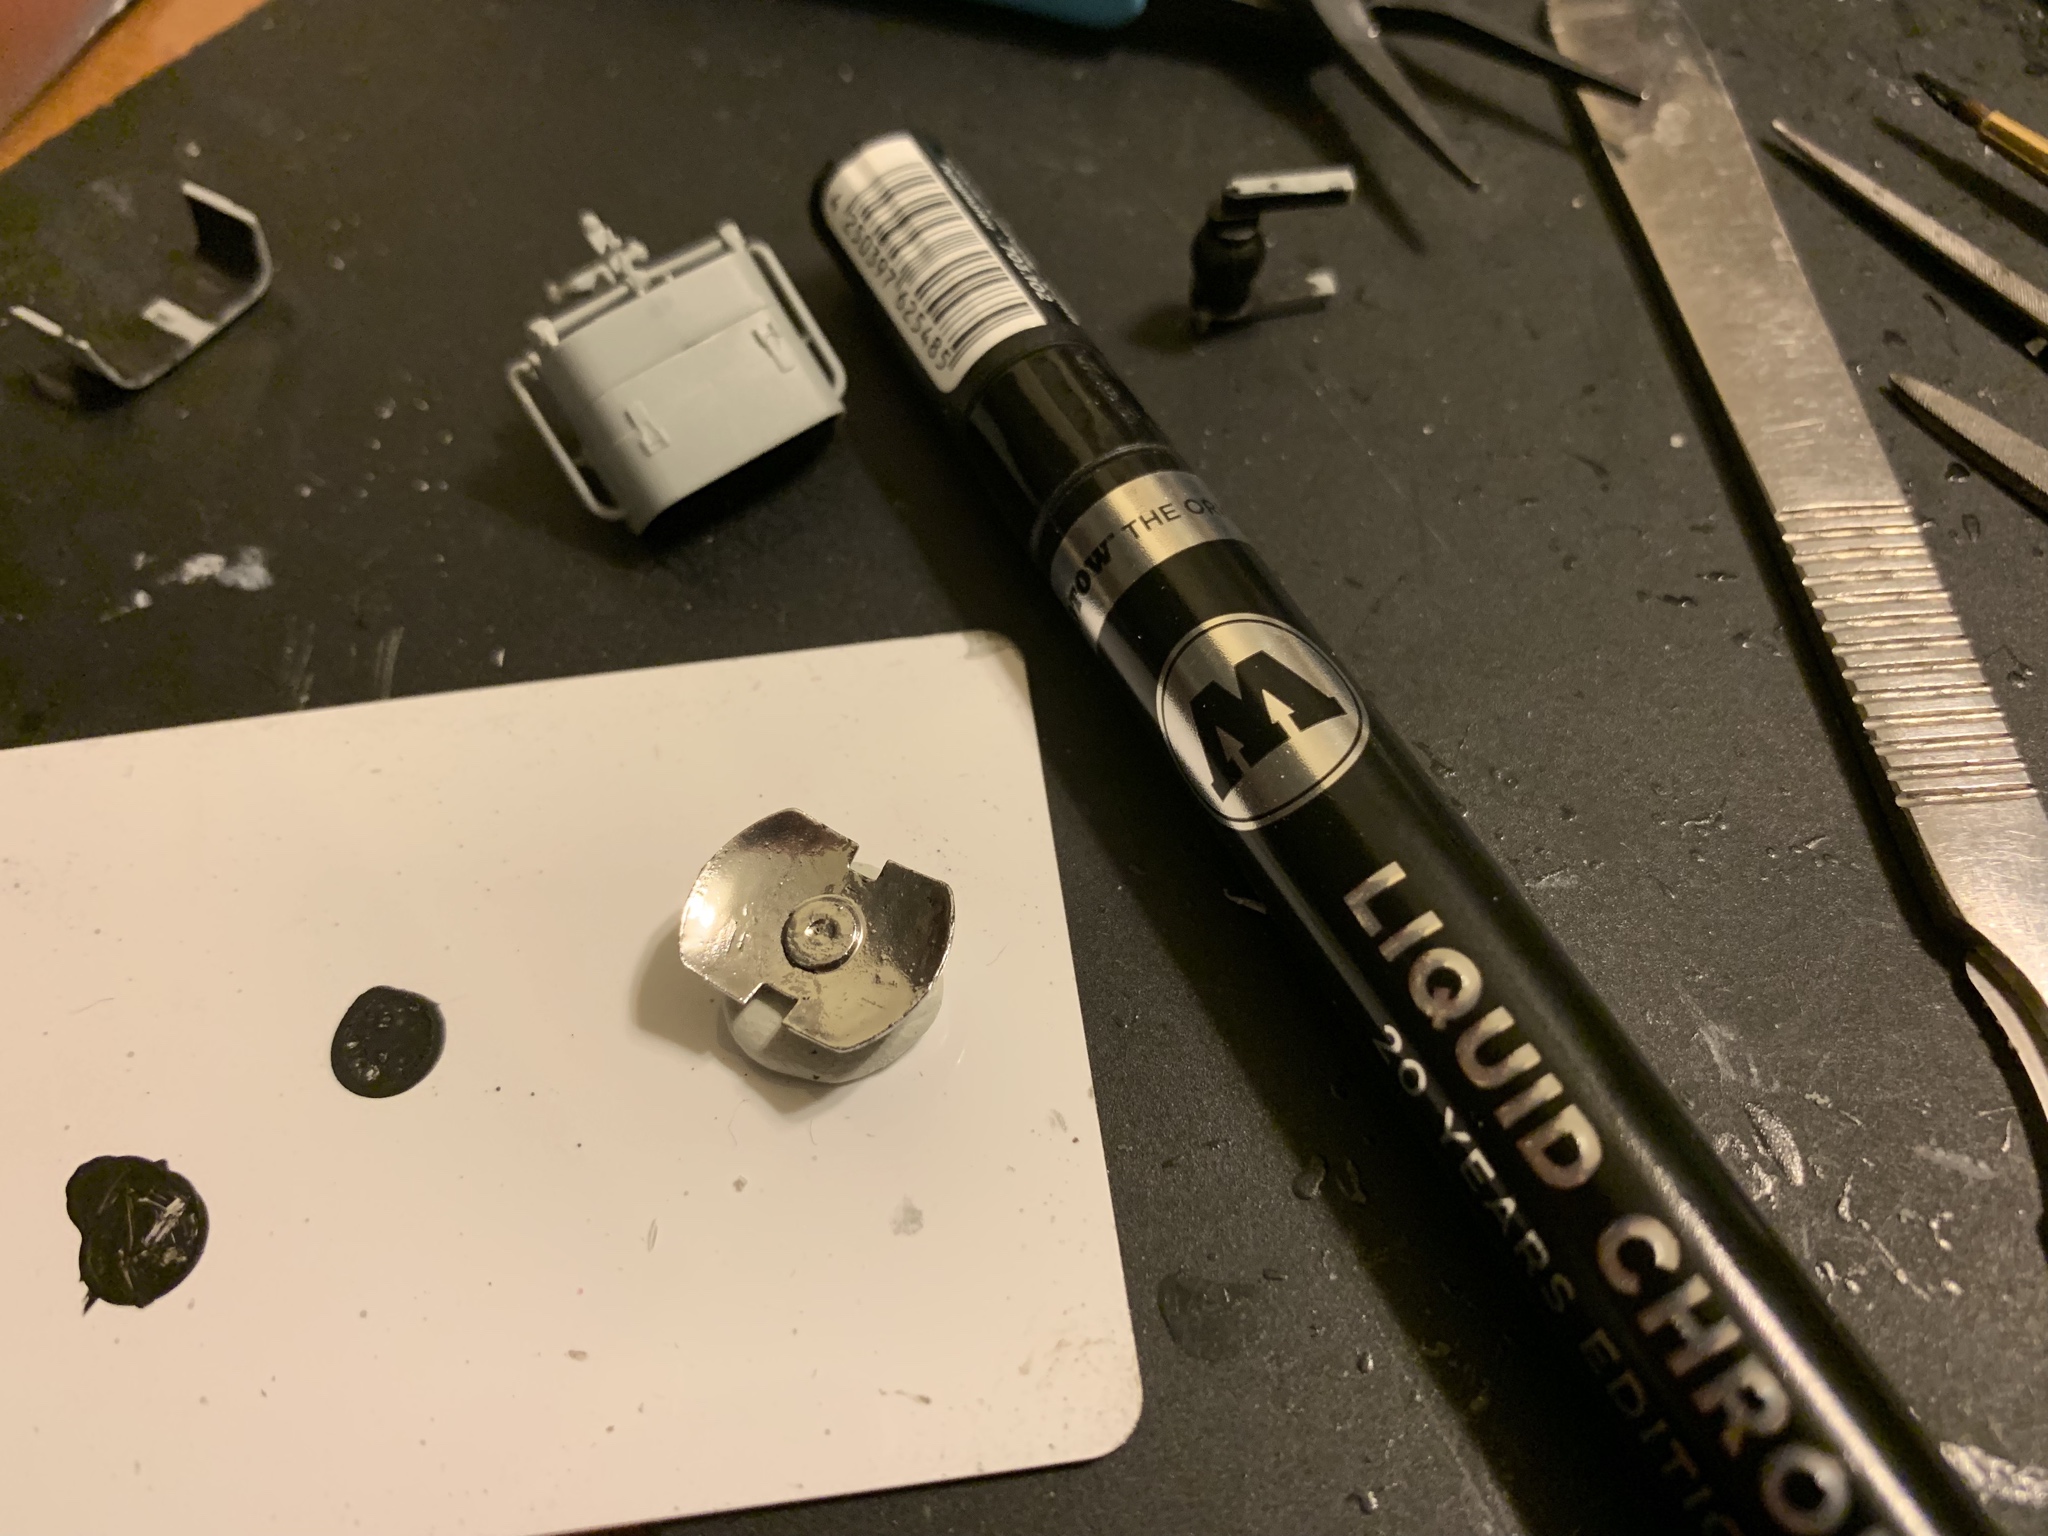
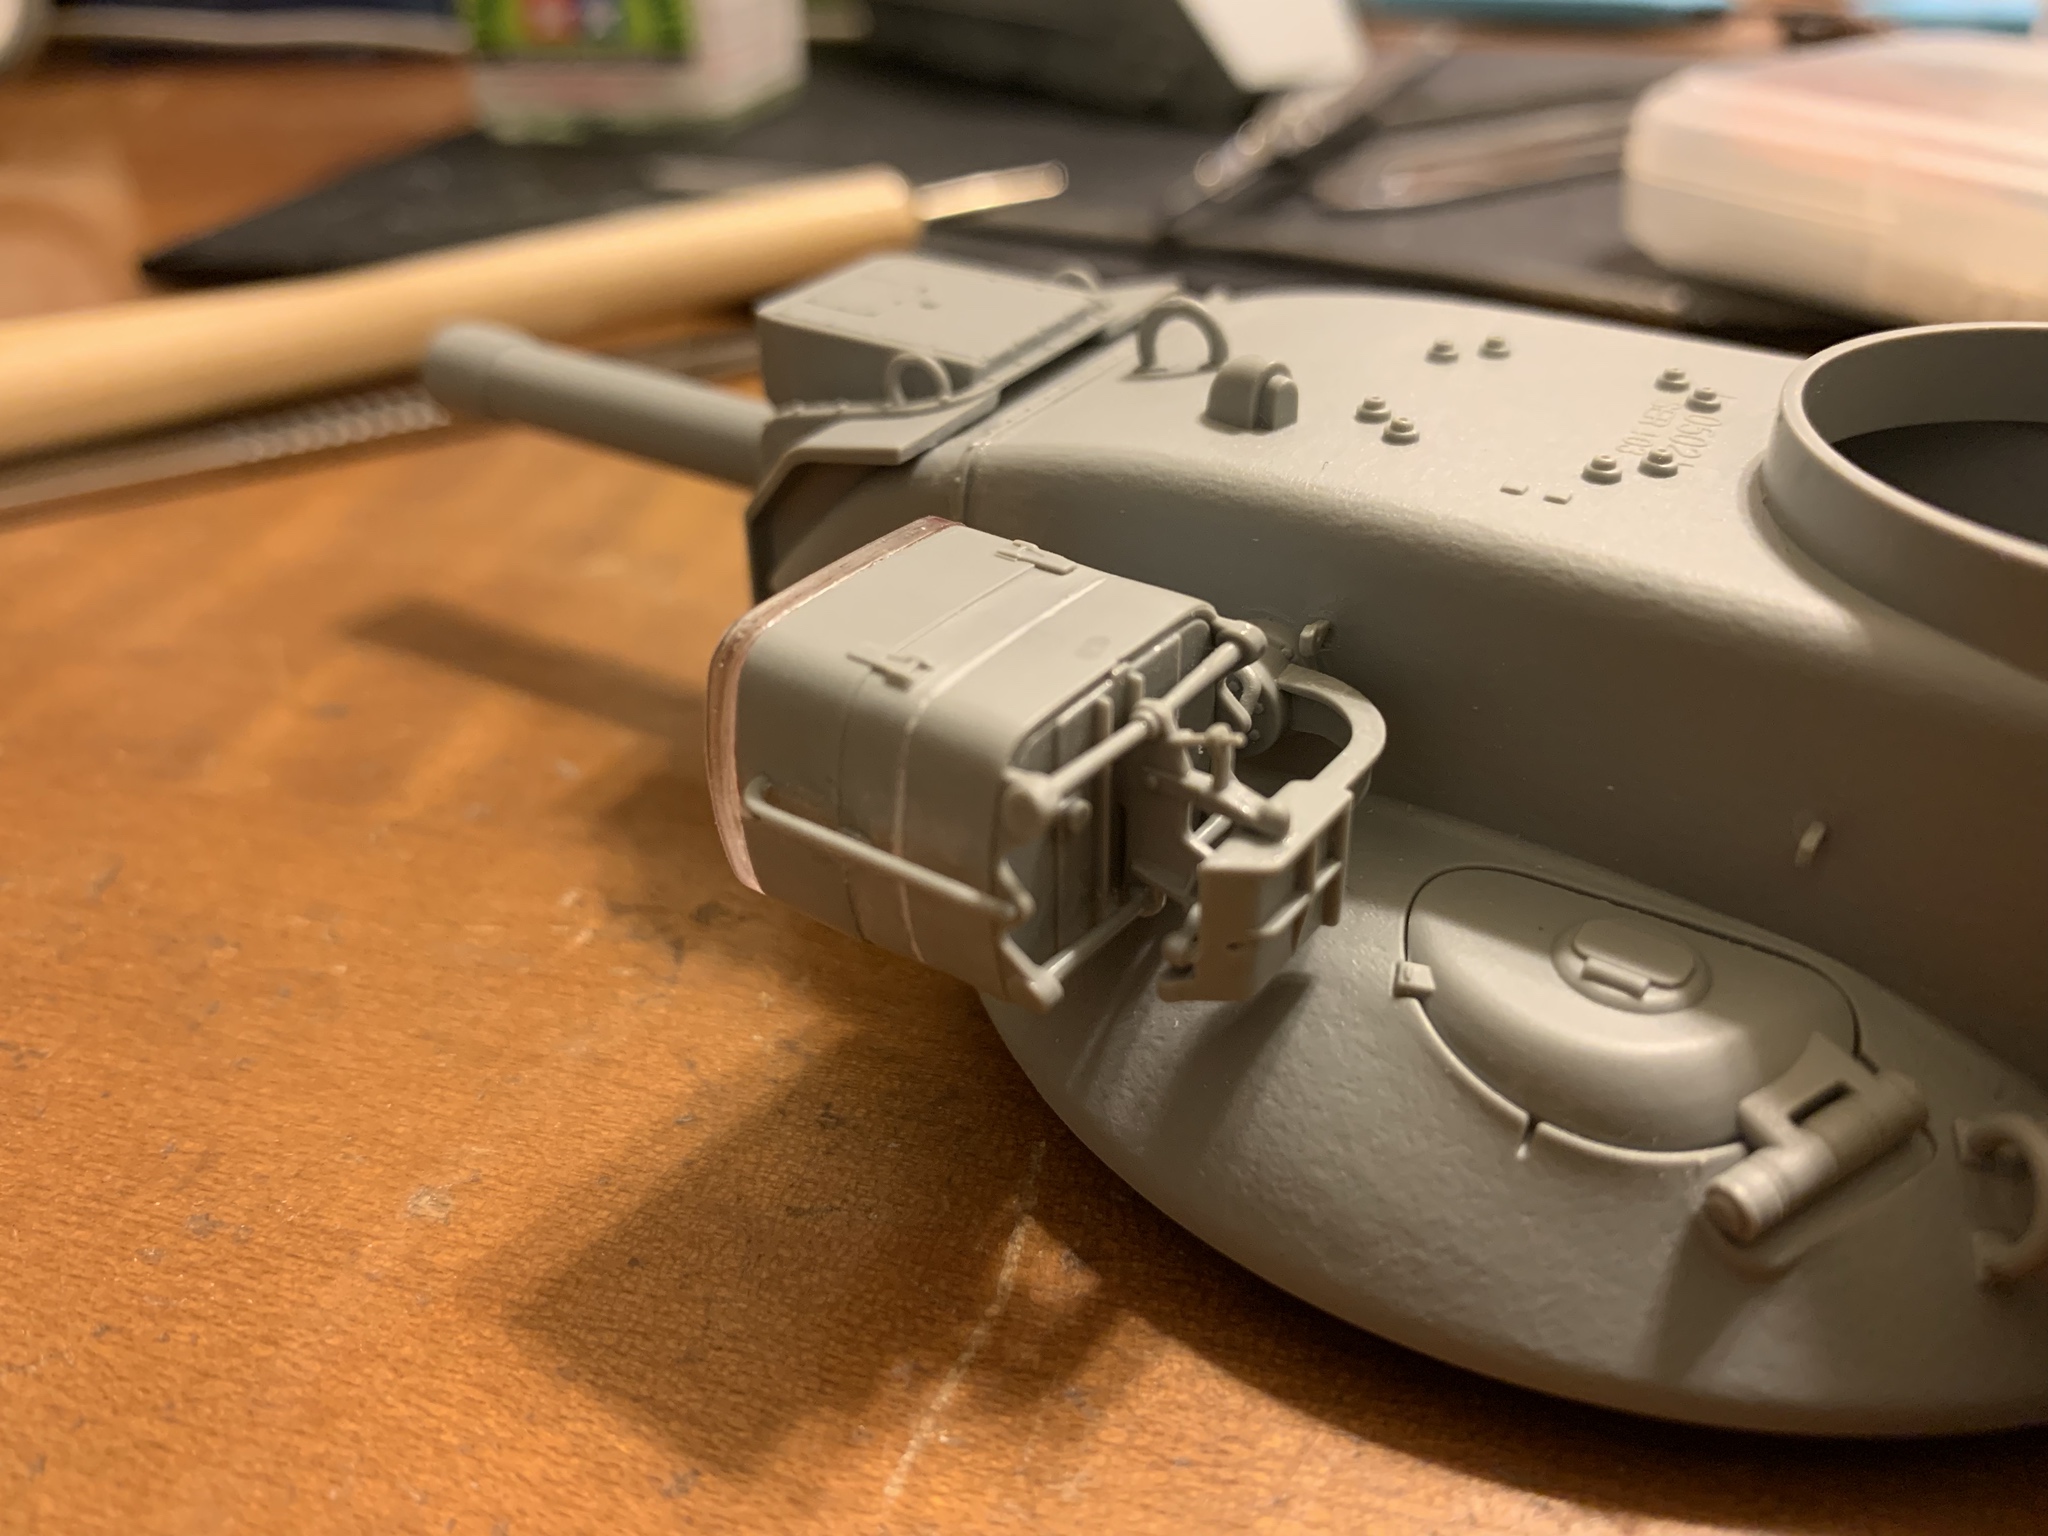
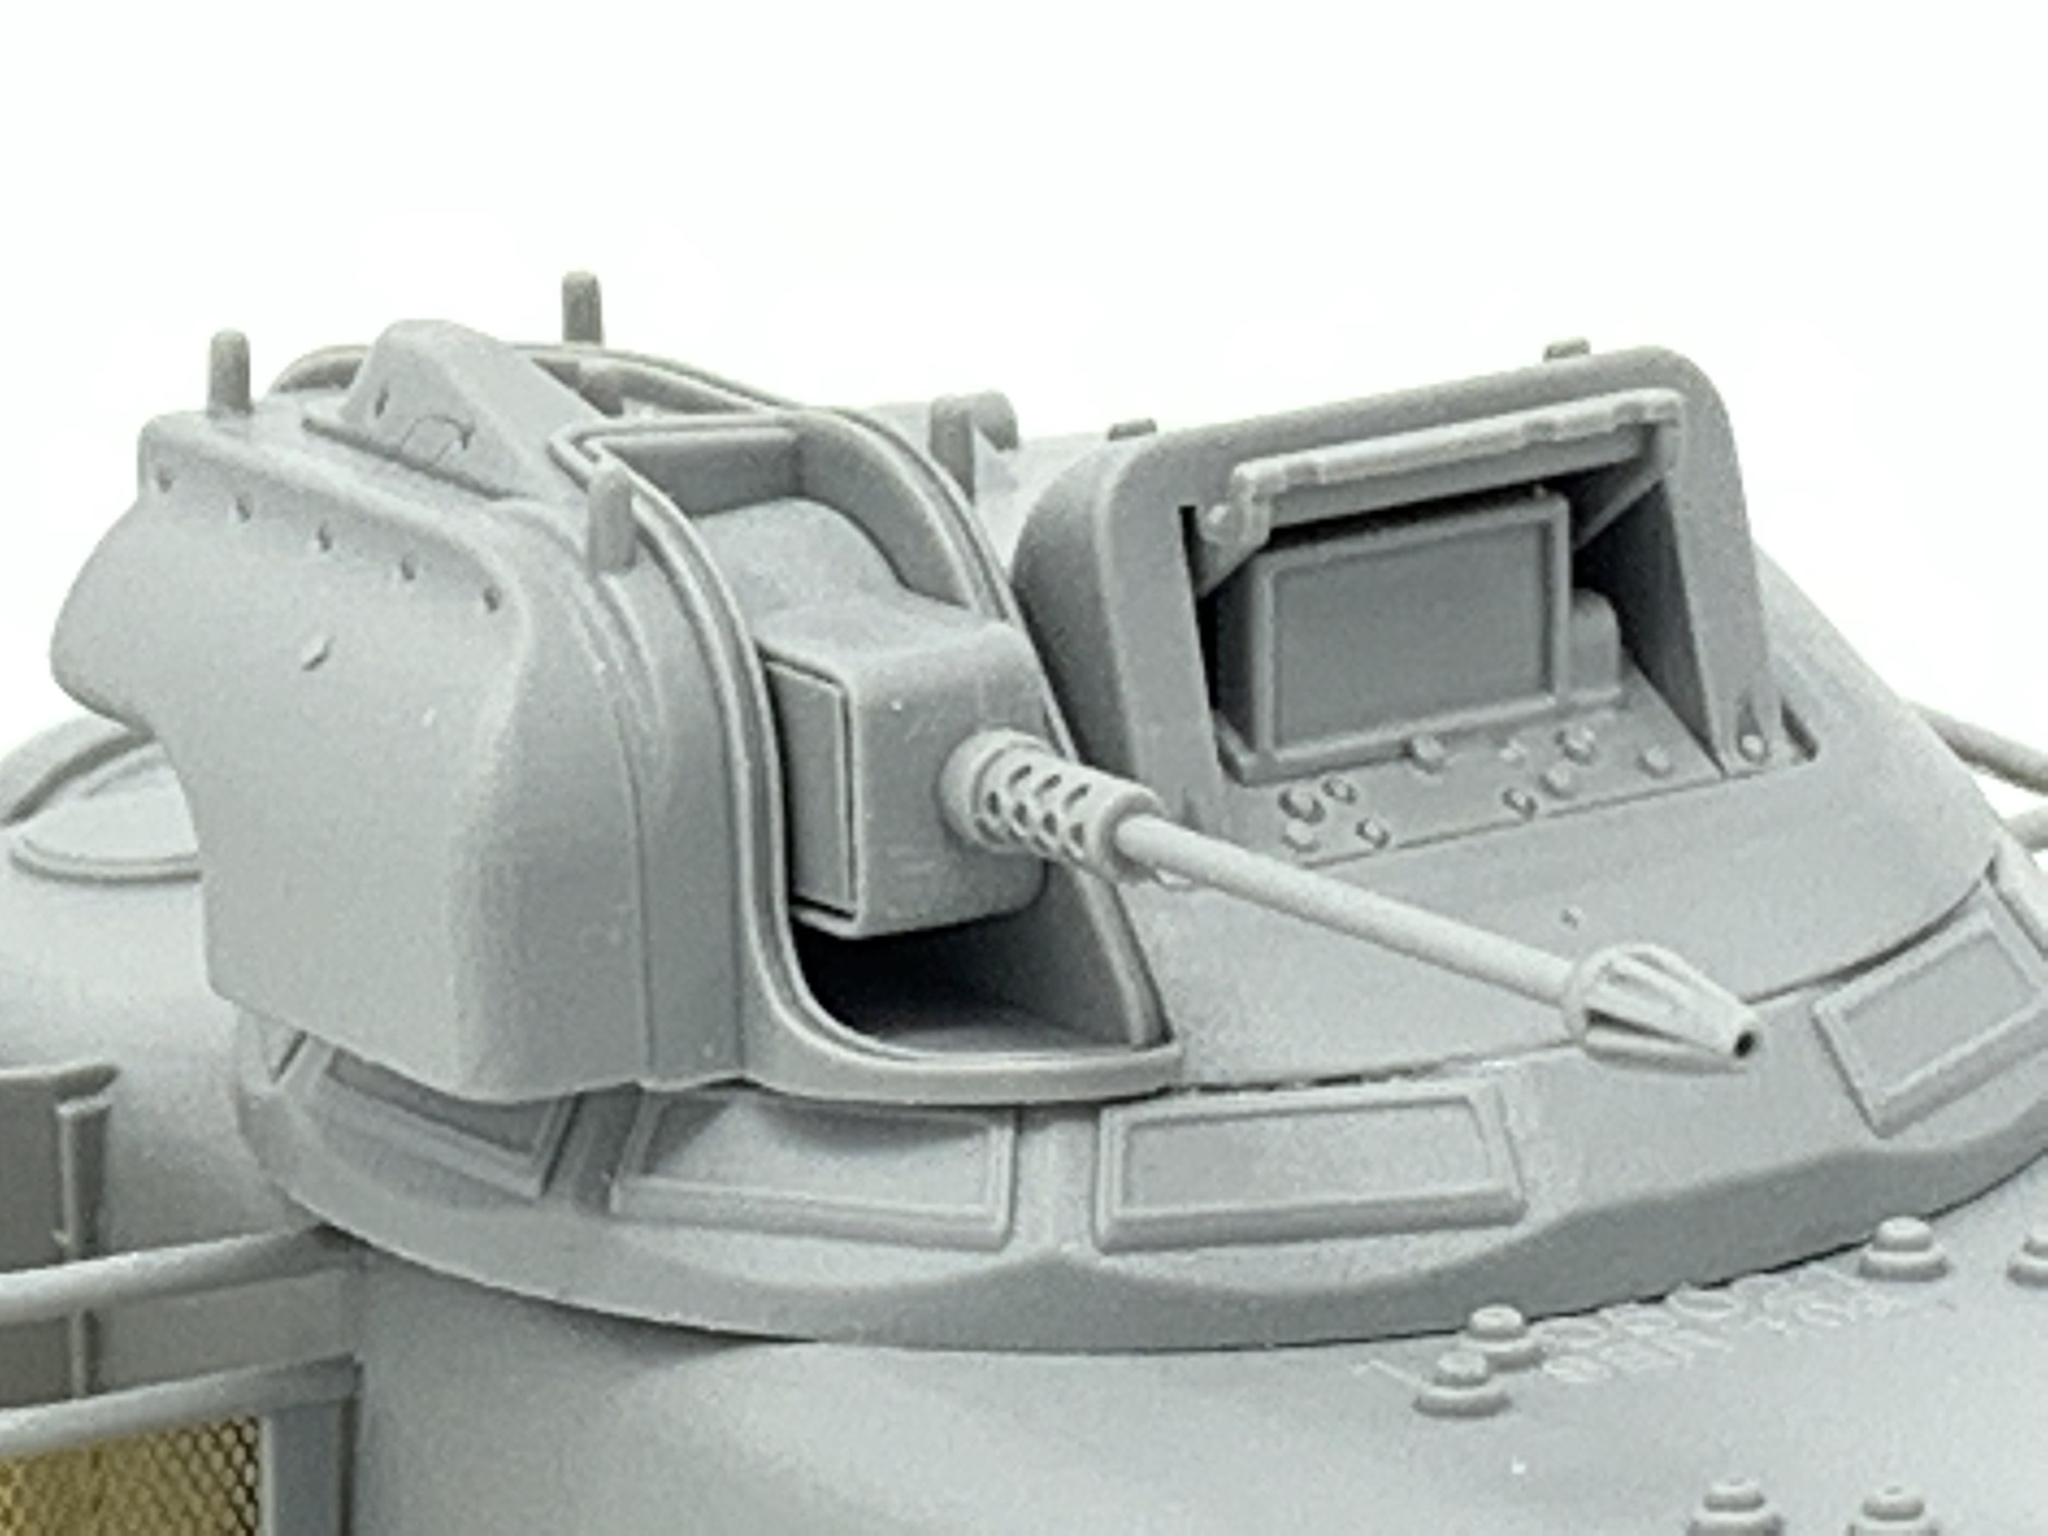
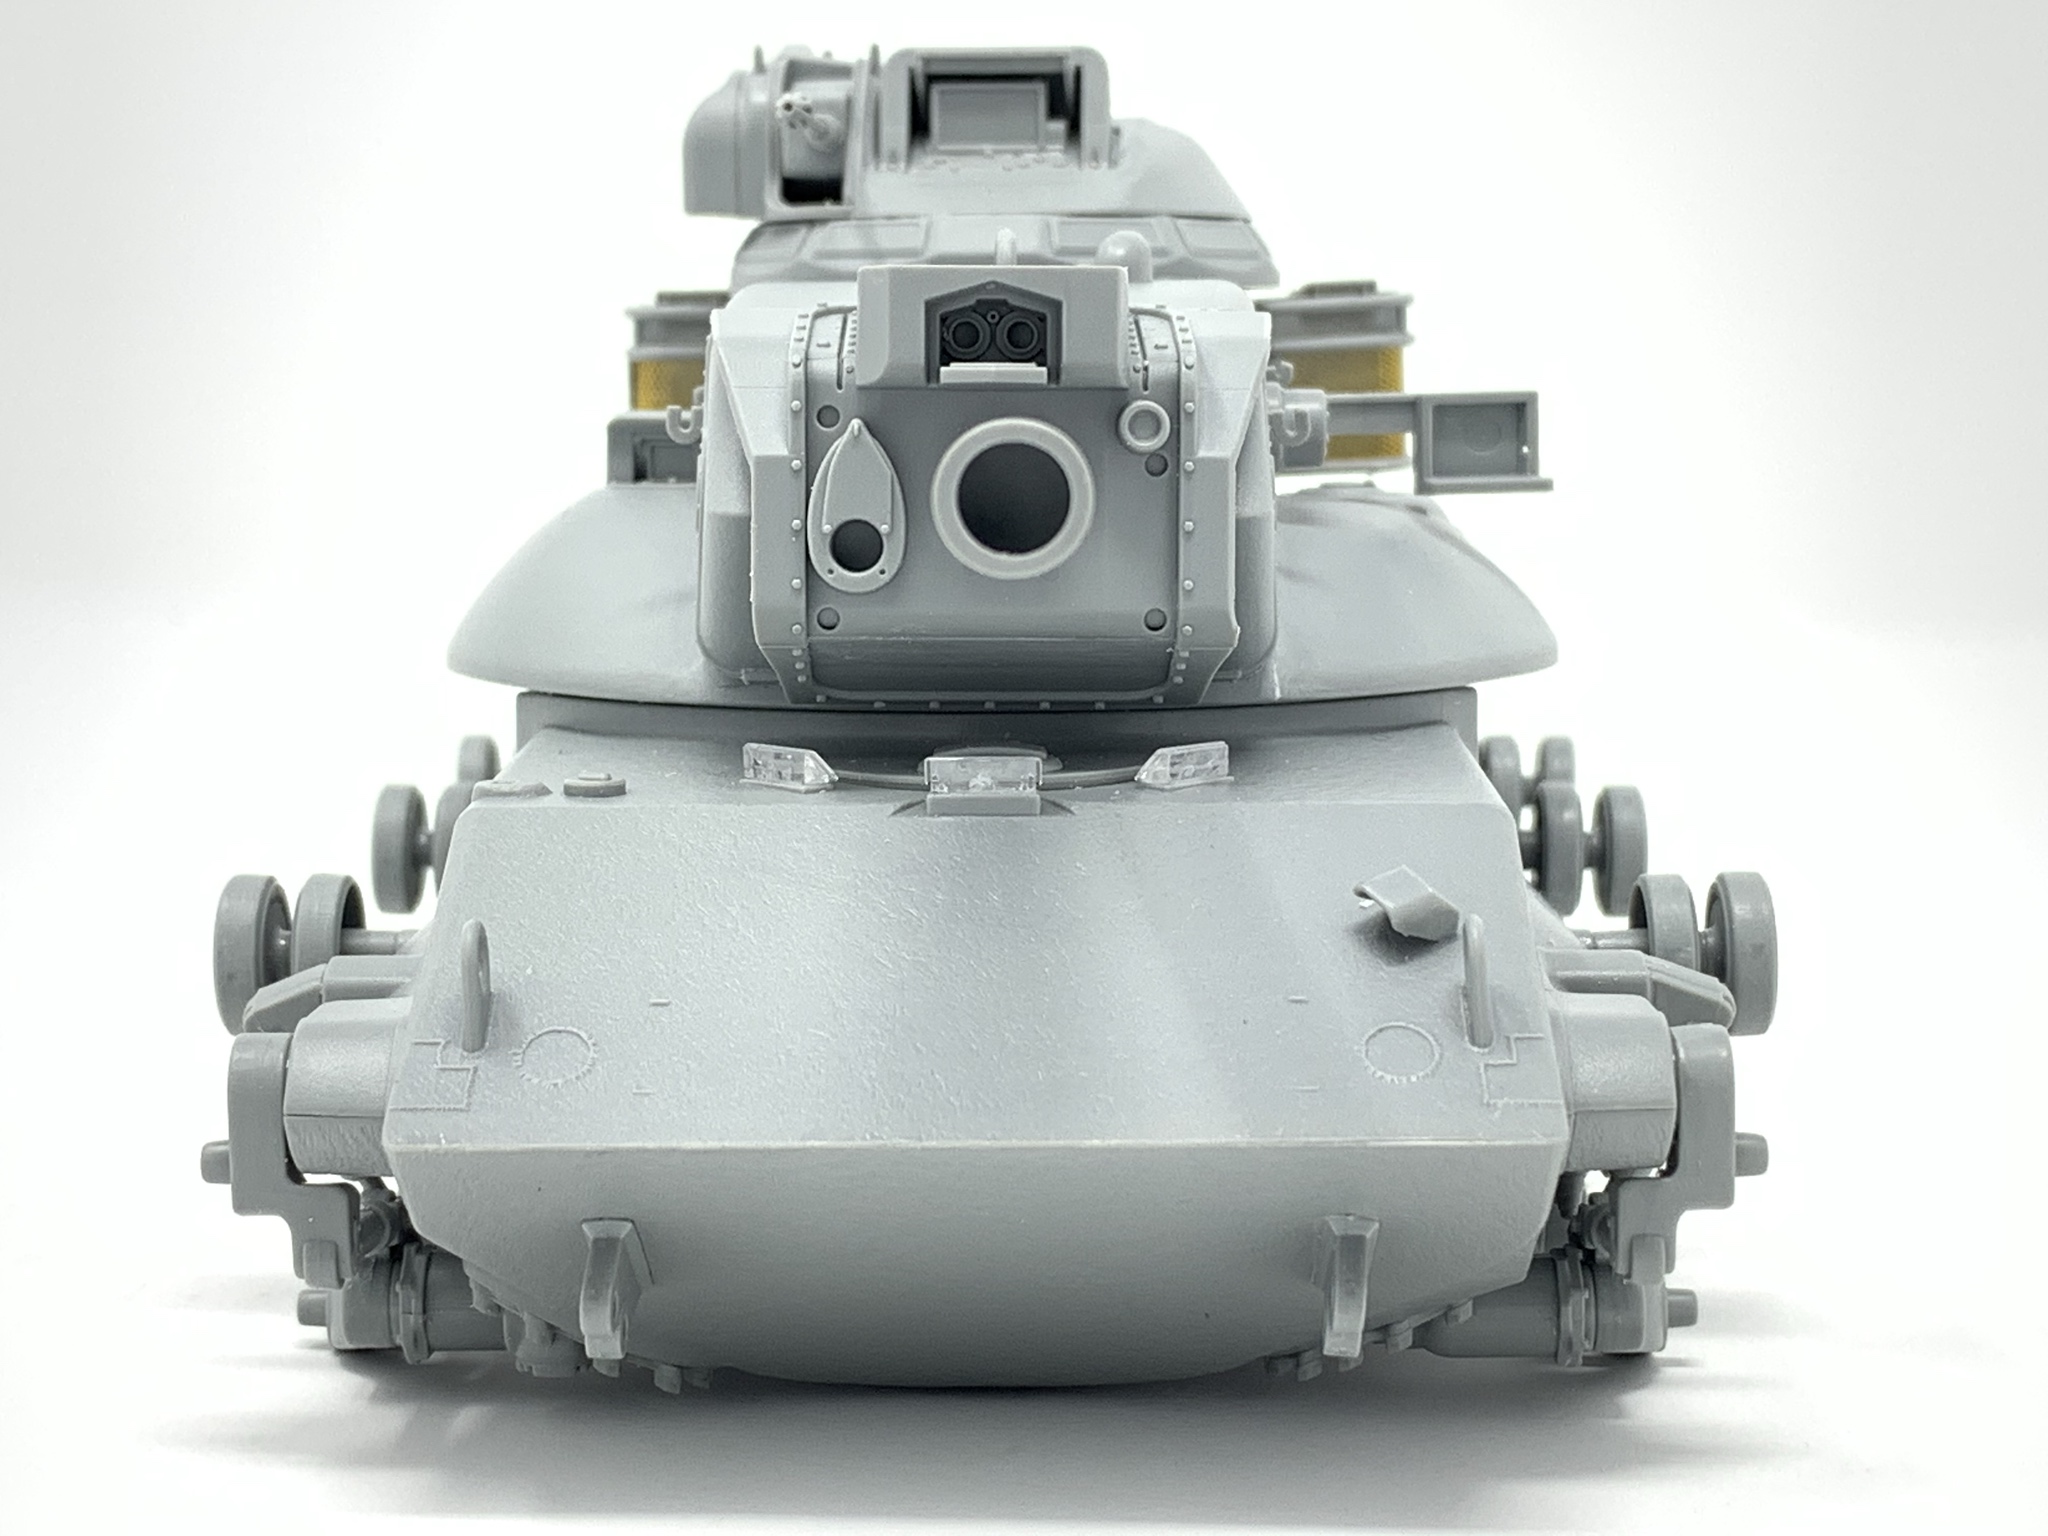
I was impressed with the MG, the barrel does not need drilling out.


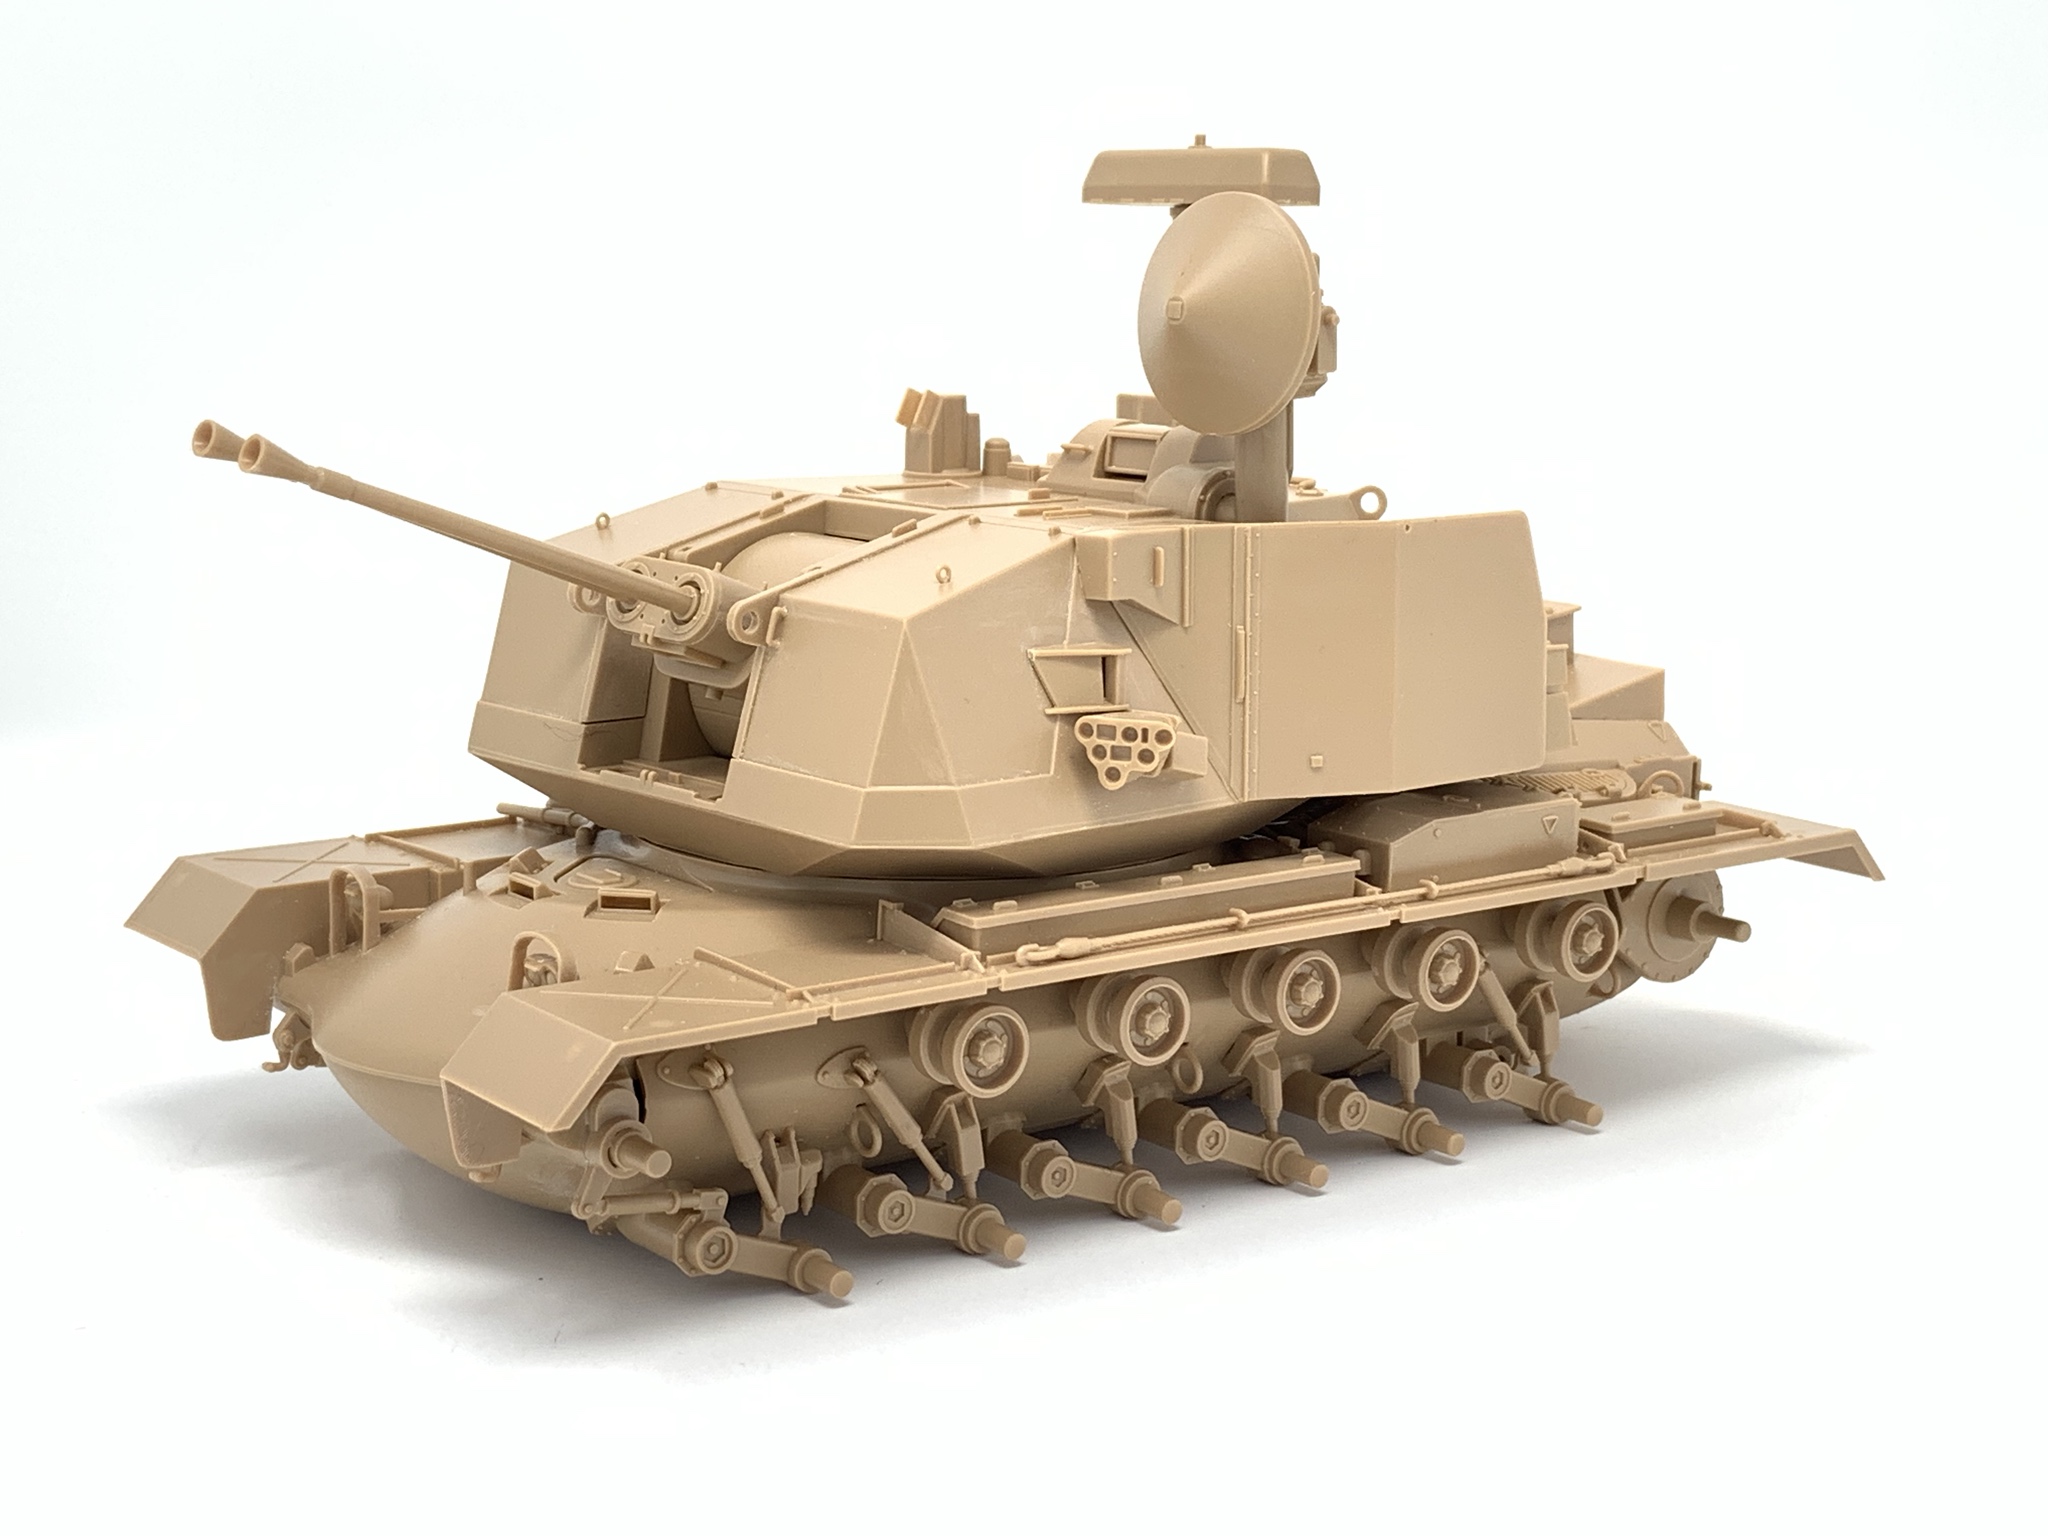
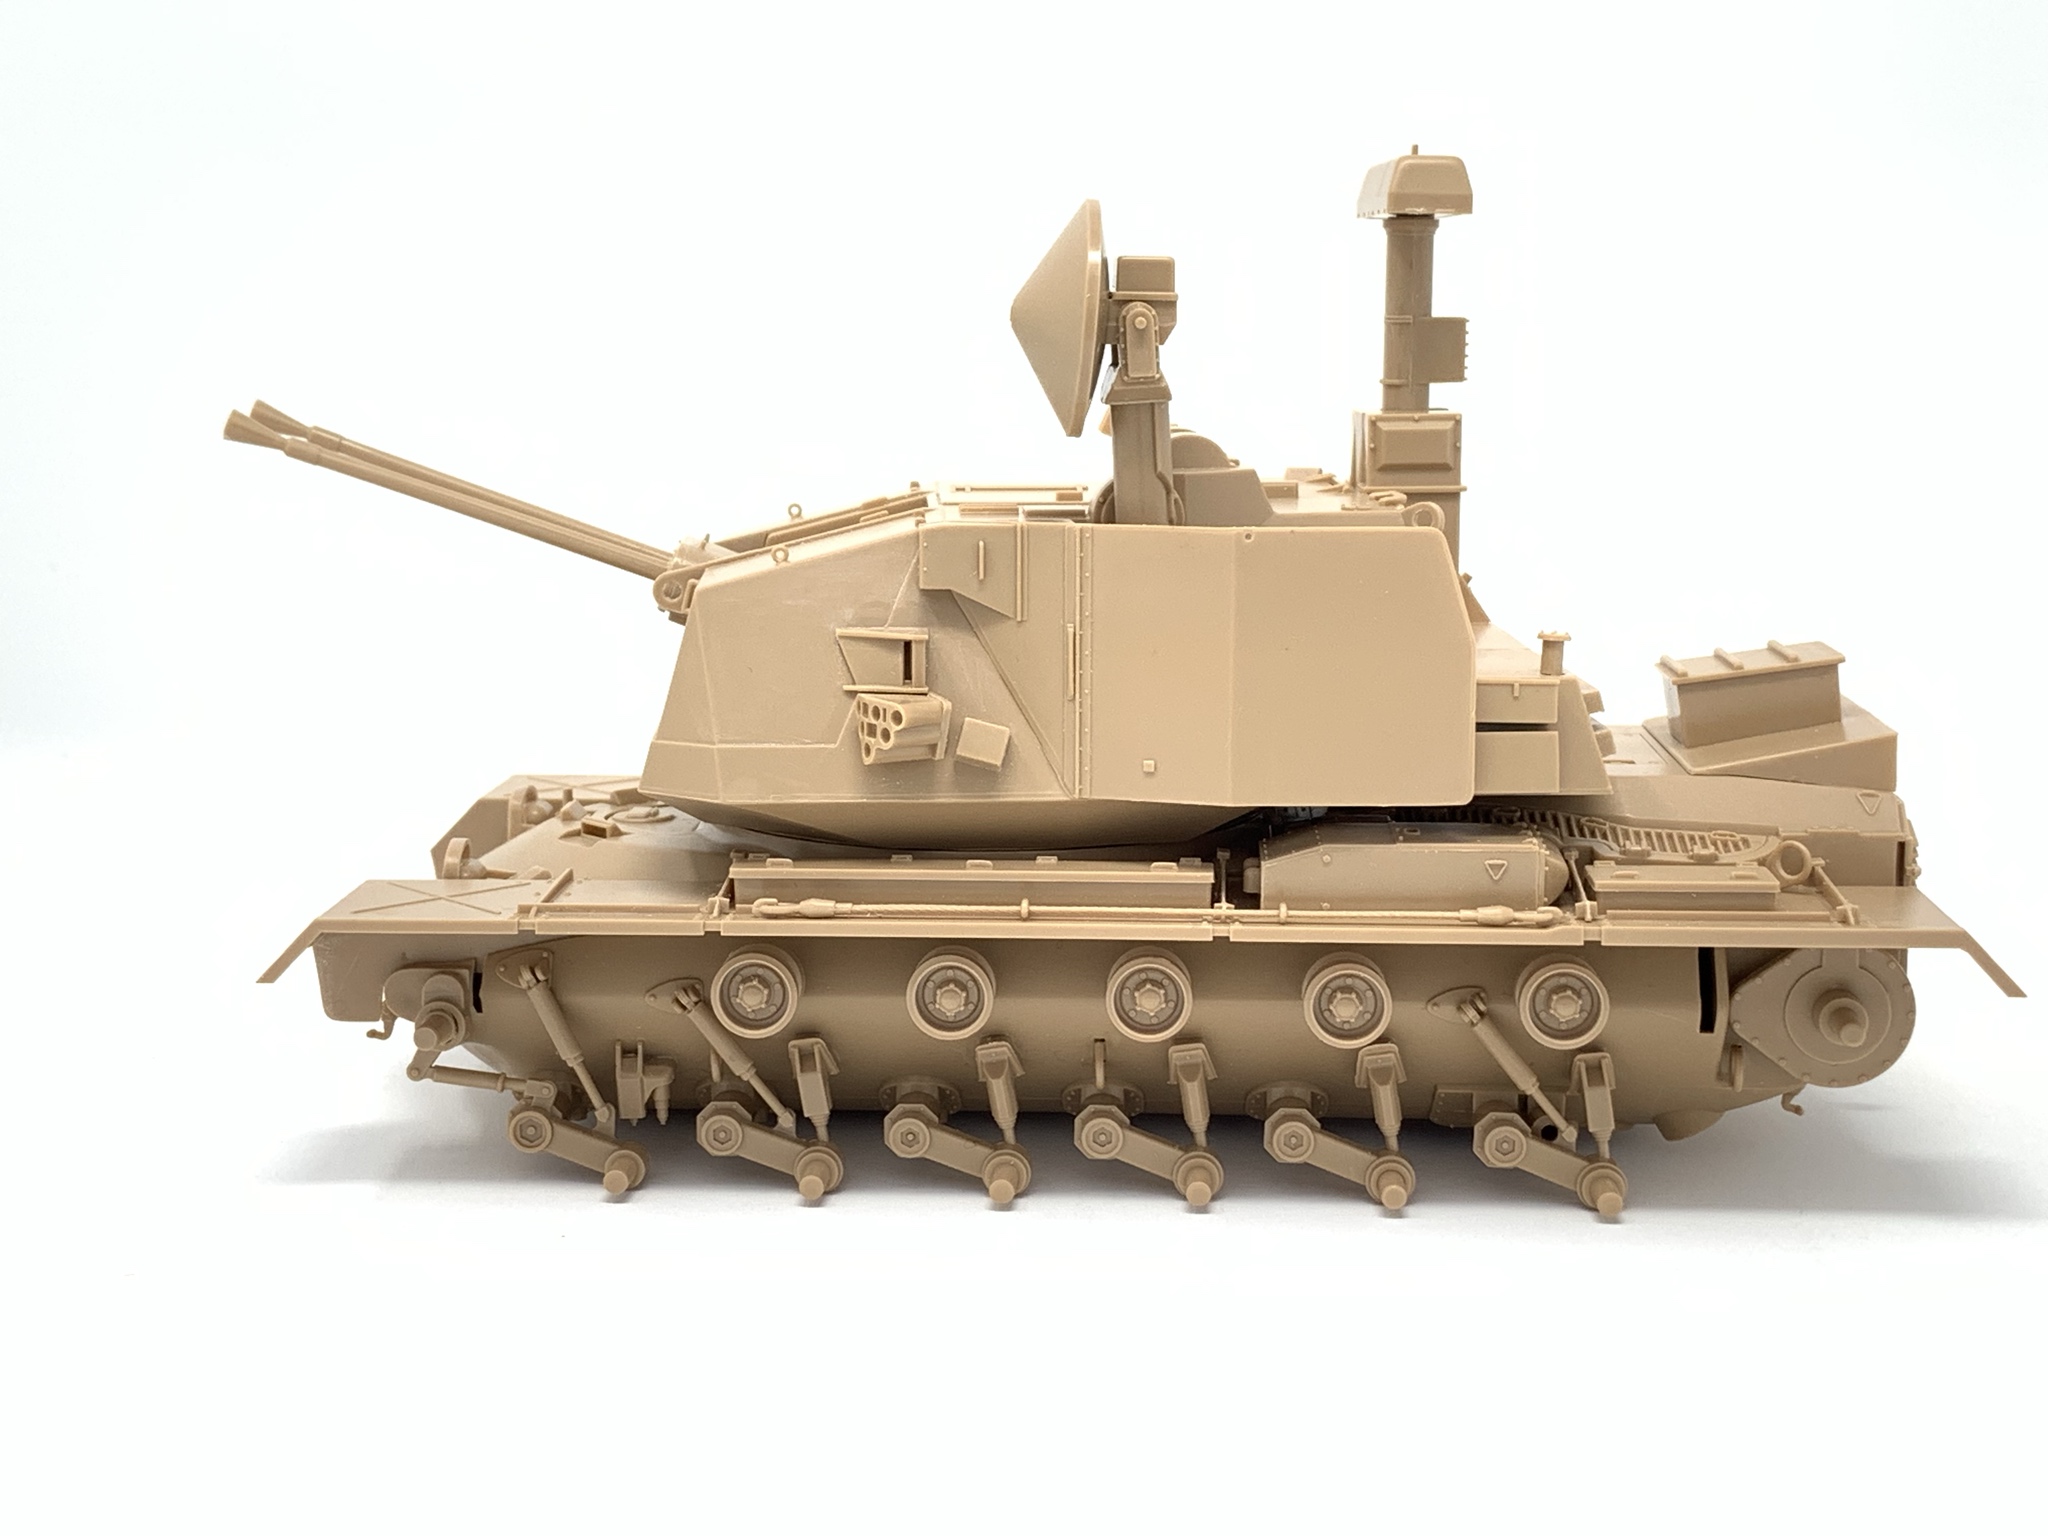
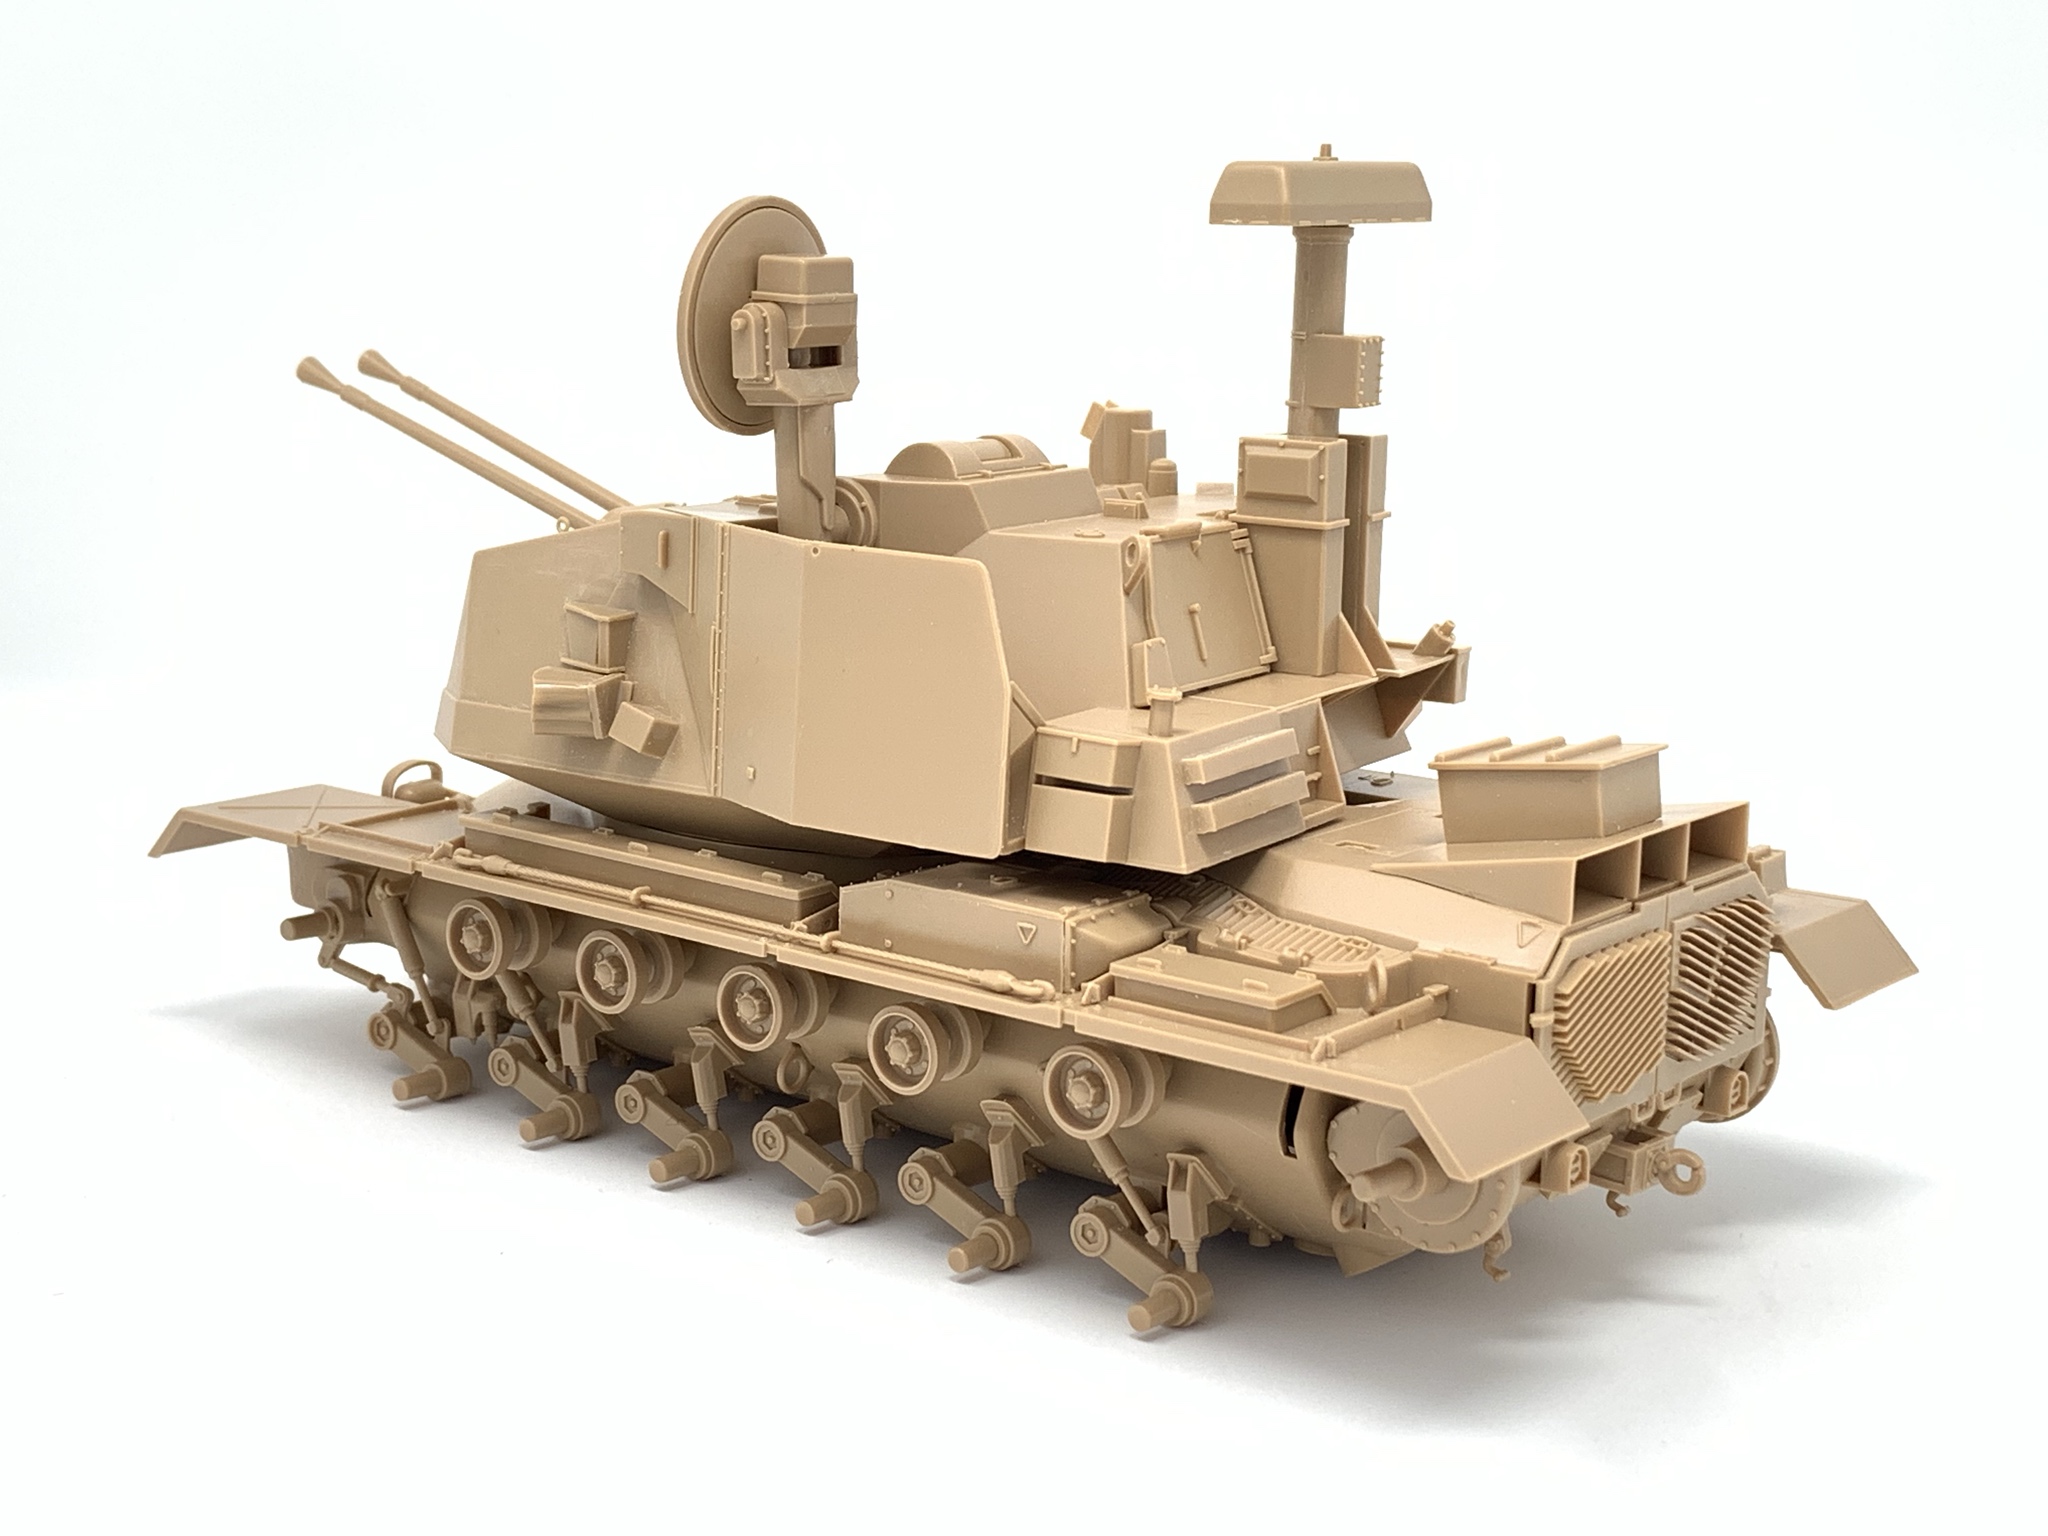
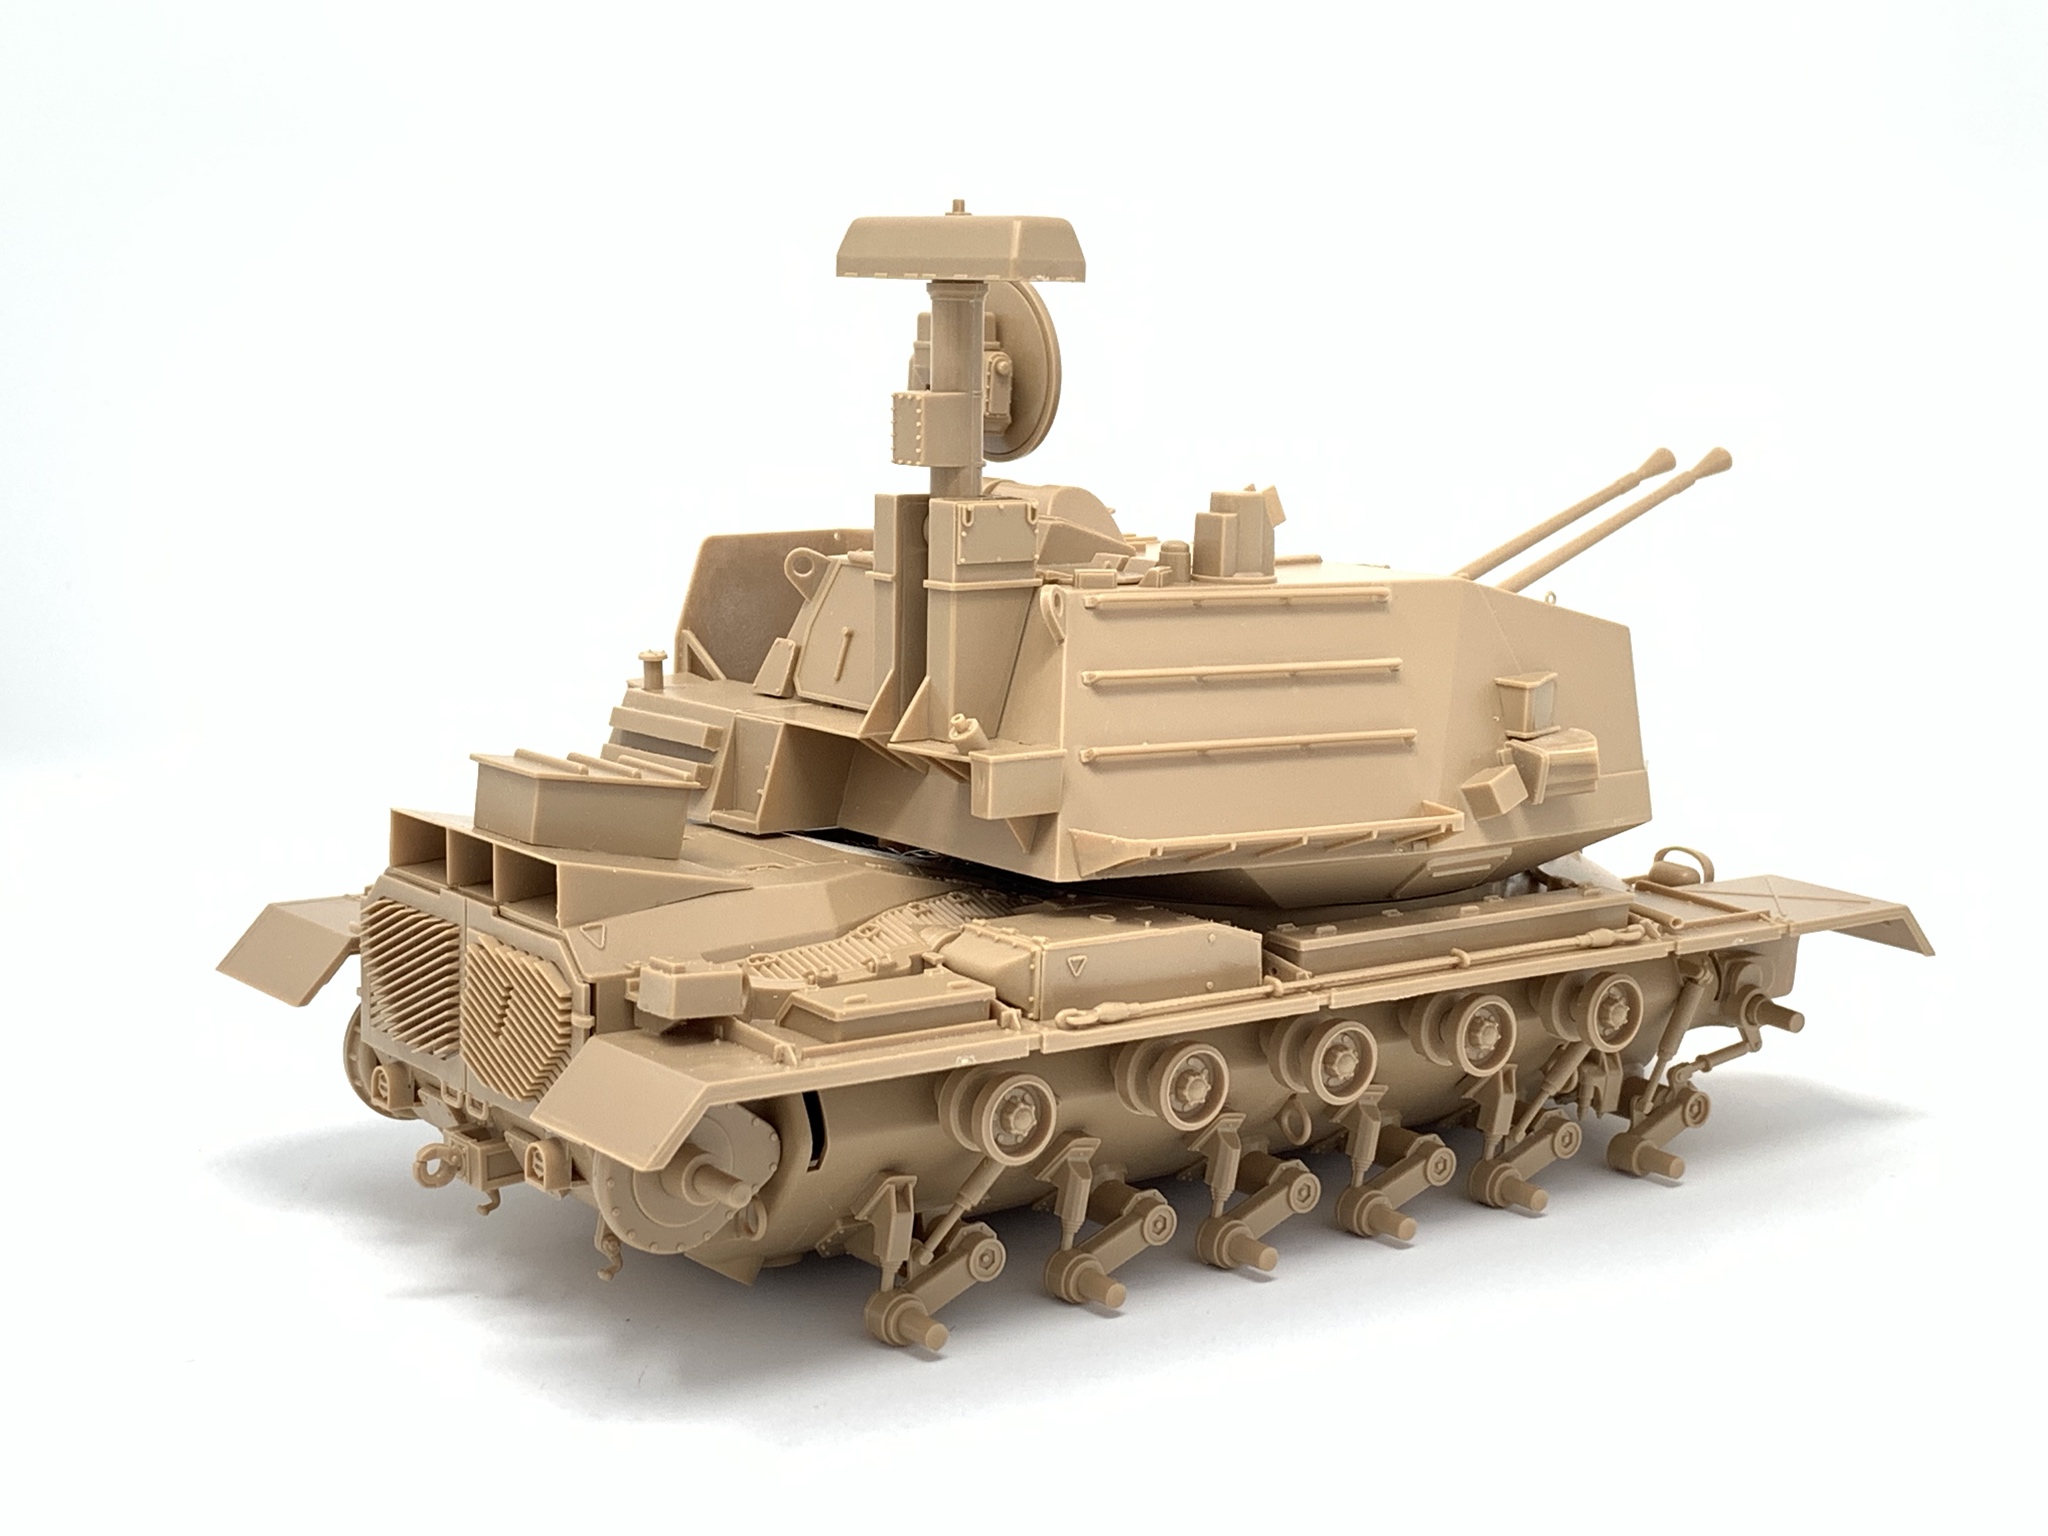
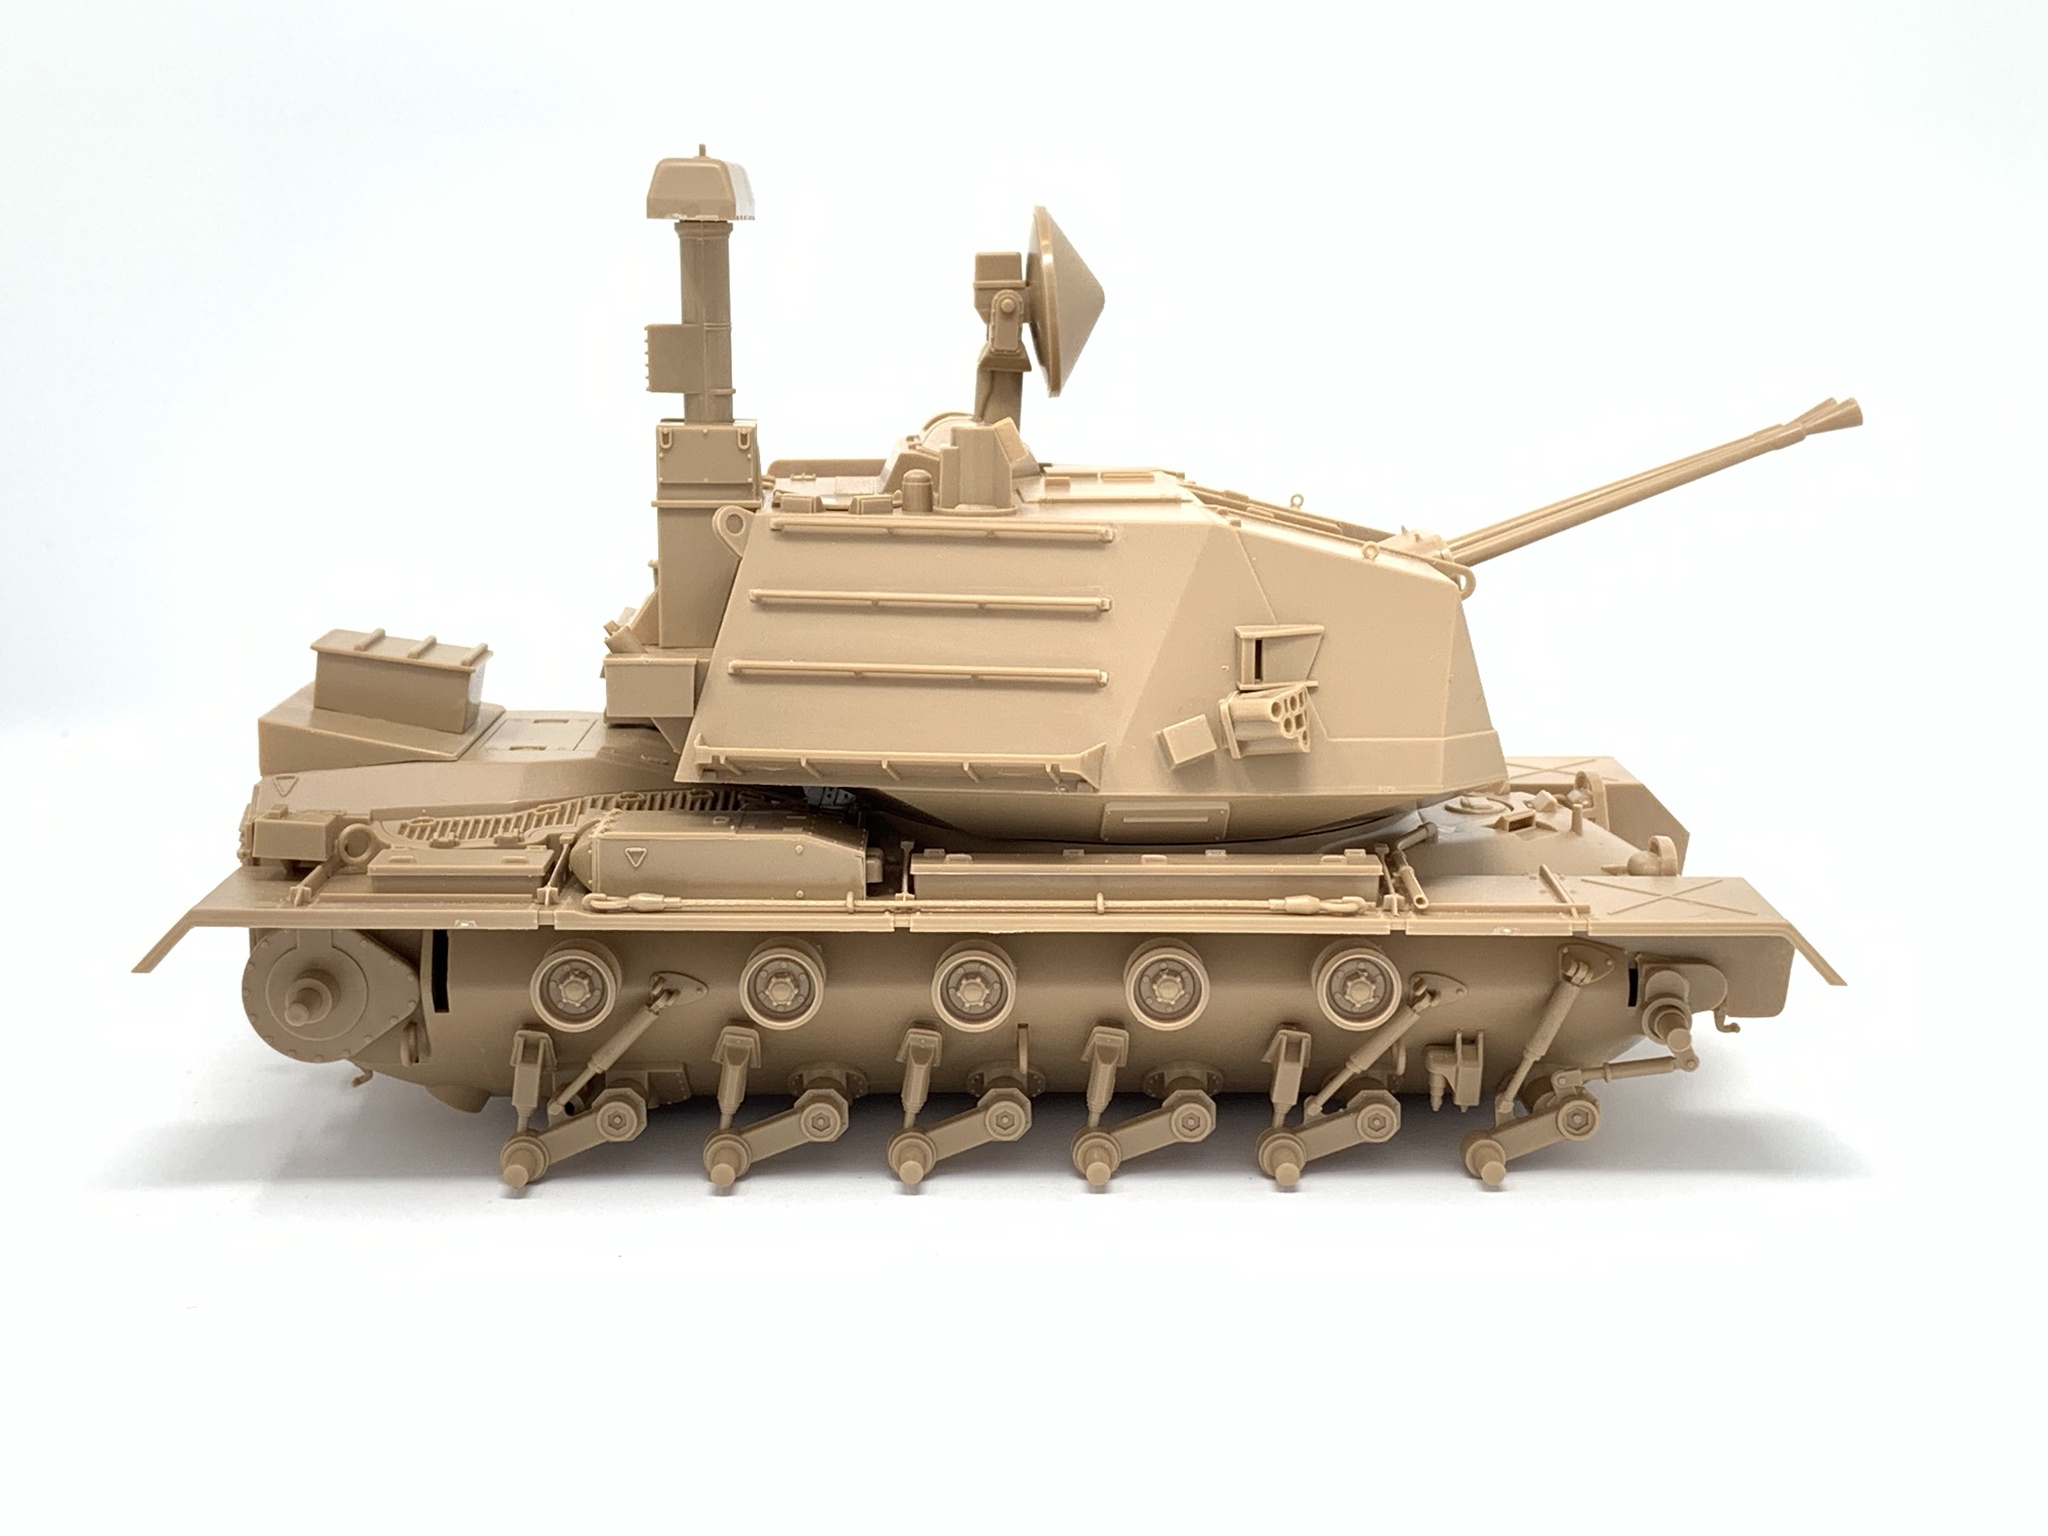
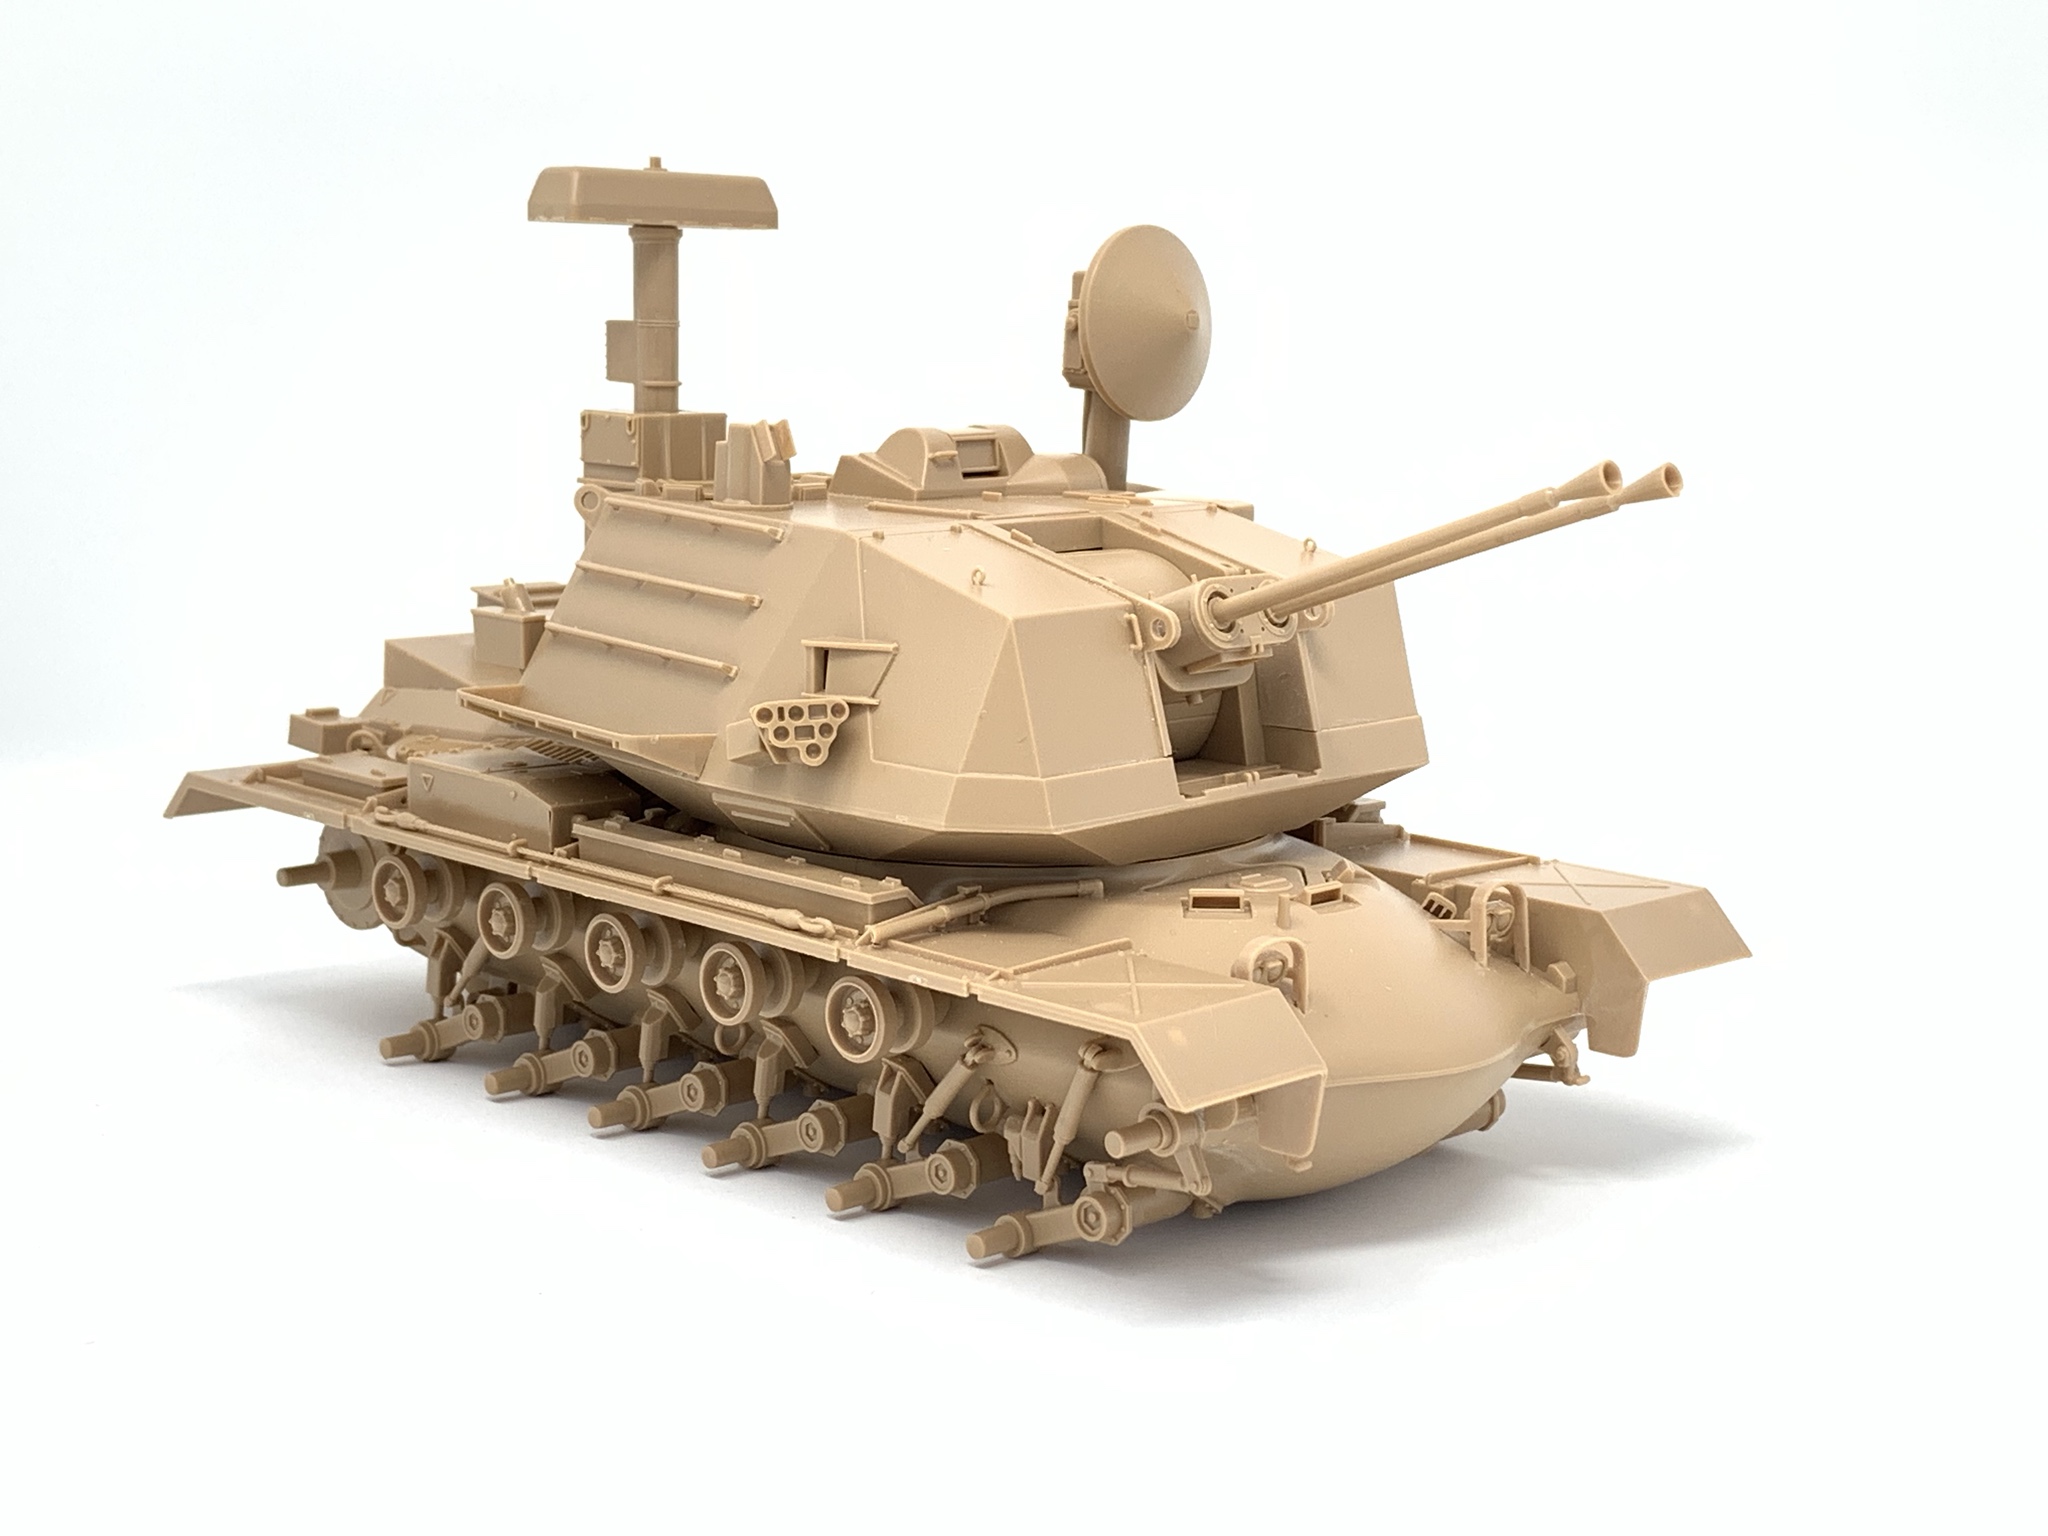
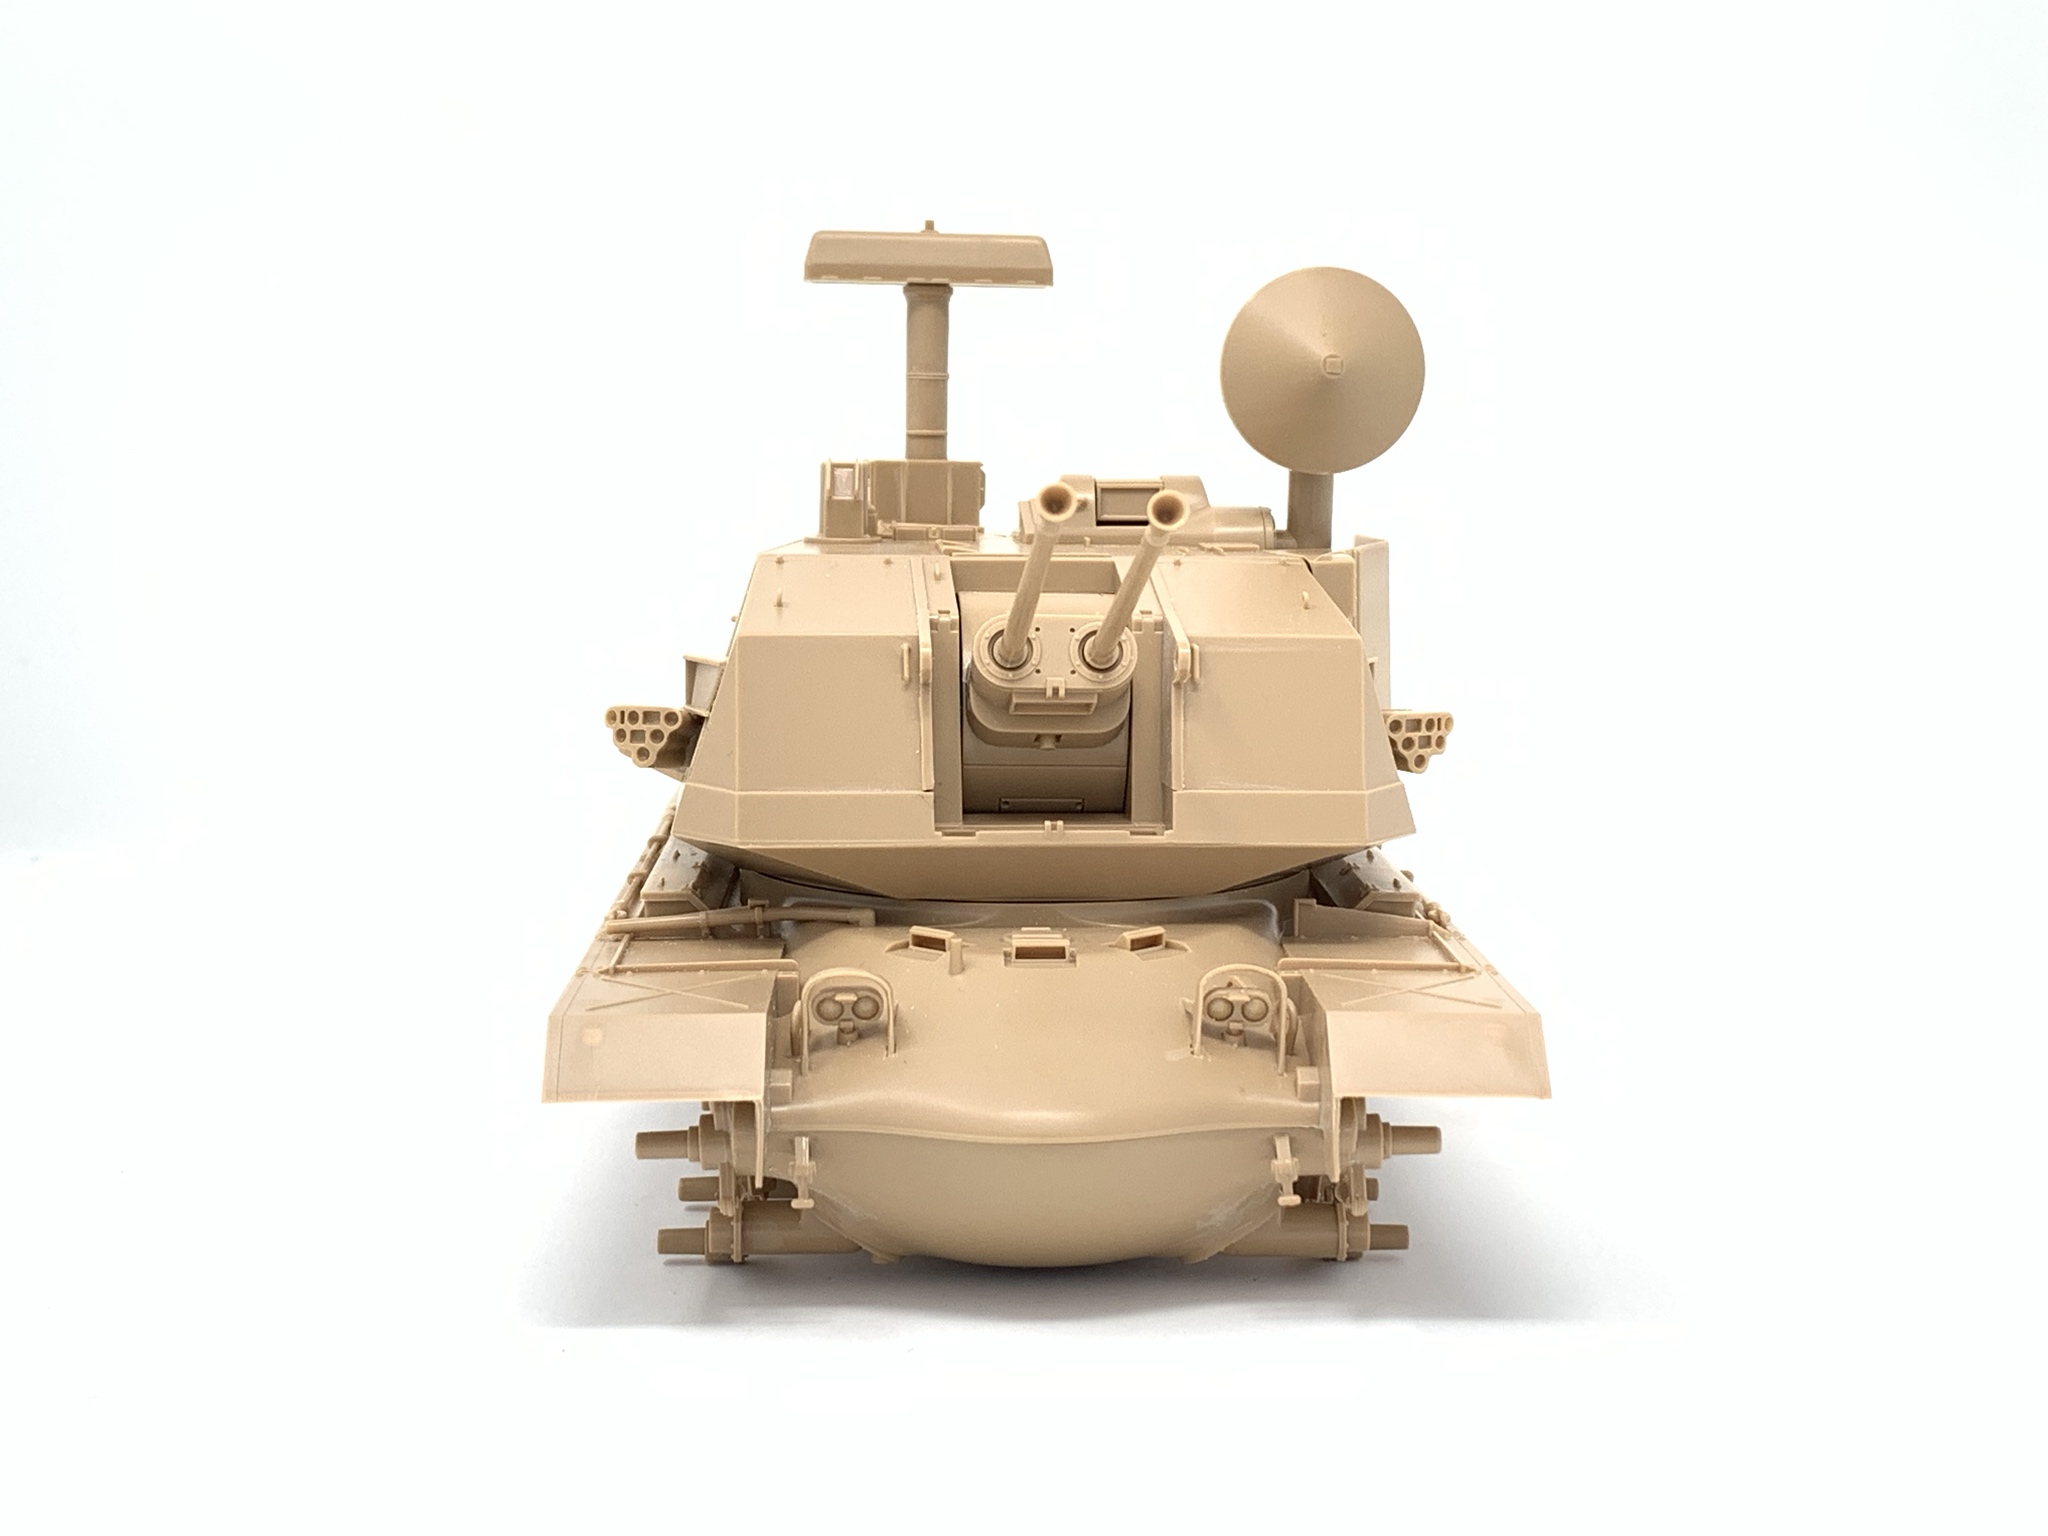
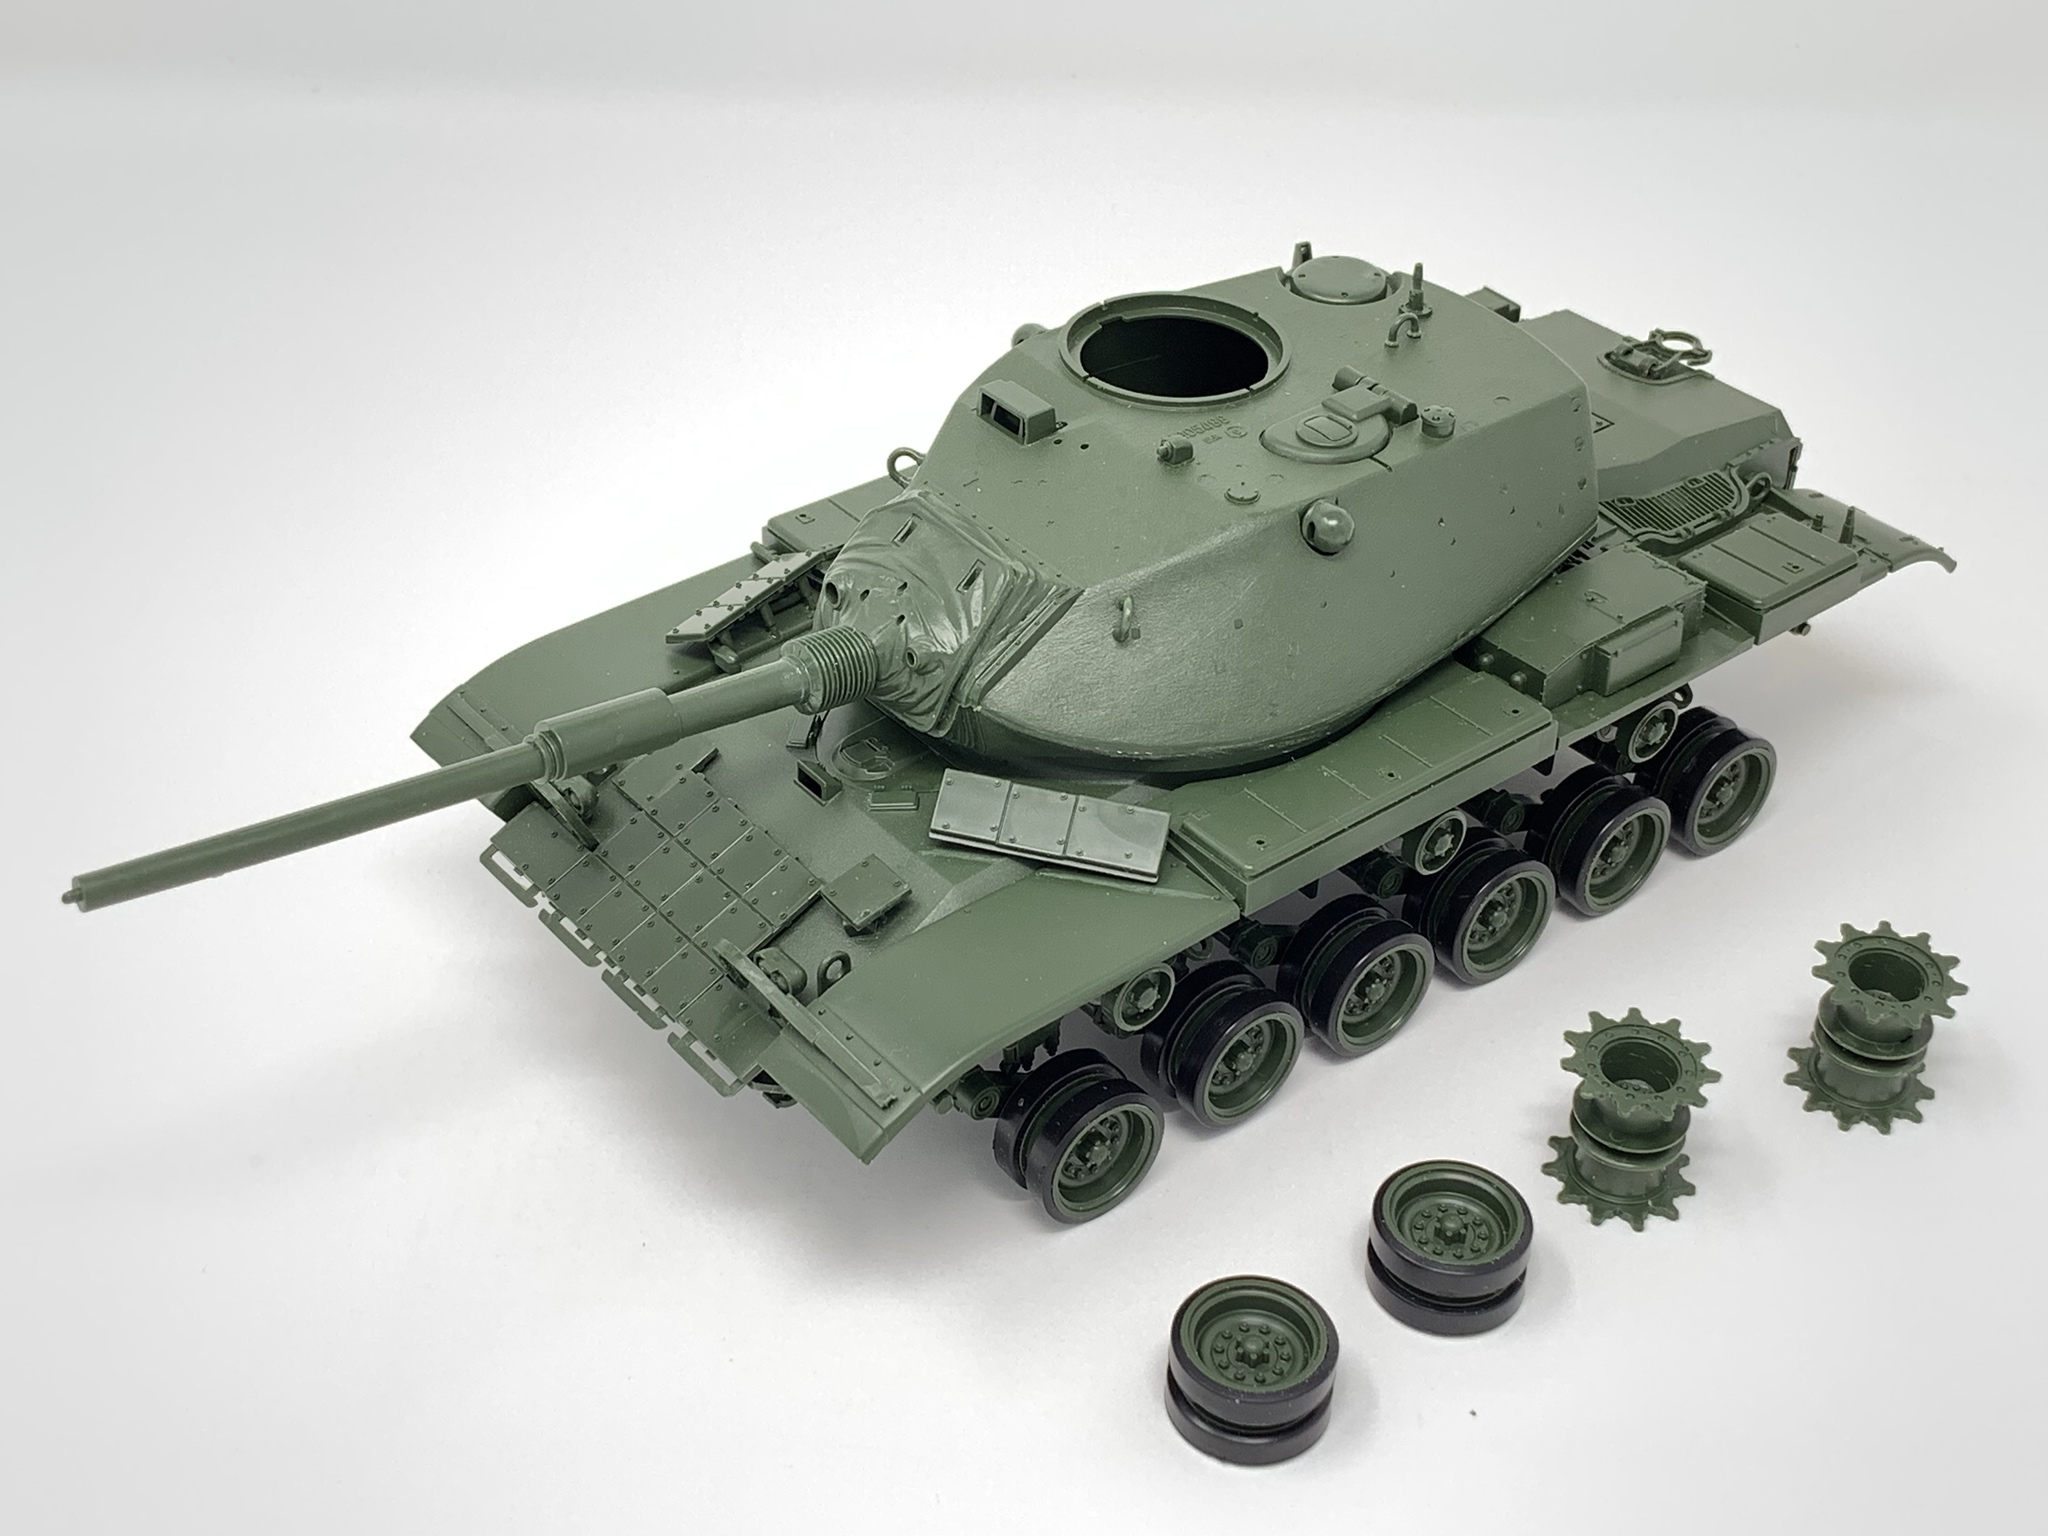
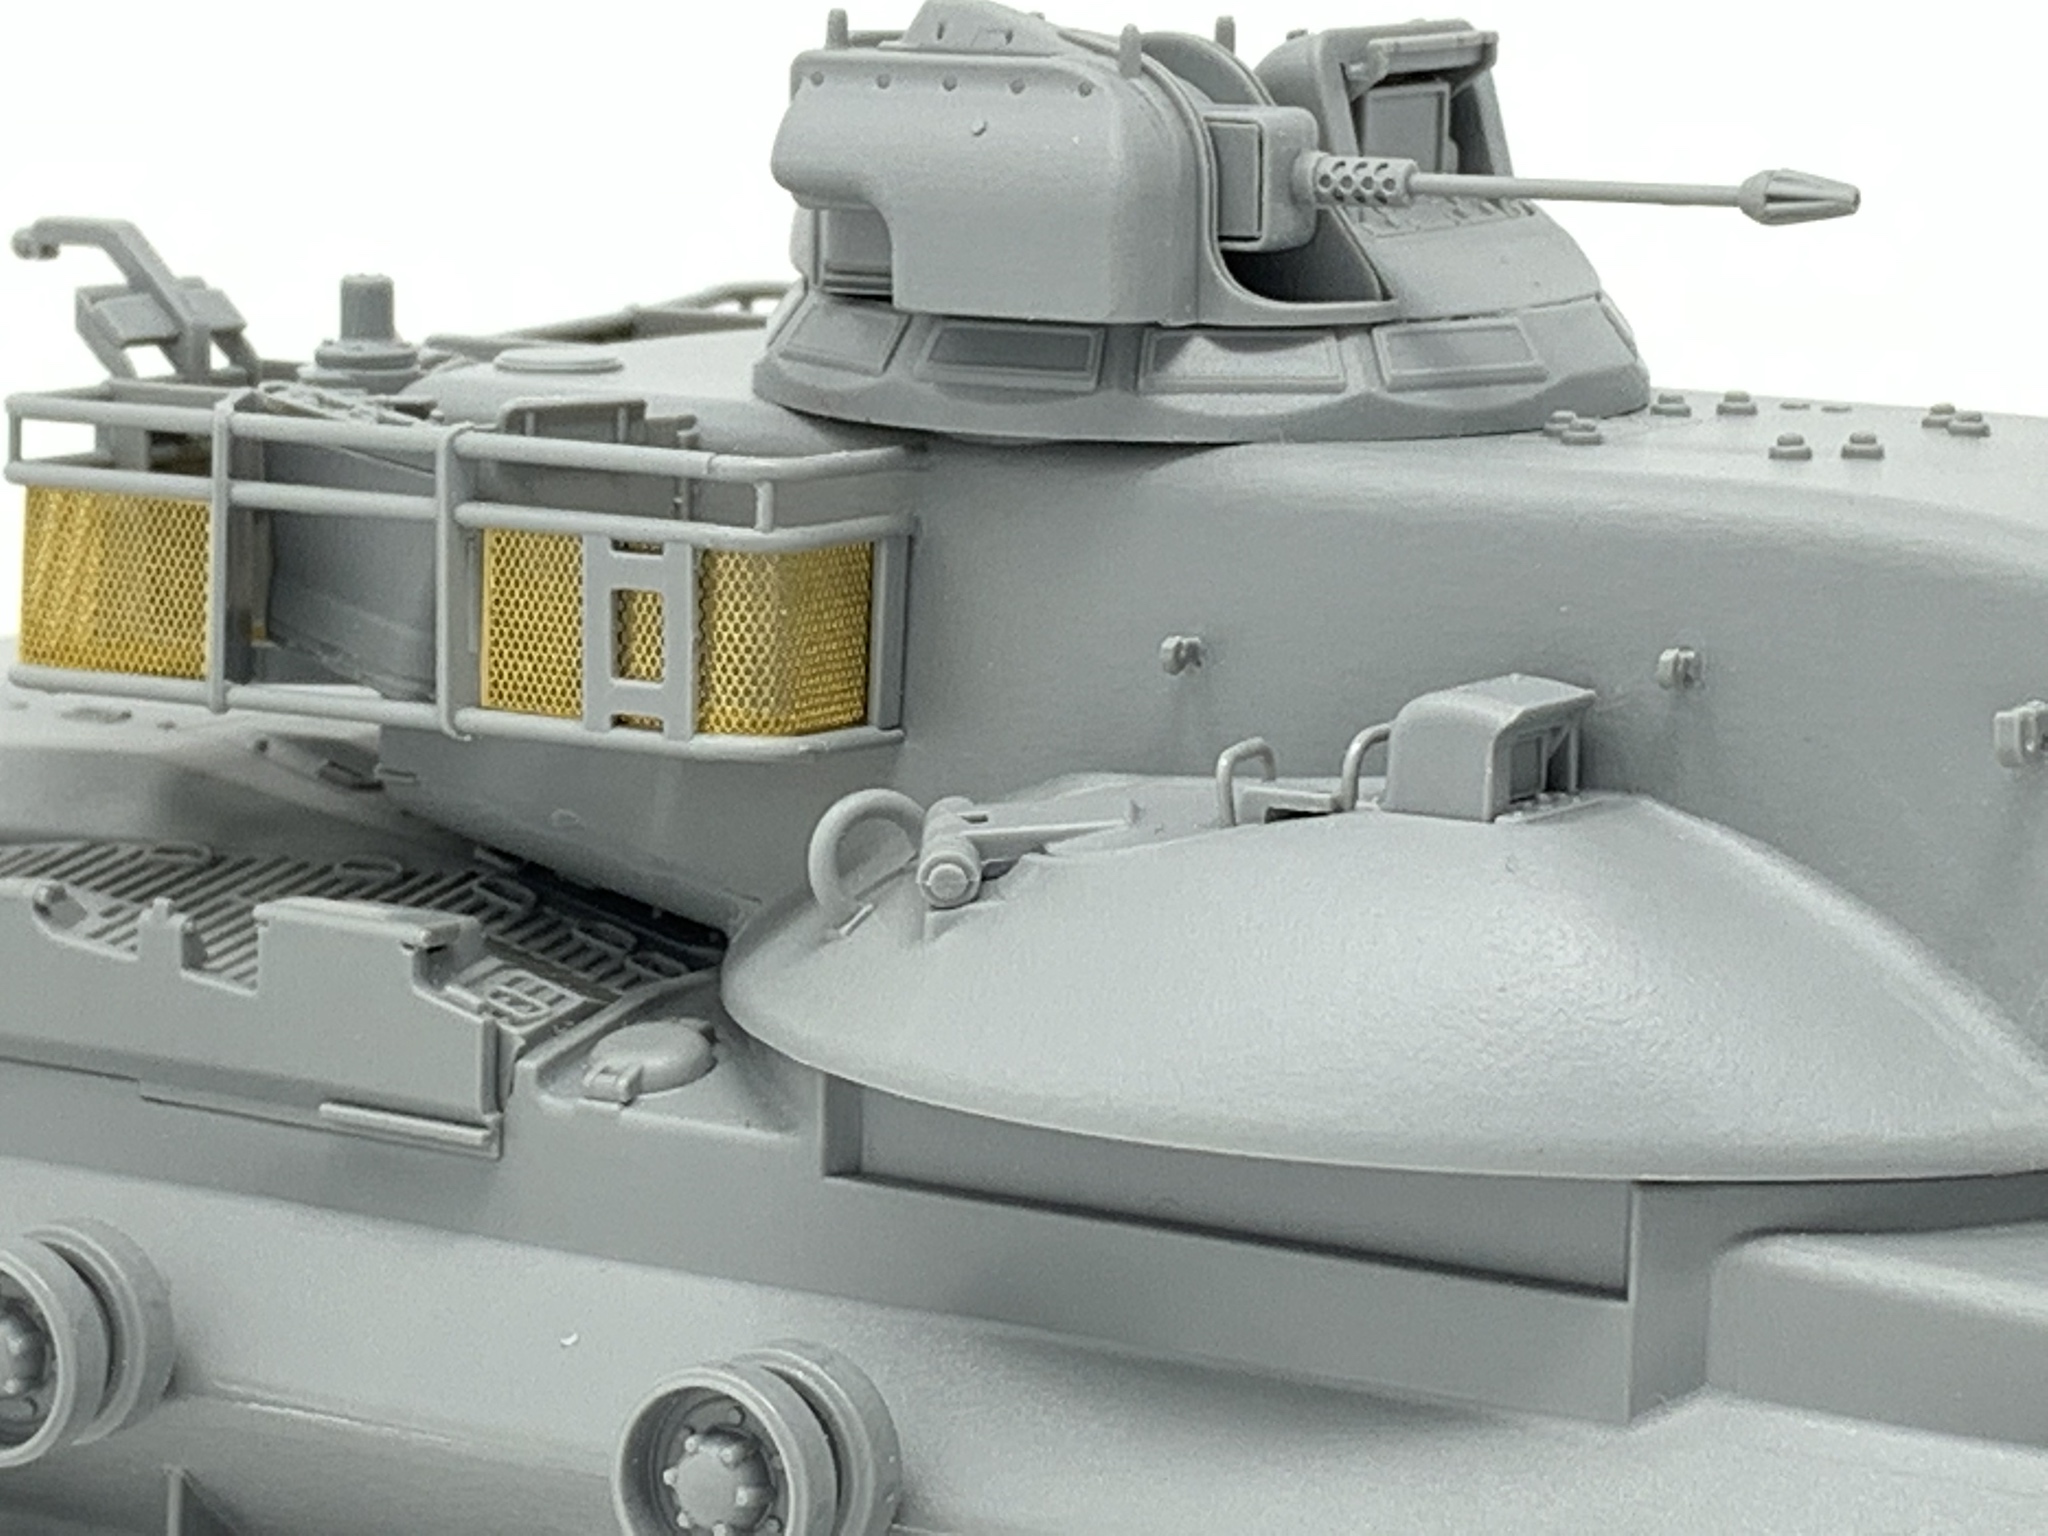
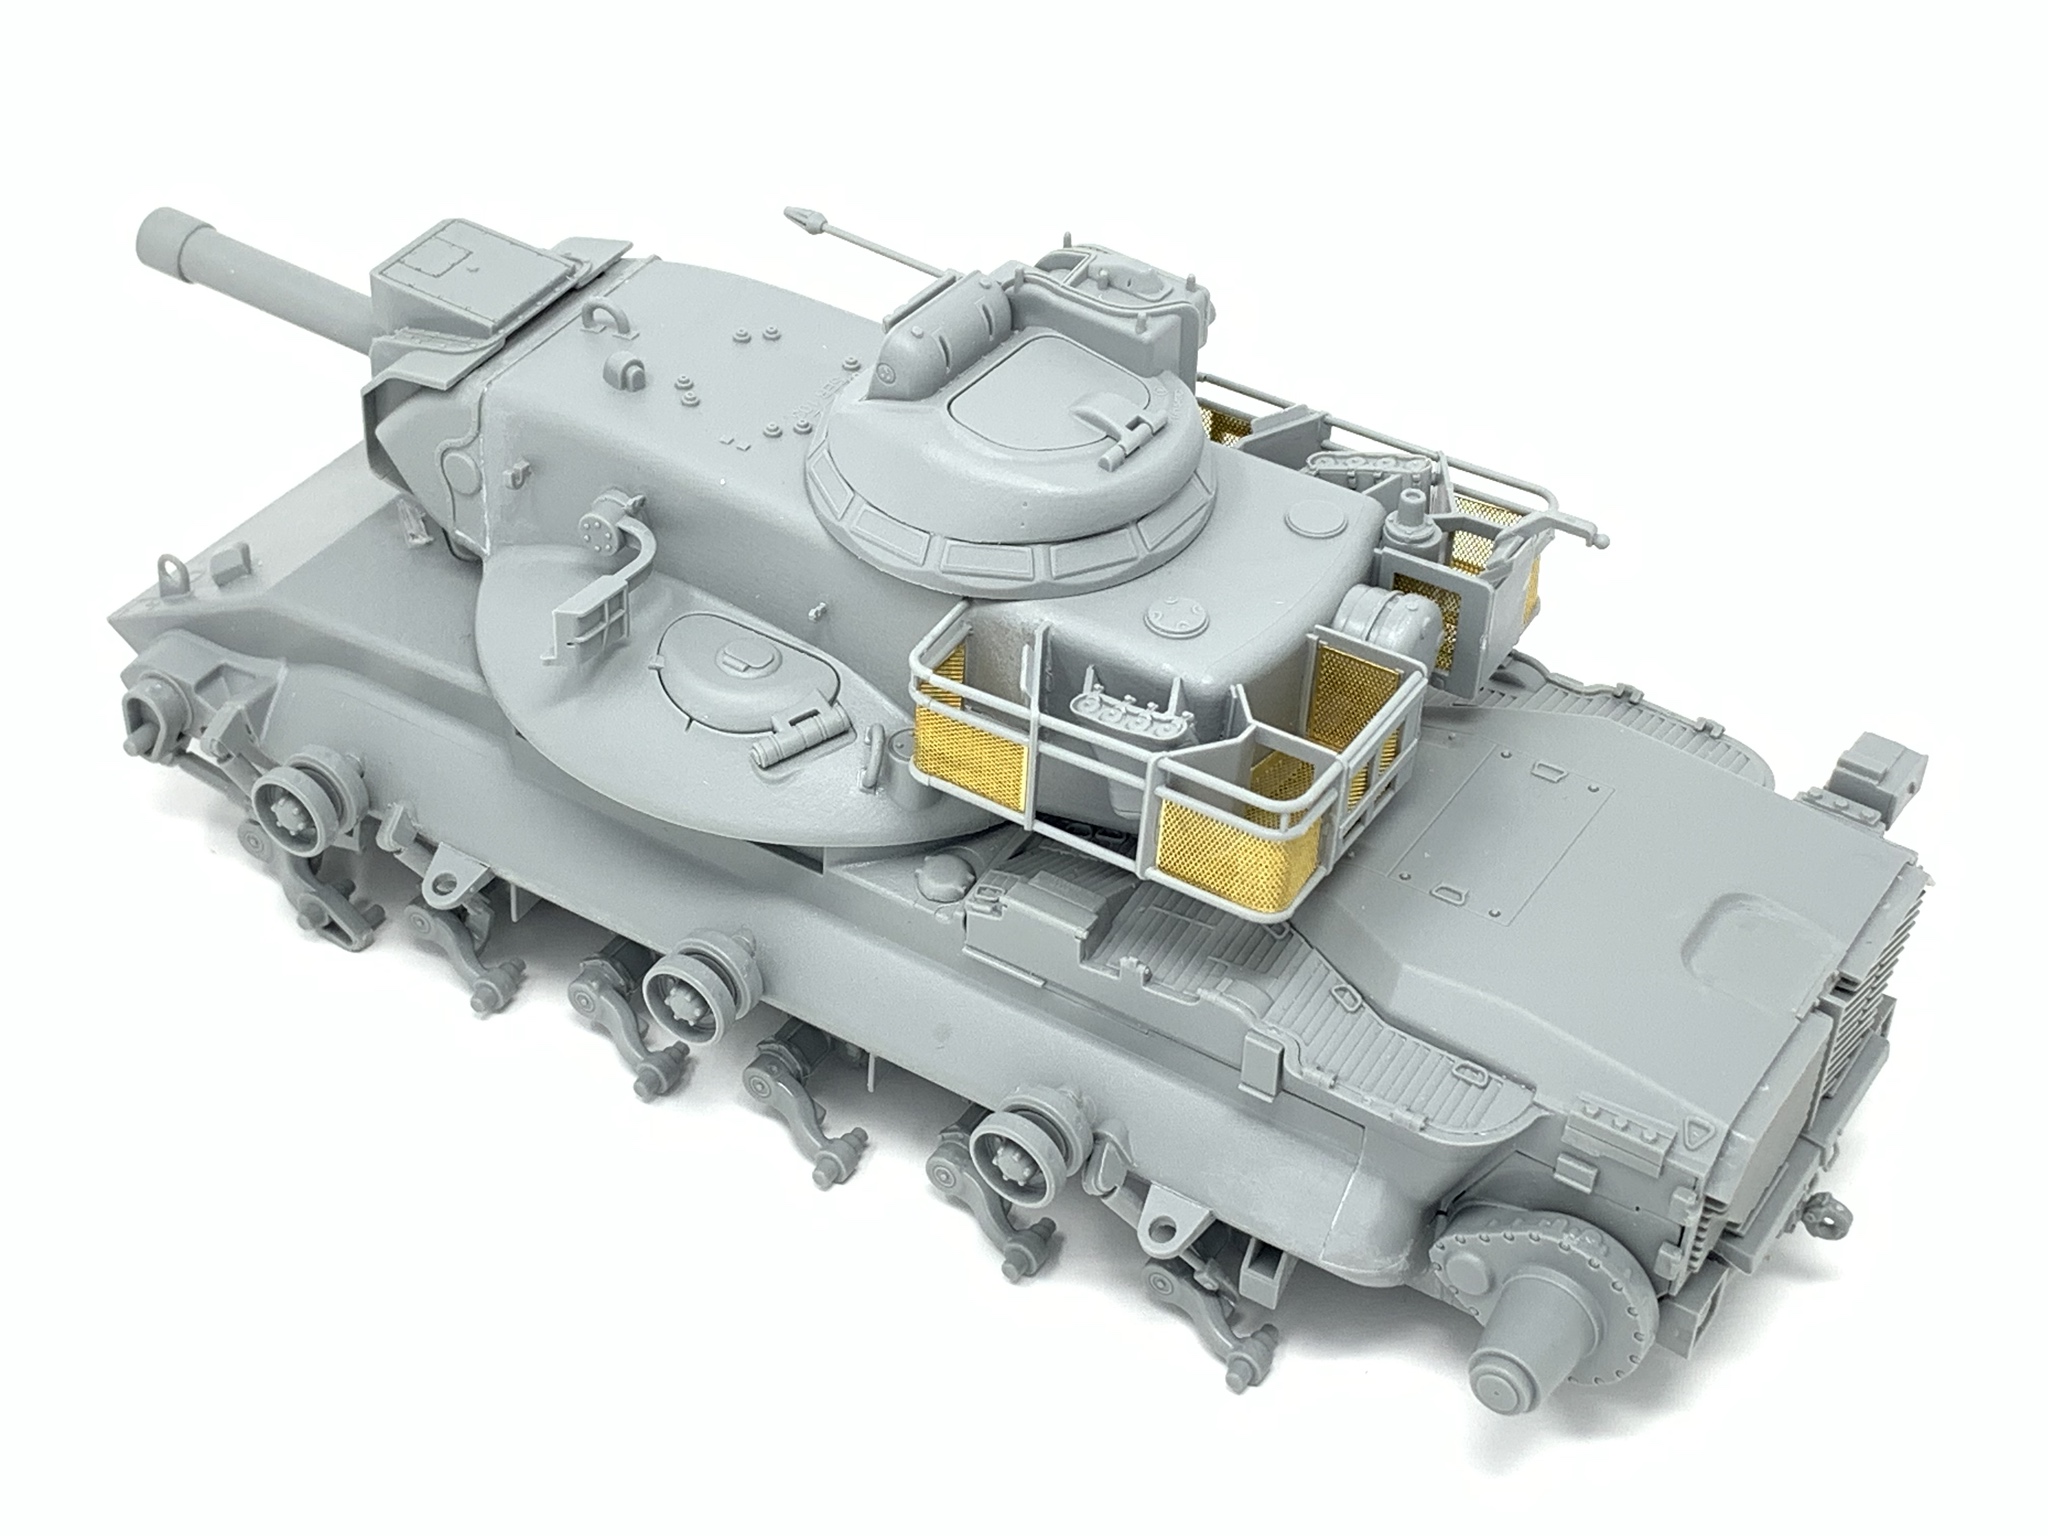
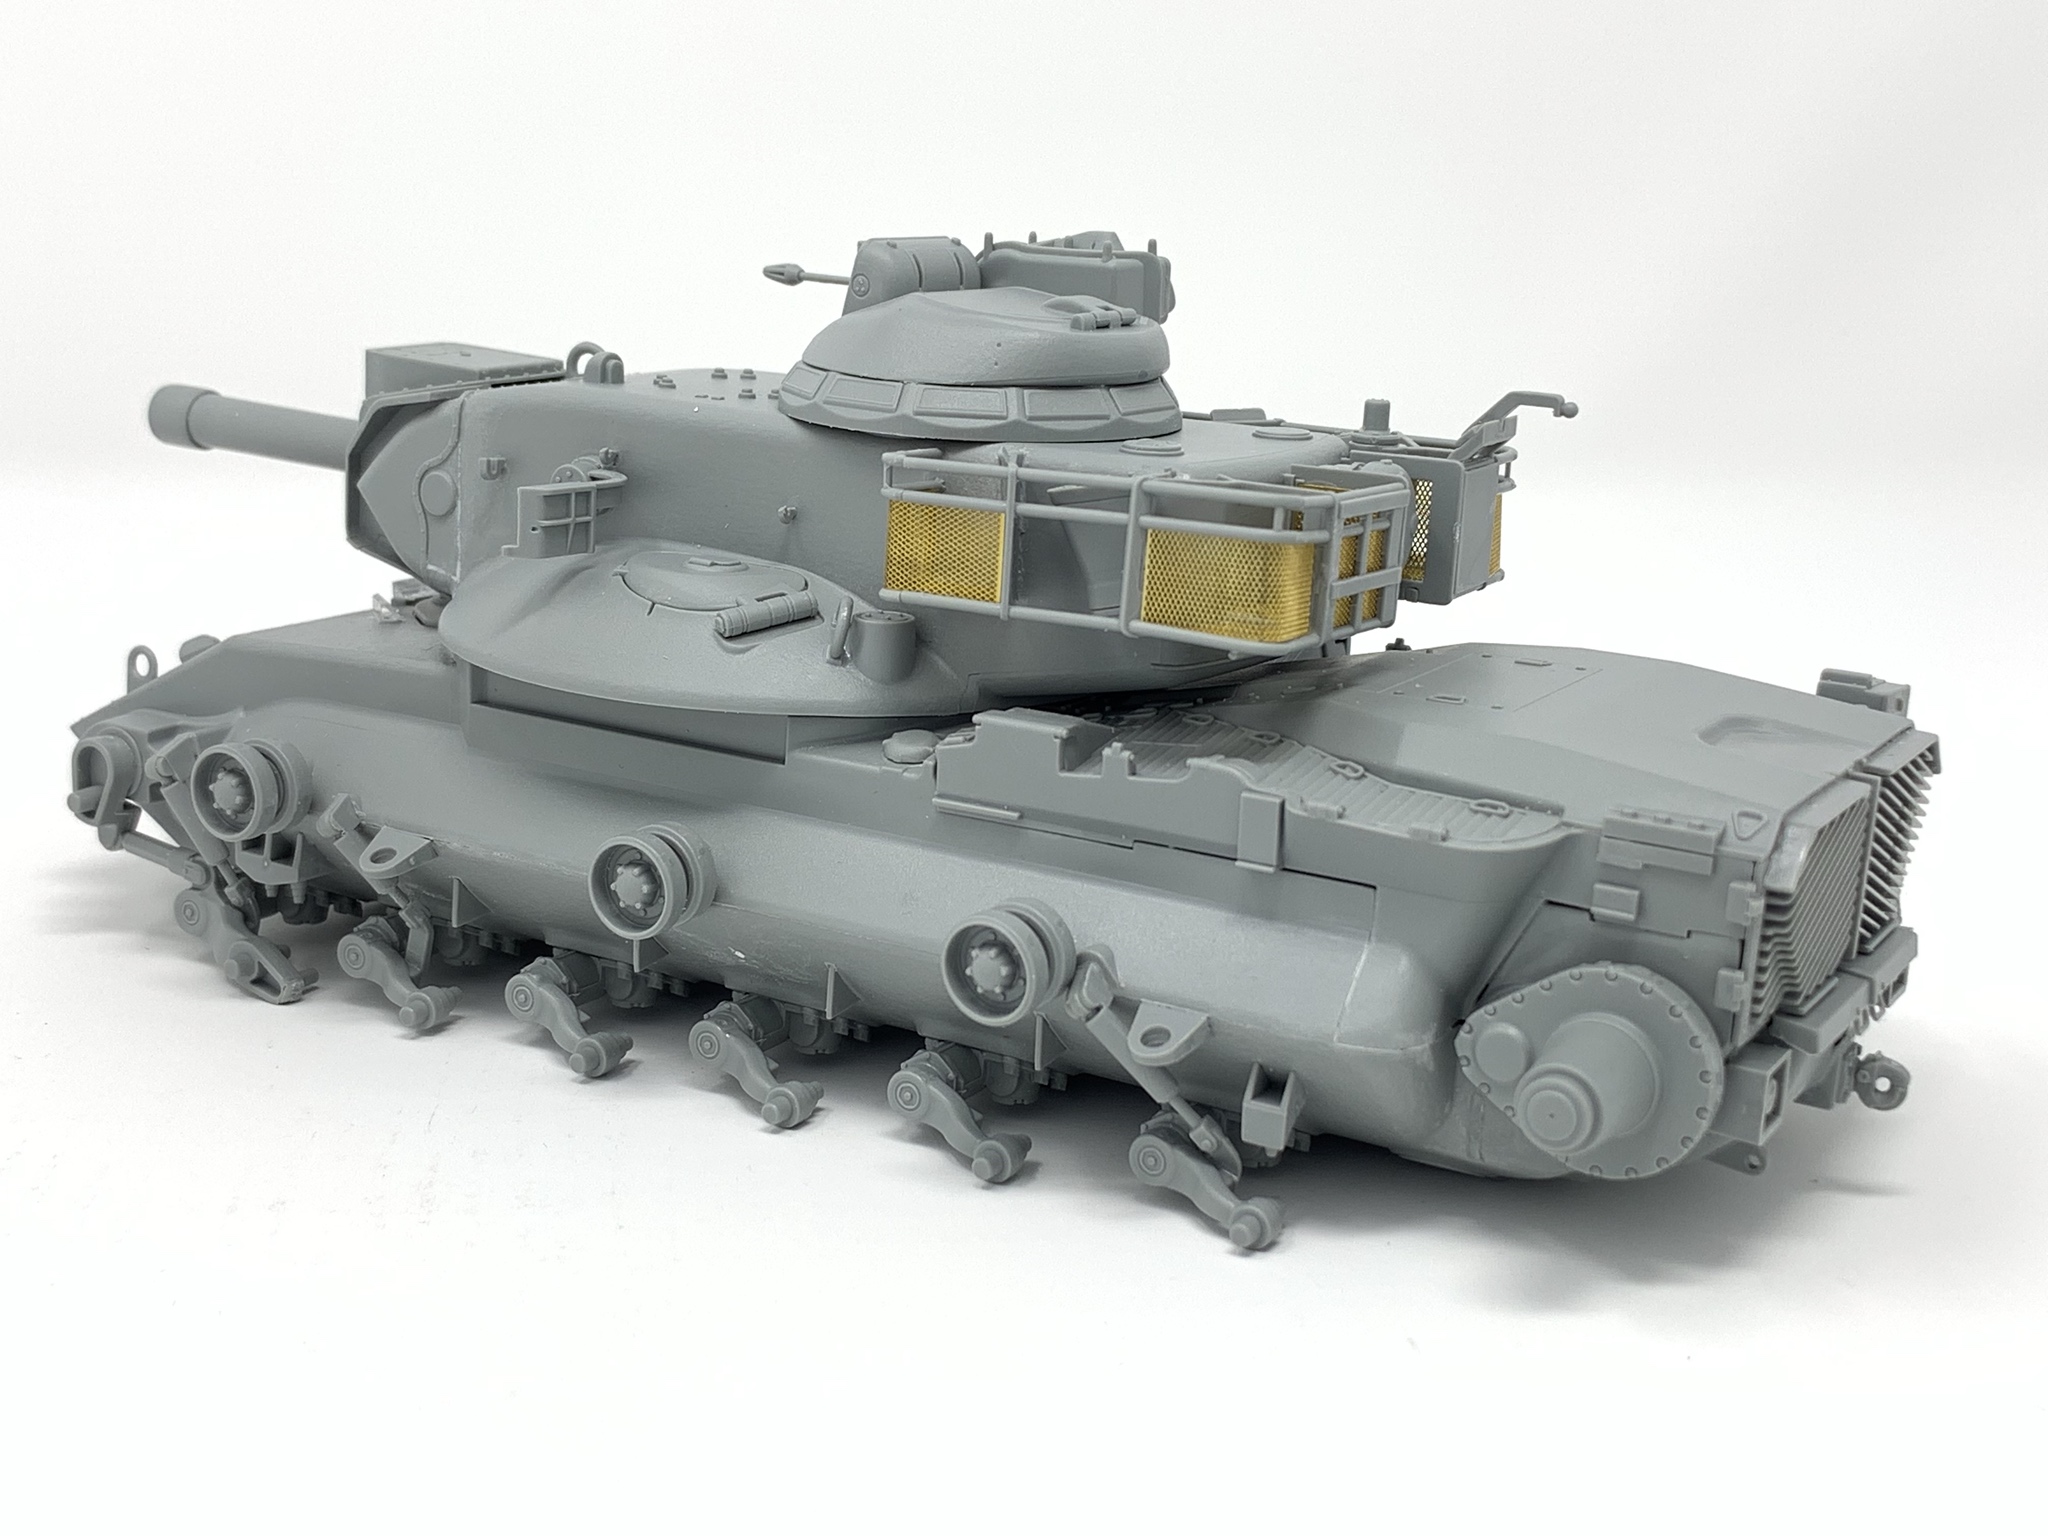
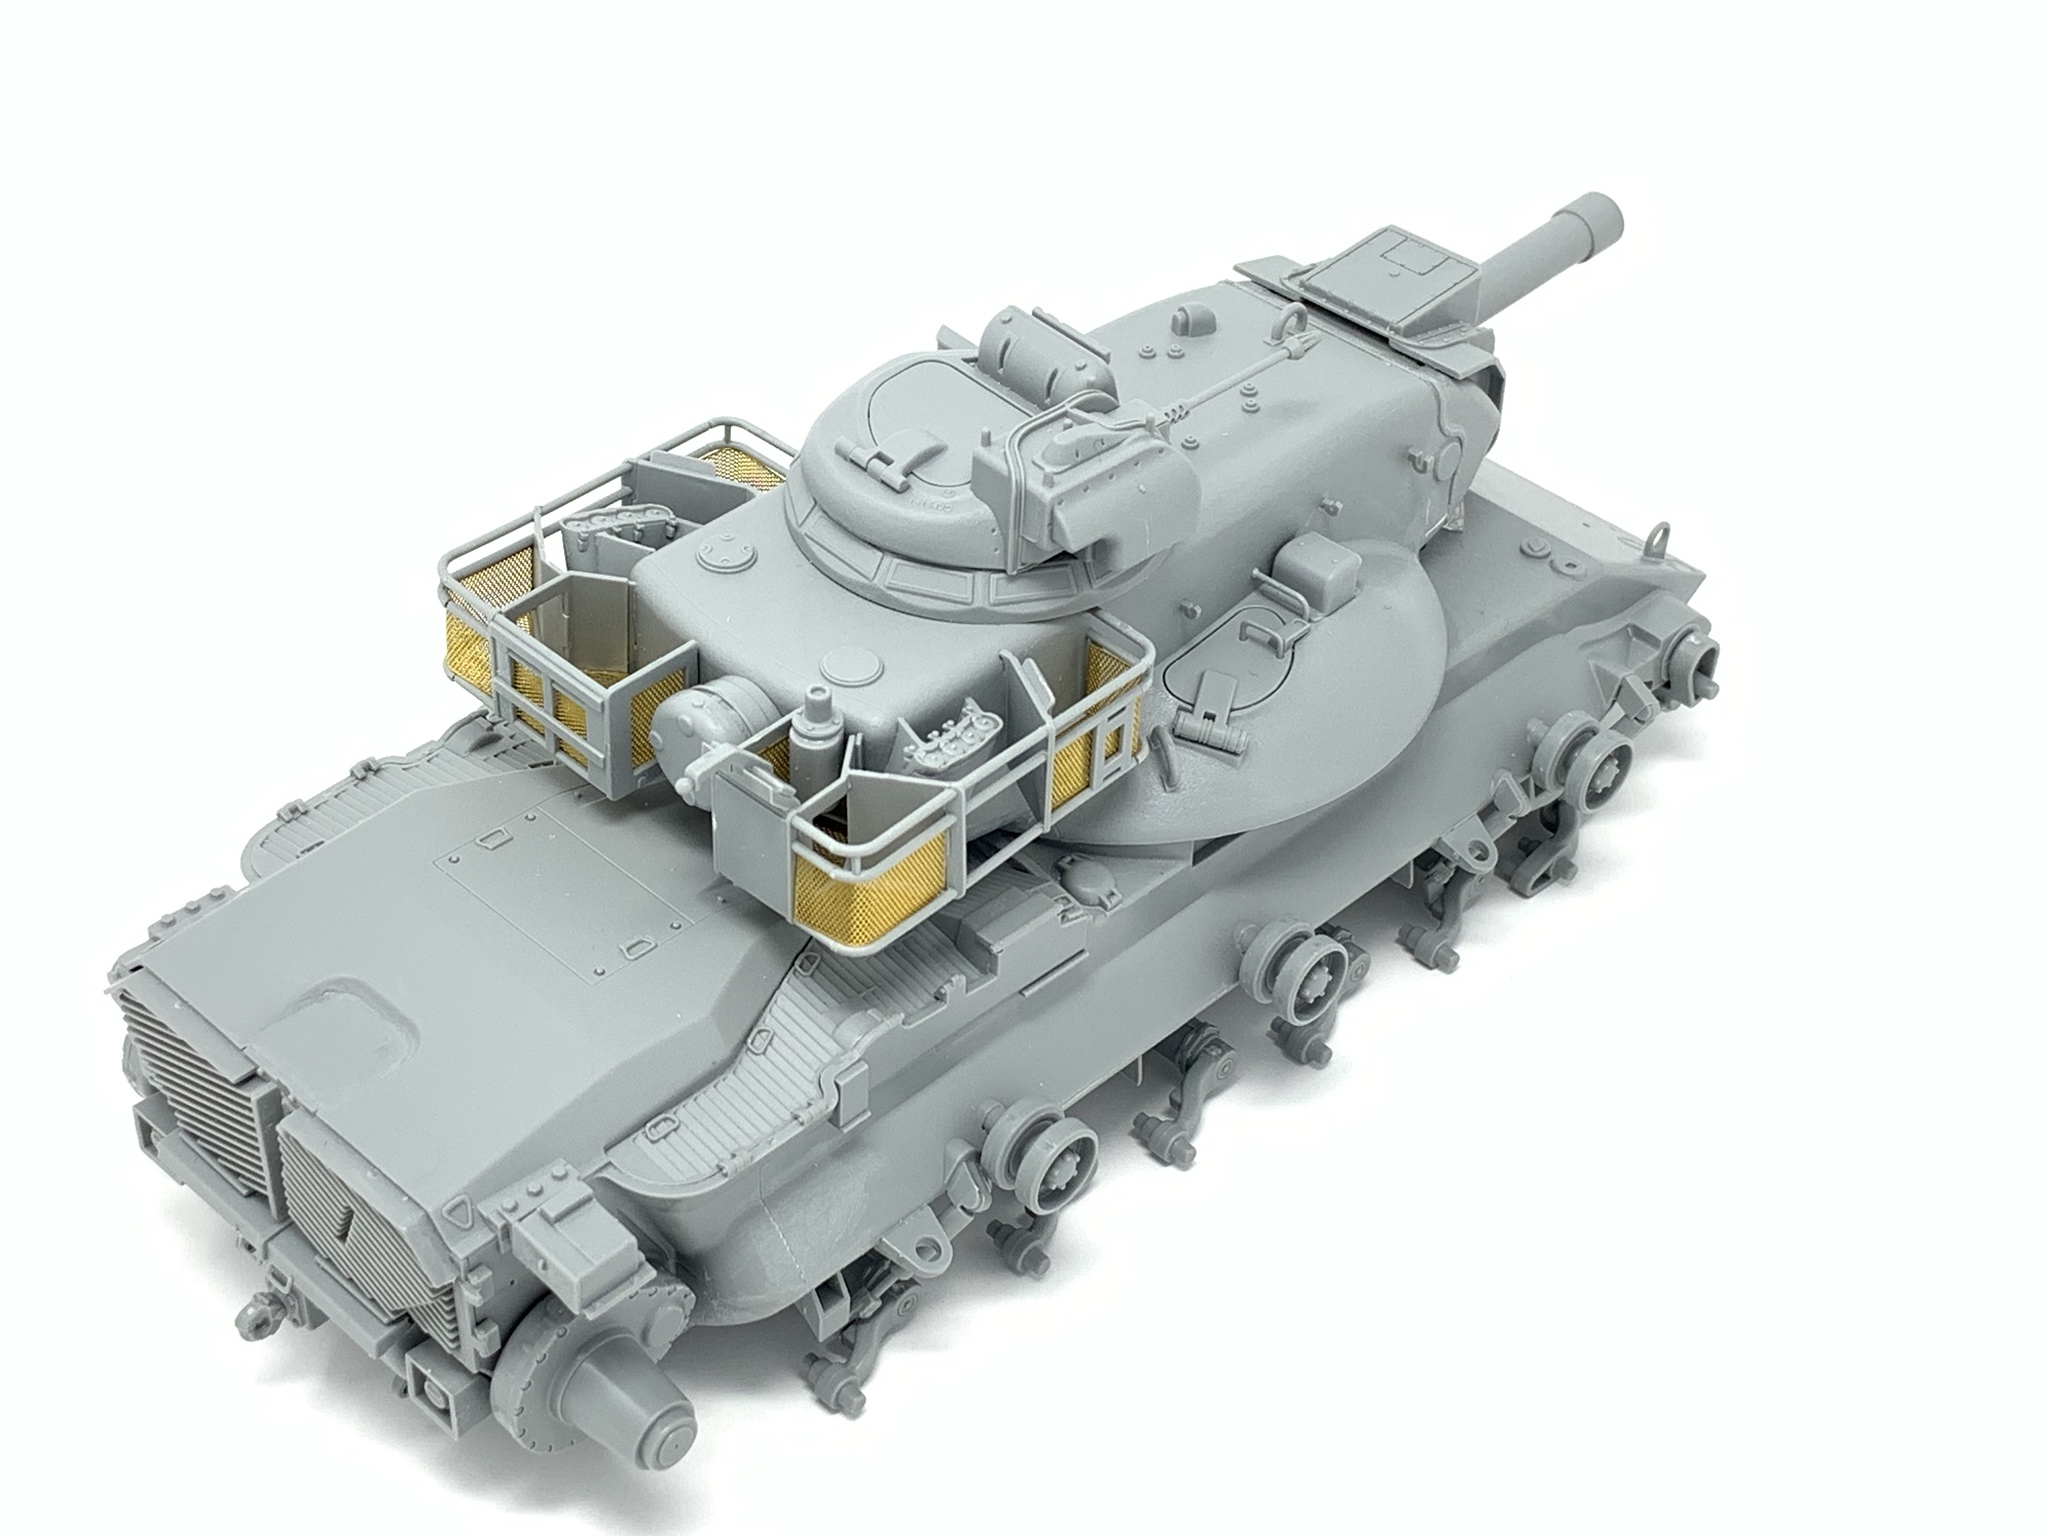
Here are pictures of the turret fitted to the hull.


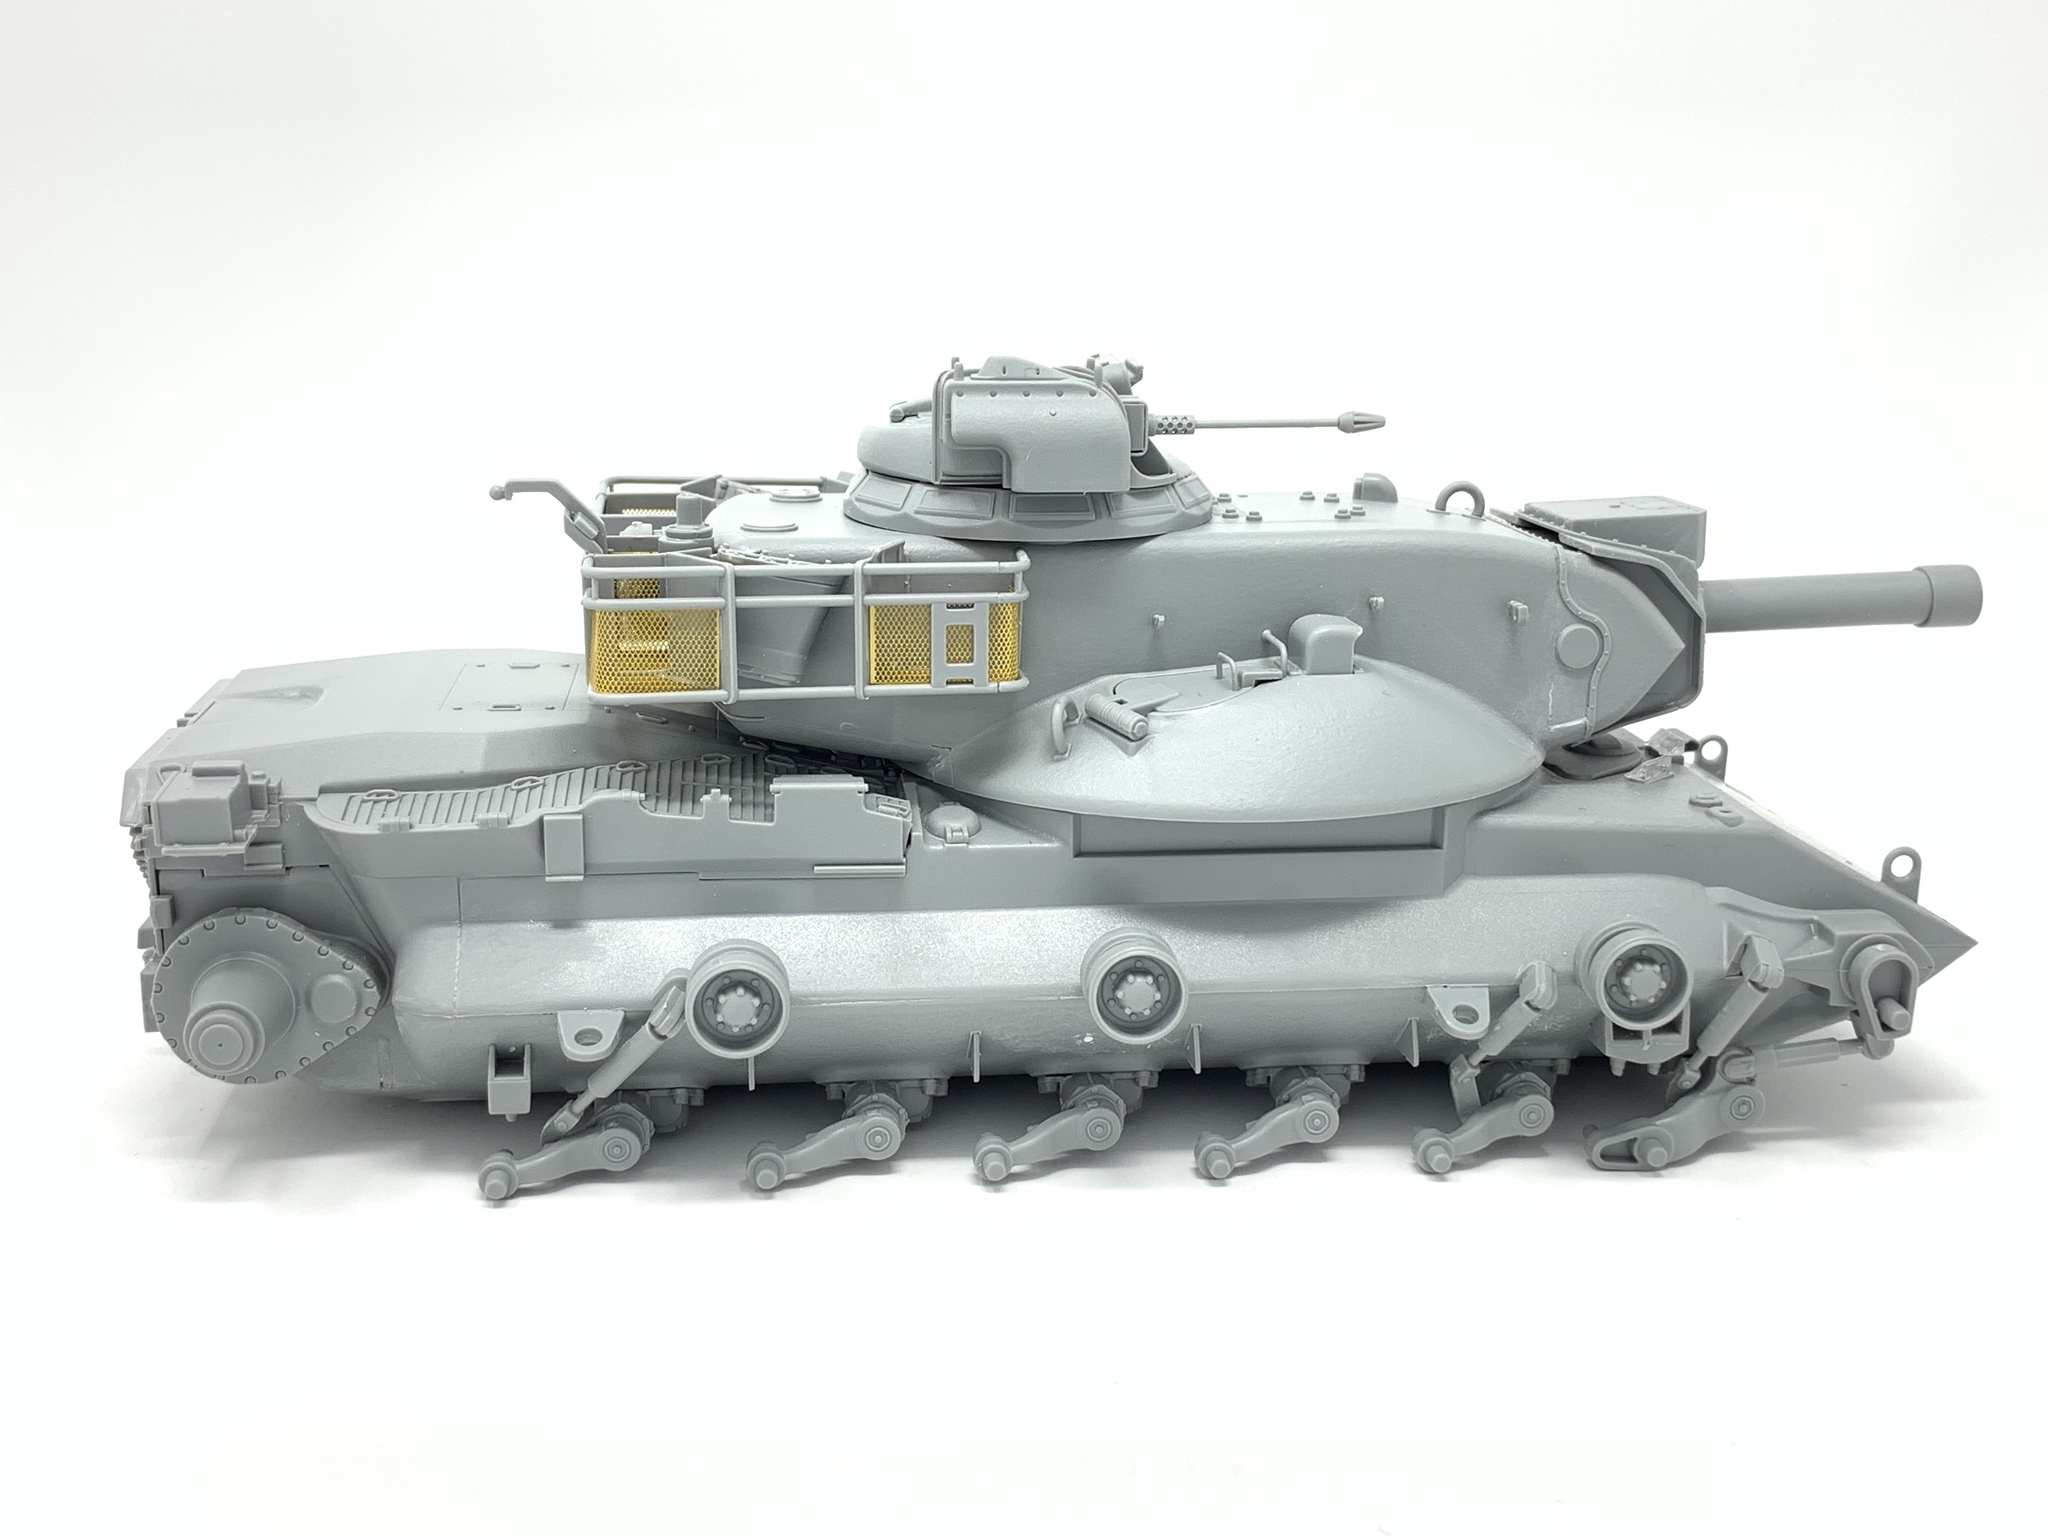
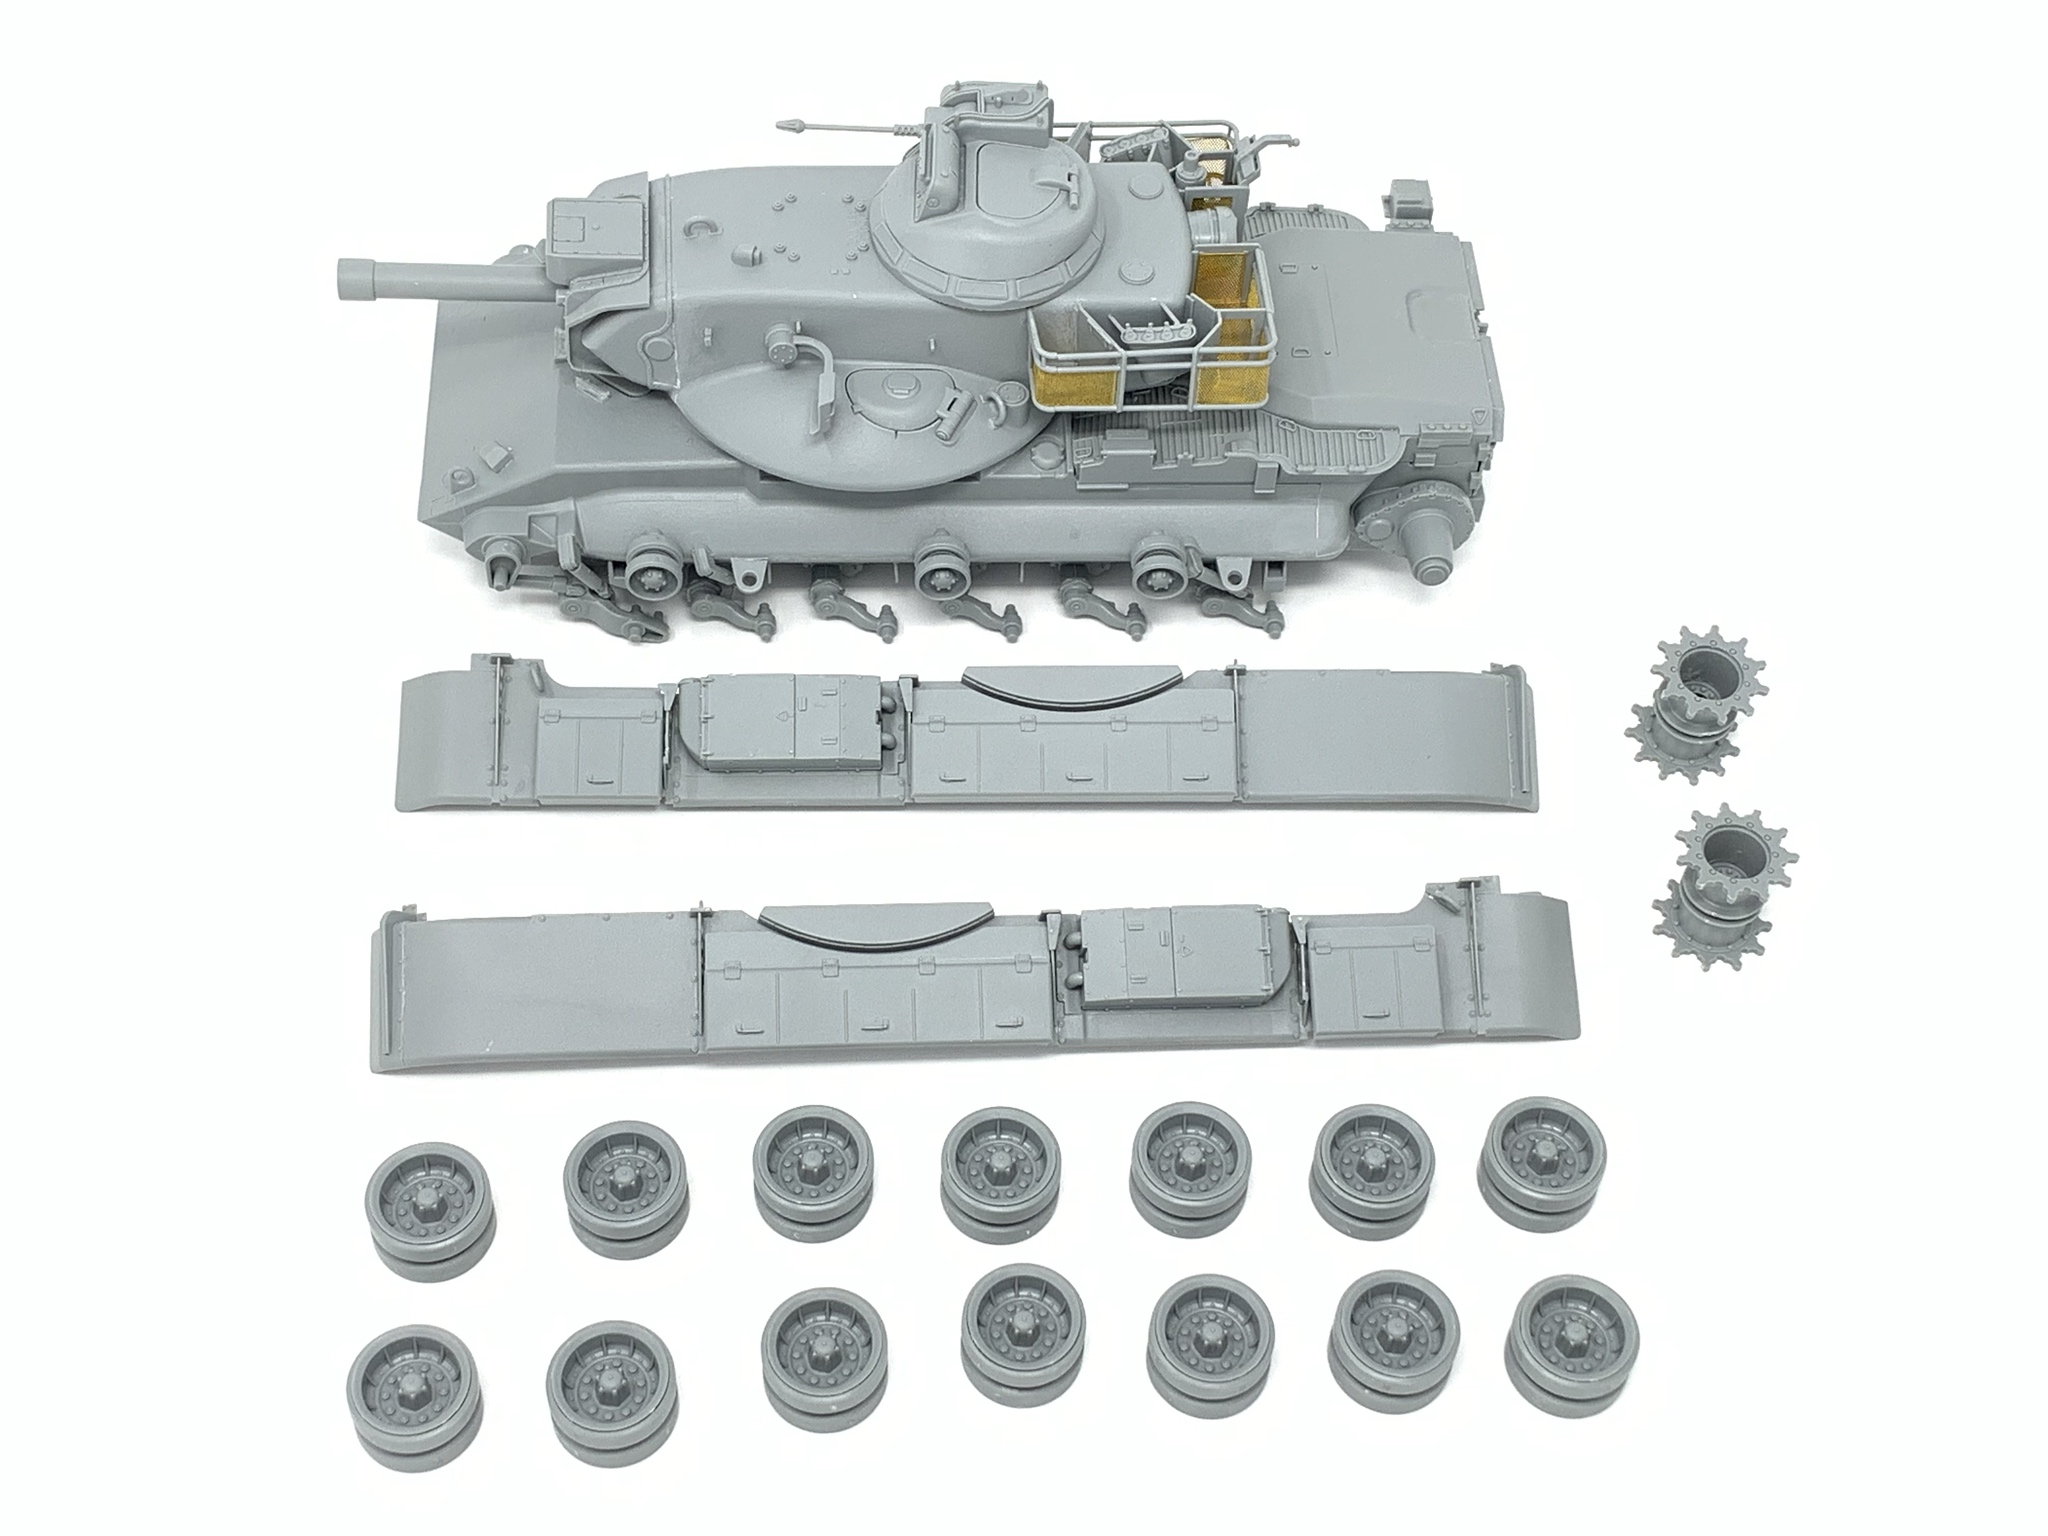
Work on the road wheels was repetative. Just glad that it's all done.


After seeing all these blown up pictures, I noticed a lot of seams and gaps that need to be filled/corrected. They have been fixed after the photoshoot.

The next step is to apply primer.


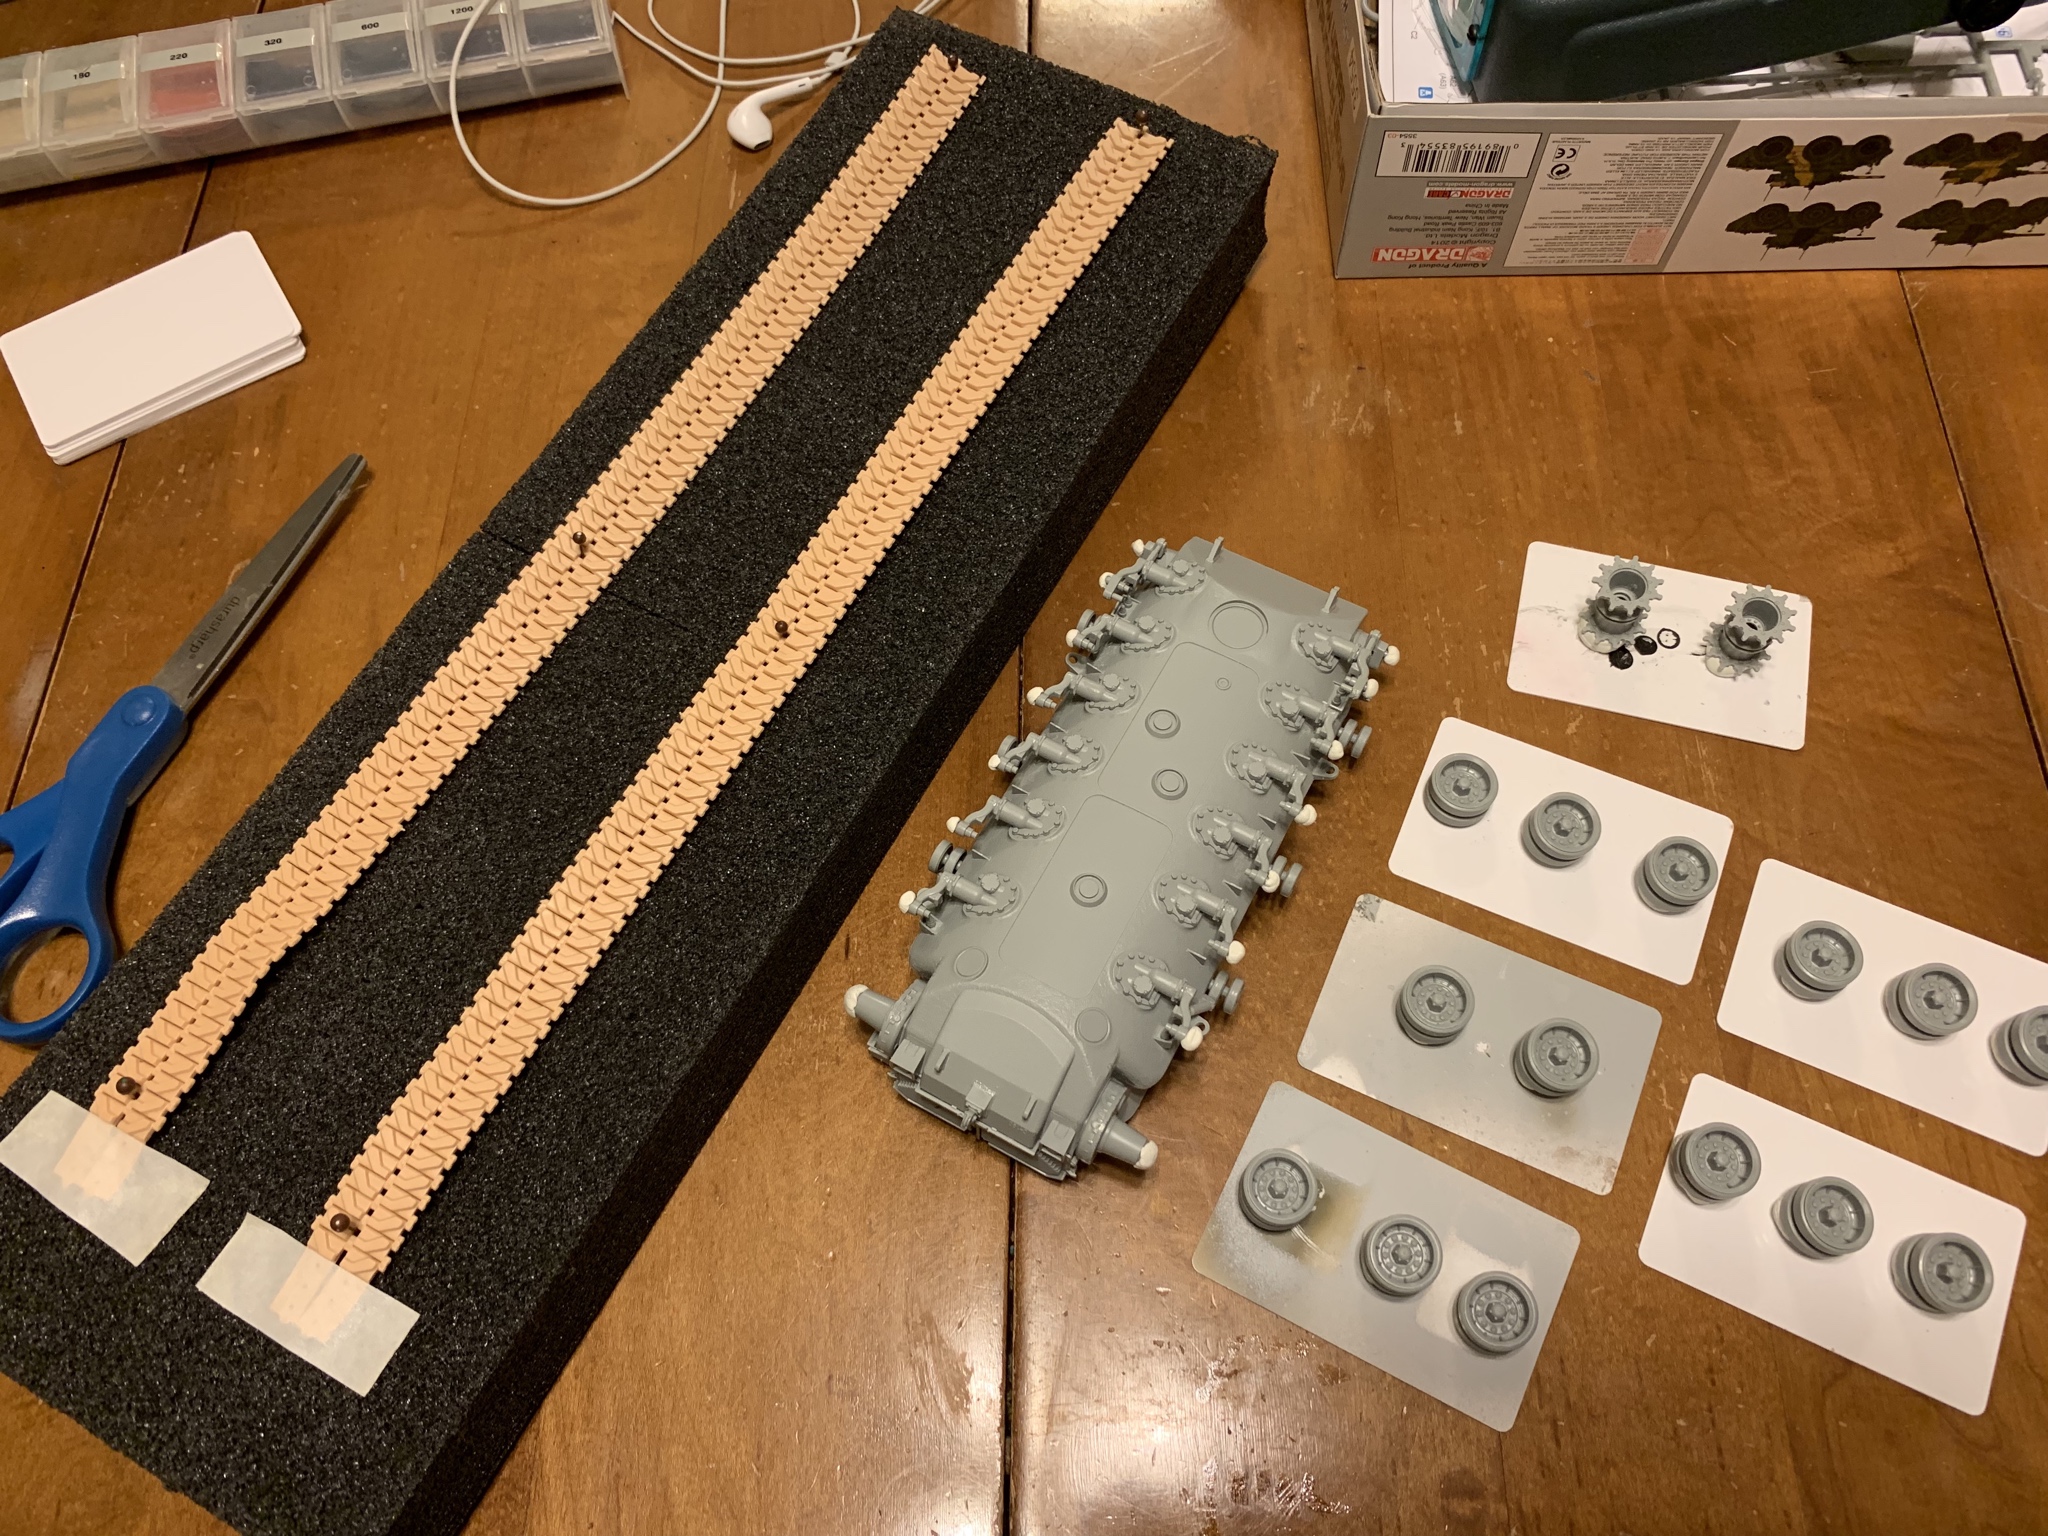
Since working with the individual track links from the Takom T-55s, this will be my first attempt at DS tracks. I have applied Mission Models primer. I've seen from their Youtube channel how their primver is resilient with vinyl materials. I'm giving it a go. Hopefully, this will prevent the crumbling issues I've heard about with DS tracks.

Thanks,

Joseph
TankCarl
Visit this Community
Rhode Island, United States
Joined: May 10, 2002
KitMaker: 3,581 posts
Armorama: 2,782 posts
Posted: Monday, February 25, 2019 - 12:20 PM UTC
Clean build.As a former crewman, there was not a handle on the gunner's hatch.I had to open it, after it was unlocked from inside,by lifting the padlock hoop on the hatch edge. Also, you can remove and smooth out the left side fuel tank cap, 60 series didn't have 2 fillers.Also, the top grill on the rear doors isn't on the A2, it may have only been on the M48, or an upgraded tank.
JPTRR
Staff MemberManaging Editor
RAILROAD MODELING
#051
Visit this Community
Tennessee, United States
Joined: December 21, 2002
KitMaker: 7,772 posts
Armorama: 2,447 posts
Posted: Monday, February 25, 2019 - 02:14 PM UTC
Joseph,

Nice work! I want to build one now.

Can't wait to see the paint. Doing MERDC?

Okay, so what is DS track? Vinyl like the old days?

BravoTwoZero
Visit this Community
California, United States
Joined: June 11, 2009
KitMaker: 461 posts
Armorama: 370 posts
Posted: Tuesday, February 26, 2019 - 05:58 AM UTC

Quoted Text

Clean build.As a former crewman, there was not a handle on the gunner's hatch.I had to open it, after it was unlocked from inside,by lifting the padlock hoop on the hatch edge. Also, you can remove and smooth out the left side fuel tank cap, 60 series didn't have 2 fillers.Also, the top grill on the rear doors isn't on the A2, it may have only been on the M48, or an upgraded tank.


Carl, thanks very much for chiming in. With you being a veteran who actually crewed this vehicle, your input is valuable. Thank you for letting me know about the left fuel tank cap. I'm still deciding whether I will keep it as-is so as I continue with this to be out of the box build, or to remove it to maintain some accuracy.
-Joseph
BravoTwoZero
Visit this Community
California, United States
Joined: June 11, 2009
KitMaker: 461 posts
Armorama: 370 posts
Posted: Tuesday, February 26, 2019 - 06:02 AM UTC

Quoted Text

Joseph,

Nice work! I want to build one now.

Can't wait to see the paint. Doing MERDC?

Okay, so what is DS track? Vinyl like the old days?


Hello Frederick, thanks for your comment. That's how I feel when I see beautiful builds here in Armorama, I want to build them as well. Yes, I plan to do MERDC Snow w/Trees Camouflage scheme for this. As far as DS Tracks, good question. I googled it and found what may be the answer to it. Apparently, "DS" stands for Dragon Styrene. It is their version of a soft styrene, similar to the vinyls. But, DS have a lot more detail. On the workbench picture I posted above, it is the tan colored material that I was prepping for application of primer. It will be my first time to work with this type of tracks. Anyway, I hope this helps.
-Joseph
BravoTwoZero
Visit this Community
California, United States
Joined: June 11, 2009
KitMaker: 461 posts
Armorama: 370 posts
Posted: Tuesday, February 26, 2019 - 06:14 AM UTC
Second in my line up for this Patton Tanks build is the Tamiya M247 Sgt York. This is a below $20 acquisition just sitting in my stash. It's so old now that the box is starting to discolor.


Parts are still sealed and finally seeing some light.


Got to work on this over the weekend. Just stayed at home and worked on it through completion.


The plastic is so old, it is brittle. A lot of them break off when I try removing them with a sprue cutter. I was hoping to make this another out of the box but I may have to add a little detail if I decide to include the figure.

I'll post some more pictures of the completed kit later.

-Joseph

p.s. This kit is so shocked that it is going to to be worked on, it is practically screaming!
TankCarl
Visit this Community
Rhode Island, United States
Joined: May 10, 2002
KitMaker: 3,581 posts
Armorama: 2,782 posts
Posted: Tuesday, February 26, 2019 - 06:18 AM UTC
OOB box "rules" allow for removal of extraneous fittings.
My unit transitioned to A2's in 1975-76.So we got them new. Now as OOB, you will use those air cleaner boxes as is.(Behind the turret,between the long and short sponson boxes.) I never saw the ones with the downward slope,like those have. Ours were flat across the top,top loading.Not to say if one got damaged, and those angled end ones were in the supply chain, they might be used.Online references will help.
Also look at images of the real thing, to see where those hooks for the towcables (on turret sides)actually start and stop.
I have this kit and started it, and also am building the AFV club version.II actually like the AFV club best.
TankCarl
Visit this Community
Rhode Island, United States
Joined: May 10, 2002
KitMaker: 3,581 posts
Armorama: 2,782 posts
Posted: Tuesday, February 26, 2019 - 06:23 AM UTC

The old tamiya with massive work
M4A1Sherman
Visit this Community
New York, United States
Joined: May 02, 2013
KitMaker: 4,403 posts
Armorama: 4,078 posts
Posted: Tuesday, February 26, 2019 - 06:25 AM UTC

Quoted Text

OOB box "rules" allow for removal of extraneous fittings.
My unit transitioned to A2's in 1975-76.So we got them new. Now as OOB, you will use those air cleaner boxes as is.(Behind the turret,between the long and short sponson boxes.) I never saw the ones with the downward slope,like those have. Ours were flat across the top,top loading.Not to say if one got damaged, and those angled end ones were in the supply chain, they might be used.Online references will help.
Also look at images of the real thing, to see where those hooks for the towcables (on turret sides)actually start and stop.
I have this kit and started it, and also am building the AFV club version.II actually like the AFV club best.


AGREE- THE AFV CLUB M60-series are better...
BravoTwoZero
Visit this Community
California, United States
Joined: June 11, 2009
KitMaker: 461 posts
Armorama: 370 posts
Posted: Tuesday, February 26, 2019 - 06:27 AM UTC

Quoted Text


The old tamiya with massive work


Wow, that looks nice! I want to build one like this. What colors did you use? Also, what type of tracks do you have there? The mantlet for this Dragon kit does not have any canvas cover. I think it adds to the look. Okay, I'll see if I can remove the left fuel cap. Thanks very much!

p.s. I just saw the spare tracks hanging on the side, they are the early type.
TankCarl
Visit this Community
Rhode Island, United States
Joined: May 10, 2002
KitMaker: 3,581 posts
Armorama: 2,782 posts
Posted: Tuesday, February 26, 2019 - 01:23 PM UTC
I built the Tamiya kit once, in Germany. I brought it to the motor pool, and matched the paint there. It is a slightly darker than OD,sort of some Forest green added to OD.My tank C23 was not camouflaged by the time I left in Oct 78.
That odd green catwalk next to the aircleaner, was a replacement one, after we bumped a tree and crumpled the original one.
The tracks on this model, are the AFV Club T142's with the separate rubber pads.We went from the original chevron style in Sept.77,I have a B&W picture of us getting sections of 8 off pallets and lining them up.Our Battalion, added 2 more 5 gallon containers,behnd the loaders side,on the bustle rack


EDIT: That is exactly how we routed the searchlight wire.
TankCarl
Visit this Community
Rhode Island, United States
Joined: May 10, 2002
KitMaker: 3,581 posts
Armorama: 2,782 posts
Posted: Tuesday, February 26, 2019 - 01:33 PM UTC
BravoTwoZero
Visit this Community
California, United States
Joined: June 11, 2009
KitMaker: 461 posts
Armorama: 370 posts
Posted: Wednesday, February 27, 2019 - 04:52 AM UTC
Thanks for the pictures and the information, Carl. I have another Dragon M60A2. I plan to have it in non-camo green scheme similar to yours. I will be reviewing your photos when I work on the second one.
BravoTwoZero
Visit this Community
California, United States
Joined: June 11, 2009
KitMaker: 461 posts
Armorama: 370 posts
Posted: Wednesday, February 27, 2019 - 05:00 AM UTC
The third tank in my Patton line-up is the Takom CM-11(M-48H) w/ERA Brave Tiger.


After building Patton tanks from both Tamiya and Dragon, I found that Takom has the best hull so far. The instruction for the torsion bars can be a bit overwhelming.


But, I found a way so I can build the individual pieces and avoid confusion.


When all the pieces were done, gluing them in place was a snap. There were no alignment issues.


Here's how far I got over with this build.
TankCarl
Visit this Community
Rhode Island, United States
Joined: May 10, 2002
KitMaker: 3,581 posts
Armorama: 2,782 posts
Posted: Wednesday, February 27, 2019 - 11:01 AM UTC
Takom kits are so great. Looking forward to see how that one goes together.
M4A1Sherman
Visit this Community
New York, United States
Joined: May 02, 2013
KitMaker: 4,403 posts
Armorama: 4,078 posts
Posted: Wednesday, February 27, 2019 - 11:17 AM UTC

Quoted Text

The third tank in my Patton line-up is the Takom CM-11(M-48H) w/ERA Brave Tiger.


After building Patton tanks from both Tamiya and Dragon, I found that Takom has the best hull so far. The instruction for the torsion bars can be a bit overwhelming.


But, I found a way so I can build the individual pieces and avoid confusion.


When all the pieces were done, gluing them in place was a snap. There were no alignment issues.


Here's how far I got over with this build.


Hi Joe!

Are you only interested in the "newer" Pattons or are you open to building the "older" ones, as well? If you like the "older" ones too, may I suggest the TAKOM M47 kits and their brand-new, upcoming M46 to you..?
BravoTwoZero
Visit this Community
California, United States
Joined: June 11, 2009
KitMaker: 461 posts
Armorama: 370 posts
Posted: Thursday, February 28, 2019 - 04:31 AM UTC

Quoted Text

Takom kits are so great. Looking forward to see how that one goes together.


Yes, I worked on 5 of their T-55 kits. It made me a Takom fan.
BravoTwoZero
Visit this Community
California, United States
Joined: June 11, 2009
KitMaker: 461 posts
Armorama: 370 posts
Posted: Thursday, February 28, 2019 - 04:38 AM UTC

Quoted Text


Hi Joe!

Are you only interested in the "newer" Pattons or are you open to building the "older" ones, as well? If you like the "older" ones too, may I suggest the TAKOM M47 kits and their brand-new, upcoming M46 to you..?


Hi Dennis, I am an equal-opportunity-1/35th-scale-Patton-tank-builder. Thank you for your suggestion about the Takom kits. I do have them in my line-up for this thread. Here are some of the kits I plan to work on.


Not in the picture are Esci's M60A3 TTS and two more Dragon M60A2s. I'm challenging myself to complete as many of these within the year.

As you can see, I have the Dragon M-46 which I plan to paint up with the Tiger face. I might consider getting the upcoming Takom (because it is one of my favorite brands), if the price is right. I won't join the bandwagon right away though and if I do get the Takom M-46, I'll finish it in an all green scheme.

Thanks,

Joseph
BravoTwoZero
Visit this Community
California, United States
Joined: June 11, 2009
KitMaker: 461 posts
Armorama: 370 posts
Posted: Thursday, February 28, 2019 - 06:00 AM UTC
Tank 01 UPDATE: Some progress on the M60A2. I took extra time to work on the infrared searchlight because the observer's eyes will be drawn to it. I Googled for images on what the actual thing looks like. Here are a couple that I found.


In both cases, there is a little bit of red that shows up on the border of the frame. I'll see if I can replicate that. Here are the kit components of the searchlight.


The attention grabbing part is the dish. I remember seeing somewhere about using Molotow Liquid Chrome Markers. I bought a couple and decided to give it a try. I'm sold. I think it is very effective. This is the first time I've tried this. One lesson I learned is not to apply the pen on the same area while it has not dried completely. This resulted in some "brush mark" effect. But, I'm still impressed anyway.


Here's the searchlight assembled.


I masked if off in preparation for primer and base color. I'm not sure if the red color will show up but I think it's worth trying.


Here is the searchlight as installed on the turret.


Thanks,
-Joseph
qcarr1
Visit this Community
Vermont, United States
Joined: March 16, 2015
KitMaker: 67 posts
Armorama: 67 posts
Posted: Thursday, February 28, 2019 - 06:58 AM UTC
What a great subject for your projects! I am just finishing the Academy USMC M60A1 RISE P w/ERA and can't wait to get my hands on the Takom M46.

Your builds are awesome and I'm getting some good pointers from you. Very much enjoying this thread and will be following. Thanks!
TankCarl
Visit this Community
Rhode Island, United States
Joined: May 10, 2002
KitMaker: 3,581 posts
Armorama: 2,782 posts
Posted: Thursday, February 28, 2019 - 11:17 AM UTC
Nice job on the searchlight. That can be painted plain OD,ours were from our other tank, the M60 &A1's we had.There was a smudge of burnt gunpowder on the lower left corner, since the light was above the coaxial MG's muzzle end.
The power cable came from the M60, so it was long.I routed my cable like this
BravoTwoZero
Visit this Community
California, United States
Joined: June 11, 2009
KitMaker: 461 posts
Armorama: 370 posts
Posted: Thursday, February 28, 2019 - 12:53 PM UTC

Quoted Text

What a great subject for your projects! I am just finishing the Academy USMC M60A1 RISE P w/ERA and can't wait to get my hands on the Takom M46.

Your builds are awesome and I'm getting some good pointers from you. Very much enjoying this thread and will be following. Thanks!


Hey there Q (I felt like James Bond there for a moment), thanks for your feedback and compliment. I'm glad you are enjoying this thread and getting some pointers as well. I've learned a lot from other modelers here and other sites including Youtube. I'm just paying it forward. Please post your Academy M60A1 here or create a thread. I'd very much like to see it.
BravoTwoZero
Visit this Community
California, United States
Joined: June 11, 2009
KitMaker: 461 posts
Armorama: 370 posts
Posted: Thursday, February 28, 2019 - 12:55 PM UTC

Quoted Text

Nice job on the searchlight. That can be painted plain OD,ours were from our other tank, the M60 &A1's we had.There was a smudge of burnt gunpowder on the lower left corner, since the light was above the coaxial MG's muzzle end.
The power cable came from the M60, so it was long.I routed my cable like this


Hey Carl, thanks for the search light wiring diagram. I will save it for my other M60A2. The build phase for this one is done. I can't add anymore to my current searchlight because the connection is pretty flimsy. I will most likely break it off.
BravoTwoZero
Visit this Community
California, United States
Joined: June 11, 2009
KitMaker: 461 posts
Armorama: 370 posts
Posted: Thursday, February 28, 2019 - 01:02 PM UTC
Tank 02 UPDATE: Completed the build phase for my M247. Thanks to the rainy weekend, I was able to work on this exclusively. Here are the shots.


Here are some oblique shots.


I was planning to have this as an OOB build but looking at the side views, I may have to fill up those gaps intended for motorizing this kit. I can skip the ones at the bottom of the hull, the ones on the sides are glaring at me.

Next step is to prime this. In case you are curious, for the color scheme, I'll go with the Gray Desert MERDC.
BravoTwoZero
Visit this Community
California, United States
Joined: June 11, 2009
KitMaker: 461 posts
Armorama: 370 posts
Posted: Monday, March 04, 2019 - 06:21 AM UTC
Here is Tank 04: Academy USMC M60A1 with RISE/Passive Armor. The hull is very similar to the Tamiya Sgt York but much better. The torsion bars had no alignment issue. The only negatives I've encountered so far, is that there are a lot of ejector pin marks that need to be cleaned/fixed and there are some parts that have no corresponding positioning markers. For example, I have to do some guess works on where to glue the ERA blocks on the mantlet.


After working on it for a week, this is how far I got.


Thanks,

Joseph
 _GOTOTOP