_GOTOBOTTOM
Armor/AFV: Axis - WWII
Armor and ground forces of the Axis forces during World War II.
Hosted by Darren Baker
Old school Tamiya SAS Jeep
yeahwiggie
Visit this Community
Dalarnas, Sweden
Joined: March 24, 2006
KitMaker: 2,093 posts
Armorama: 1,359 posts
Posted: Friday, June 14, 2019 - 03:38 AM UTC


It has been quite a while since I last have been active in the hobby and even longer still since I did any 1/35 or military subjects. I figured starting again with a small kit, nothing complicated or expensive would give me the incentive and inspiration again.
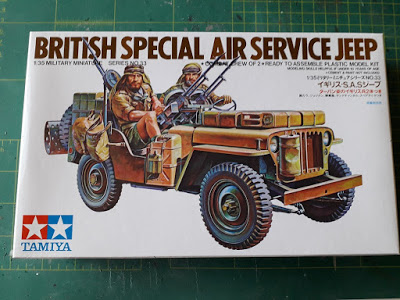
I had been eyeballing the Ford Mutt M151-series for a while and while purchasing 2 I can across a golden oldie from 1974; Tamiya's desert SAS jeep. I had been wanting to build one for years, ever since I came across it in my early days actually and this one was cheap. So cheap and nostalgia - can't beat that!
However this nostalgia came at a price; allthough the basic kits is quite acceptable, many of the details most certainly are not up to today's standards. If you want better details or accuracy, Dragon's 6745 SAS 1/4 ton patrol car is the one you want. It'll set you back anywhere between $30 and €35. This jeep cost me SEK70 which is 20% of that.
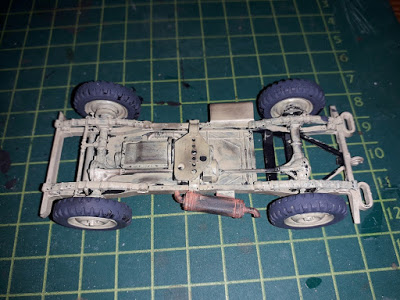
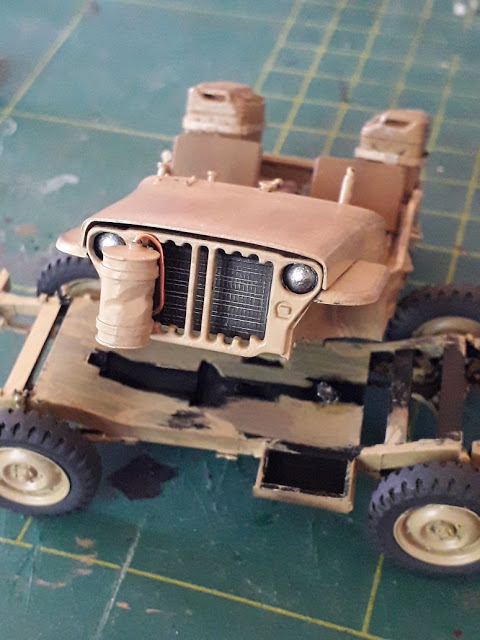
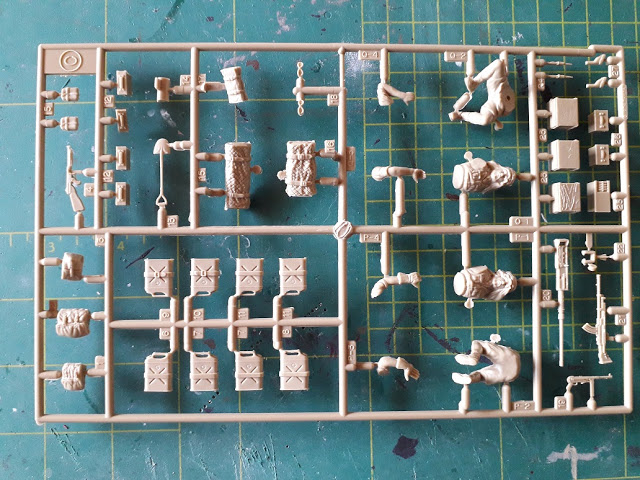
My kit did not show any flash, however the moulds show their age. In my kit they had aligned quite badly in some areas, resulting in some serious castingseams. Quite a bit of scraping and sanding was required. The quality of the details, such as jerrycans, Vickers machineguns and above all the crewfigures is downright poor, but since I wanted an easy kit with little bells 'n whistles I decided to roll with that and only add what I could from my seriously limited sparesbox and some skill.... or what is left of that.


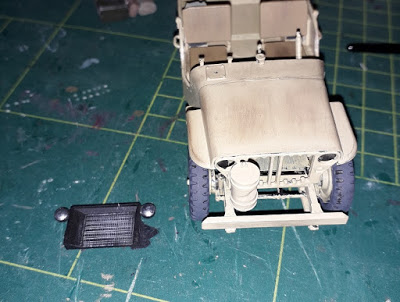
Assembly is actually rather straight forward. All parts fit well and the instructions are clear as has always been with Tamiya.
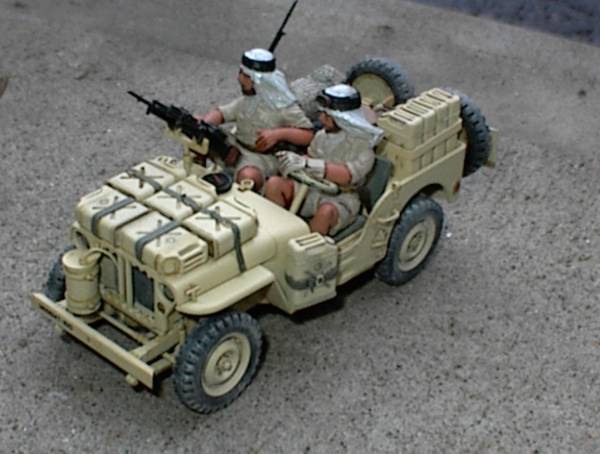
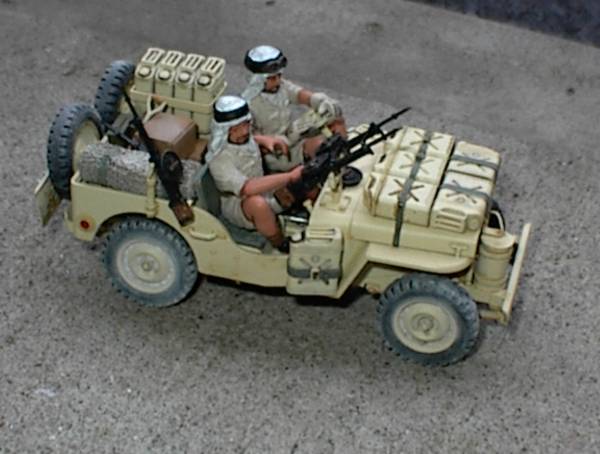
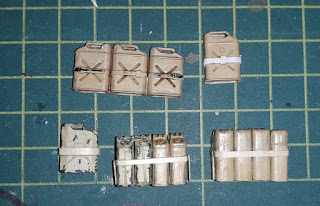
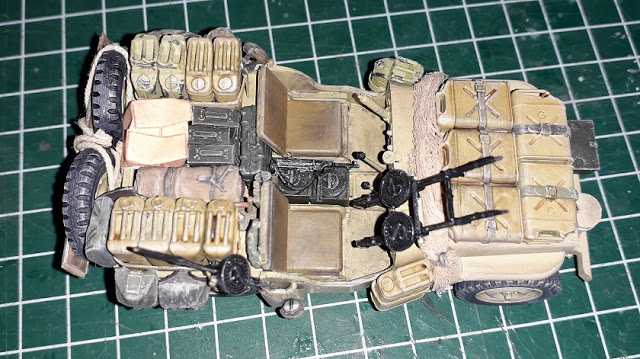
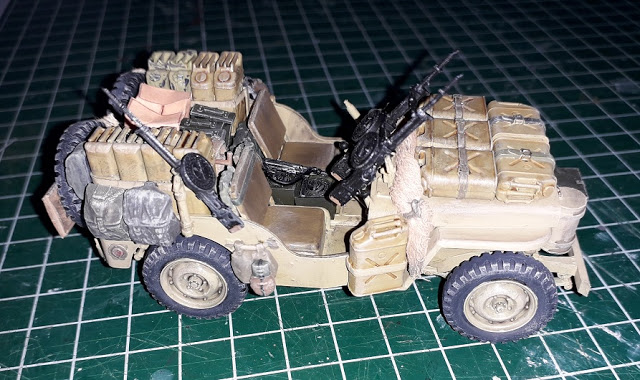
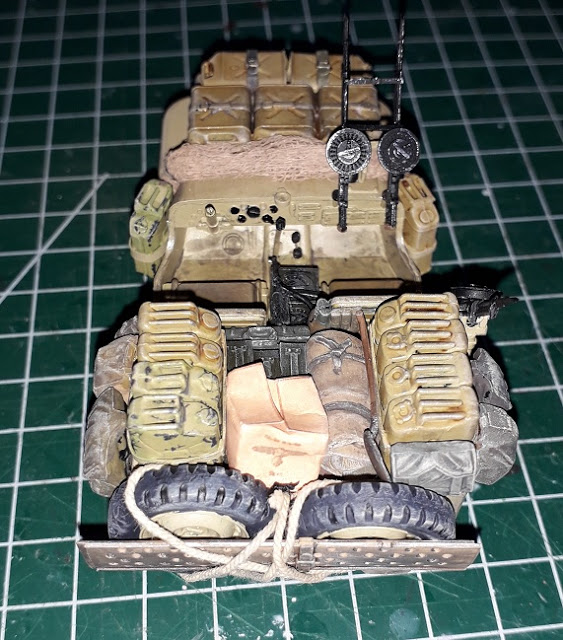
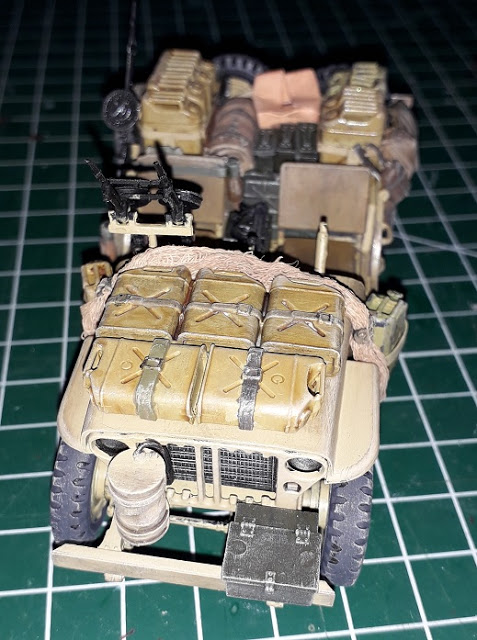
I exchanged all the jerrycans, since Tamiya's versions have a serious snag; the have 2 handlebars instead of the required 3! That could have been remedied by cutting away the old ones and making new ones, but many also had serious alignment issues. So out they went and in with some spares from Italeri and (I believe) Tamiya. Some old bedrolls were added from an equally ancient M3A2-kit among other things.


Then came the next challenge; the crew figures. The passenger is especially awkward. He has a very peculiar pose, which I assume has to do with the use of the .50 for a second version, but that gun is simply unusable, because of the low quality. So I had to figure out what to do with that awkward pose.


Sabot
Joined: December 18, 2001
KitMaker: 12,596 posts
Armorama: 9,071 posts
Posted: Friday, June 14, 2019 - 04:47 AM UTC
Looks good, I did the old jeep about 15 years ago. It was a fun kit.

Bodeen
#026
Visit this Community
Pennsylvania, United States
Joined: June 08, 2002
KitMaker: 1,744 posts
Armorama: 1,359 posts
Posted: Friday, June 14, 2019 - 06:10 AM UTC
I like it. Welcome back to the land of 1/35. I just bought the 1974 Monogram 1/32 Ostwind...purely for nostalgic reasons. I seem to remember the figures as being way better than Tamiya. I was very wrong. The figures are very primitive...probably ok in 1974 terms and more 1/35 than 1/32. But....it takes me back to my early days of modeling and, with what I've learned since first buying this kit way back then, I hope to do it justice. Having an airbrush will surely make a big difference.


Sometimes it's fun to revisit our youth and build something purely for fun.
petbat
Visit this Community
Queensland, Australia
Joined: August 06, 2005
KitMaker: 3,353 posts
Armorama: 3,121 posts
Posted: Friday, June 14, 2019 - 08:09 AM UTC
Ah, a blast from the past. Built a few of these over the years.
yeahwiggie
Visit this Community
Dalarnas, Sweden
Joined: March 24, 2006
KitMaker: 2,093 posts
Armorama: 1,359 posts
Posted: Saturday, June 15, 2019 - 07:45 PM UTC
Yeah, somtimes it really is fun to go down Nostalgia Road!

All parts and subassemblies are about ready for paint and now enters the critical fase; painting. This is where I tend to run aground. But first I primed them. I used both black and white in order to bet both more depth on the jeep and a slight difference in colour/shades of yellow and sand in the figures and assorted gear.
Priming also shows areas that need more attention, like gaps to fill or seams to remove, as is the case in the figures. It was at this stage that I realized I had forgotten the weaponsling on the Thompson and the stowagerack for the jerrycans.
The smaller gear was primed with a non-coloured plastic primer.
The primers I used were Citadel's Chaos black and Corax white out of a rattlecan.


GaryKato
Visit this Community
California, United States
Joined: December 06, 2004
KitMaker: 3,694 posts
Armorama: 2,693 posts
Posted: Saturday, June 15, 2019 - 09:24 PM UTC
I thought for sure Tamiya would re-make this one after they made a totally new Jeep kit years ago, but they didn't. Honestly, I think they decide on kit subjects with dartboard and blindfold.

I have one I started working on when it was new. Have a set of Italeri jerry cans to replace the horrid Tamiya ones.

Yours is looking good!
yeahwiggie
Visit this Community
Dalarnas, Sweden
Joined: March 24, 2006
KitMaker: 2,093 posts
Armorama: 1,359 posts
Posted: Saturday, June 22, 2019 - 11:03 PM UTC
I am proceeding into and with the most precarious fase of any build for me; the painting!
As shown previously I basecated all the subassemblies with Citadel primers from a spraycan and decided to paint the model by hand. Didn't feel like breaking out the airbrush for such a small project and, knowing Tamiya's paints reaction to brushpainting, felt the probably patchy finish might suit a beat up desert Jeep. I got more patchy than I bargained for. Tamiya's paint, allready notorious for bad coverage when brushpainted, did NOT like the primer. It would not stick. It took 4-5 separate layers to achieve a somewhat homogenous cover.


I used the shown colourized images as a guide and that showed a noticeable differance between the sandyellow Jeep and the sandyellow jerrycans, so I wanted to replicate that. Besides the jeeppaint would fade quite quickly in the desertsun. I blended Tamiya's XF-60 Dark yellow with a good deal of X-2 white and a dash of XF-59 sand yellow, all these paints were actually old stock I still had.
The tires were painted with Vallejo's German grey and I used pencil and an old Tamiya weatheringset, one of those that looks like an eye makeup set, for weathering.


The collection of jerrycans were painted with basic XF-60, but in order to create even more variation I used a sepia wash from Citadel for the British cans and a green one for the German cans. Then I added chipping on the German ones with German grey and drybrushed the British ones with basic steel.
This way everything still sort of looks like in the picture, but some much needed variety in the basic colour was achieved.


The figures are turning out to be a story on their own. They almost completely lack and definition or detail, so painting them is tricky, to say the least.
I am using a combination of Citadel and Vallejo paints so far, with the skin tone and first wash belonging to Citadel whereas the clothes are Vallejo-colours. These latter dry up to a semi-gloss, making the washes flow into the cavities, but not adhering to the overall surfaces. Which they do with Tamiya-paint, thus altering the very nuance of the paint. I had hoped to get that with Vallejo too..... To bad. Need to find other ways now.

m4sherman
Visit this Community
Arizona, United States
Joined: January 18, 2006
KitMaker: 1,866 posts
Armorama: 1,808 posts
Posted: Sunday, June 23, 2019 - 11:37 AM UTC
Looking good. The worn paint on the curve in the body beside the driver could very well be down to bare metal. I rarely drive my Jeep and yet that area is worn down.
JPTRR
Staff MemberManaging Editor
RAILROAD MODELING
#051
Visit this Community
Tennessee, United States
Joined: December 21, 2002
KitMaker: 7,772 posts
Armorama: 2,447 posts
Posted: Sunday, June 23, 2019 - 02:44 PM UTC
Ron,

Love it! I'll be watching.

Like Sabot, I built this kit again about 15 years ago. It was OOB except I cast a bunch of newer nicer jerry cans in resin. And like Bodeen, I am planning to build an old Monogram tank soon. I am finding that I want to build some of the old kits for fun, not that the latest-greatest aren't fun. But I really enjoy seeing these oldies done right today.
yeahwiggie
Visit this Community
Dalarnas, Sweden
Joined: March 24, 2006
KitMaker: 2,093 posts
Armorama: 1,359 posts
Posted: Monday, June 24, 2019 - 02:56 AM UTC
Thanks gents!
Indeed it is fun, yet the urge to go overboard is still there, so I must.... try.... to..... contain.....

On the the next fase...
The devil is in the details
Or sometimes brown, smelly stuff happens....

Now the first painting is done, I turned my attention to the details to "decorate" the Jeep. Rummaging through the box I found a part that look.... oddly out of place. It was the radiator/headlamp-part... and it should have been glued in place BEFORE I glued bodywork onto the chassis.... Damn..! With a wide scalpelblade I pried the 2 apart, hoping nothing would break.... which it didn't!


While I was at it I decided to make the hose connecting the condensator to the radiator; a small but quite visible detail Tamiya chose to omit.
The dents in the condensator weren't there to begin with either.


Now it was time to start with all the bells & whistles
Tamiya does provide very little in regard to equipment and gear, so most of it comes from the sparesbox. The supplies ammoboxes are.... just crap. Square lumps of plastic, supposed to represent a box. After removing some serious modseams I added 2 strips of plasticcard to represent grabhandles. In hindsight pretty much nothing of it is visible, but still.....
I also added racks for the jerrycans makde by plasticcard as well. One of them did not work out as tight as I had envisioned.. Oh well. Here the difference between the original ones and the ones from the sparesbox becomes quite apparent; the 3 handlebars instead of Tamiya's 2.
I got carried away with adding details and gear and headed straight into mishap nr.2. The dashboard is now barely accessible yet it still needs to be painted!


I did not change the handlebar-mistake on the set of 3 jerrycans. I figured they would not be seen anyway with the other 2 covering that area up. Here came mistake nr.3; I glued the set the wrong way around, so the wrong side was now facing the driver..... and was very visible!
Time for camouflage!! That came in the form of a net, made from a gauze bandage, died with desant sand-paint and diluted pva glue.


yeahwiggie
Visit this Community
Dalarnas, Sweden
Joined: March 24, 2006
KitMaker: 2,093 posts
Armorama: 1,359 posts
Posted: Tuesday, June 25, 2019 - 10:38 PM UTC
The stage of completion is drawing ever nearer.
All parts are in place, painted and received their first washes and drybrush.
I used to use Mig-washes, but find that they are quite heavy, so switched to Citadel washes and these are much more delicate, easier to distribute AND correct.

As for the drybrushes, these were first done with Vallejo "natural steel" for the worn off areas, followed by another Citadel newcomer the drybrush paint "Eldar flesh". This paint really is thick, almost paste-like and very easy to use with good results.
I also like their brushes. Good quality and each with their special purpose; base, layer, shade and dry which correspond with the paintsystems used by Games Workshop. What I don't like about these systems is that you end up with a myraid of different colours, hues and painttypes. However the quality of these is outstanding and I just wish they'd go into military colours. They'd obliterate the competition!


All being said and done; everything's painted in a variety of sandy, earth- and greentones, which, together with the washes and drybrushes, makes for an interesting display without resulting in an off-look with clashing tones.
The last stages, as far as the Jeep goes, will be the touching up of the dashboard and blending everything more together by a coat of dust and dirt.


 _GOTOTOP