Dioramas
Do you love dioramas & vignettes? We sure do.
The Road to Singapore: Malaya 1941-42
TanksForTheMemory
Visit this Community
England - South East, United Kingdom
Joined: August 31, 2016
KitMaker: 154 posts
Armorama: 152 posts
Posted: Friday, May 22, 2020 - 10:47 AM UTC

Quoted Text

Great work on the Ha-Go Tim. I was agreeing with you that the fallen tree looked like part of the ambush i.e. it stopped the column, but your penultimate image seems to show the lead tank in front of that tree & it can’t have run over it. Whatever, it amazes me the Aussies made no (apparent) attempt to camouflage their gun with nearby leaves & branches, planted it in the middle of the road. Was it a very rapid deployment? It sure doesn’t look like they had much of a range advantage


Thanks Tim.

Yes, the trees were a puzzle to me at first, but having read up on several sources on the internet, it seems clear that they were felled after the tanks had already been KO'ed.

As for the location of the 2-pounder, it seems almost certain that this was not the location from where it actually shot up the tanks. I strongly suspect that it was moved forward after the action either to better defend the road or to provide a better shot for the photographers.
TanksForTheMemory
Visit this Community
England - South East, United Kingdom
Joined: August 31, 2016
KitMaker: 154 posts
Armorama: 152 posts
Posted: Monday, June 01, 2020 - 04:28 AM UTC
I decided to get cracking on the rubber trees...

A bit of research led me to believe that the trees we are looking at in the images go by the Latin name Hevea brasiliensis and are described thus: "Typically 30-40 m tall with a leafy crown. The trunk is cylindrical, unbranched up a long way and then with much-branched leafy canopy, but frequently swollen towards the base. The bark is pale to dark brown with a smooth surface and the inner bark pale brown with abundant white or cream coloured latex."

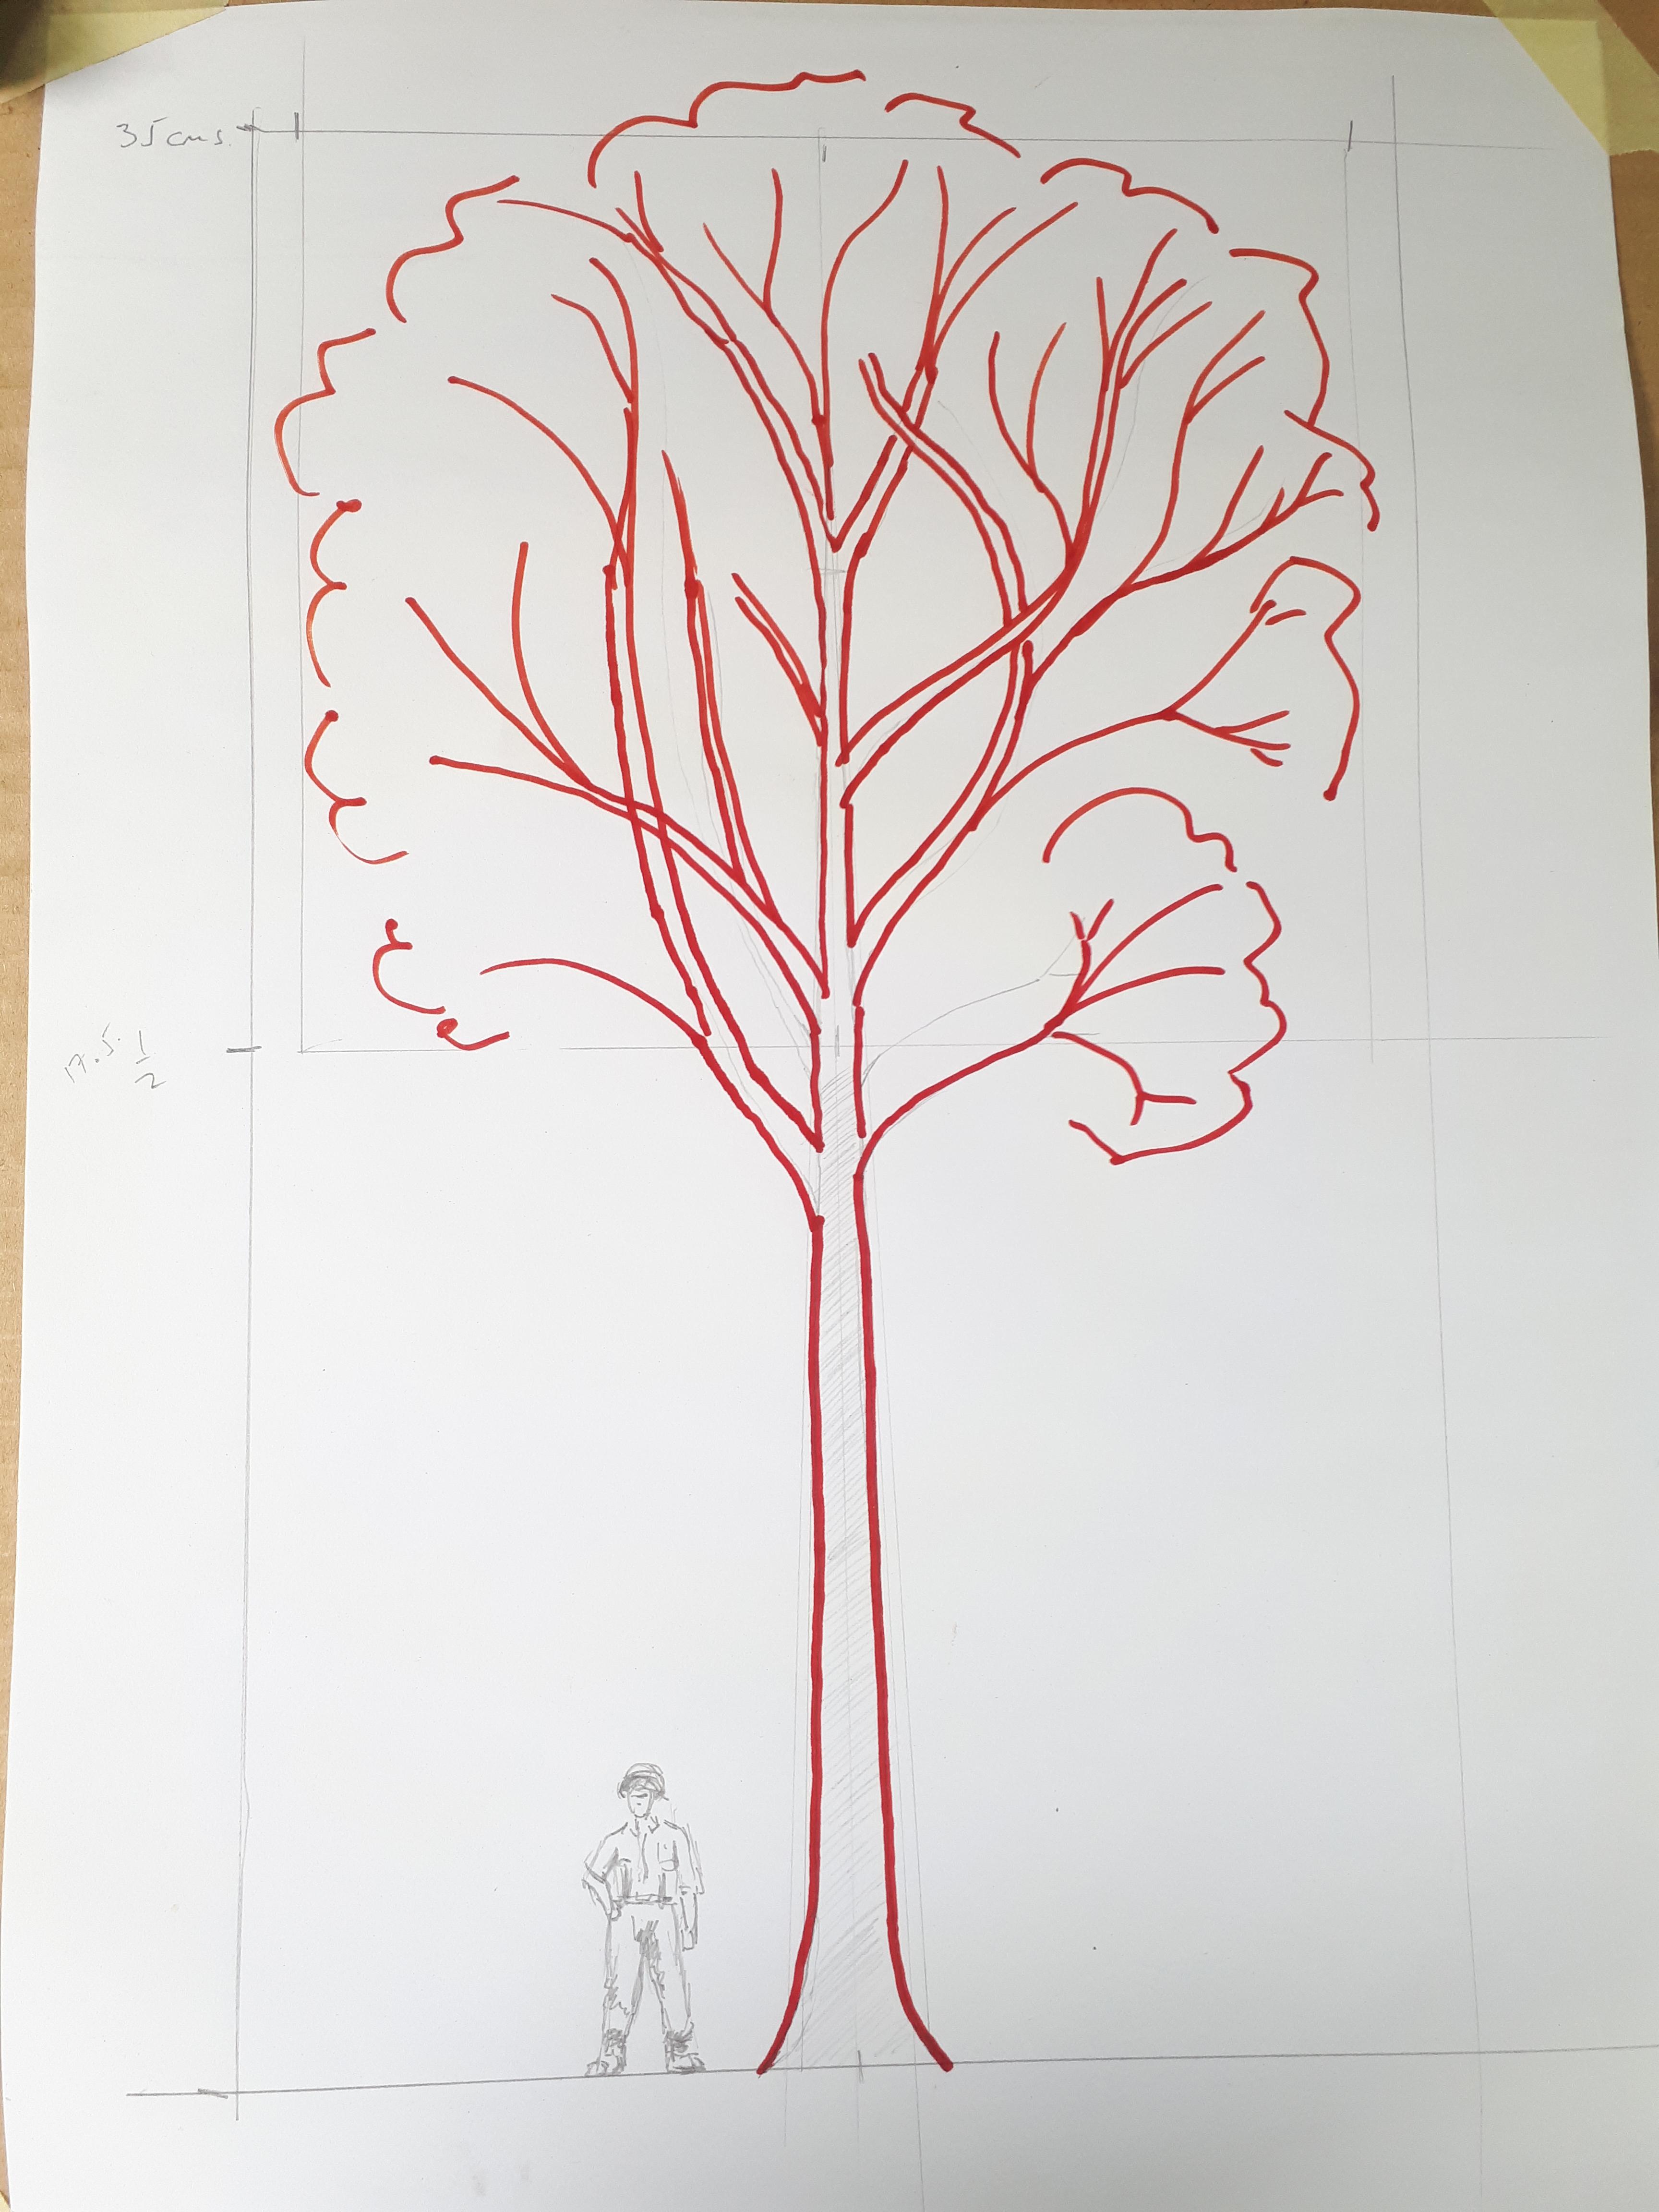
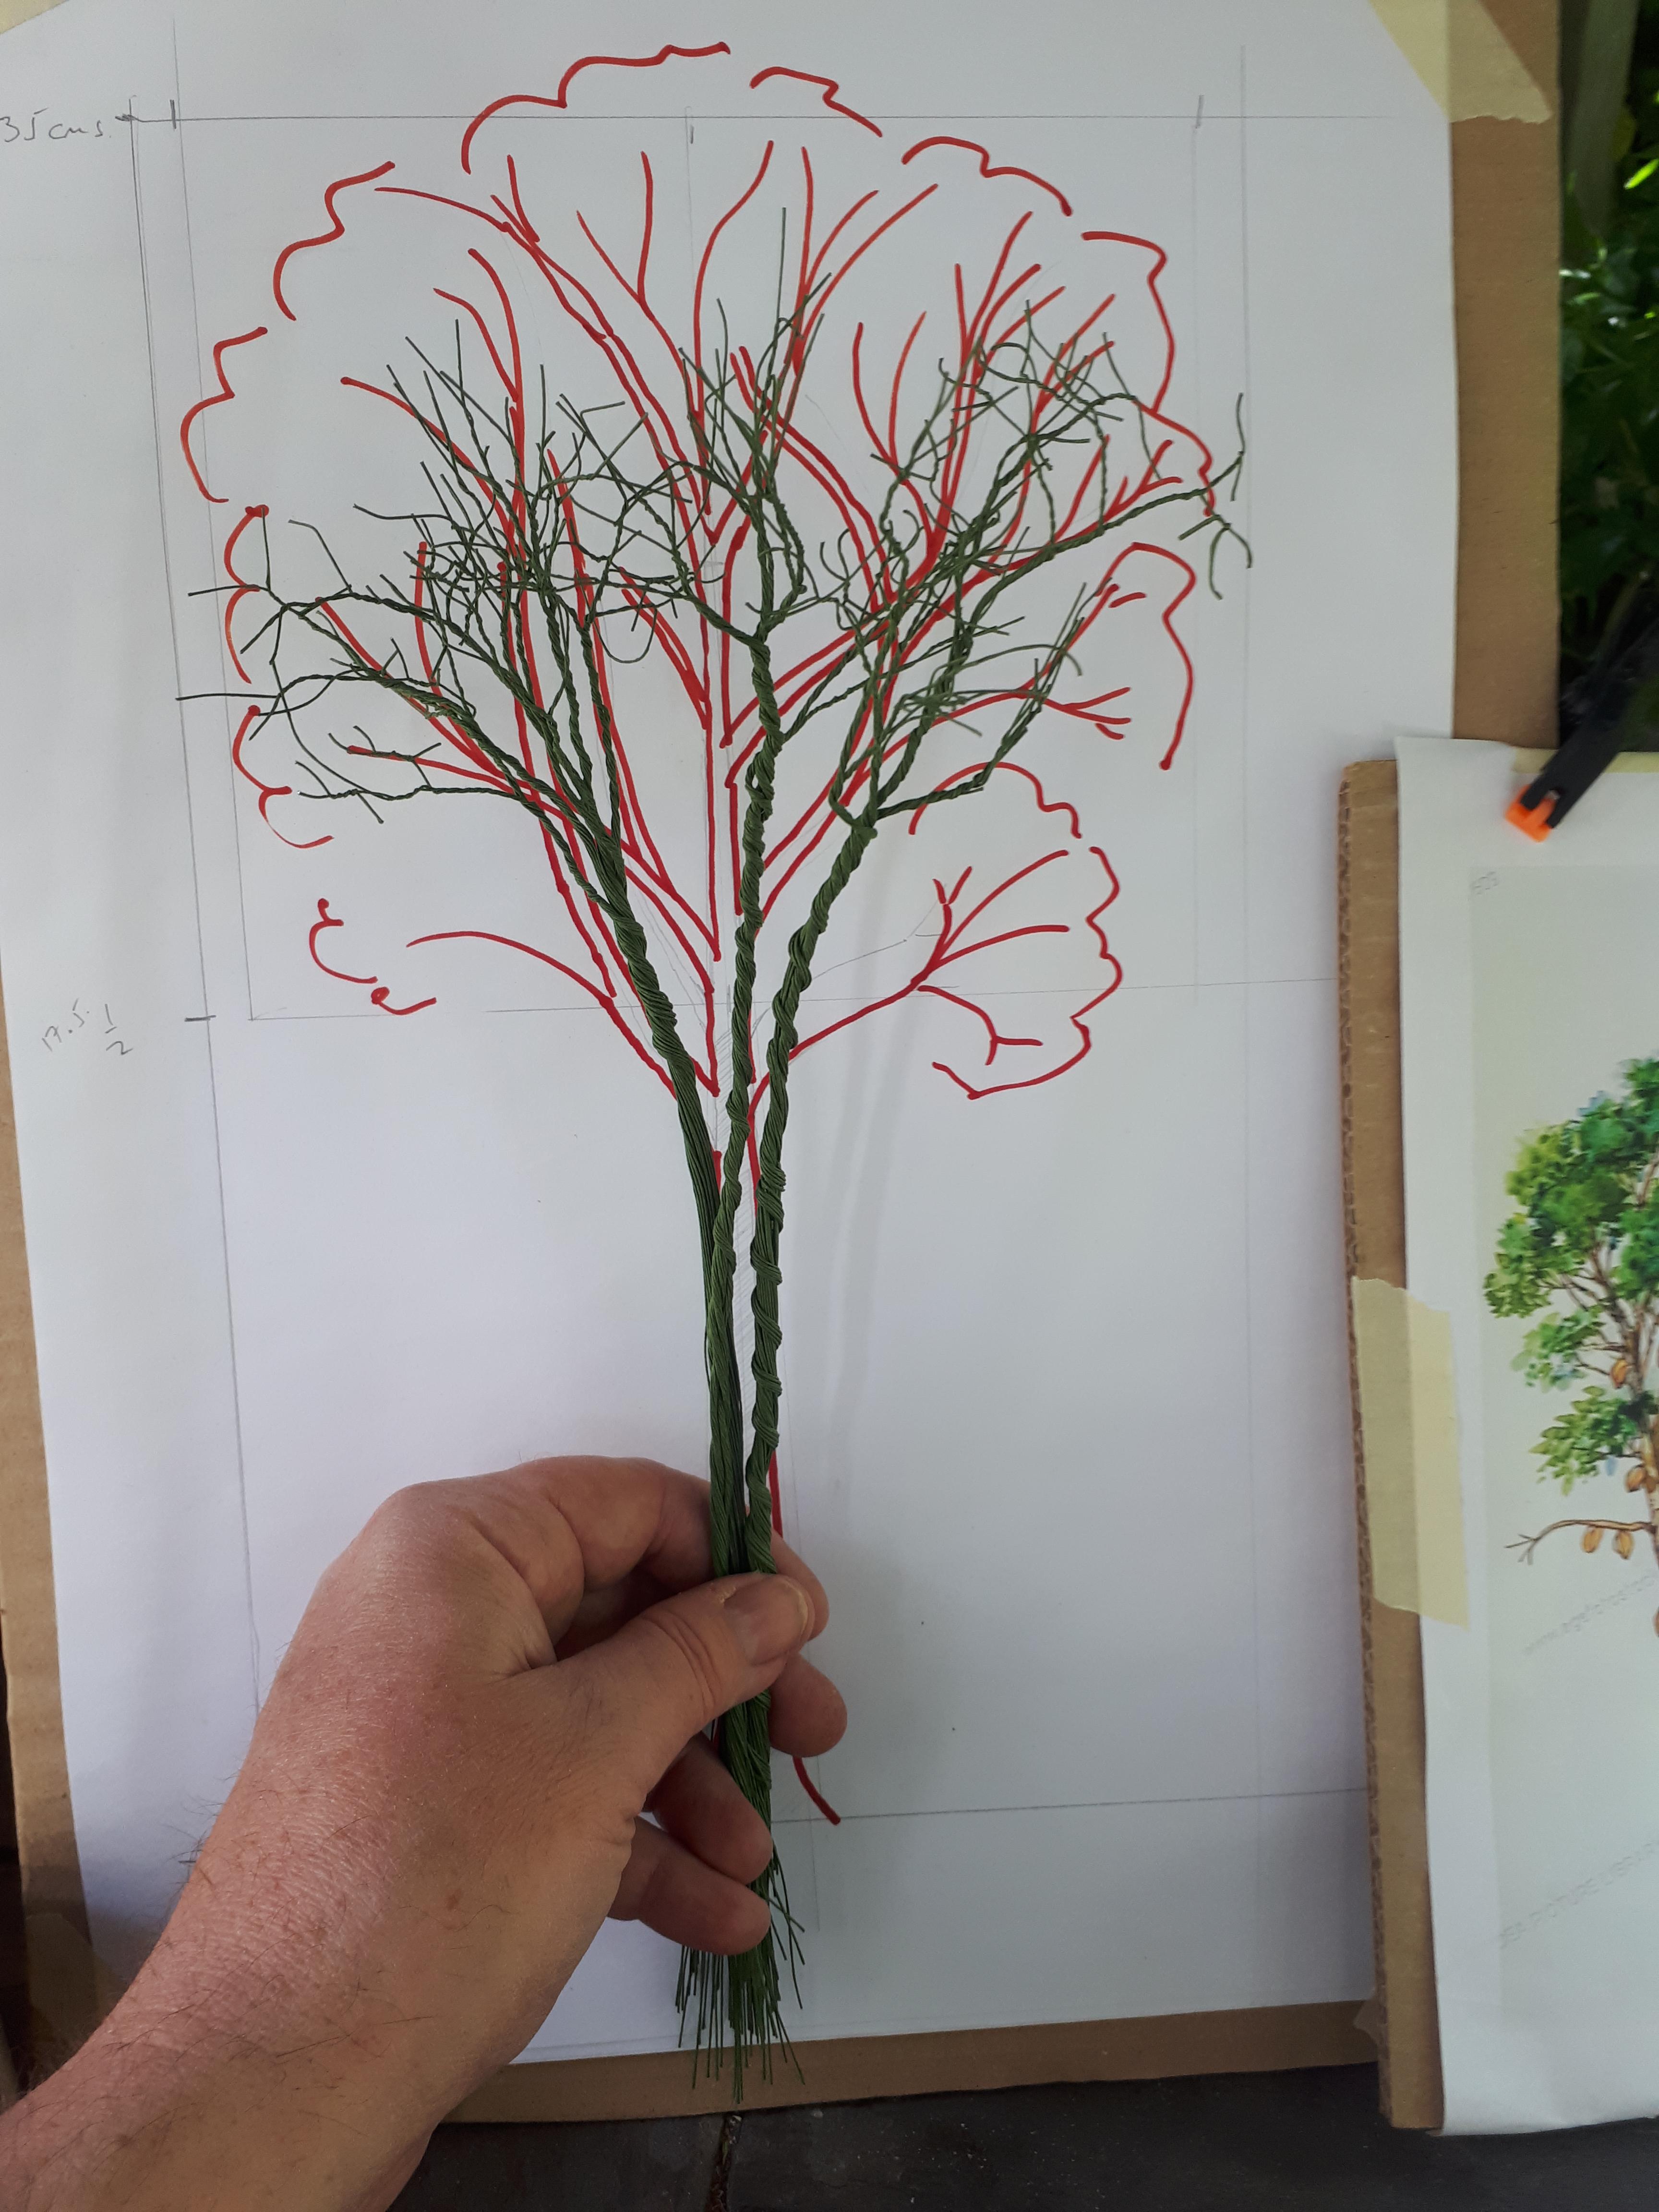
I started off by making a rough scale drawing based on images I had found on the internet. This was mainly to remind me of the correct proportions and height: 35cms. This is not intended to be true scale height because they would appear to tall (I believe this has much to do with the fact that, close up, we tend to look up at trees, thus for-shortening them in our mind's eye).


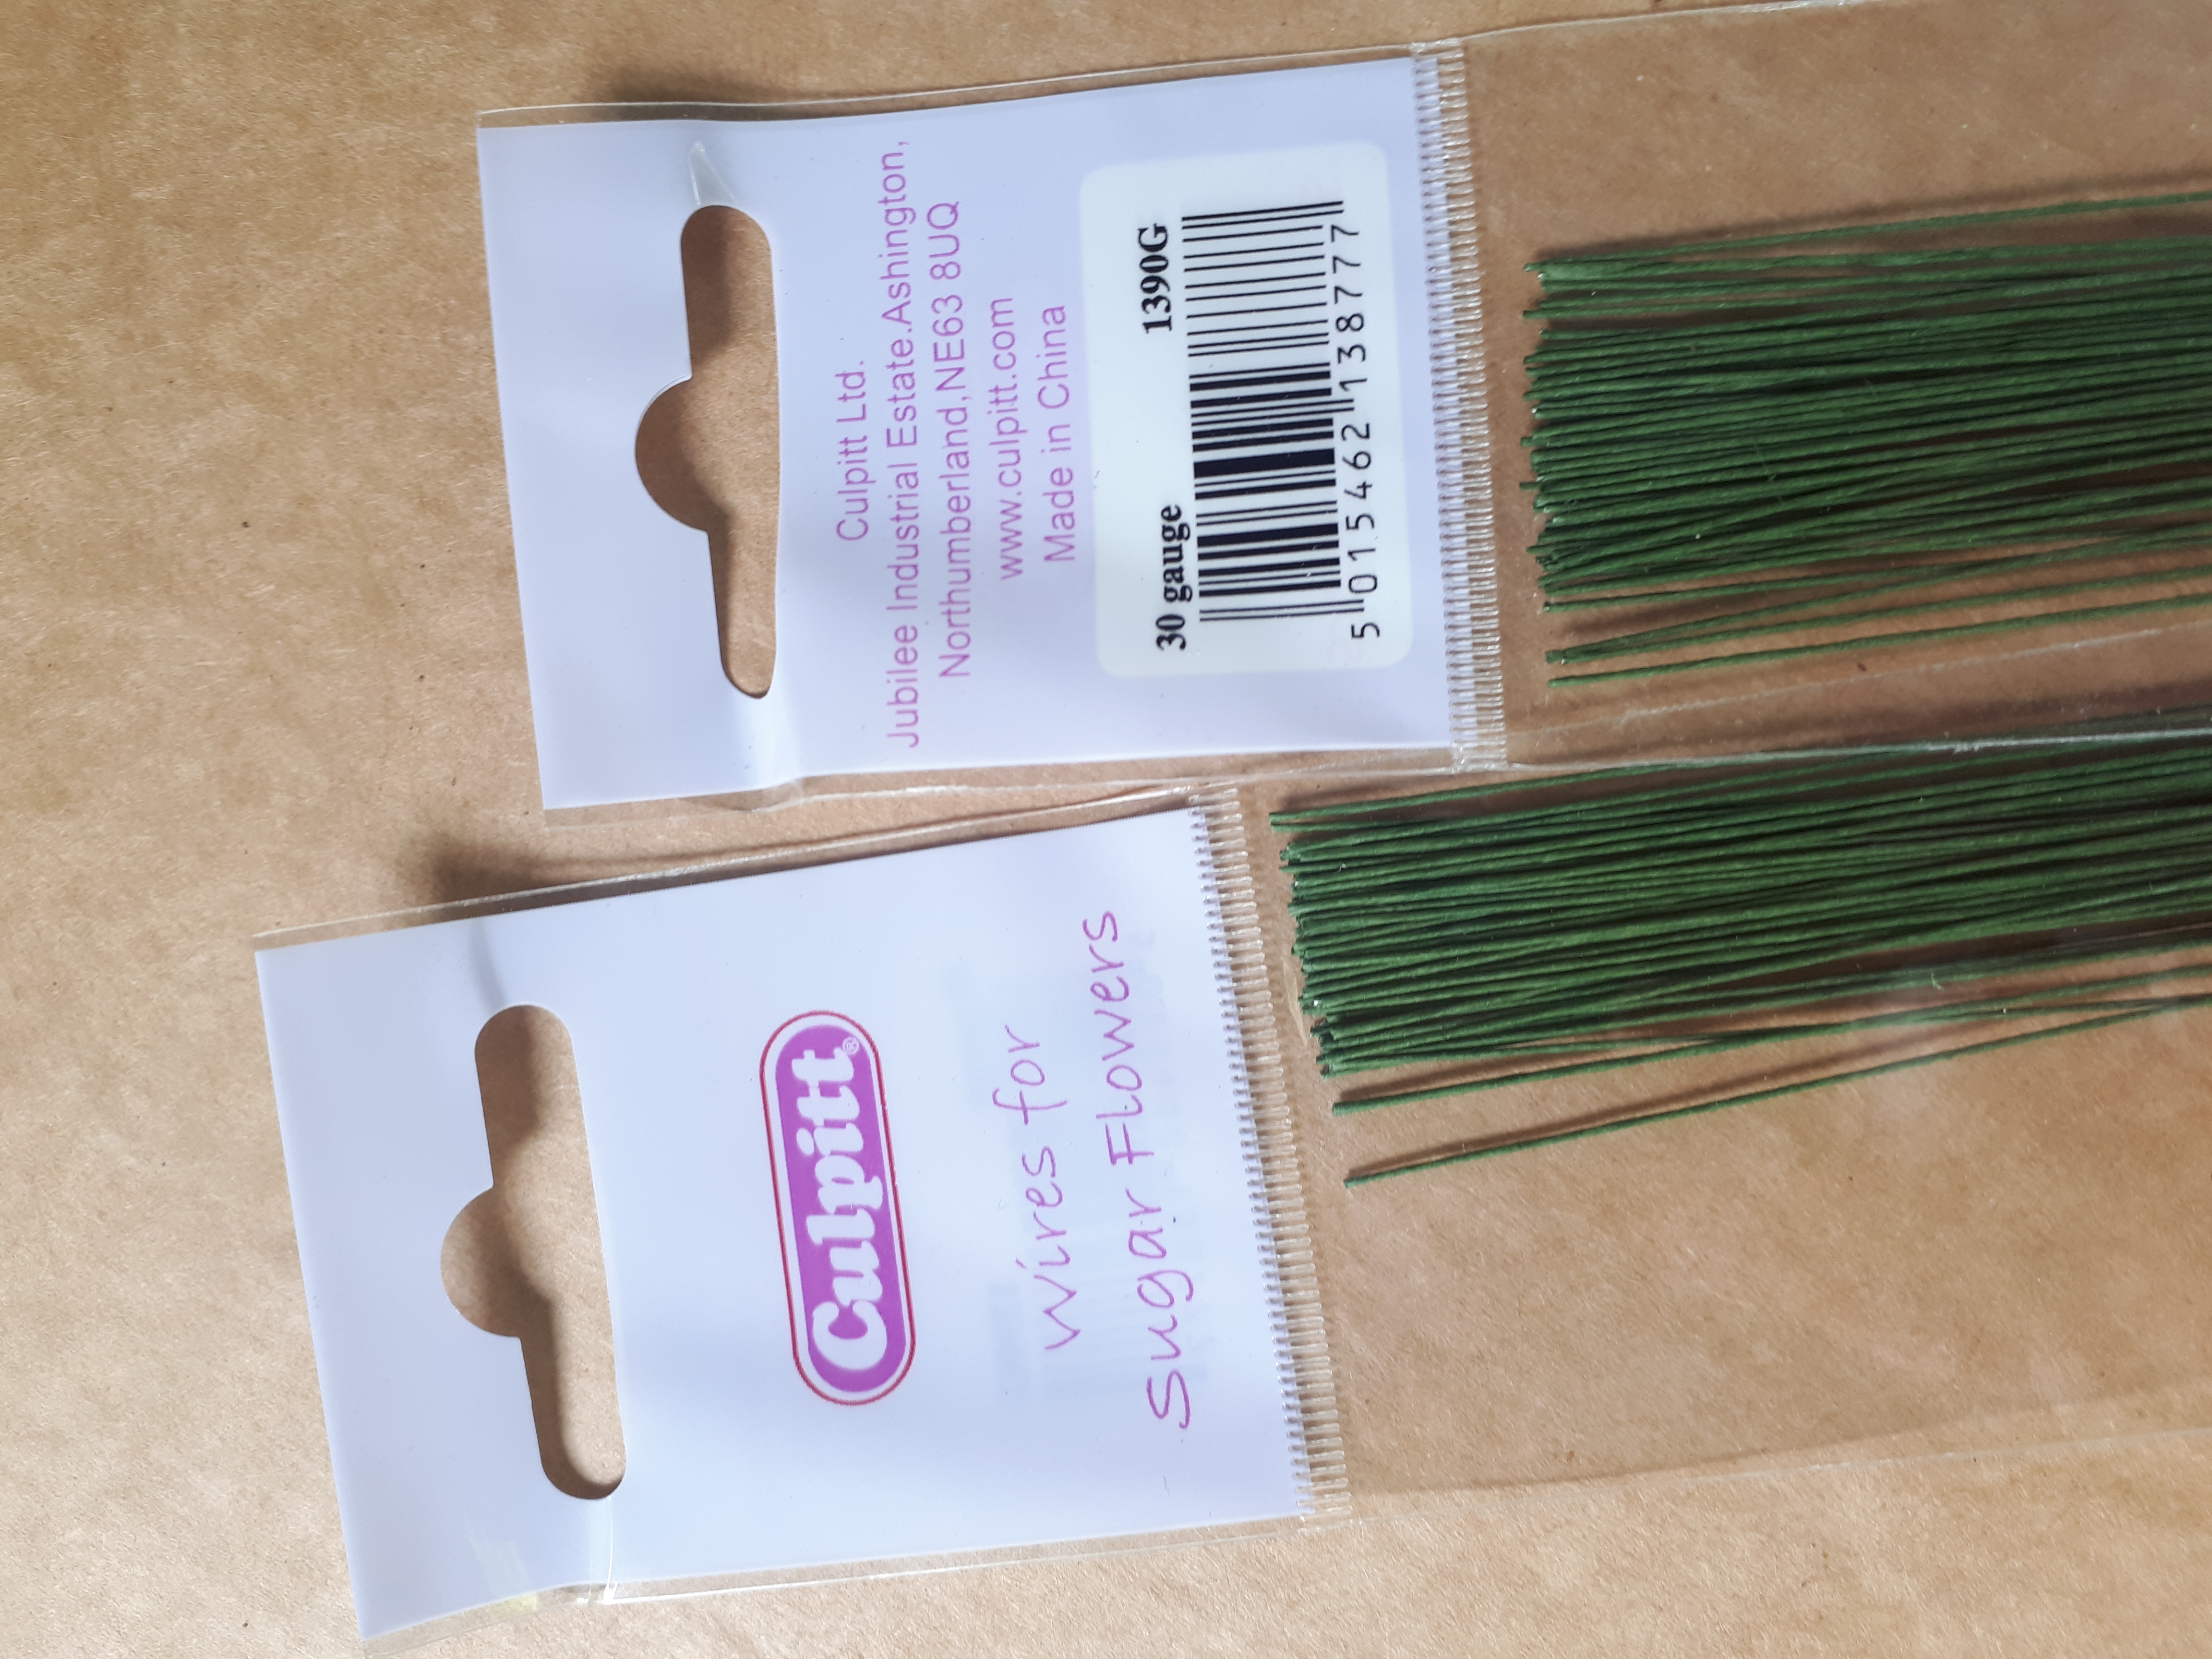
The trees were then constructed using the Gordon Gravett method, i.e. start from the top of the tree and work your way down. Although his trees are generally designed in a smaller scale (for model railways) it seems to work just as well in this larger scale. The florist's wire I used, which comes in handy 35 cm lengths, is actually the same brand that he uses! The best guage is the smallest: 30 gauge.


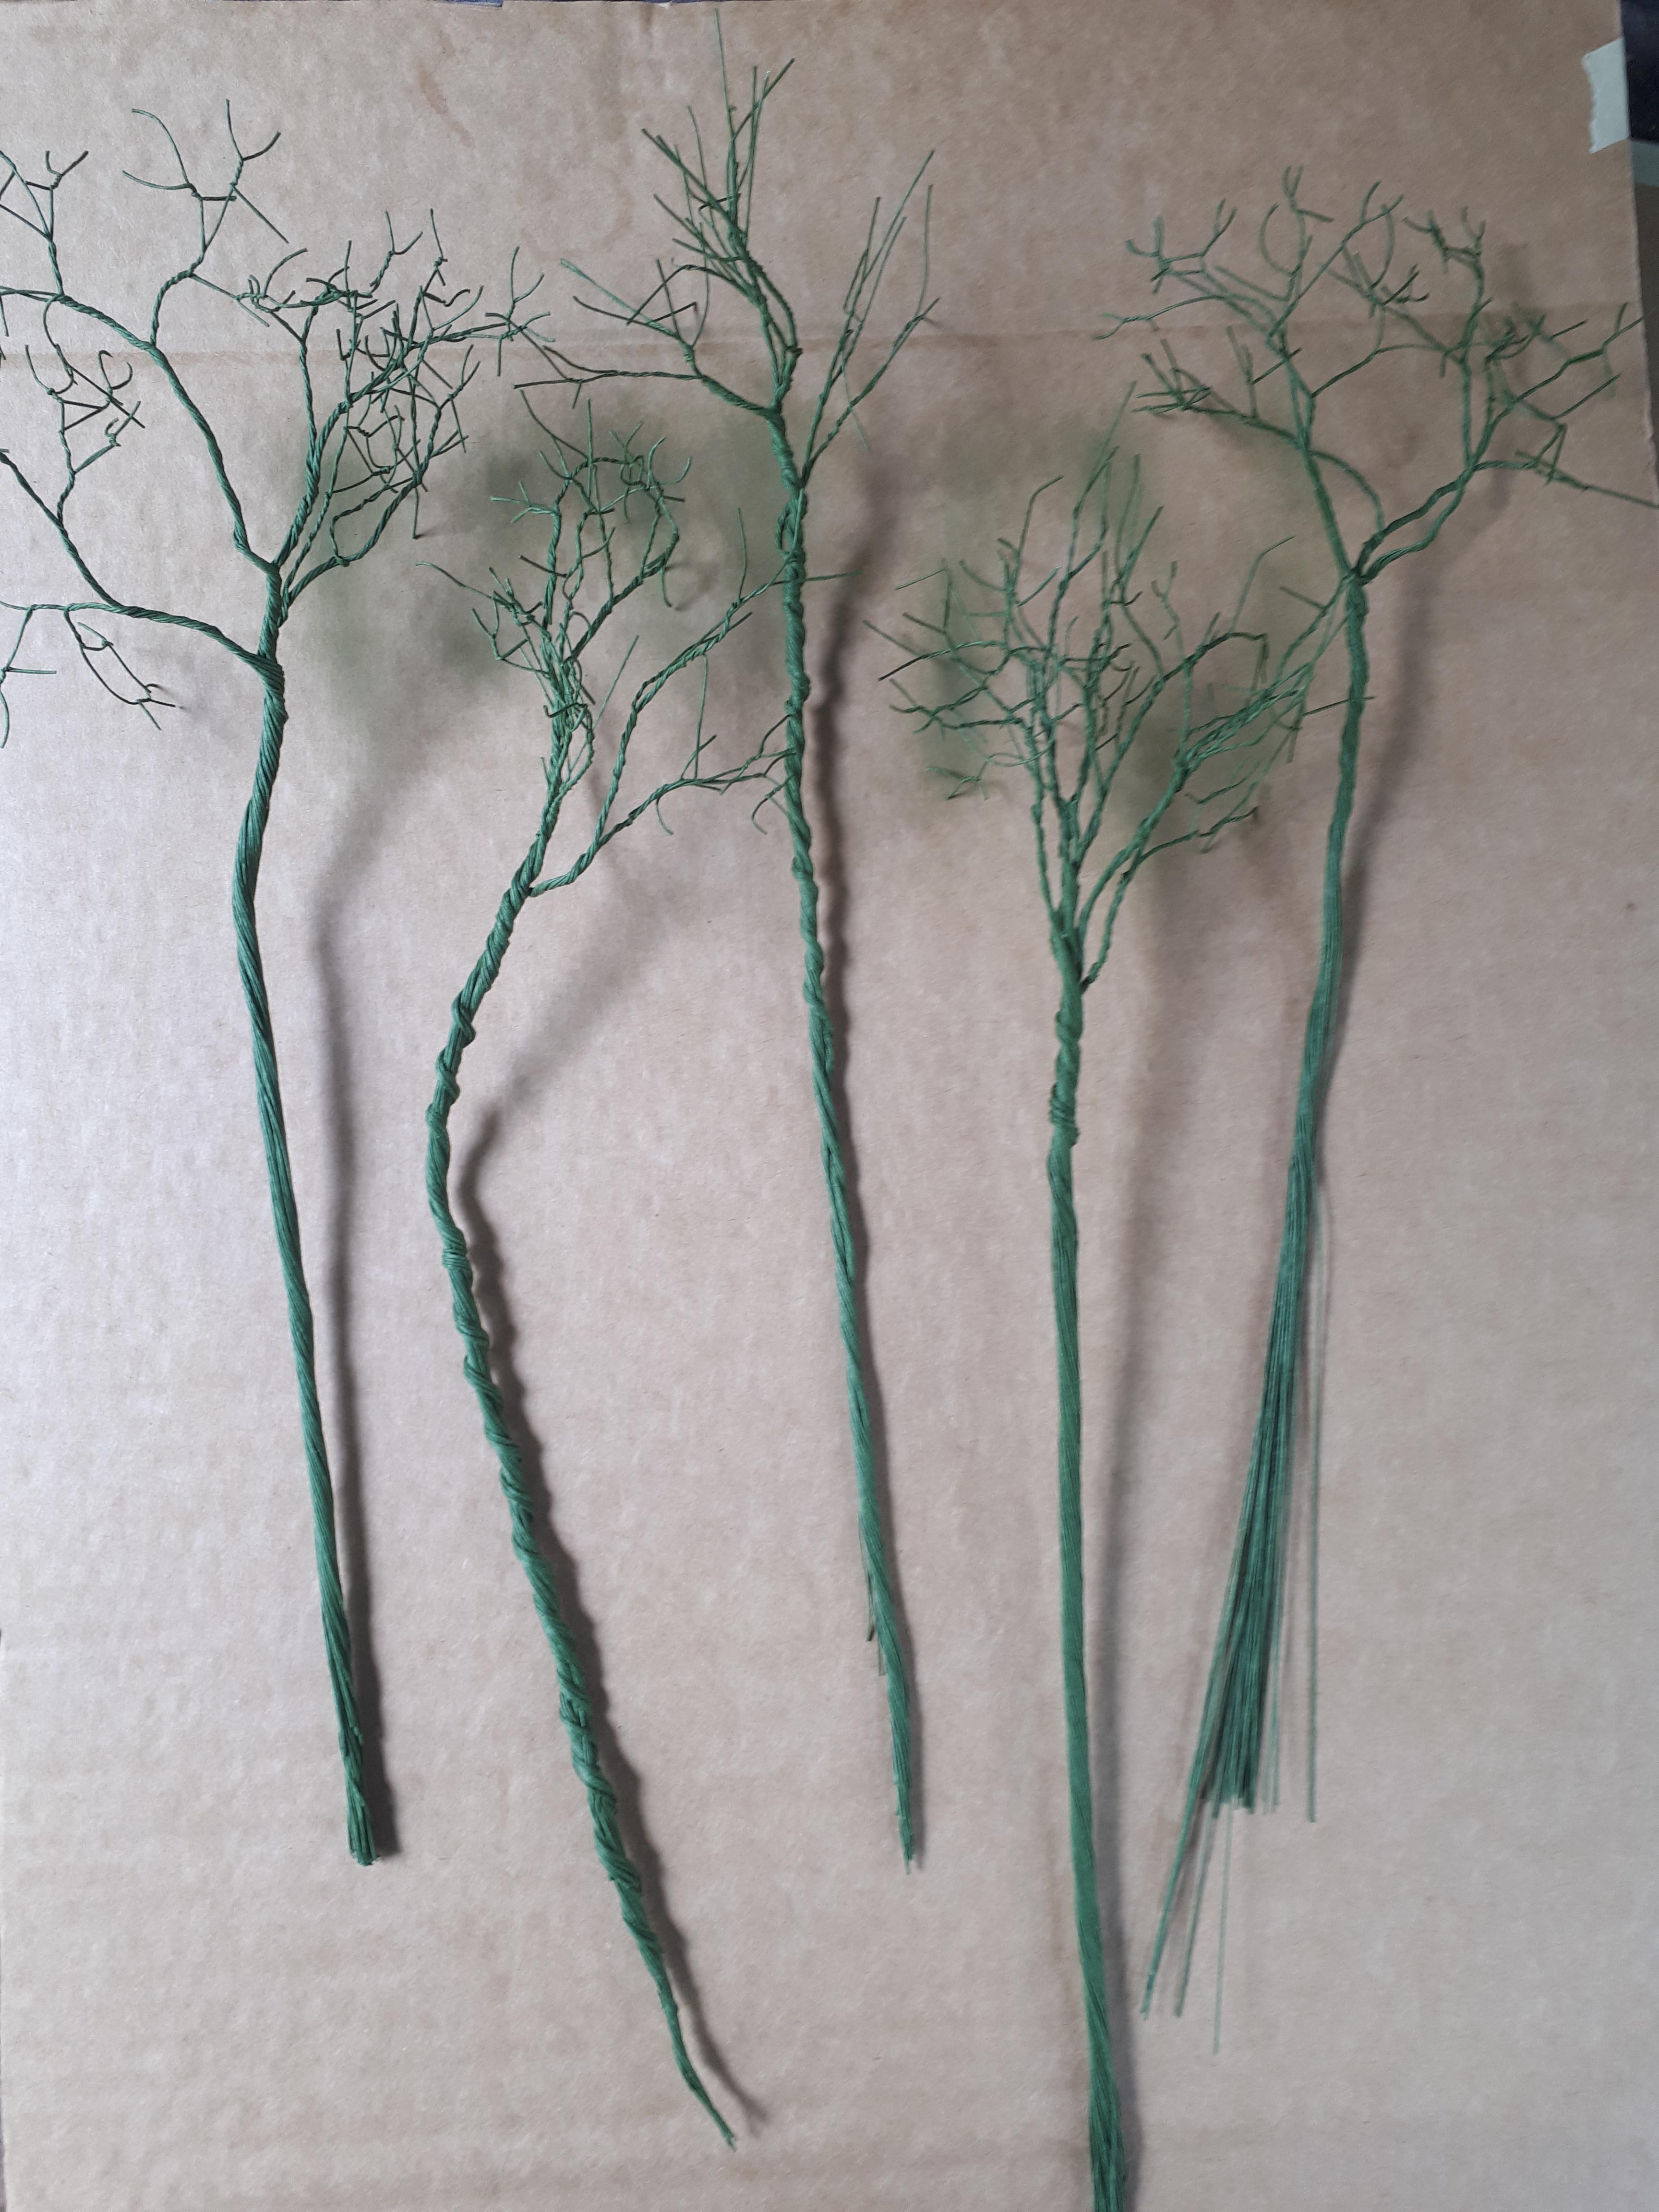
Twisting the wire into shape can be done easily by hand, although pliers help for some of the bigger twists lower down. As you can see, you make a number of separate assemblies which are then combined to make a larger branch or part of the trunk.


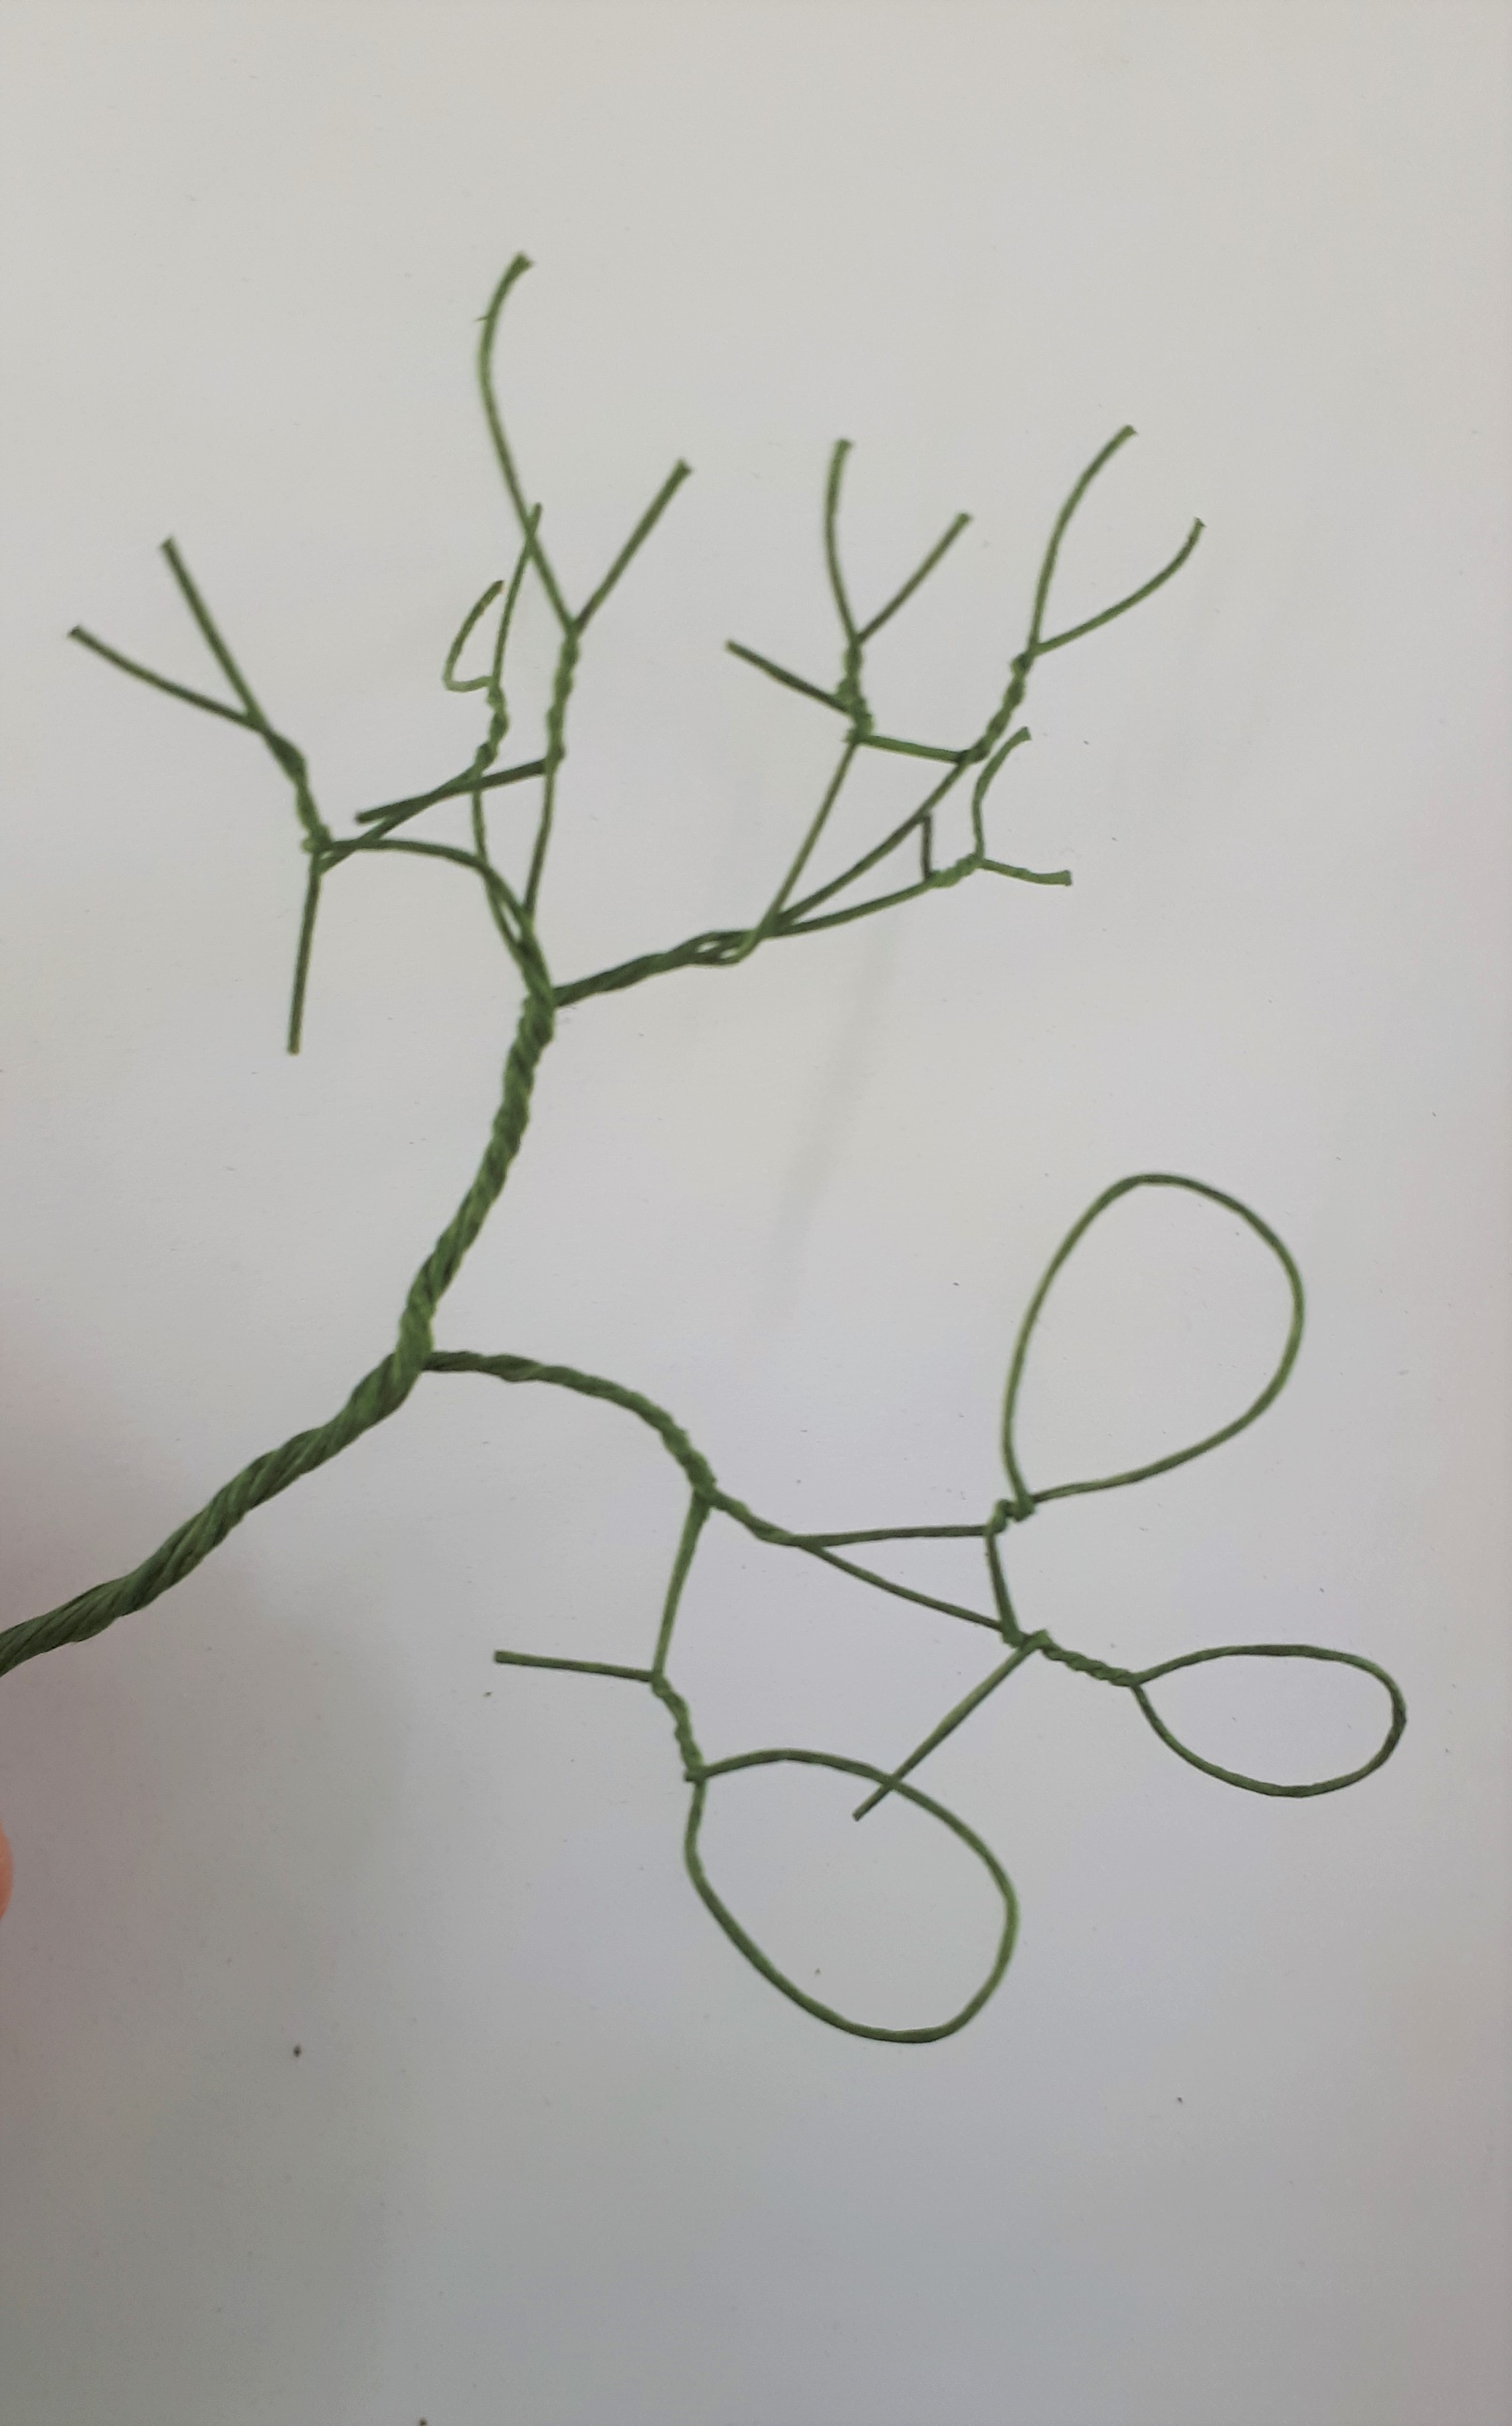
In order to make more smaller branches / twigs at the tips I came up with my own trick: looping the single wire around on itself, twisting it back on itself and then snipping the loop to separate it.
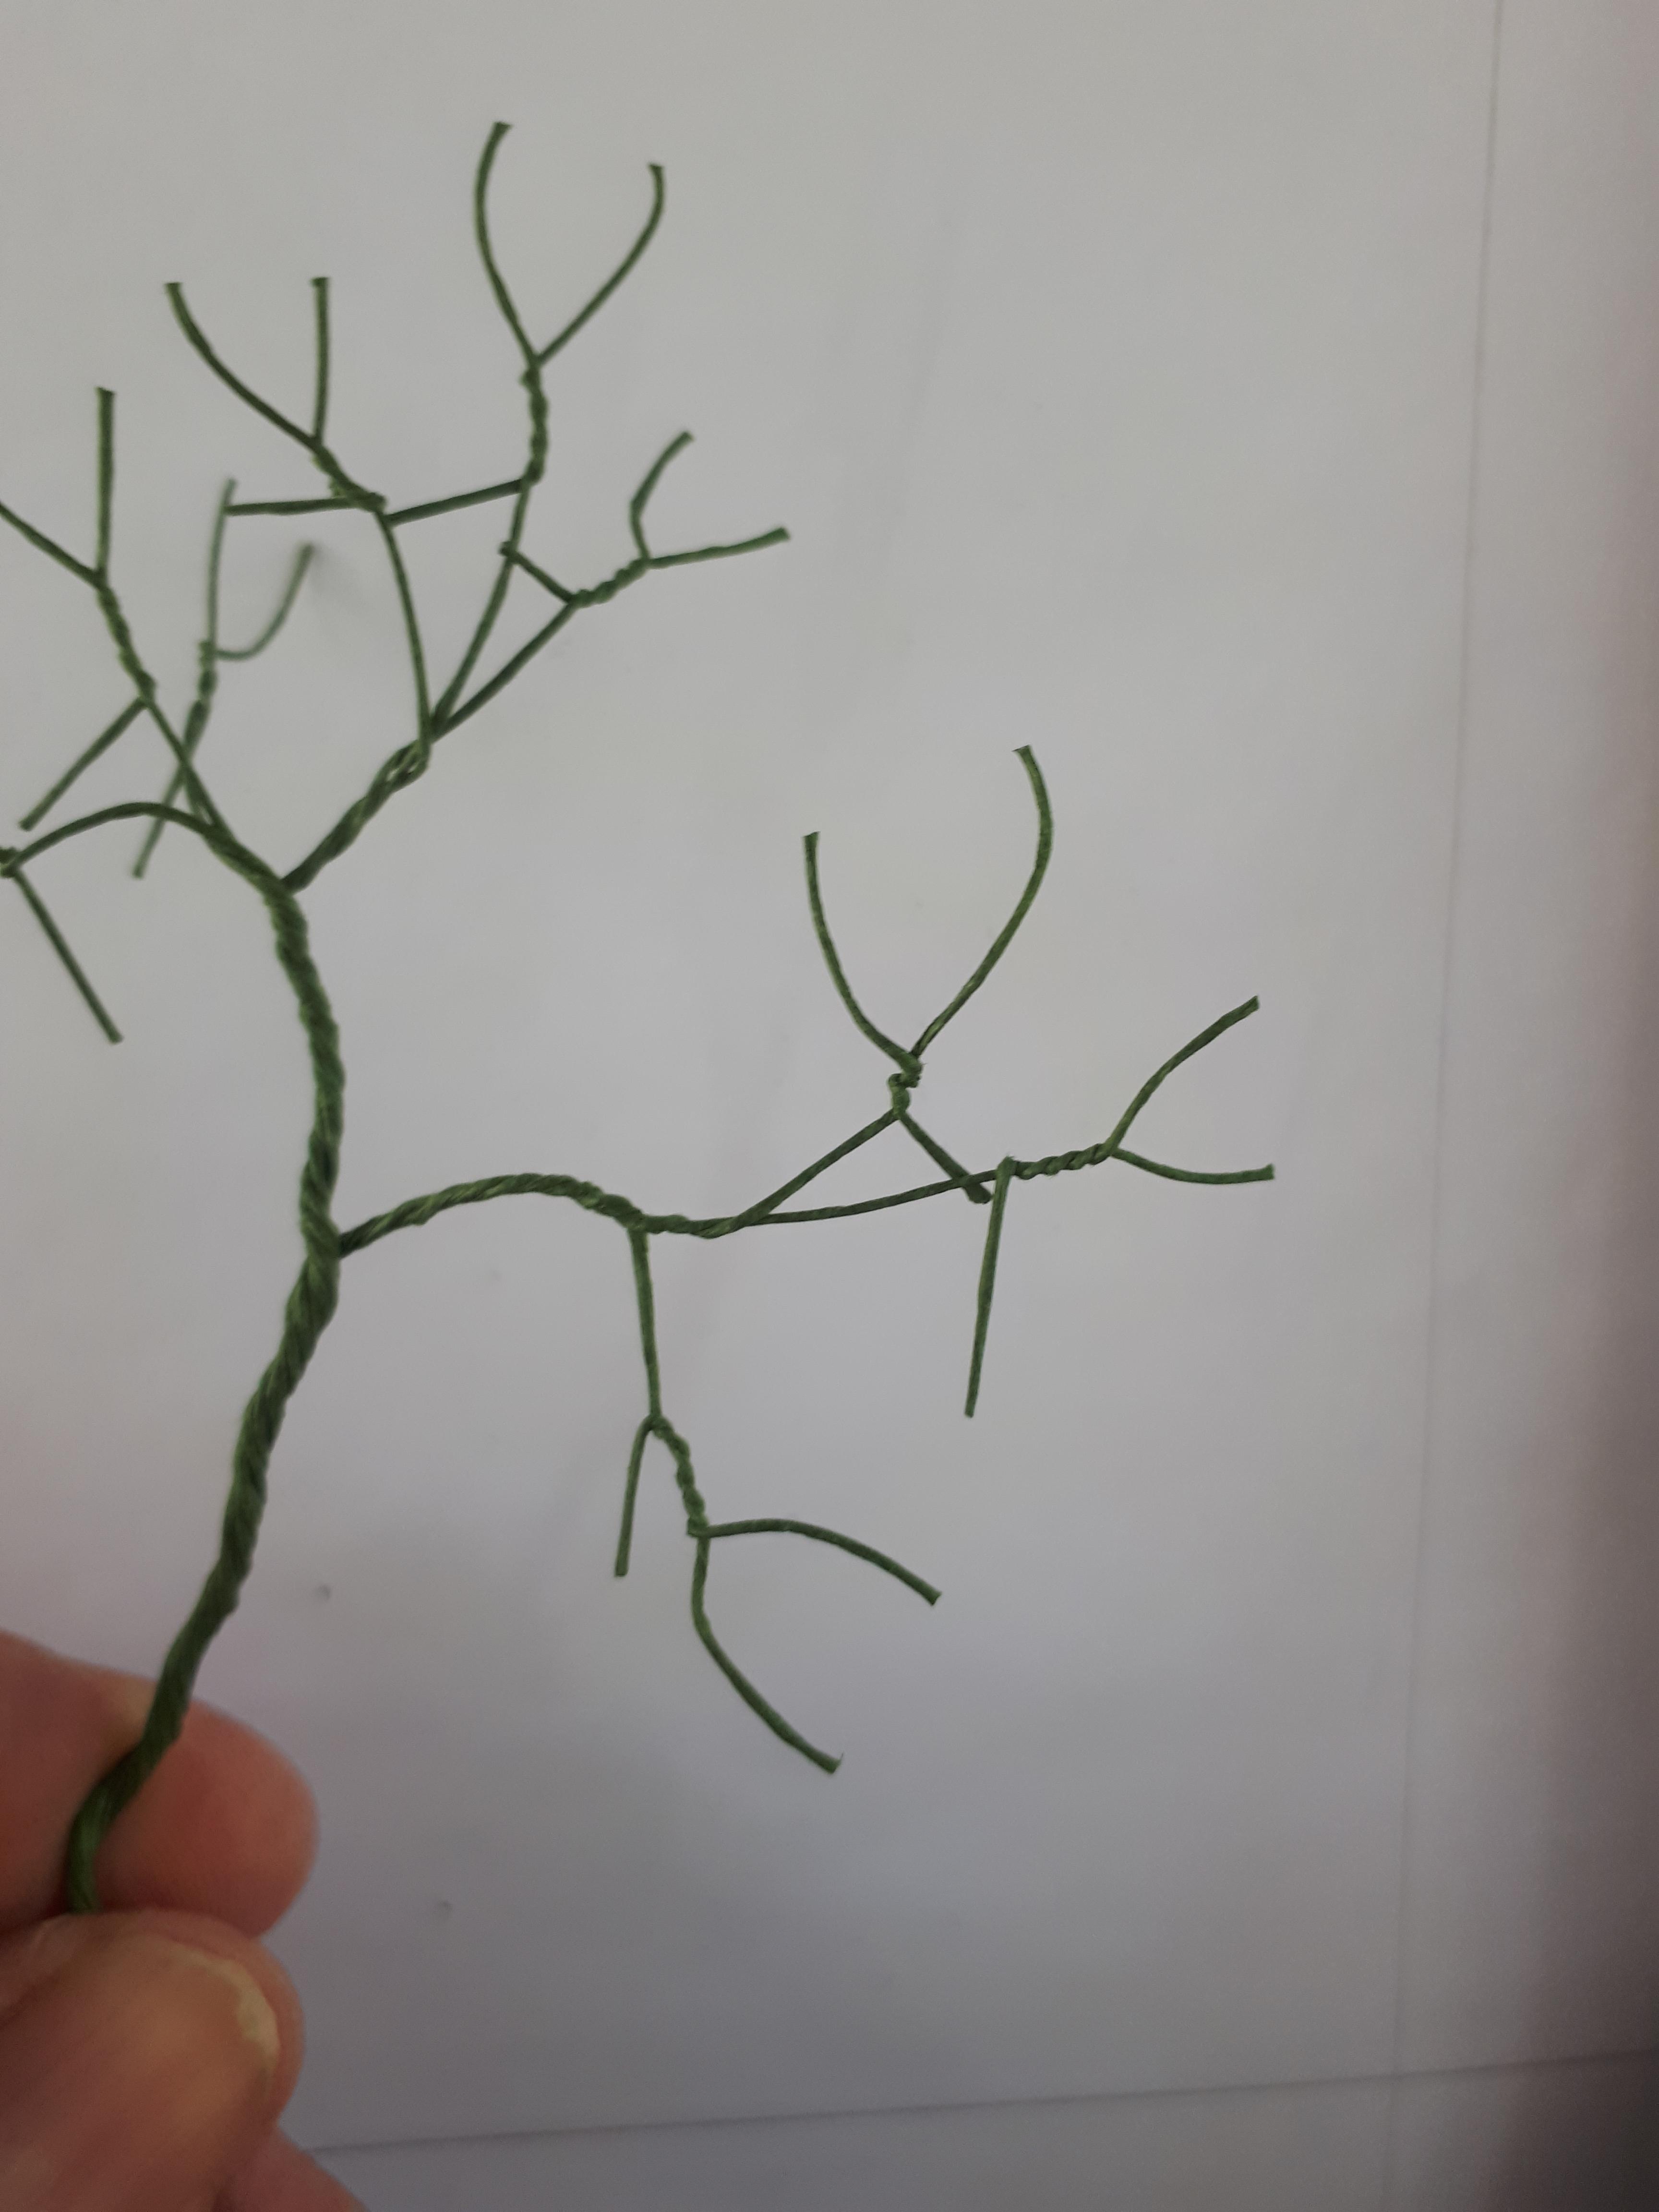


Having said all of that, assembling the trees into a realistic and accurate shape was not as easy as I thought. I made quite a mess of the fuse wire used to bind the clumps of wires in place, which is why I resorted to using masking tape to cover up some of the roughest areas.

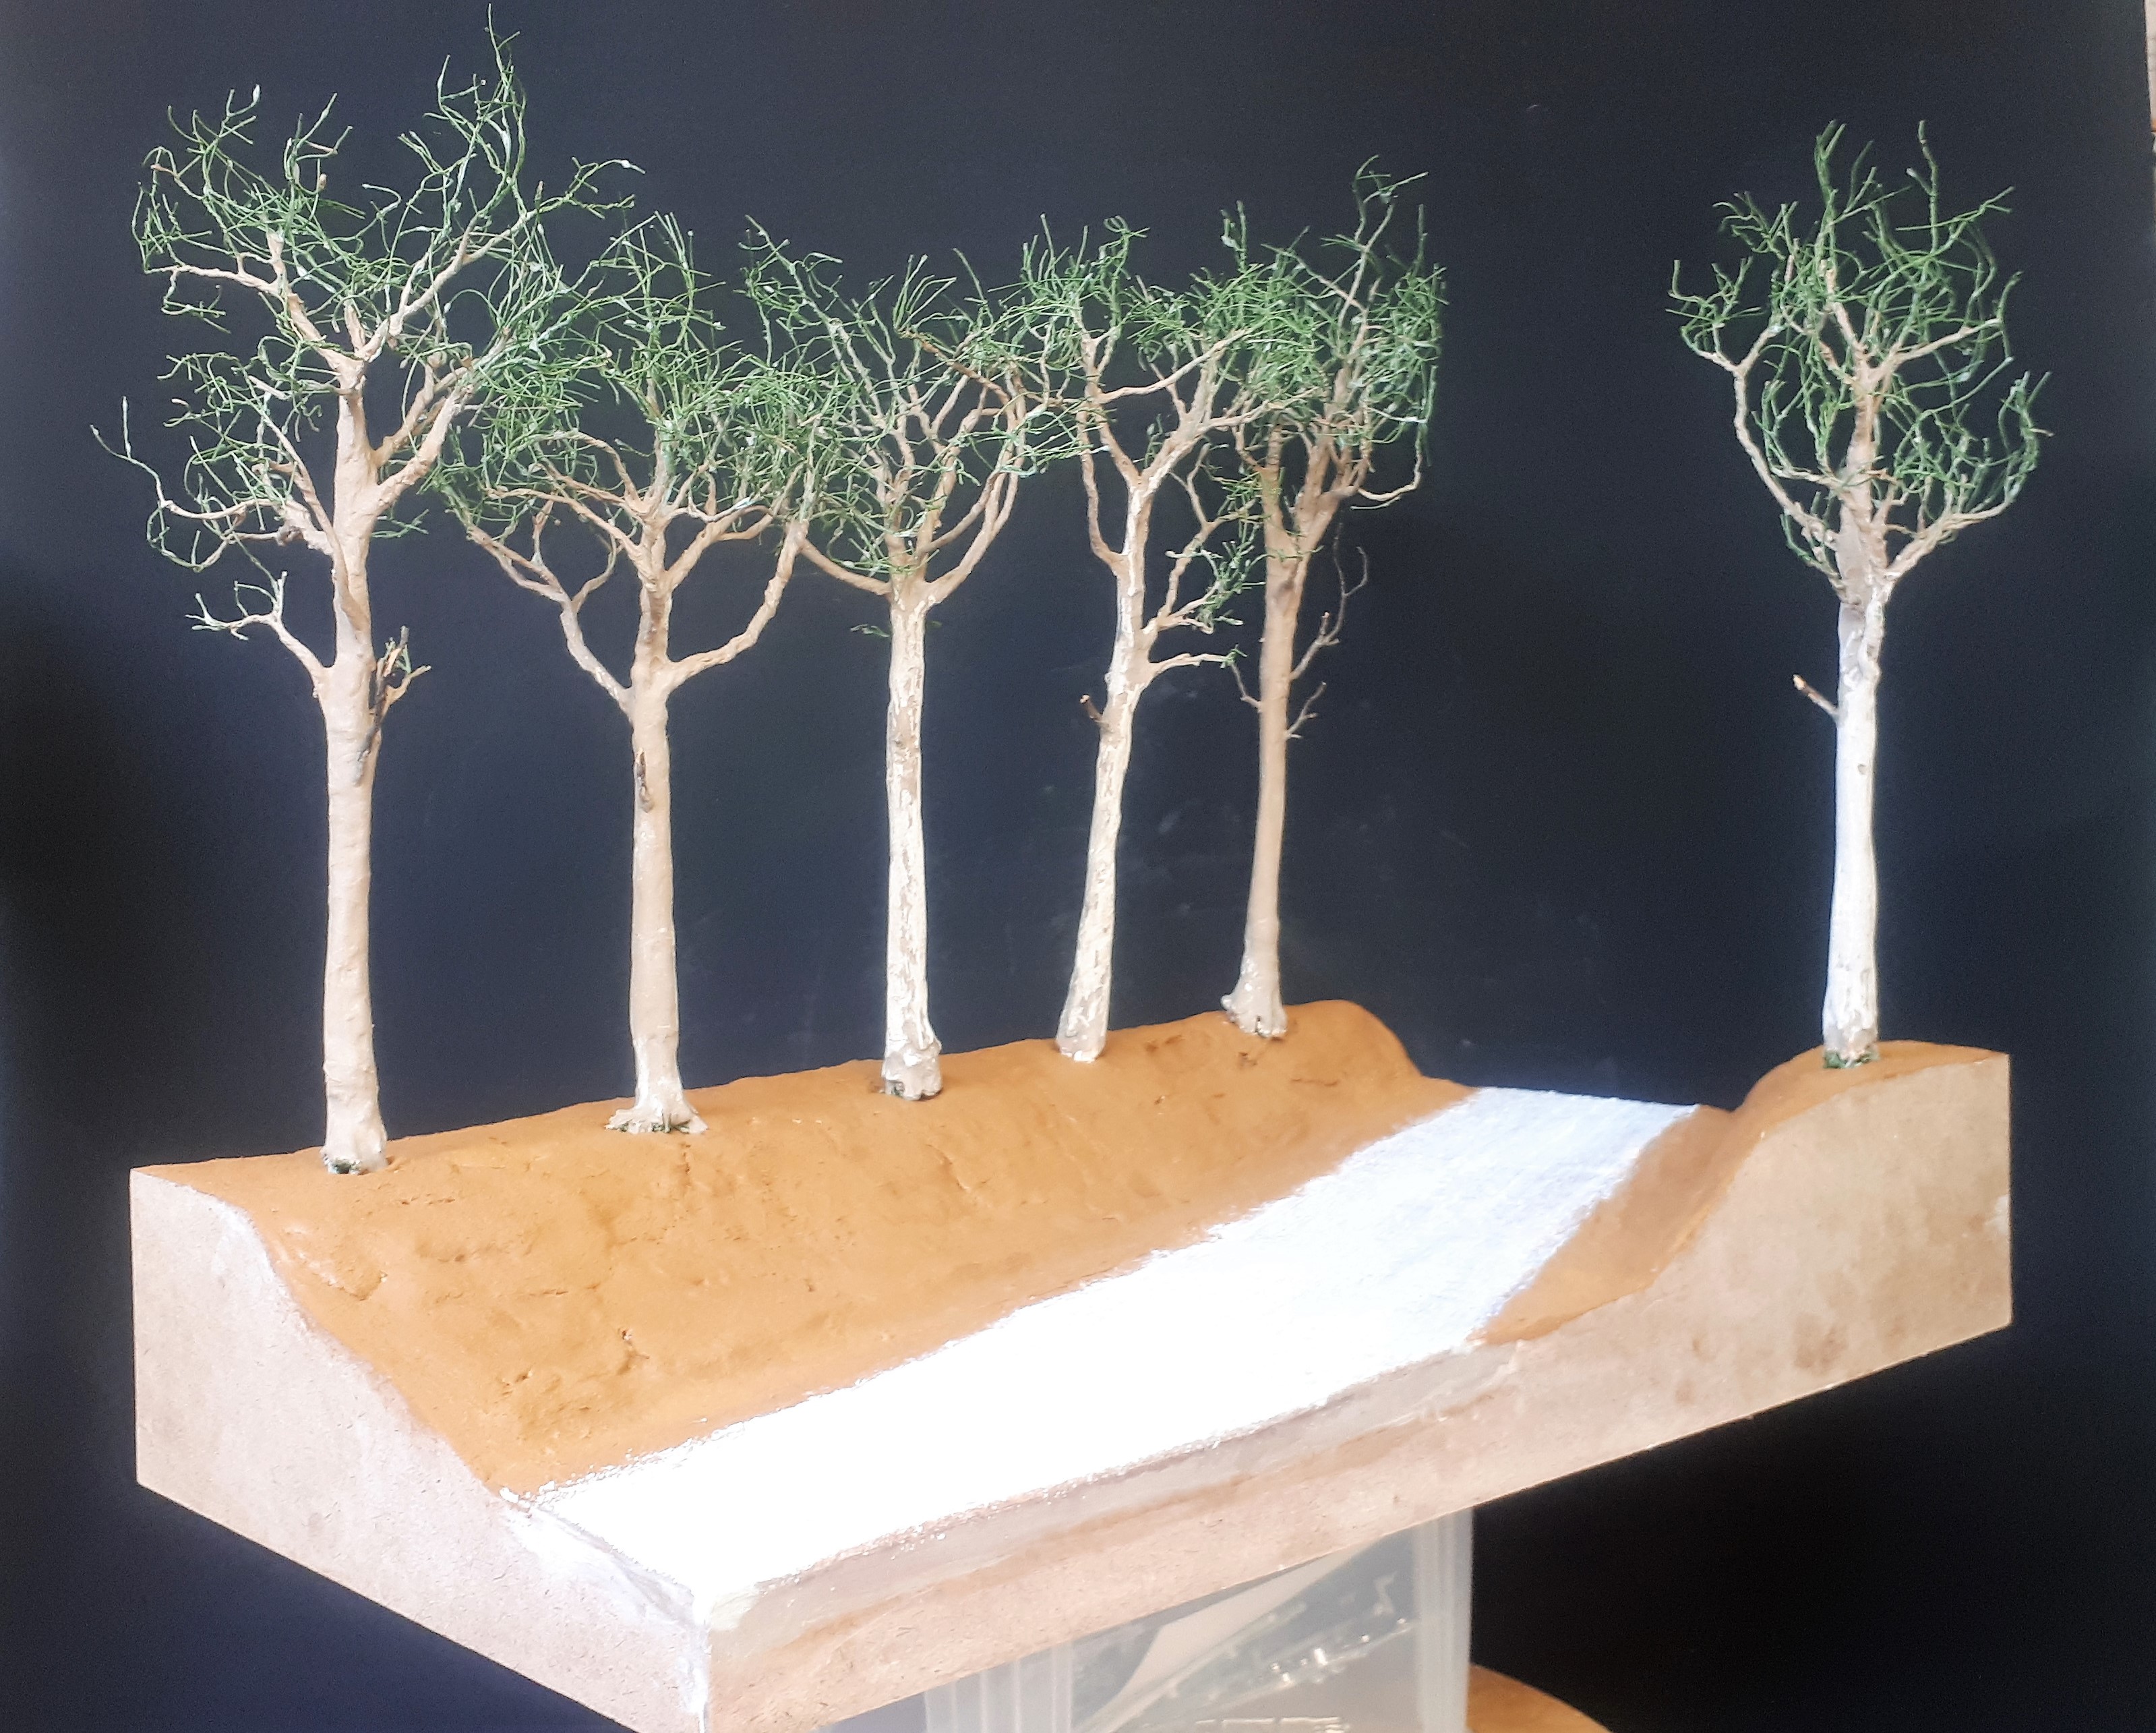
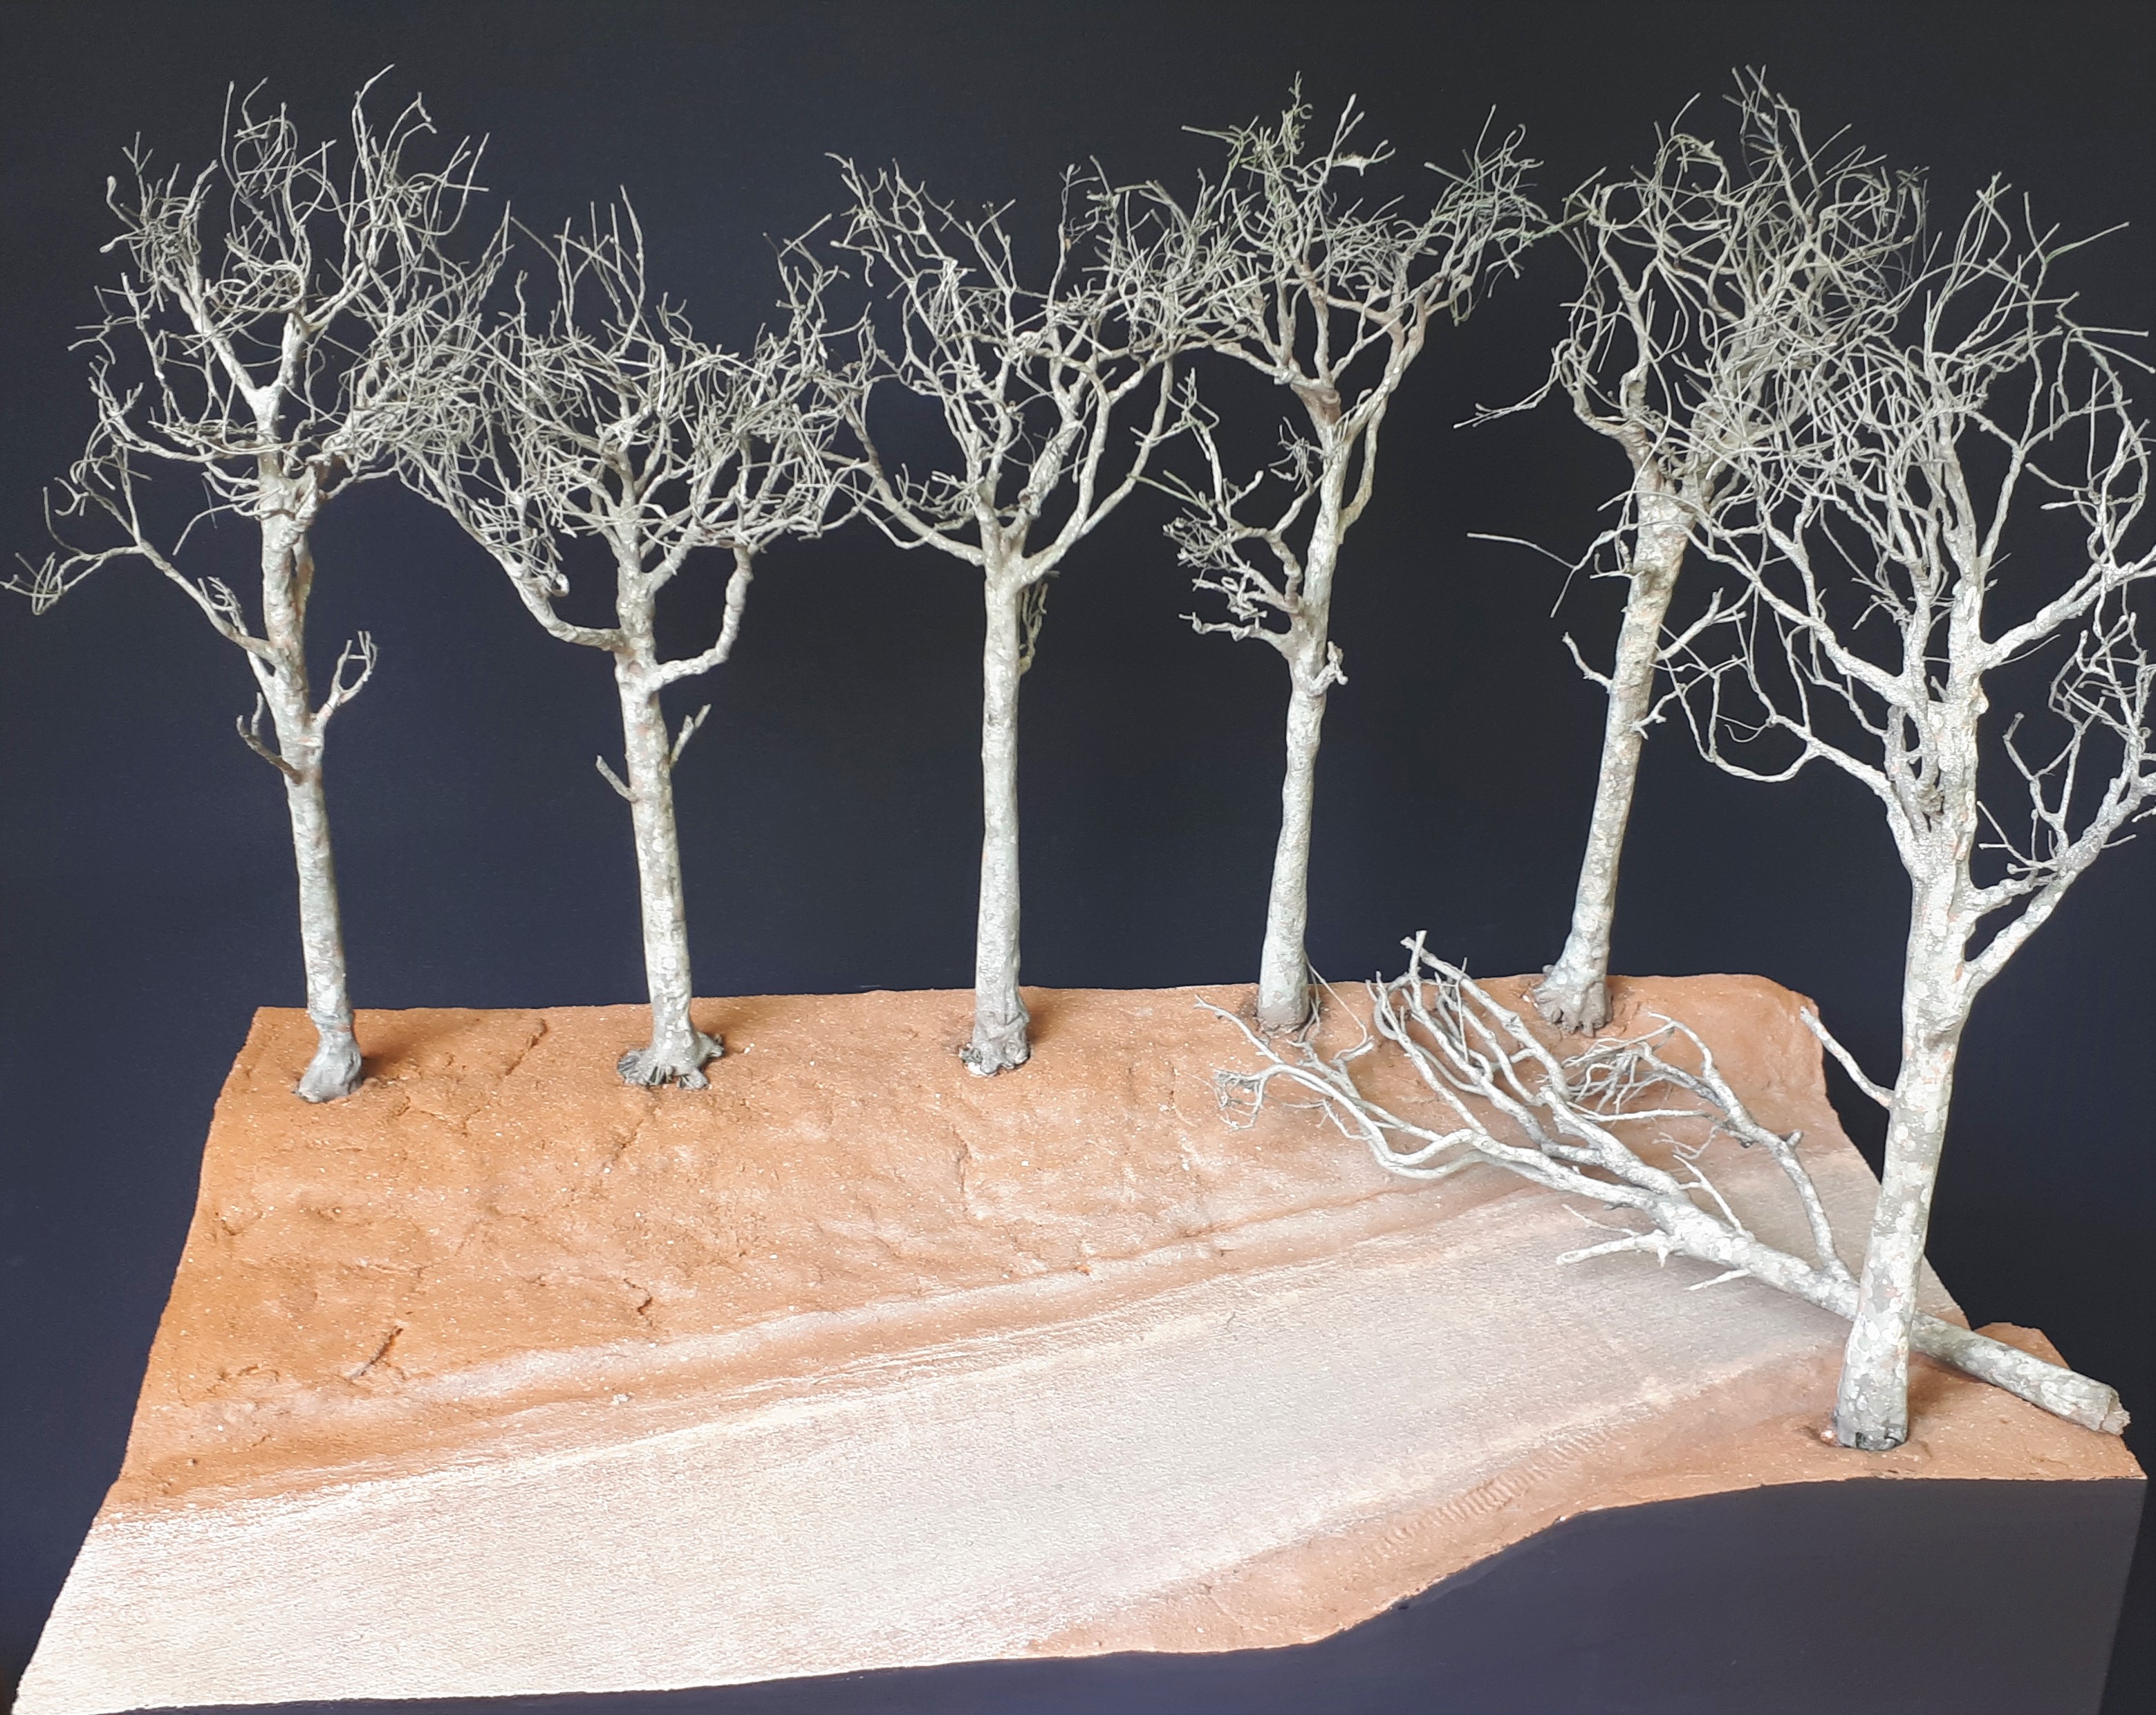
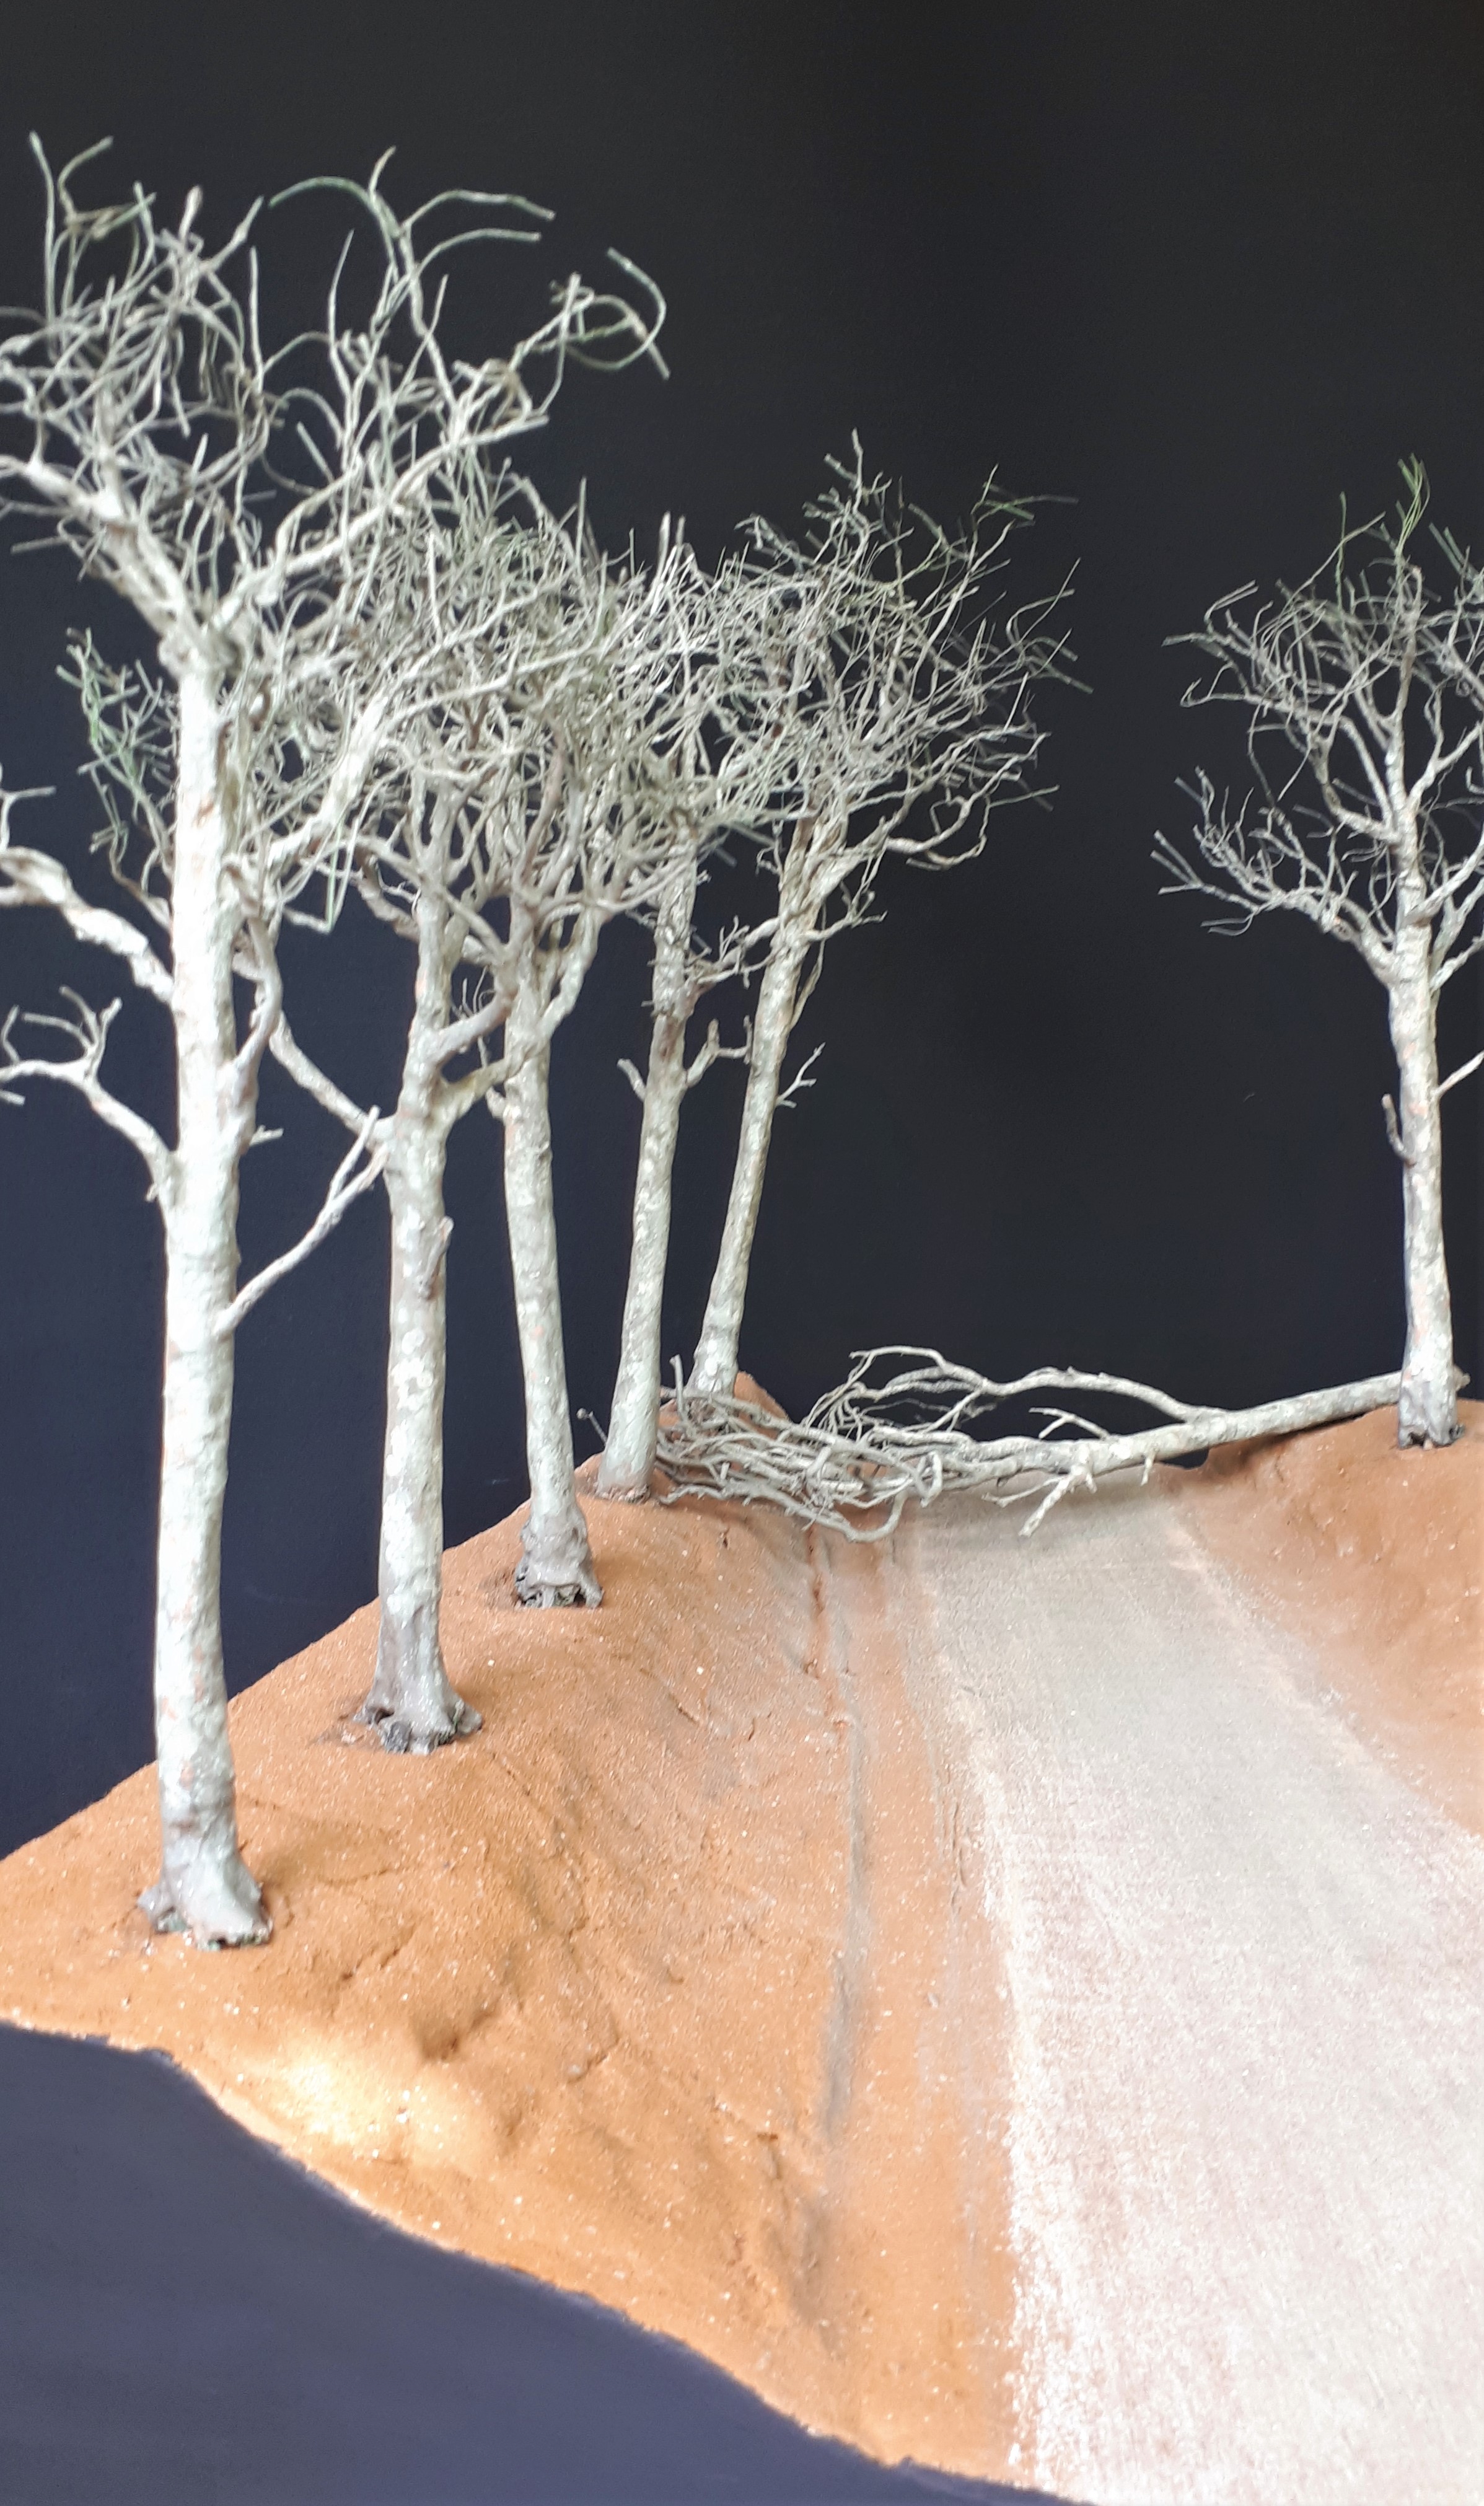
Here are the trees temporarily installed...
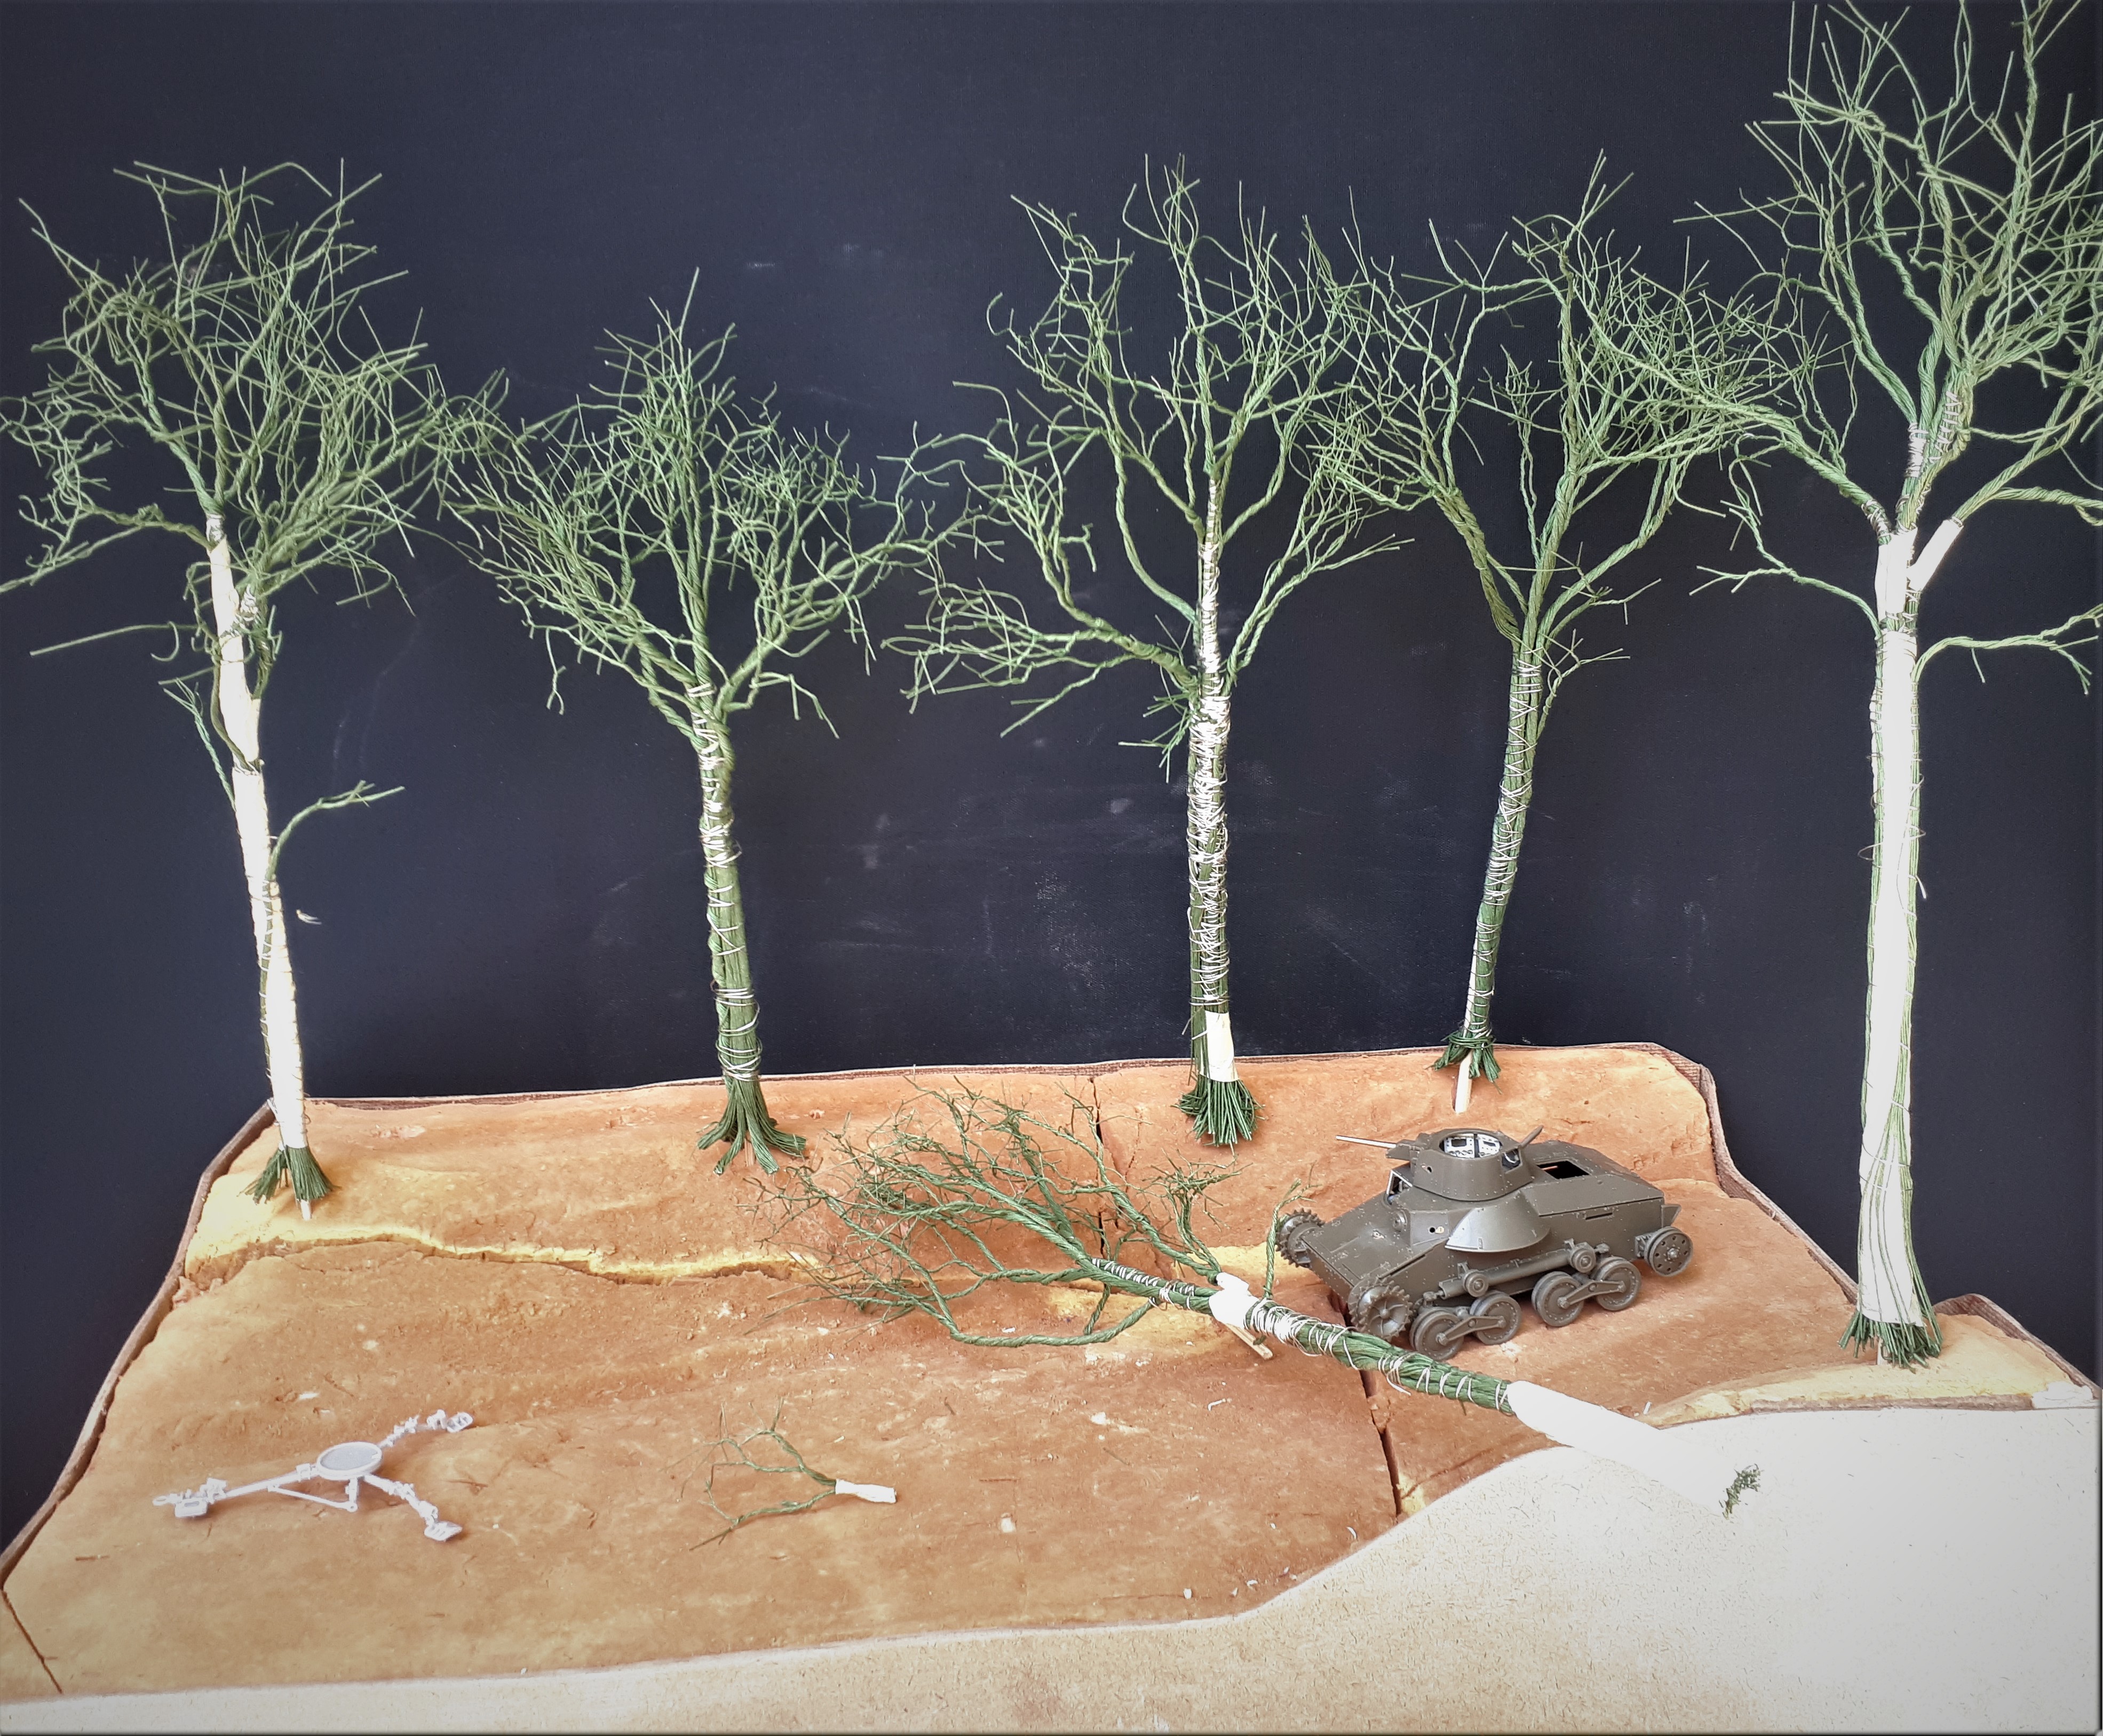


I then coated the trees with PVA glue. Here, however, I made a schoolboy error. For some inexplicable reason I decided to hang them upside down whilst waiting for them to dry. I guess I was thinking that the glue would run towards the tips of the branches and help to create a graceful point. It didn't and instead formed some ugly lumps. However, I am confident that this will all be hidden when it comes time to add the foliage.

The next stage is messy - and fun. Basically you make a mixture of PVA and plaster powder (I used a ceiling product called Artex recommended by Gordon) and add some colour (I used acrylic brown paint) and then 'paint' it onto the trees. After a few coats were applied and left to dry, I sanded them down to try and make them as round and smooth as possible.
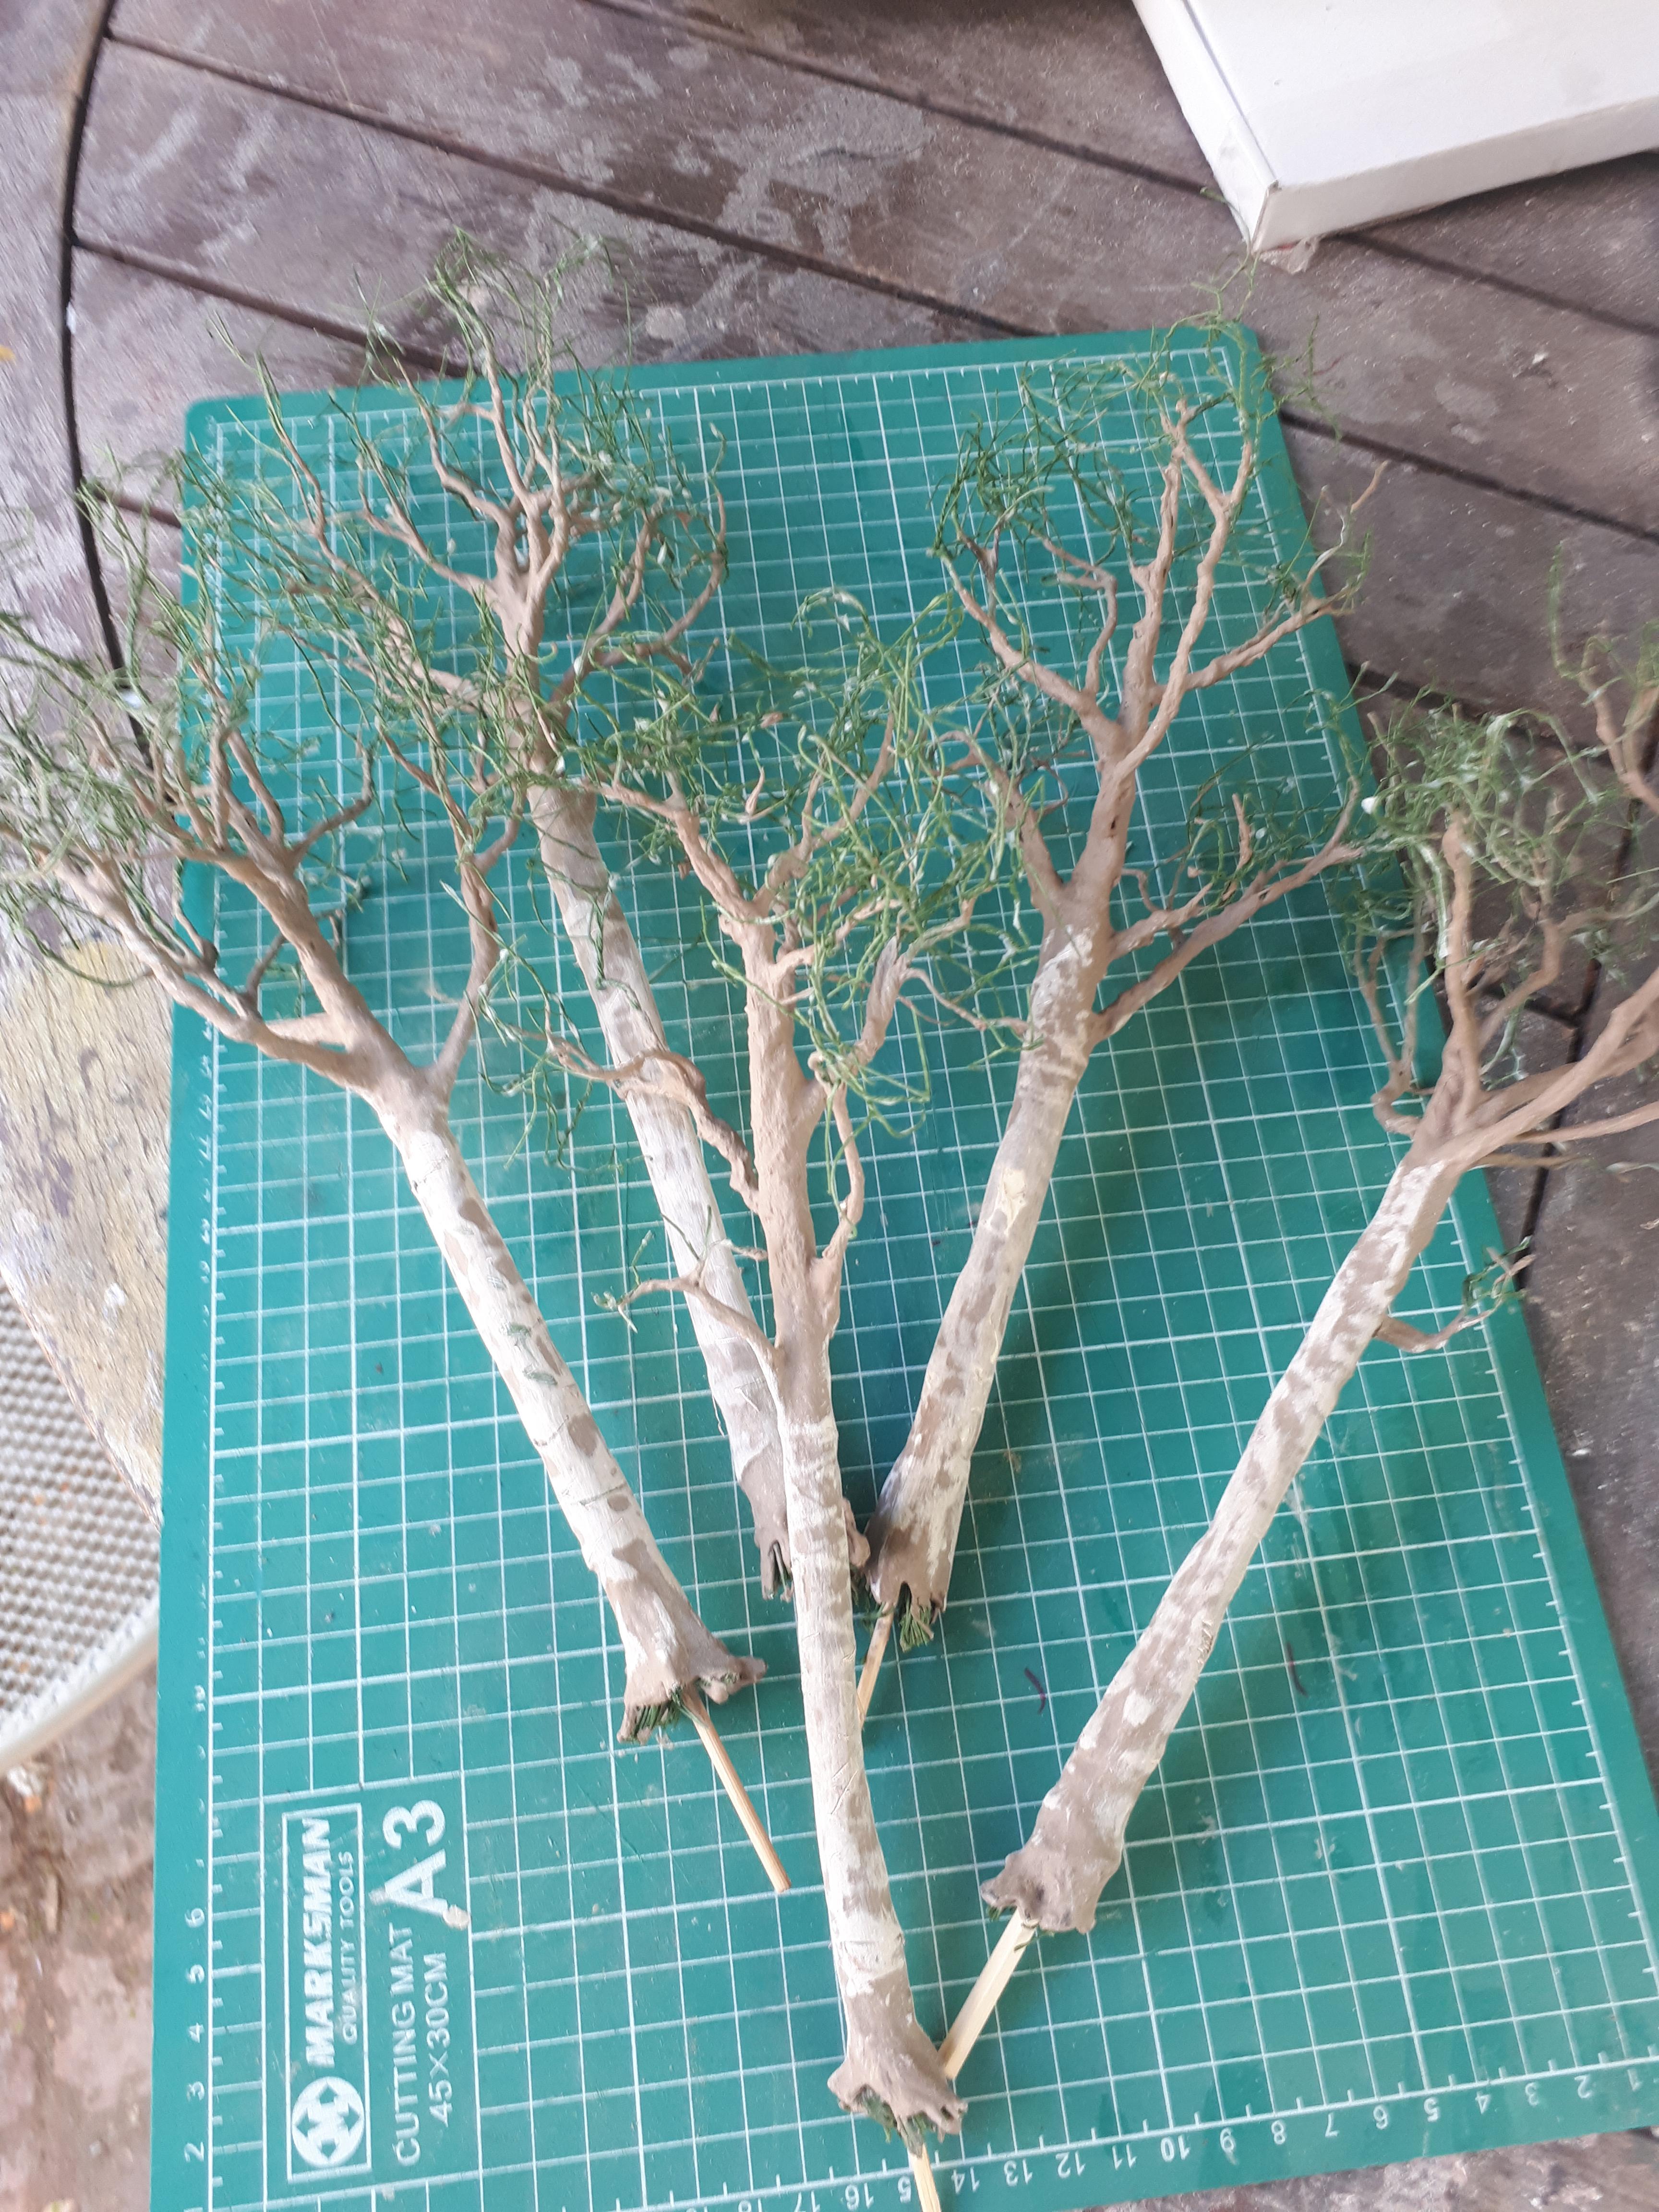


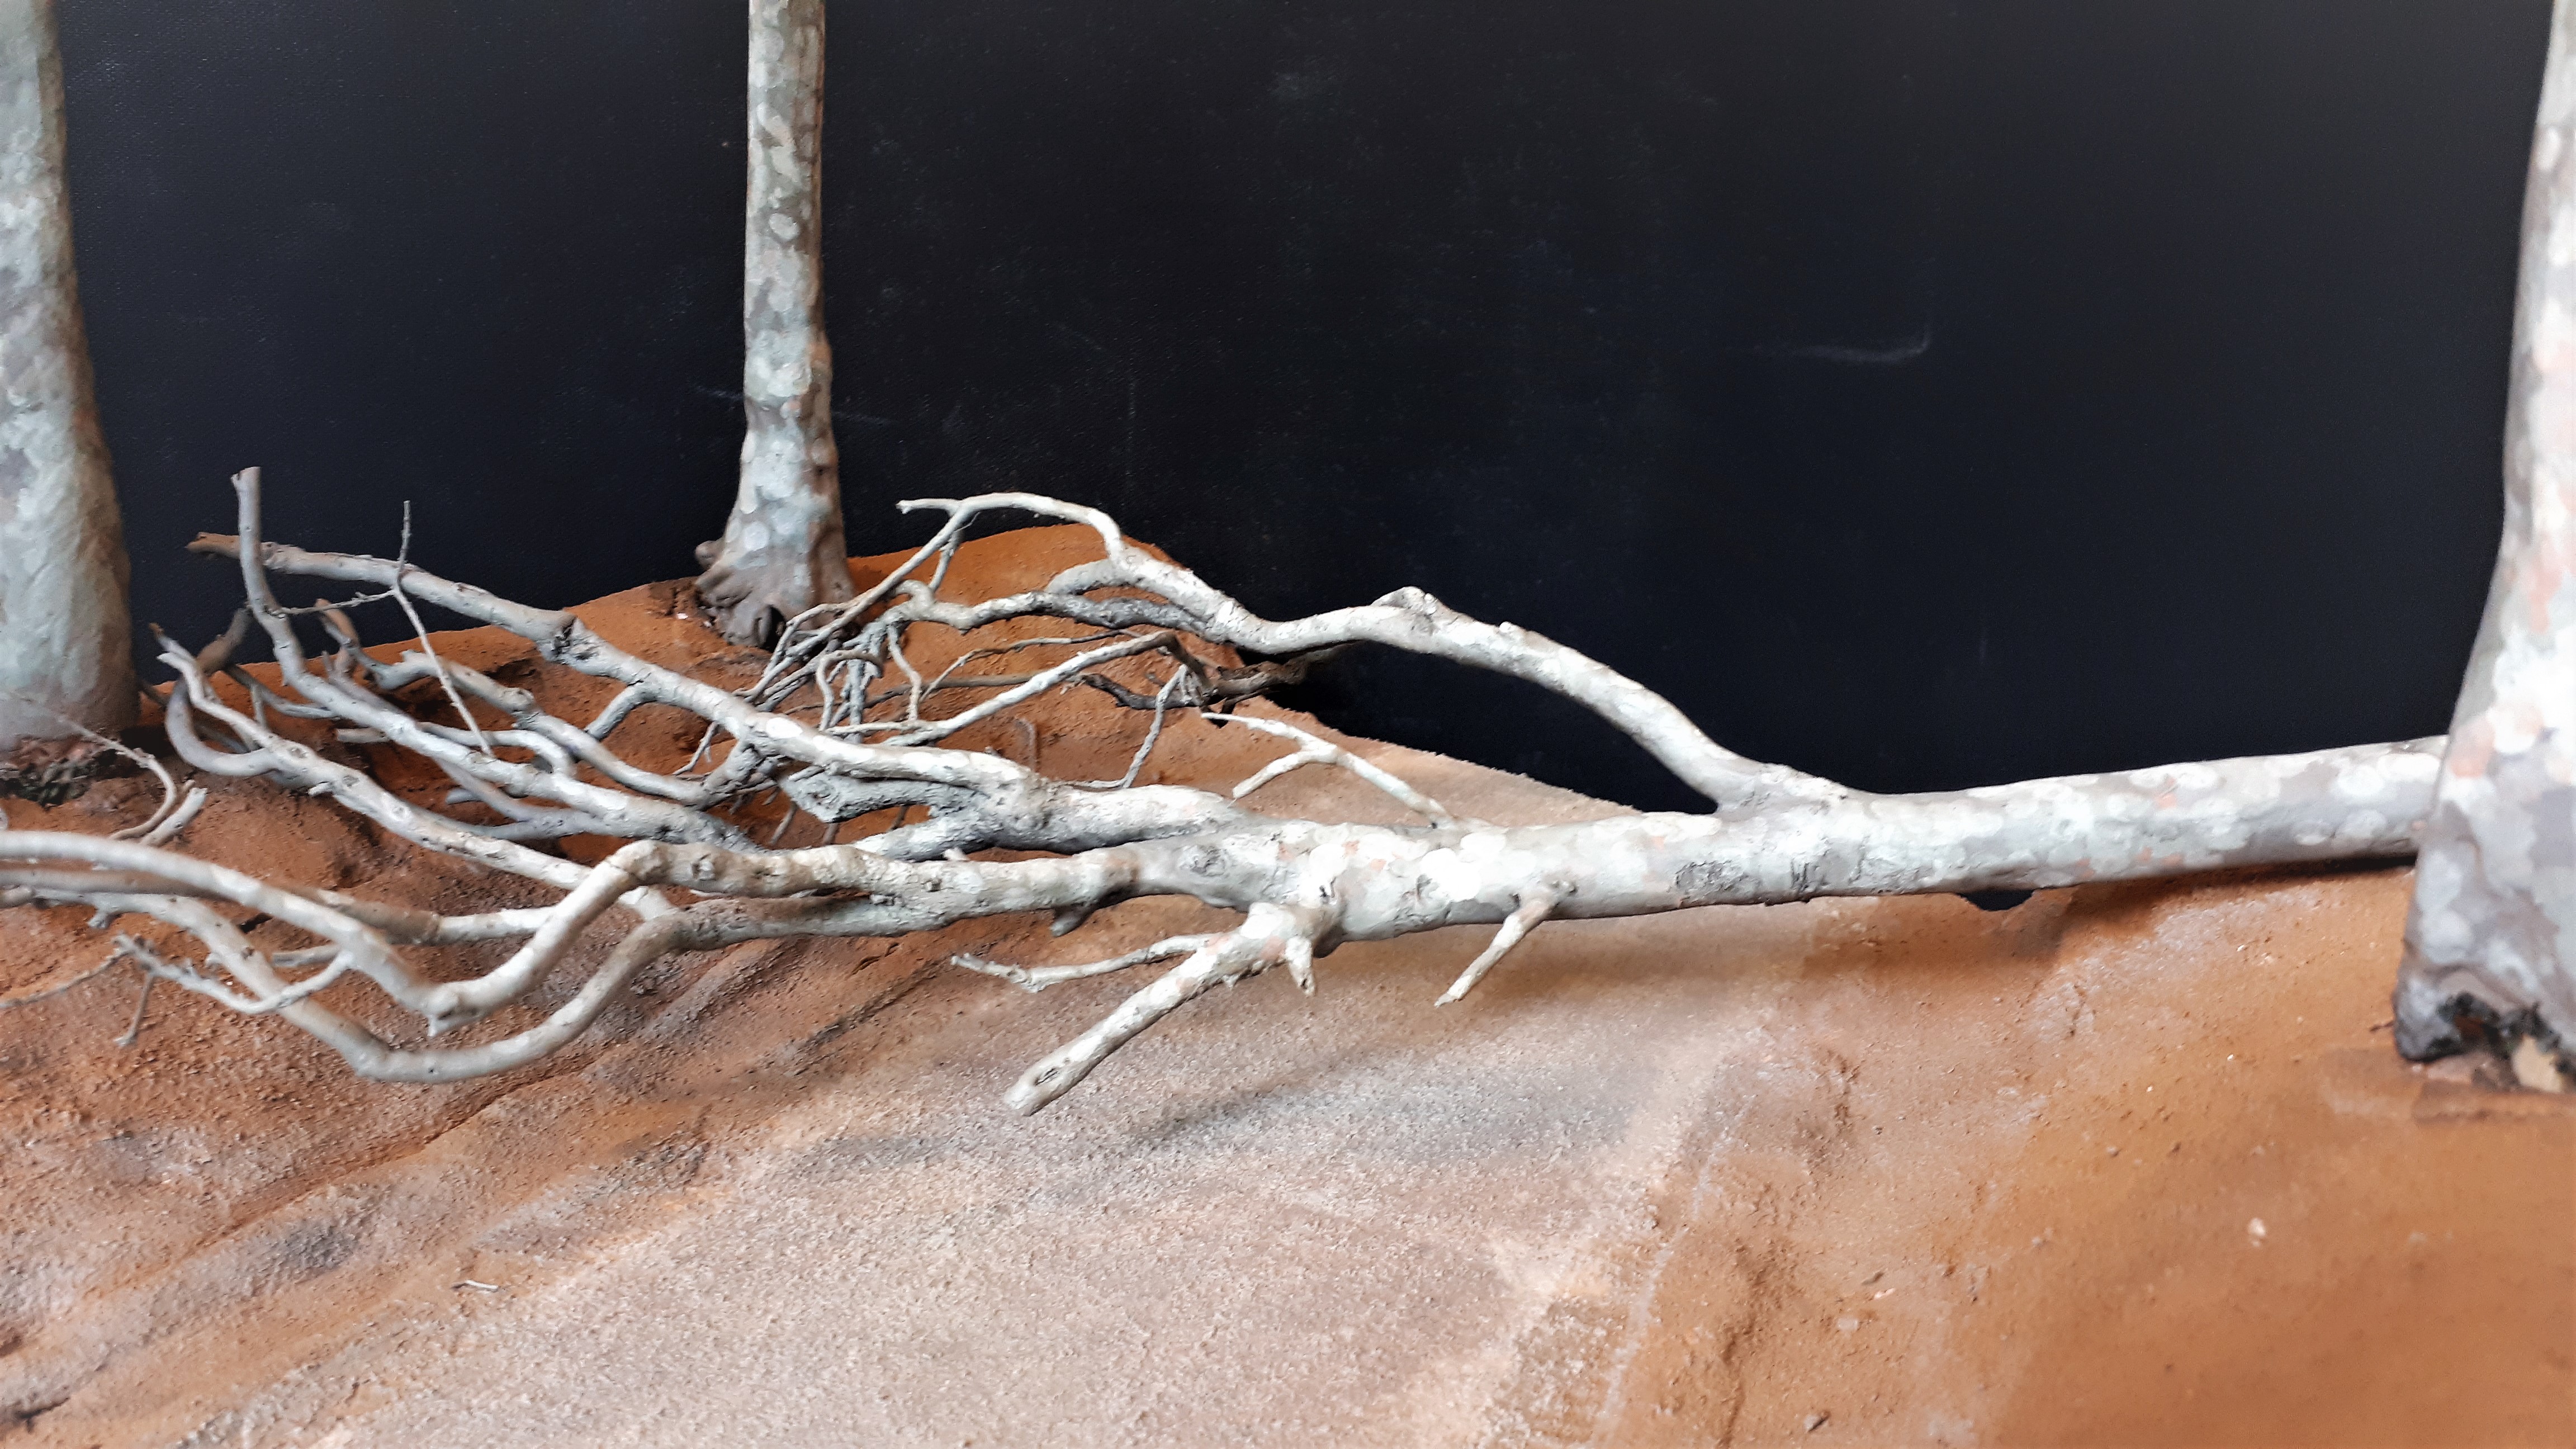
Initially I started making the fallen tree (which should be behind, not in front of, the Ha-Go, unlike my earlier shots) using the same method, but I felt that it just didn't look right. So in the end that tree ended up joining the others at the back of the diorama and I constructed another using real dried heather branches, a wooden dowel and some masking tape. It has yet to be covered with the PVA / ARtex mix, however.

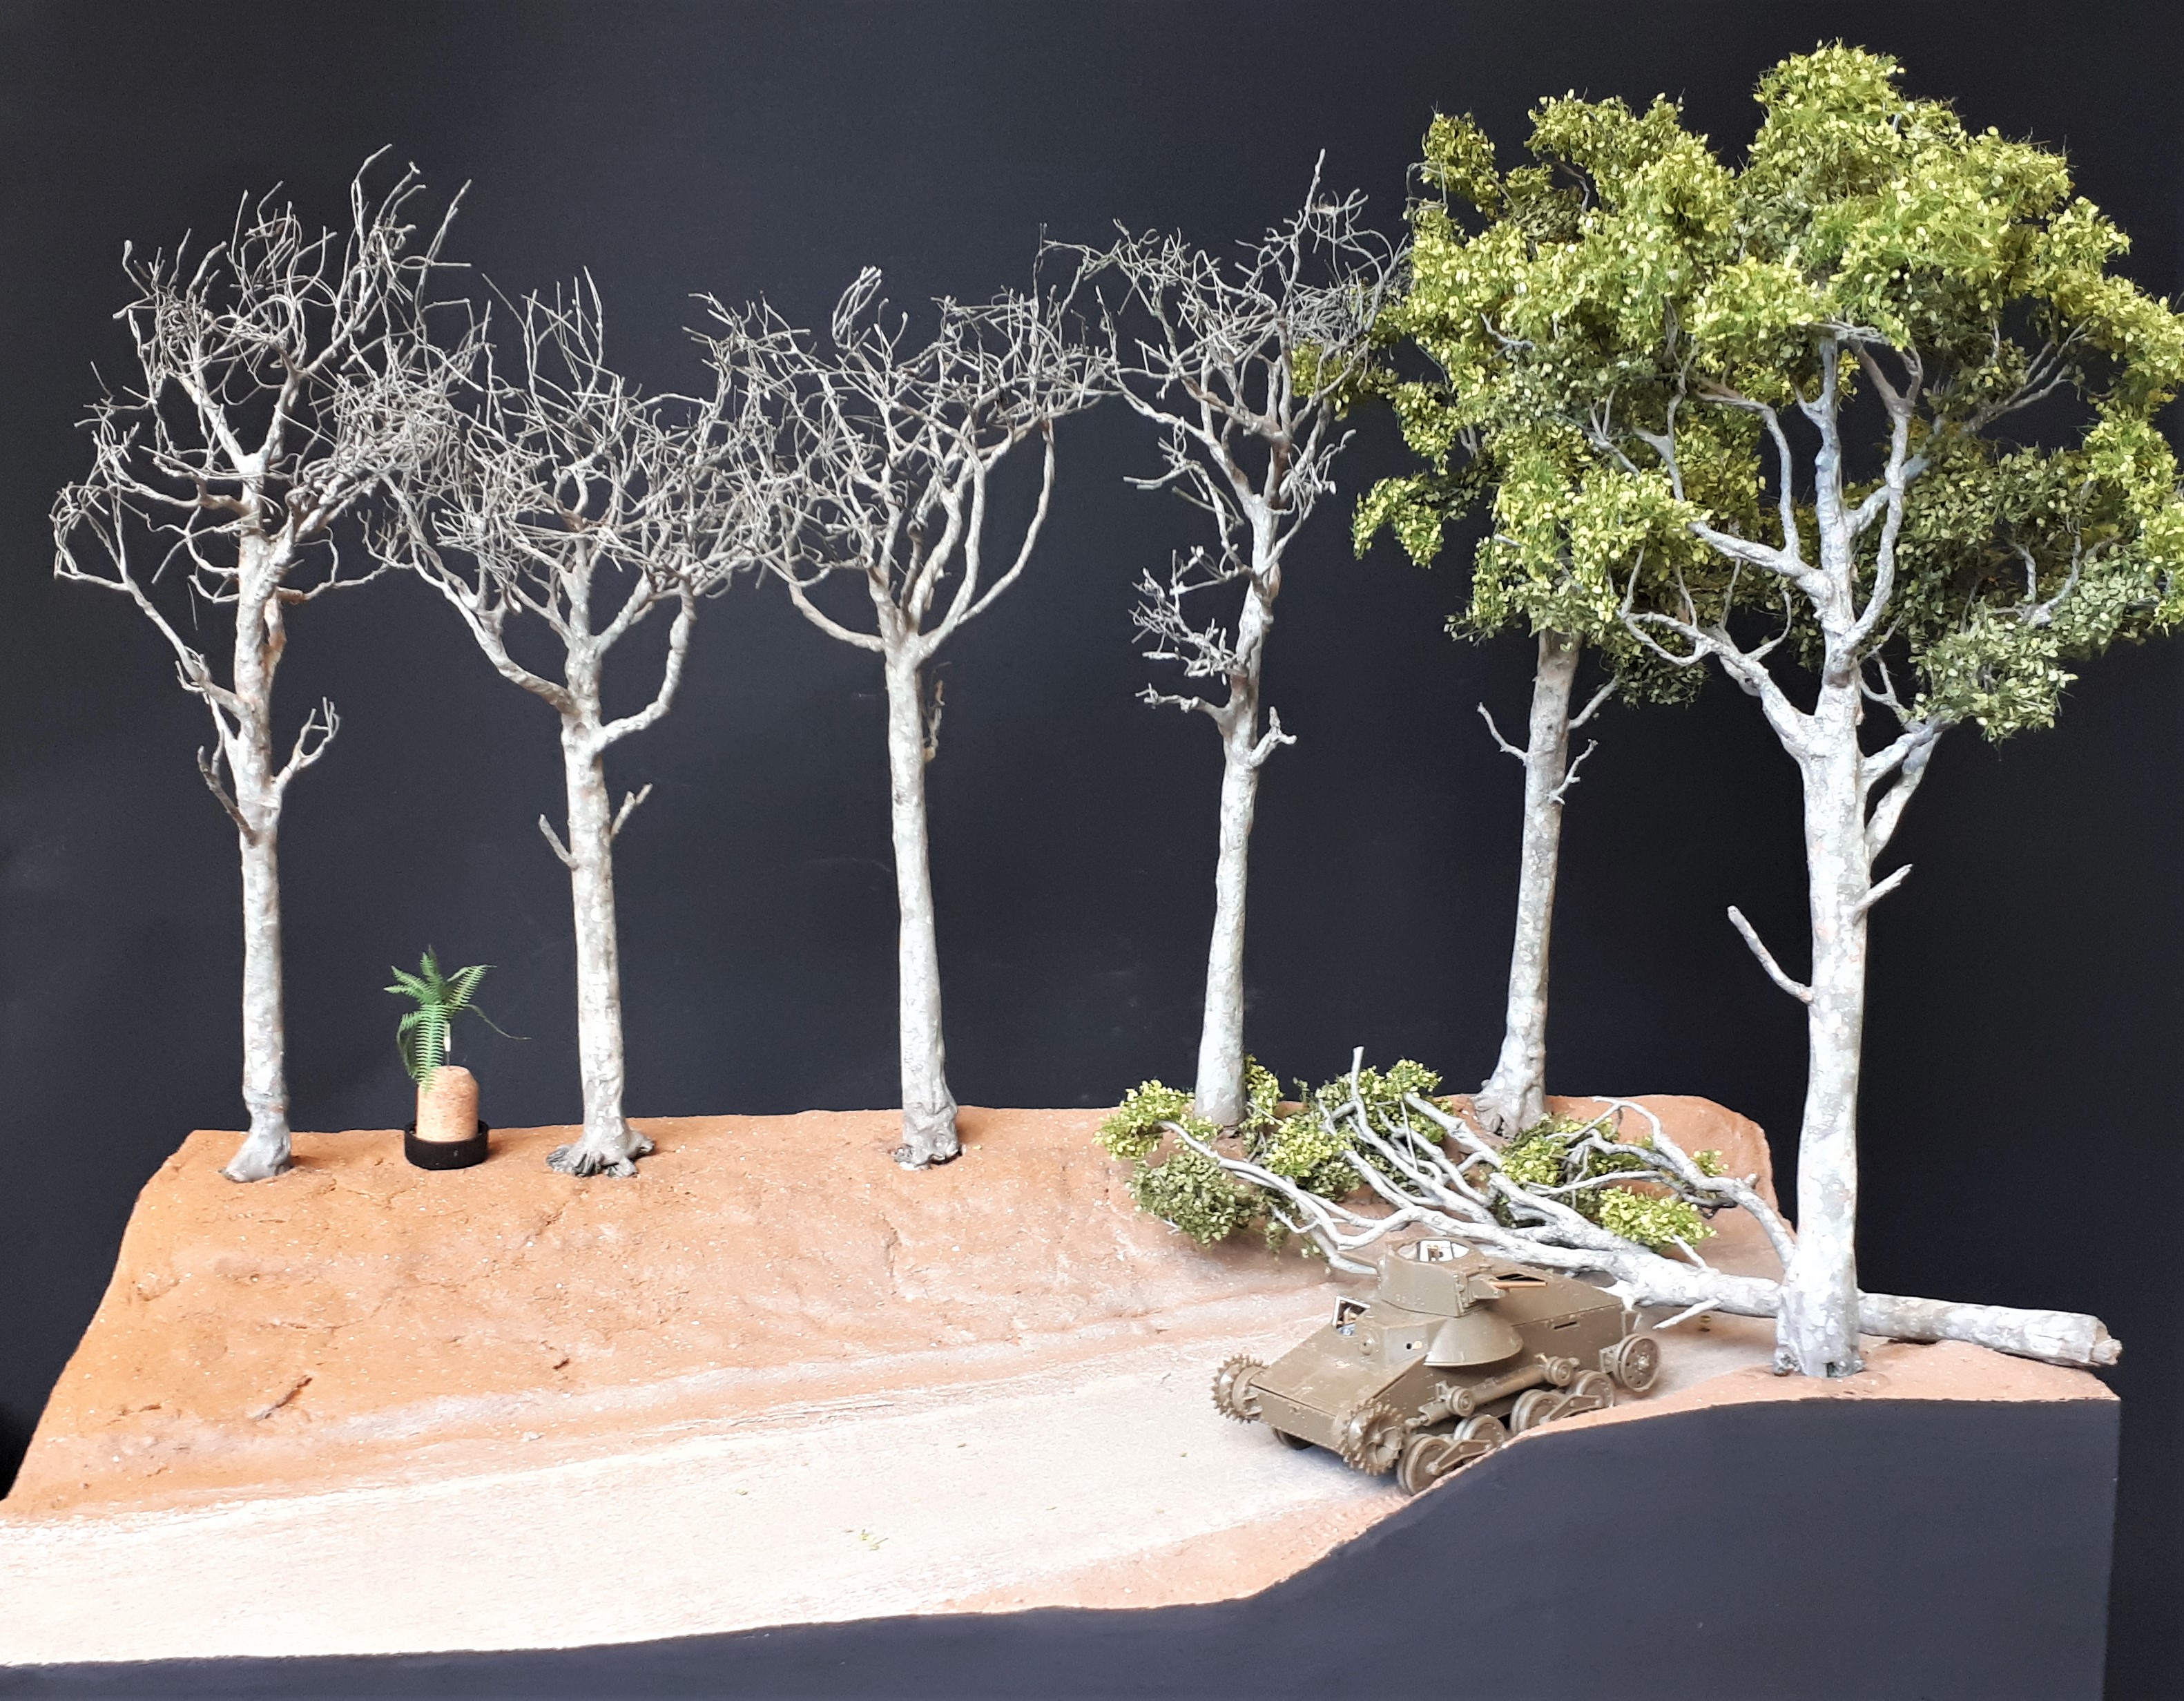
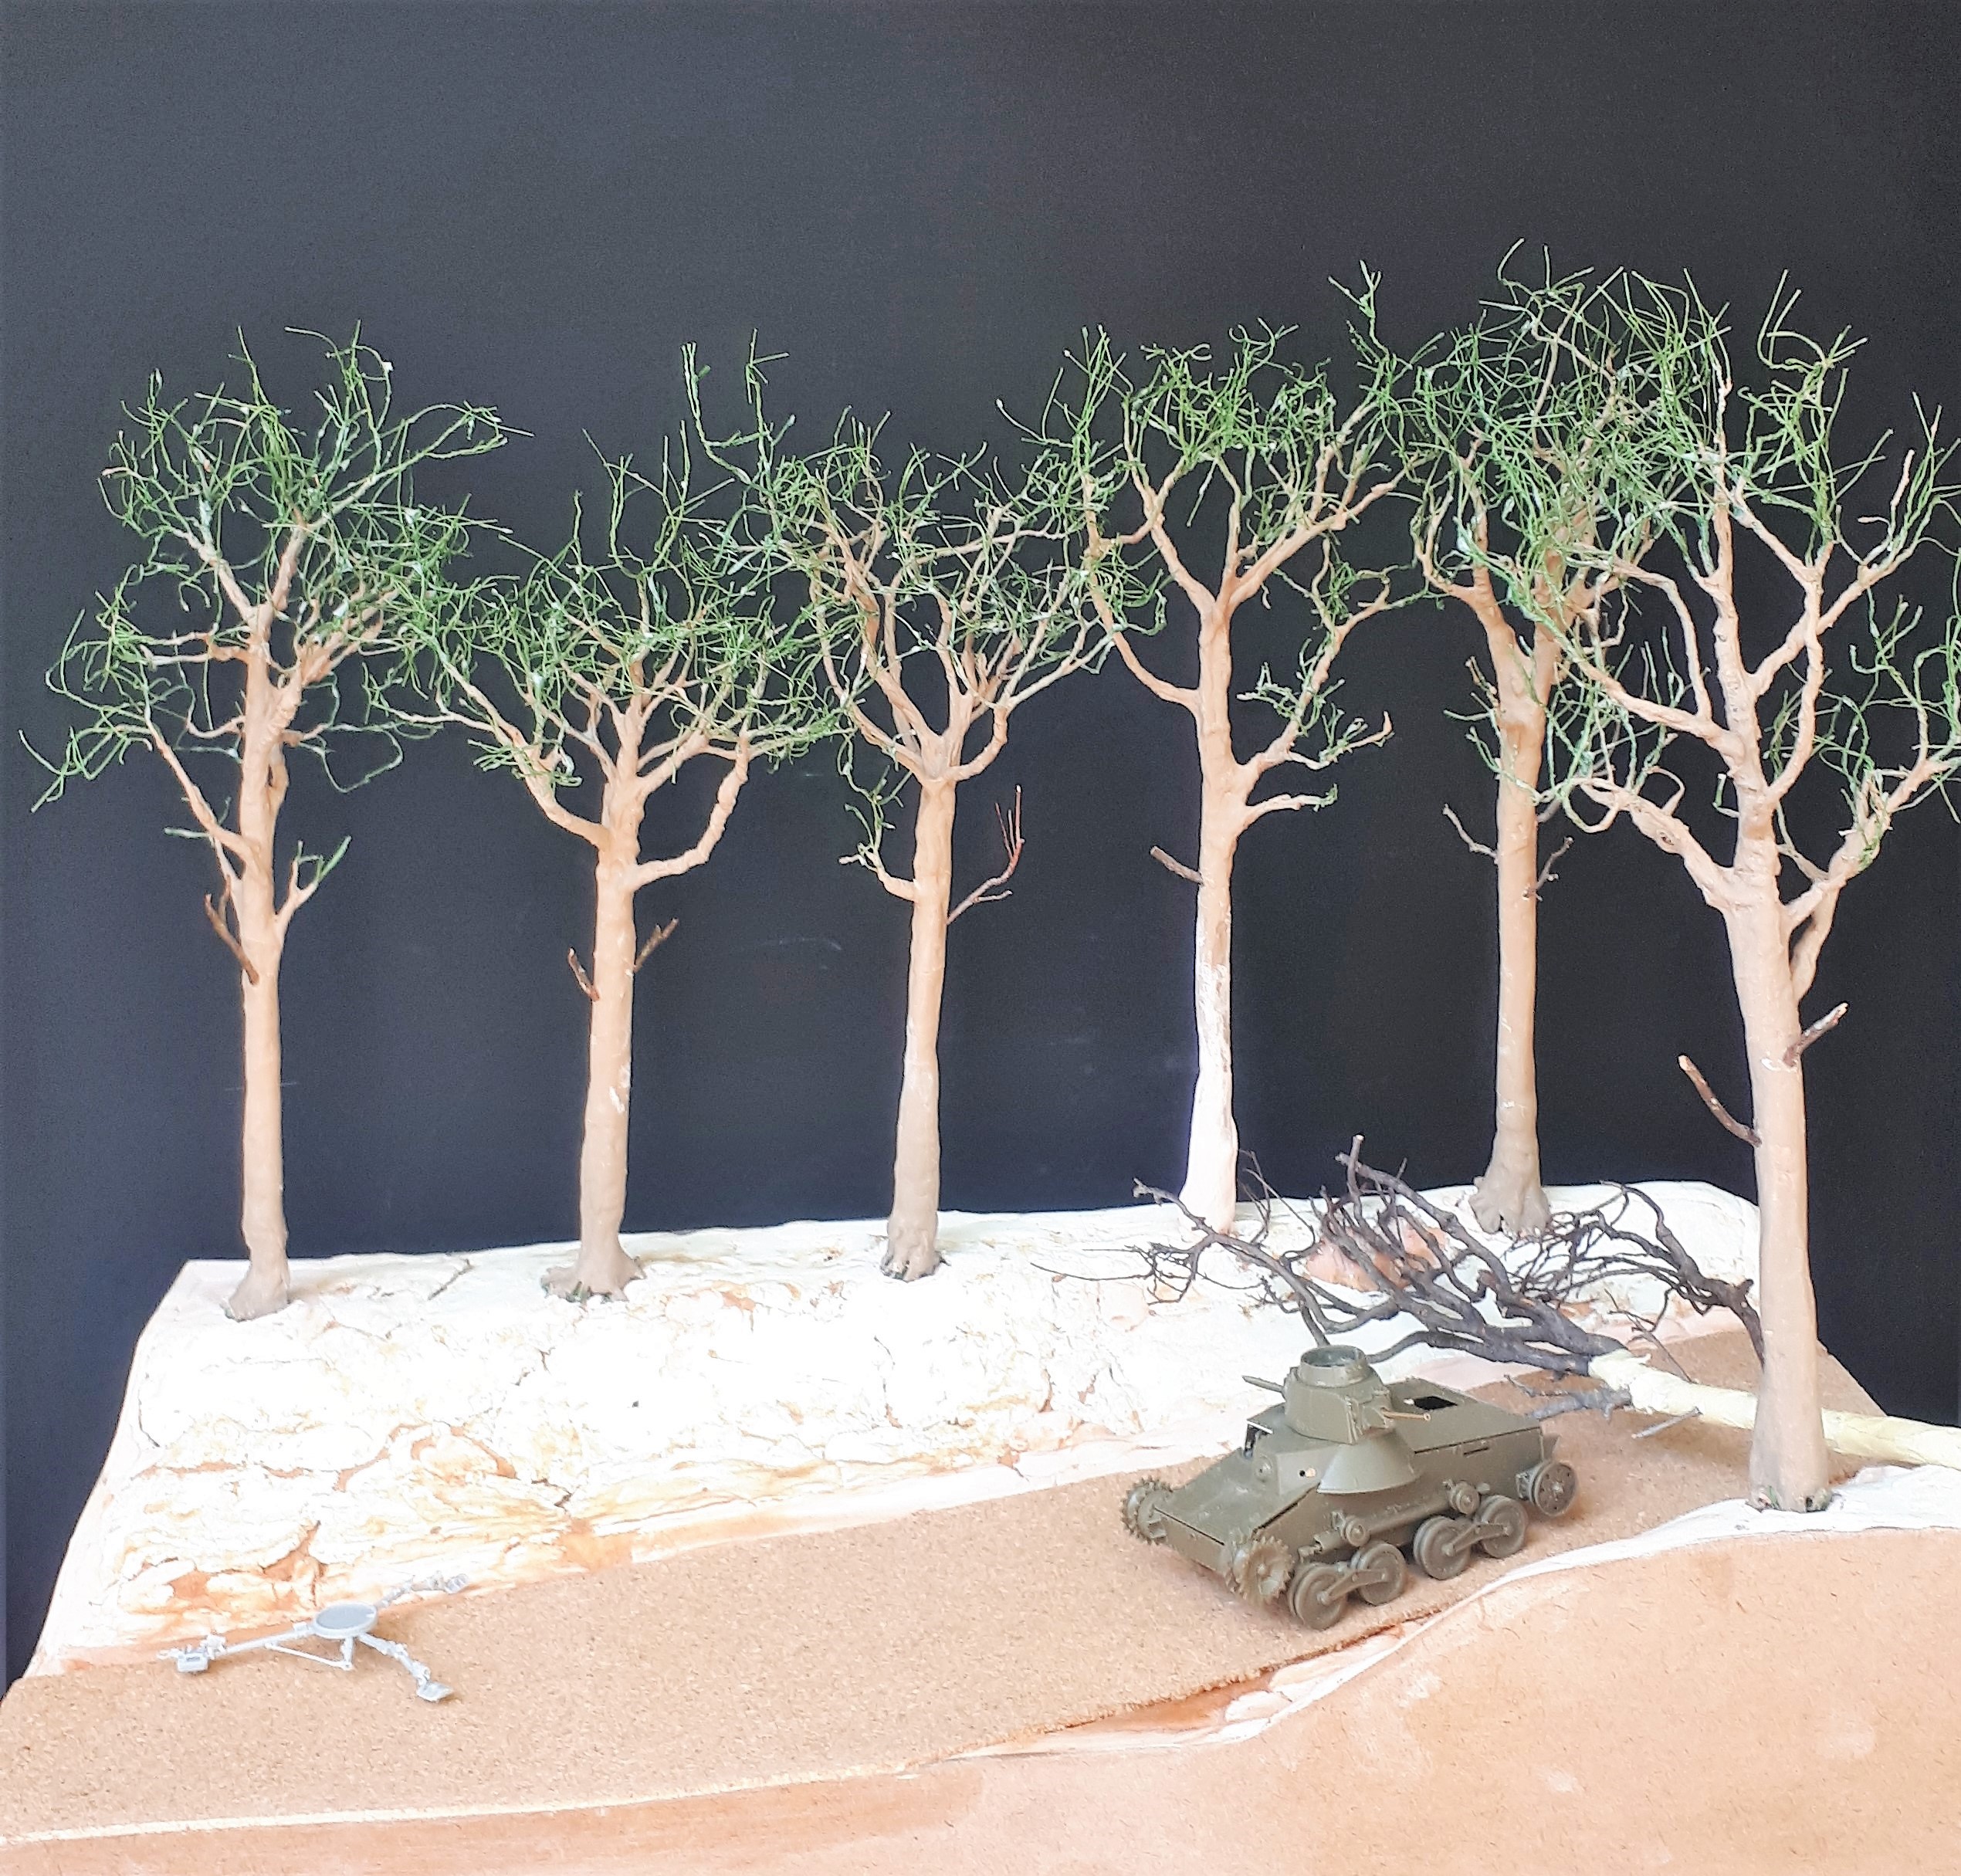
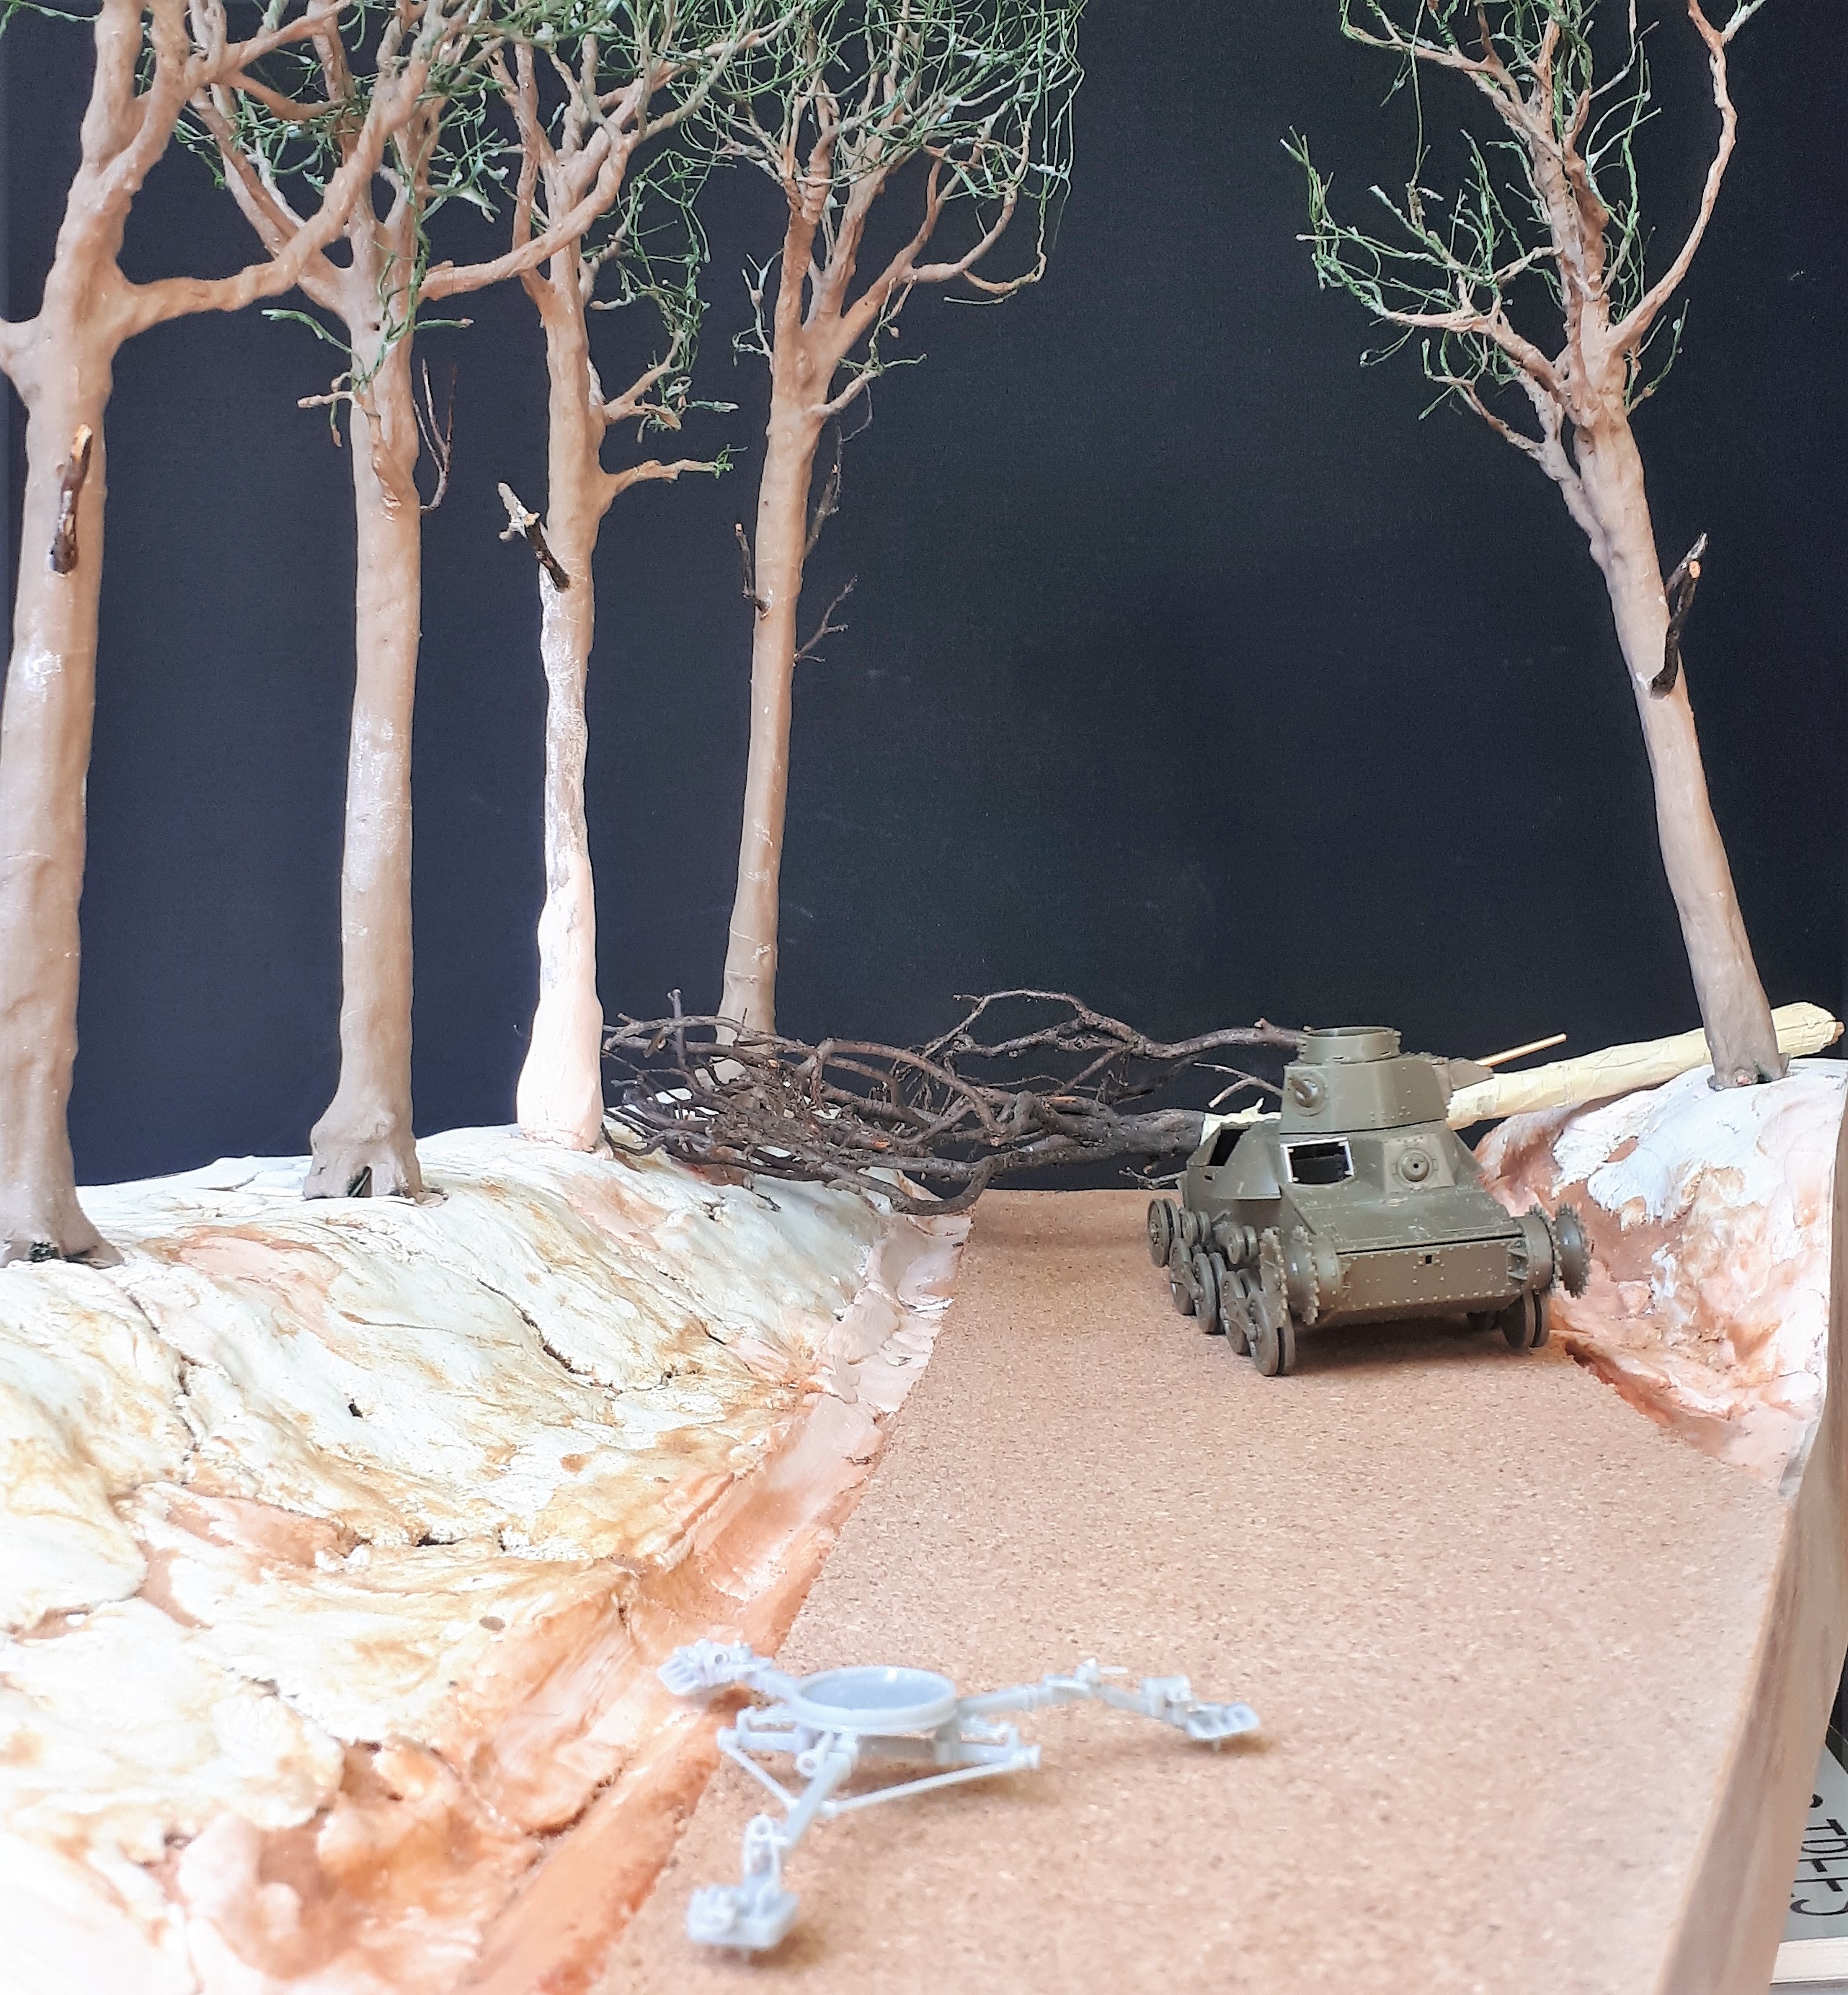
So finally here some shots of the diorama with all the trees assembled, but yet to be painted. I have some foliage on its way. The road, buy the way, has only been started by gluing a thin cork mat into place.


Golikell
Visit this Community
Noord-Holland, Netherlands
Joined: October 25, 2002
KitMaker: 1,757 posts
Armorama: 914 posts
Posted: Monday, June 01, 2020 - 06:43 AM UTC
Your diorama is really taking shape. I know there is much more than enough work left to be done, but the fundament is showing loud and clear, and I really do like it...
Dioramartin
Visit this Community
New South Wales, Australia
Joined: May 04, 2016
KitMaker: 1,476 posts
Armorama: 1,463 posts
Posted: Monday, June 01, 2020 - 12:30 PM UTC
Those trees are looking extremely promising going by the penultimate photo – are you going to use a painted backdrop or photo for trees further away? This is almost exactly how I’ve been imagining I’ll tackle the trees in my dio so I’m taking detailed notes. Ah the perils and pitfalls of the diabolical English language, we all know what you mean Erwin but without “-als” on the end of that F-word you used, it has a very different and hilarious meaning
Golikell
Visit this Community
Noord-Holland, Netherlands
Joined: October 25, 2002
KitMaker: 1,757 posts
Armorama: 914 posts
Posted: Monday, June 01, 2020 - 07:14 PM UTC
Eh, I thought fundamentals meant basics. While what I ment to say the lower portion (usually hidden in the ground) of a building??? Which ofcourse is foundation... Oh well, if I can make you laugh, my day is good
TanksForTheMemory
Visit this Community
England - South East, United Kingdom
Joined: August 31, 2016
KitMaker: 154 posts
Armorama: 152 posts
Posted: Monday, June 01, 2020 - 10:34 PM UTC

Quoted Text

Those trees are looking extremely promising going by the penultimate photo – are you going to use a painted backdrop or photo for trees further away? This is almost exactly how I’ve been imagining I’ll tackle the trees in my dio so I’m taking detailed notes. Ah the perils and pitfalls of the diabolical English language, we all know what you mean Erwin but without “-als” on the end of that F-word you used, it has a very different and hilarious meaning


Thanks Tim. I will have to see what I can do for a backdrop when I photograph the finished dio. That is the challenge with this one - usually you want to hint at events beyond the base, but here it's all about the road and the forest. I'm hoping that the fallen tree will help to break up the background somewhat. Also you will have noticed that I have introduced a little forced perspective into the scene anyway.
TanksForTheMemory
Visit this Community
England - South East, United Kingdom
Joined: August 31, 2016
KitMaker: 154 posts
Armorama: 152 posts
Posted: Monday, June 01, 2020 - 10:35 PM UTC

Quoted Text

Eh, I thought fundamentals meant basics. While what I ment to say the lower portion (usually hidden in the ground) of a building??? Which ofcourse is foundation... Oh well, if I can make you laugh, my day is good


Thanks for the kind words and the laugh Erwin. If it helps my knowledge of Dutch is precisely nil...
Golikell
Visit this Community
Noord-Holland, Netherlands
Joined: October 25, 2002
KitMaker: 1,757 posts
Armorama: 914 posts
Posted: Monday, June 01, 2020 - 10:54 PM UTC
My pleasure... So strange that so few people speak any Dutch at all...
I think the fallen tree looks very good, and does not too different from the upright ones...
Dioramartin
Visit this Community
New South Wales, Australia
Joined: May 04, 2016
KitMaker: 1,476 posts
Armorama: 1,463 posts
Posted: Tuesday, June 02, 2020 - 01:29 AM UTC
Ah the old forced perspective ploy, as you say that should help somewhat down the road – in the first images on page 1 the trees are kinda set back with masses of ferns lining the roadsides but I guess you could just pile high loads of them to fill between the trees to good effect. Looking forward to seeing what foliage is coming…hopefully not by sea

(My apologies Erwin you were perfectly correct, the first meaning of fundament is indeed the foundation of something but the second jocular meaning (and I’ve only ever heard it used thus) is to describe a person’s bottom…which in your sentence made me laugh. It’s why the grammatically incorrect (but less likely to cause laughter) “fundamentals” is usually used instead. I’m ashamed to admit I didn’t even know what bottom is in Dutch so what kind of achterste am I? )
Golikell
Visit this Community
Noord-Holland, Netherlands
Joined: October 25, 2002
KitMaker: 1,757 posts
Armorama: 914 posts
Posted: Tuesday, June 02, 2020 - 02:23 AM UTC

Quoted Text


(My apologies Erwin you were perfectly correct, the first meaning of fundament is indeed the foundation of something but the second jocular meaning (and I’ve only ever heard it used thus) is to describe a person’s bottom…which in your sentence made me laugh. It’s why the grammatically incorrect (but less likely to cause laughter) “fundamentals” is usually used instead. I’m ashamed to admit I didn’t even know what bottom is in Dutch so what kind of achterste am I? )


Well, sometimes, as a non-native speaker, one unknowingly uses words that are more known for it's colloquial meaning than for it's more official meaning...

As for the translation of bottom in Dutch: there are just as many meanings, some ruder, some less rude, as there are in English
TanksForTheMemory
Visit this Community
England - South East, United Kingdom
Joined: August 31, 2016
KitMaker: 154 posts
Armorama: 152 posts
Posted: Thursday, June 18, 2020 - 05:39 AM UTC
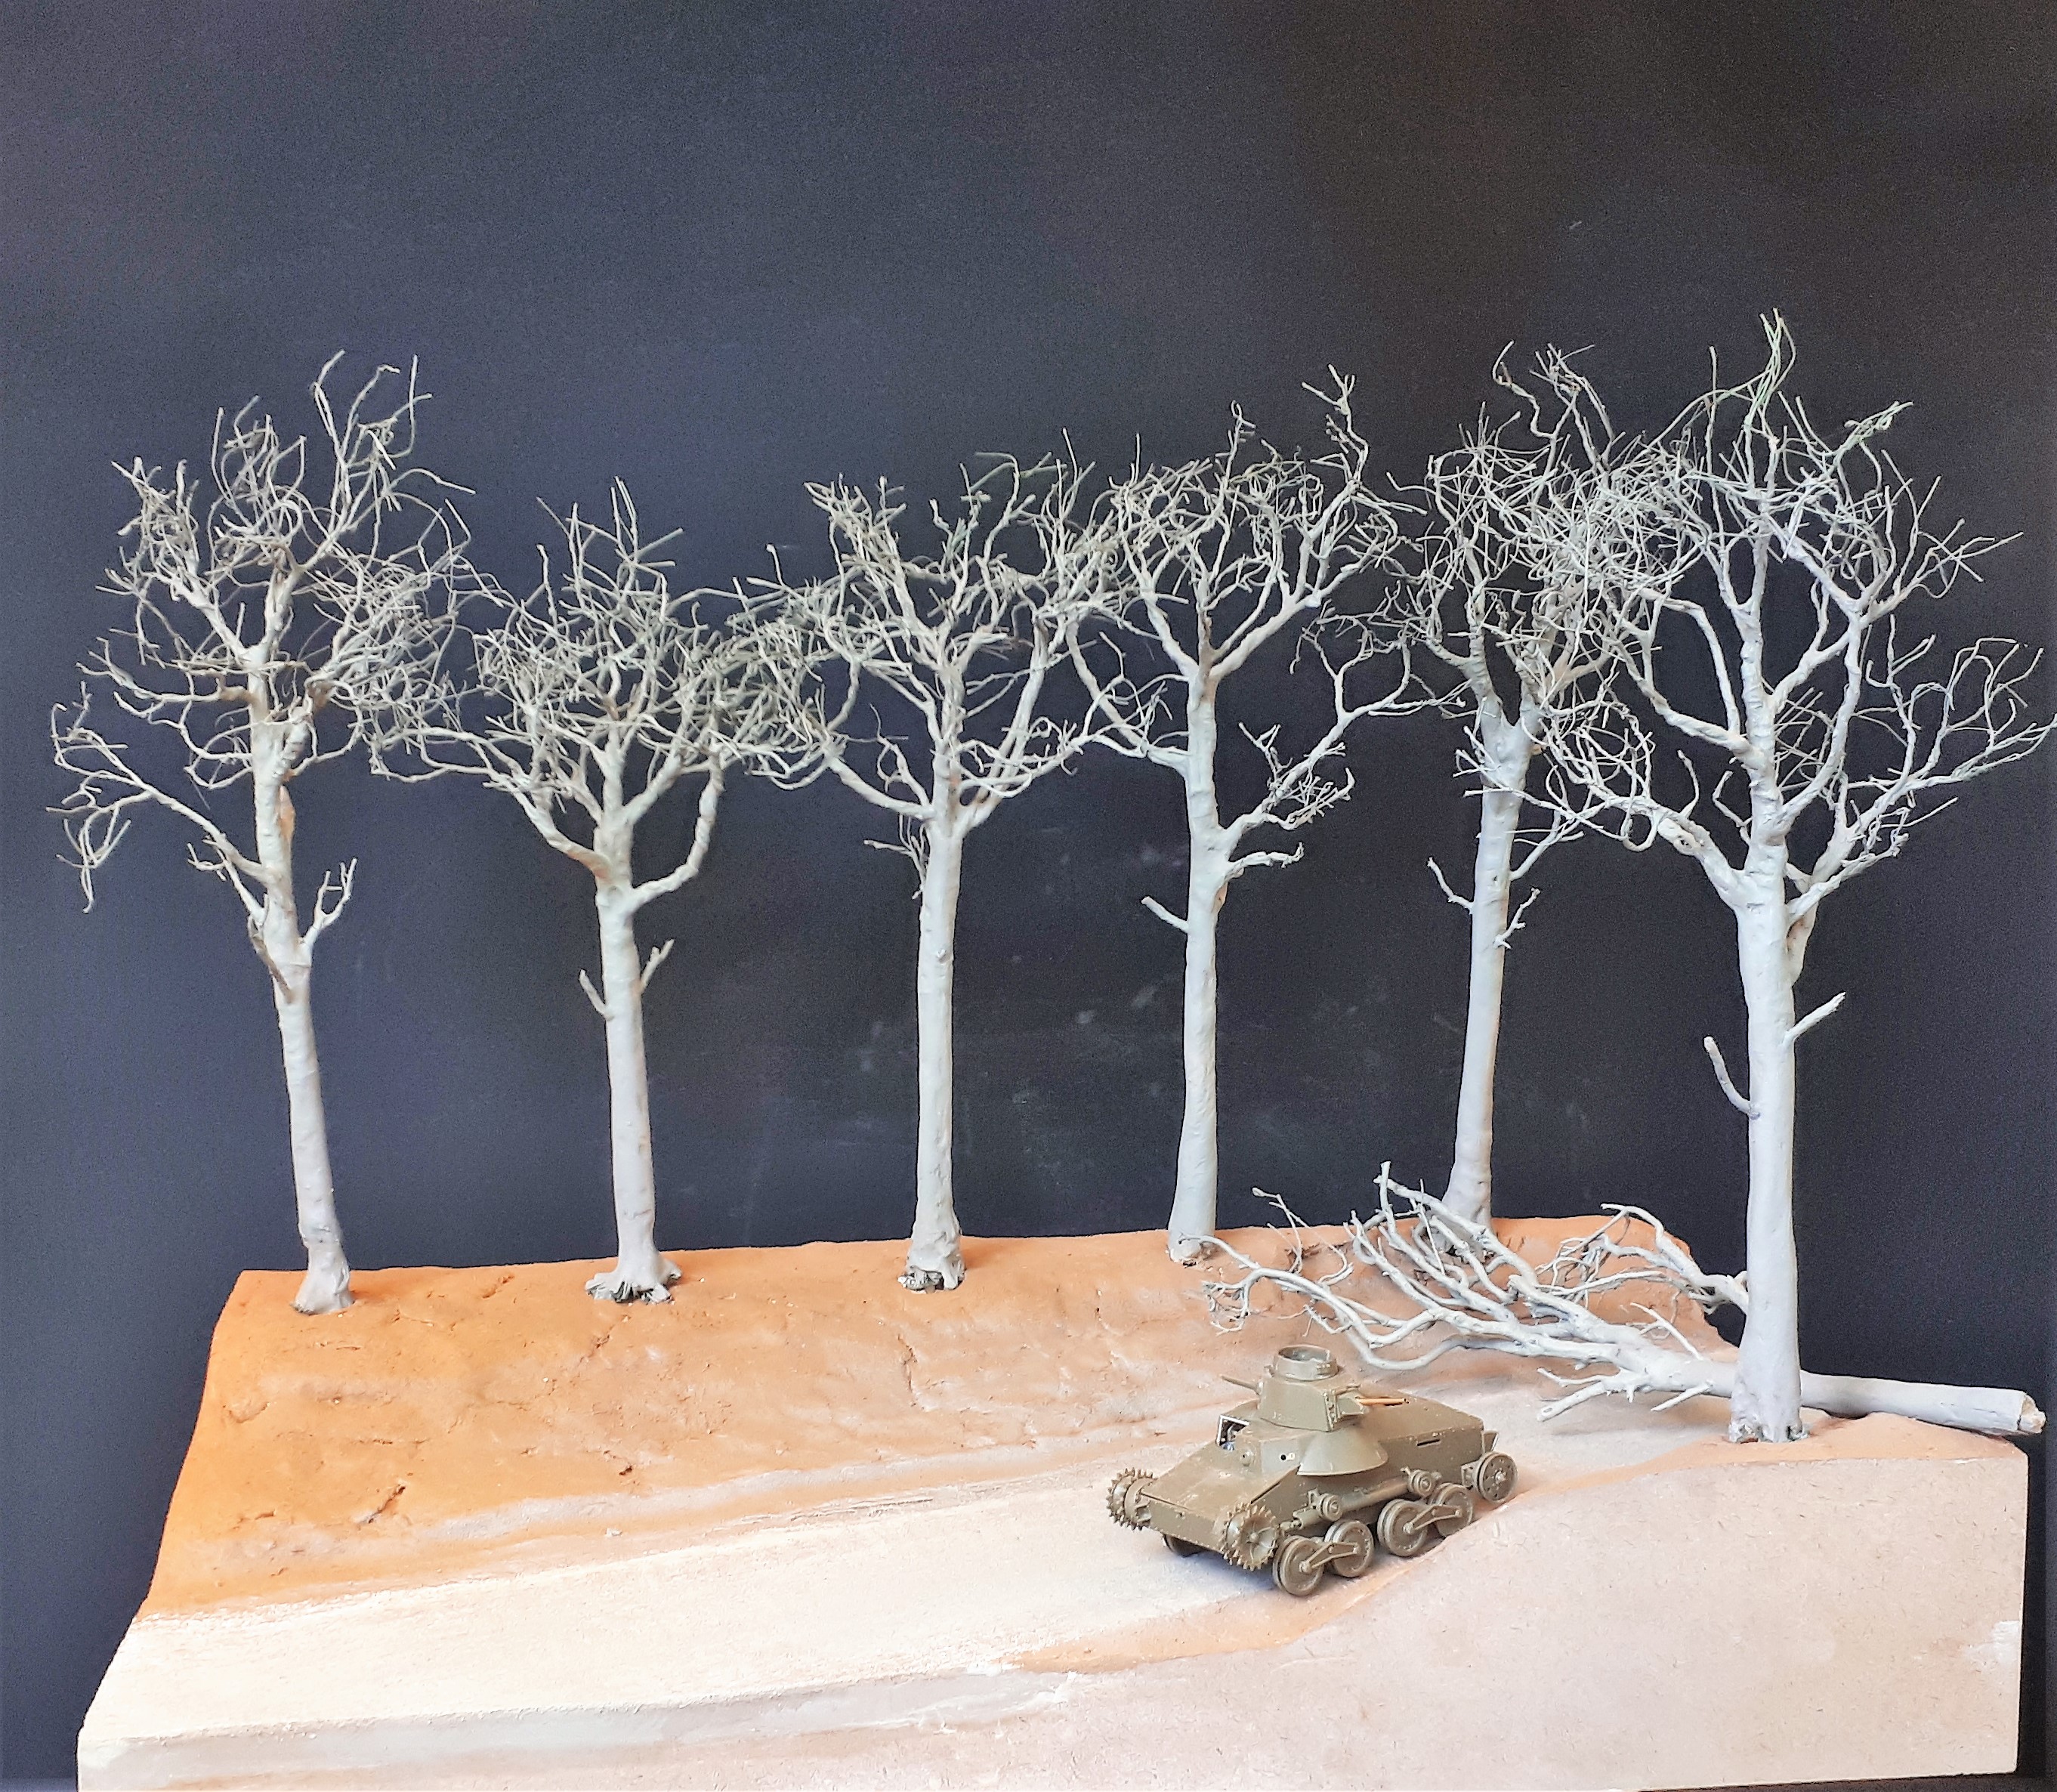
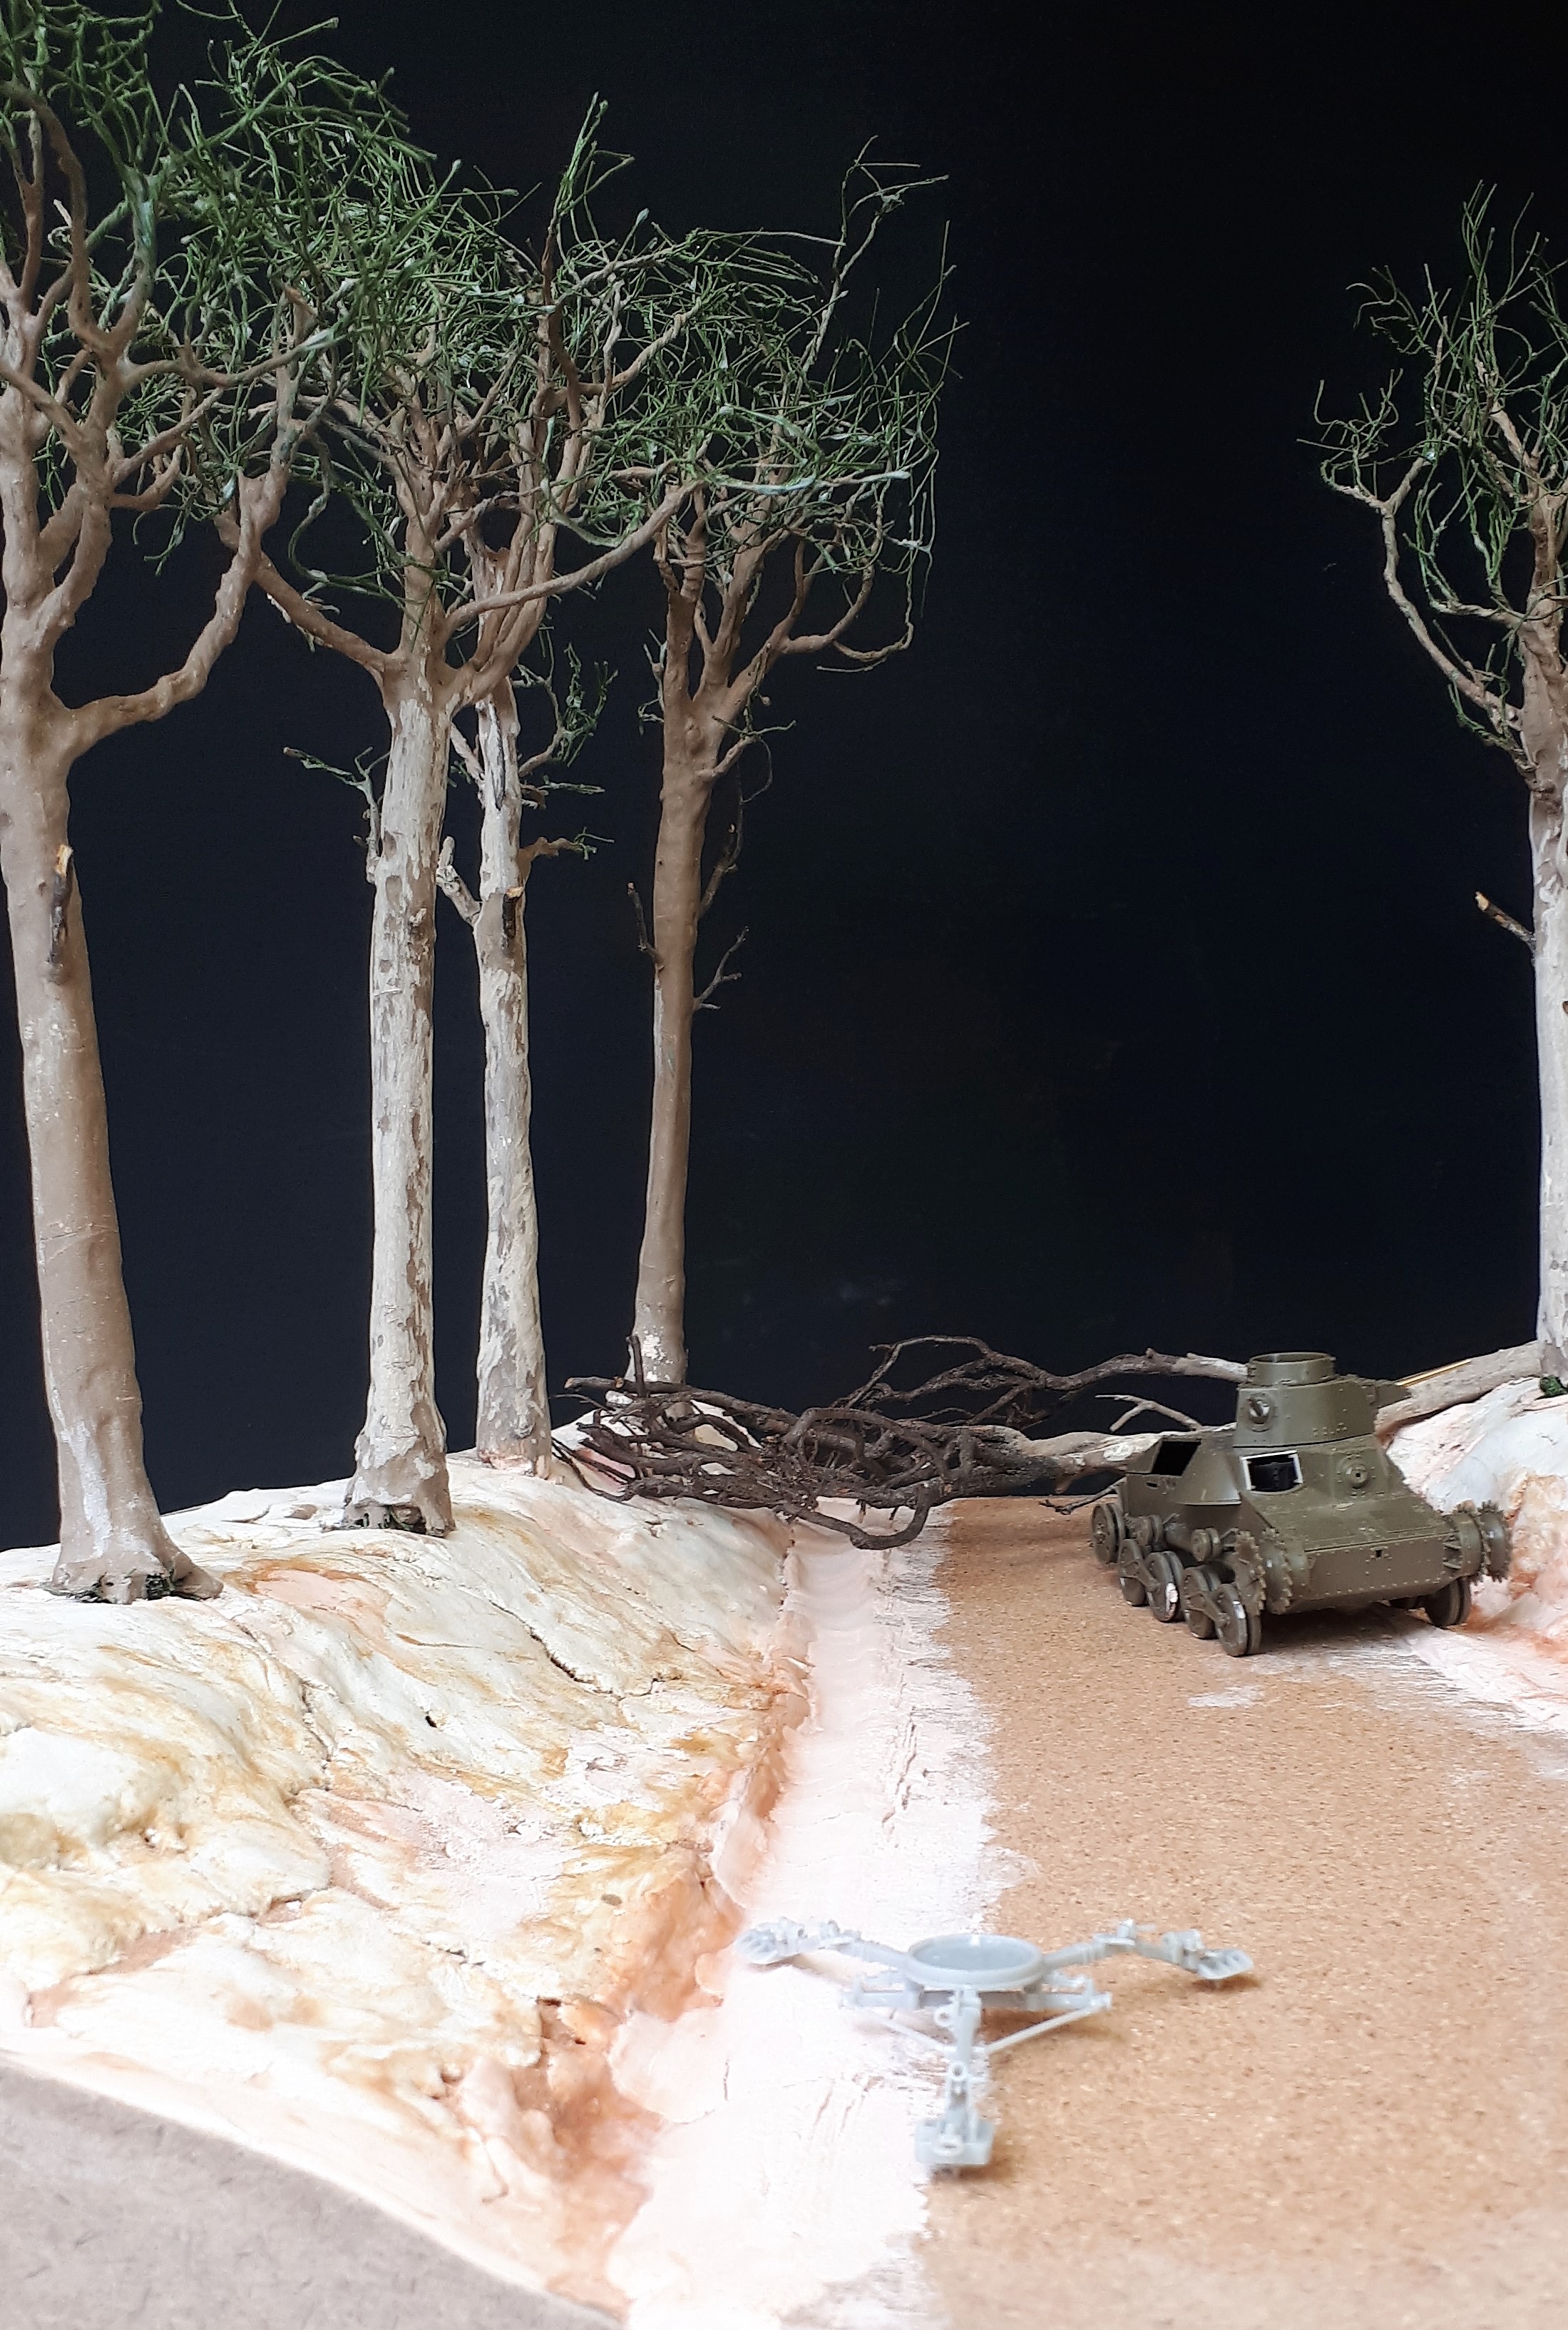
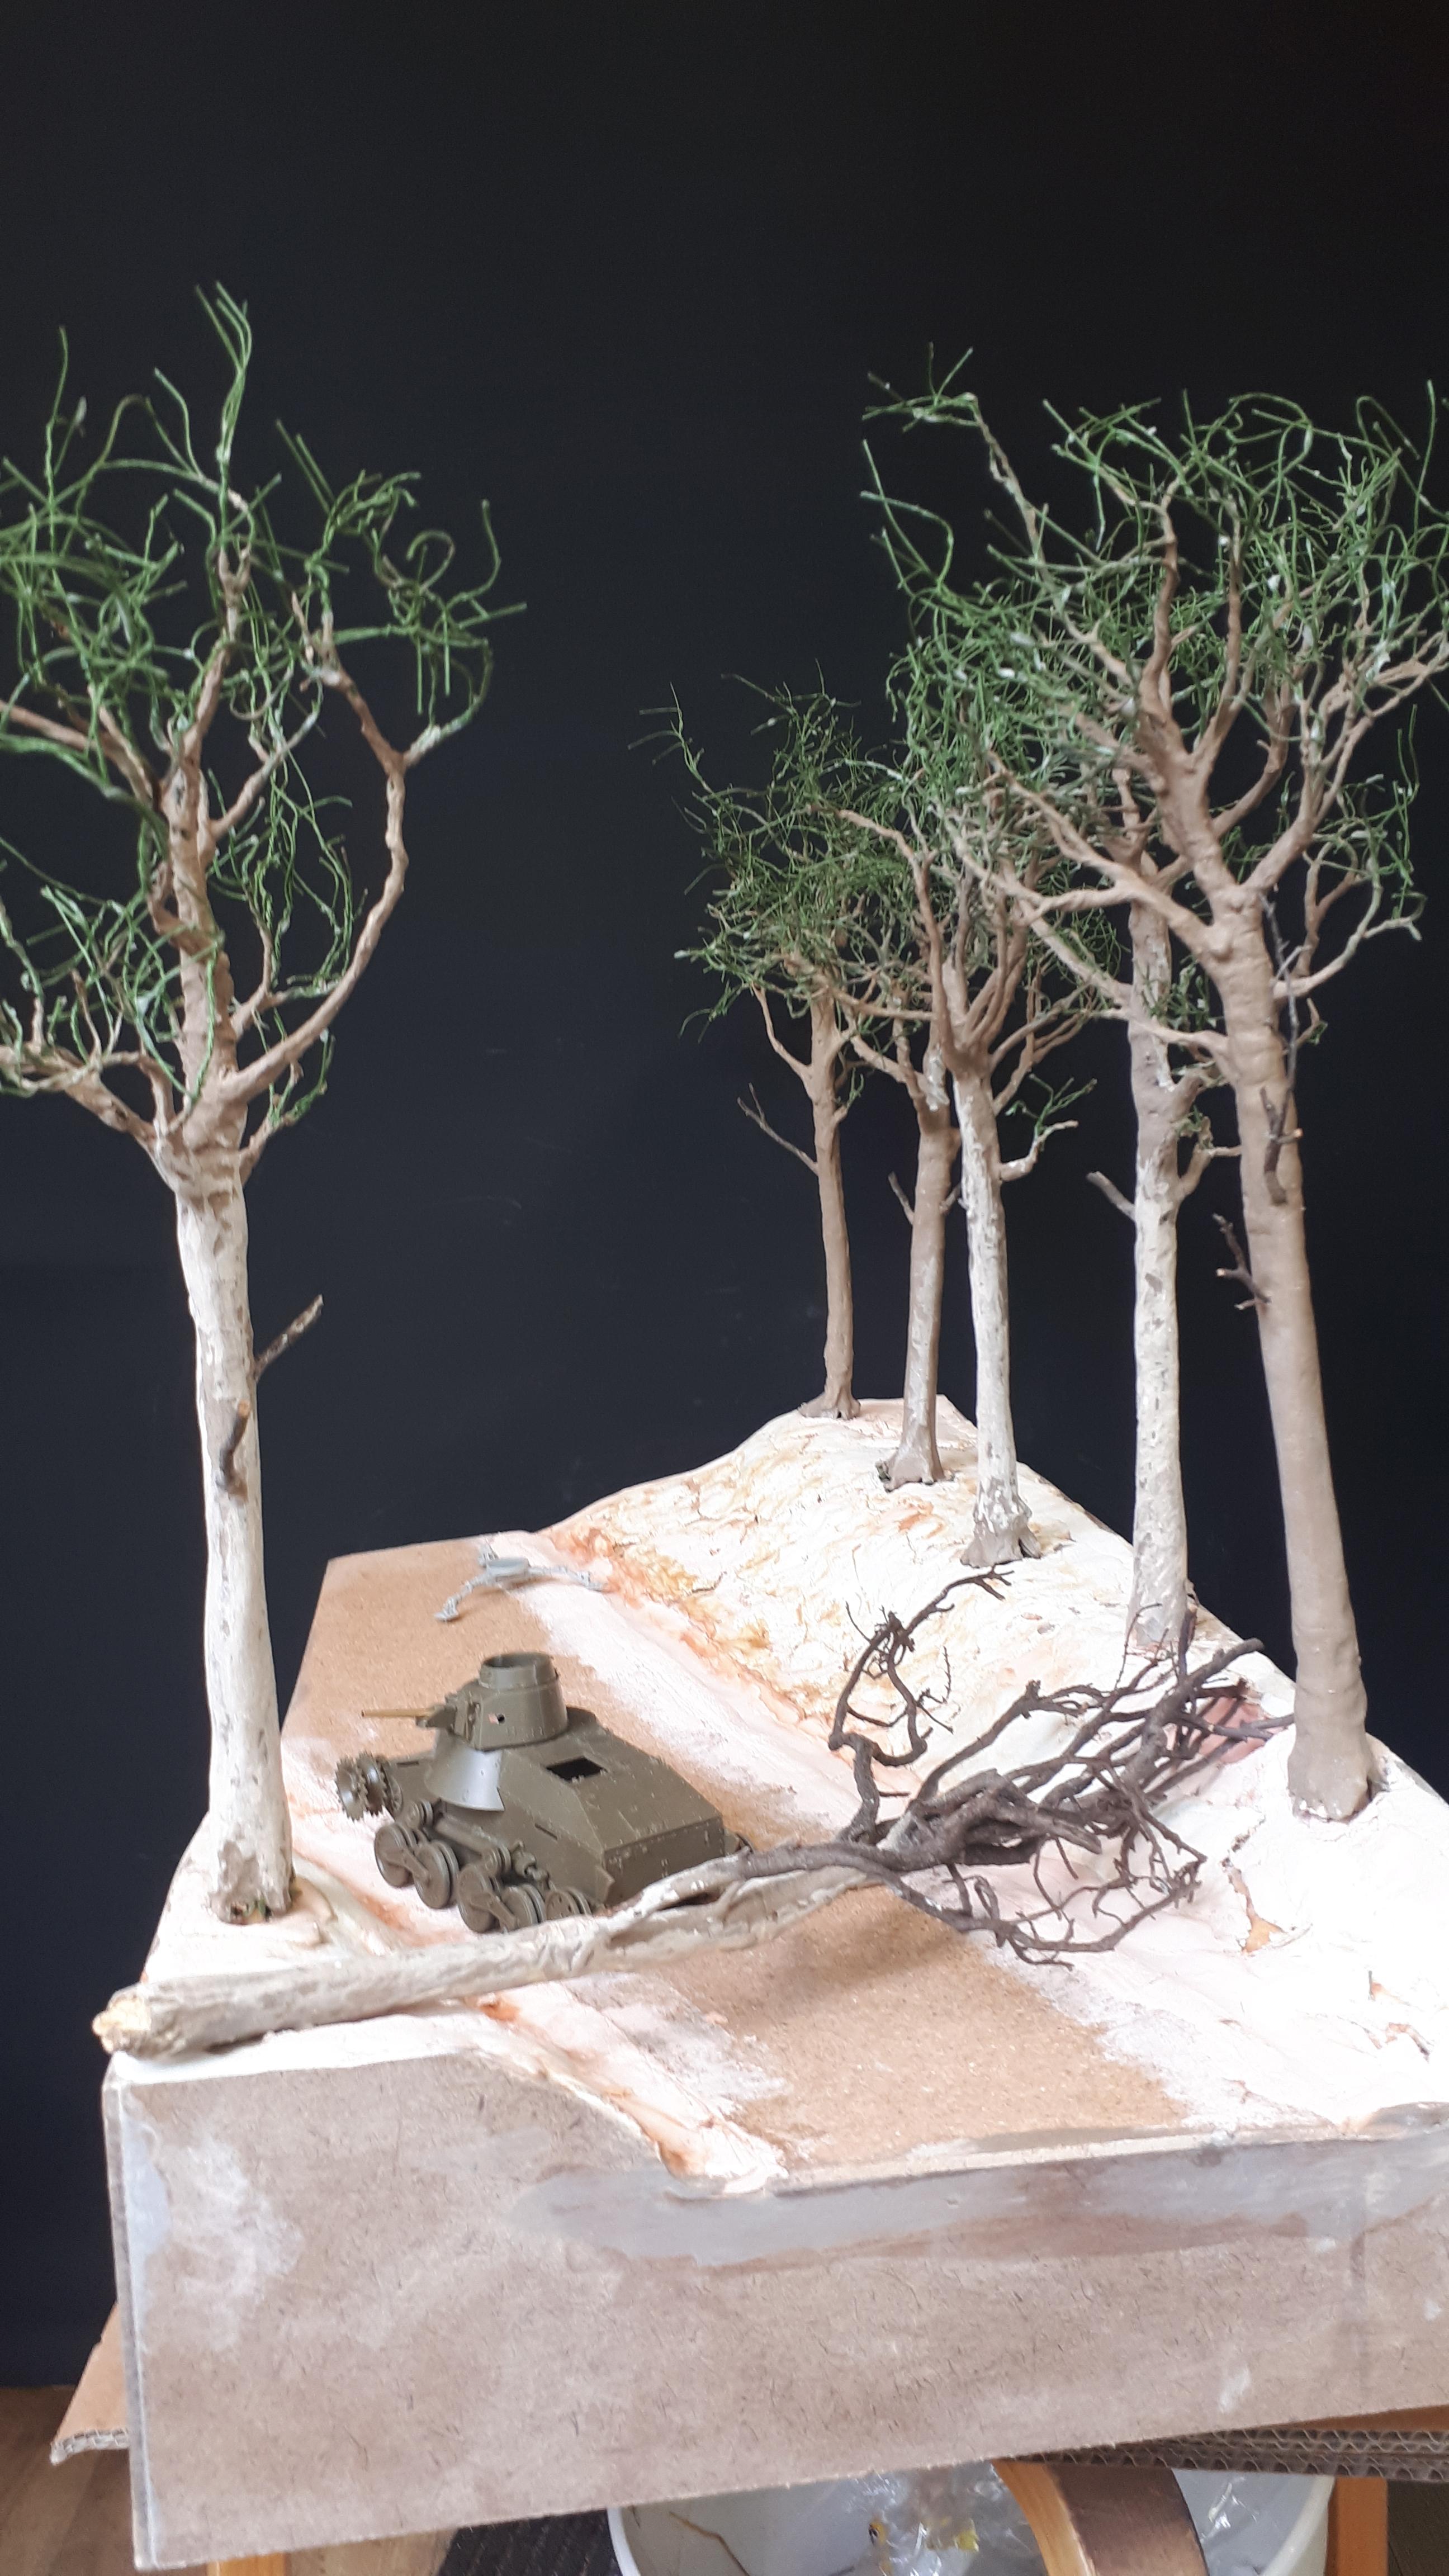
Sorry, work has kept me from posting for a while. Here is some more progress on the trees and landscape.


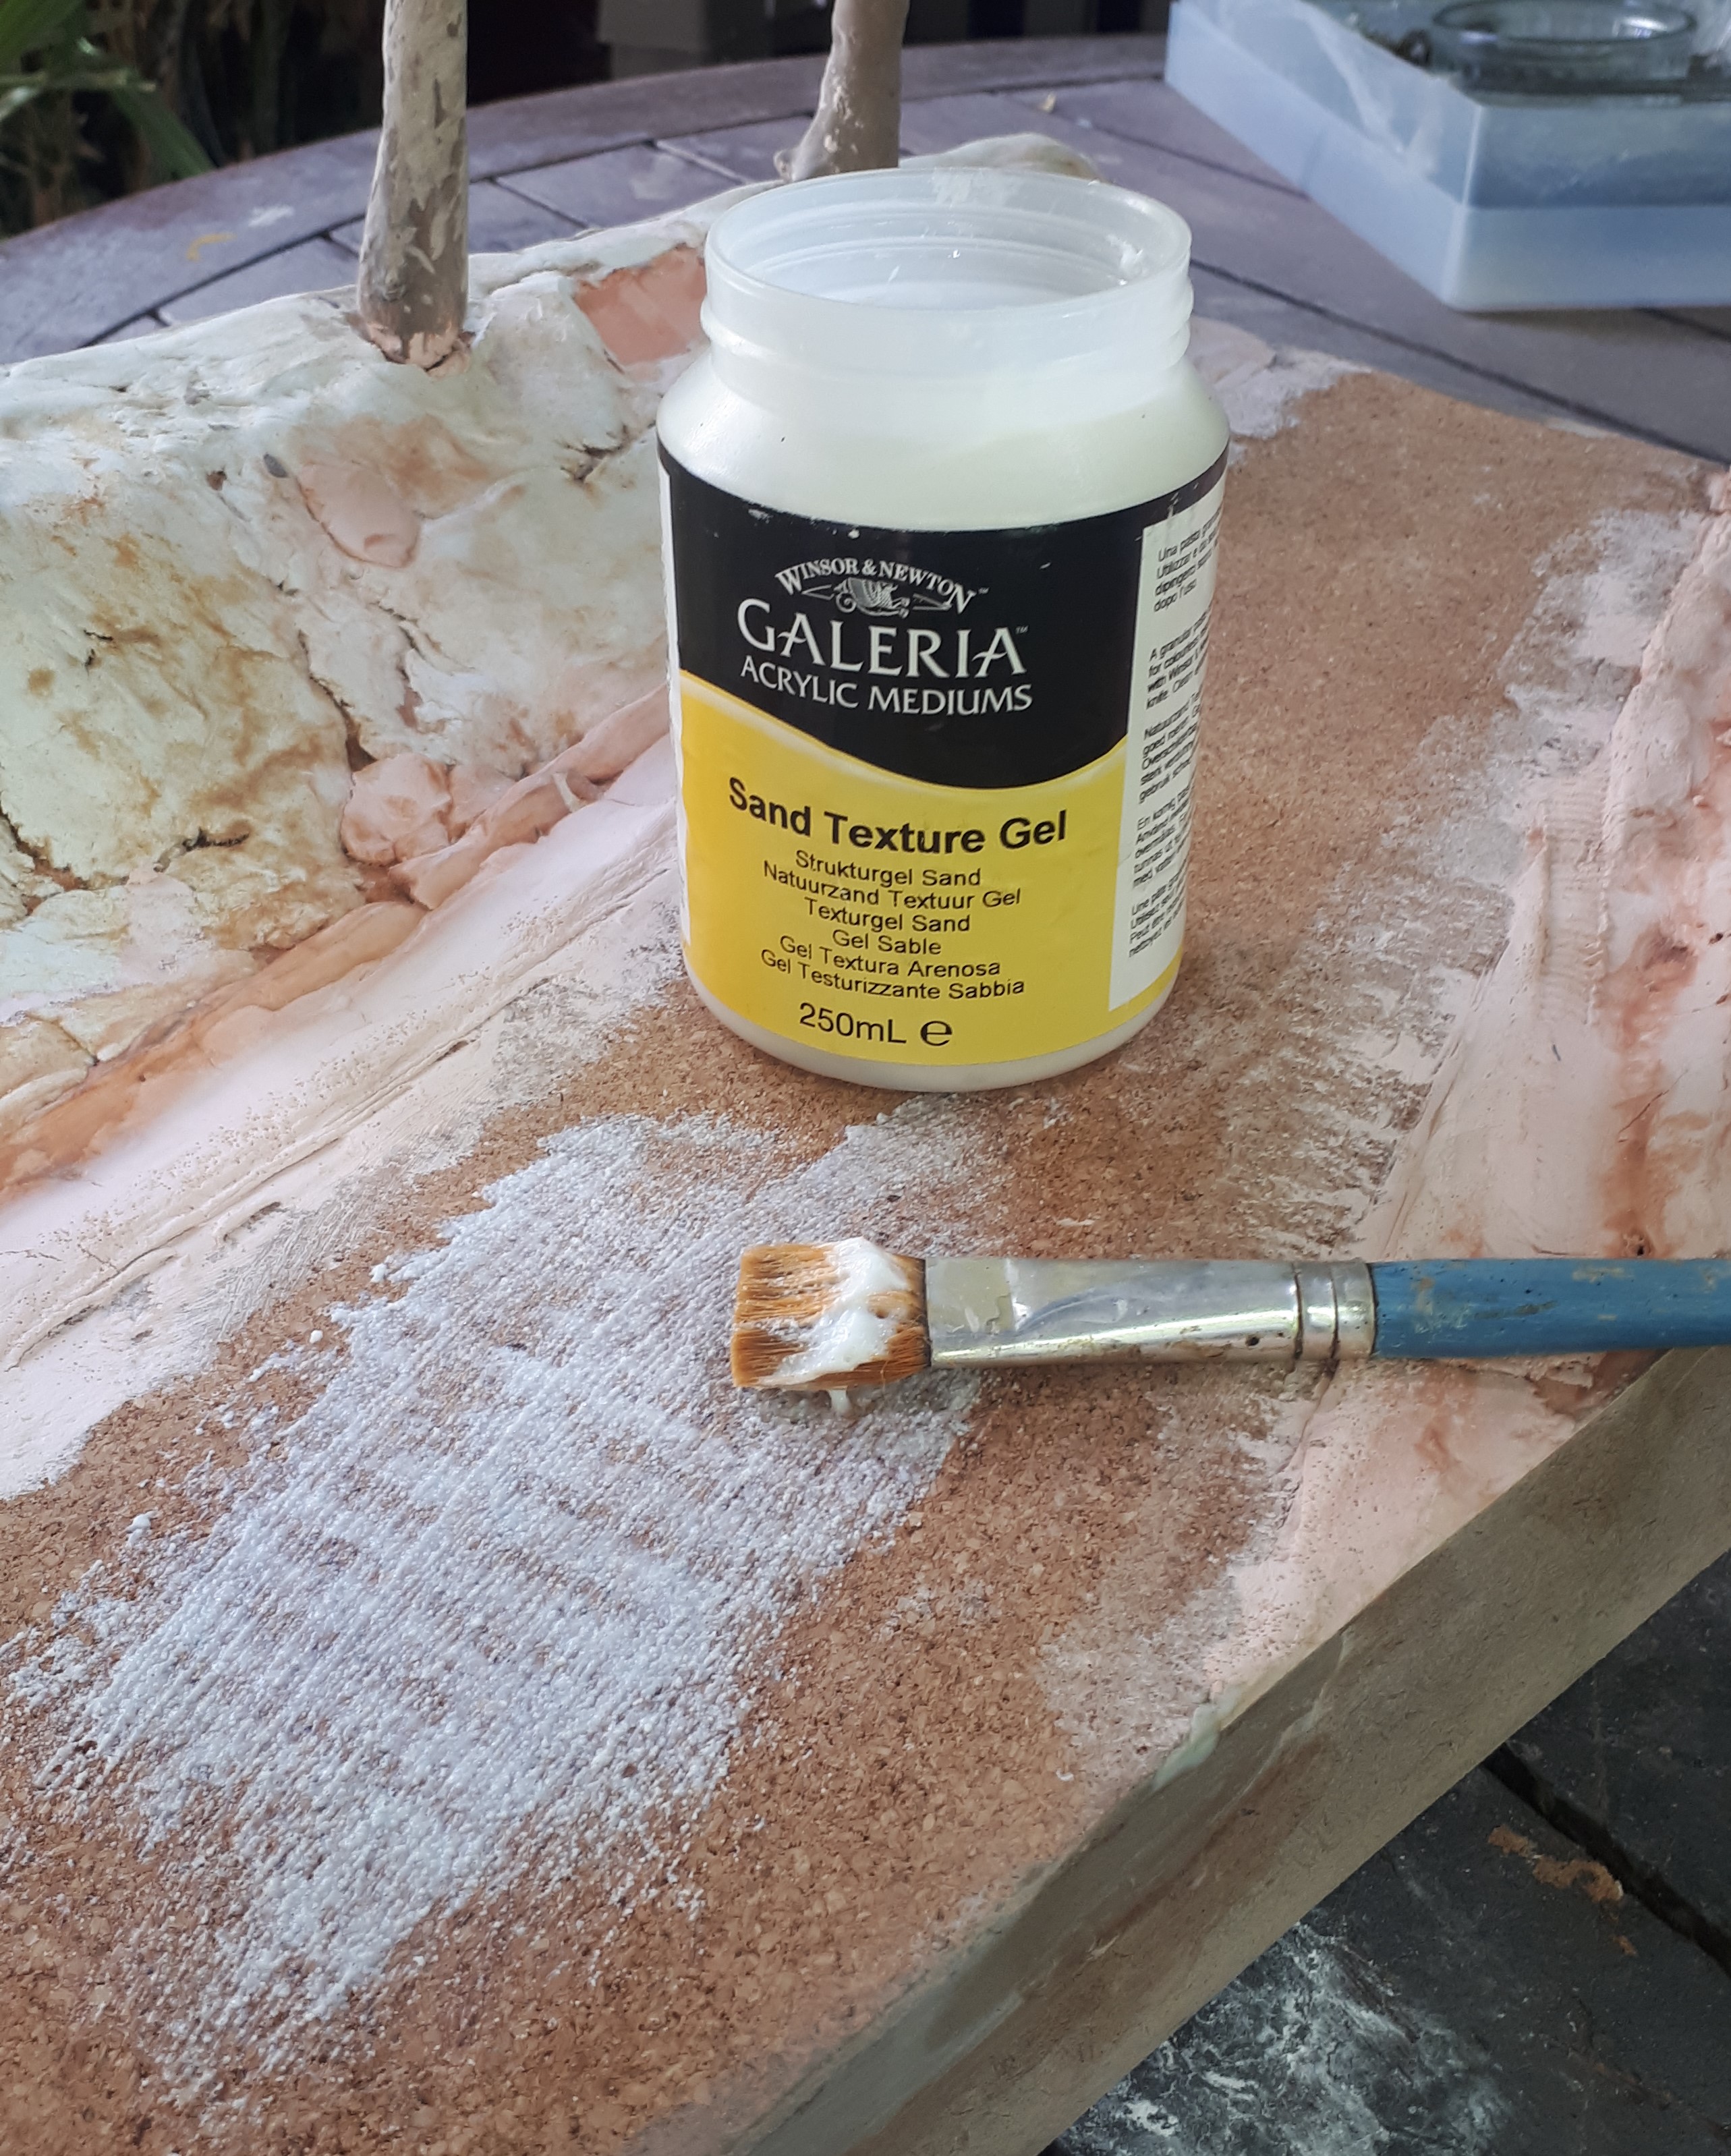
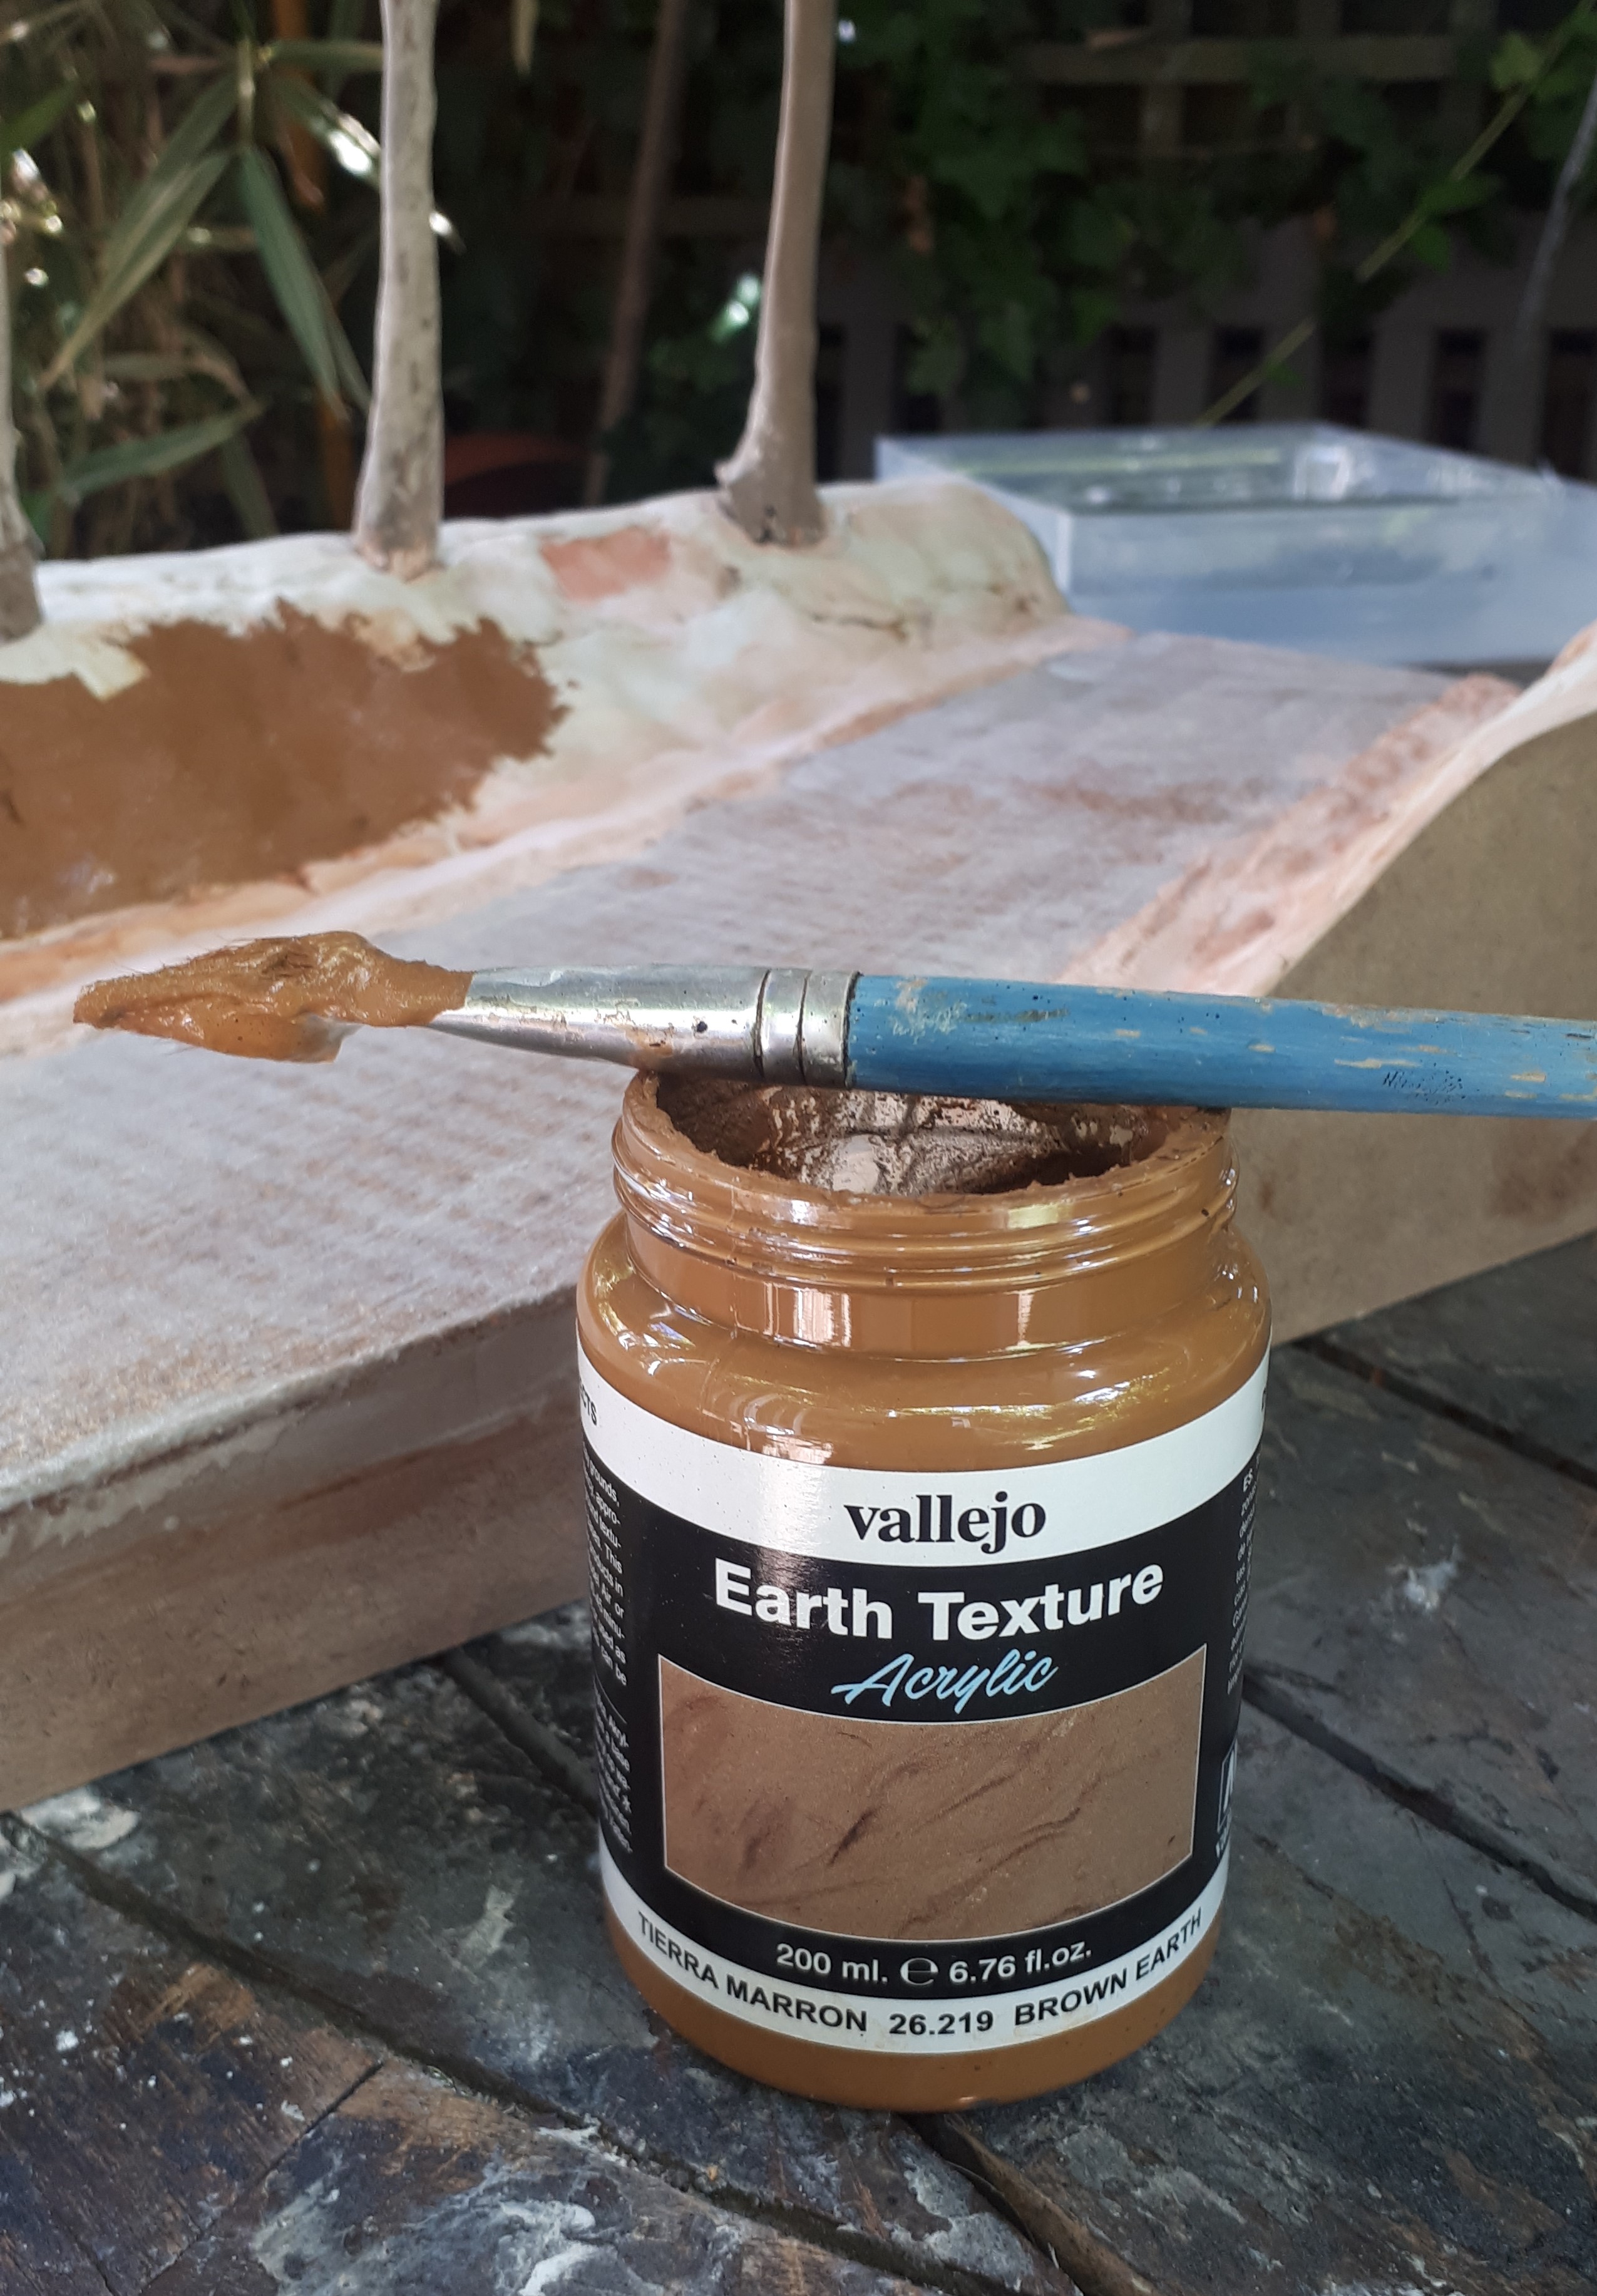
Having given the terrain a layer of Das I then gave it a liberal coating of Vallejo Earth Texture. This is great stuff - it just covers so well and gives instant colour and texture. None of this has been done with much care because almost every millimetre is going to be covered with vegetation of some kind. For the tarmac road I used Galeria Sand Texture Gel.


Now back to the trees.

Looking at the images of the Muar River action, it may be that the trees at that time (or perhaps in that area) were not as neatly cultivated as they are today. For example, they branch out quite a bit lower than thos I have seen on the web.

It may not be obvious from the shots above, but I went back to work on some of them, sanding them, adding some more Artex / PVA mix and then sanding them again. The aim was to try and make them as rounded and regular as I could; these aren't supposed to be gnarly old oak trees!

Although I'm not 100%, I feel that this is the best I am going to achieve unless I start all over again.

I then gave them a blast of colour which I mixed from Vallejo acrylic primer (plentiful and cheap). The colours I used were simply what I had: black, white, German dark yellow and track colour. As I went I added more white to give them some highlights. It's a solid undercoat for what I plan to do next.

jrutman
Visit this Community
Pennsylvania, United States
Joined: April 10, 2011
KitMaker: 7,941 posts
Armorama: 7,934 posts
Posted: Thursday, June 18, 2020 - 08:44 AM UTC
Very nice work. Some of the best arbor work I have seen !! I am watching closely as I wanna build a small orchard for some kinda project I seem to be obsessed with for a while now.
Looking forward to your next update Sir!
J
Golikell
Visit this Community
Noord-Holland, Netherlands
Joined: October 25, 2002
KitMaker: 1,757 posts
Armorama: 914 posts
Posted: Thursday, June 18, 2020 - 09:09 PM UTC
Nice... Those trees really dwarf the tank, let alone the 2 pounder...
SpeedyJ
Visit this Community
Bangkok, Thailand / ไทย
Joined: September 17, 2013
KitMaker: 1,617 posts
Armorama: 1,150 posts
Posted: Friday, June 19, 2020 - 02:07 AM UTC
Coming along very nice. Making notes on tree building. Reminds me of the trains in H0 I used to build, same technique.
Bookmarked as they say.
TanksForTheMemory
Visit this Community
England - South East, United Kingdom
Joined: August 31, 2016
KitMaker: 154 posts
Armorama: 152 posts
Posted: Thursday, June 25, 2020 - 10:48 PM UTC

Quoted Text

Very nice work. Some of the best arbor work I have seen !! I am watching closely as I wanna build a small orchard for some kinda project I seem to be obsessed with for a while now.
Looking forward to your next update Sir!
J


Thanks Jerry. The orchard sounds like an interesting idea. I can honestly say that I have found making these trees a lot easier than I had feared - it has also been quite relaxing! Ironically, I am better than building artificial plants than growing the real thing - my wife has the green fingers in this house.

TanksForTheMemory
Visit this Community
England - South East, United Kingdom
Joined: August 31, 2016
KitMaker: 154 posts
Armorama: 152 posts
Posted: Thursday, June 25, 2020 - 10:50 PM UTC

Quoted Text

Nice... Those trees really dwarf the tank, let alone the 2 pounder...


Yes they do! And these are not even to true scale height. Mind you, as you can see in the photos from the Muar River, they were set back further from the road than they are in my diorama. So I'm trying to compromise.
TanksForTheMemory
Visit this Community
England - South East, United Kingdom
Joined: August 31, 2016
KitMaker: 154 posts
Armorama: 152 posts
Posted: Thursday, June 25, 2020 - 10:52 PM UTC

Quoted Text

Coming along very nice. Making notes on tree building. Reminds me of the trains in H0 I used to build, same technique.
Bookmarked as they say.


Thanks Robert.
TanksForTheMemory
Visit this Community
England - South East, United Kingdom
Joined: August 31, 2016
KitMaker: 154 posts
Armorama: 152 posts
Posted: Thursday, June 25, 2020 - 10:56 PM UTC
Thanks everyone.

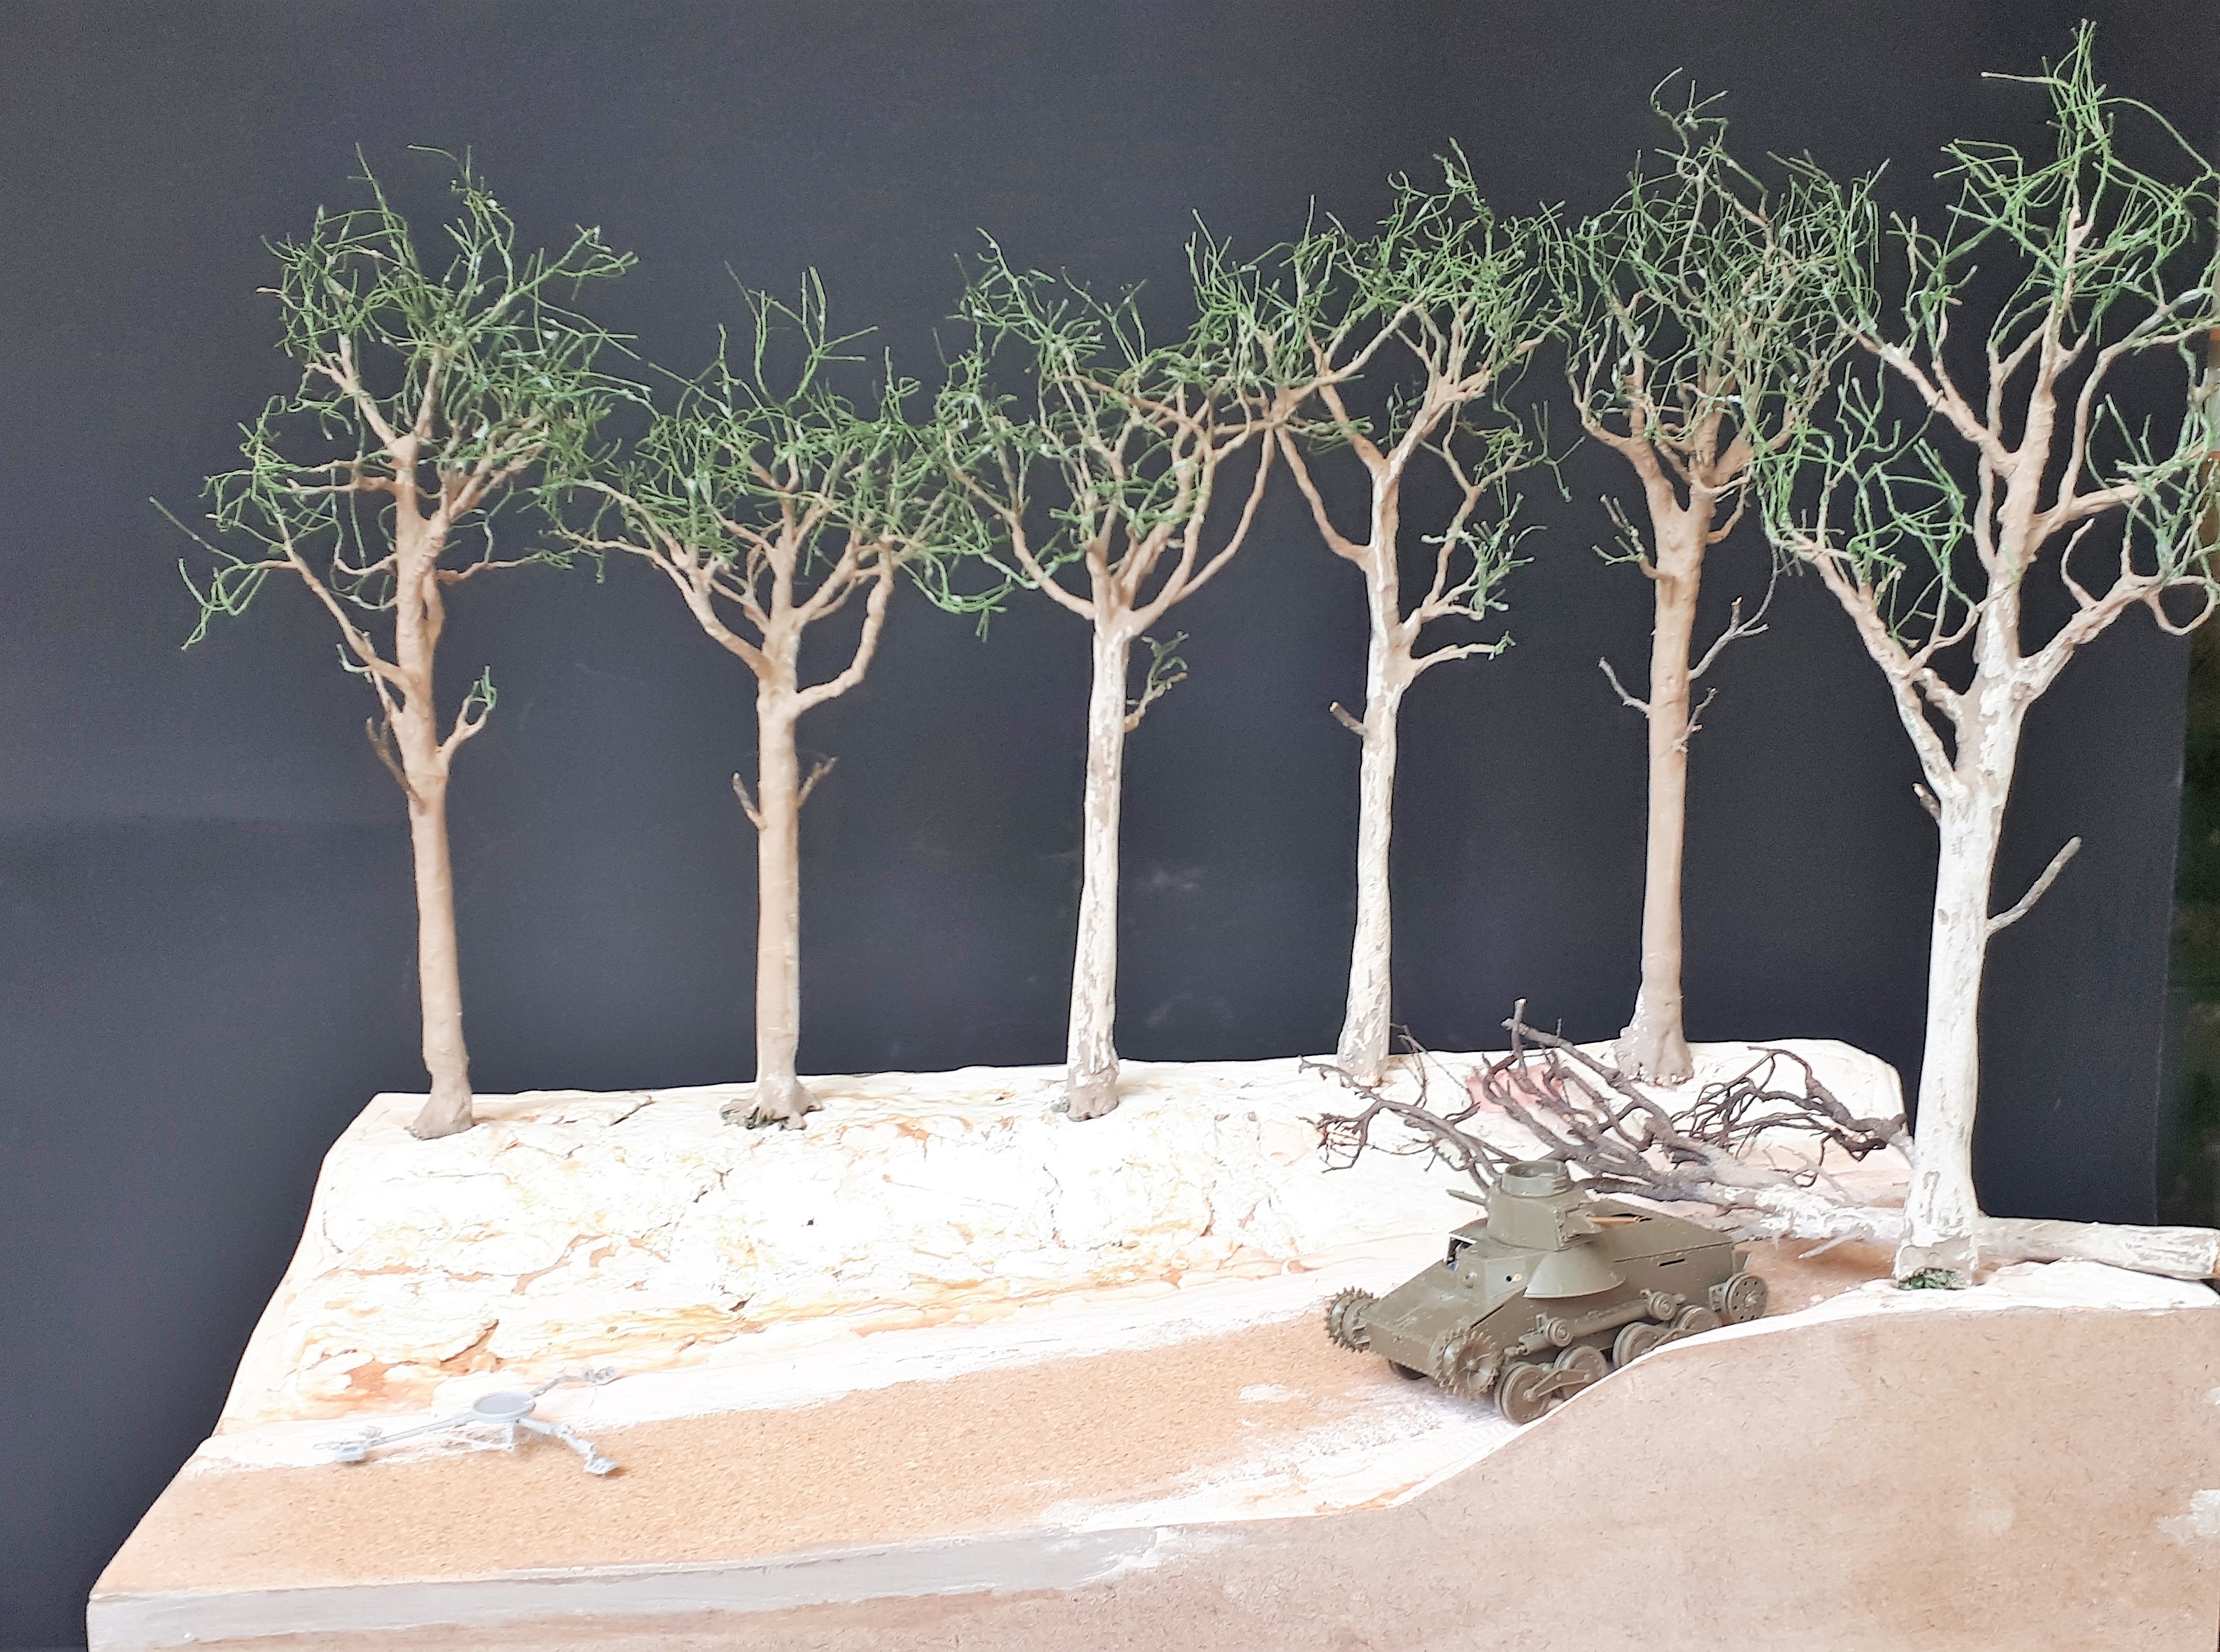
The next stage was to give the trees some more colour.

Looking at the images from Muar River, this one provides a useful close-up of the bark pattern on these rubber trees.


This pattern of blotches, with the lighter bark peeling off to reveal the darker bark beneath, actually looks quite a lot like the plane trees that are very common here in London.


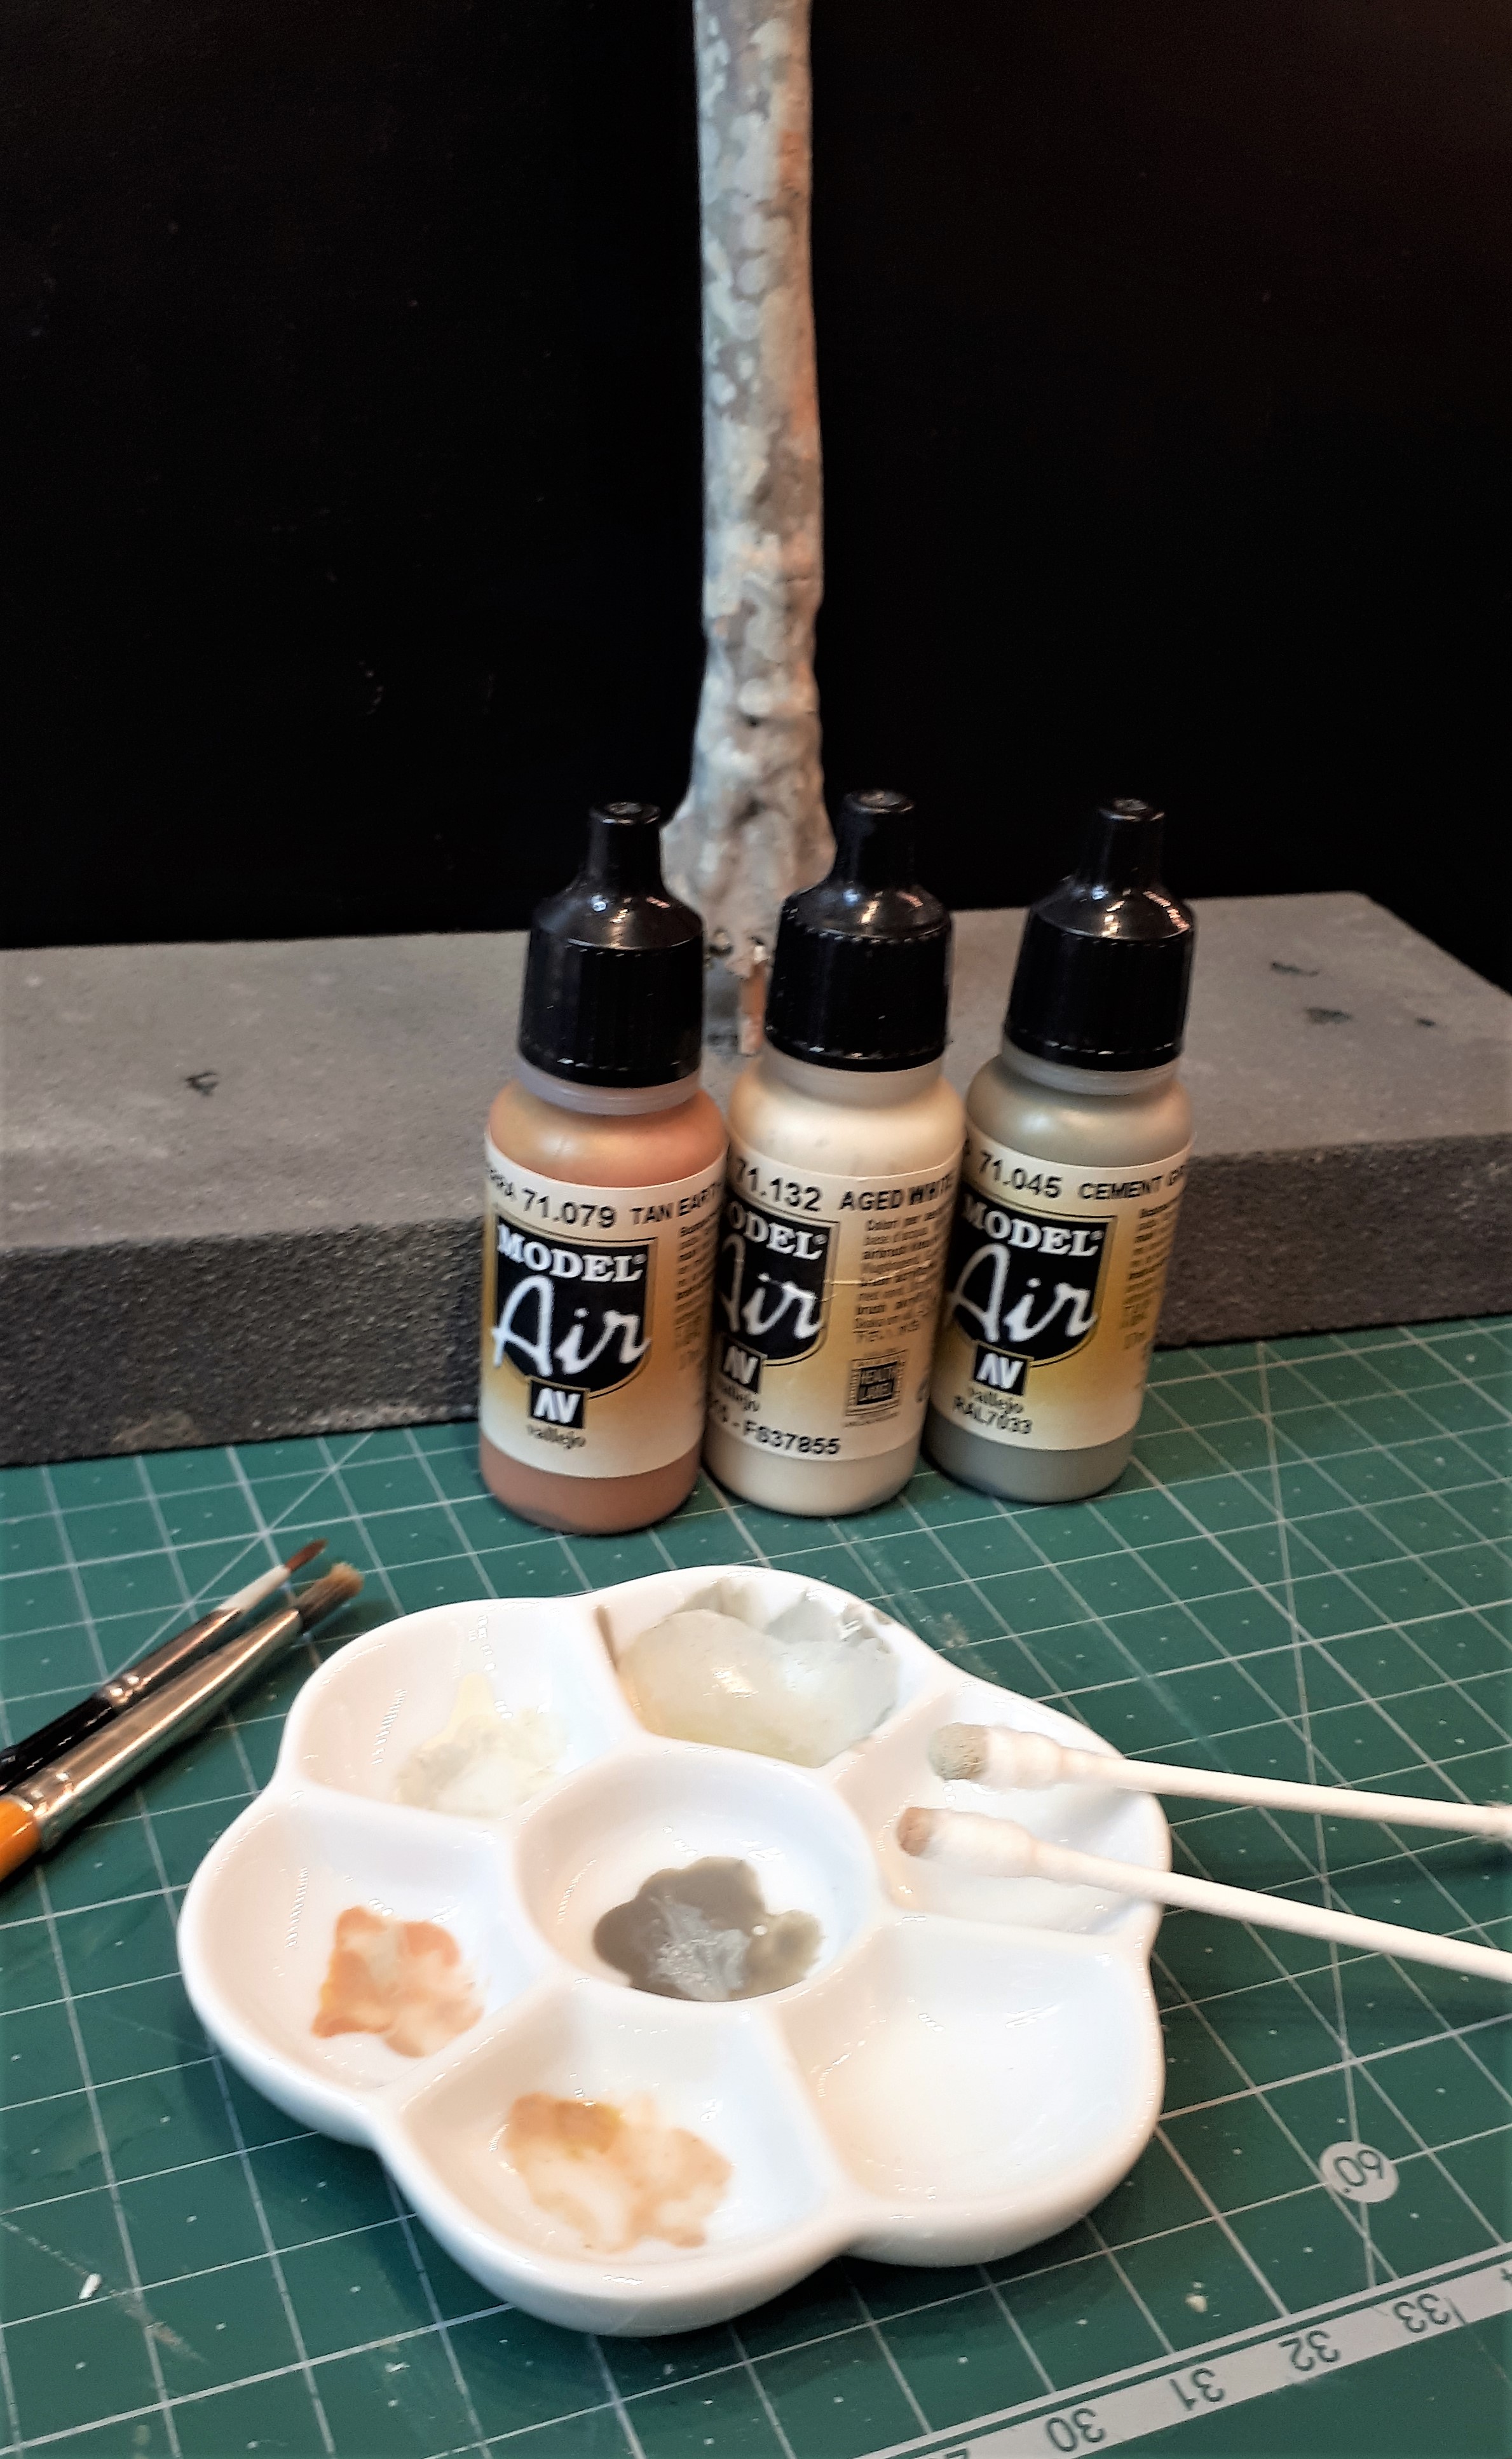
Painting the trees was a little like a German uniform camouflage, except on a larger scale. I used three Vallejo colours: tan earth, aged white and cement.


These were applied with a brush in fairly random patterns and then the steps were repeated with the same tones mixed slightly with one another. Sometimes I covered quite a large area with a connected pattern of colour, sometimes I used spots.

I then repeated these steps using cotton buds to 'stamp' the same colours onto the trunks in an attempt to replicate those distinctive larger spots. It's a little like doing an Impressionist painting. I managed to get through all seven trees in a couple of hours.

All in all I'm quite happy with the outcome. I'm hoping the pattern will stand out better once the foliage and bushes are all in place to provide a contrast. To give everything a head start I painted the edges of the base black because this always lightens the tones and helps the colours to pop out.


cheyenne
Visit this Community
New Jersey, United States
Joined: January 05, 2005
KitMaker: 2,185 posts
Armorama: 1,813 posts
Posted: Thursday, June 25, 2020 - 11:07 PM UTC
Nicely done Tim , very cool !!
jrutman
Visit this Community
Pennsylvania, United States
Joined: April 10, 2011
KitMaker: 7,941 posts
Armorama: 7,934 posts
Posted: Friday, June 26, 2020 - 01:09 AM UTC
I agree with Cheyenne. Those sticks are lookin' FINE !
J
Golikell
Visit this Community
Noord-Holland, Netherlands
Joined: October 25, 2002
KitMaker: 1,757 posts
Armorama: 914 posts
Posted: Saturday, June 27, 2020 - 05:13 AM UTC
Same here... Those trunks are great... I wonder what miracles you will do with the foliage..
Dioramartin
Visit this Community
New South Wales, Australia
Joined: May 04, 2016
KitMaker: 1,476 posts
Armorama: 1,463 posts
Posted: Monday, June 29, 2020 - 11:03 PM UTC
Superb trunks Tim (not to mention my budgie-smugglers) there are some eucalypts in Oz that look oddly similar too…rubber…gum/resin…maybe they’re related? Good luck with the foliage, to my mind the most difficult stage
TanksForTheMemory
Visit this Community
England - South East, United Kingdom
Joined: August 31, 2016
KitMaker: 154 posts
Armorama: 152 posts
Posted: Sunday, July 05, 2020 - 05:23 AM UTC
Thankyou gentlemen.

Let the foliage commence!


As the othher Tim says, foliage can be one of the most difficult parts of tree making.

We know there are various methods out there, but I have previously worked with products from Mininatur (called Silflor in the US) when I made the olive tree for my Italian diorama (and I also used it for ivy on the bridge).


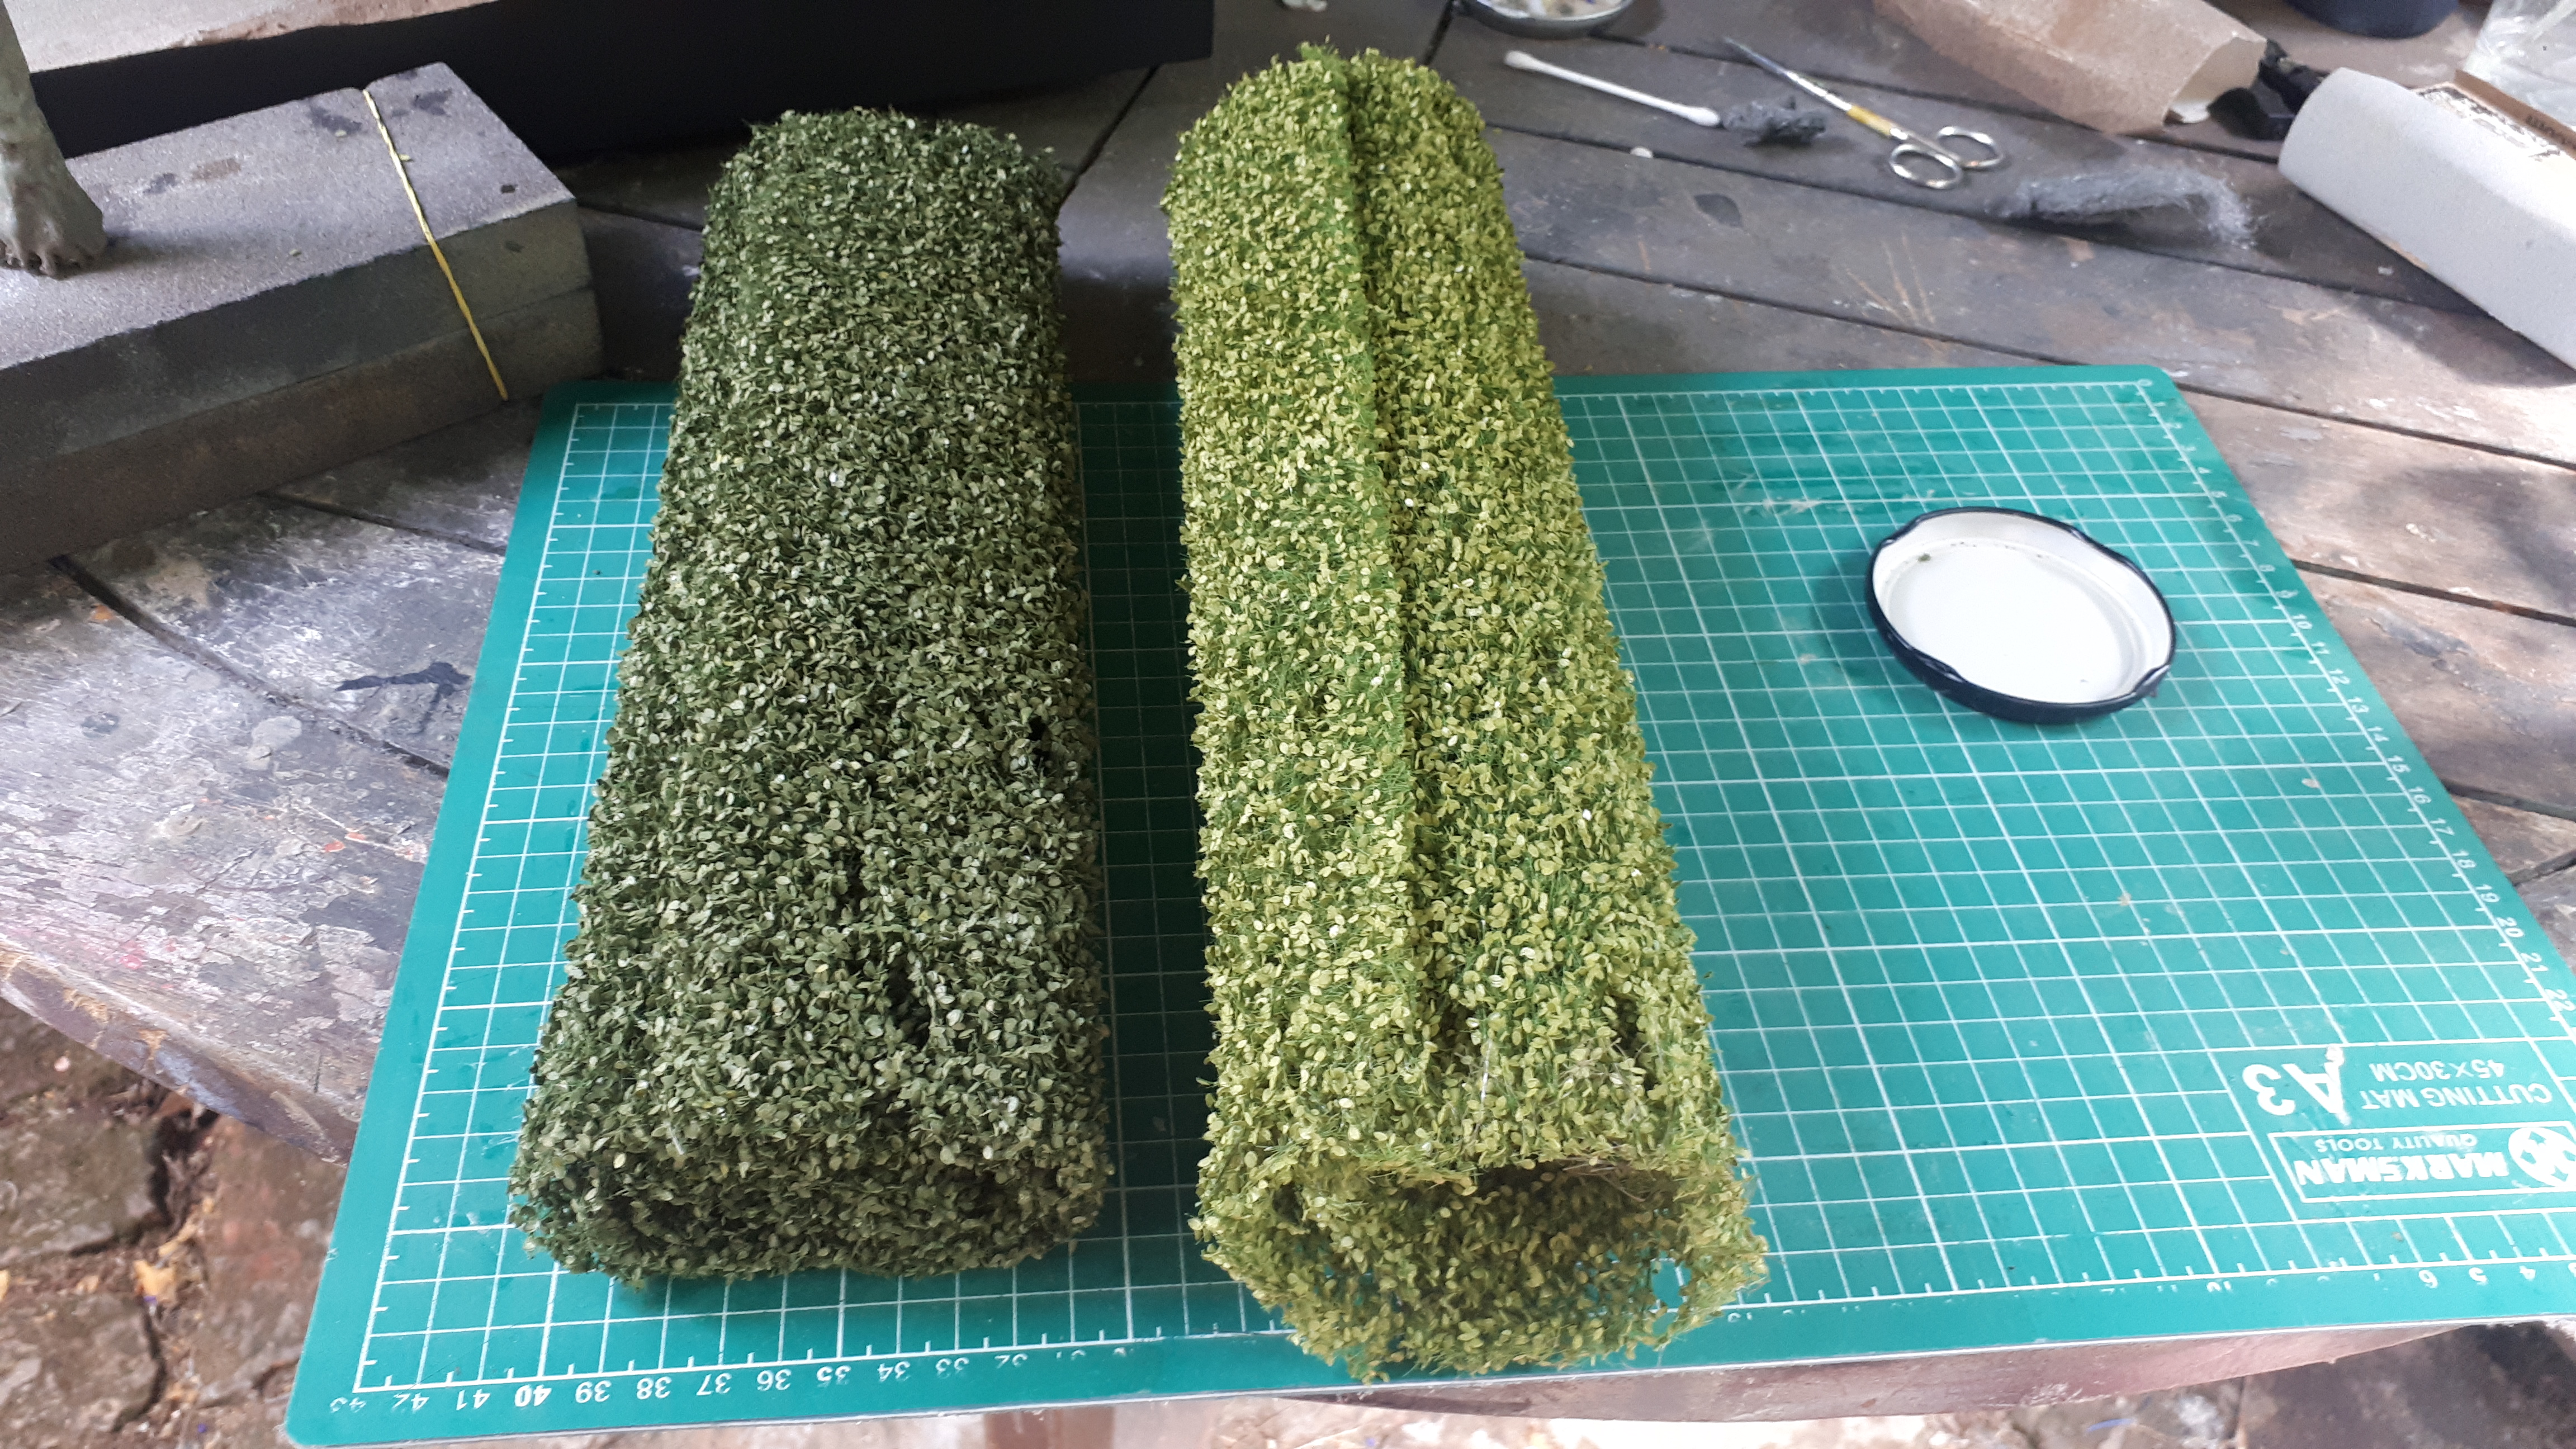
They make a large range of different leaf types and use a sort of netting with the individual leaves attached.

There are pros and cons with this stuff. The biggest advantage to me is the fact that the actual leaves are well stuck on to the netting and so you are less likely to suffer from the sort of 'arborial dandruff' that you can get with other methods.

The structure of the netting also provides you with that all-important twig layer which would otherwise take an awfully long time to make. I have see people make this out of sea foam, for instance, but it seems very fiddly and I simply wasn't prepared to contemplate this for my SEVEN trees.

The disadvantage is that the sheets, although three-dimensional, are quite thin and so it is hard to give them the shape of the real foliage, rather than a tree that has simply been draped with sheets of the fake stuff.

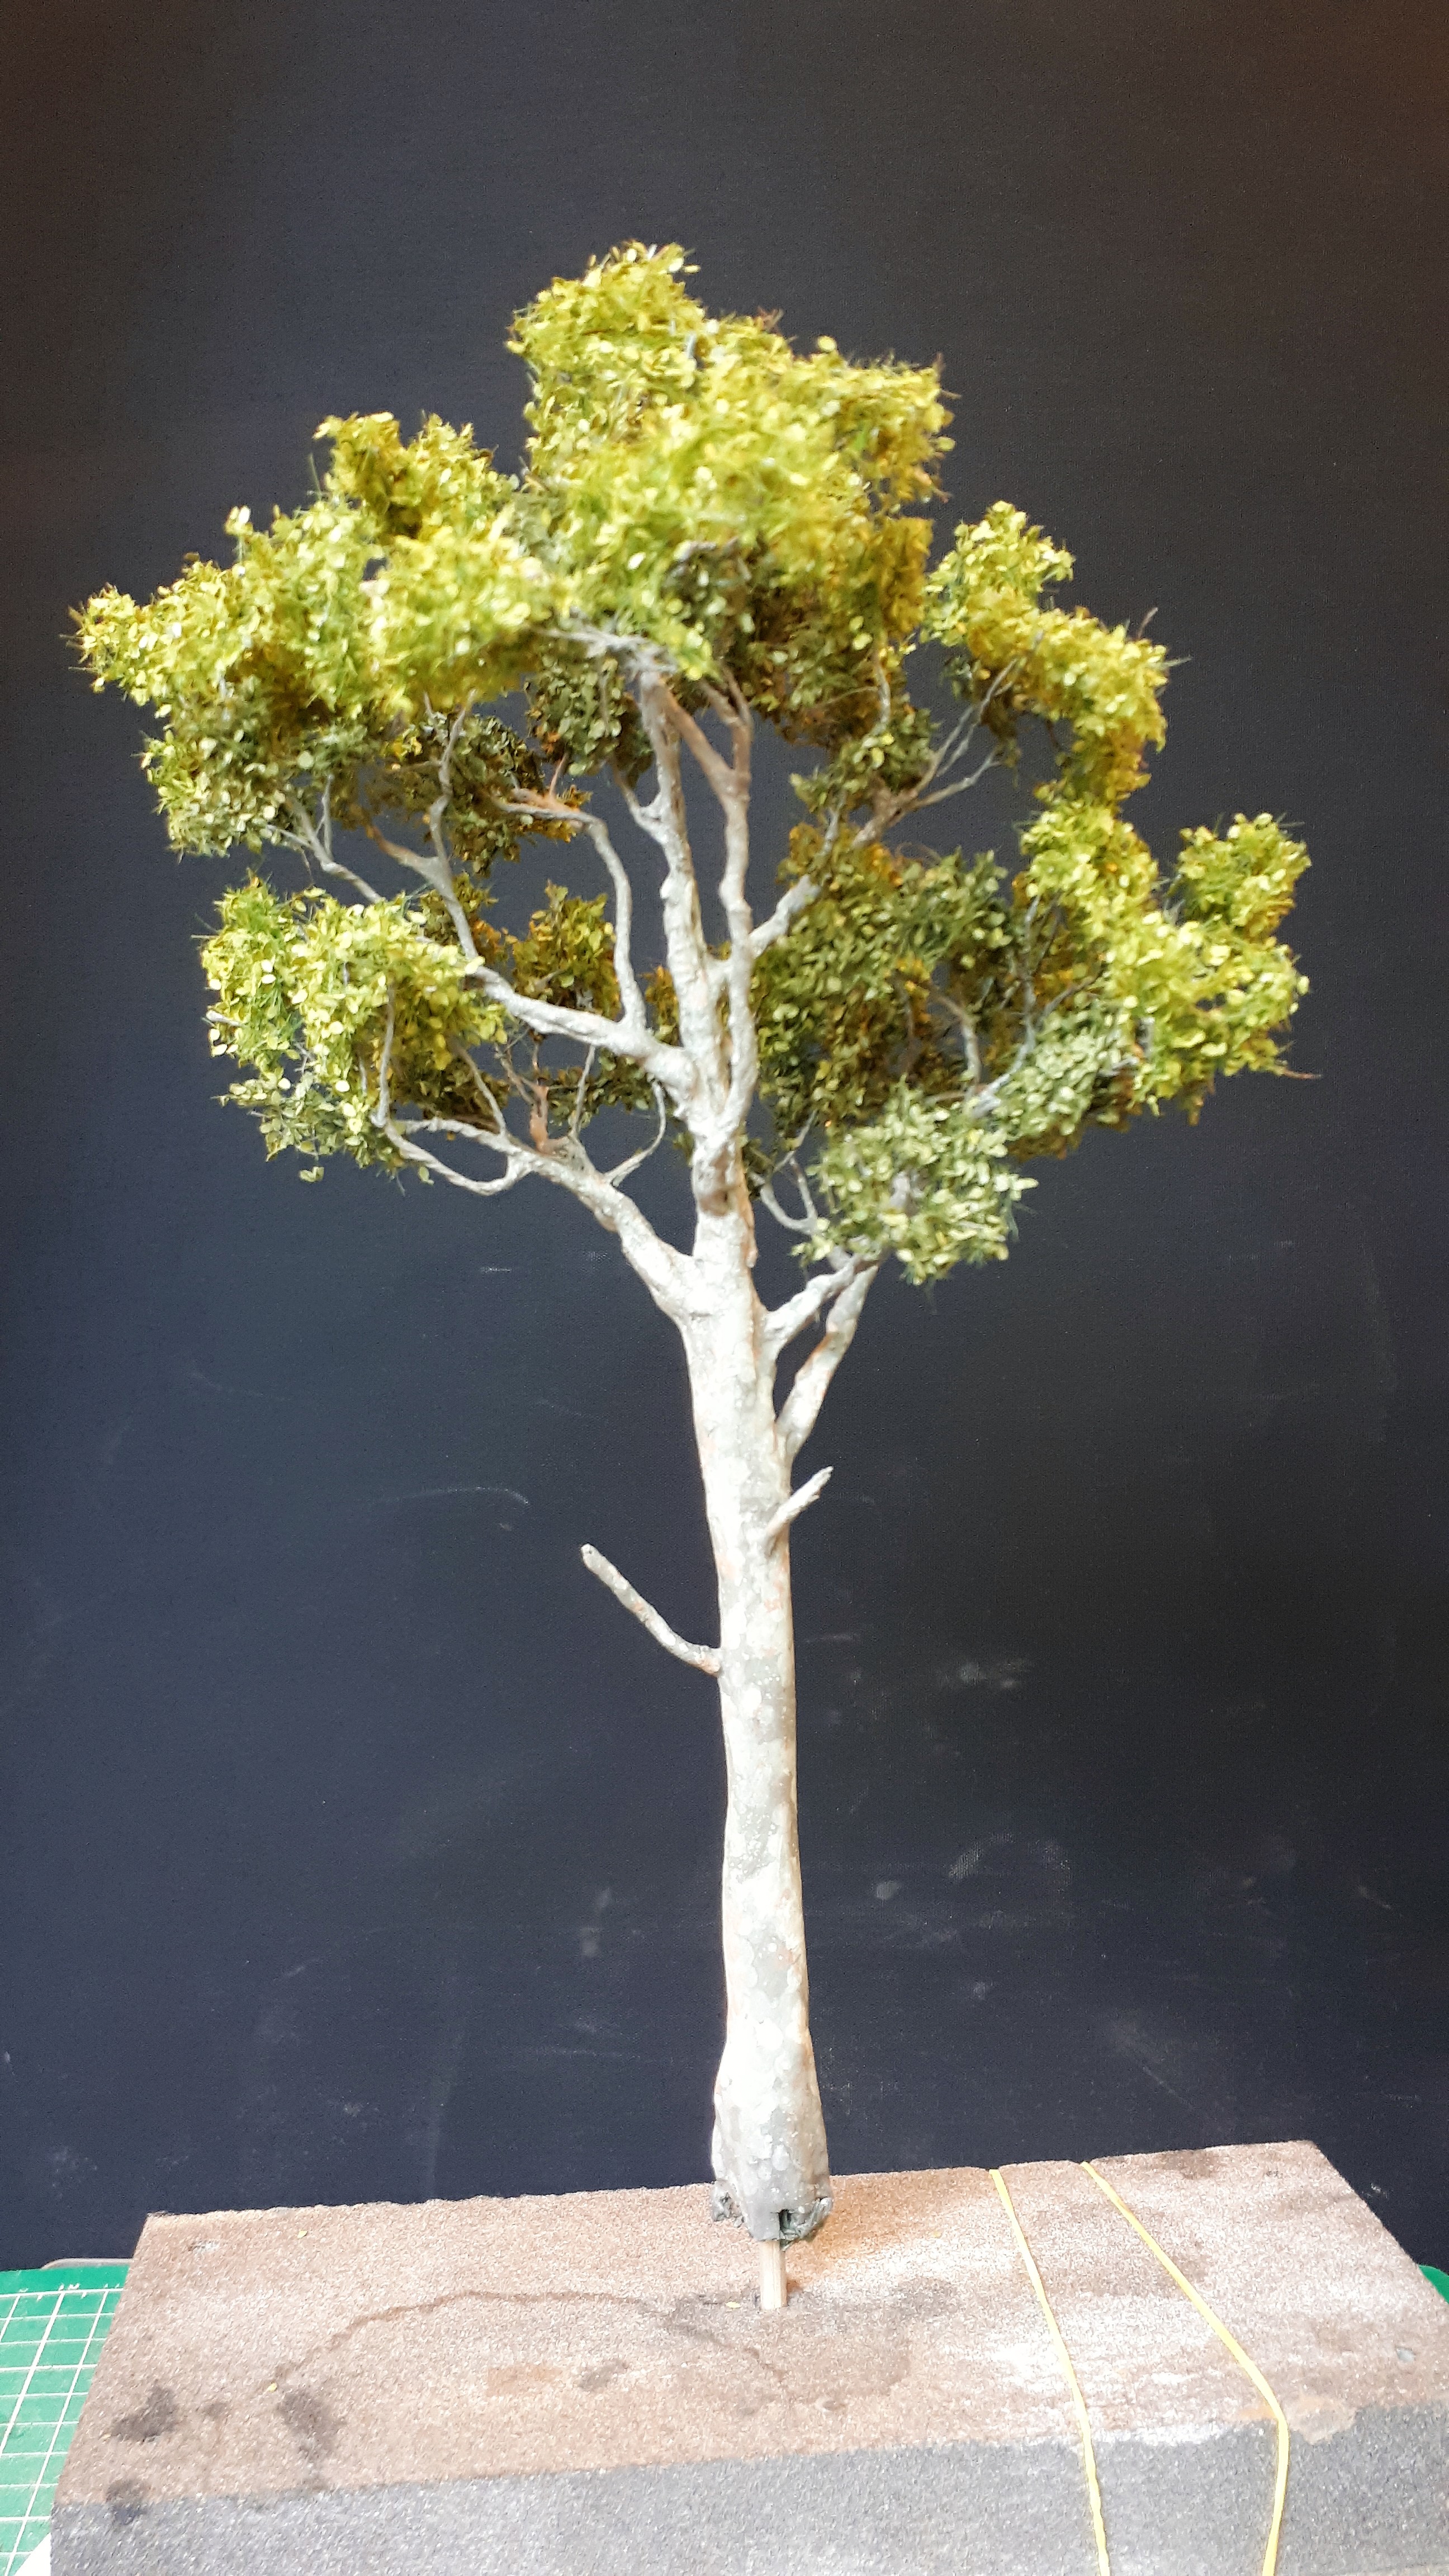
To give my trees a bit more depth, I actually used two different types: Beech Foliage Spring 920-31 and Beech Foliage Summer 920-32. I started with the latter, which is darker, to build up the foliage which would be at the bottom or the middle and then used the lighter spring version to cover the upper / outer parts of the tree.


I have to say that I was very pleased / relieved with the result! It's also good to see how the colouring of the tree trunks seems to stand out more now that it has something to compete against.

PanzerFloor
Visit this Community
Zuid-Holland, Netherlands
Joined: February 10, 2017
KitMaker: 22 posts
Armorama: 22 posts
Posted: Sunday, July 05, 2020 - 07:49 AM UTC
Wowh, what a nice brunch off thee,s
UpperCanadian
Visit this Community
British Columbia, Canada
Joined: June 28, 2020
KitMaker: 152 posts
Armorama: 133 posts
Posted: Sunday, July 05, 2020 - 08:28 AM UTC
This is really cool, and a campaign that is neglected.

The Brits and Commonwealth fought bravely, but were let down by poor strategic and operational planning. I remember reading that the C-in-C of British forces in Malaya had warned successive PM's of the need to take the Japanese threat seriously. These warnings were largely unheeded.

Then there is the sad saga of HMS Prince of Wales and HMS Renown ...

Anyways I digress.