AFV Painting & Weathering
Answers to questions about the right paint scheme or tips for the right effect.
Answers to questions about the right paint scheme or tips for the right effect.
Hosted by Darren Baker, Matthew Toms
weathering products
chrisb760

Joined: January 05, 2015
KitMaker: 70 posts
Armorama: 47 posts
Posted: Friday, January 17, 2020 - 10:37 PM UTC
That would be great thank you so
Johnnych01

Joined: June 29, 2019
KitMaker: 604 posts
Armorama: 506 posts

Posted: Friday, January 17, 2020 - 11:00 PM UTC
I still cannot believe you can get pre-peeled bananas and oranges, the worlds gone crazzzzzzzzy.
Back on topic, I quite liked Robins idea about how he used the "yuk" from the jar he washes his brushes in, its sounds like a cunning plan which I may well try in the future ...
I remember when I tried to weather something for the first time, I must of read about a million topics about it and comments about this and that and I was still bricking it lol ... thankfully it turned out ok.
One thing I did read which I found the best bit of advice regarding weathering was..... Do not over do it, a little bit in the right place can look a lot better than something that is covered in weathering all over.
southpier

Joined: December 11, 2009
KitMaker: 546 posts
Armorama: 316 posts

Posted: Friday, January 17, 2020 - 11:01 PM UTC
[quote]
I think this is a very real consideration for a lot of us. I understand how I could derive a greater volume of product if I went to the hardware store and purchased bulk ingredients, but then I have an investment & storage considerations which for my living and interest considerations far outweigh the cost of a prepared, dedicated use, product.
plus, I get to wear a new T-shirt and join the elite!
Quoted Text
...personal choice and that convenience is THE leading factor for choosing to use products X, Y or Z.
…
I think this is a very real consideration for a lot of us. I understand how I could derive a greater volume of product if I went to the hardware store and purchased bulk ingredients, but then I have an investment & storage considerations which for my living and interest considerations far outweigh the cost of a prepared, dedicated use, product.
plus, I get to wear a new T-shirt and join the elite!
Posted: Sunday, January 19, 2020 - 06:18 AM UTC
Oil Paint Homework
Before posting my technique on painting an entire model with oil paints I wanted to share a few links to videos and articles that heavily influenced how I started playing around with this idea.
For these first two it's important to understand the Application Method, Brush Control and understanding Less-Is-More.
Oil Paint Rendering-An Introductiont
Michael Rinaldi Oil Painting Technique
This last video goes over the process of painting an entire model in oils.
Painting Plastic Models with Brushes and Oil Paints
Stay tuned I'll be posting my take on these


RobinNilsson

Joined: November 29, 2006
KitMaker: 6,693 posts
Armorama: 5,562 posts

Posted: Sunday, January 19, 2020 - 07:42 AM UTC
Quoted Text
I still cannot believe you can get pre-peeled bananas and oranges, the worlds gone crazzzzzzzzy.
Back on topic, I quite liked Robins idea about how he used the "yuk" from the jar he washes his brushes in, its sounds like a cunning plan which I may well try in the future ...
One vital thing to keep in mind when re-cycling the brush wash is that the solvent must not be to 'hot' for the paint on the model. I almost washed off the paint (Tamiya acrylics) once when the brush wash contained white spirit and turpentine. I noticed the paint going soft a few seconds before it was too late.
The wash got a REALLY good grip though .....

/ Robin
Posted: Sunday, January 19, 2020 - 08:18 AM UTC
Full Oil Rendering...Ok here we Go 
Let me start by saying that this is NOT my original idea/technique but several I have found over the years. (See my post above) Also I'm still very much in the experimental phase of this technique and with anything new there is a learning curve. So please pretice this technique on an old paint mule first.
BRUSHES
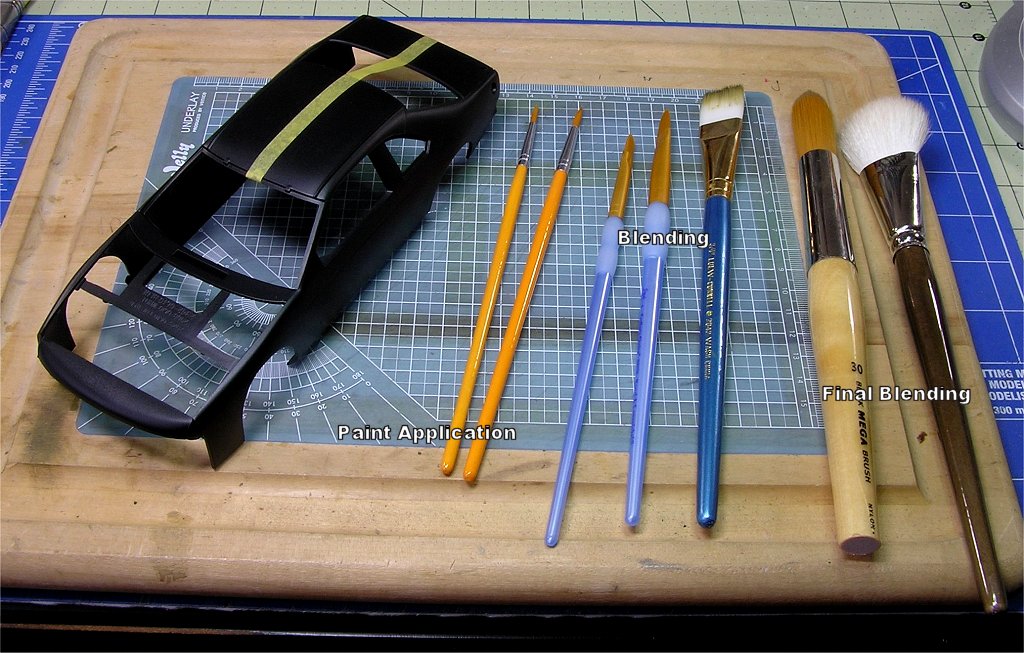
First off you will need several brushes. I find round and flat brushes most useful as well as large Mop style brushes for the Final blending.
Oil Paints
Of course you will need Oil paint of your choice and any brand you like will work. I use Winsor & Newton Artisan Water Mixable Oil Paints for their ease of use and clean up....Oh and I do have a few Abteilung 502s as well.
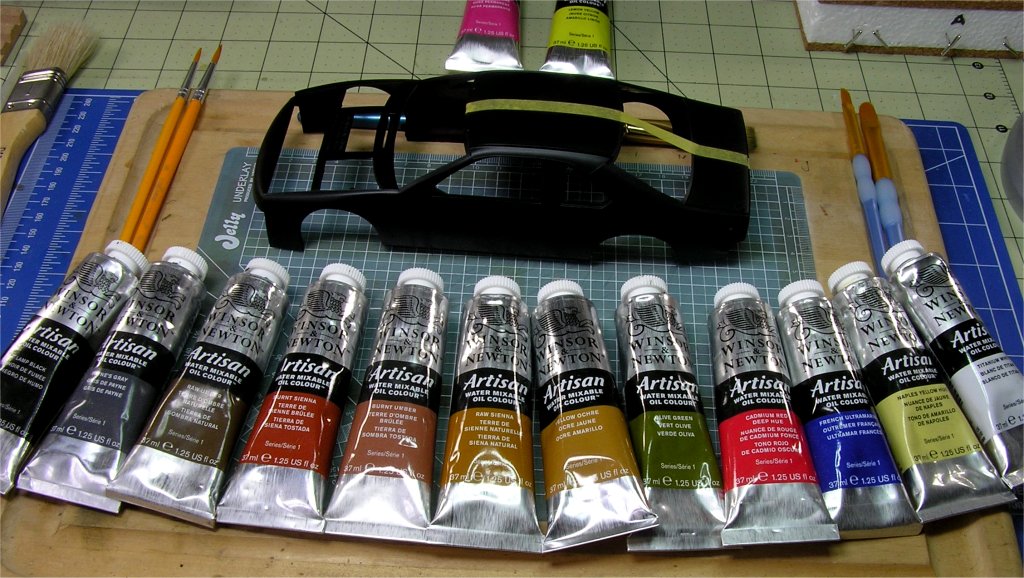
A few words regarding Artisan Water Mixable Oil Paints if you plan to give them a try. While they a water mixable the are still Oil Paints and behave just as normal Oil Paints do. There is plenty of online material on how to get the best results from them and how to handle some special elements with water mixable oils. So definitely do some research before going in full head a steam.
Opacity of Oil Paints
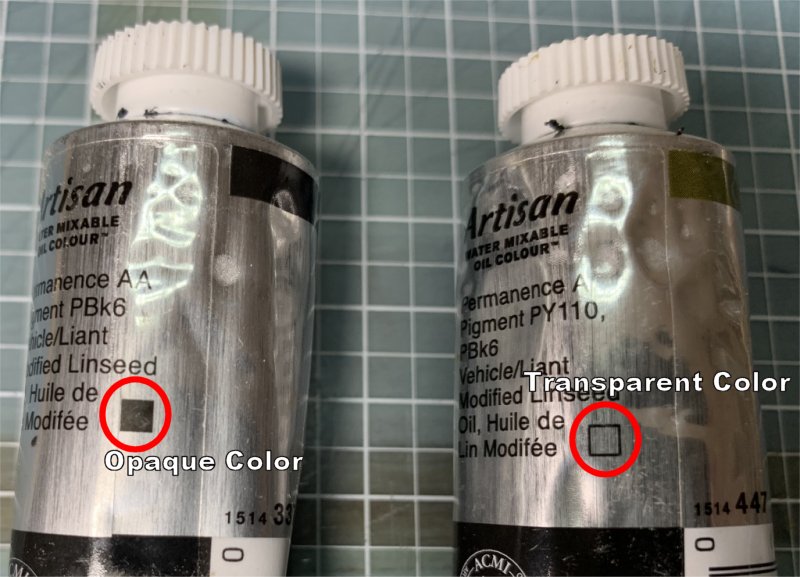
This is something I just learned myself not to long ago. NOT all oil paints have the same opacity. This definitely will impact you if have to use them, either straight from the tube or as part of a special mix for color. But luckily is somewhat easy to tell the difference between the two.
Working Palette
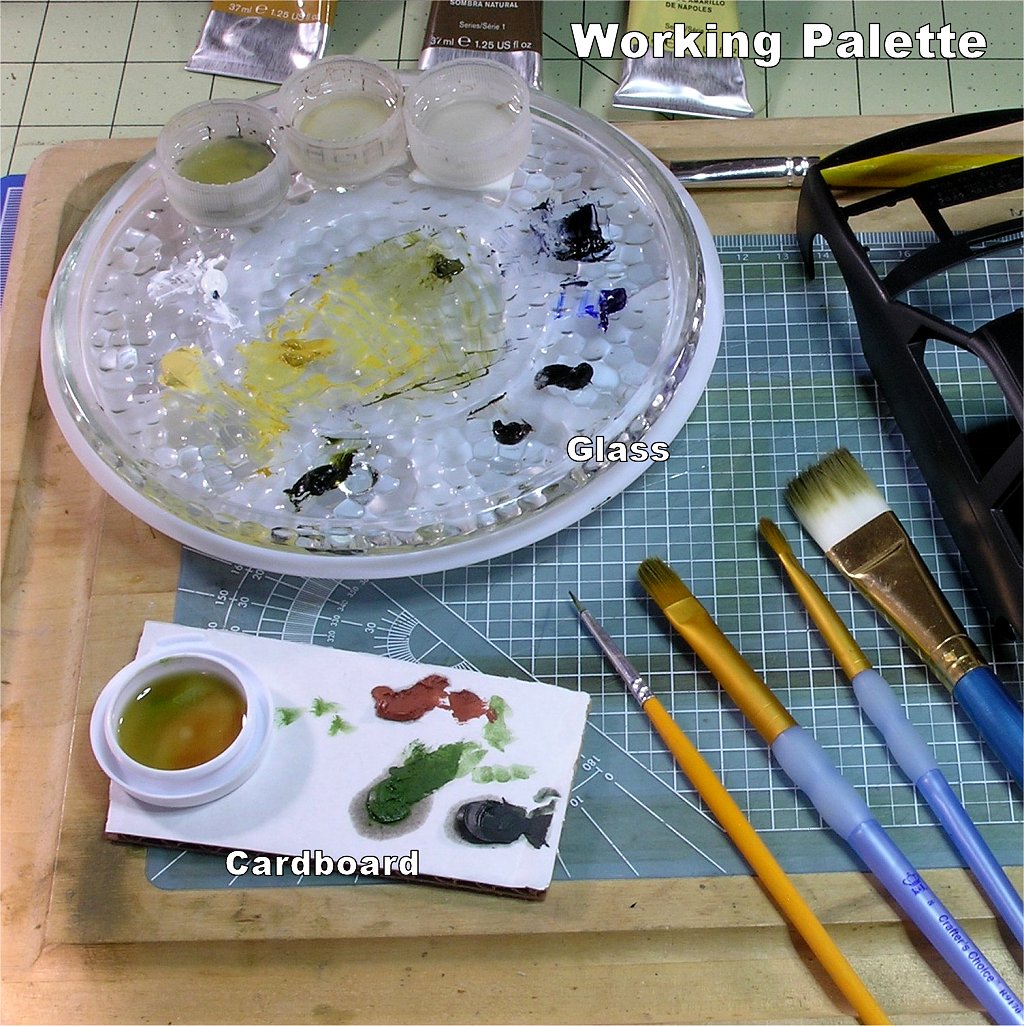
This rule is fairly well know but will just mention it here. Place your oil paint on a piece of cardboard to pull out the linseed oil from the paint. This will help shortin the drying time and help with coverage. Since I use the Water Mixable Oils I sometimes use a glass palette, but I'm using this less and less.
Priming the Model
I prime all my models the same way. I use Krylon Flat Black from a rattle can. I let it cure for about 48ish hours.
Applying the Paint to the Model
Apply paint with a stabbing/dabbing motion using only enough paint to lightly cover the area with a thin layer of paint. Several layers maybe need to cover fully. Do NOT brush it one in thick layers. remember "Less is More"
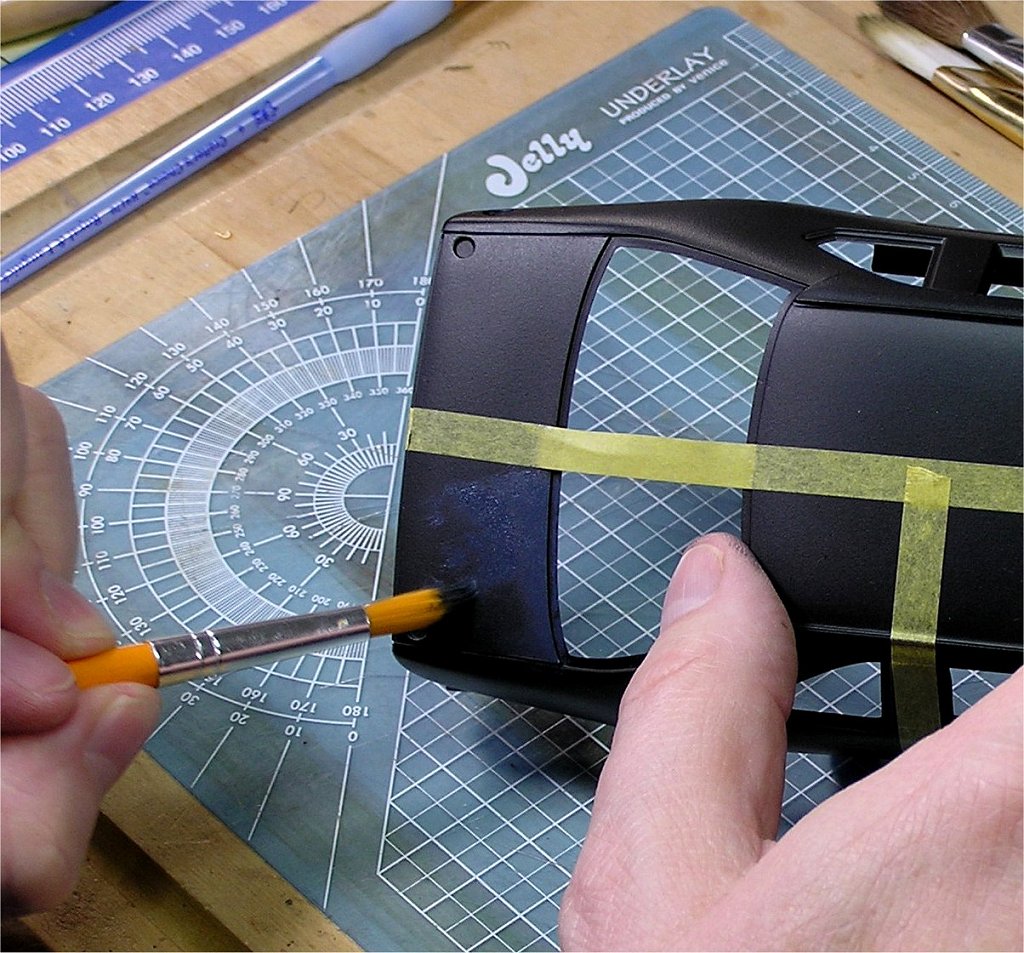
Once the paint is applied I hit it with a hair dryer just to get it to start setting up, though I'm not sure it is necessary to do that. I then set the model aside for about an hour. After that I start the blending process.
Using a DRY small flat brush using the stabbing/dabbing motion I slowly blend and smooth out the layer of paint. Try not to use the tip of the brush but rather the wide side of the brush. Repeat this process with increasing sizes of flat brushes until you are happy with the result. Lastly only use the large MOP brush as a final light blending.
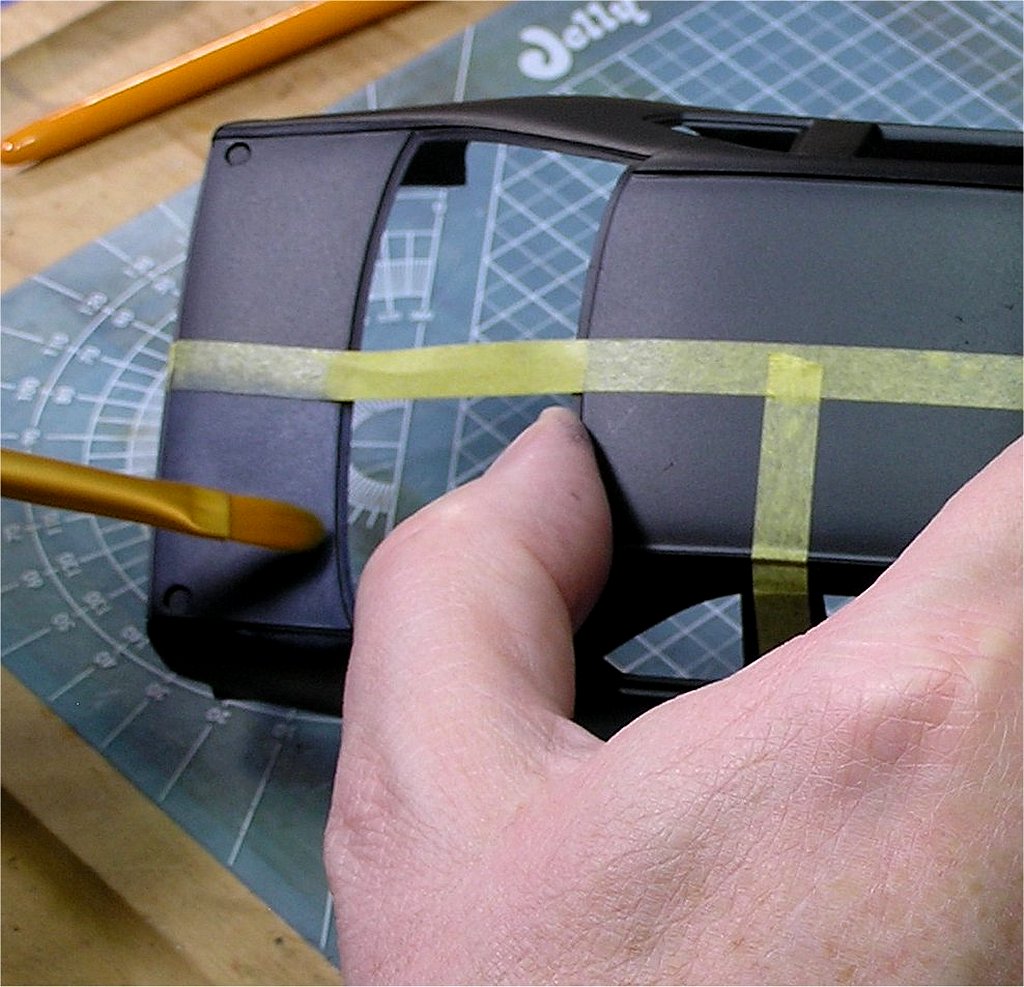
Please note that at no time are any of my brushes dipped in thinner or water. Use them DRY!
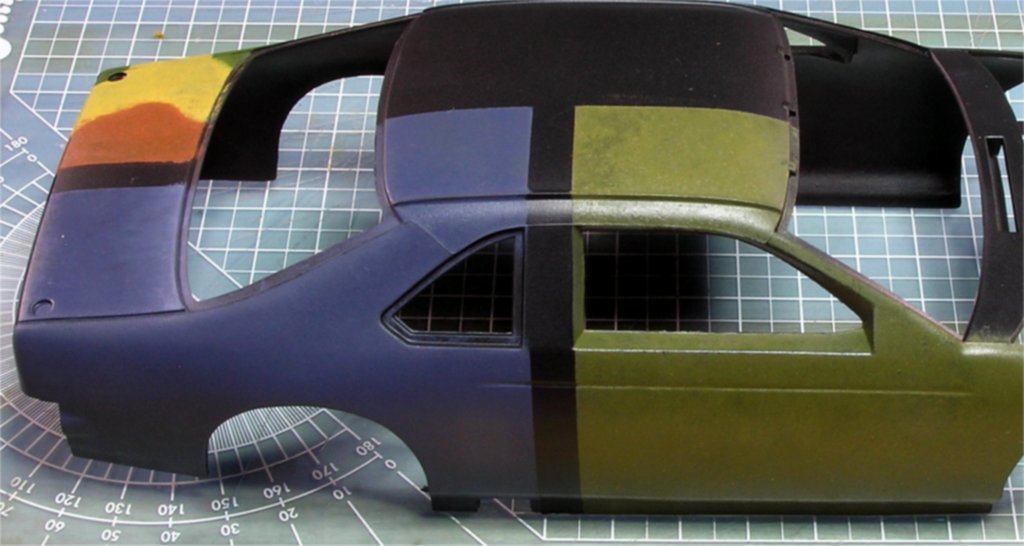
Below is the sample I did up yesterday showing different colors.
I did this fast so it not quite a smooth as I would like.
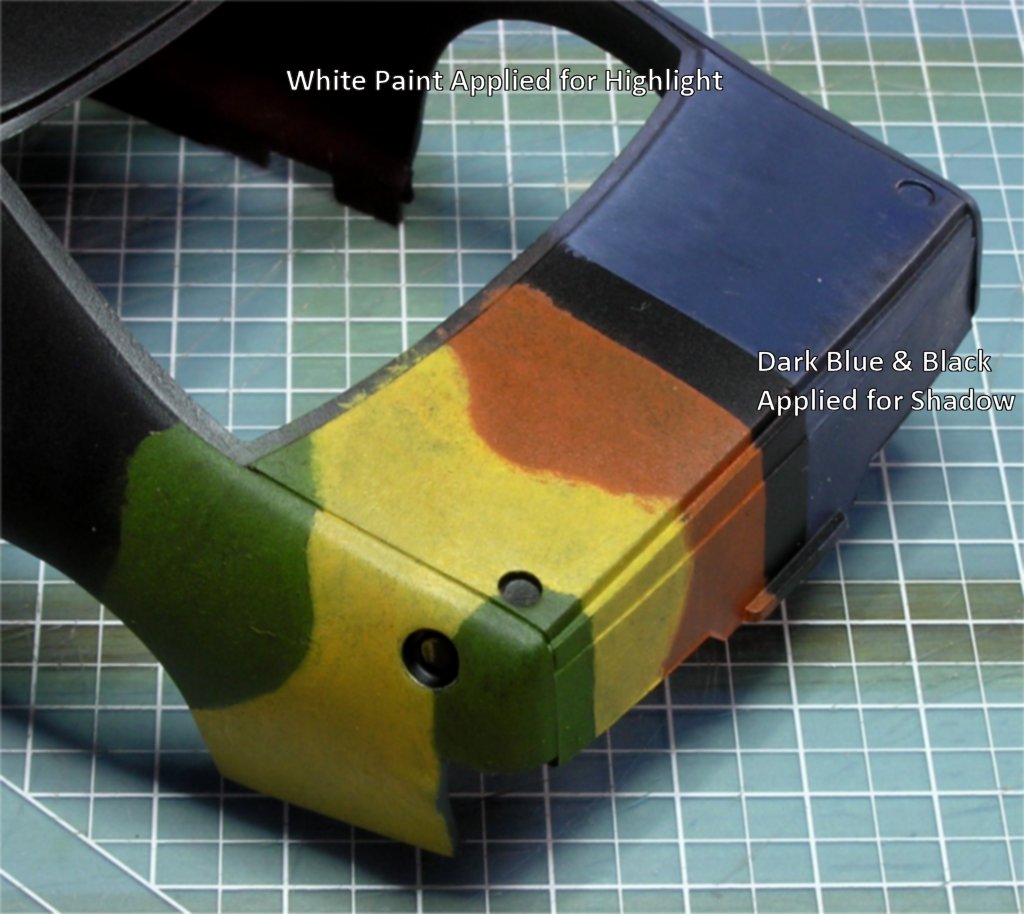
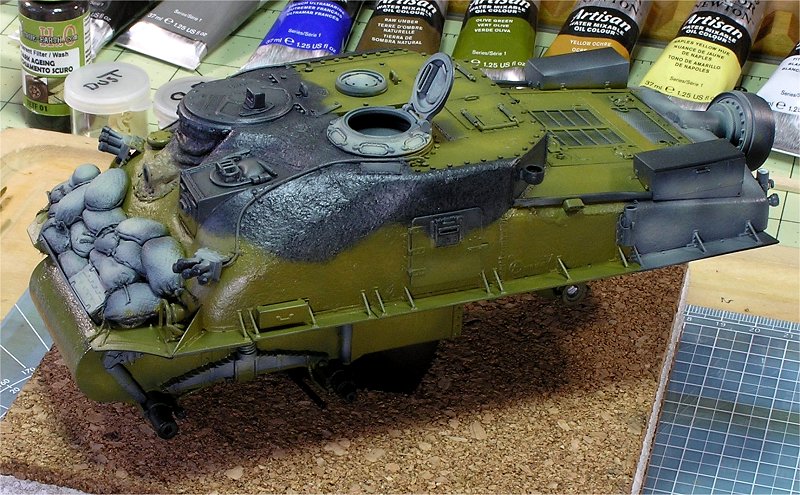
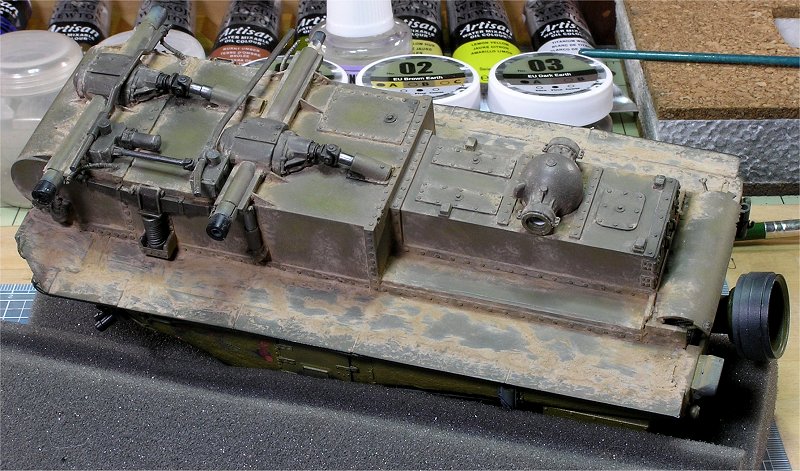
Lastly here is my current project. After applying a primer of flat black from Krylon Spray can the entire model was painted in Winsor & Newton Artisan Water Mixable Oil Paint. The first picture is an early shot as I have since gone back and repainted it as it looked to green. The last photo is after the underside had VMS pigments applied...they are nice by the way.
Thanks for following along with all this and I sure hope it makes a little sense and not overly confusing. IF anyone has question feel free to ask or shot me a PM.
Good Luck and Have Fun


Let me start by saying that this is NOT my original idea/technique but several I have found over the years. (See my post above) Also I'm still very much in the experimental phase of this technique and with anything new there is a learning curve. So please pretice this technique on an old paint mule first.
BRUSHES
First off you will need several brushes. I find round and flat brushes most useful as well as large Mop style brushes for the Final blending.

Oil Paints
Of course you will need Oil paint of your choice and any brand you like will work. I use Winsor & Newton Artisan Water Mixable Oil Paints for their ease of use and clean up....Oh and I do have a few Abteilung 502s as well.

A few words regarding Artisan Water Mixable Oil Paints if you plan to give them a try. While they a water mixable the are still Oil Paints and behave just as normal Oil Paints do. There is plenty of online material on how to get the best results from them and how to handle some special elements with water mixable oils. So definitely do some research before going in full head a steam.
Opacity of Oil Paints
This is something I just learned myself not to long ago. NOT all oil paints have the same opacity. This definitely will impact you if have to use them, either straight from the tube or as part of a special mix for color. But luckily is somewhat easy to tell the difference between the two.

Working Palette
This rule is fairly well know but will just mention it here. Place your oil paint on a piece of cardboard to pull out the linseed oil from the paint. This will help shortin the drying time and help with coverage. Since I use the Water Mixable Oils I sometimes use a glass palette, but I'm using this less and less.

Priming the Model
I prime all my models the same way. I use Krylon Flat Black from a rattle can. I let it cure for about 48ish hours.
Applying the Paint to the Model
Apply paint with a stabbing/dabbing motion using only enough paint to lightly cover the area with a thin layer of paint. Several layers maybe need to cover fully. Do NOT brush it one in thick layers. remember "Less is More"


Once the paint is applied I hit it with a hair dryer just to get it to start setting up, though I'm not sure it is necessary to do that. I then set the model aside for about an hour. After that I start the blending process.
Using a DRY small flat brush using the stabbing/dabbing motion I slowly blend and smooth out the layer of paint. Try not to use the tip of the brush but rather the wide side of the brush. Repeat this process with increasing sizes of flat brushes until you are happy with the result. Lastly only use the large MOP brush as a final light blending.

Please note that at no time are any of my brushes dipped in thinner or water. Use them DRY!
Below is the sample I did up yesterday showing different colors.
I did this fast so it not quite a smooth as I would like.


Lastly here is my current project. After applying a primer of flat black from Krylon Spray can the entire model was painted in Winsor & Newton Artisan Water Mixable Oil Paint. The first picture is an early shot as I have since gone back and repainted it as it looked to green. The last photo is after the underside had VMS pigments applied...they are nice by the way.


Thanks for following along with all this and I sure hope it makes a little sense and not overly confusing. IF anyone has question feel free to ask or shot me a PM.
Good Luck and Have Fun

Tank1812

Joined: April 29, 2014
KitMaker: 1,112 posts
Armorama: 886 posts

Posted: Monday, January 20, 2020 - 01:35 AM UTC
Very interesting, still seems weird but your results look good. Thanks for sharing this technique. Probably would be best if a separate thread is also started so more folks can see it as opposed to this thread with ‘extra content’ (which I have also enjoyed).
Can explain more about the cork and foam base?
Can explain more about the cork and foam base?
Posted: Monday, January 20, 2020 - 02:50 AM UTC
Goodmorning Ryan,
I was thinking of starting a thread on the oil paint once i was a bit comfortable with.
Oops forgot to add the cork and foam base stuff.
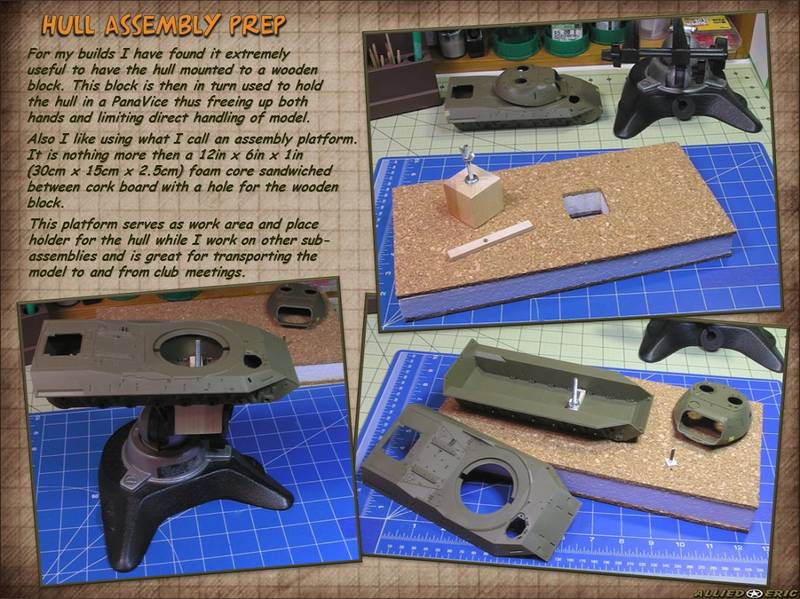
I borrowed this idea from wooden ship model builders, which they call a build board. The Idea is to hold your model and use the building board so as not to directly handle the model. It really simple to make, I have about 10 of the in my studio.
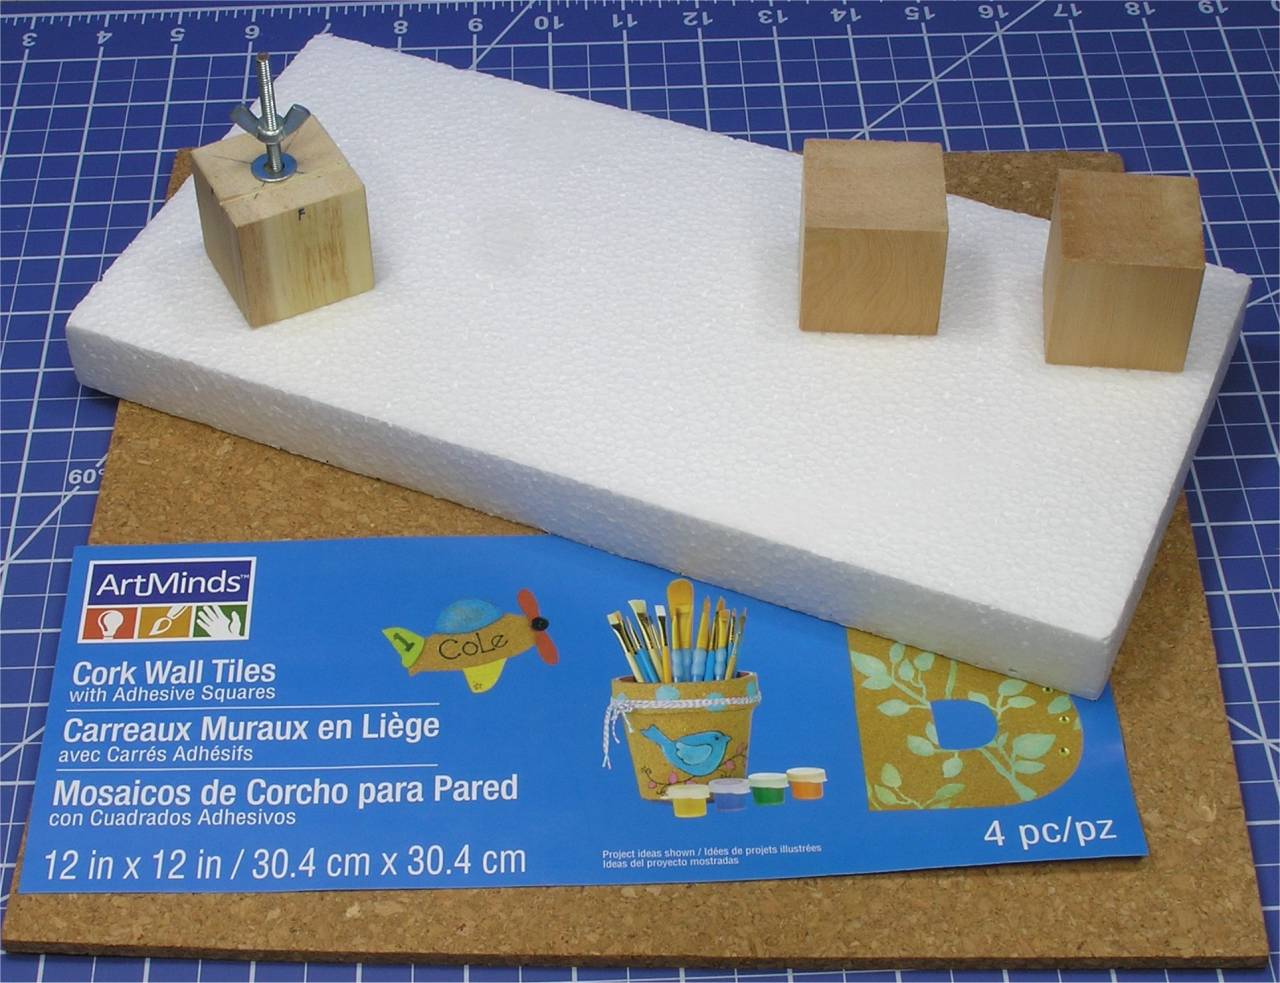
Here are materials needed to make a building board.
Here is a slide I made up a few years ago about making the board.
Hope this helps. Let me know if you have any questions.

I was thinking of starting a thread on the oil paint once i was a bit comfortable with.
Oops forgot to add the cork and foam base stuff.
I borrowed this idea from wooden ship model builders, which they call a build board. The Idea is to hold your model and use the building board so as not to directly handle the model. It really simple to make, I have about 10 of the in my studio.
Here are materials needed to make a building board.

Here is a slide I made up a few years ago about making the board.

Hope this helps. Let me know if you have any questions.

Tank1812

Joined: April 29, 2014
KitMaker: 1,112 posts
Armorama: 886 posts

Posted: Monday, January 20, 2020 - 03:51 AM UTC
I like the idea. Thanks for sharing.
Do you find the need to keep the block secured to the base, in case you turn it over or sideways?
Do you find the need to keep the block secured to the base, in case you turn it over or sideways?
Posted: Monday, January 20, 2020 - 04:18 AM UTC
Kool Ryan Glade you like it.
I do not secure the wooden block into foam base. Since it's about the same thickness as the foam it stays in good most of the time. If I need to rotate it I just be careful and not to tip it out. I use the Panavise if I need to work on the kit at an angle.
| |)
I do not secure the wooden block into foam base. Since it's about the same thickness as the foam it stays in good most of the time. If I need to rotate it I just be careful and not to tip it out. I use the Panavise if I need to work on the kit at an angle.
| |)
 |


