_GOTOBOTTOM
Constructive Feedback
For in-progress or completed build photos. Give and get contructive feedback!
Meng Merkava 4M with Trophy
cabasner
Visit this Community
Nevada, United States
Joined: February 12, 2012
KitMaker: 1,083 posts
Armorama: 1,014 posts
Posted: Sunday, March 22, 2020 - 11:01 AM UTC
Hi All,

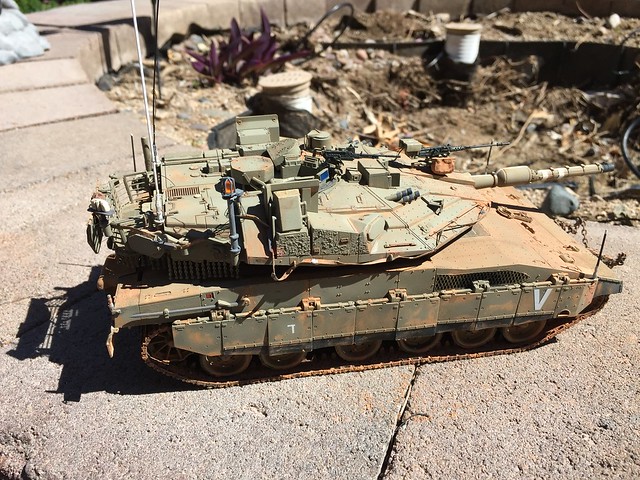
I FINALLY finished my Meng Merkava 4M tank with the Trophy protective system. I'd gotten pretty well along with the build, but then got sidetracked when I got bitten by the airplane 'bug', something I had not done since I was a kid. This was the last tank I'd been working on before I started on planes, so I wanted to finish this one first after having it sit idle for almost a year..

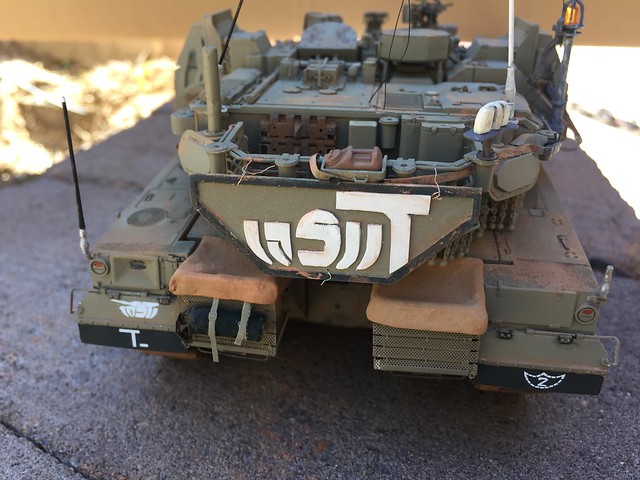
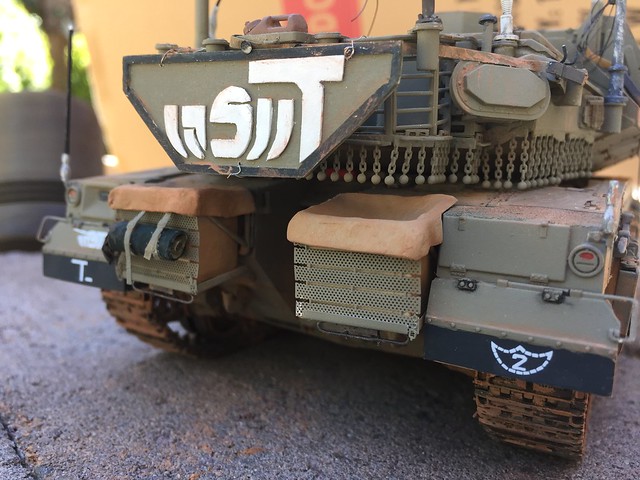
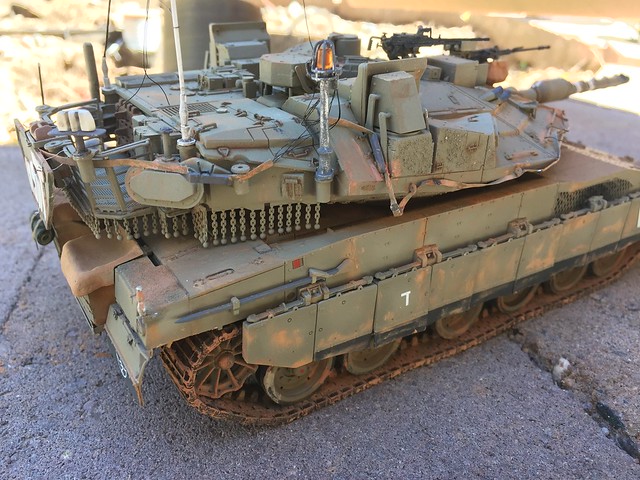
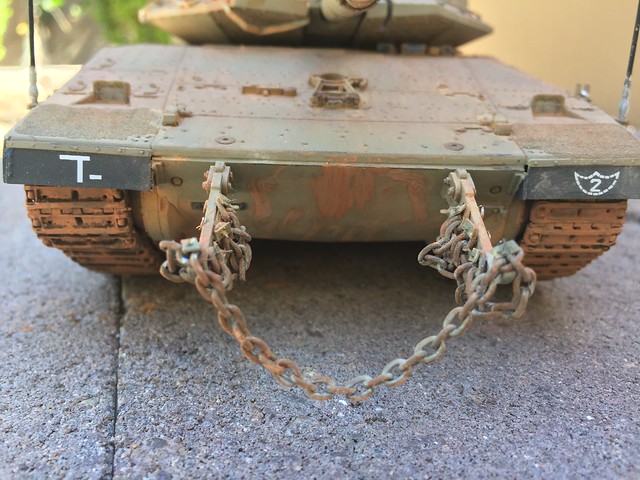
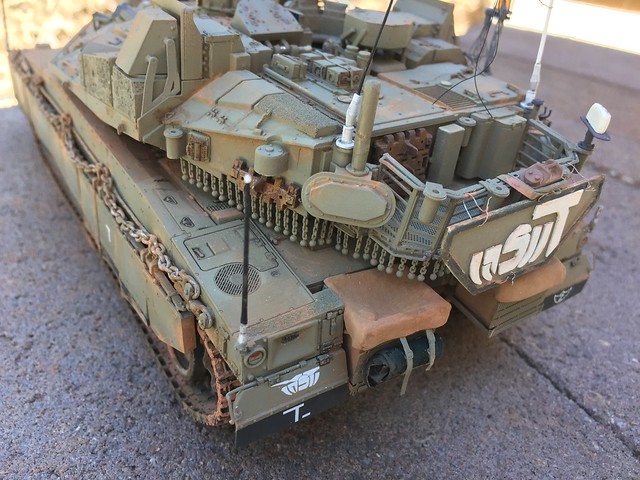
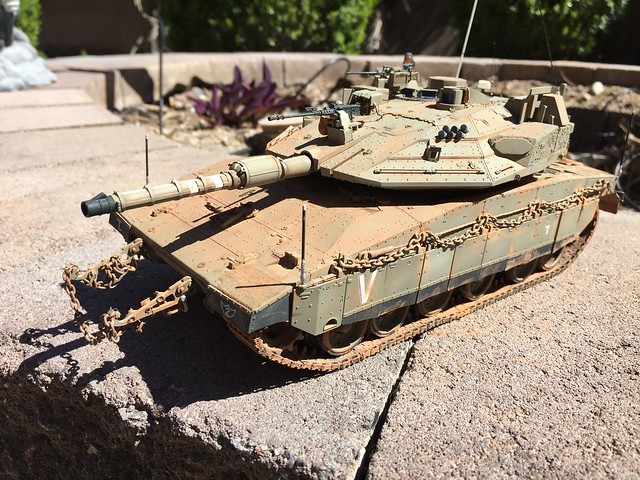
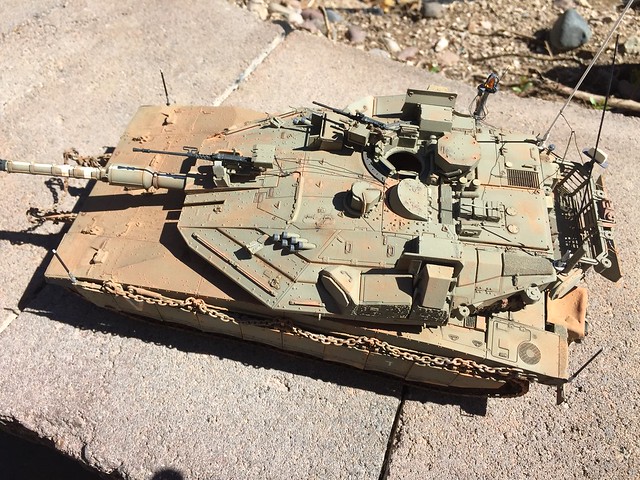
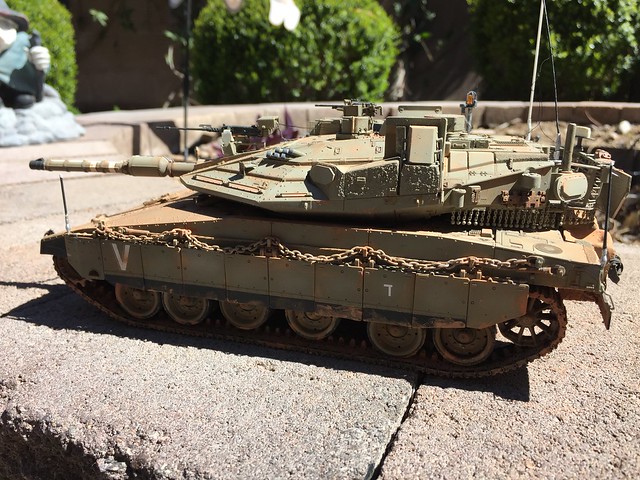
I did a fair amount of minor scratch building, the corner dimensional indicators (1 of them is missing on the real tank, thus only 3), the chain on the front towing horns and associated hardware, the MILES cables and amber rotating beacon tower on the left side and left rear of the turret, the large identification placard on the back of the turret basket, the 'tan antenna thing’ on the right rear of the turret, and, lastly, the black and white tall antennas. The tank I was modeling, a real life tank with training hardware, shown in the Desert Eagle Publishing Merkava 4M book, has VERY few scratches and very little chipped paint, in VERY good shape, but was covered in a significant amount of reddish dirt/dust. I still didn’t do a very good job on the weathering, even so, but at least I can say it’s done, such as it is. I’ve been waiting a long time to get that scratch built placard hung on a model, as I’d done that placard long before I even started on the model itself. Please feel free to comment on the tank, and let me know what you think!

Sorry for the poor quality photos, but I just wanted to get SOMETHING posted...

Thank you!


Tankrider
Visit this Community
Oklahoma, United States
Joined: October 07, 2002
KitMaker: 1,280 posts
Armorama: 1,208 posts
Posted: Friday, March 27, 2020 - 03:45 AM UTC
Double thumbs up Curt.
I especially like the dangling MILES belts as well as the "plywood" tactical sign on the back of the bustle rack.

John
errains
#045
Visit this Community
South Carolina, United States
Joined: September 23, 2005
KitMaker: 362 posts
Armorama: 350 posts
Posted: Friday, March 27, 2020 - 04:33 AM UTC
OUTSTANDING!!!

You did a super JOB here Curt especially with all the added details. This really lights a fire under the ol'Bum to get back to my Merk. Its funny we will have many of the same details.

Once again Awesome JOB Curt!!!

PS: Curt want brand of paint and color did you use for your base color? I really like it.
cabasner
Visit this Community
Nevada, United States
Joined: February 12, 2012
KitMaker: 1,083 posts
Armorama: 1,014 posts
Posted: Friday, March 27, 2020 - 04:44 AM UTC

Quoted Text

Double thumbs up Curt.
I especially like the dangling MILES belts as well as the "plywood" tactical sign on the back of the bustle rack.

John


John,

Thank you very much for your comments. The placard on the back of the bustle rack is in fact real micro plywood. The MILES cable is just masking tape with some embedded wires on one end of each, which I used to attach to the rotating beacon tower.
cabasner
Visit this Community
Nevada, United States
Joined: February 12, 2012
KitMaker: 1,083 posts
Armorama: 1,014 posts
Posted: Friday, March 27, 2020 - 04:48 AM UTC

Quoted Text

OUTSTANDING!!!

You did a super JOB here Curt especially with all the added details. This really lights a fire under the ol'Bum to get back to my Merk. Its funny we will have many of the same details.

Once again Awesome JOB Curt!!!

PS: Curt want brand of paint and color did you use for your base color? I really like it.


Eric,

Your comments are greatly appreciated, and if it turns out to be motivational for you, I’m thrilled! The tank color is Tamiya paint, a custom mix that I’ve been using for current IDF tanks. I was really happy to get to the point of mounting that placard on the back of the rack, as I think that’s the best feature of the build.

Eric, the Tamiya mix is 2 parts XF-20 Medium Grey to 1 part XF-49 Khaki. I did quite a bit of research several years back (there are a number of posts by me scattered throughout Armorama on the topic of IDF colors, and I shamelessly borrowed much of the research others had done, but had to confirm for myself) doing different mixes of Tamiya colors, and this is the one that I settled on as being the closest to what I see in photos. Hope this helps 😊

By the way, in case I’ve not mentioned it before, the Desert Eagle Publishing series of IDF vehicles is well worth getting for the specific tank you are working on. The Mark 4M book was what gave me the photos needed to detail my tank.
panamadan
Visit this Community
Minnesota, United States
Joined: July 20, 2004
KitMaker: 1,513 posts
Armorama: 1,449 posts
Posted: Friday, March 27, 2020 - 05:31 AM UTC
Very nice work!
D
cabasner
Visit this Community
Nevada, United States
Joined: February 12, 2012
KitMaker: 1,083 posts
Armorama: 1,014 posts
Posted: Friday, March 27, 2020 - 03:03 PM UTC

Quoted Text

Very nice work!
D


Thanks, Dan.
sinsling
Visit this Community
Singapore / 新加坡
Joined: January 16, 2007
KitMaker: 86 posts
Armorama: 85 posts
Posted: Friday, March 27, 2020 - 04:54 PM UTC
Hi Curt,

Wondering how I missed this?! Phenomenal work, and your attention to detail is exquisite.

Currently working on a Magach 6b so this is wonderful inspiration. If mine turns out half as nice I'll be a happy camper!

Thanks for posting,

Regards,
Johanan
cabasner
Visit this Community
Nevada, United States
Joined: February 12, 2012
KitMaker: 1,083 posts
Armorama: 1,014 posts
Posted: Saturday, March 28, 2020 - 04:16 AM UTC

Quoted Text

Hi Curt,

Wondering how I missed this?! Phenomenal work, and your attention to detail is exquisite.

Currently working on a Magach 6b so this is wonderful inspiration. If mine turns out half as nice I'll be a happy camper!

Thanks for posting,

Regards,
Johanan


Johanan,

Many thanks for your very kind words. I know I could’ve done a whole lot more weathering if I had spent more time, but I picked this build up after ignoring it for almost a year with most of the painting done and none of the detailing. I just wanted to get this thing completed. So I greatly appreciate your very nice comments.

By the way, which Magach kit are you working on?
sinsling
Visit this Community
Singapore / 新加坡
Joined: January 16, 2007
KitMaker: 86 posts
Armorama: 85 posts
Posted: Saturday, March 28, 2020 - 07:12 AM UTC
Hi Curt,

Its the Magach 6b Gal by Meng. Its a phenomenal kit and the fit, detail and finesse of the parts is superb. It took me a week of 4 hour nights to complete construction. So your painted masterpiece comes at just the right time to spur me on!

So...thanks again for the inspiration!

Regards,
Johanan
cabasner
Visit this Community
Nevada, United States
Joined: February 12, 2012
KitMaker: 1,083 posts
Armorama: 1,014 posts
Posted: Saturday, March 28, 2020 - 10:08 AM UTC

Quoted Text

Hi Curt,

Its the Magach 6b Gal by Meng. Its a phenomenal kit and the fit, detail and finesse of the parts is superb. It took me a week of 4 hour nights to complete construction. So your painted masterpiece comes at just the right time to spur me on!

So...thanks again for the inspiration!

Regards,
Johanan


Johanan,

I am humbled by your compliment 😊 I’m amazed at the speed with which you built the Magach!! The reason I asked which kit you have is because I have the older Academy kit, which I got way before the Meng kit hit the market. I figured the Meng kit would be as you describe, and if /when I get serious about starting a Magach, I may get the Meng version. I’ve so far been thrilled with all of the Meng kits I’ve built so far, nice to see that the quality remains consistent!
 _GOTOTOP