_GOTOBOTTOM
Constructive Feedback
For in-progress or completed build photos. Give and get contructive feedback!
Dragon 1/35 Elefant at Kursk
USMA15
Visit this Community
Colorado, United States
Joined: September 25, 2016
KitMaker: 32 posts
Armorama: 12 posts
Posted: Monday, July 20, 2020 - 03:06 AM UTC
Dear friends,

After a haitus of about 10 years for college, military, life, etc. I am SO happy to be back in the hobby. I finished my first AFV in about 10 years recently, Meng's 1/35 Rolls Royce armored car, but I'm really proud so far of my effort on Dragon's 1/35 Elefant tank destroyer, finished with parts from Aber's fine and comprehensive detail set, and Friul metal tracks.

I also attempted some new techniques for me such as texturing the rolled steel armor with putty, and adding homemade weld beads. I was inspired to try these techniques after watching videos from Martin Kovic on YouTube.

Enough intro, here are the progress pictures! Construction is complete, and I think I'll be priming this morning!


And bonus Rolls Royce:


Thanks for looking, and happy modeling!
Andrew


UpperCanadian
Visit this Community
British Columbia, Canada
Joined: June 28, 2020
KitMaker: 152 posts
Armorama: 133 posts
Posted: Monday, July 20, 2020 - 03:36 AM UTC
Excellent work.

Did you have to scribe out the weld lines on the Elefant?
USMA15
Visit this Community
Colorado, United States
Joined: September 25, 2016
KitMaker: 32 posts
Armorama: 12 posts
Posted: Monday, July 20, 2020 - 03:43 AM UTC
Hi Dan, thanks you! Yes, I did scribe out the molded weld seams, which admittedly were totally fine. I also added the flame cut marks. I just wanted to practice!

Here are Martin's videos which I used for inspiration in case anyone wonders:
https://www.youtube.com/watch?v=0-kqLtRGhUQ&t=314s
https://www.youtube.com/watch?v=F3GlNC2cK8s
Scarred
Visit this Community
Washington, United States
Joined: March 11, 2016
KitMaker: 1,792 posts
Armorama: 1,186 posts
Posted: Monday, July 20, 2020 - 06:04 AM UTC
Looks very good, can't wait to see it in paint. A minor or major correction. Ferdinands were used at Kursk not Elefants. The Kursk survivors were sent back and reworked into Elefants with the addition of a ball mounted MG on the bow, a commanders cupola, zimmerit and a few other changes.
brekinapez
Visit this Community
Georgia, United States
Joined: July 26, 2013
KitMaker: 2,272 posts
Armorama: 1,860 posts
Posted: Monday, July 20, 2020 - 09:19 AM UTC

Quoted Text

Looks very good, can't wait to see it in paint. A minor or major correction. Ferdinands were used at Kursk not Elefants. The Kursk survivors were sent back and reworked into Elefants with the addition of a ball mounted MG on the bow, a commanders cupola, zimmerit and a few other changes.


I saw the thread titled and got triggered, myself. Wrong name aside, this looks to be a very nice Ferdinand and look forward to seeing it painted. Don't get it too dirty, though, as it was back to the garage for these bad boys after Kursk.
d6mst0
#453
Visit this Community
Texas, United States
Joined: August 28, 2016
KitMaker: 1,925 posts
Armorama: 601 posts
Posted: Monday, July 20, 2020 - 09:53 AM UTC
Andy,

Nice work I always like that vehicle. One thing, the shield for the 88mm is on correct. Problem is that it was field mod and most of the Ferdinand's that did add the shield before the battle installed it backwards because it was much easier. Yours could be the one they first installed before saying the hell with this install, and install the rest the other way....LOL.

Nice work, looking forward to the paint work.

Mark
Panzer_Modeler
Visit this Community
New Mexico, United States
Joined: May 19, 2020
KitMaker: 419 posts
Armorama: 217 posts
Posted: Wednesday, July 22, 2020 - 01:03 AM UTC
Very nice! Night Shift is a great teacher!
marcb
Visit this Community
Overijssel, Netherlands
Joined: March 25, 2006
KitMaker: 1,244 posts
Armorama: 1,226 posts
Posted: Friday, July 24, 2020 - 03:13 AM UTC
Looks great,

Are there two molded locating points above the upper grab handle on the rear?
Scarred
Visit this Community
Washington, United States
Joined: March 11, 2016
KitMaker: 1,792 posts
Armorama: 1,186 posts
Posted: Friday, July 24, 2020 - 07:10 AM UTC

Quoted Text

Looks great,

Are there two molded locating points above the upper grab handle on the rear?


They for Dragon's Elefants to locate mounting points for two brackets. Not needed for Ferdinands.

If you look thru the pictures taken of the Elefant you can see the brackets.

https://armorama.kitmaker.net/features/7686
Dioramartin
Visit this Community
New South Wales, Australia
Joined: May 04, 2016
KitMaker: 1,476 posts
Armorama: 1,463 posts
Posted: Friday, July 24, 2020 - 05:00 PM UTC
Mighty impressive build Andy it looks fantastic, although as others have said those two raised locating strips on the rear plate need to go. If you go dull red primer it’ll look exactly like the Nibilungen factory pictures – maybe worth taking some snaps of before the camouflage. Talking of which you may already know there were two detachments deployed at Kursk, each with tricky schemes over the base yellow to replicate – schPzAbt 653 had faded green blotches (& a unique colour-coded i/d panel on the upper rear plate) while schPzAbt 654 had the green “net” pattern. Hope you’ll forgive these interlopers, provided to illustrate/assist…


It's your baby but if you’re intending an accurate scheme, 653’s is probably much easier to do but somewhat underwhelming, while 654’s is more difficult but to my mind more interesting. As you can see I went for 654’s but being a useless air-brusher made several failed attempts on #724, an antique Italeri Elefant I retro-converted to a Ferdy long before Dragon’s kit appeared i.e around 1999. Over what must have been the 3rd dunkelgelb overpaint (acrylic) I laid a very thin wash of plain water and then trailed a thin pointy brush of semi-dilute green over it to make the pattern. I had to angle the Ferdy so each panel being painted was level to prevent runs. The green spread slightly due to the water & did the job of appearing sprayed, although once dry dunkelgelb touch-ups were needed where the green had pooled round fixtures. But of course if you’re an airbrush ace skip all that.

# II02 with a pink & black command pennant on the aerial is the Dragon kit, by this time (2010?) I’d taken out a mortgage & bought Munch’s unit history of 654 which has multiple photos of around two-thirds of all its Kursk runners, which showed a wide variation in net patterns - no two alike so you’ve got plenty of scope. Best of luck whatever you do
USMA15
Visit this Community
Colorado, United States
Joined: September 25, 2016
KitMaker: 32 posts
Armorama: 12 posts
Posted: Tuesday, July 28, 2020 - 06:48 AM UTC
Hello friends,

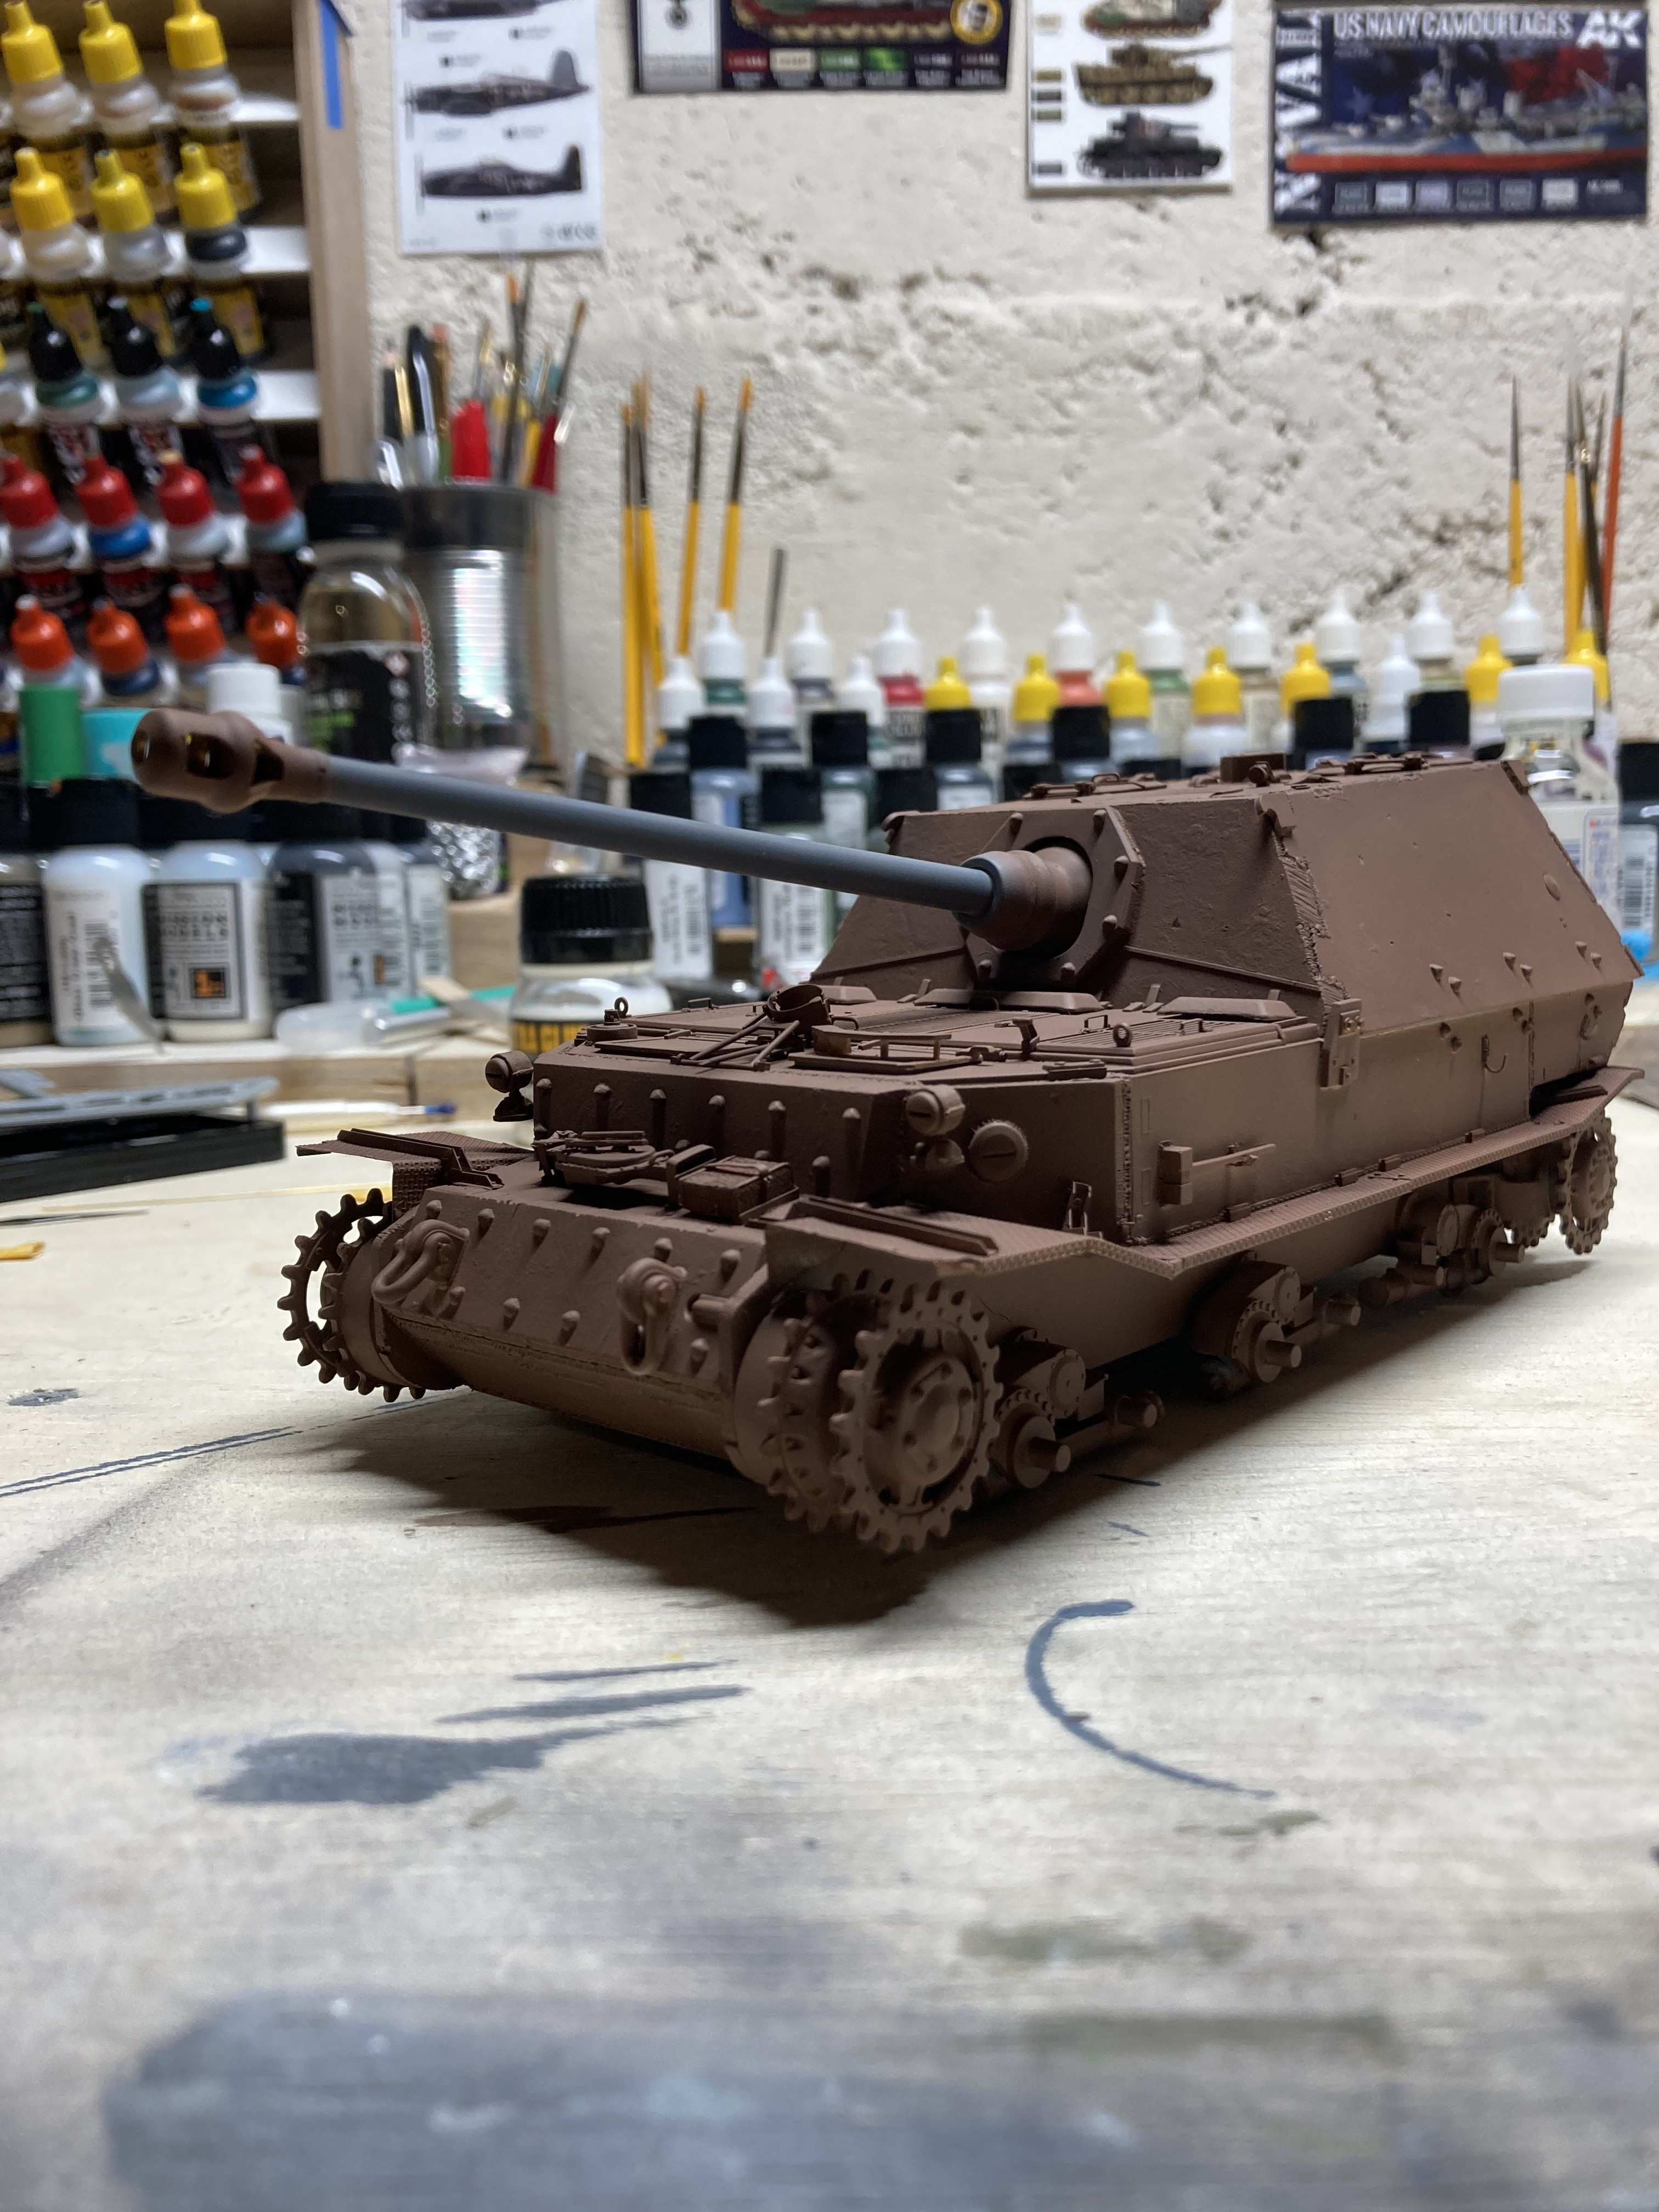
First of all, thank you for all the kind comments. I'm very inspired to keep moving ahead on this project, despite the fact that I apparently cannot read the labeling on the kit's box and mis-labeled this thread an "Elefant" build. I stand corrected and am building a Ferdinand at Kursk! That being said, the educational comments are most welcome.

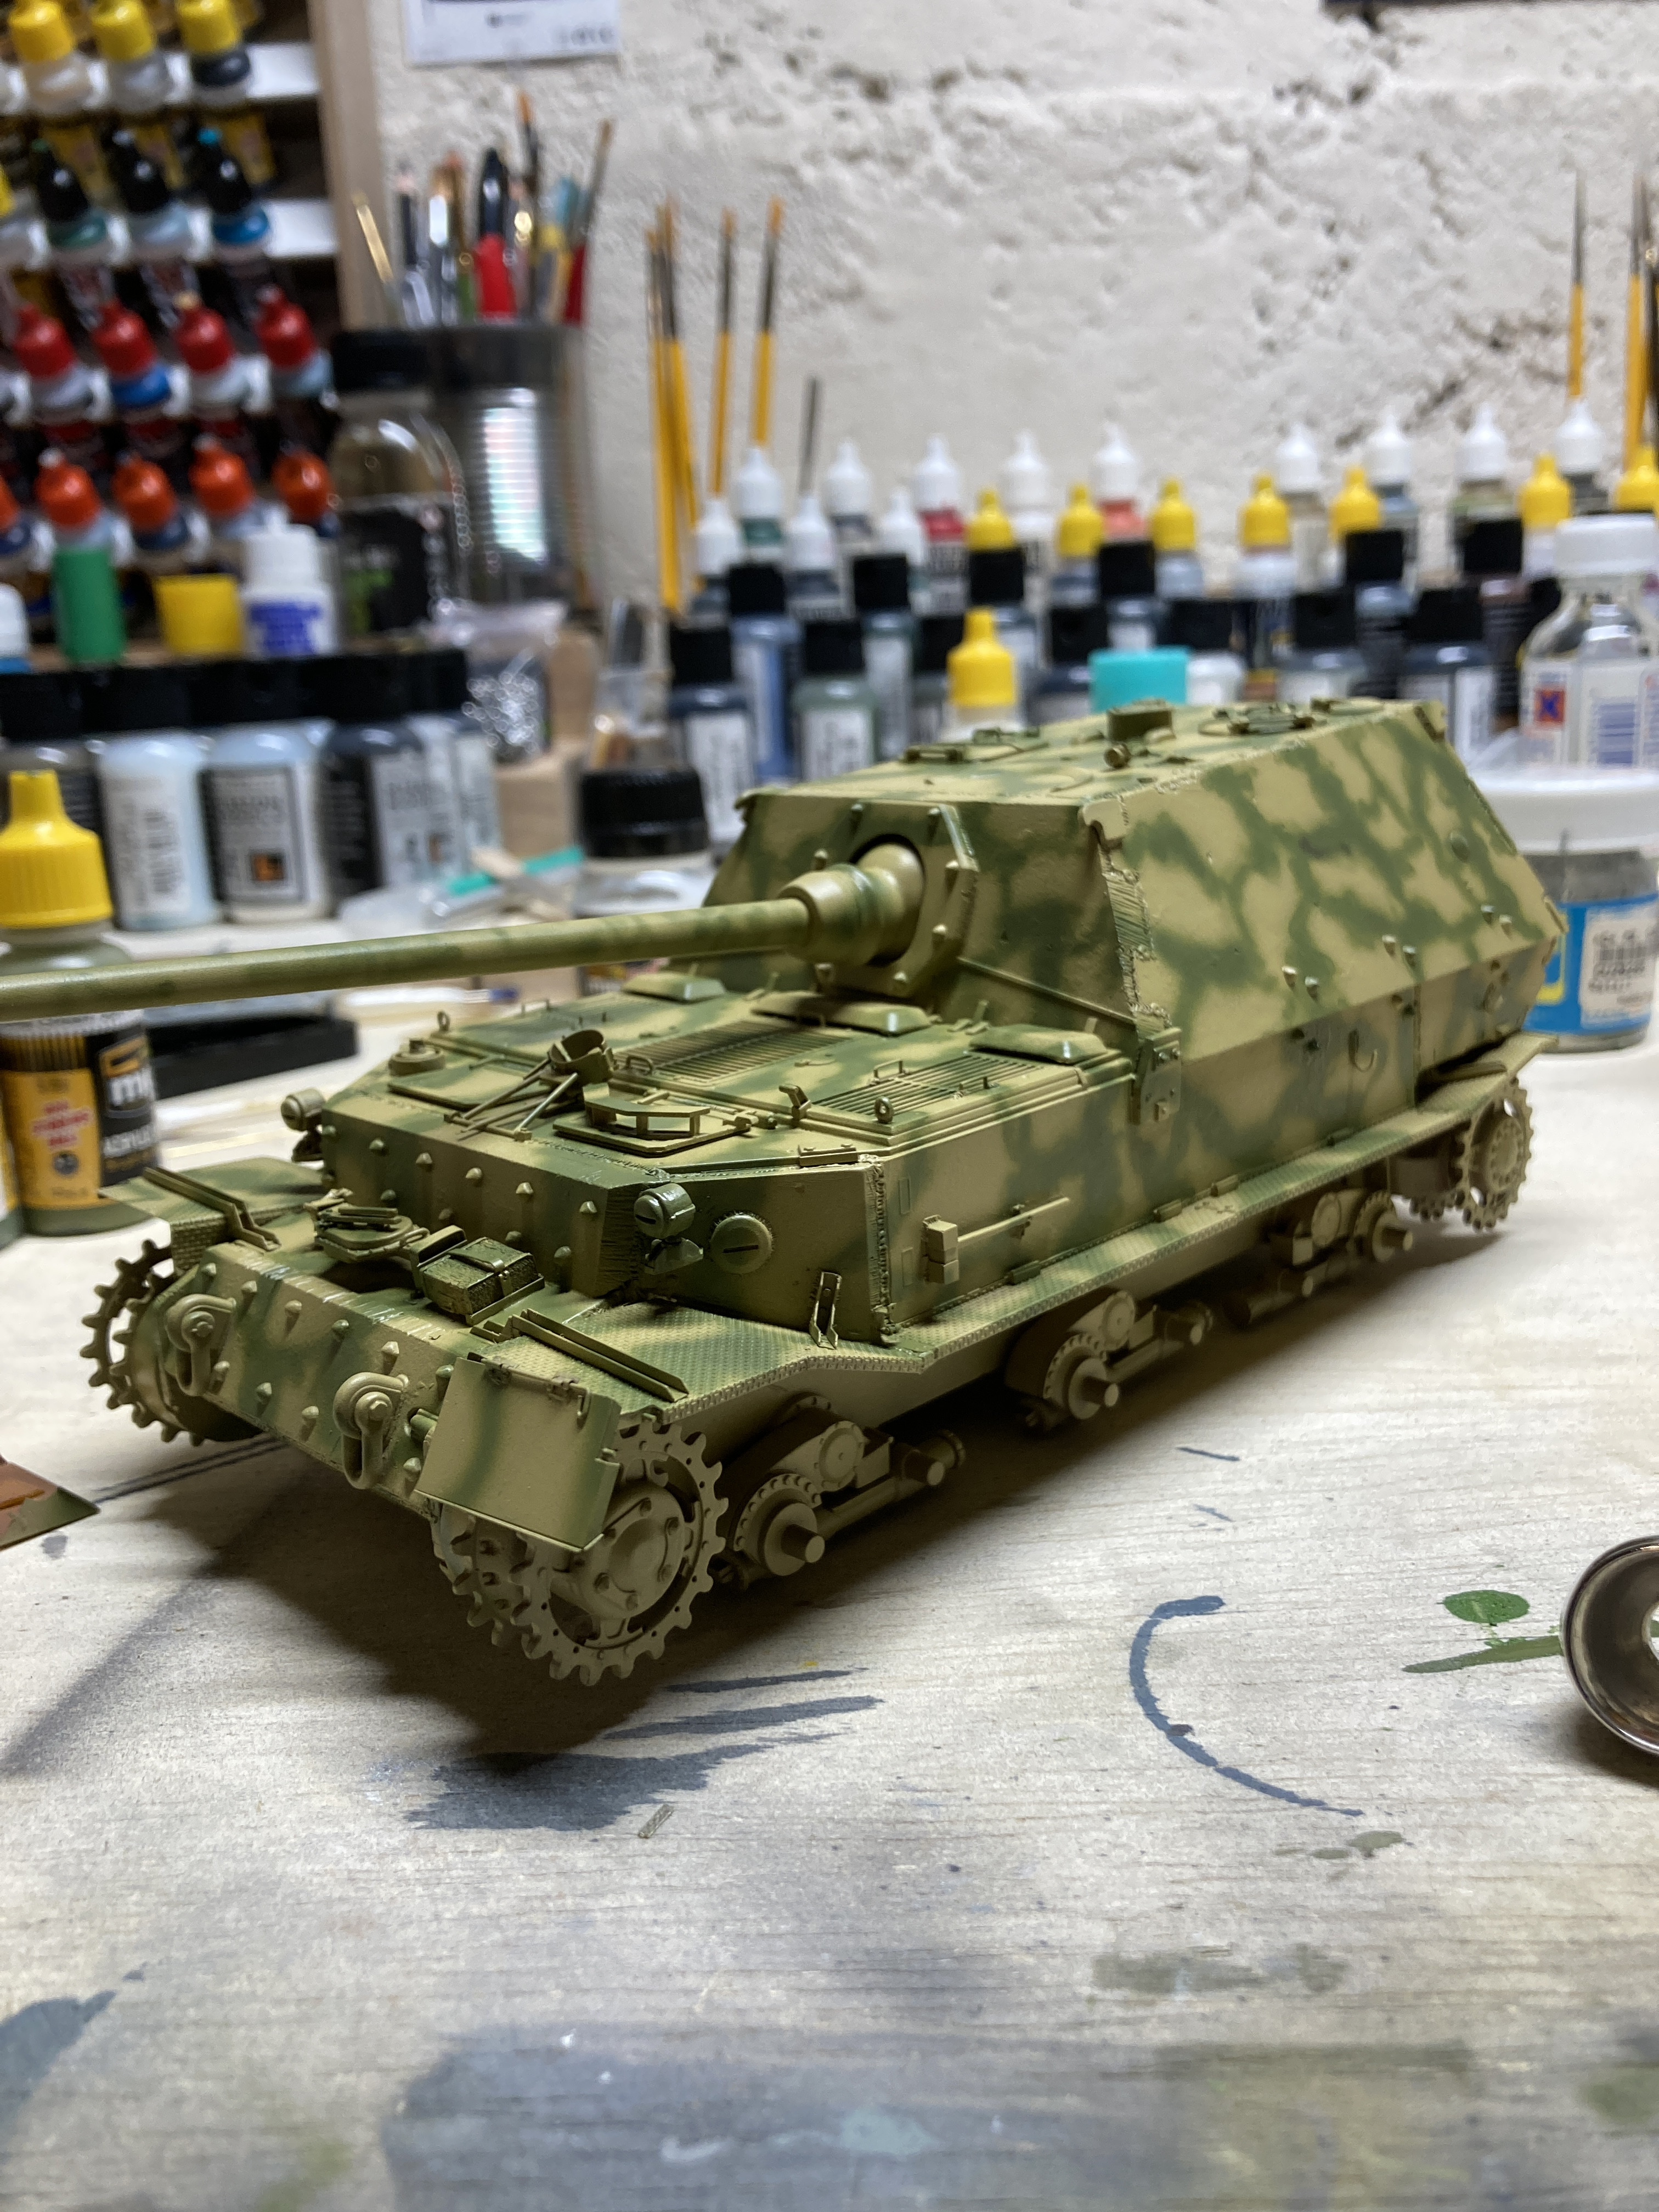
Regarding the mounting brackets above the grab handles on the read, unfortunately I think I'm just going to leave them as-is since I didn't check this thread soon enough, and I've proceeded on to painting. I'm not going for a 100% accurate, rivet-counted build, but rather I am using this kit to try out new construction techniques, new painting techniques, and metal tracks for the first time. That being said, I am attempting to keep it more rather then less accurate!

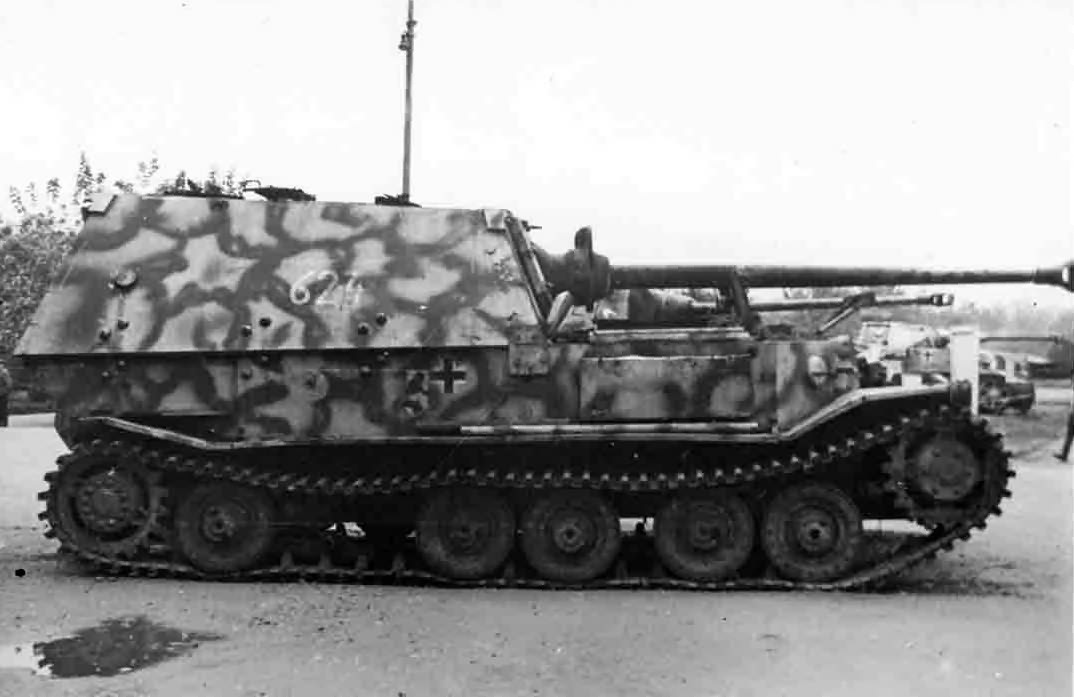
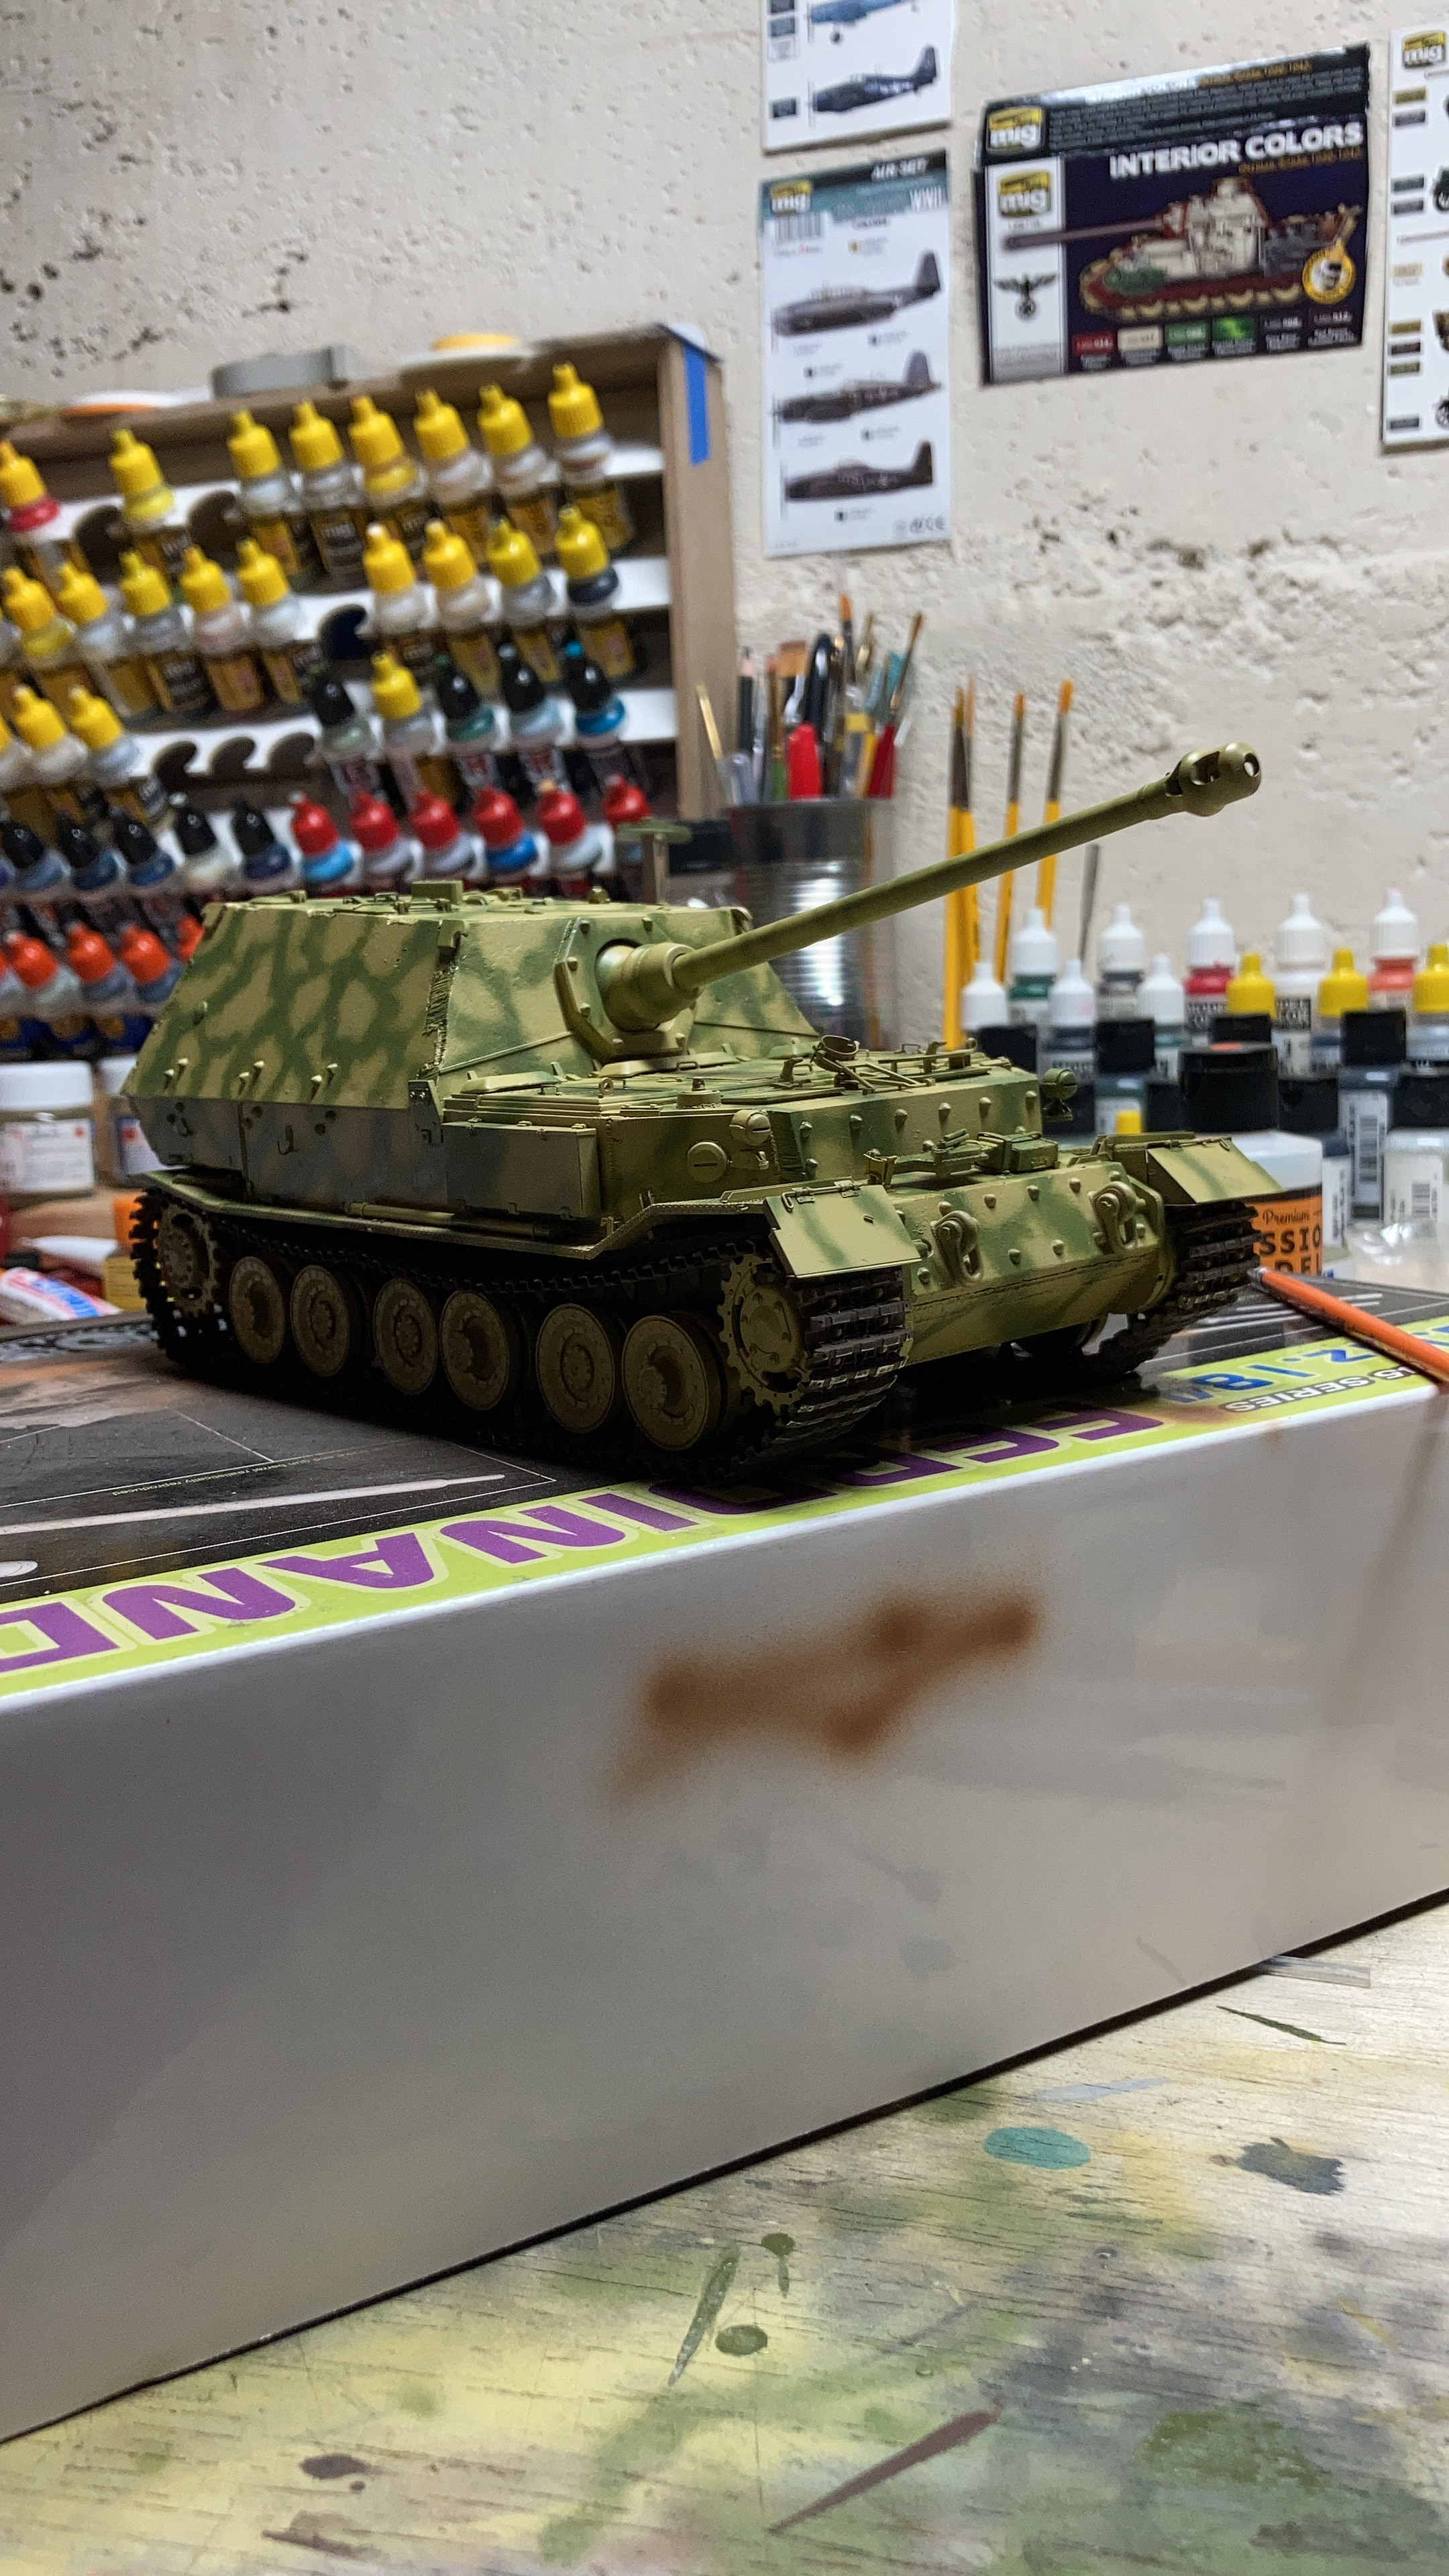
I settled on Ferdinand 624 since unfortunately the Dragon kit doesn't give the modeler a full range of numbers. I chose 624 because I found some good reference photos online, and the camouflage looked like it would be a fun challenge to attempt to reproduce a hand-sprayed camo in 1/35 scale.

On to the photos:
Ferdinand-624-656-EF
source

G-Ferdinand-624
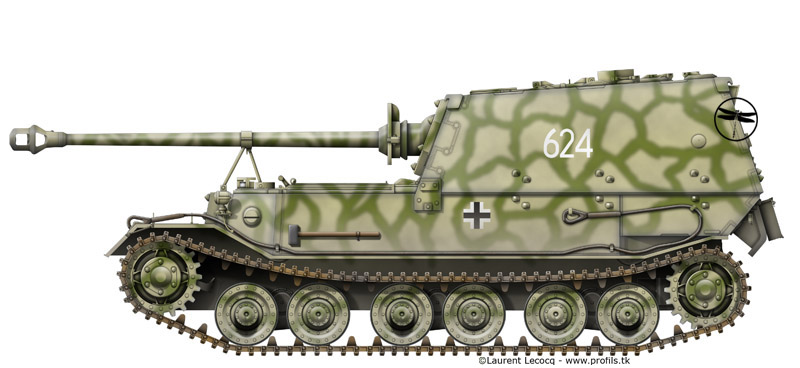
Really great Ferdinand resource

IMG-0584
IMG-0583
61716541534-F61-A4-DBC-764-A-45-EA-89-FB-1-AEB794-C5429
Ferdinand-Kursk

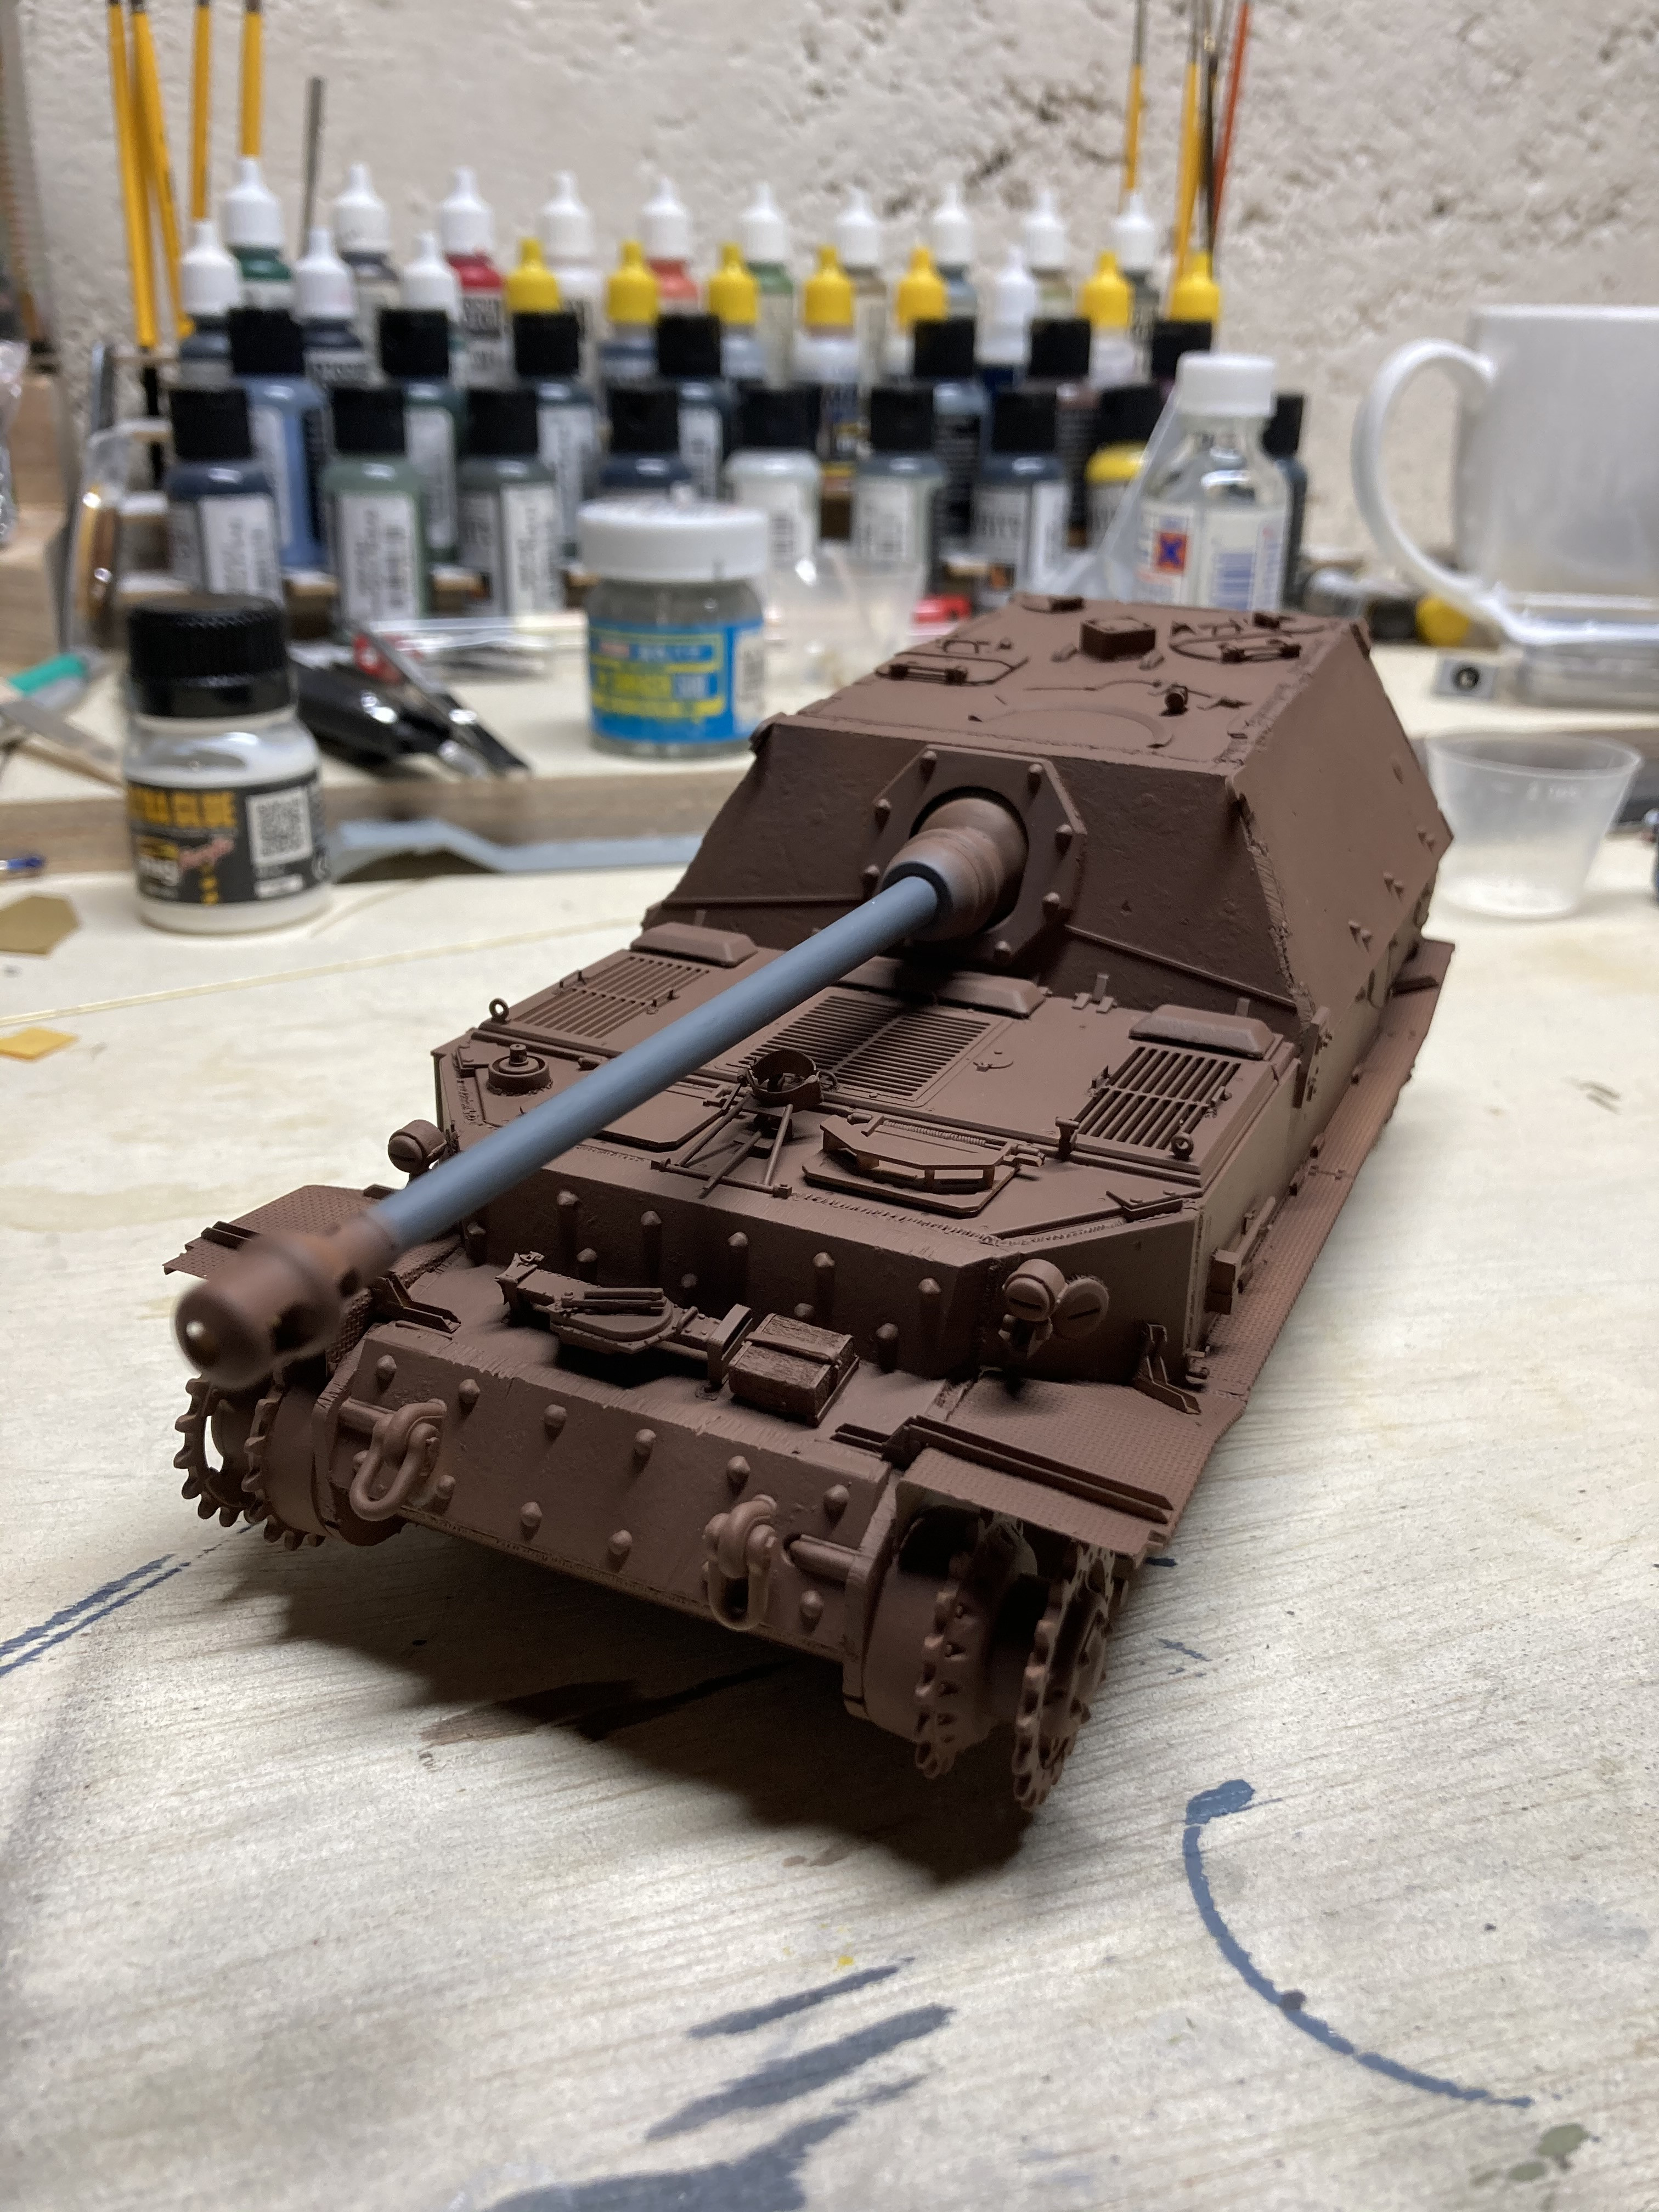
Now, I have a question for anyone who might know the answer...since I took these photos I gloss-coated with AMMO Mig's gloss Lucky Varnish which is acrylic. I let it dry for 24 hours before applying decals, however, Micro-set seemed wrinkle and dissolve the gloss coat. The decals settled down fine and did not affect the paint, so I'm wondering does anyone know what I did wrong? This is my first time using an acrylic gloss-coat. Previously I've used Tamiya gloss or Model Master gloss out of a rattle caan.

Thanks for looking, and happy modeling!
Andrew
Dioramartin
Visit this Community
New South Wales, Australia
Joined: May 04, 2016
KitMaker: 1,476 posts
Armorama: 1,463 posts
Posted: Tuesday, July 28, 2020 - 11:57 AM UTC
Great job Andrew, very accurate. You may be interested to know Munch’s 654 unit history has three photos of 624 (commander was a Feldwebel Bohling), one on the (9th July?) battlefield after it ran over a mine & was abandoned and the other two after the Russians had repaired it and took it to Moscow to show off at a (Kursk) victory parade. I can’t be sure but it may even be the one still at the Kubinka tank museum
 _GOTOTOP