_GOTOBOTTOM
Armor/AFV: Modern Armor
Modern armor in general.
Hosted by Darren Baker
Kampfpanzer Leopard 1 - Tamiya 1/35
yeahwiggie
Visit this Community
Dalarnas, Sweden
Joined: March 24, 2006
KitMaker: 2,093 posts
Armorama: 1,359 posts
Posted: Tuesday, August 25, 2020 - 04:21 AM UTC
For all you non-campaigners I thought it might be interesting to share my shenanigans with this ancient kit.
So I will post here what I post in the Operation Snow White campaign. As posted on August 07, 2020

OK, here goes nothing.....

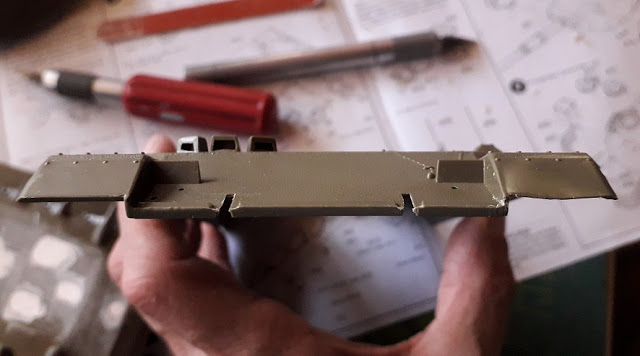
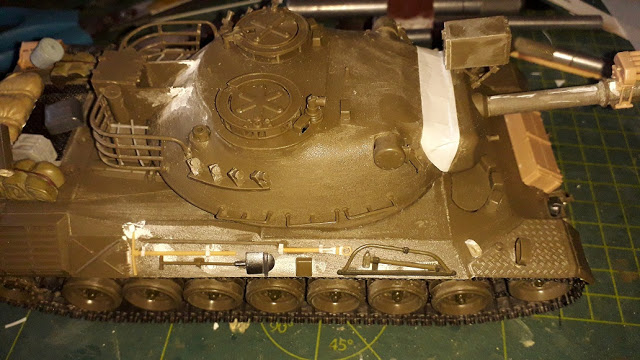
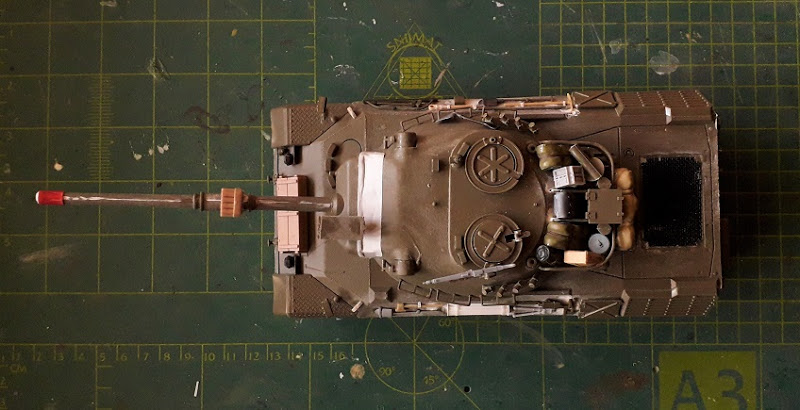
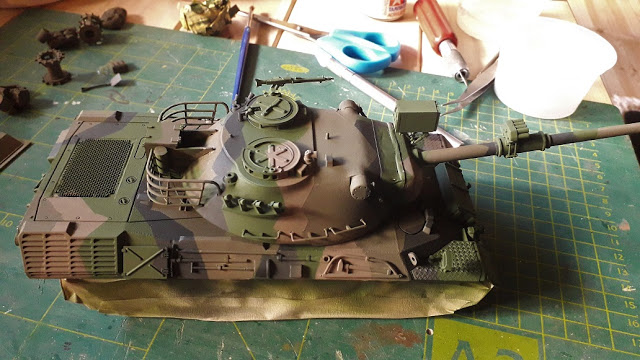
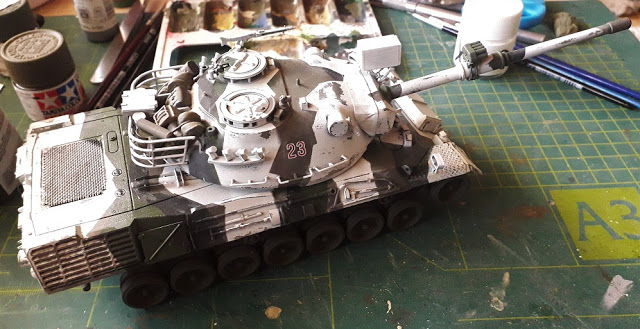
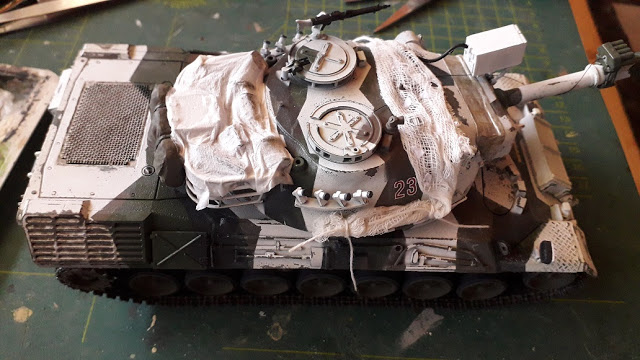
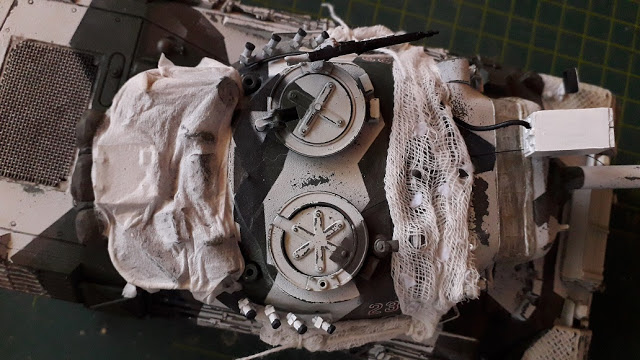
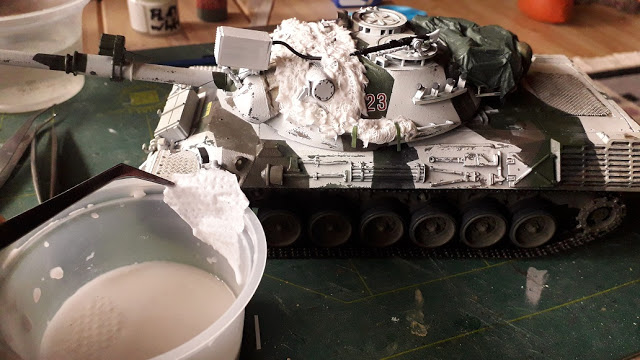
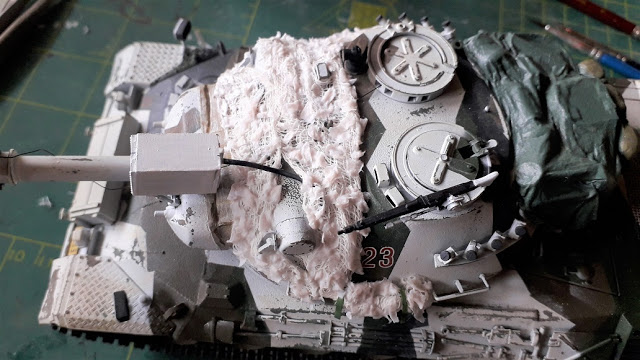
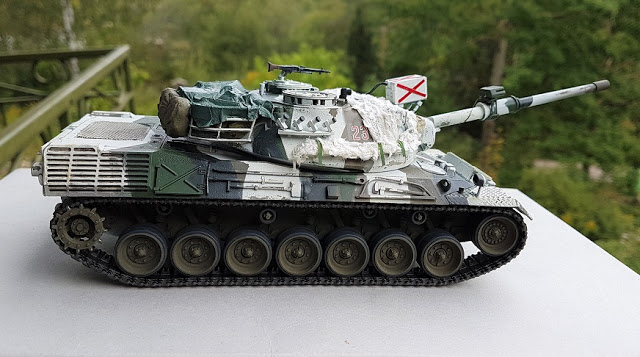
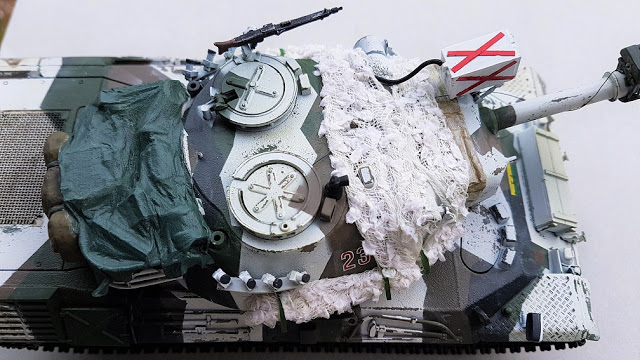
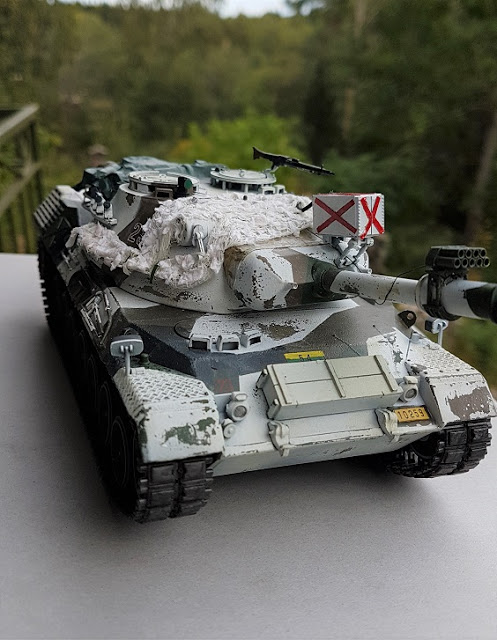
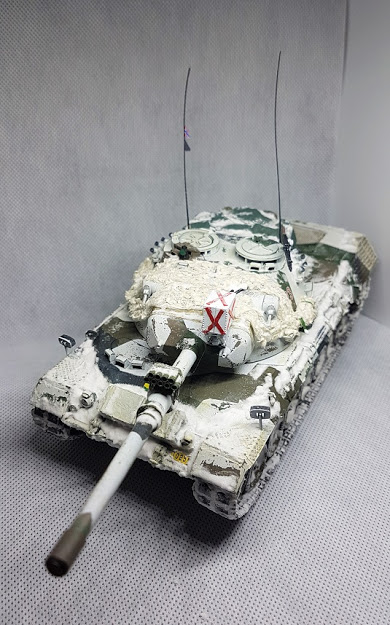
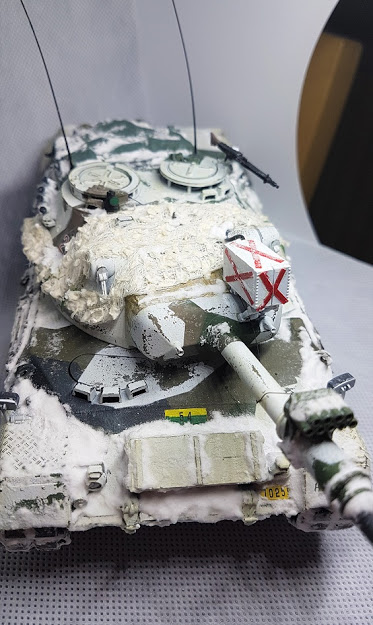
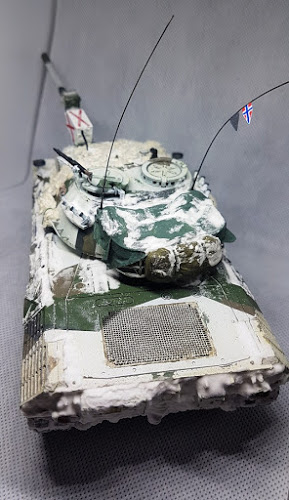
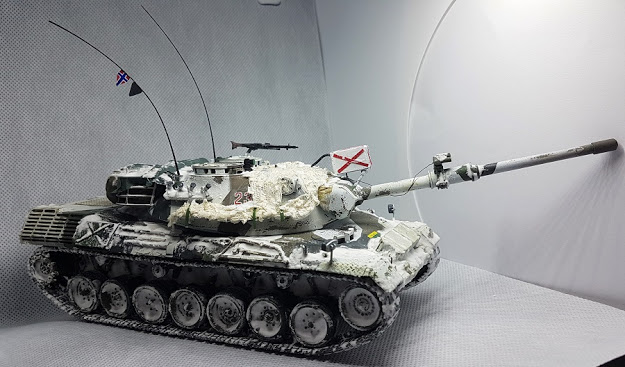
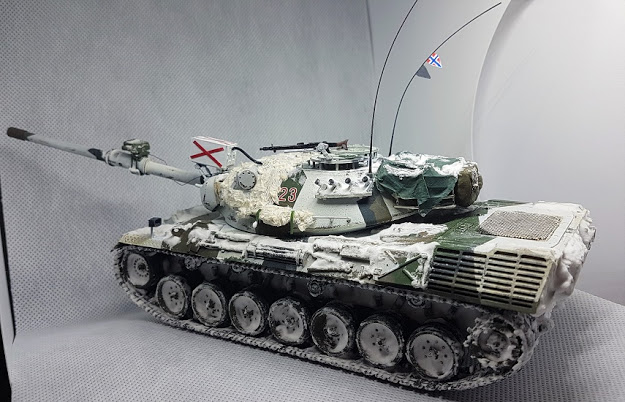
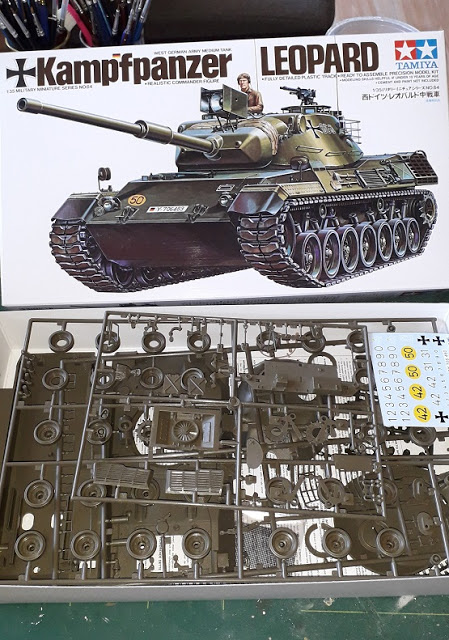
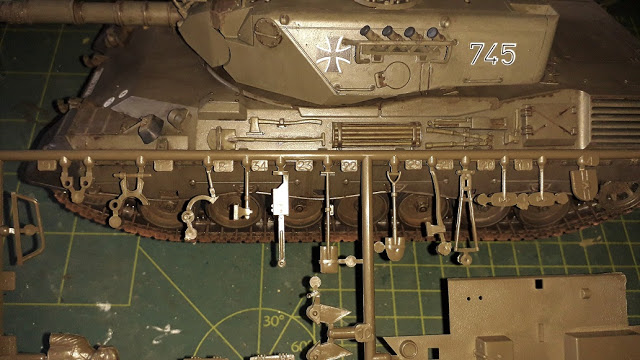
Another oldie. This time it is Tamiya's Leopard 1, which will be made into a Norwegian version during winter. Turns out that is a good choice, since some of the details will need to be buried under snow!

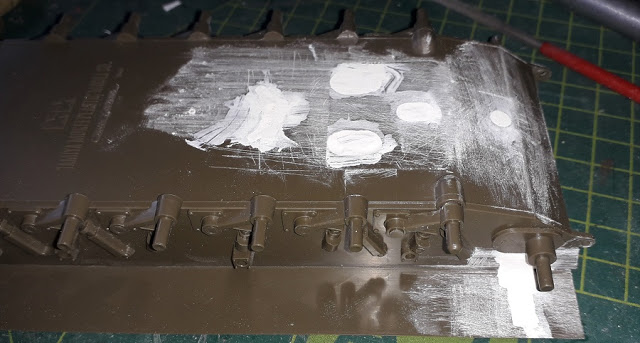
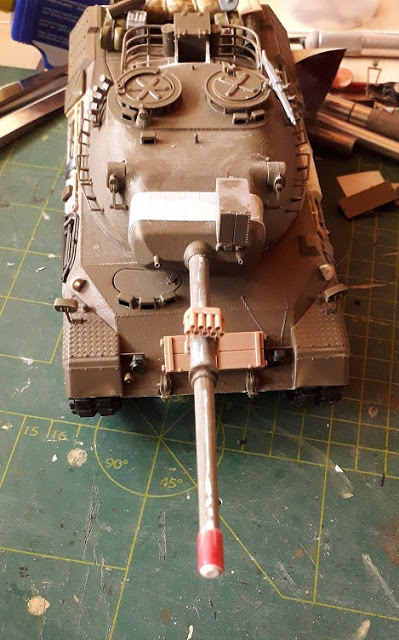
Although slightly older than the Leopard 1A4, max. 5 years, the quality of sculpting in this kit is nowhere near the quality of the A4. Indeed the year 1969 on the bottom of the hull confirms the age and subsequent quality. Again this kit may, and probably does, have dimensional and other errors, yet I will not address these. Why? Simply because I am not knowledgeable on Leopard tanks. I just want to build one and make it reasonably resemble the real thing. I just want a simple build, even though I fear I might have gotten more than I bargained for..... since this kit was a bargain.

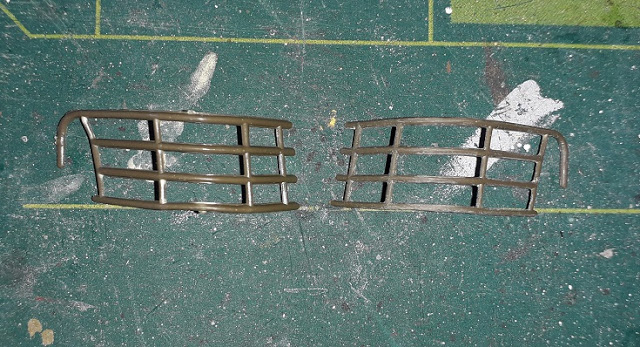
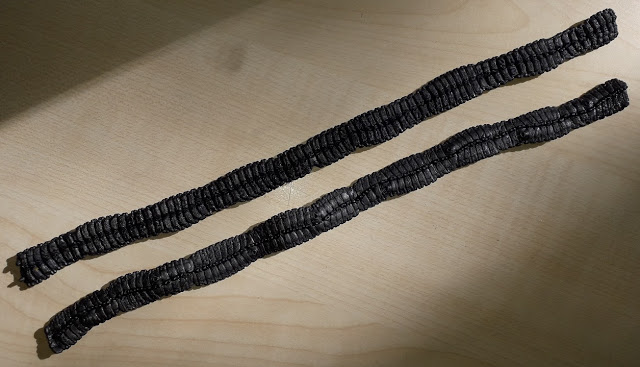
One thing that immediately catches the eye are the chevron-style tracks, typical for the first batch of tanks produced. After that they switched to the block-style tracks.


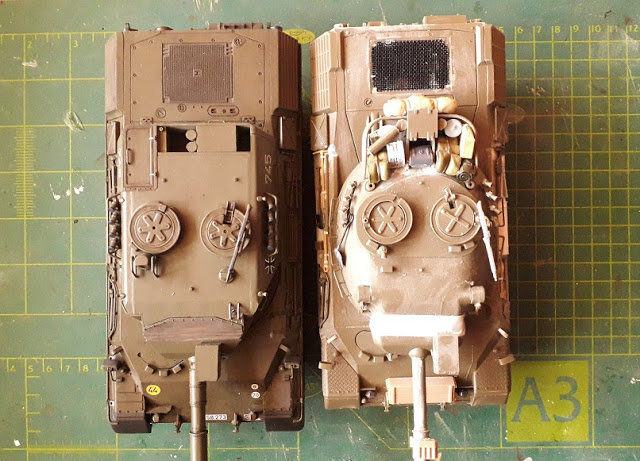
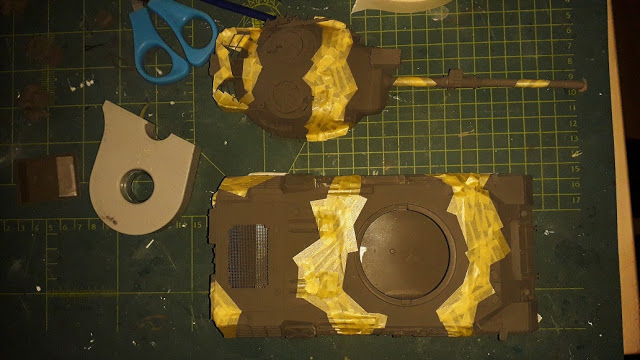
Some comparisons to the 1A4 kit;


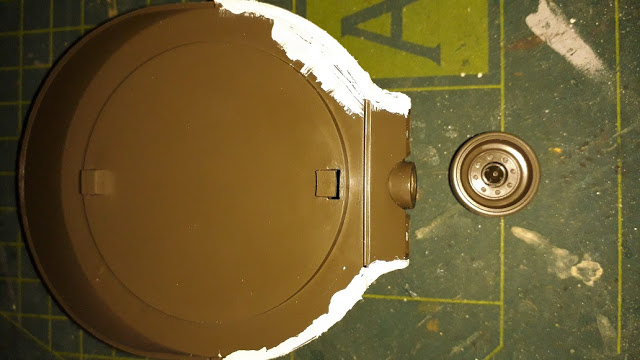
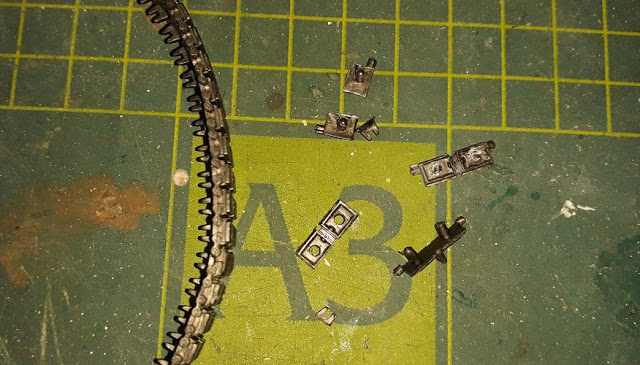
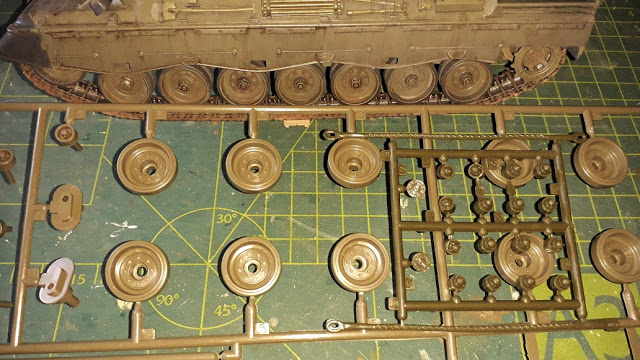
Polycap wheels centers and a horrible and horribly think poly tow cable. No chance in hell I will use that or that it would even fit and stay in place!


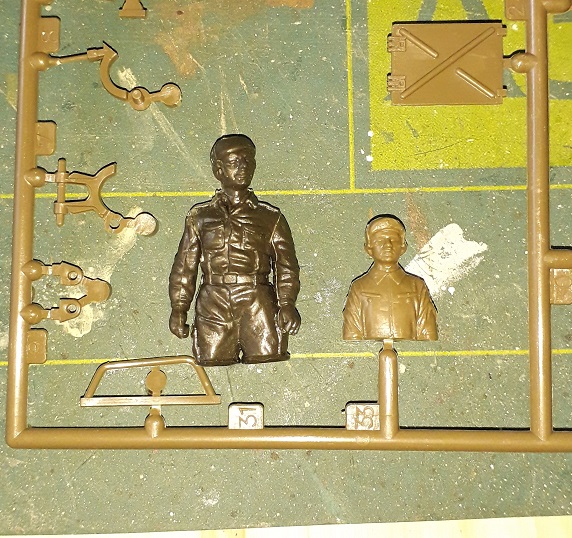
A child soldier in this kit??


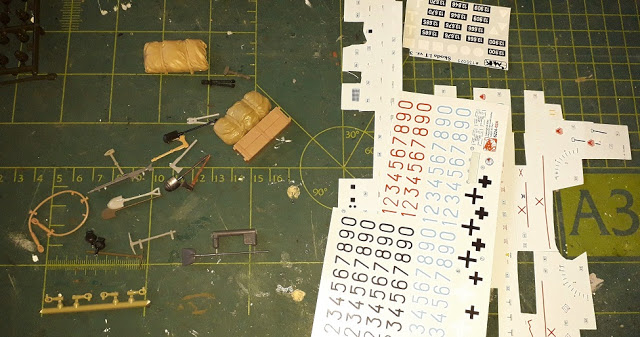
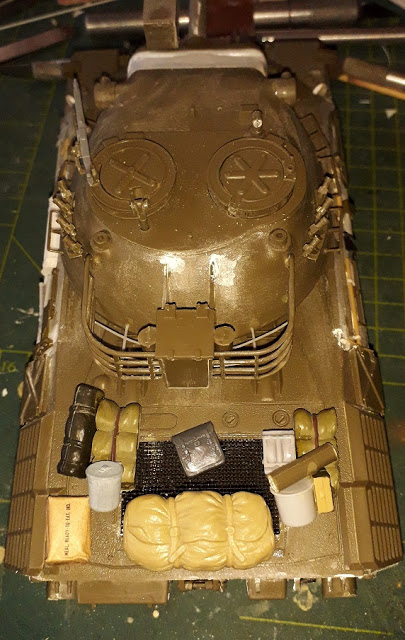
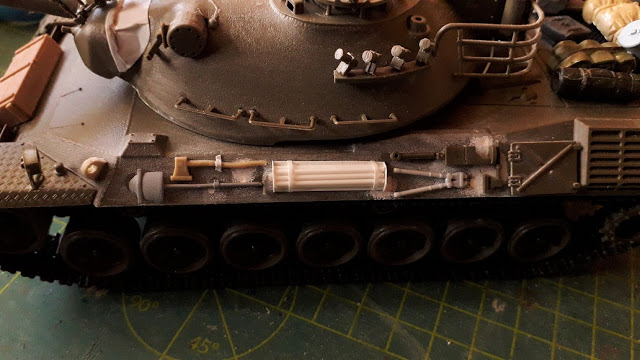
And a first round up of replacements from the spares box. The tools and the MG are especially.... unsatisfactory. The decals will be used to cobble together something Norwegian(looking).
yeahwiggie
Visit this Community
Dalarnas, Sweden
Joined: March 24, 2006
KitMaker: 2,093 posts
Armorama: 1,359 posts
Posted: Tuesday, August 25, 2020 - 04:23 AM UTC
Tamiya's Kampfpanzer Leopard 1 is not a kit for the beginner!

First of all the fit it not good. There's a lot of filling and sanding to be done and that excludes the holes for motorized use! The barrel was oval shaped, when glued and the wheels have badly fitting poly-caps.


A neat feat; a real metal screen to be popped in from below, followed by the "engine", which shows through. Only problem is that it is not correct and quite visibly so. The screen should be flush with the top, not under it. It also is not fine enough and lacks all detail.


Sanding is a PITA, since the plastic is rather soft.


The turret underside has considerable gaps to fill.


Thinning down the turret basket sides. Here the plastic's annoying feature of fraying when sanded or scraped comes to life in full! It is very hard to get a smooth even finish, because after each pass over there's more to be removed, leaving behind fine curls or hairs of plastic.


Thinned down and bent the "rubber" mudguards too.


And then disaster struck!

I wanted to replace the original chevron trakcs with square padded ones and I was given a free set of Tamiya's Marder 1A2. These do fit and would look OK with snow on them. But they were bent and twisted. So I thought a warm bath would soften them and laying them on a flat surface when cooling would make them straight.

However I was not having a clear mind and used water that was far to warm.....


yeahwiggie
Visit this Community
Dalarnas, Sweden
Joined: March 24, 2006
KitMaker: 2,093 posts
Armorama: 1,359 posts
Posted: Tuesday, August 25, 2020 - 04:24 AM UTC
This build is completed! Well, apart from the future tarpaulin over the turret basket, that is. I was getting pretty fed up with this kit and I am afraid it might show a little here and there. I think it is a bad kit by today's standards; dimensions are way off, details are bad, horrible or non-existent and the fit in many places was not exactly precise either. The rear comes immediately to mind, as do the wheels and their cursed polycaps.

Many of the details had to be redone, cobbled together from existing parts or made from scratch. The new tracks I got, coming from a Tamiya 1A4 were too long and the kit's dimensions explain why. The stowage in the baskets are not accurate, but these only serve to give the upcoming tarp its lumps and bumps.

Detaisl I made from scratch were the canvas cover at the base of the gun, the muzzlecover, the2 lifting eyes on the front, the entire basket bottom and the pole arrangement on the left side. The rest, the colours will show that, was made by mixing and matching parts or parts of the parts to get something that looked reasonable instead of horrendous.

Now it is time to get this thing painted.


ptruhe
Visit this Community
Texas, United States
Joined: March 05, 2003
KitMaker: 2,092 posts
Armorama: 1,607 posts
Posted: Tuesday, August 25, 2020 - 04:47 AM UTC
That is a good effort on that kit. I had one but scrapped it after saving a few parts to put on an Italeri Leo 1A2(not an A2, more like A1) kit.
stikpusher
Visit this Community
Arizona, United States
Joined: June 16, 2005
KitMaker: 83 posts
Armorama: 79 posts
Posted: Tuesday, August 25, 2020 - 05:00 AM UTC
Well, you sure have made it look better than what comes in the box “as is”. Nothing wrong with doing that, instead of having the latest & greatest kit of the same subject. It can be fun!
yeahwiggie
Visit this Community
Dalarnas, Sweden
Joined: March 24, 2006
KitMaker: 2,093 posts
Armorama: 1,359 posts
Posted: Tuesday, August 25, 2020 - 08:50 PM UTC
Thanks gents!

This build keeps frustrating me.

First choice I had to make was whether I would go for plain dark olive, like the old German ones or if I would go for the Norwegian 4-tone splinter camouflage pattern. Of course I went for the latter. Why keep it simple, when you can complicate things??

That meant a whole lot of taping and masking during the process. And wouldn't you know it. I ran out of tape almost right at the beginning. I did happen to find another roll, but that was not as wide. So more pieces were needed.

As a basis I chose the same colour I had mixed for the 1A4.... but forgot that it looks like it does, because of washes and such. For the black I chose NATO black, the brown is flat earth and the second green is flat green. All Tamiya. Spray and mask. Spray and mask. Repeat..


And then the moment of truth. Always exciting to remove the tape... But then...


The colours are all wrong, except for the black. The olive green is not dark enough, the earth too pale and the green too dark. So I was left with the choice of stripping the paint never done that), just repeat the entire painting and masking cycle or just go with it and add the winter camouflage. I went for the last option. Just want to get this build over with...

So more tape, then hairspray and then Tamiya flat white. But not after I had done the markings, which was a chapter on its own. I'll get back to that later.

While doing the hairspray technique I noticed that the water used started turning a slight green??? At first I thought the brush was not clean, but it kept doing that. I g´have no explanation for it, but the white now has a very faint green hue. Makes it look not fresh, used, exposed.


The decals..... As always I use a gloss clear coat underneath them, usually Vallejo's. This time I took Tamiya's Clear coat. Out of habbit I thinned it down with a drop of water.... and it turned milky on the model! When used pure it dissolved the NATO black at places... What the....??

The decals themselves took ages to loosen from the carrier paper and silvered, despite gloss, Micro sol and Micro Set. The covering coat of clear matt tones it down. I made the number plates out of strip styrene, painted a mustard yellow and applying numbers on them. The Cavalry marking on the glacis is painted in place and decal numbers were added.


The fight continues!!
Hohenstaufen
Visit this Community
England - South East, United Kingdom
Joined: December 13, 2004
KitMaker: 2,192 posts
Armorama: 1,615 posts
Posted: Wednesday, August 26, 2020 - 12:21 AM UTC
Not my normal period, so can't comment on accuracy etc. But credit where it's due for making something of such an old kit. The Leopard has a special memory for me, as it is the first Tamiya kit I ever saw, back in 1970 when I was at boarding school. I'd only messed with Airfix, Frog and Revell until then. Another kid brought this in to do and I was blown away with the engineering of the kit and the detail (sounds pretty sad now, but in the day the big T was the boy). He later brought in the big scale Tamiya Honda racing car - that really was a quantum shift!
yeahwiggie
Visit this Community
Dalarnas, Sweden
Joined: March 24, 2006
KitMaker: 2,093 posts
Armorama: 1,359 posts
Posted: Wednesday, August 26, 2020 - 04:40 AM UTC
Thanks!
It certainly is a challenge to make something like this look presentable. Much more so than modern kits, I think.

The end of this build is drawing near. And none too soon!

Since this is a build with focus on whites I am looking to get a varied look within the whites. The worn camouflage paint was one and now I have added winter camouflage netting as a second. The third will be the snow itself. For netting I used bandaging that had expired, but was unused. However I felt that it just looked like that, when I had draped it over the tank; bandaging. So I looked at my references and saw that the netting actually was like the 3-tone netting, but white. How to make that? Normally I would go for bandage + herbs, but I know that spraying that white would get the herbs to leak their colour into the paint. In 3-tone not an issue, in white a major issue. And then I had the luminous idea of doing it with paper! With wet paper to be precise. Soaking that in water will make it fall apart and the fibers can be used to make the netting's cover. Time to try something completely new! Never seen anyone do it before...

With tissue it was a no go. I had used that to make a cover for the turret basket. With kitchen paper a similar result. That is made to hold even when wet. Hmm... printing paper? Works, sort of, but is way to bright due to the added whiteners. It glowed blue compared to the bandage. And I ended up with toilet paper in the right shade. I added small pieces to a mix of white glue & water and started the tedious job of picking apart the soaked paper and adding one piece/blob at a time. The result however is none too bad, I think.

I tied the netting to the sidebars of the turret. Because I applied the same glue/water mix to it, it would retain its shape, so that later on I could add straps that would hold it all in place.


As can be seen in the photos I also added cables to search light and Hoffman device and added the red tape that is used in exercises to distinguish between teams. I used the thinnest plastic card, but it still is too thick. Decals would be optimal here. I painted the tarp on the back in Vallejo's German field grey. It looks a lot darker in the photos. I added a coat of satin varnish to make it look like a artificial fiber tarp. The last details to be added will be the antennae with pennants, but I will add those last.


GeraldOwens
Visit this Community
Florida, United States
Joined: March 30, 2006
KitMaker: 3,736 posts
Armorama: 3,697 posts
Posted: Wednesday, August 26, 2020 - 09:51 AM UTC
My congratulations on the sheer hairy-chested individualism required to turn this ancient beast into something presentable! Well-done! Don't forget to add a healthy amount of very black diesel soot on the side exhaust grills. Very noticeable, especially on winter-white camouflage.

For less hardy souls, there are much easier and more accurate early Leopard kits available from Revell-Germany and Meng. For lovers of all things Leopard, the Leopard Club website http://leopardclub.ca/ is a treasure trove of reviews, tips, products and photo walkaround links.
stikpusher
Visit this Community
Arizona, United States
Joined: June 16, 2005
KitMaker: 83 posts
Armorama: 79 posts
Posted: Wednesday, August 26, 2020 - 11:01 AM UTC
Bravo!!! Great idea to use paper pulp for the winter camo net disruptive material. I’ll have to remember that one!

Are you planning to add frozen/dry mud and snow in the road wheels for weathering?
WilliamHarry
Visit this Community
United States
Joined: August 07, 2009
KitMaker: 32 posts
Armorama: 30 posts
Posted: Sunday, September 27, 2020 - 11:55 AM UTC
I am curious. I keep seeing the same comment about the Italeri Leopard 1A2 kit . . . not an A2 but more like an A1. In what ways is the kit inaccurate?

Bill
yeahwiggie
Visit this Community
Dalarnas, Sweden
Joined: March 24, 2006
KitMaker: 2,093 posts
Armorama: 1,359 posts
Posted: Sunday, September 27, 2020 - 06:45 PM UTC
Oh my... completely forgot to update on this build!
Finished it almost 4 weeks ago. As far as the the inaccuracies are concerned, I have not measured or researched it, so it is all hearsay, but overall dimensions are an issue and the lack of detail, either absent or crude (own experience).

No dried mud, since that is not to be found in snowy Norway...

Looking at pictures I tried to figure out where snow would accumulate logically and started applying the mix of water and sodium carbonate. I learned there apparently are several sorts, because I used 2 different sorts on 2 different projects and with different results!

This mix was with a powderlike, very finely ground kind. Maybe that's the difference? One of the main advantages of working with sodium bicarbonate is that you can always adjust it, just by making it wet again. Main disadvantage is that it crumbles and comes off, when touched or lifted.

So I decided to do an experiment; create a mixture of white glue and water, thin enough to use in an airbrush and spray the whole, so that the sodium gets fixed in place. I had tried applying said mix with a brush, but the sodium came off, right away. The spraying leaves a hard surface, so the model can be handled.

Another project done!


BootsDMS
Visit this Community
England - South West, United Kingdom
Joined: February 08, 2012
KitMaker: 978 posts
Armorama: 965 posts
Posted: Monday, September 28, 2020 - 12:49 AM UTC

Quoted Text

I am curious. I keep seeing the same comment about the Italeri Leopard 1A2 kit . . . not an A2 but more like an A1. In what ways is the kit inaccurate?

Bill


Ron,

If you're asking if the Italeri "1A2" is accurate then it's not too bad a kit at all; I'm in the throes of resurrecting a half built one which I've dithered over for something like 15 years - to my shame! Italeri have confused themselves as it's actually a Leopard 1A1. The difference being I believe is that the 1A2 turret had noticeably thickened turret. However, it doesn't seem to be too bad a kit; I have added an etched brass engine cover manufactured by Perfect Scale Modellbau (for a mere 5 Euros) as the kit one consisted of some rather basic mesh - not surprising as this kit appeared back in 2000 I think. I'll also add some etched chains to the smoke dischargers, some rubber bungs/chains to the turret and glacis, and replace the tow ropes and that, I hope will be about it.

Brian
ptruhe
Visit this Community
Texas, United States
Joined: March 05, 2003
KitMaker: 2,092 posts
Armorama: 1,607 posts
Posted: Monday, September 28, 2020 - 02:55 AM UTC
The easiest thing to spot on a Leo 1A2 turret is the oval shaped range finder heads. PSM does a good resin version if you are picky:
https://www.perfect-scale.de/en/www--perfect-scale-de-3/Leopard-1A2-Turret.html
yeahwiggie
Visit this Community
Dalarnas, Sweden
Joined: March 24, 2006
KitMaker: 2,093 posts
Armorama: 1,359 posts
Posted: Monday, September 28, 2020 - 03:44 AM UTC

Quoted Text


Quoted Text

I am curious. I keep seeing the same comment about the Italeri Leopard 1A2 kit . . . not an A2 but more like an A1. In what ways is the kit inaccurate?

Bill


Ron,

If you're asking if the Italeri "1A2" is accurate then it's not too bad a kit at all;

Brian


Not me, WilliamHarry did in the post previous to my last one.
BootsDMS
Visit this Community
England - South West, United Kingdom
Joined: February 08, 2012
KitMaker: 978 posts
Armorama: 965 posts
Posted: Monday, September 28, 2020 - 04:49 AM UTC

Quoted Text


Quoted Text


Quoted Text

I am curious. I keep seeing the same comment about the Italeri Leopard 1A2 kit . . . not an A2 but more like an A1. In what ways is the kit inaccurate?

Bill


Ron,

If you're asking if the Italeri "1A2" is accurate then it's not too bad a kit at all;

Brian


Not me, WilliamHarry did in the post previous to my last one.


Sorry folks for the confusion - finger trouble and fading brain.

Clearly should have been marked for "Bill" (!)
WilliamHarry
Visit this Community
United States
Joined: August 07, 2009
KitMaker: 32 posts
Armorama: 30 posts
Posted: Monday, September 28, 2020 - 06:30 AM UTC
Thanks! I am currently building the Italeri kit and I want to make it as accurate as I can. It is a nice kit`.

I also have the old Tamiya kit. I have read about "dimension" problems as well but no specific comments. It certainly looks like a Leopard I to me. Well done on your model!

Bill
GeraldOwens
Visit this Community
Florida, United States
Joined: March 30, 2006
KitMaker: 3,736 posts
Armorama: 3,697 posts
Posted: Monday, September 28, 2020 - 07:19 AM UTC

Quoted Text

I am curious. I keep seeing the same comment about the Italeri Leopard 1A2 kit . . . not an A2 but more like an A1. In what ways is the kit inaccurate?

Bill


When viewed from the side the rangefinder housings are noticeably oval on the Leopard 1A2, because the armor was thicker. The turret side was thicker overall, but this is hard to spot except for the base of the turret, where the armor is ground to a vertical edge so it doesn't foul anything outside of the turret ring. You can add a thin layer of epoxy putty to simulate this, if you wish. The rangefinder heads can also be beefed up with putty. Use a disk of masking tape to preserve the circle of recessed bolts on the outer face.
WilliamHarry
Visit this Community
United States
Joined: August 07, 2009
KitMaker: 32 posts
Armorama: 30 posts
Posted: Tuesday, September 29, 2020 - 04:18 AM UTC
Thanks, Gerald! I appreciate the comments.

Bill
BootsDMS
Visit this Community
England - South West, United Kingdom
Joined: February 08, 2012
KitMaker: 978 posts
Armorama: 965 posts
Posted: Tuesday, September 29, 2020 - 06:25 AM UTC
Bill,

Just a final comment if you like: the original (ancient) Tamiya Leopard 1 is really a bit past its shelf life - though I must confess it was the very first kit I ever built in 1:35 - like so many others I suspect. It has seen better days and if you wish to build an early production Leopard I would strongly recommend the Revell offering:

https://www.scalemates.com/kits/revell-03240-leopard-1--754443

It doesn't, in my opinion, need that much to change it and it really is a nice kit. Additions might be say, new tracks, a few detailed additions eg the plugs on the mantlet and glacis, and perhaps, the addition of the excellent Valkyrie crew (!)

Revell also do a new Leopard 1A1.

Brian
WilliamHarry
Visit this Community
United States
Joined: August 07, 2009
KitMaker: 32 posts
Armorama: 30 posts
Posted: Tuesday, September 29, 2020 - 10:01 AM UTC
Brian,

Thank you for the excellent advice! I appreciate it very much. I do have the Revell kit as well as the Tamiya kit. I believe that I will build the Revell kit, then use it as a guide to make something of the Tamiya. Thanks again!

Bill
 _GOTOTOP