
Constructive Feedback
For in-progress or completed build photos. Give and get contructive feedback!
For in-progress or completed build photos. Give and get contructive feedback!
Hosted by Darren Baker, Dave O'Meara
Sherman in Progress
andy007

Joined: May 01, 2002
KitMaker: 2,088 posts
Armorama: 1,257 posts

Posted: Thursday, September 02, 2004 - 03:08 PM UTC
Thanks Ralph I might do a practice construction this weekend 

shonen_red

Joined: February 20, 2003
KitMaker: 5,762 posts
Armorama: 2,283 posts

Posted: Saturday, September 18, 2004 - 06:07 PM UTC
It's been a while since I've updated my Sherman.

I tried finishing the extras items for now. Wash/drybrush next week. The extra bags/ammo came from Academy AFV Miniature Accessories
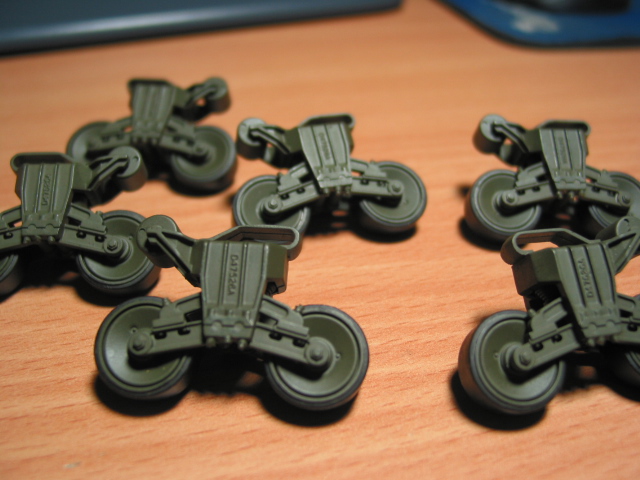
Bogie painting done. On to the weathering...
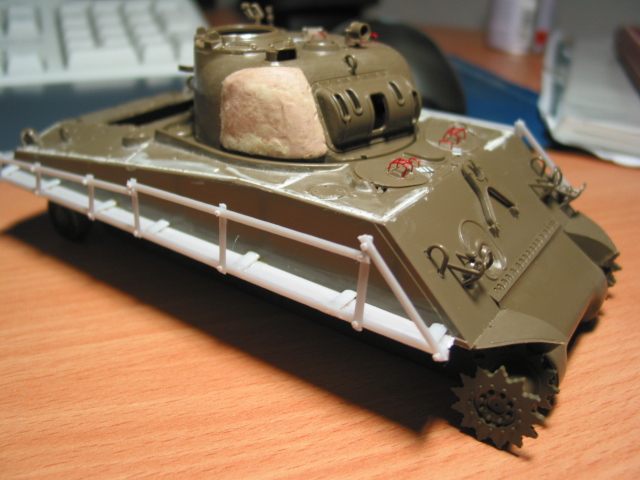
Added the sandbag rails on the other side
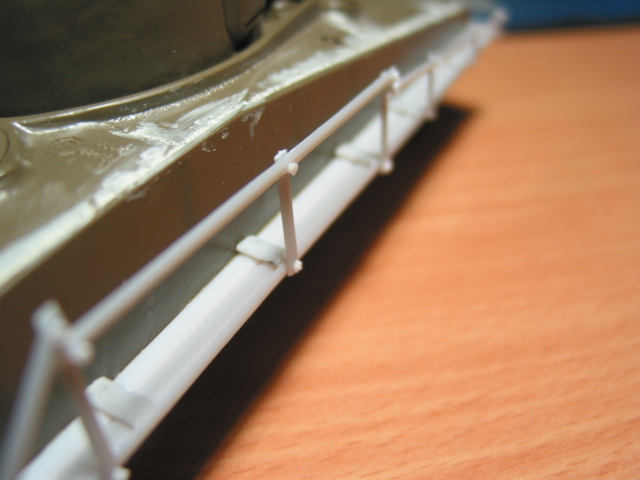
I noticed that the rails looks too plain, so I added bolts to the connecting areas

I tried finishing the extras items for now. Wash/drybrush next week. The extra bags/ammo came from Academy AFV Miniature Accessories

Bogie painting done. On to the weathering...

Added the sandbag rails on the other side

I noticed that the rails looks too plain, so I added bolts to the connecting areas
warthog

Joined: July 29, 2002
KitMaker: 1,460 posts
Armorama: 1,080 posts

Posted: Saturday, September 18, 2004 - 07:20 PM UTC
SR: What have you done the plastic? You turned it to something real (in small scale)  . I like what you did...makes me want to do my shemmie already...hmmm. I looks greate, I can't wait to see the finished product.
You going to enter it in the Nationals (atin atin lang)? (My lips are sealed). :-)
 . I like what you did...makes me want to do my shemmie already...hmmm. I looks greate, I can't wait to see the finished product.
 You going to enter it in the Nationals (atin atin lang)? (My lips are sealed). :-)
shonen_red

Joined: February 20, 2003
KitMaker: 5,762 posts
Armorama: 2,283 posts

Posted: Saturday, September 18, 2004 - 07:56 PM UTC
Quoted Text
SR: What have you done the plastic? You turned it to something real (in small scale). I like what you did...makes me want to do my shemmie already...hmmm. I looks greate, I can't wait to see the finished product.
You going to enter it in the Nationals (atin atin lang)? (My lips are sealed). :-)
The main problem is the engine. I've opened it up and having problems how to do the darn engine


Posted: Saturday, September 18, 2004 - 08:09 PM UTC
Hi Ralph, that's coming on very nicely. Sorry to add only this late ( I think you've already painted the wheels and bogies) but I would add some damage to the wheel rubbers and maybe the casting numbers to the bogie arms. Although that might not be nessecary if you weather the bottom half with lots of mud.

These I think are the sand shield attachment strips (below the applic armor plate)

Detail of the tyre color and rubber damage
I've got more of these, but havn't had the time to upload them all in my album, but if your interested, let me know and I'll make some more effort :-)
Cheers
Henk
These I think are the sand shield attachment strips (below the applic armor plate)
Detail of the tyre color and rubber damage
I've got more of these, but havn't had the time to upload them all in my album, but if your interested, let me know and I'll make some more effort :-)
Cheers
Henk
shonen_red

Joined: February 20, 2003
KitMaker: 5,762 posts
Armorama: 2,283 posts

Posted: Saturday, September 18, 2004 - 08:20 PM UTC
Thanks Henk! The rubbers look very smooth at a distance, but when you take a closer look, it has a rough appearance and feel. 
Will take your advice on the damage

Will take your advice on the damage

ShermiesRule

Joined: December 11, 2003
KitMaker: 5,409 posts
Armorama: 3,777 posts

Posted: Saturday, September 18, 2004 - 10:30 PM UTC
Wow SR! I just love all the scratchbuilding. Hurry and get it done
shonen_red

Joined: February 20, 2003
KitMaker: 5,762 posts
Armorama: 2,283 posts

Posted: Saturday, September 18, 2004 - 10:40 PM UTC
Quoted Text
Wow SR! I just love all the scratchbuilding. Hurry and get it done
I'll probably finish it in the next 2-3 weeks. I still need a lot of pics and techniques to build an engine

warthog

Joined: July 29, 2002
KitMaker: 1,460 posts
Armorama: 1,080 posts

Posted: Sunday, September 19, 2004 - 07:12 AM UTC
Quoted Text
The main problem is the engine. I've opened it up and having problems how to do the darn engine
Oh, that certainly is a problem....It seems that you don't have a pre-fab engine yet (based on your previous thread)... Have you tried this site might be useful http://afvinteriors.hobbyvista.com/m4fac/m4fac1.html or here
http://afvinteriors.hobbyvista.com/m4a3/m4a3c.html
Hope this helps
Cheers
Arvin
shonen_red

Joined: February 20, 2003
KitMaker: 5,762 posts
Armorama: 2,283 posts

Posted: Sunday, September 19, 2004 - 09:58 AM UTC
Thanks! I've visited that site several times. I can't calculate how big the engine is and the pic ain't that very detailed. (No front, top, rear and bottom view)  I might decide to close the hatch if I find no cure....
 I might decide to close the hatch if I find no cure....
warthog

Joined: July 29, 2002
KitMaker: 1,460 posts
Armorama: 1,080 posts

Posted: Sunday, September 19, 2004 - 10:17 AM UTC
How about this site http://members.aol.com/tankland/images/m4e1fl.jpg
shonen_red

Joined: February 20, 2003
KitMaker: 5,762 posts
Armorama: 2,283 posts

Posted: Sunday, September 19, 2004 - 01:55 PM UTC
Ah cool! Thanks! Now I need to know the depth and width of it.
warthog

Joined: July 29, 2002
KitMaker: 1,460 posts
Armorama: 1,080 posts

Posted: Sunday, September 19, 2004 - 02:42 PM UTC
SR: If ever you will have a problem regarding the depth and width, what I would suggest is that you make the top look at least realistic and then make the engine cover half open just to cover whatever information is not available. Just a suggestion.... 

shonen_red

Joined: February 20, 2003
KitMaker: 5,762 posts
Armorama: 2,283 posts

Posted: Sunday, September 19, 2004 - 02:51 PM UTC
Quoted Text
SR: If ever you will have a problem regarding the depth and width, what I would suggest is that you make the top look at least realistic and then make the engine cover half open just to cover whatever information is not available. Just a suggestion....
Good idea!
 That way, I can concentrate on the half of the detailing I need. Thanks!
 warthog

Joined: July 29, 2002
KitMaker: 1,460 posts
Armorama: 1,080 posts

Posted: Monday, September 20, 2004 - 03:51 PM UTC
Glad to help. Good luck 

shonen_red

Joined: February 20, 2003
KitMaker: 5,762 posts
Armorama: 2,283 posts

Posted: Monday, September 20, 2004 - 07:48 PM UTC
Hello chaps! It's me again and back with more inprog pics.
She's almost finished!


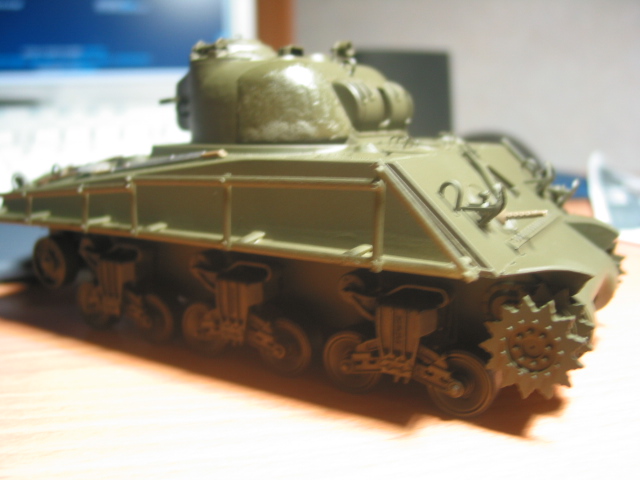
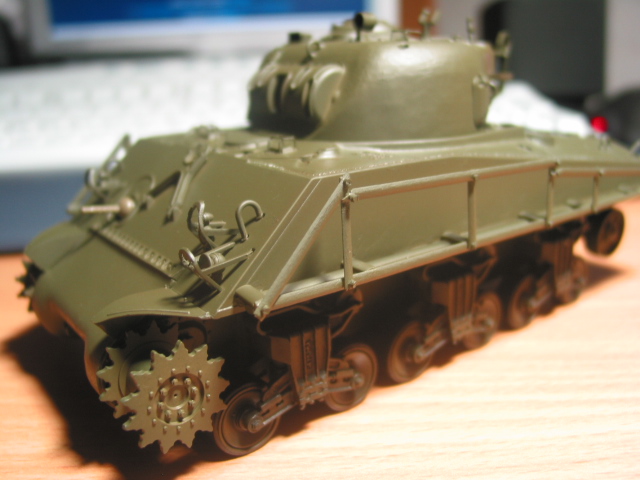
I'm glad the flushed out welds, scratchbuilt sandbag rails came out pretty nicely and so with the cheek bulge. Hurray!!!
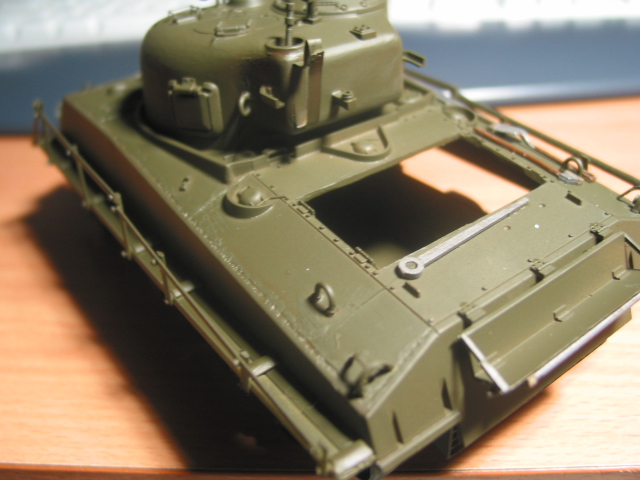
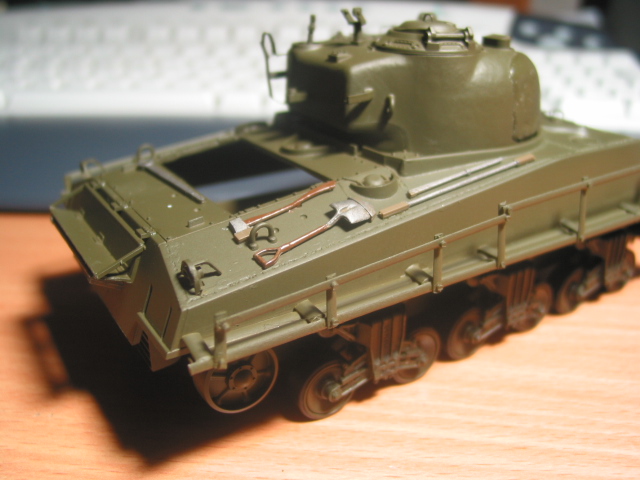
One thing I'm angry of... is because I lost some of the pioneer tools!


As for the sponsons, I think there's no need to add it up since hatches would all be closed and the engine would be housed in a box.
She's almost finished!


I'm glad the flushed out welds, scratchbuilt sandbag rails came out pretty nicely and so with the cheek bulge. Hurray!!!


One thing I'm angry of... is because I lost some of the pioneer tools!


As for the sponsons, I think there's no need to add it up since hatches would all be closed and the engine would be housed in a box.
shonen_red

Joined: February 20, 2003
KitMaker: 5,762 posts
Armorama: 2,283 posts

Posted: Monday, September 20, 2004 - 07:52 PM UTC
I feared that I won't finish this kit until the IPMS Nationals 


 (Oct. 11) Please pray that I may finish this kit.


 (Oct. 11) Please pray that I may finish this kit.
shonen_red

Joined: February 20, 2003
KitMaker: 5,762 posts
Armorama: 2,283 posts

Posted: Monday, September 20, 2004 - 07:54 PM UTC
Lastly, Shermiesrule, you pointed out last time on my M4 Early Sherman that the backpacks located on the turret are "floating". Any ideas on how to put the backpacks?
thebear

Joined: November 15, 2002
KitMaker: 3,960 posts
Armorama: 3,579 posts

Posted: Monday, September 20, 2004 - 11:59 PM UTC
Hi Ralph seems like things are moving along nicely... I noticed in the painted picture that the cheek armor sticks out too much... You should not see a line, it should be a smooth melding as this was all part of the same casting .. try blending it together a bit more ..
For your sand bag rack I'd add at least another horizontal bar to hold the the bags in place otherwise the sand bags would just fall off. Keep up the good work and I'm sure you'll be ready in time for the Nats..
Rick
For your sand bag rack I'd add at least another horizontal bar to hold the the bags in place otherwise the sand bags would just fall off. Keep up the good work and I'm sure you'll be ready in time for the Nats..

Rick
shonen_red

Joined: February 20, 2003
KitMaker: 5,762 posts
Armorama: 2,283 posts

Posted: Tuesday, September 21, 2004 - 10:22 AM UTC
Quoted Text
Hi Ralph seems like things are moving along nicely... I noticed in the painted picture that the cheek armor sticks out too much... You should not see a line, it should be a smooth melding as this was all part of the same casting .. try blending it together a bit more ..
For your sand bag rack I'd add at least another horizontal bar to hold the the bags in place otherwise the sand bags would just fall off. Keep up the good work and I'm sure you'll be ready in time for the Nats..
Rick
Thanks! I noticed the bulge looks very thick.... on to thinning it out...
shonen_red

Joined: February 20, 2003
KitMaker: 5,762 posts
Armorama: 2,283 posts

Posted: Tuesday, September 21, 2004 - 12:17 PM UTC
More inprog
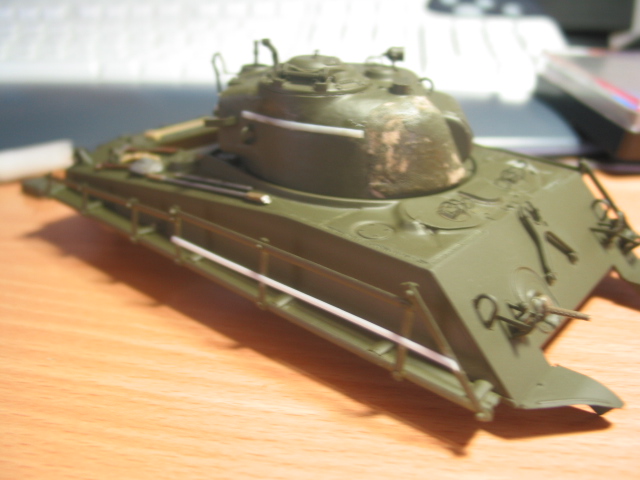
Reworked on the cheek bulge and added some more railings.
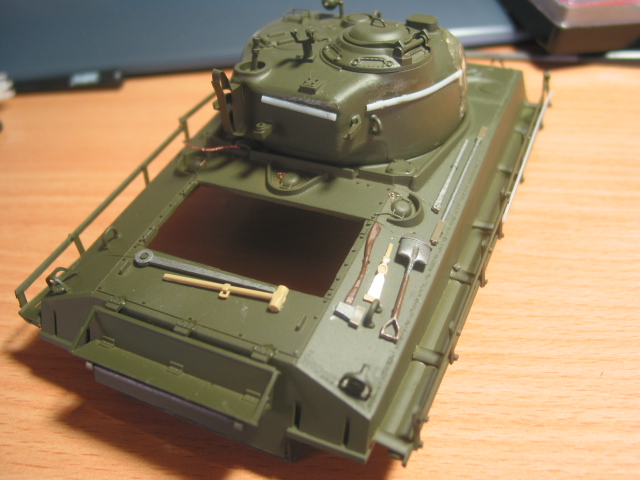
Man! That Academy Allied/German accessory set saved my life! Grabed some of the tools from that sprue
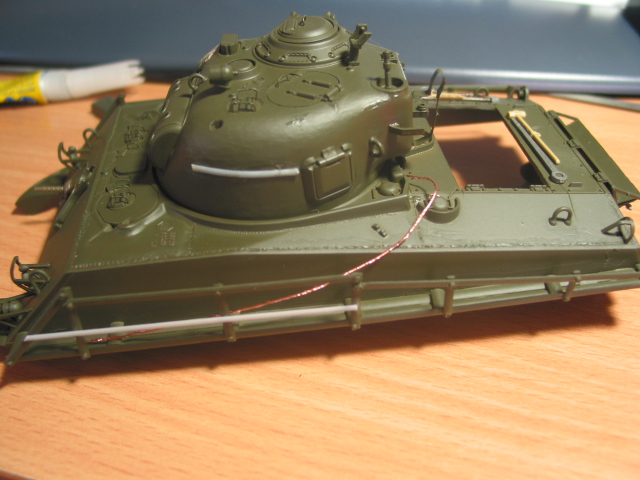
Another side of the Shermie. Scratchbuilt the rope using wire.
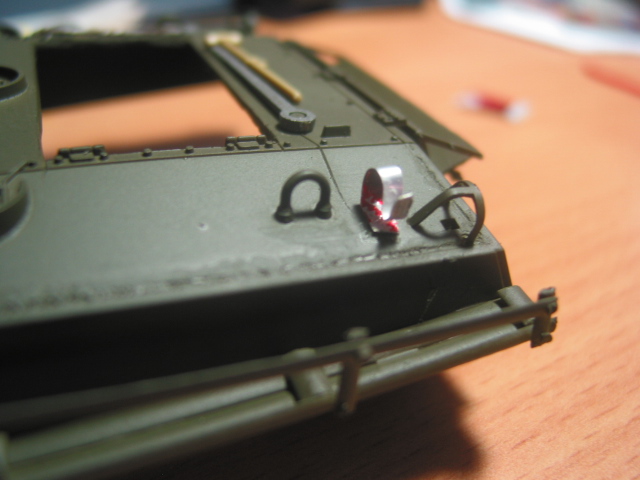
As you can see.... most of the pieces are scratchbuilt either by alum cans or stretched sprues. Absolutely no other items!
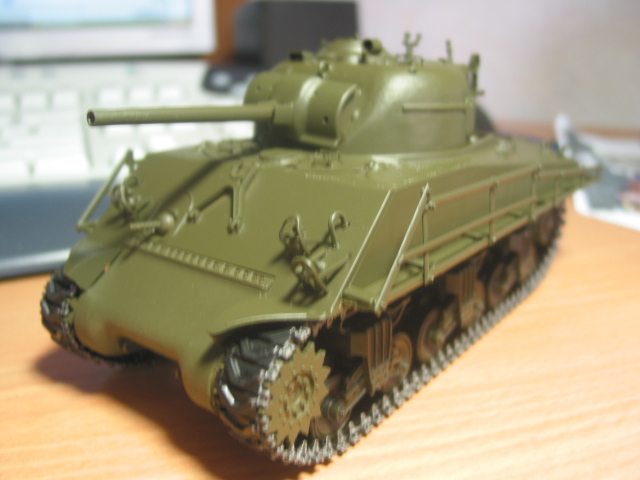
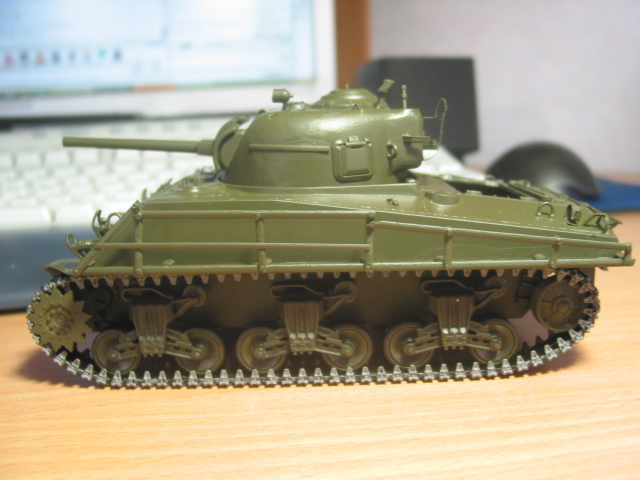
She's alive!!! I can't believe it! I may finish the decaling and weathering this week!! Next week: sandbags.

Reworked on the cheek bulge and added some more railings.

Man! That Academy Allied/German accessory set saved my life! Grabed some of the tools from that sprue

Another side of the Shermie. Scratchbuilt the rope using wire.

As you can see.... most of the pieces are scratchbuilt either by alum cans or stretched sprues. Absolutely no other items!


She's alive!!! I can't believe it! I may finish the decaling and weathering this week!! Next week: sandbags.
thebear

Joined: November 15, 2002
KitMaker: 3,960 posts
Armorama: 3,579 posts

Posted: Wednesday, September 22, 2004 - 12:30 AM UTC
Hmmm... Those tracks look a little loose.... I think you might have to cut off a link or at least try gluing the tracks to the skids it might help.
Rick
Rick
shonen_red

Joined: February 20, 2003
KitMaker: 5,762 posts
Armorama: 2,283 posts

Posted: Wednesday, September 22, 2004 - 12:54 PM UTC
Quoted Text
Hmmm... Those tracks look a little loose.... I think you might have to cut off a link or at least try gluing the tracks to the skids it might help.
Rick
Agree. I just placed it there but it ain't finished yet. I still need to paint the other tread. Don't worry, I'll make some more adjustments later
 |


