

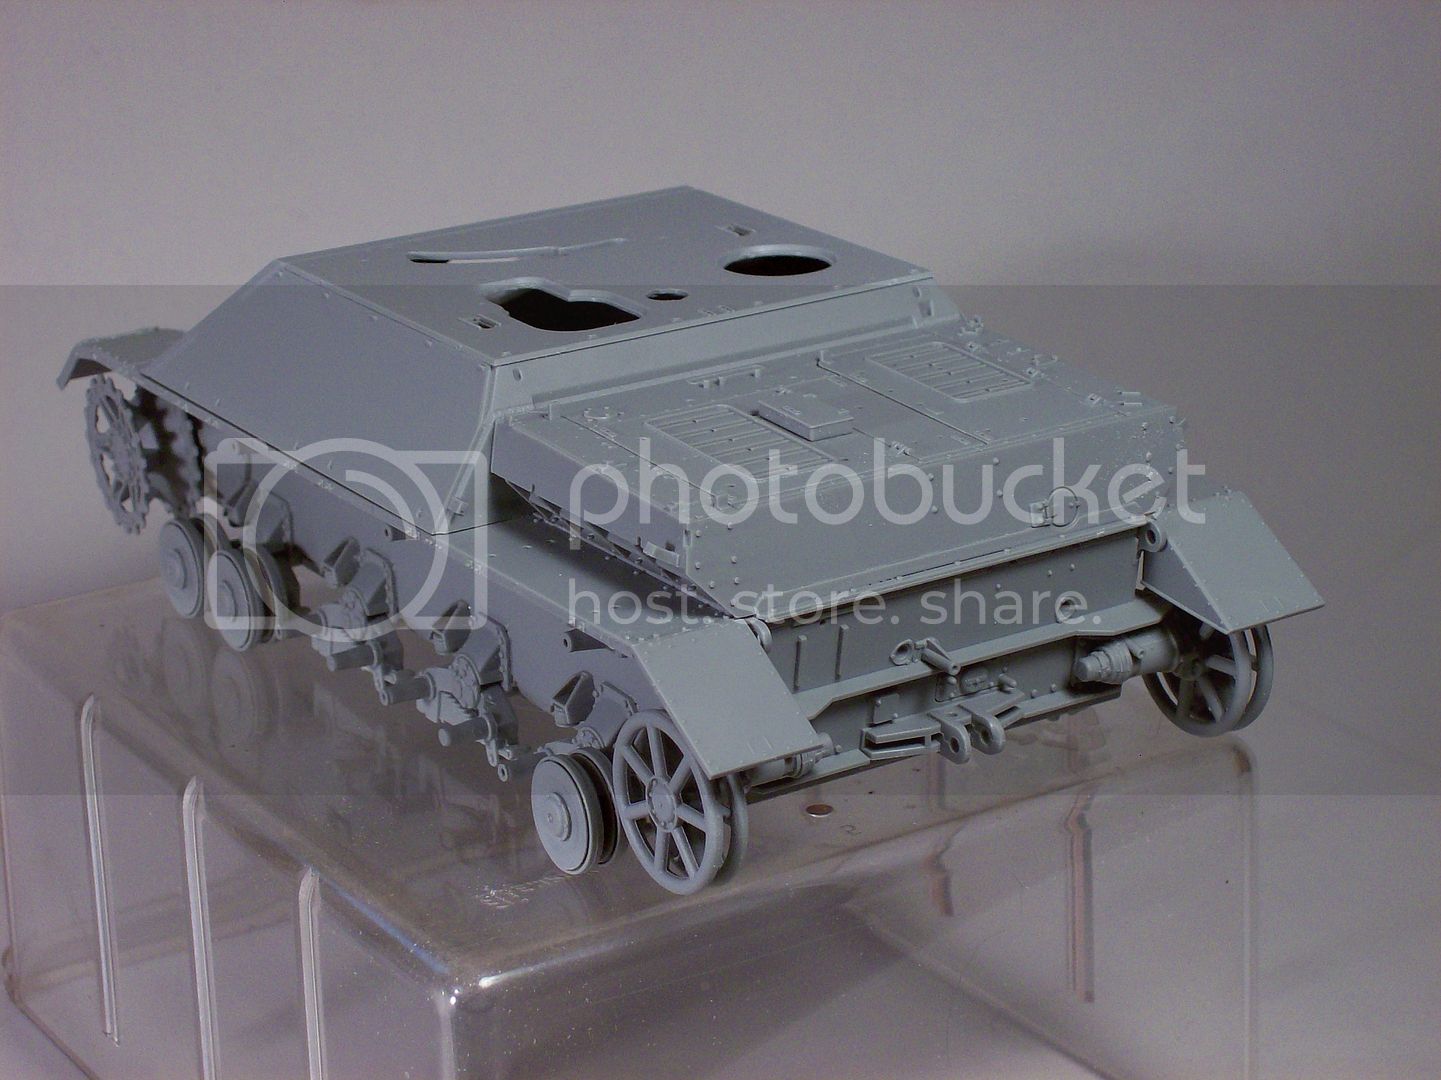
This is the Opel Blitz I started some time ago but put a hold
on it until I found some instructions for painting it.
As you can see i've left the tires off for now,hopeing they
will stretch enough to go over the rims after some paint
is applied.(panzer grey)
See pics in the next post,thanks to Dave.
....Tony...
Hosted by Darren Baker
"Basic Training"project by Pvt Mutt

PvtMutt

Joined: July 01, 2006
KitMaker: 614 posts
Armorama: 601 posts
Posted: Tuesday, September 12, 2006 - 04:29 AM UTC
Removed by original poster on 09/13/06 - 06:34:46 (GMT).

Grumpyoldman
Joined: October 17, 2003
KitMaker: 15,338 posts
Armorama: 7,297 posts

Posted: Tuesday, September 12, 2006 - 04:35 AM UTC
Hope this helps


 Looking pretty good so far.
Looking pretty good so far. 
PvtMutt
Joined: July 01, 2006
KitMaker: 614 posts
Armorama: 601 posts
Posted: Tuesday, September 12, 2006 - 04:46 AM UTC
DANG it's magic.
I was workin my brain to a meltdown and looky here.
Thanks Dave-"Howyadoin?"I mean, how'd you do that?
...Tony....
I was workin my brain to a meltdown and looky here.
Thanks Dave-"Howyadoin?"I mean, how'd you do that?
...Tony....
Grumpyoldman
Joined: October 17, 2003
KitMaker: 15,338 posts
Armorama: 7,297 posts
Posted: Tuesday, September 12, 2006 - 04:54 AM UTC
Well, I do it a little weird, and I'm sure there are other ways to do it, but what works for my senile mind is this:
1. I open gallery in a new tab,
2. Find the photo,
3. Click on it, when it opens I simply right click on the UBBC Code, and copy it
4. I go back to other tab with the response page, and simply paste the copied code.
Hope that helps.
1. I open gallery in a new tab,
2. Find the photo,
3. Click on it, when it opens I simply right click on the UBBC Code, and copy it
4. I go back to other tab with the response page, and simply paste the copied code.
Hope that helps.

RedLeg

Joined: April 30, 2005
KitMaker: 746 posts
Armorama: 389 posts

Posted: Tuesday, September 12, 2006 - 05:23 AM UTC
Quoted Text
Well, I do it a little weird, and I'm sure there are other ways to do it, but what works for my senile mind is this:
1. I open gallery in a new tab,
2. Find the photo,
3. Click on it, when it opens I simply right click on the UBBC Code, and copy it
4. I go back to other tab with the response page, and simply paste the copied code.
Hope that helps.
No worries Dave i do it exactly the same way :-)
Tony that looks great what paint have you used colours etc
 redleg
PvtMutt
Joined: July 01, 2006
KitMaker: 614 posts
Armorama: 601 posts
Posted: Tuesday, September 12, 2006 - 05:49 AM UTC
Red,I wish I knew,that's a great rusty look wouldin you say?
Here's the secret formula=
You go out and buy your first digi cam,get a couple of those high dollar true color lights and point them at a model you've sprayed with jet black
car primer and press the button.
That truck looks like its been sitttin in a open field for 60 years
don't it?
Sorry it's not for real. If I could put that in a bottle i'd get rich.LOL
....Tony....

xplan303ex
Joined: March 07, 2006
KitMaker: 94 posts
Armorama: 65 posts

Posted: Tuesday, September 12, 2006 - 06:00 AM UTC
It looks really good Tony, I hope to see it finished soon.
As for the color in your pictures, make sure you are using the correct white balance for the type of lights you have (refer to your camera's manual for that).
As for the color in your pictures, make sure you are using the correct white balance for the type of lights you have (refer to your camera's manual for that).

PvtMutt
Joined: July 01, 2006
KitMaker: 614 posts
Armorama: 601 posts
Posted: Tuesday, September 12, 2006 - 06:46 AM UTC
You know I bet that's it,forgot it had that setting.
Sure do like that rusty look.
Thanks a bunch xplan,i'm going to reshoot in the morning.
....Tony....
Sure do like that rusty look.
Thanks a bunch xplan,i'm going to reshoot in the morning.
....Tony....
PvtMutt
Joined: July 01, 2006
KitMaker: 614 posts
Armorama: 601 posts
Posted: Tuesday, September 26, 2006 - 03:21 AM UTC
Hi Ya'll:
Here's where I am as of today. Sure hope the wash and
weathering blends in that nasty brown.
Later
Tony
Here's where I am as of today. Sure hope the wash and
weathering blends in that nasty brown.
Later
Tony

Henk

Joined: August 07, 2004
KitMaker: 6,391 posts
Armorama: 4,258 posts

Posted: Tuesday, September 26, 2006 - 03:42 AM UTC
I'm sure that 'nasty brown' will lok great after you have weathered it. Lookig good from here, and I see you went to the trouble to open the door. I like the old Italeri Opel Blitz, a very nice basic kit which builds up really icewith a bit of care. You're doing it justice. Are you going to cover those hoops with a cover?
Cheers
Henk
Cheers
Henk
PvtMutt
Joined: July 01, 2006
KitMaker: 614 posts
Armorama: 601 posts
Posted: Tuesday, September 26, 2006 - 04:51 AM UTC
Yeah Henk, I was planning to use some gauze and make a net
like i've seen others do. Say cover 1/2-2/3rds of the top and roll
the rest back. What do you think??
Yes it is a pretty good little model,better than I thought it
would be. I've also got the Italeri Opel Radio and the
Mercedes L3000 trucks.
I know i'm doing things I shouldn't be doing with this
group build but at my age and two heart attacks under
my belt ,i've got too much to learn and too many
kits to build .
.
All this is a shot in the dark for me and any guidance is
much appreciated.
Thanks Henk
...Tony...
like i've seen others do. Say cover 1/2-2/3rds of the top and roll
the rest back. What do you think??
Yes it is a pretty good little model,better than I thought it
would be. I've also got the Italeri Opel Radio and the
Mercedes L3000 trucks.
I know i'm doing things I shouldn't be doing with this
group build but at my age and two heart attacks under
my belt
,i've got too much to learn and too manykits to build
.All this is a shot in the dark for me and any guidance is
much appreciated.
Thanks Henk
...Tony...

DeskJockey
Joined: July 17, 2006
KitMaker: 1,558 posts
Armorama: 1,159 posts
Posted: Tuesday, September 26, 2006 - 06:12 AM UTC
Looking good. One tip--if you want a tarp instead of a net to cover the truck bed, you can use tissue paper soaked in diluted white glue. It can be a bit hard to work with, butonce it dries you can paint it very easily and it looks great--just like a canvas tarp.
PvtMutt
Joined: July 01, 2006
KitMaker: 614 posts
Armorama: 601 posts
Posted: Tuesday, October 10, 2006 - 04:41 AM UTC
OK here it is,my first after fifty years.
I think i'll wait on the net or tarp for now,
i'm worn out.
If anyone has any suggestions or criticism,let her rip.
I'm too old to get POed at anything you might say
Thanks Everybody
.....Tony.....
I think i'll wait on the net or tarp for now,
i'm worn out.
If anyone has any suggestions or criticism,let her rip.
I'm too old to get POed at anything you might say
Thanks Everybody
.....Tony.....

Adolph

Joined: August 27, 2005
KitMaker: 171 posts
Armorama: 127 posts

Posted: Tuesday, October 10, 2006 - 02:03 PM UTC
Damn, I can't find anything to criticize, Looks pretty good to me Tony
djohannsen
Joined: June 24, 2005
KitMaker: 364 posts
Armorama: 355 posts
Posted: Tuesday, October 10, 2006 - 05:14 PM UTC
I think that she's a winner! You did a really nice job.
This makes it doubly impressive. My Panther is my third kit since coming back to this hobby, and I know that it won't turn out half so well as yours did.
I really like the camo scheme that you chose - does this put the vehicle as summer '43? I'm interested in Grossdeutschland at Kursk, so this gives me even more reason to gush over your build. Also, the way that you weathered the tires (they're not jet black and I like the dust in the tread) is quite convincing. If I were going to make any criticism, I would say that you need some dust on the wheels themselves and on the undercarriage.
Thanks for posting the photos of the finished kit, you can be proud of this.
Dave
Quoted Text
OK here it is,my first after fifty years.
This makes it doubly impressive. My Panther is my third kit since coming back to this hobby, and I know that it won't turn out half so well as yours did.
I really like the camo scheme that you chose - does this put the vehicle as summer '43? I'm interested in Grossdeutschland at Kursk, so this gives me even more reason to gush over your build. Also, the way that you weathered the tires (they're not jet black and I like the dust in the tread) is quite convincing. If I were going to make any criticism, I would say that you need some dust on the wheels themselves and on the undercarriage.
Thanks for posting the photos of the finished kit, you can be proud of this.
Dave
Henk
Joined: August 07, 2004
KitMaker: 6,391 posts
Armorama: 4,258 posts
Posted: Tuesday, October 10, 2006 - 05:39 PM UTC
Tony, well done on the Opel Blitz. I like your camo,
 Although I think you may have given it a helping hand...
  .
.
What happened to the windscreen? It looks frosted over, as if it was hit with super glue, but in the previous pics it was clear? If the 'damage' is not to severe, brush on Klear (Future) which is good at 'de-fogging' clear glass.
No silvering around the decals eiher, and the GrossD mark has setteled nicely in the groves on the tail board, top marks. Care to tell us your secret?
One or two things to look out for in the future, the little triangel on the cab roof (which incidentally indicates that the vehicle is towing a trailer, your next project? ) has a knock-out mark in it, and the Notek light is not pointing straight ahead.
Good job Tony
Cheers
Henk
Quoted Text
, think the wash has worked wonders. Sure hope the wash and
weathering blends in that nasty brown.
Although I think you may have given it a helping hand... .What happened to the windscreen? It looks frosted over, as if it was hit with super glue, but in the previous pics it was clear? If the 'damage' is not to severe, brush on Klear (Future) which is good at 'de-fogging' clear glass.
No silvering around the decals eiher, and the GrossD mark has setteled nicely in the groves on the tail board, top marks. Care to tell us your secret?
One or two things to look out for in the future, the little triangel on the cab roof (which incidentally indicates that the vehicle is towing a trailer, your next project?
) has a knock-out mark in it, and the Notek light is not pointing straight ahead. Good job Tony
Cheers
Henk
PvtMutt
Joined: July 01, 2006
KitMaker: 614 posts
Armorama: 601 posts
Posted: Tuesday, October 10, 2006 - 07:36 PM UTC
First to Erin:
I thank you for the compliment but there are plenty
of things that need improvements.
Dave:
That little truck almost went to the junk yard more
than once so hang in there with the tank.
I read a paint post somewhere that said the colors
are from the 1935 to 41 time period.
The panzer grey looks greenish because of the
burnt umber wash and the brown is flat earth(Tamiya)
that closely matches the brown used.
Pattern is from a early tank scheme that a very trusted guy
here used so I figured why not put it on the truck.
So far as the tires go,I had dust on the sidewalls too
but it just looked like too much.I got to thinking about it
and went outside and took alook at my pickups tires.
The sidewalls were much lighter than the rest of the tire
because that part of the tire flexes and keeps the dust or
mud knocked off. You have a very light stain left so I took
a stick of grey-black chalk and rubbed them down alittle.
Henk:
No,that's not CA on the windshield, it's overspray.
I mask off the outside but forgot the windows were down
and the door was open. Give this OLDMAN a break will you.
I didn't know what that thing was on the roof,broke it off four times
and its lucky to even be there. :-) Same for that little do-dad on the
upper left corner of the windshield too.
Decals: Followed the tips given on the sites. 1st-coat of Future,
2nd-a drop of decal set,placed decal on top of the drop, 3rd-a drop
on top of the decal,4th-let it dry then clean off any extra fluids and
then a top coat of Future.
Am I allowed to be this long winded here?

...Tony...
I thank you for the compliment but there are plenty
of things that need improvements.
Dave:
That little truck almost went to the junk yard more
than once so hang in there with the tank.
I read a paint post somewhere that said the colors
are from the 1935 to 41 time period.
The panzer grey looks greenish because of the
burnt umber wash and the brown is flat earth(Tamiya)
that closely matches the brown used.
Pattern is from a early tank scheme that a very trusted guy
here used so I figured why not put it on the truck.
So far as the tires go,I had dust on the sidewalls too
but it just looked like too much.I got to thinking about it
and went outside and took alook at my pickups tires.
The sidewalls were much lighter than the rest of the tire
because that part of the tire flexes and keeps the dust or
mud knocked off. You have a very light stain left so I took
a stick of grey-black chalk and rubbed them down alittle.
Henk:
No,that's not CA on the windshield, it's overspray.
I mask off the outside but forgot the windows were down
and the door was open. Give this OLDMAN a break will you.
I didn't know what that thing was on the roof,broke it off four times
and its lucky to even be there. :-) Same for that little do-dad on the
upper left corner of the windshield too.
Decals: Followed the tips given on the sites. 1st-coat of Future,
2nd-a drop of decal set,placed decal on top of the drop, 3rd-a drop
on top of the decal,4th-let it dry then clean off any extra fluids and
then a top coat of Future.
Am I allowed to be this long winded here?
...Tony...
DeskJockey
Joined: July 17, 2006
KitMaker: 1,558 posts
Armorama: 1,159 posts
Posted: Wednesday, October 11, 2006 - 04:20 AM UTC
Very nice build, even with the overspray on the windshield. I feel your pain regarding fiddly bits that break off. I must have broken of the mirror of my MUTT a dozen times while building and painting it a couple of months ago.  By the end I was a pro at reattaching it with small dabs of super glue without damaging the finish...
By the end I was a pro at reattaching it with small dabs of super glue without damaging the finish... 
Easy_Co
Joined: September 11, 2002
KitMaker: 1,933 posts
Armorama: 985 posts

Posted: Wednesday, October 11, 2006 - 01:48 PM UTC
Great build Tony,for an old kit it still looks good. Ive got a Tamyia duce&half in my stash half built from four and a half years ago you have encouraged me to dig her out and finish it.

PvtMutt
Joined: July 01, 2006
KitMaker: 614 posts
Armorama: 601 posts
Posted: Wednesday, October 11, 2006 - 06:04 PM UTC
Thanks John
The old girl went togeather real well,
her new dress was a real chore for me
being my first.
I'd say after four and a half years the
rings are stuck in that duce and a half
and it's goin to smoke alittle when you start her up :-)
Good Luck with her and show it off when completed.
....Tony....
The old girl went togeather real well,
her new dress was a real chore for me
being my first.
I'd say after four and a half years the
rings are stuck in that duce and a half
and it's goin to smoke alittle when you start her up :-)
Good Luck with her and show it off when completed.
....Tony....

Sticky
Joined: September 14, 2004
KitMaker: 2,220 posts
Armorama: 1,707 posts
Posted: Wednesday, October 11, 2006 - 10:34 PM UTC
Nice Finish Mutt. Don't forget to paint the inside of the triangle white and fill that ejector pin mark!
Grumpyoldman
Joined: October 17, 2003
KitMaker: 15,338 posts
Armorama: 7,297 posts
Posted: Thursday, October 12, 2006 - 01:44 AM UTC
For your first kit in 50 years, you did a d*mn nice job.
If your over spray on the inside is an acrylic, you could try a little ammonia or Windex containing ammonia on a q-tip, to try to remove it. (not the first time I've had to do that!) It will remove 98% of the overspray, and give the appearance of the driver cleaning the inside of the windshield.
Looking forward to seeing your next one.
 |

WEB HOSTING BY


Copyright ©2021 Armorama and Kitmaker Network, a subsidiary of Silver Star Enterprises
All Rights Reserved. Please read our Conditions of Use and Privacy Policy.
All Rights Reserved. Please read our Conditions of Use and Privacy Policy.