


the kit

Stage 1 the chassis


I replaced the kit wheel nuts and filled the sink holes in the bumper.
more later
cheers
David


 (yes I know the campaign is Paint it Yellow)


 luckily on an old test hull and not the WC-54
  . I found that the salt stains the paint (Tamiya) and that that stain shows through the top coat of paint. So it's for chipping it's out with the 0000 paint brush, on with the high power magnifier and take something to steady the old hands


 So I repainted the doors and relocated the squares closer to the hinges:
 and 20 minutes painting


 Good job on the painted crosses.
  But still managed to do a bit.
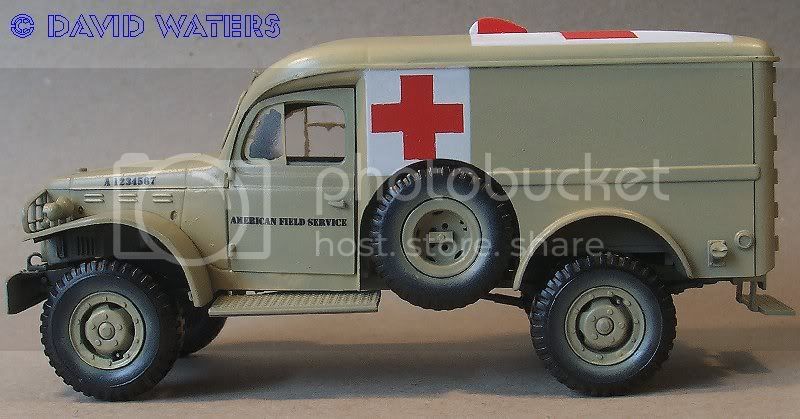


 to start the weathering process.


It seems like the windows have gone very unclear? Is that so or is it just the lighting in the pictures?
Another lesson learned, hopefully Am glad you got the ownership of your chair sorted, I have a similar problem with my computer chair...
We now have a chair each  Luckily it was just a case of rearrange the furniture to suit the cats

David,
A minor thing but the window cranks should be more on the hinge edge of the front doors. Where you've placed them there was an armrest/doorpull.
In the late 60s-early 70s, we used one of these as our surf buggy on the San Clemente California coast.
Original inside and out, paint too, but CHP (California Highway Patrol) made us paint over the red crosses. Lime green left over from a greenhouse.
I'm sure enjoying your build. Keep up the good work.
looks like I'll keep the front doors closed. But then I read some posts that talked about using Scotch Brite pads. So this time I did experiment and came up with a method that works for me 


 Klear (Future) is very good at repelling water. I should have given it a flat coat first, yet another lesson learnt
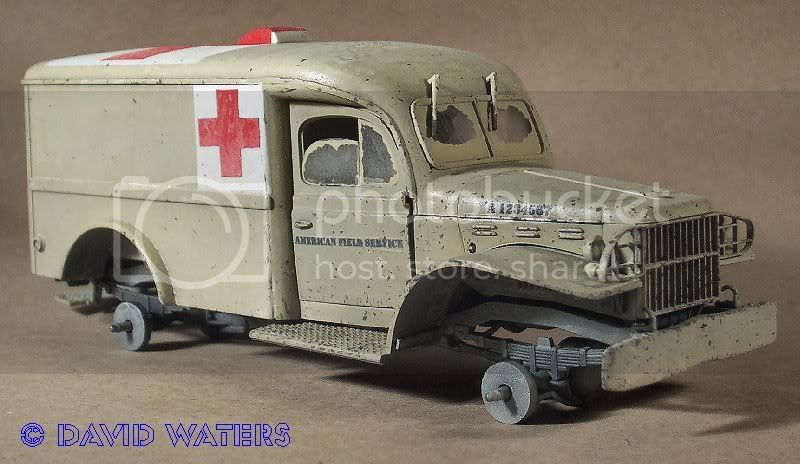

 Hopefully dry brushing and a light dust with pastels will tone in down it seemed to work on the wheels.


 |


