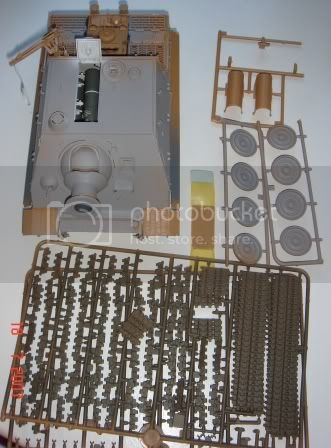
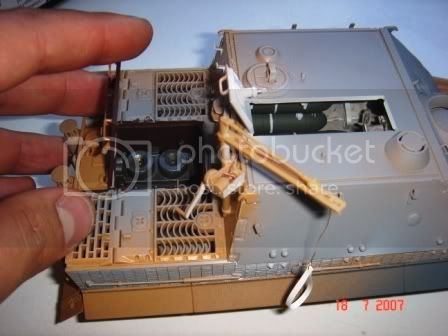
It is the First of July, and the HoG Campaign has now begun. After a lot of thought, I decided to go with the DML6320 Stug III Ausf.G Early Production Smart Kit supplimented by the Verlinden VPI2087 Sturmgeschutz III Ausf.G Interior Detail set, Eduards EDU35752 Zimmerit StuG.III Ausf.G Waffel Photo-etch Set, and Lion Roar's LNRLE35038 LNRLE35038 Stug III Late Ausf G Detail, LNRLE35039 LNRLE35039 Skirt Armor for Stug III G Detail sets. I will also be using some Friulmodel metal tracks.
The Verlinden VPI2087 Sturmgeschutz III Ausf.G Interior Detail set was actually made for the Tamiya StuG III, but I am confident I can make them marry up quite well. Eduards EDU35752 Zimmerit StuG.III Ausf.G Waffel Photo-etch Set was actually designed for Dragons StuG III #6043. I think it should fit this kit without too much difficulty. This is the only set I do not already have. It is scheduled to be delivered on Tuesday. That should not be a problem because I don't think I will be ready for it until at least Wednesday. The two Lion Roar sets were designed for DMLs StuG III. They do not say specifically which one, but it is probably safe to assume they are also for 6043. The DML Smart Kit is simply amazing. I know it was designed to not need all this extra stuff, but it will all be added in the true spirit of the HoG.
Campaigns
Where Armorama group builds can be discussed, organized, and updates posted.
Hosted by Darren Baker, Richard S.
Heart of Gold
CaptainA
Indiana, United States
Joined: May 14, 2007
KitMaker: 3,117 posts
Armorama: 564 posts
Joined: May 14, 2007
KitMaker: 3,117 posts
Armorama: 564 posts
Posted: Sunday, July 01, 2007 - 02:57 AM UTC
spongya
Associate Editor
Budapest, Hungary
Joined: February 01, 2005
KitMaker: 2,365 posts
Armorama: 1,709 posts
Joined: February 01, 2005
KitMaker: 2,365 posts
Armorama: 1,709 posts
Posted: Sunday, July 01, 2007 - 04:06 AM UTC
I'm going with the DML smart kit Panther G with TWS interior. I have started some work on it (it can be seen on my webshots gallery), but since it did not progress far, I hope it qualifies. Accidentally, I started to paint the ivory color today (completely forgot about the starting date). One thing I can already say: painting white/ivory/yellow is hard. It will take a while.
I don't plan to close the hull pernamently -most of the detail would be obscured. Does anybody have any ideas how to mate the hull together so that it can be detached?
exer
Dublin, Ireland
Joined: November 27, 2004
KitMaker: 6,048 posts
Armorama: 4,619 posts
Joined: November 27, 2004
KitMaker: 6,048 posts
Armorama: 4,619 posts
Posted: Sunday, July 01, 2007 - 07:39 AM UTC
I picked up the M4A3E8 105 and I'll use a T23 turret from another Dragon Kit to go with the interior cast for me by John Eary.
cuales
California, United States
Joined: February 21, 2004
KitMaker: 54 posts
Armorama: 45 posts
Joined: February 21, 2004
KitMaker: 54 posts
Armorama: 45 posts
Posted: Sunday, July 01, 2007 - 02:00 PM UTC
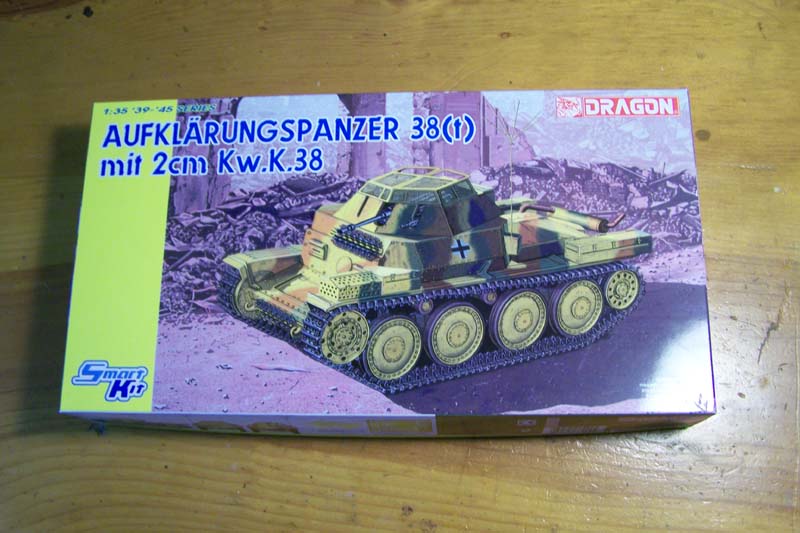
This will be my first build for the campaign, extrictly out of the box, although I may scratchbuild some of the missing detail.
I picked this subject because of its sophisticated look, and it's a pretty sophisticated kit as well.
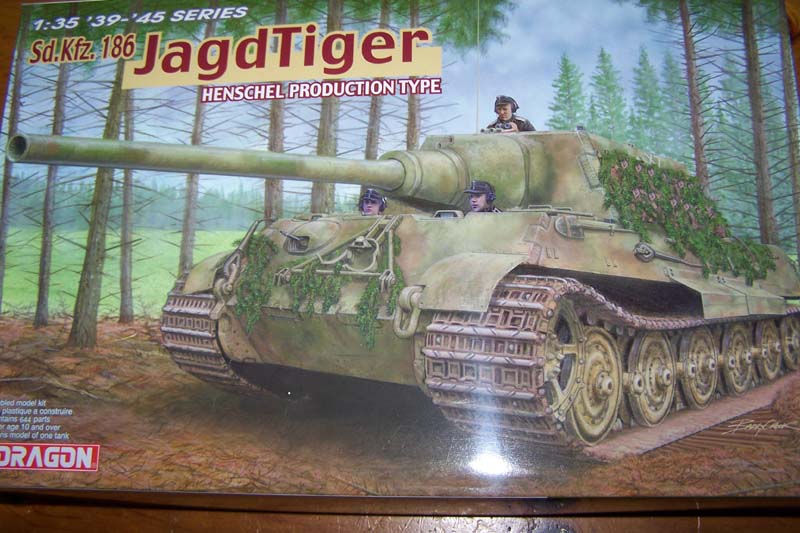
This will be my second build for the campaign, and I will sure try to go all out with this one: resin interior, PE, and possibly zimmerit, some figures as well.
I picked this subject because of its impressive looks, I really like jagdtigers.
I still need to get the stuff for the jagdtiger, so I'll build that later.
Thank you.
Posted: Sunday, July 01, 2007 - 07:20 PM UTC
I will enter this campaign with the 1/35 Revell/Italeri Sturmtiger.
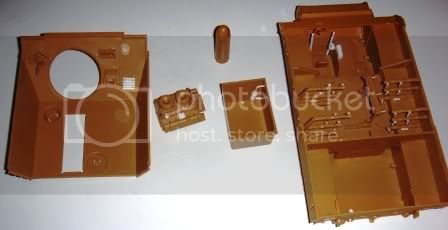
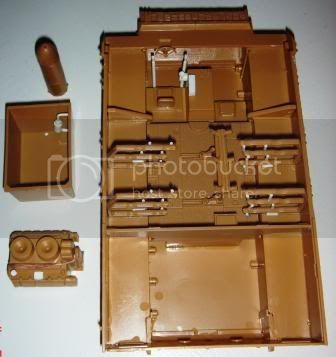
The kit comes with a pretty nice interior with 38cm Rockets, loading ramp, breech detail etc. I will scratchbuild a few things for the interior, but nothing extreme. I have a lot of very good pictures of the interior.
A basic engine is also included. This I will probably detail if I can find some photos to go from. Should not be to difficult as it is basically a Tiger I late engine that is in the Sturmtiger.
I am planning to start the build this week or the next, so pictures will follow as I move along....
Great to participate
blackeast19
Singapore / 新加坡
Joined: February 22, 2005
KitMaker: 394 posts
Armorama: 217 posts
Joined: February 22, 2005
KitMaker: 394 posts
Armorama: 217 posts
Posted: Monday, July 02, 2007 - 01:23 AM UTC
Hi all,
Wow, time flies and here we all are at the start line of another fun group build. I will be entering with a rather old kit: Tamiya's M2 Bradley (35132). It coes with an interior, so no kit bashing for me. Pure OOB.
I will be posting some progress pictures soon.
See ya at the finishing line!
Cheers!
Wow, time flies and here we all are at the start line of another fun group build. I will be entering with a rather old kit: Tamiya's M2 Bradley (35132). It coes with an interior, so no kit bashing for me. Pure OOB.
I will be posting some progress pictures soon.
See ya at the finishing line!
Cheers!
Posted: Monday, July 02, 2007 - 07:03 PM UTC
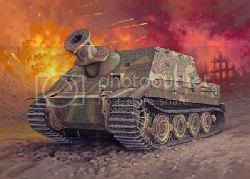
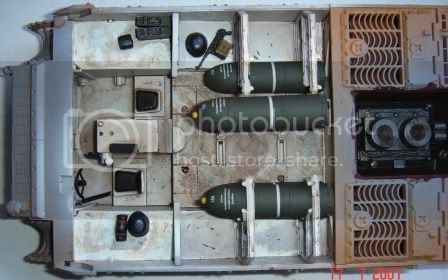
This is the "little storm baby" I am going to enter into this campaign. It might have worked earlier in the war for destroying strong points with good logistic support, but for defensive battles the SturmTigers did not really seem to work that well.
Anyway, they would quickly run out of ammunition. Looking at the interior you can understand why - only 7 rockets could be carried in the tank including one on the loading rail.
spongya
Associate Editor
Budapest, Hungary
Joined: February 01, 2005
KitMaker: 2,365 posts
Armorama: 1,709 posts
Joined: February 01, 2005
KitMaker: 2,365 posts
Armorama: 1,709 posts
Posted: Tuesday, July 03, 2007 - 03:47 AM UTC
Actually, 14 rounds if you load the gun...
What are you planning to use for interior? (I have used the Eduard set with the Tamiya kit, but I'm tempted to get the new AFV kit with the interior, too -or maybe the Jaguar set.)
Posted: Tuesday, July 03, 2007 - 08:34 PM UTC
Quoted Text
Actually, 14 rounds if you load the gun...
What are you planning to use for interior? (I have used the Eduard set with the Tamiya kit, but I'm tempted to get the new AFV kit with the interior, too -or maybe the Jaguar set.)
Yeah, my 7 rounds were wrong. My memory is playing tricks on me - must be the age On recounting I get 6 rockets pr. side and and one on the rail and in the gun if it is set at 16 degrees elevation. Total of 14 rounds. So you are right.
I am making the Revell/Italeri Sturmtiger with a few scratch build parts for the interior and the engine. Nothing extensive. Otherwise I am just using the kit supplied interior.
Posted: Wednesday, July 04, 2007 - 07:06 PM UTC
Hi there
First post on my Sturmtiger build. I have finished the lower hull and interior. I have added a few things in white plastic card:
- Track brakes, gear, and control panel for the driver.
- Accessory box, some sort of pump, wires, and oil filling line for the engine
- Handles for the rocket racks.
- Some tubes to the inside of the front glacis plate. I do not know what they are for.
I used my references: "New Vanguard: Tiger I" for the engine and "Militaria: Sturmtiger" for the rest of the interior. Other than that only my mk.1 eyeball to make all the additions. Next is painting and the adding of rocket to the interior.
CaptainA
Indiana, United States
Joined: May 14, 2007
KitMaker: 3,117 posts
Armorama: 564 posts
Joined: May 14, 2007
KitMaker: 3,117 posts
Armorama: 564 posts
Posted: Thursday, July 05, 2007 - 08:45 AM UTC
I have begun on mine also. No pictures yet though. Mostly, I have been cleaning up the resin pieces. I like to get them all detached from their pour plugs and cleaned up before I do anything else. I have been test fitting them into the hull. So far, I am very happy with the fit. That can change quickly once they are painted and in place though.
There is a lot of decision making when using so many AM kits. The DML StuG has a very nice hull and torsion bars. The Resin also has torsion bars. I decided to eliminate the resin torsion bars in favor of the kits. This will result in a lot of surgery on the resin parts.
Most of the clean up is done and painting is going to begin soon.
spongya
Associate Editor
Budapest, Hungary
Joined: February 01, 2005
KitMaker: 2,365 posts
Armorama: 1,709 posts
Joined: February 01, 2005
KitMaker: 2,365 posts
Armorama: 1,709 posts
Posted: Tuesday, July 10, 2007 - 12:25 PM UTC
CaptainA
Indiana, United States
Joined: May 14, 2007
KitMaker: 3,117 posts
Armorama: 564 posts
Joined: May 14, 2007
KitMaker: 3,117 posts
Armorama: 564 posts
Posted: Wednesday, July 11, 2007 - 07:58 AM UTC
I am slowly moving along also. These are photos of the subassemblies dry fitted in place.
I have decided to use the kits torsion bars. That means I had to cut off all the resin ones. The are dry fitted in place here. I managed to get into the StuG III G at Ft. Knox. I decided to mimick the colors of that in this build. Yes the Fighting Compartment Floor is Interior White (Elfenbein) in that one. I have the initial paint chipping done in this shot. I need to go back and touch up a few spots. The transmission fluid fillers were to far forward so I shaved them off and replaced them.
The Engine Compartment required a lot of dry fitting and work. To put in in simple terms, all that stuff wont fit. The engine sits too high and the back plate wont fit. I had to lower the engine, and that still was not enough. I also had to shave off the bottom of the carb and lower the air filters, and modify the radiators. The fighting compartment floor got a lot of wear and chipping.
A lower angle shot of the fighting compartment shows the ammo bin with nine rounds in place. This build will have a full battle load. These rounds probably wont be visible when completed. As I stated earlier, everything is dry fitted in place. I will be chipping and weathering the Engine Compartment. I plan to give the engine compartment a heavy coat of dust. It will end up being a summer Eastern Front StuG, if all goes well.
So far, I am very impressed by the kit. It appears to be a very substantial kit that will have a very complete interior on its own. I might get another one for my stash. DML sure puts out some nice kits. And yes, I know Smart Kits are designed not to need all this extra stuff.
Posted: Wednesday, July 11, 2007 - 06:33 PM UTC
@Carl: Your StuG is coming along very well. It is definently a very worn interior you have there. Very fitting for a StuG on the Eastern front.
A little update on my own build.
Yesterday basic construction of the sub assemblies finished and were given a light grey base coat.
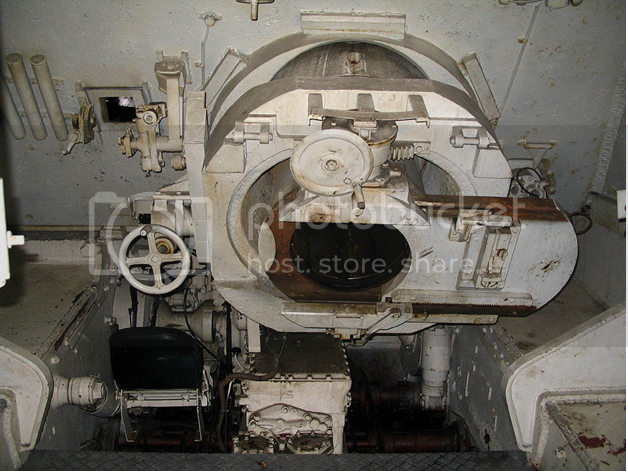
Now I am considering how much to weather the interior of my Sturm Tiger. Basically it should be weathered lightly as it was a pretty new vehicle and most pictures of the interior show it quite clean. On the other hand the Sturm Tigers were based on old Tiger Is, so the interior could have been very worn. But when rebuild the interior would probably have been repainted. Hmmm....any suggestions anyone?
Here is a good colour picture of the interior, but it could have been of a restored vehicle.
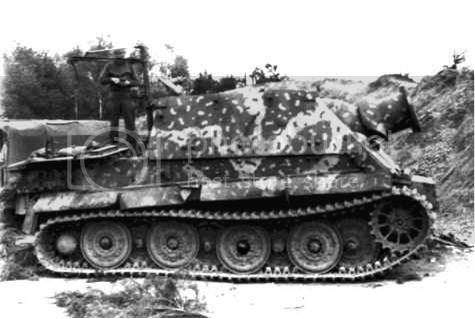
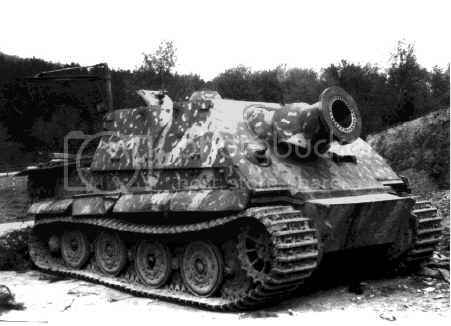
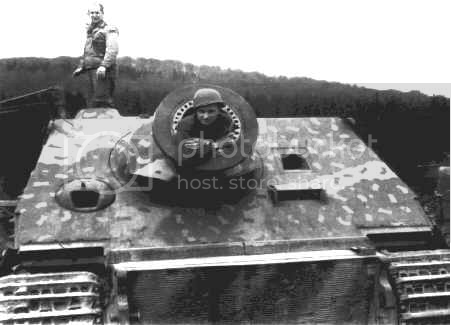
Overall colour for the Sturm Tiger?
The first three production series Sturmmoerser were completed by Alkett on rebuilt Tiger I chassis in August 1944. Plans to complete an additional seven 38 cm Tiger-Moerser from 15 to 21 September 1944 were presented to Hitler in a conference on 18/20 August 1944. Ten Sturmmoerser were produced in September, along with an additional five in December 1944. (Source: Jentz, Thomas L., Panzer Tracts No. 8 "Sturmgeschuetz - s.Pak to Sturmmoerser", Darlington Productions, Inc, 1999)
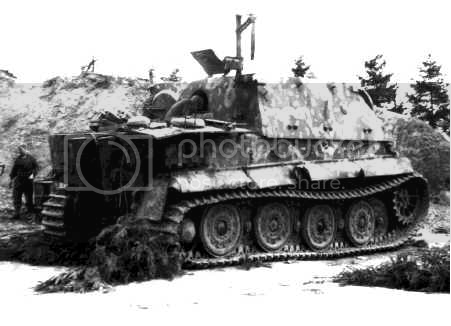
From pictures it seems that at least some of the Sturm Tigers were painted overall green and then brown and sand were applied on top of that. However, it is difficult to judge from the pictures below. The vehicle below is the one I would like to make. Does anybody have any information on Sturm Tigers base colour?
CaptainA
Indiana, United States
Joined: May 14, 2007
KitMaker: 3,117 posts
Armorama: 564 posts
Joined: May 14, 2007
KitMaker: 3,117 posts
Armorama: 564 posts
Posted: Thursday, July 12, 2007 - 11:13 AM UTC
Hey all. Ever wonder why modeling is so much fun. Here's why.
After spending two days modifying the engine compartment on my StuG, I noticed the instructions show the engine being built backwards. Maybe that is why the air filters wont fit. Thank you Verlinden for speeding me along on this build.
Lesson learned...check references befor cutting, painting, and gluing. Now, do all you modellers out there who do not do resin interiors see what you are missing out on.
On the flipside. I was soooo very unhappy, I did hit another 400 yard drive.
spongya
Associate Editor
Budapest, Hungary
Joined: February 01, 2005
KitMaker: 2,365 posts
Armorama: 1,709 posts
Joined: February 01, 2005
KitMaker: 2,365 posts
Armorama: 1,709 posts
Posted: Thursday, July 12, 2007 - 11:30 AM UTC
Don't complain... TWS gives you a bad-quality photocopy of photos of the assembled interior, and it's up to you to make something of it. Makes you check your references, that's for sure
(Otherwise the interior is p-e-r-f-e-c-t.)
Jesper,
I ended up cutting out the side of the sturmtiger to show any of the work I've done on it... After tedious work I realized it won't show. (And the radio, the wires, the MG still can't be seen... well, it's been some practice at least.) Maybe you could leave the superstructure unglued, so it can be removed like the real thing. The boltheads can be removed, and their place drilled. (At least that's what I plan to do if I get an AFV with the separate interior...)
Don't mean to give unwanted advice, just sharing my thoughts.
CaptainA
Indiana, United States
Joined: May 14, 2007
KitMaker: 3,117 posts
Armorama: 564 posts
Joined: May 14, 2007
KitMaker: 3,117 posts
Armorama: 564 posts
Posted: Thursday, July 12, 2007 - 12:56 PM UTC
I apologize to verlinden. I went back and looked at the instructions very closely and the instructions are correct. It is basically a case of operator headspace and timing, on my part.
I put the air cleaners on backwards. But twhen I turned them around, they still dont fit. Even though I lowered them, they are still to high for the back plate. They also extend way too far forward, into the fighting compartment. I wonder if this is also a problem on the Tamiya kit it was designed for.
Well, with resin you have to expect a lot of modifications. After doing this a few times, with different interiors by different manufacturers, I wonder if the manufacturers ever build these kits with their interiors. They always seem to be on the large size.
On a positive note, the DML kit is great.
Spongya...Does your TWS have a lot of air bubbles. I got one for a king tiger, bubbles like champaign, lots of warped parts to. It is so bad, it is almost unusable.
spongya
Associate Editor
Budapest, Hungary
Joined: February 01, 2005
KitMaker: 2,365 posts
Armorama: 1,709 posts
Joined: February 01, 2005
KitMaker: 2,365 posts
Armorama: 1,709 posts
Posted: Thursday, July 12, 2007 - 01:27 PM UTC
No, they are perfect. TWS so far was really high quality. You might want to contact them -after all they might be willing to give you a good one. I dunno, but these people seem reasonable.
(I have an old kt interior from Panzer Concepts. It looks good, too. So far the only low quality resin was an old conversion for an MiG-21 MF. That airplane is still half-finished in a box.)
CaptainA
Indiana, United States
Joined: May 14, 2007
KitMaker: 3,117 posts
Armorama: 564 posts
Joined: May 14, 2007
KitMaker: 3,117 posts
Armorama: 564 posts
Posted: Friday, July 13, 2007 - 06:09 AM UTC
Thanks. I will count my blessings and whack some more golf balls.
Posted: Sunday, July 15, 2007 - 07:00 PM UTC
Quoted Text
Jesper,
I ended up cutting out the side of the sturmtiger to show any of the work I've done on it... After tedious work I realized it won't show. (And the radio, the wires, the MG still can't be seen... well, it's been some practice at least.) Maybe you could leave the superstructure unglued, so it can be removed like the real thing. The boltheads can be removed, and their place drilled. (At least that's what I plan to do if I get an AFV with the separate interior...)
Don't mean to give unwanted advice, just sharing my thoughts.
Thanks, I will consider to leave it off, but I think the best thing will be to glue it in place to make the camouflage and weathering blend together better. Well, on the other hand it could be cool to be able to see the interior. Hmmm... what to do, what to do
CaptainA
Indiana, United States
Joined: May 14, 2007
KitMaker: 3,117 posts
Armorama: 564 posts
Joined: May 14, 2007
KitMaker: 3,117 posts
Armorama: 564 posts
Posted: Monday, July 16, 2007 - 07:28 AM UTC
SGTJKJ-New avataar? where do you find the time?
Posted: Monday, July 16, 2007 - 08:06 PM UTC
Quoted Text
SGTJKJ-New avataar? where do you find the time?
Yeah, I am getting some rutine at banners now so they take less and less time to make.
Emre asked for some banners for the Flamethrower campaign, so I thought I would support the campaign a little as well by drawing some attention to it.
I actually belive there are quite a number of people in the forums that do not check out the campaigns forum often. Banners are a good way of reminding people about the current campaigns.
spongya
Associate Editor
Budapest, Hungary
Joined: February 01, 2005
KitMaker: 2,365 posts
Armorama: 1,709 posts
Joined: February 01, 2005
KitMaker: 2,365 posts
Armorama: 1,709 posts
Posted: Tuesday, July 17, 2007 - 04:08 AM UTC
Quoted Text
Thanks, I will consider to leave it off, but I think the best thing will be to glue it in place to make the camouflage and weathering blend together better. Well, on the other hand it could be cool to be able to see the interior. Hmmm... what to do, what to do
You can secure the superstructure temporarily, if you chose so. There's an excellent Sturmtiger model built like this in Budapest, if you happen to be around. Visit the Sas militaria model shop.
Posted: Tuesday, July 17, 2007 - 10:17 PM UTC
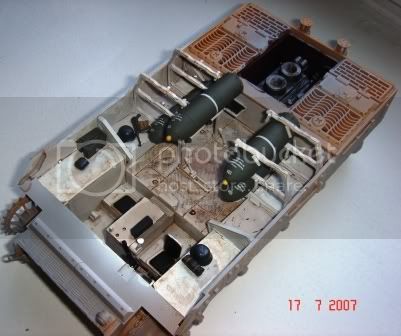
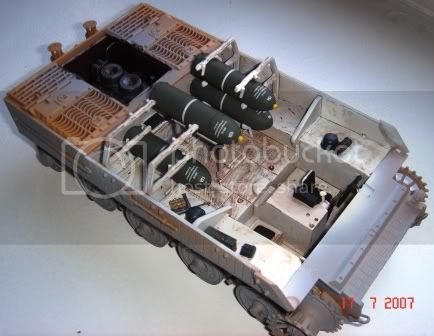
A short update on my build. I have finished the interior and the engine now. It will soon be closed up...
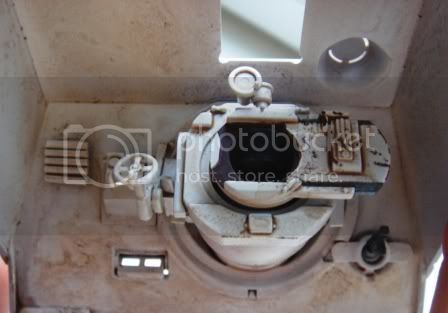
Interior
As is visible earlier in this tread I added a few extra details on the interior but otherwise it is OOB. I kept the weathering very light as I am building a vehicle that was refurbished in January 1945, so it would not have seen much action before VE day.
I also added some extra helmets, bags, boxes etc. to the interior to clutter up the interior a bit.
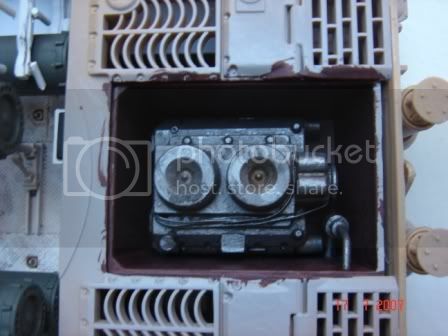
Engine
I spiced up the engine with some wires, tool box, filler caps, and a pump. I weathered the engine a little more than the interior as the engine was probably not completely refurbished as the interior. Sturm Tigers were made by modifying Tiger Is sent back for repair. Also more oil spills etc would be present on the engine.
Now on to the exterior....
Posted: Wednesday, July 18, 2007 - 08:41 PM UTC
Closed up my interior on my Sturm Tiger last evening. Today I will give it an exterior base coat and start camouflage painting afterwards.
Not much can be seen of the interior, but what can be seen looks quite allright.