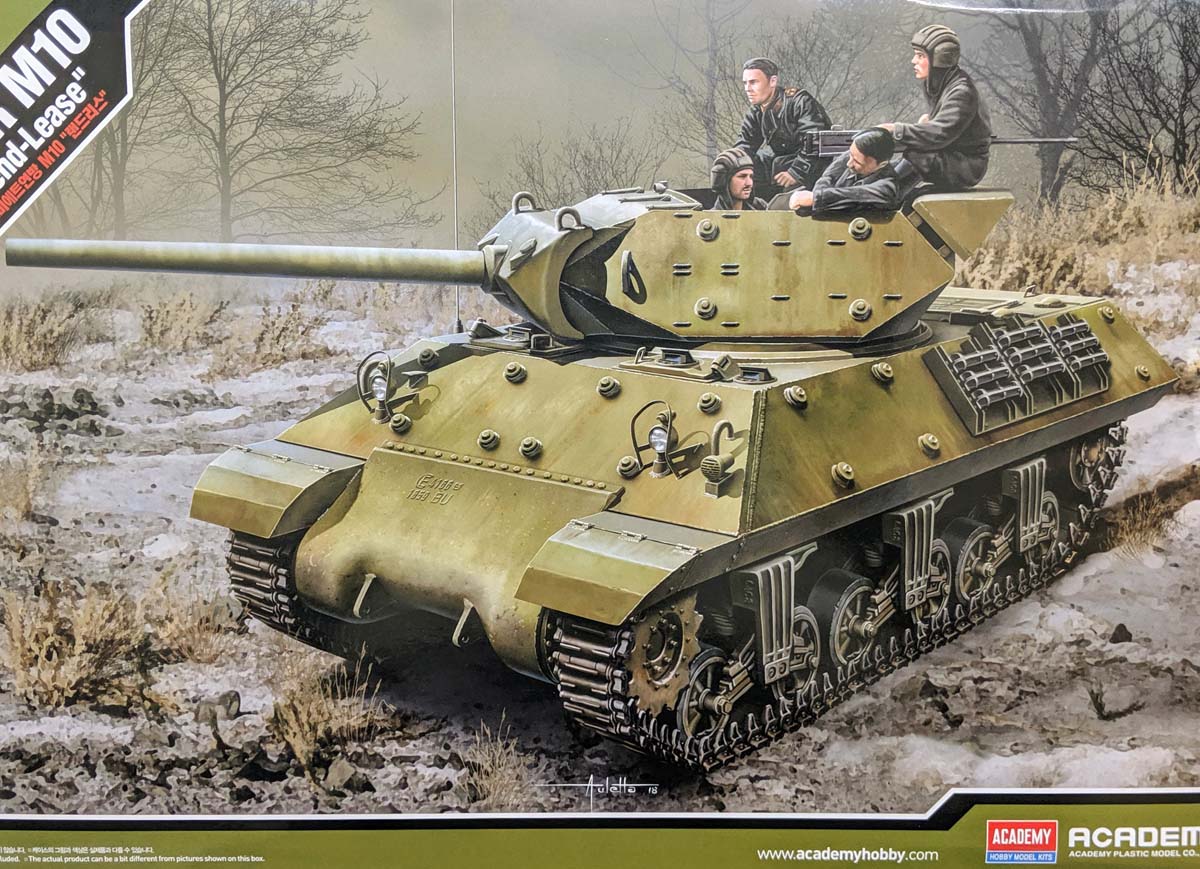
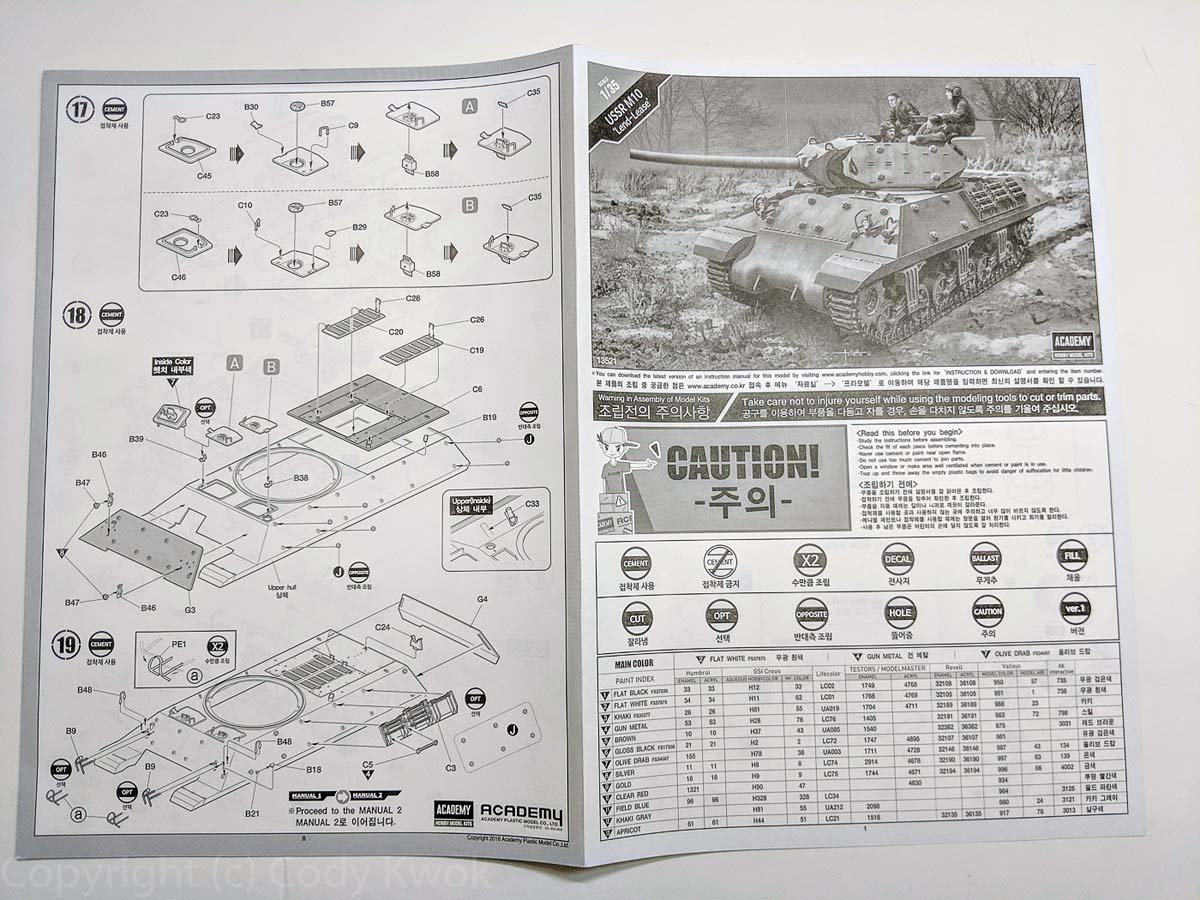
The M10 Wolverine tank destroyer was one of the most prominent allied vehicles during WW2, seeing service from late 1942 until the end of the war. Mounting a 3-inch M7 gun on an M4 Sherman chassis, the design exemplifies the US doctrine of speed over power, with a very lightly armored turret but heavily gunned.
The Lend-lease program supplies allies of the US with various materials including weaponry, which is the subject of this M10. While most of the M10s went to the UK (1648) and Free French forces(443), 52 of them went to the Soviets, which is the subject of this vehicle. According to material written in 1982 by Hero of the Soviet Union Ivan Ivanovich Finyutin, he speaks glowingly of the M10's firepower, excellent optics, and easy turret traverse. He does complain about the open-topped turret and compares the M10's mobility and armor unfavorably with the T-34, although it was certainly no worse than the SU-76. He also praises the usefulness of the .50-cal heavy machine gun, which he specifically mentions as being mounted atop the turret counterweights. Finyutin was a driver of one the the M10's in his unit, who became Heroes of the Soviet Union following an action in which they engaged and knocked out a column of 6 Panthers in dense fog.
The Kit
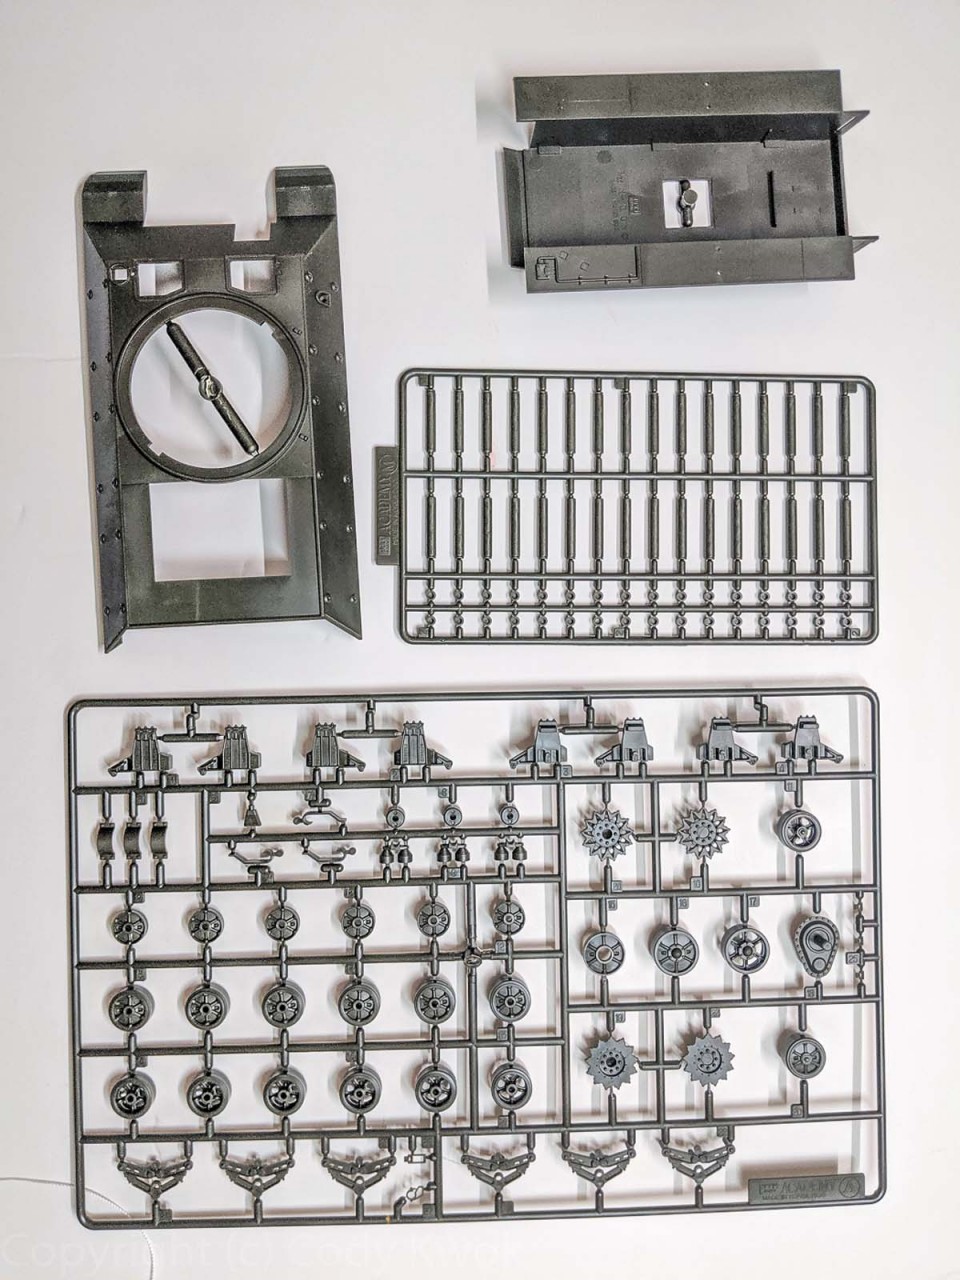
Academys M10 has a long lineage of M4 chassis vehicles, more than a few of them of different GMCs, with the based kit tooled in 2001 on the British Achilles which uses the 17 pdr gun instead of the 3-in., and the first M10 produced soon after in 2002. That kit had a lot of dimensionality issues, which therefore resulted in the 2014 updated version reviewed by Russ Amott. This 2018 kit is almost exactly the same as the older one with three differences: first, the tracks are the T49 Soviet lend-lease tracks instead of the T54 block types; second the kit includes the single sprue of the Masterbox 3568 Soviet Tank Crew 1943-1945 kit; third the decals are of the Soviet Army. Here is the sprue breakdown:
A x 2 of suspension and wheels
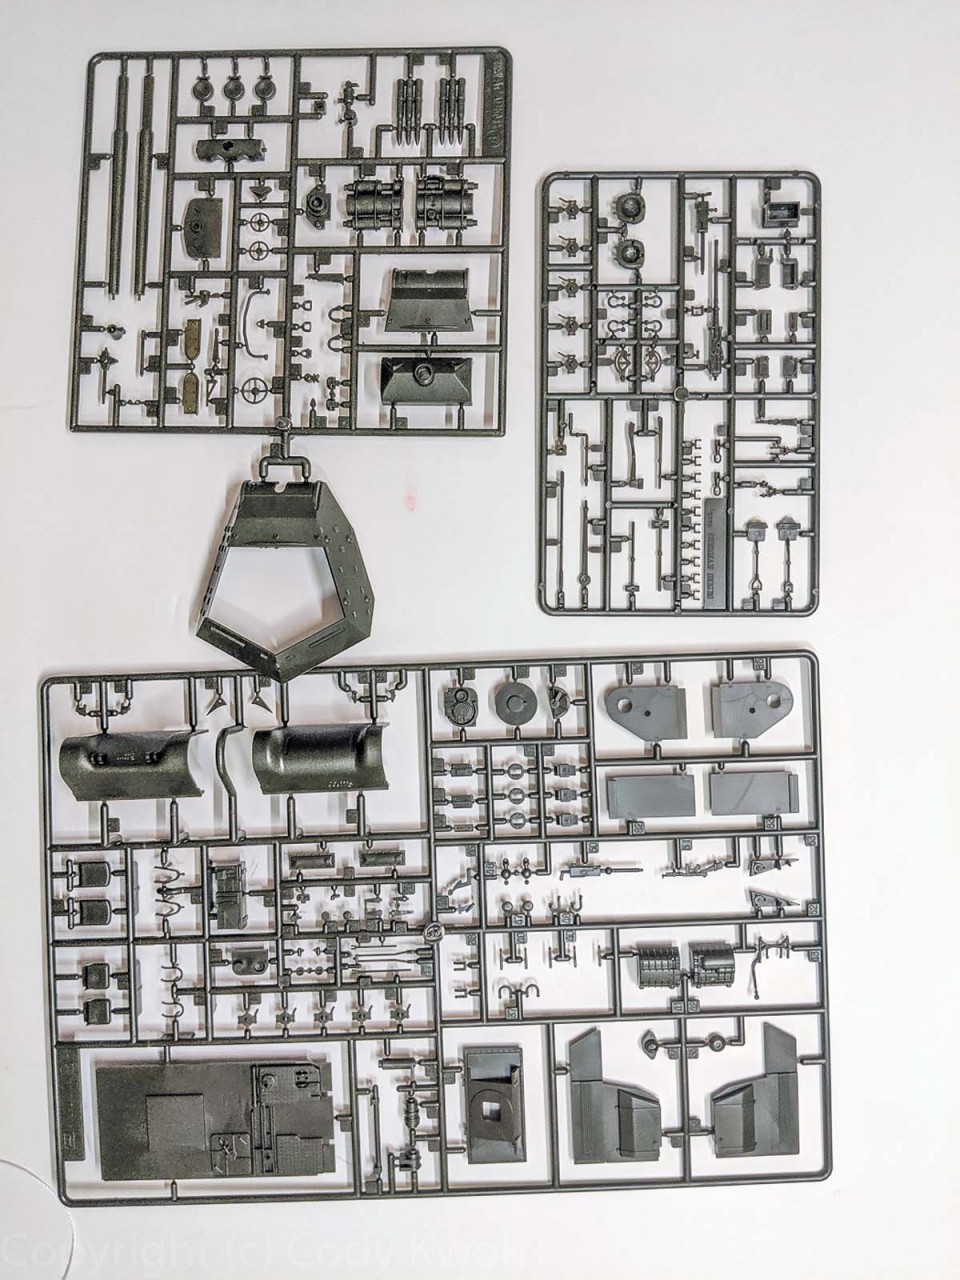
B of all the lower hull parts including the interior
C is another interior sprue
D has tools and the old M2 and M1919
F is the turret and the gun breech
There are two G sprues, the small one that of the new excellent M2, and the other of the rest of the turret. The latter is also molded with sprue J, which has the Appliqué armor attachment bolts.
H has miscellaneous details such as tow hooks and alternative idler wheels
M has all the ammo tubes
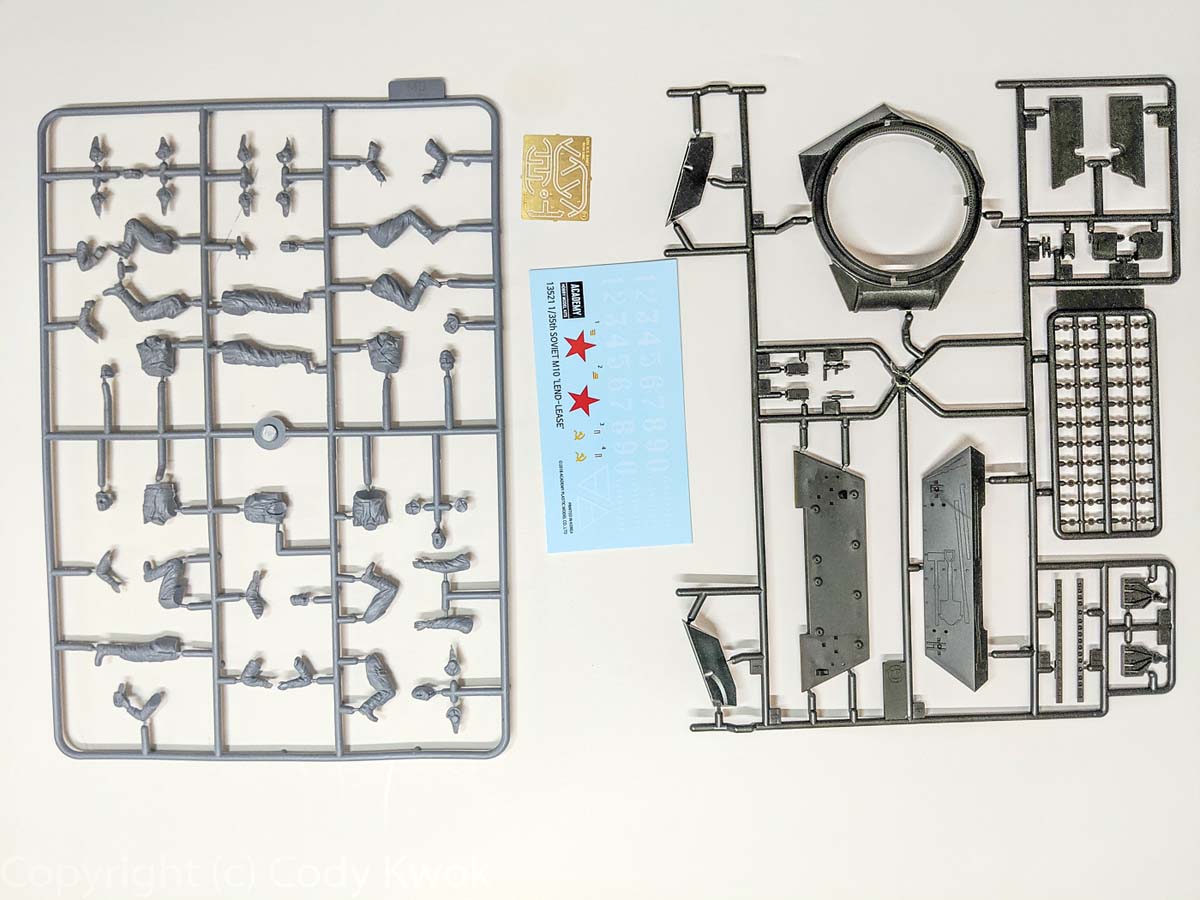
One PE fret for the light guards
Decals
One thread for tow cable
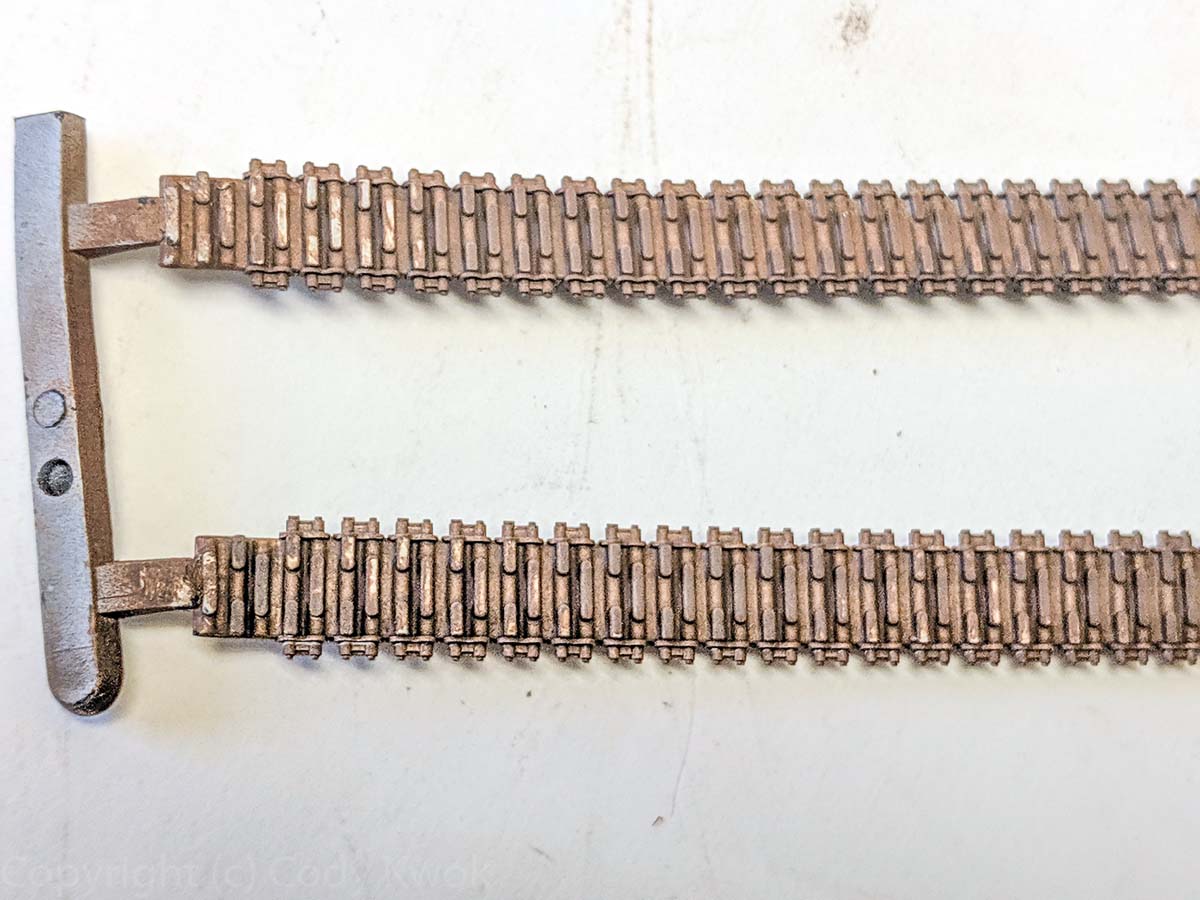
T49 vinyl tracks
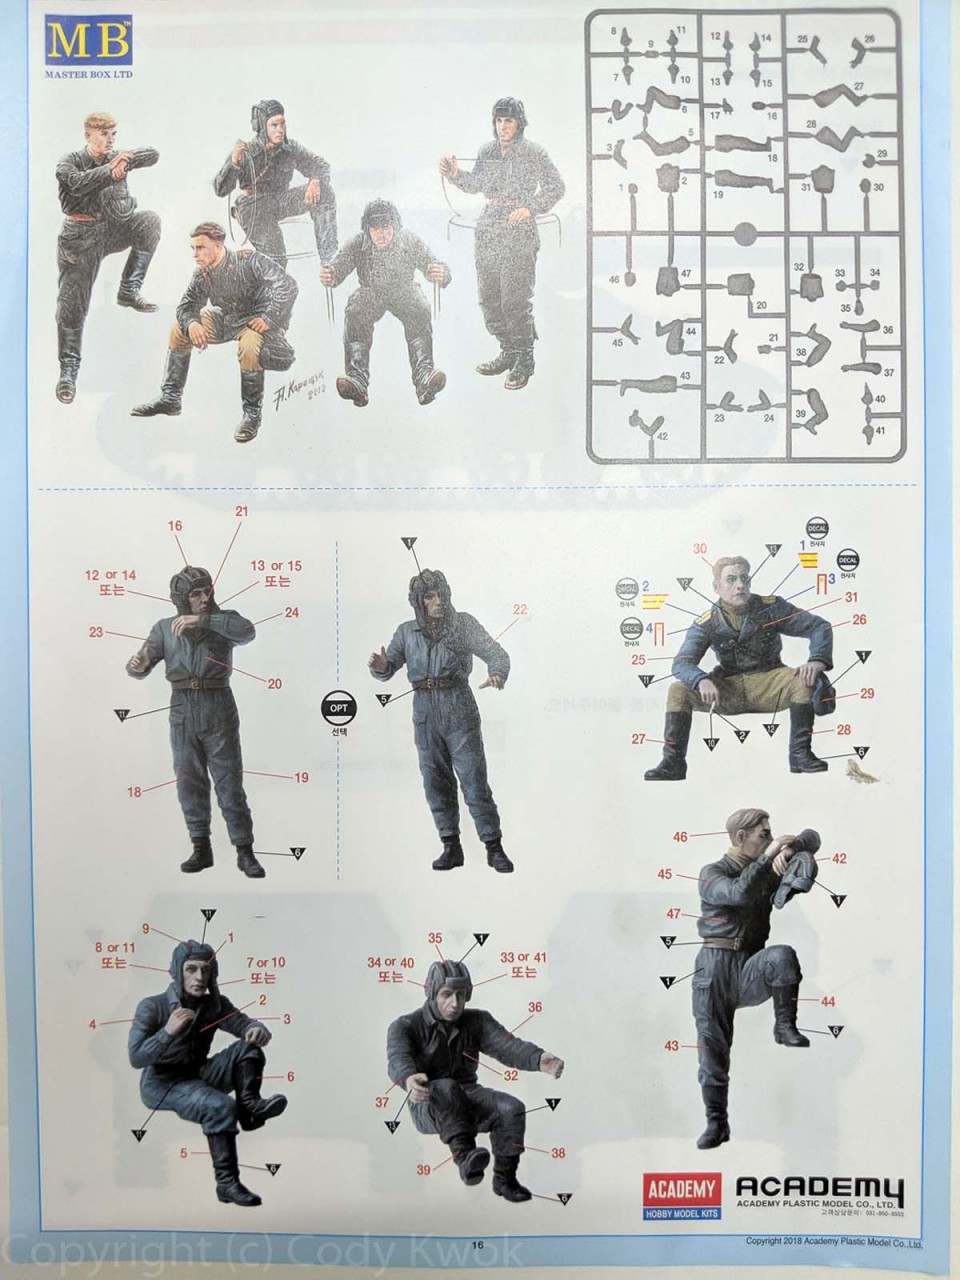
One sprue of Master Box 3568 figures
While the inclusion of T49 makes sense in the context of the lend-lease program, the single photo of Soviet M10 in action showed that it was using a cuff type track and not T49 (1223rd Self-Propelled Artillery Regiment, 29th Tank Corps, 5th Guards Tank Army, 3rd Belorussian Front).
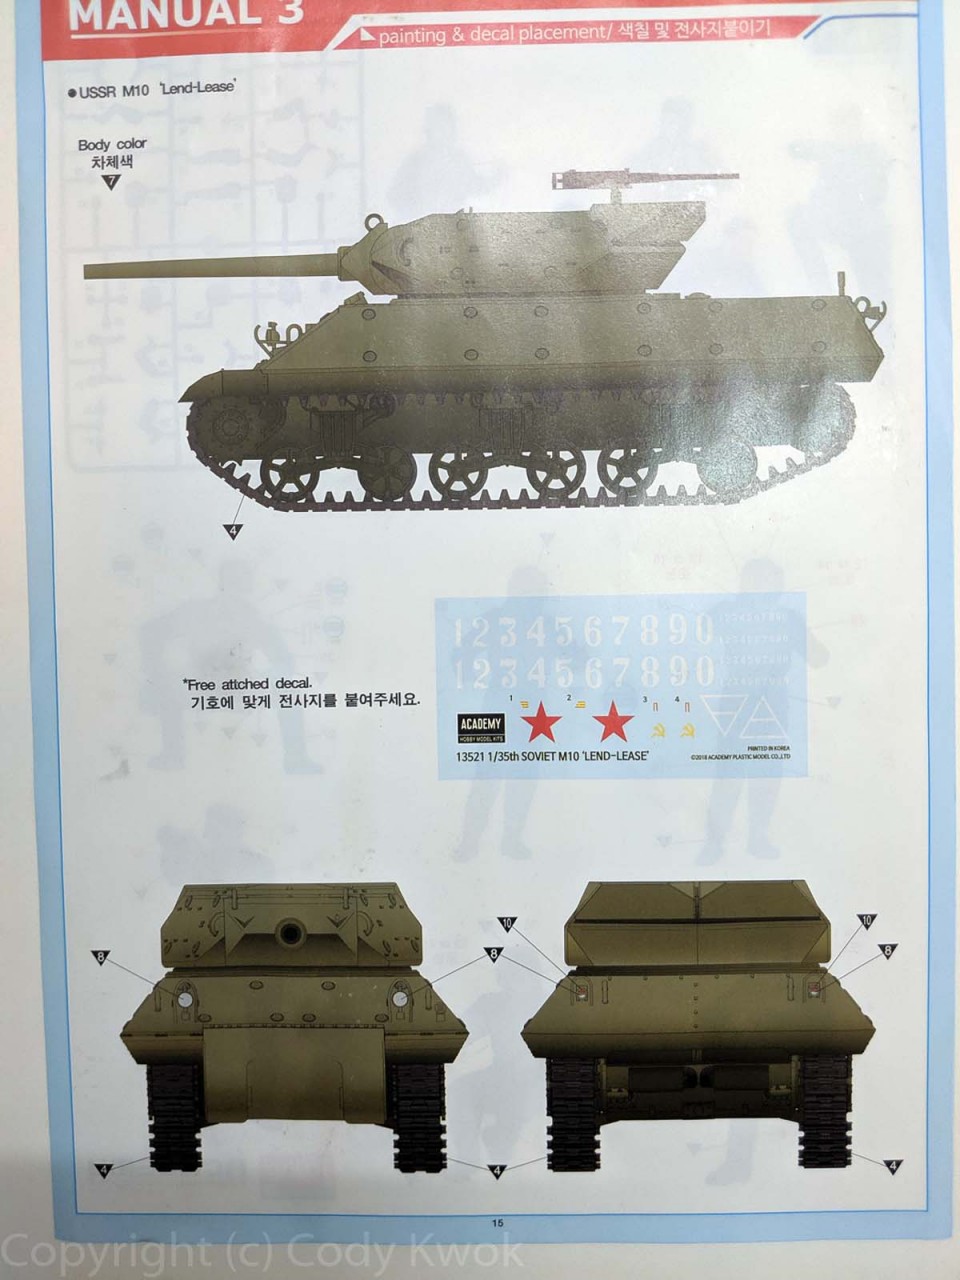
As usual Academy has their instructions split into 2 fold-out sheets, as well as a color guide that also includes instructions and painting guide for the Masterbox figures. Alas, due to the rarity of any reference the painting guide doesnt show any markings. The sheet has a bunch of generic numbers and red stars of the Soviet, plus a couple of unit markings that I was not able to discern. There is going to be some creative license here if you were to use these. On the vehicles colors, from what I could gather from various online discussions the conjecture is that these lend-lease vehicles werent repainted from their original factory olive drab.
The Build
Despite the interior (which is mostly complete sans the engine), the kit was still a breeze to build. It consists of 32 steps.
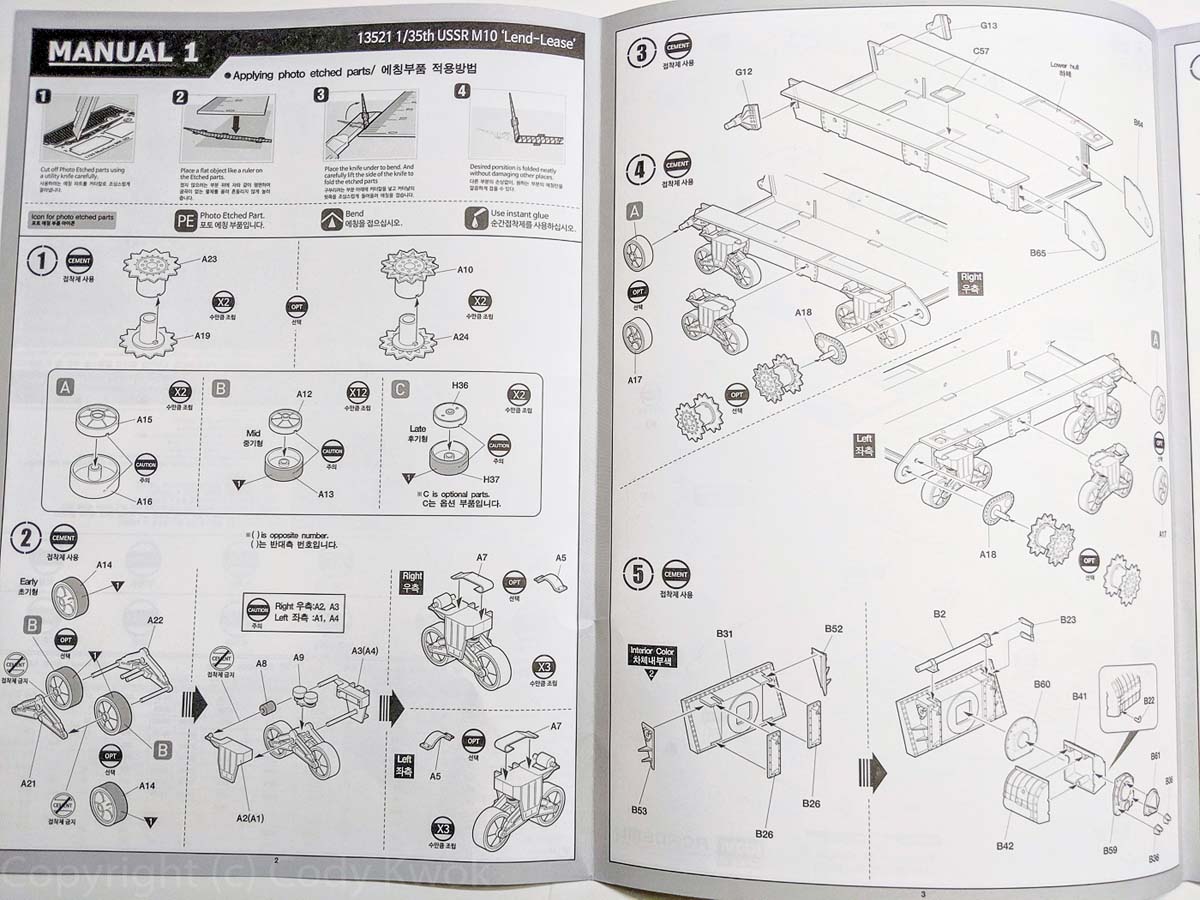
Steps 1 2 builds the bogies. They are difference choices of wheels, sprockets and idlers of the VVSS system. From the single reference photo I chose to go with the Mid wheels and idlers, and the plate type drive sprocket (vs. the Chrysler type). I went with the skids A7 which is more popular with M4s. Painting is a hassle for the wheels if you glue down the bogies, so I painted them separately and then put everything together afterwards.
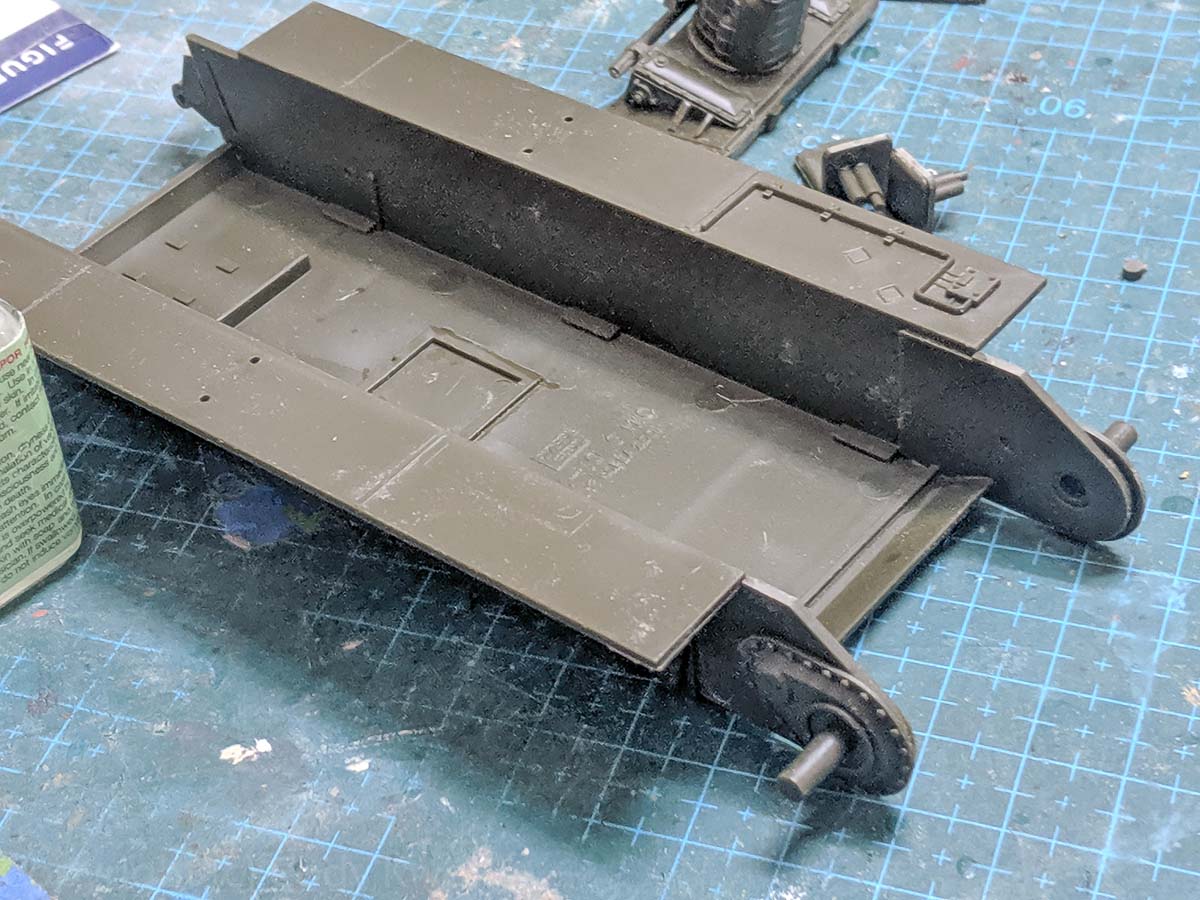
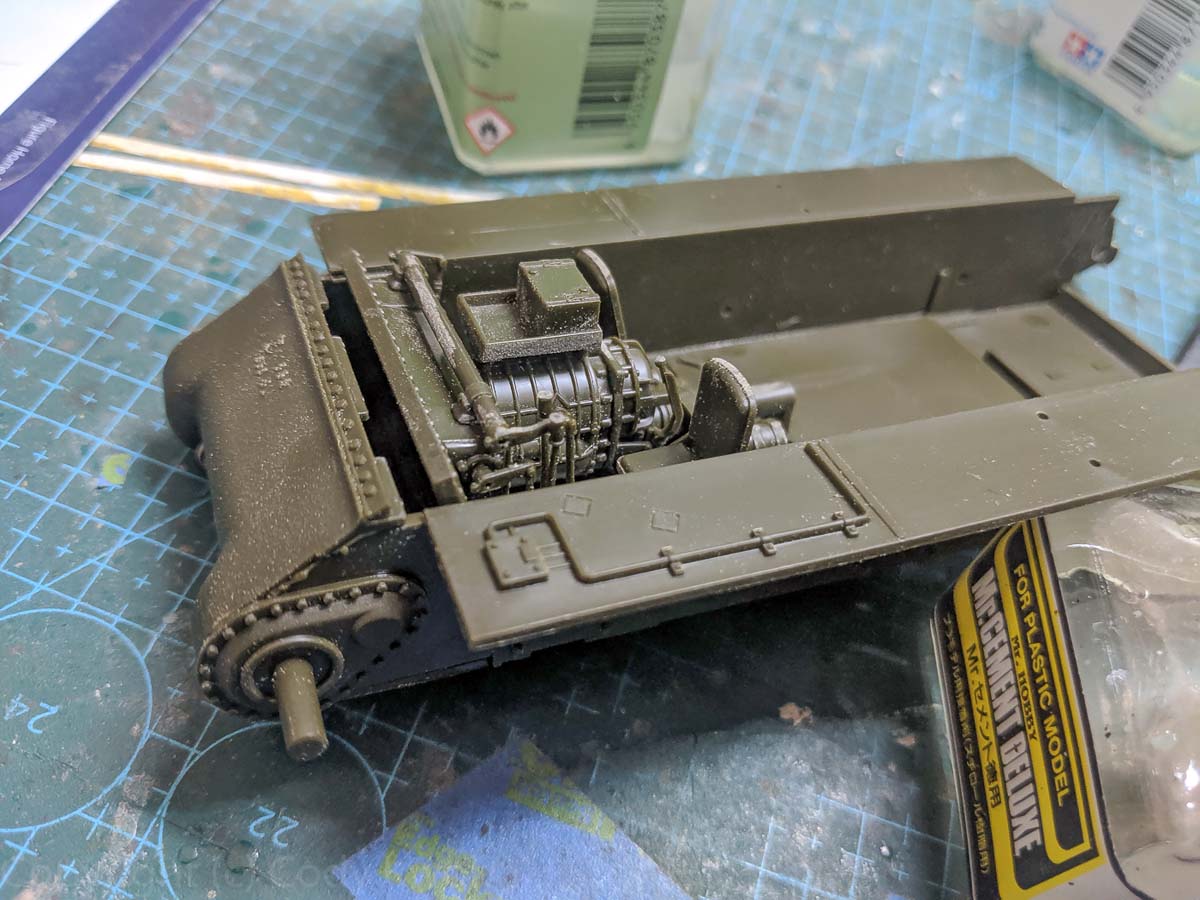
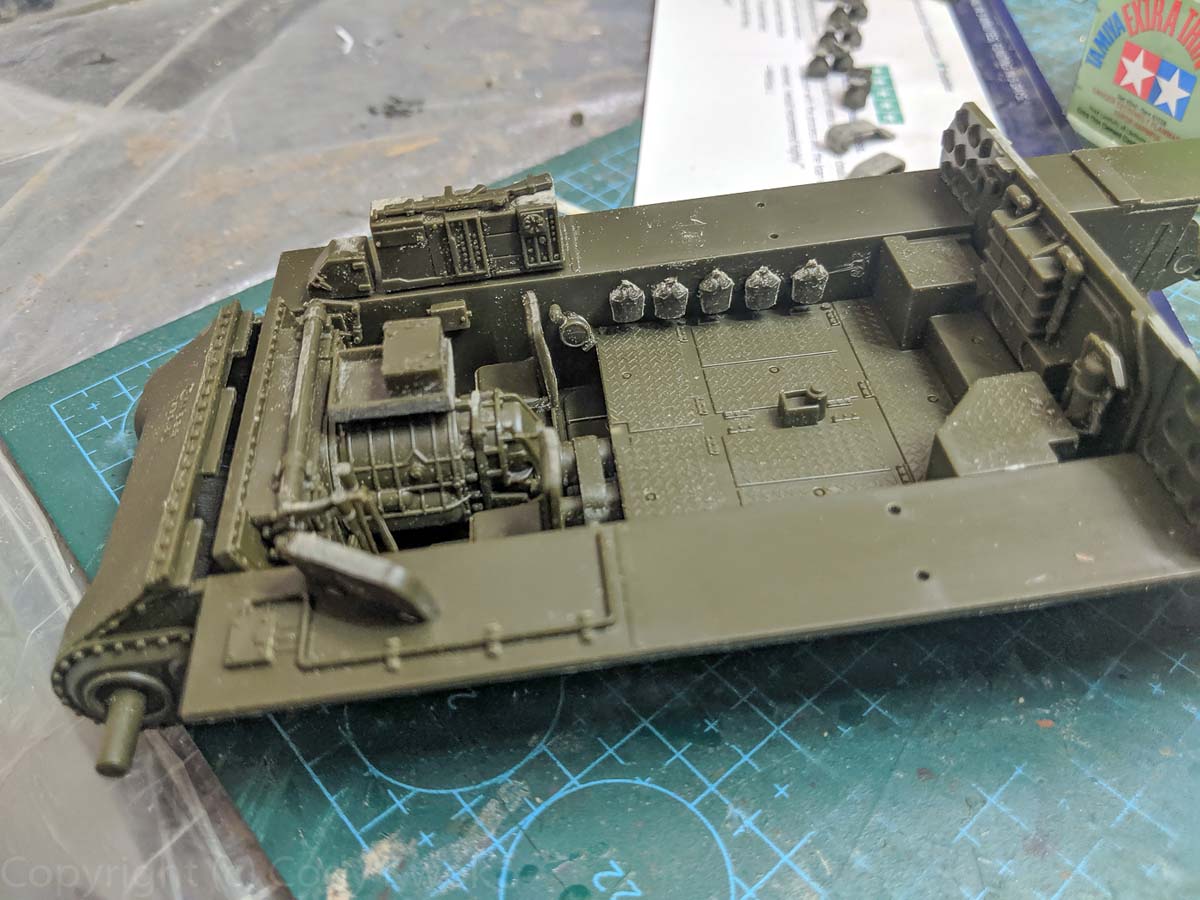
Steps 3 4 puts the whole lower hull together. B64 and B65 have some play with the lower hull which presents problems later when you fit the differential cover. You can either have it sit flush with the side fenders which gives you a good fit for the differential covers top, but poor bottom, or vice versa. I chose the former.
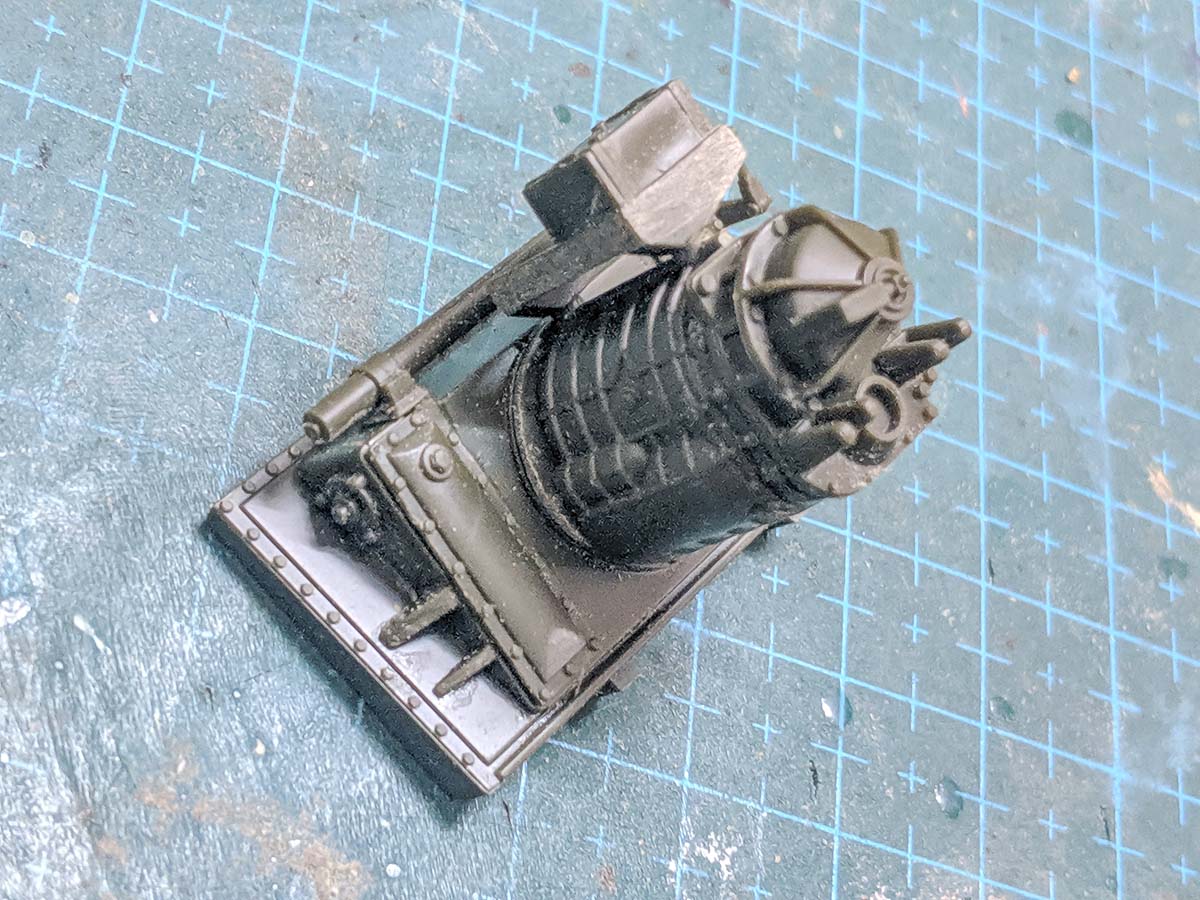
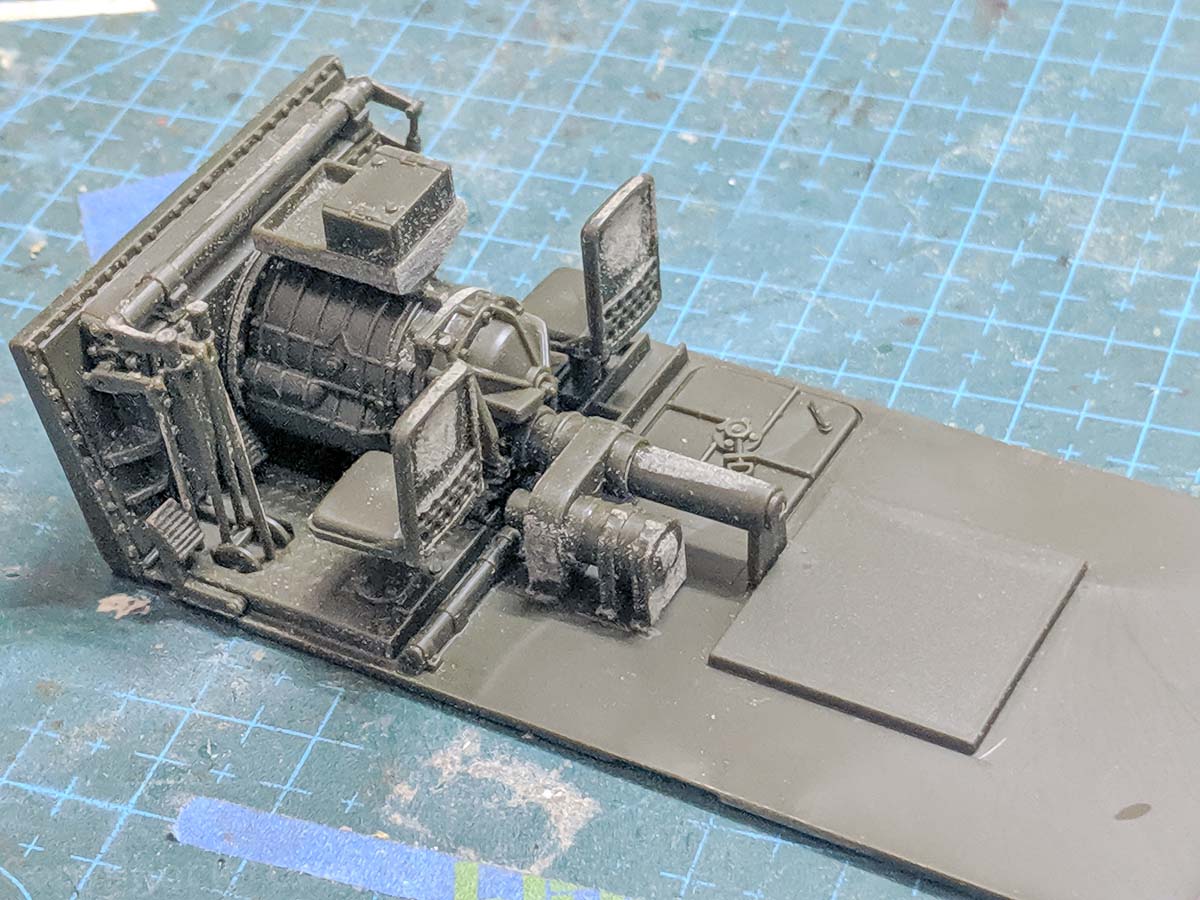
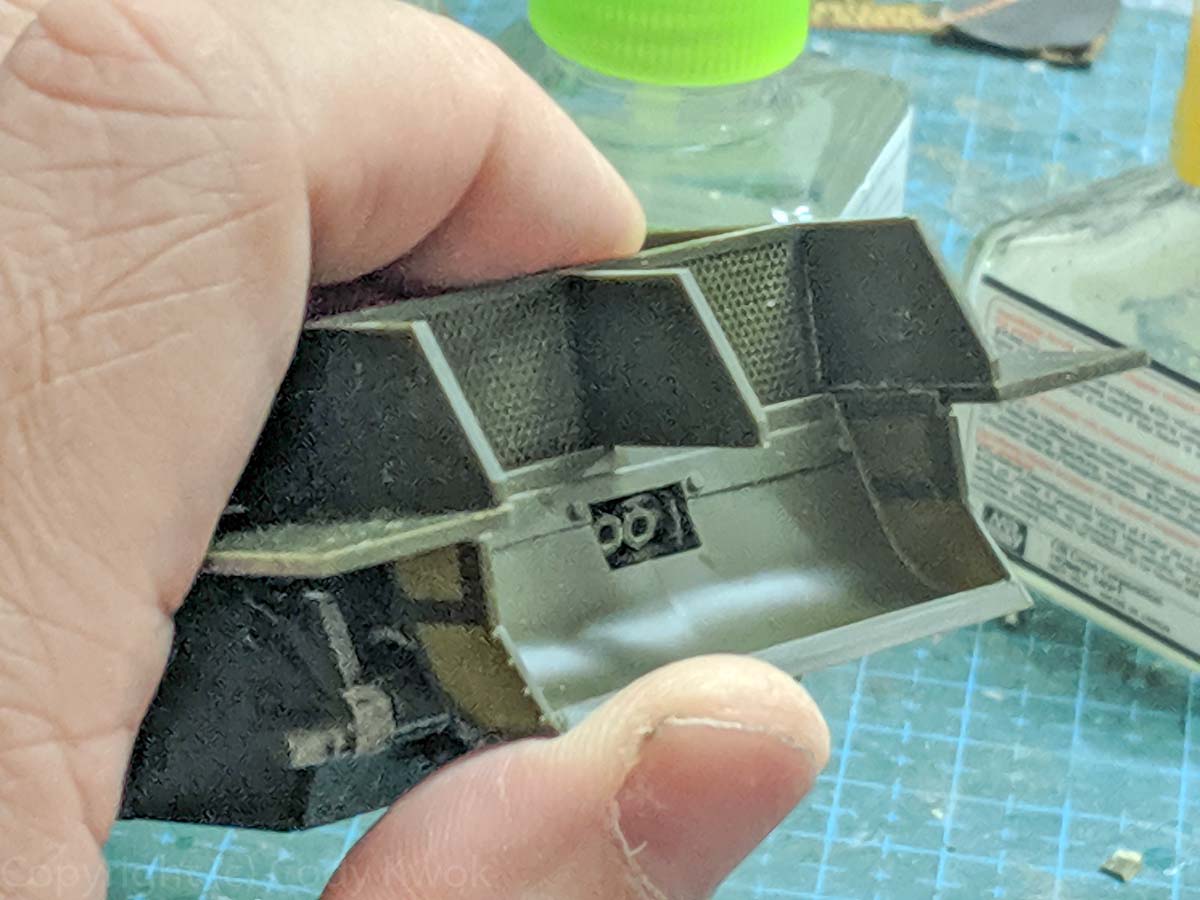
Steps 5-6 build the interior which includes the transmission and driving compartment. There is some play for part B31s fit on B1 and will subsequently affect the transmission shafts location. Its not a big deal since it doesnt get in the way of anything.
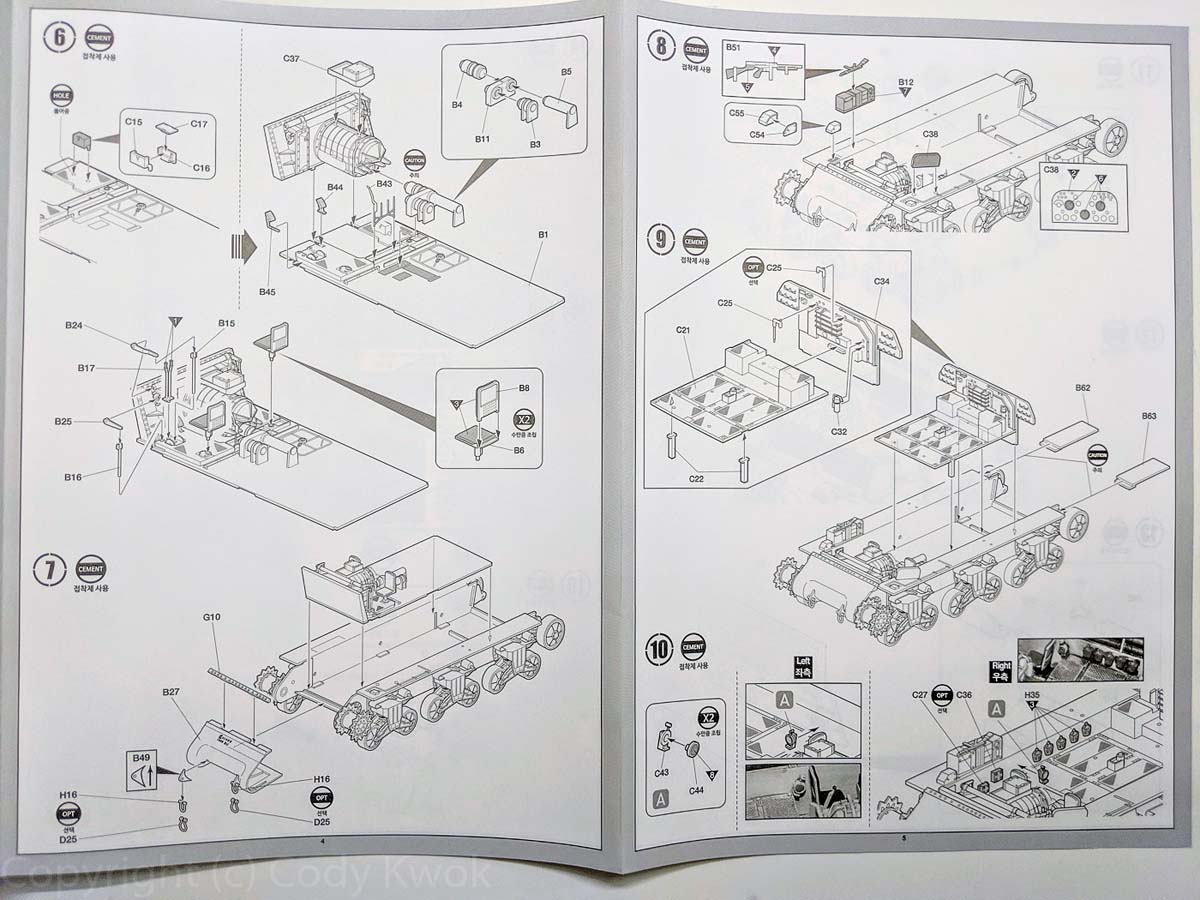
Steps 7 8 fits the differential cover and the driving compartment to the lower hull as well as some dashboard and radio. The differential cover fits well and ultimately mates well with the upper hull, but the lower part of the differential cover did not sit flush with the bottom of the vehicle as I mentioned in Step 3. The bottom is hidden so I didnt care for it.
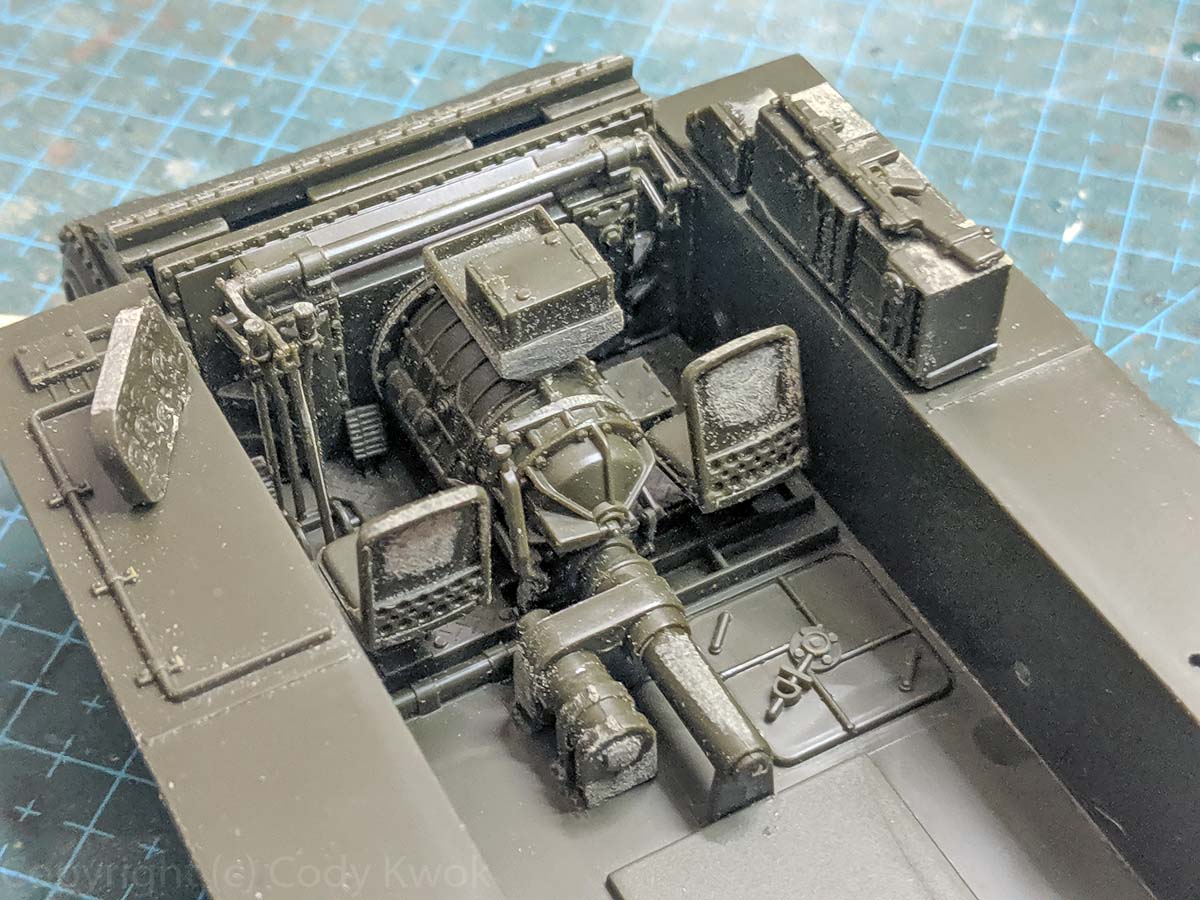
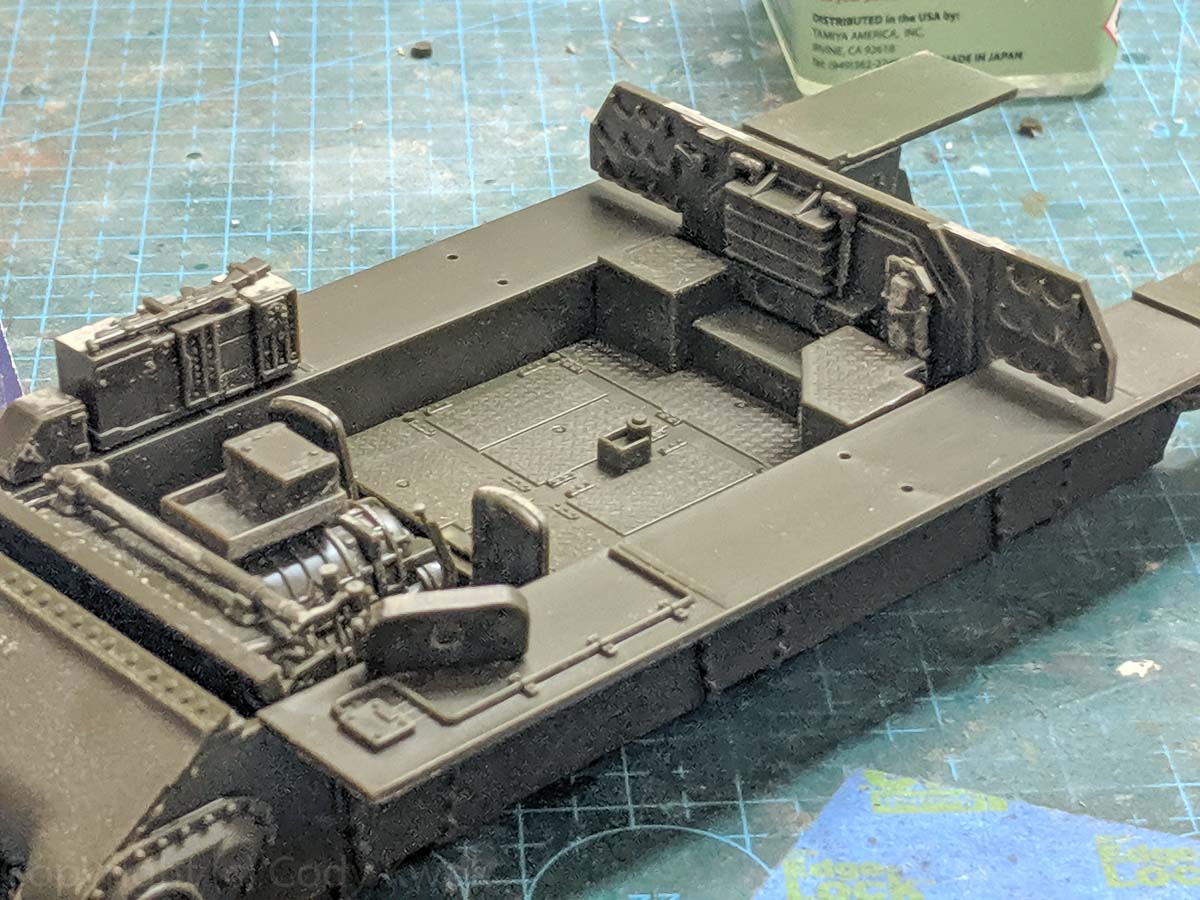
Step 9 is a little busy with the rest of the lower hull interior and details. You may want to be careful wtih the extended fenders B62 and B63, because if you swap them you may encounter fitting problems later (I did). C34 the firewall did not fit perfectly into the lower hull, but with some quick setting glue you can get the side fenders to mate flush.
Step 10 has a number of optional interior details. The water canteens were drawn too far apart in the instructions so you need to look at the printed photo.
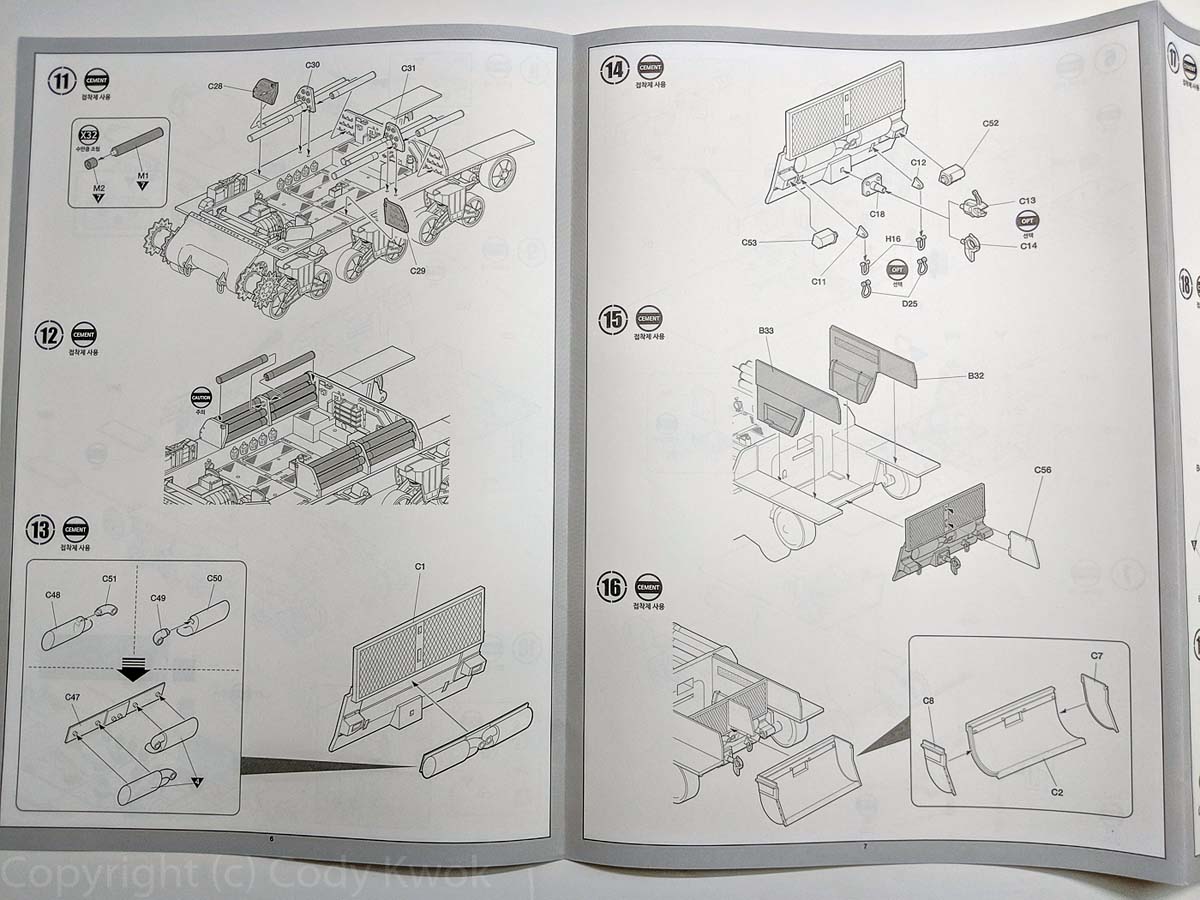
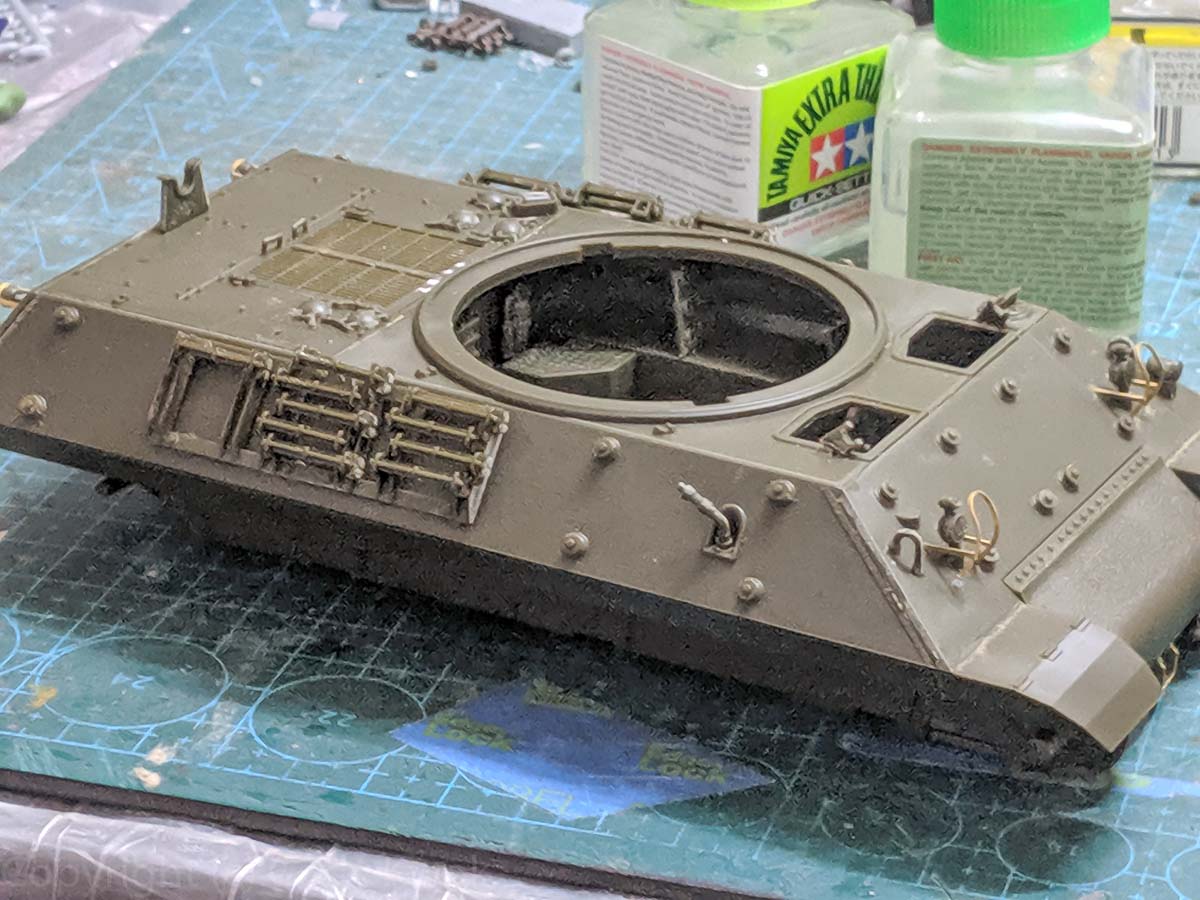
Steps 11 12 builds the ammo tubes and racks. I loosely fit these for the ease of painting. I kept the caps on the sprue and stuck the tubes onto them so that I can have an easier time handling so many loose bits.
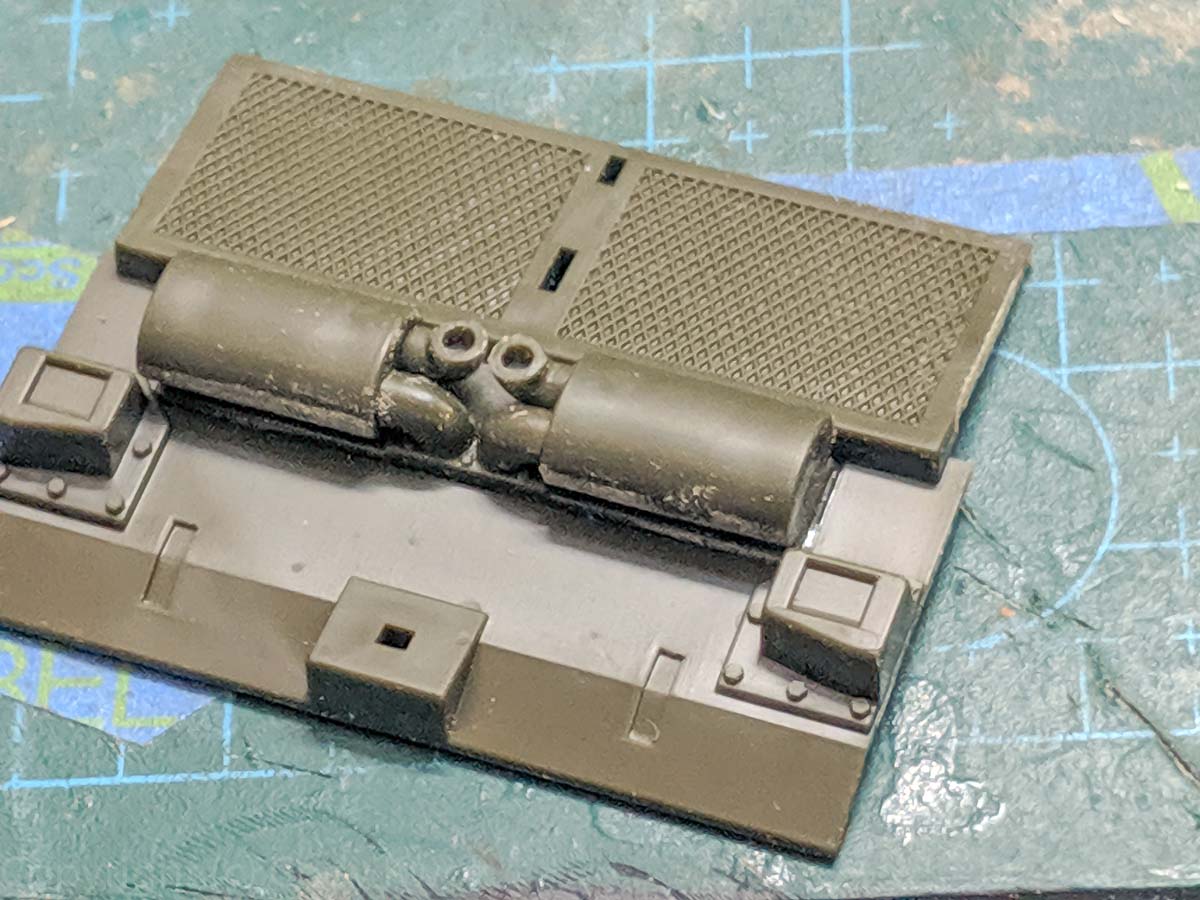
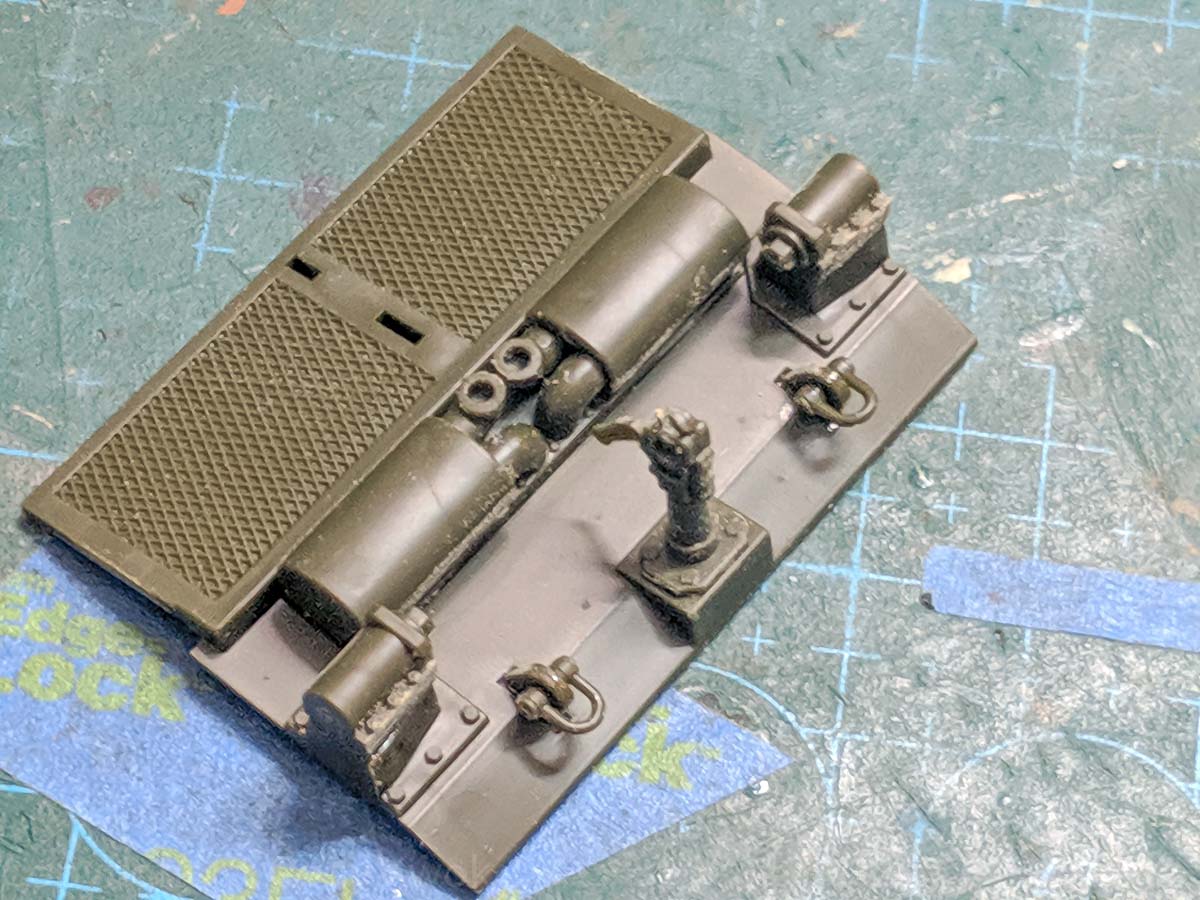
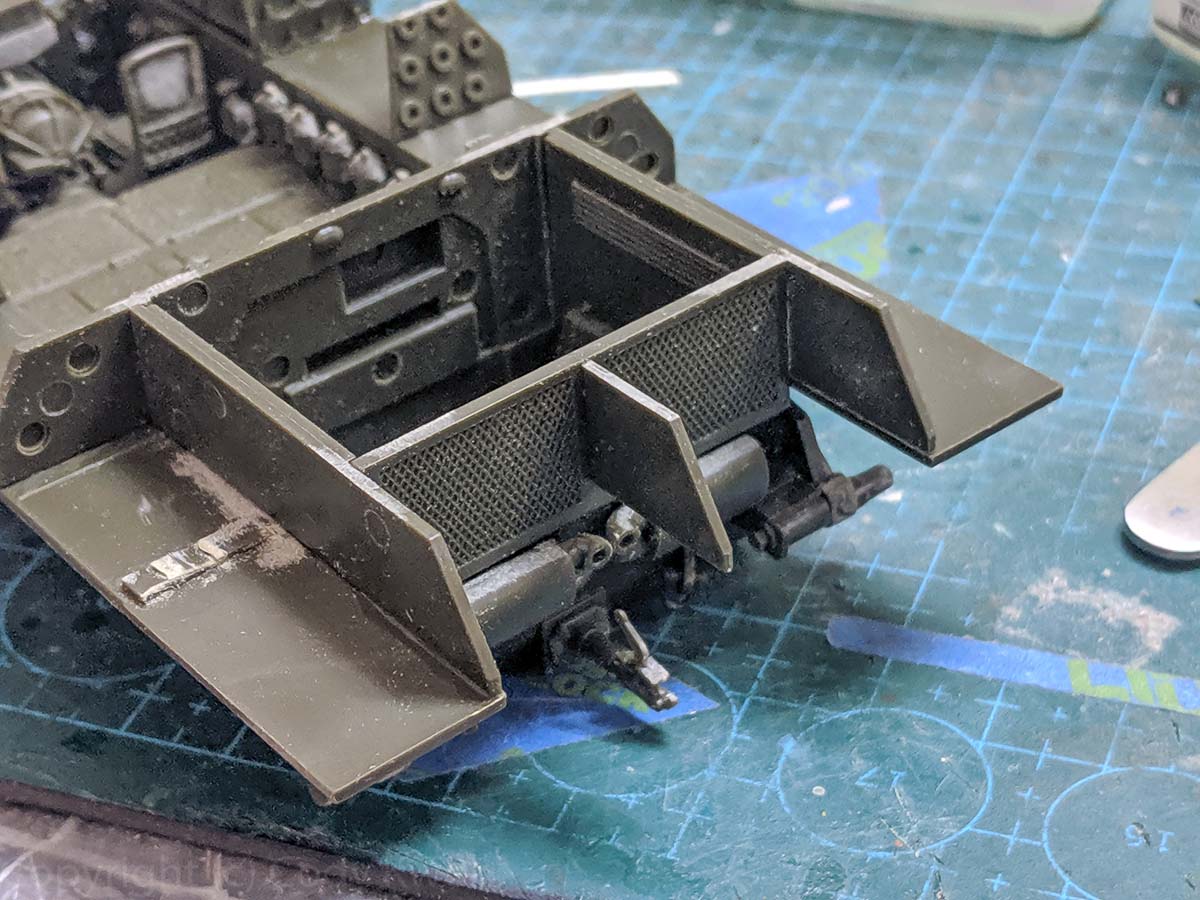
Steps 13 14 builds the rear and exhaust, not much trouble here.
Step 15 fits the rear hull. If you flipped B62 and B63, B32 and B33 would not fit. Alas its probably just me who made that mistake.
Step 16 is the optional exhaust deflector. I dont know how commonly it is used, the Academly painting guide also doesnt have it, and I dont want to hide the exhaust details, so I decided to leave it off.
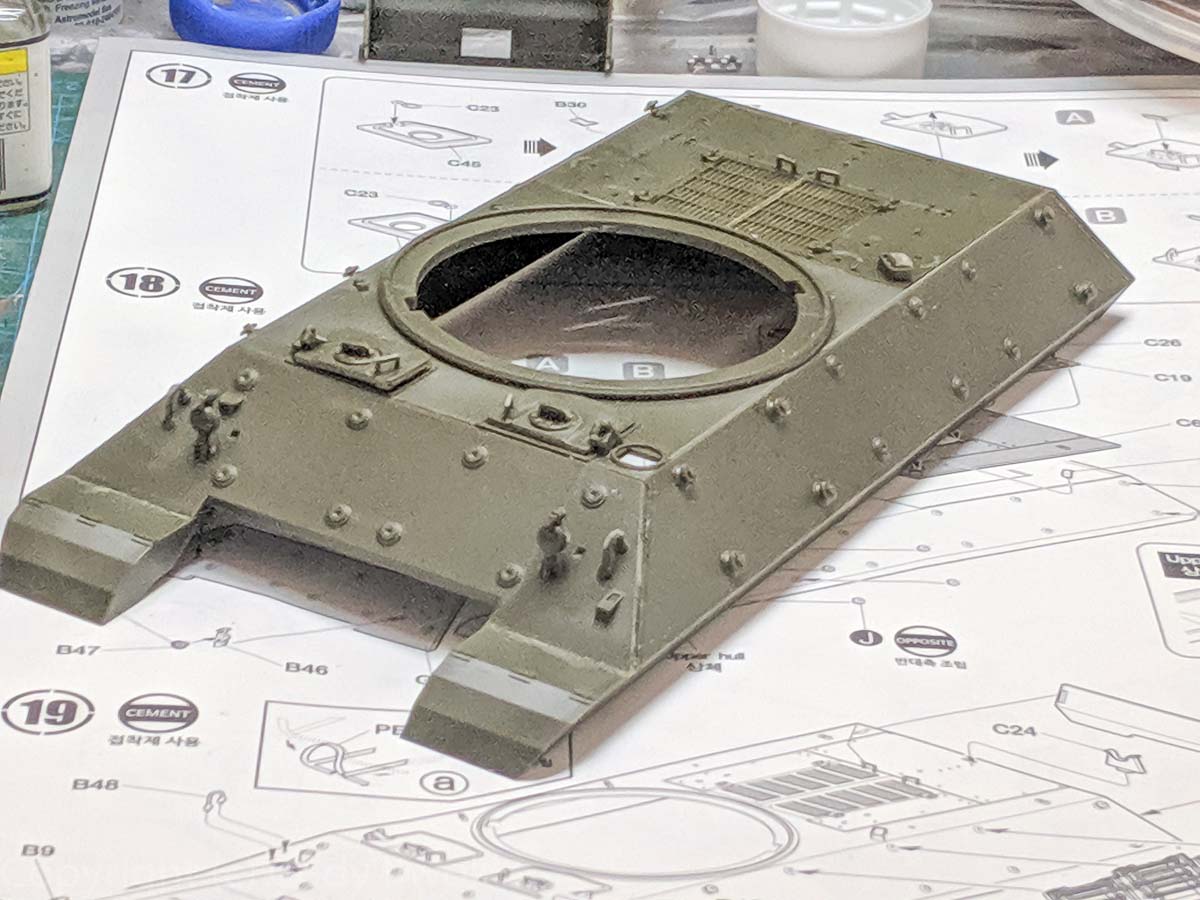
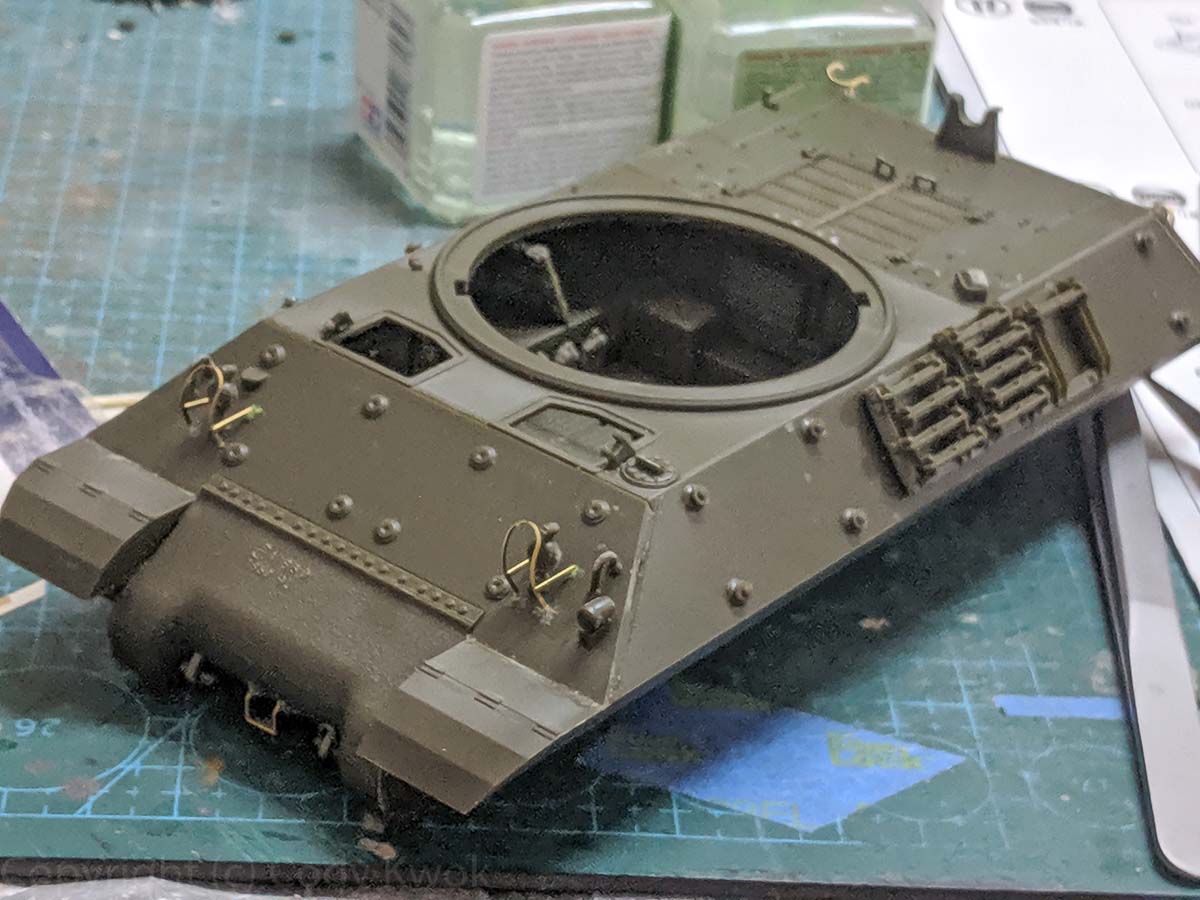
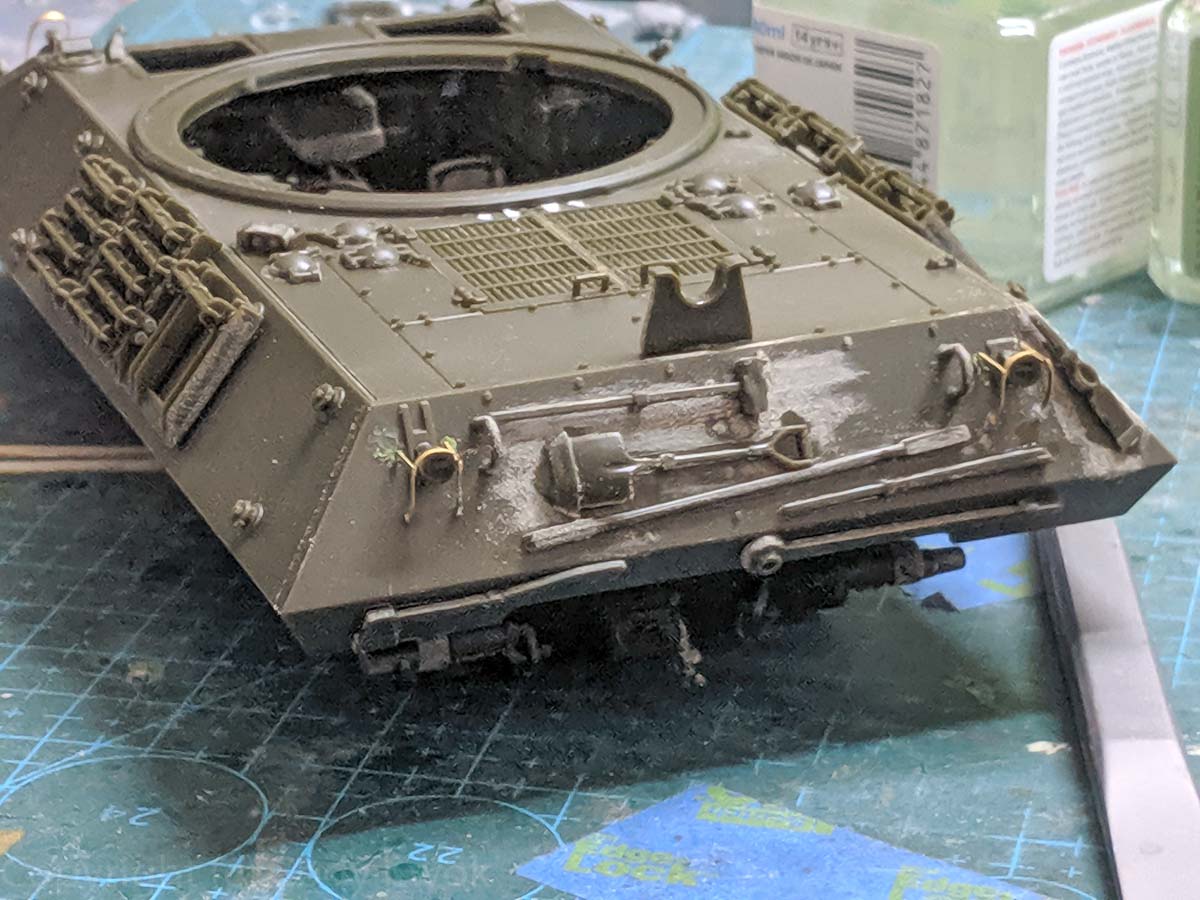
Steps 17-19 are the upper hull details and finishes the first manual. The fit of everything is good, but like the M36 I didnt like the hinges for the drivers hatches since their fit are fiddly and having never built this type of hinge before, I find the orientation quite difficult to comprehend from the instruction drawings. For the light guards I used the PE, following Steve Zalogas excellent advice of using sticky putty to set them on. The armor bolts are a hassle due to their small size and not-so perfect fit into their slots - the nub and the hole dont look like theyre meant for each other and your bolt could swivel around after gluing. Not to mention theyre a pain to sand.
Steps 20 21 onto manual 2, we continue the upper hull details. You have a choice of erect aerials or tied down.
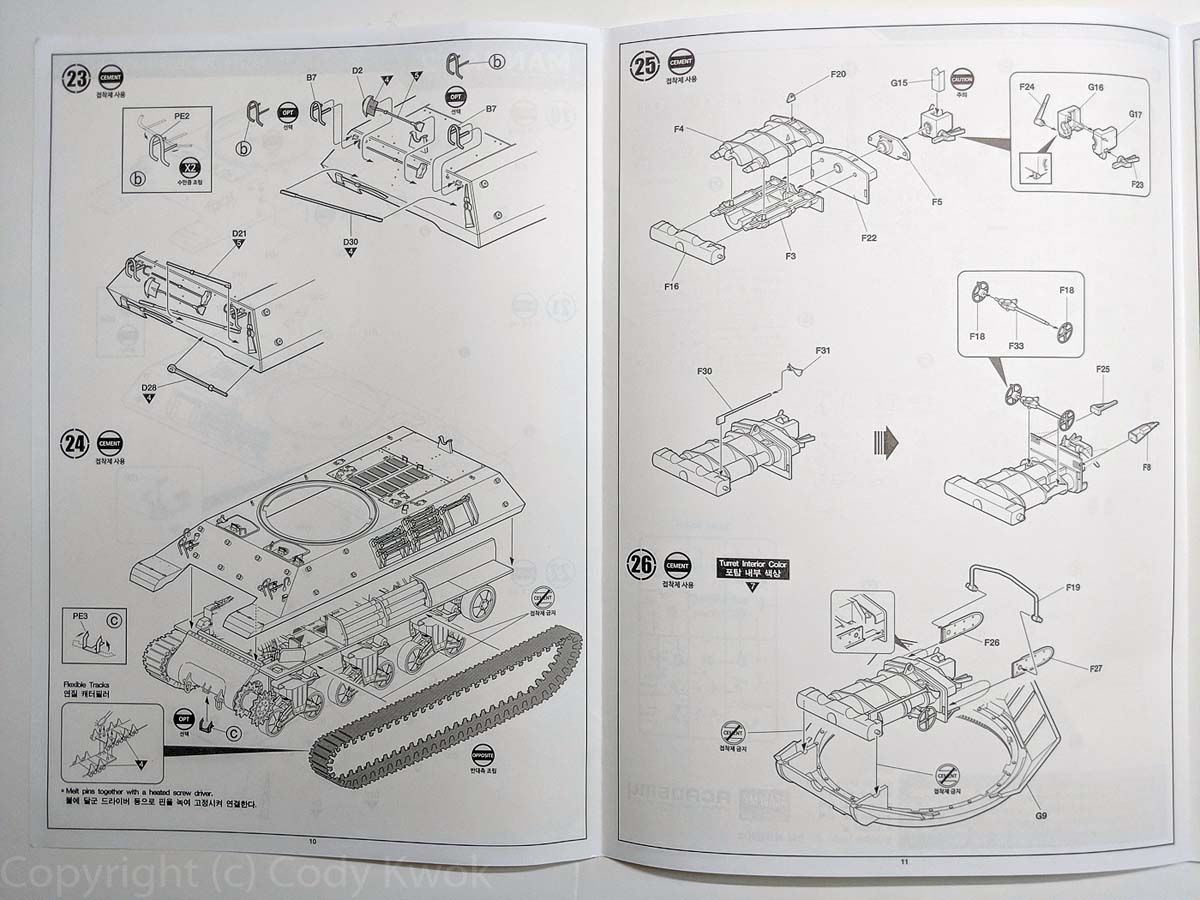
Steps 22 23 are the rear stowage and tools. I really dislike Academys way of outlining the tools in their location for positioning rather than the traditional nubs, which youll have to sand off if you want your finish to look reasonable.
Step 24 mates the lower and upper hull. The fit is very good especially when there is just a single visible seam that is the differential cover.
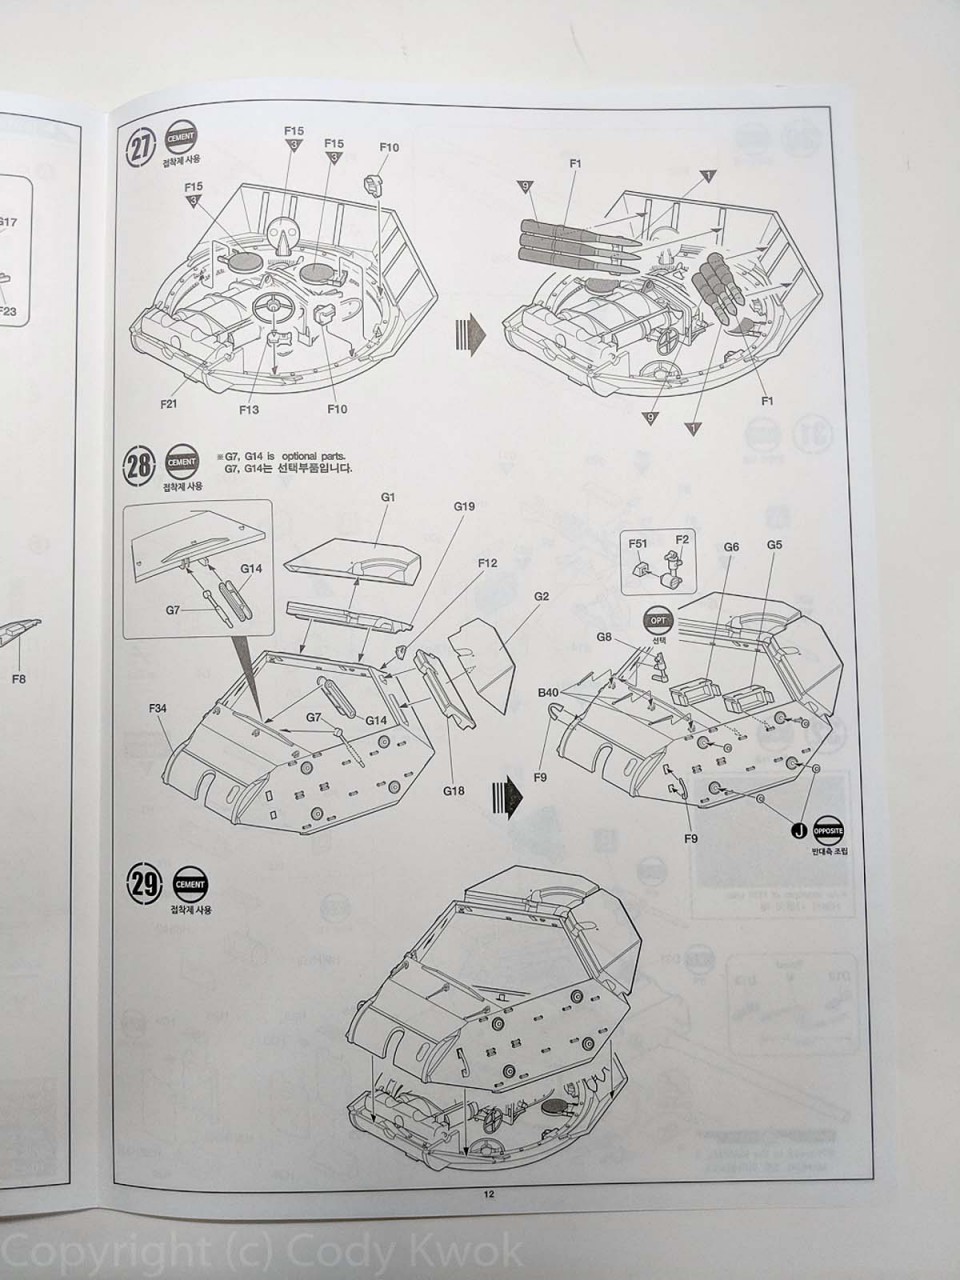
Steps 25-29 are the turret interior and exterior. Theyre pretty straightforward, and the interior is good but you can definitely beef up the details. The upper and lower turret halves fitted really well.
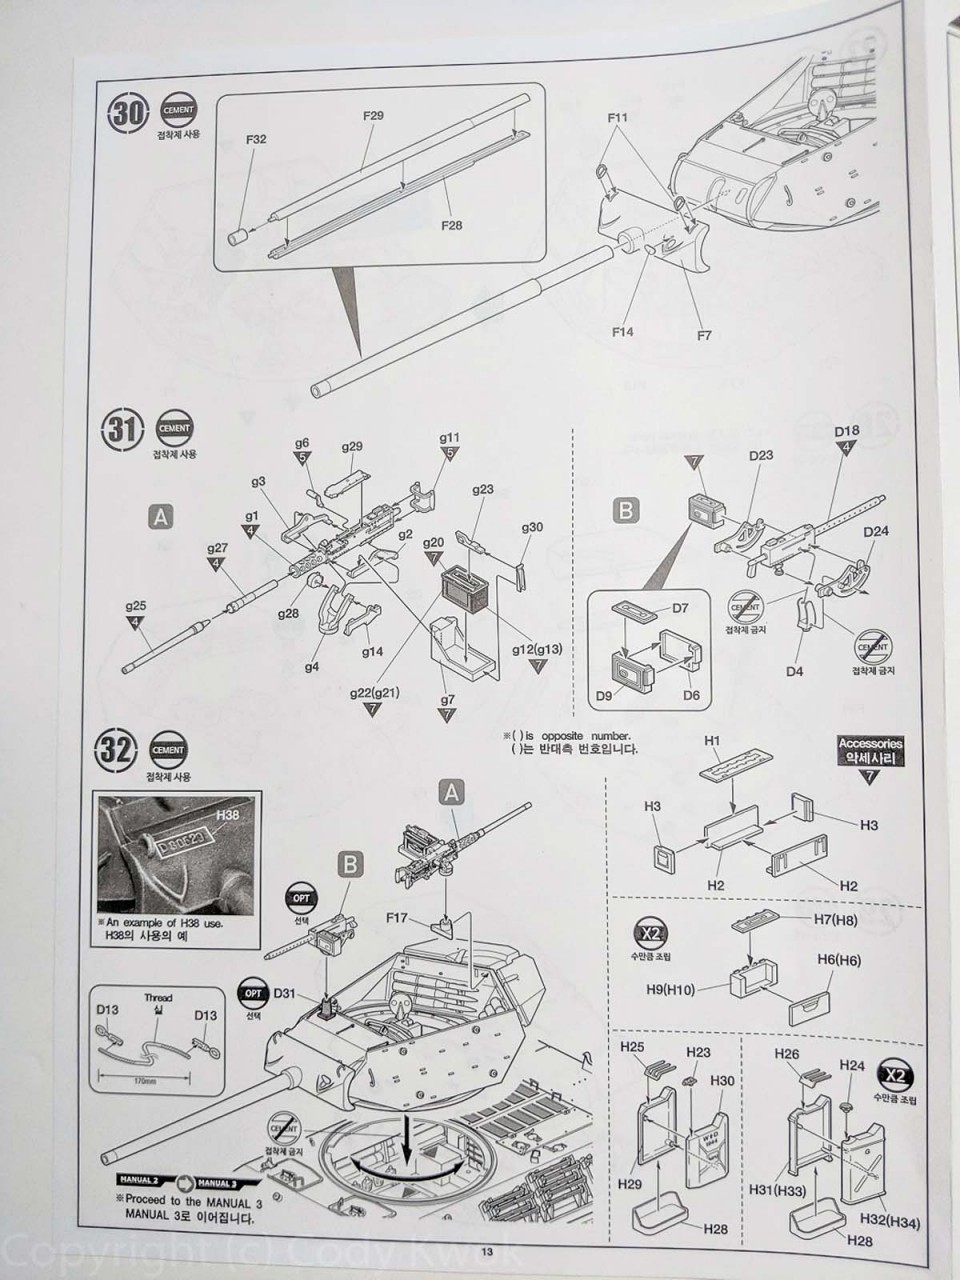
Step 30 is the gun. You get the halves for the barrel so off you go handling that seam.
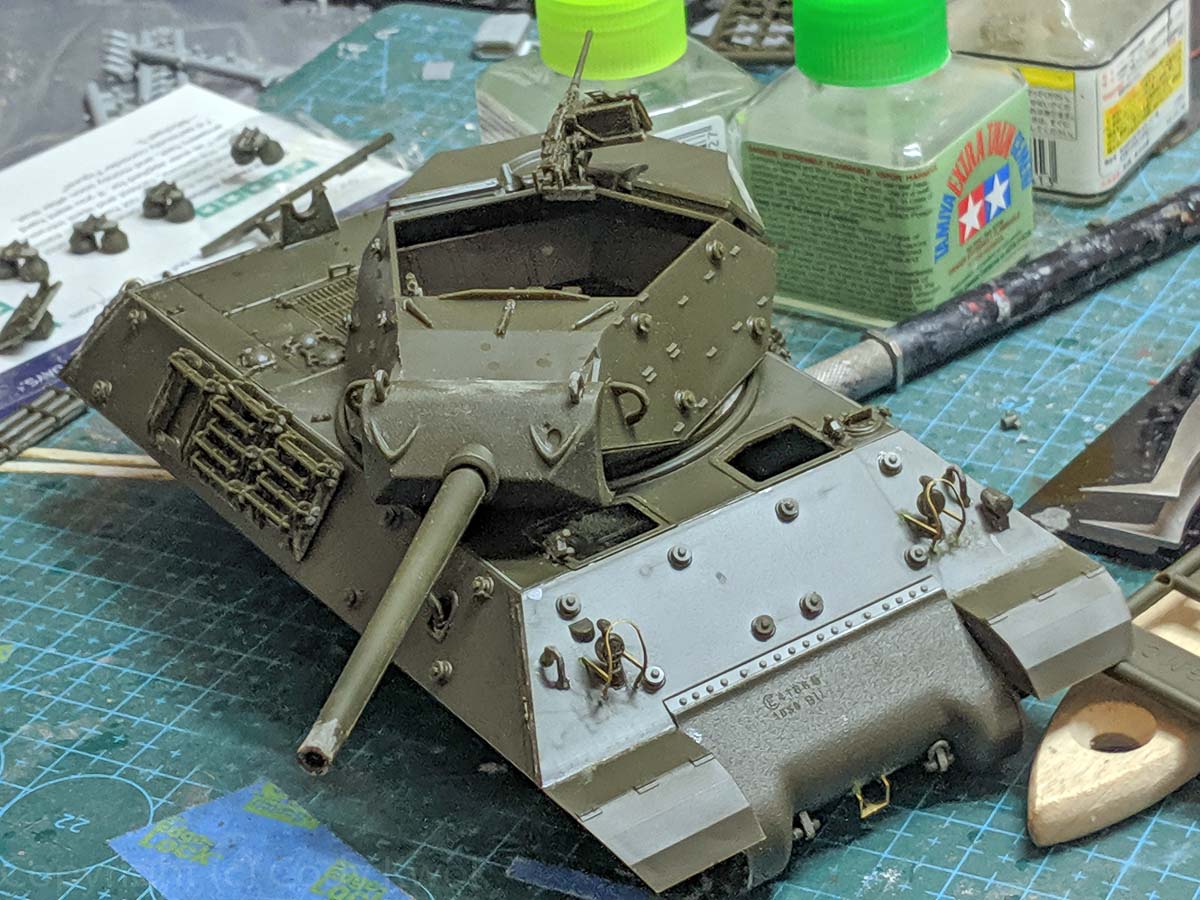
Step 31 is their new M2. It has excellent details especially the slide-molded cooling jacket and very fine muzzle. The fit of the barrel between g25 and g27 seems a little bit off, and it was quite a hassle to align them. I have the ammo box flipped in the photos which I later fixed.
Step 32 is the final assembly. The turrets fit into the hull is very tight for me, so I needed to shave off some plastics to get it to go in. I dont find a whole lot of photos with M1919 fitted to M10s so I left it off. There are some casting marks on the mantlet that the instructions used the rows of alphanumeric embossings to add, but they didnt say what the casting marks was supposed to be. After a bit of scavenging it seems E9475 was the closest I could get to, and there seems to be a few different ones. Using GodHand allows you to shave the letters off the sprue so it wasnt too bad to add them. A word on the vinyl tracks: Academy has definitely upped their game since the M1A2 they released a couple of years ago, and these vinyl tracks are made of a somewhat rigid material that gave good detail definition and paint adhesion (though I still prime with Tamiya fine grey). They are very well done, especially when you compare with more rubbery tracks from other manufacturers.
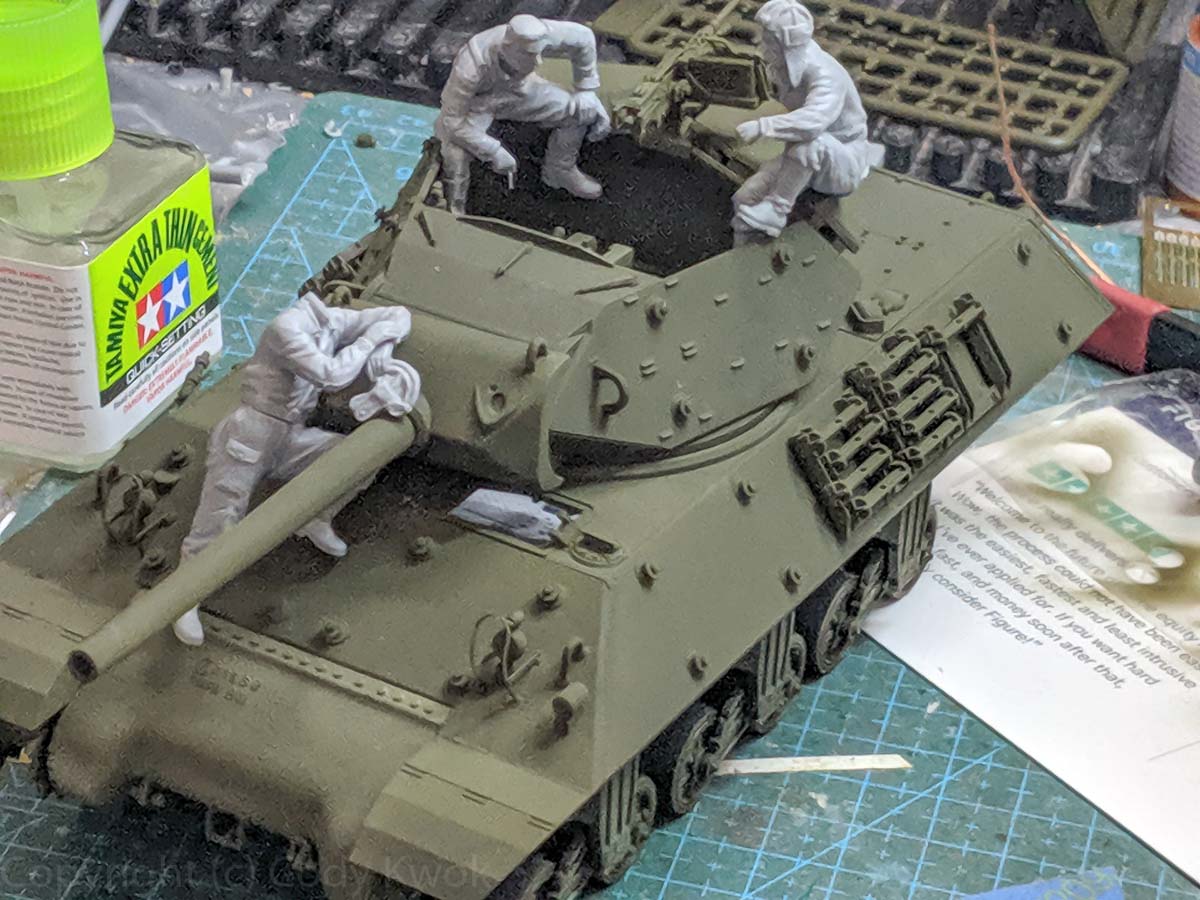
The most interesting question for me is how would one go about fitting the figures onto the tank, if they do at all. All these kits that have semi-relevant figure sets tossed in (like Dragon often do) I always wondered how many modelers would actually use them on their kits. I think Master Box meant these figures for T34s, so for this lower profile open top vehicle you have to be creative as well as prepared to amputate the figures to get them into the scene. I played around a bit and gotten one that have them chatting in a circle shown in photo. The set has a few relaxed pose figures which make it less challenging to adopt.
Conclusion
This kit is basically a re-box with a bit of goodies thrown in of Academys already excellent M10. While the fit is not Tamiya-perfect, nevertheless I compared it with builds of M10 and Academy has done a more detailed job in a lot of areas compared with Tamiyas. The main challenge is the lack of reference materials and one has to wonder why Academy chose this variant? The build is not difficult and could use some detailing especially inside the turret, the Master Box figures are a nice touch if you could get creative with it. Recommended for folks who want something different but not too taxing.
SUMMARY
Highs: Simple build, good fit, bonus figures, good track definitionLows: Minor fit issues on some parts, lack of any referenceVerdict: Recommended for modelers with a few kits under their belt.
Our Thanks to MRC! This item was provided by them for the purpose of having it reviewed on this KitMaker Network site. If you would like your kit, book, or product reviewed, please contact us.
Cody,
Thanks for the review! I agree with you that it may be a strange choice for Academy to box but at the very least it does give Shermaholics another option. While it may not be a pure Sherman at least it is a close cousin!!
Thanks again, I know how much commitment reviews can take at times.
Cheers,
Rick Cooper
You're very welcome, I enjoy the build review process and I hope builders may find them useful. Academy's M10 seems to have gone under the radar as they've messed up the turret in the first versions and a lot of people don't know they've improved it.
I'm trying to finish painting the kit for a feature, in the process I realized the box art was already trying to pose the master box figures with their original pose. It works pretty well, perhaps with minor modifications to a couple of arms to make poses more natural.
I agree with Rick, thanks for the review. I had picked up the kit a bit ago and not started yet. I grabbed the Def set for the M10 as it was cheap for the barrel.
LINK
I've always enjoyed building Academy kits seeing them as great value for the product and while I agree that they aren't Tamiya-like in terms of perfect parts fit I've become adept enough to manage in spite of that and the extra level of detail is a nice compromise. I rather like that more "Lend-Lease" gear is seeing the light of day as it shows part of history that many simply know next to nothing about. The Russian public, for example, aren't told about this crucial program in their school texts or history books and revealing it, if only through such kits, remedies that deliberate oversight on the part of the Russian Government.
The DEF set looks like a great value. Normally I don't care much for metal barrels, but I didn't mention this kit has not just the halves to deal with, but the muzzle is a separate piece. I thought it was supposed to be that way, but I was wrong.
I like the kit. I always find it interesting to do U.S. lend-lease vehicles in Soviet service. Allows for some variety in the display case. Thanks for a great review.


Comments