In December 1944, the Germans planned a major counter-offensive in the Ardennes region of Belgium; part of the planned offensive was operation Greif. Operation Greifs goal was to capture the bridges over the river Meuse by utilising German forces equipped with American armoured vehicles in order to get in amongst the Allied defenders and cause confusion. The unit assembled for this task was called Panzer Brigade 150; it was made up of 3,300 men and composed of 500 Waffen SS, 800 Luftwaffe ground unit personnel, with the remainder from the Wehrmacht.
Panzer Brigade 150 was under the overall command of Otto Skorzeny (June 12, 1908 July 6, 1975). He served with the SS throughout the war, but did not see active service until the invasion of Russia (Operation Barbarossa) where he was with the 2nd Waffen SS division Das Reich. He was awarded the Iron Cross late in 1941 after receiving a head wound, and refusing evacuation to continue fighting with his unit. Skorzeny came to prominence on September 12, 1943 when he with 108 troops successfully rescued Mussolini without a shot being fired during Operation Oak. For this action Skorzeny was made a Major and awarded the Knights Cross.
Panzer Brigade 150 was made up of three Kampfgruppen called X, Y, and Z (combat formations, a loose term that could be applied to many kinds of ad hoc units, often abbreviated KG). Each Kampfgruppe consisted of an HQ, three infantry companies, two Panzer Grenadier companies, two tank-destroyer platoons, two mortar platoons, a platoon of combat engineers, a platoon of signal personnel, and a company of repair personnel. The plan to equip the units with captured American armoured vehicles was quickly found to be impossible, as only two Shermans were available and combat ready. It was then decided to equip Kampfgruppe X with five Panther Gs, and Kampfgruppe Y with five Stug IIIs, This left Kampfgruppe Z as the weakest unit, having only trucks and armoured personnel carriers in reserve.
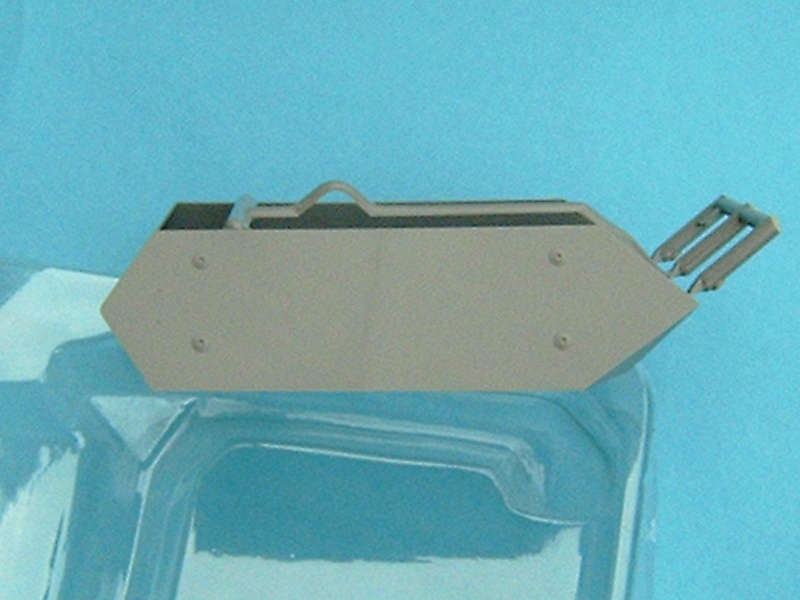
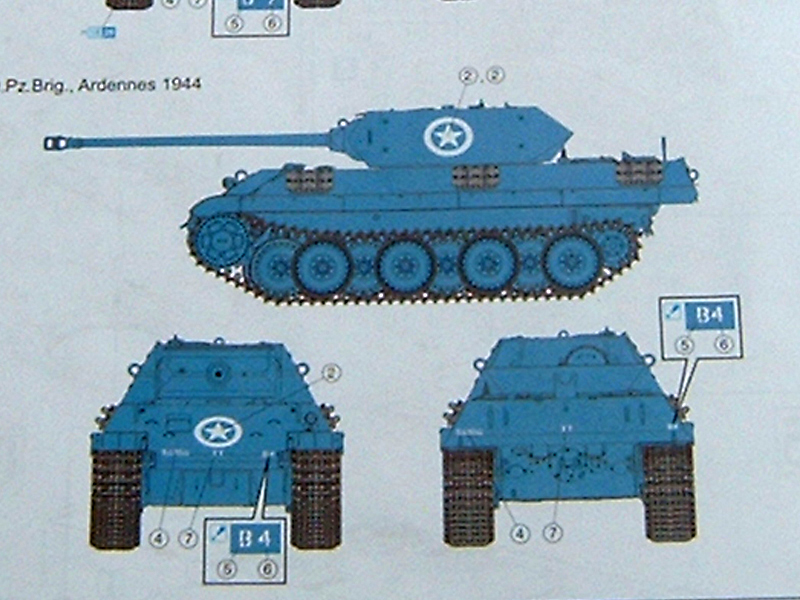
The five Panthers issued to Kampfgruppe X were made to look like M10 tank destroyers by welding sheet metal onto their fronts, sides, and rears; this gave the Panthers the general appearance of the Allied M10. This subterfuge was doomed to fail against anything but the freshest troops, as the vehicle was bigger, sounded different, and the resemblance was only general in appearance. The designation of four of these five Panthers is known; they were pennant numbers (vehicle designation) B4, B5, B7, and B10. I have been unable to locate the pennant number of the 5th Panther. It is worth mentioning here that two of the five Panthers had no circle around the stars on the turret (B7 and the unknown 5th Panther); B4, B5, and B10 did have the circles on the turret.
The Panthers of Kampfgruppe X were manned by men of the 6th Panzer Divisions 11th Panzer regiment, 1st Battalion, and were the under the command of SS Obersturmbannführer (Lt.Col.) Willi Hardieck. Hardieck died on the evening of the 17th of December in a field hospital after the jeep he was travelling in hit a German mine, the explosion having killed Hardiecks driver and radio operator outright. Hardieck was replaced by SS Hauptsturmführer (Captain) Adrian von Foelkersam. The Stug IIIs of Kampfgruppe Y were manned by men of the 1st Company, 655th Heavy Tank Destroyers Battalion under the command of Hauptmann (Capt.) Scherif. The reserve force of Kampfgruppe Z was only equipped with trucks and armoured personnel carriers under the command of Oberstleutnant (Lieutenant Colonel) Wolf.
Panzer Brigade 150 went into action on the morning of the 21st of December 1944, with the plan to capture the bridges over the river Meuse having now become a secondary requirement due to the limited forces available. Instead the brigade was to capture the town of Malmedy with KG X on the left flank attacking along the Ligneville road, and KG Y on the right flank attacking from Baugnez. The first attack at 03:00 failed, and Panther B5 was destroyed, while the supporting Panzer Grenadiers came under artillery fire, forcing them to withdraw at 05:00. A second attack at 10:30 the same day had the Warche River Bridge as the objective; this attack was stopped by artillery fire 100 meters from the bridge with the loss of Panther B4 and later in the day, Panther B10. The remainder of Panzer Brigade 150 was attacked from the air; this however also resulted in 300 American troops and 200 Belgian civilians being killed in air raids on Malmedy by American medium and heavy bombers of the US Ninth Air Force (117th Infantry Regiment had erroneously reported that Malmedy had been taken). The bombers returned on the 24th and 25th of December, due to no one correcting that miscommunication to the Air Force, resulting in the almost complete destruction of Malmedy.
Panther B5 was knocked out on the outskirts of Malmedy with a bazooka by Private Francis Currey of K Company, 120th Infantry, 30th Infantry Division, the action earning him the Congressional Medal of Honor. Panther B7 was destroyed by artillery fire on the outskirts as well, just 100 meters from the bridge over the river Meuse, with four of the five-man crew being killed while bailing out. Panther B10 (Commanded by 1st Lt. Gertenschlager) was lost while retreating from an artillery barrage, having crashed into the Café du Rocher de Falize. Panther B4 (Commanded by 1st Lt. Peter. Mandt) hit a mine near the railroad viaduct losing its left track. The fifth and final Panther with the unknown designation was abandoned on the Malmedy-Spa road.
The result of all this was the complete failure of Panzer Brigade 150 to capture any of its objectives, and cost them all of their heavy equipment and 450 men. The brigade was withdrawn from battle on the 28th of December, and disbanded, with all troops being returned to their previous units.
The Kit
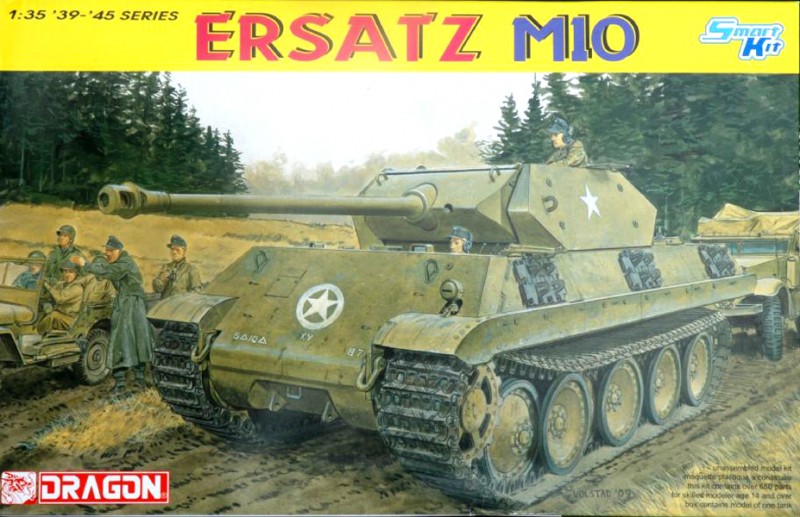
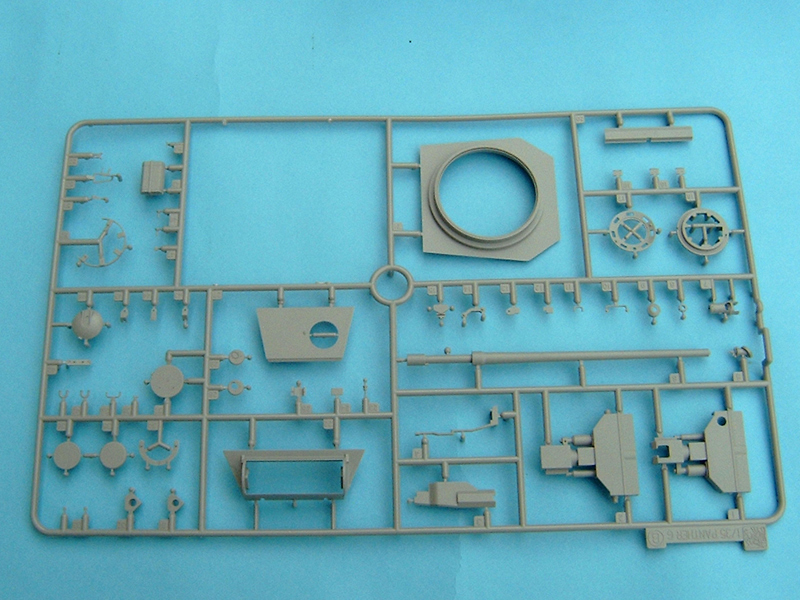
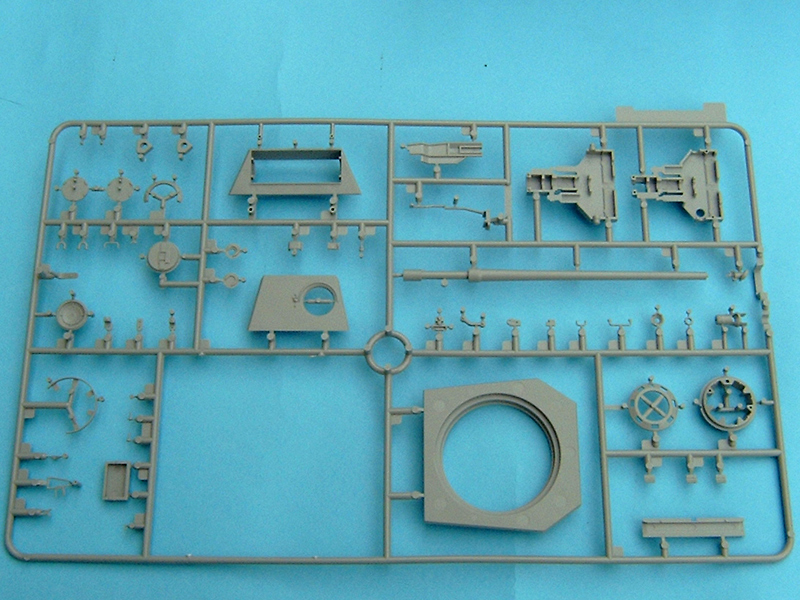
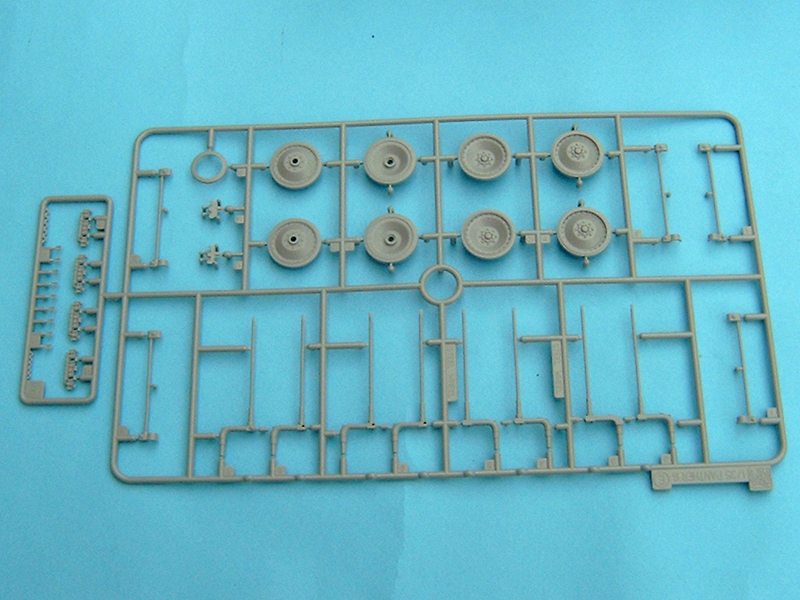
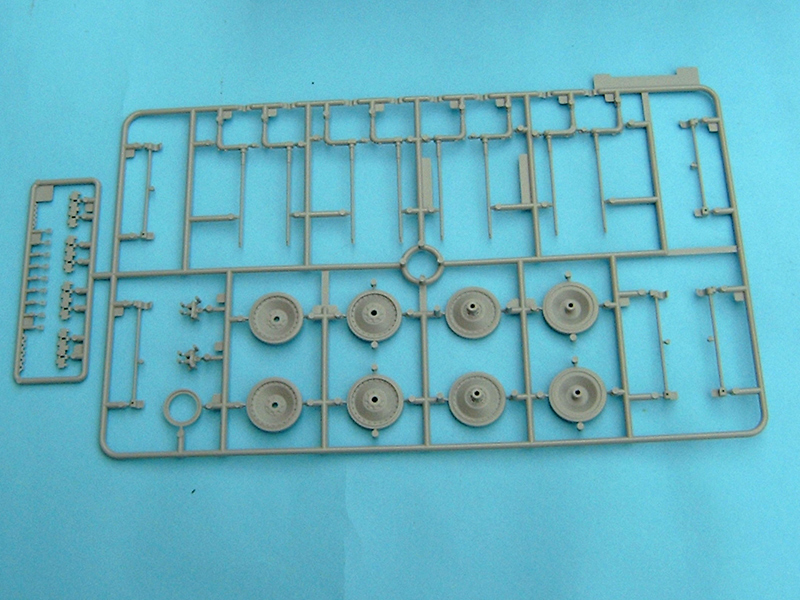
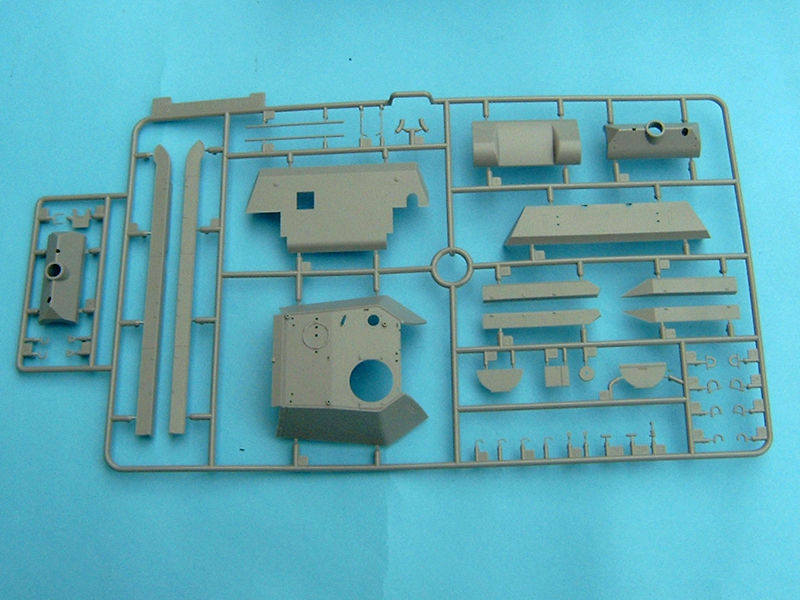
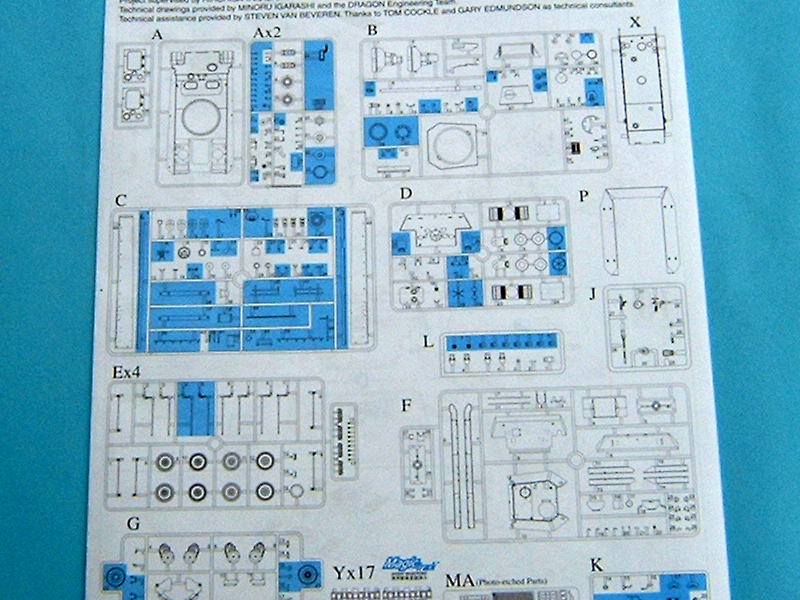
The model is packed in typical DML fashion, the box measuring 380mm x 245mm x 80mm. Inside are eight poly bags containing:
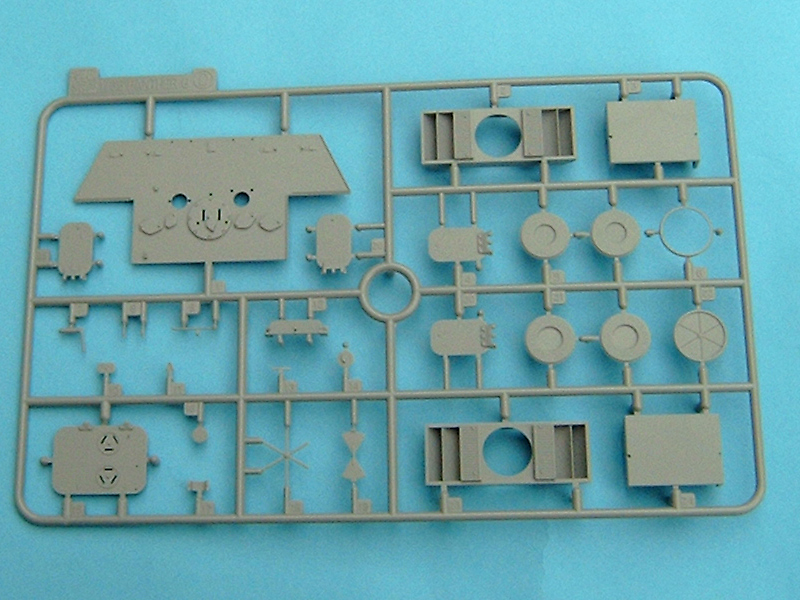
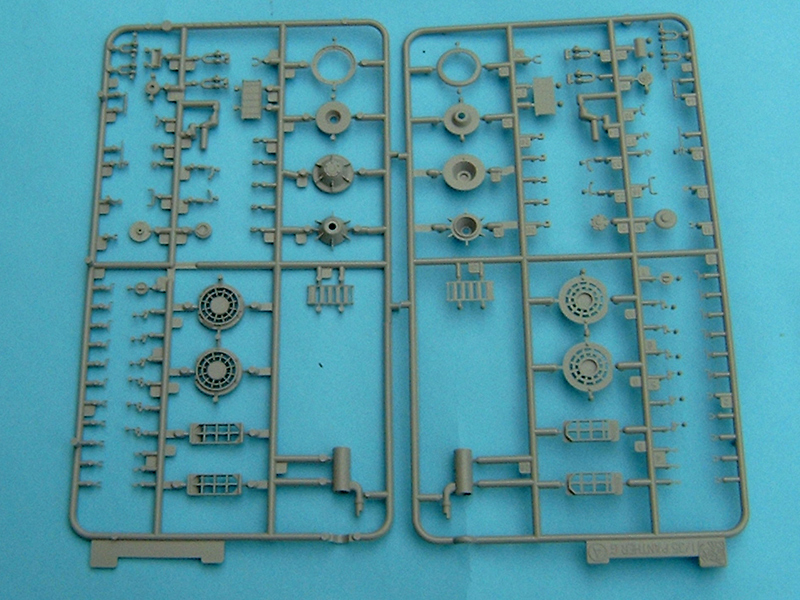
15 sprues of light gray styrene
1 light gray styrene hull tub
1 sprue of clear styrene
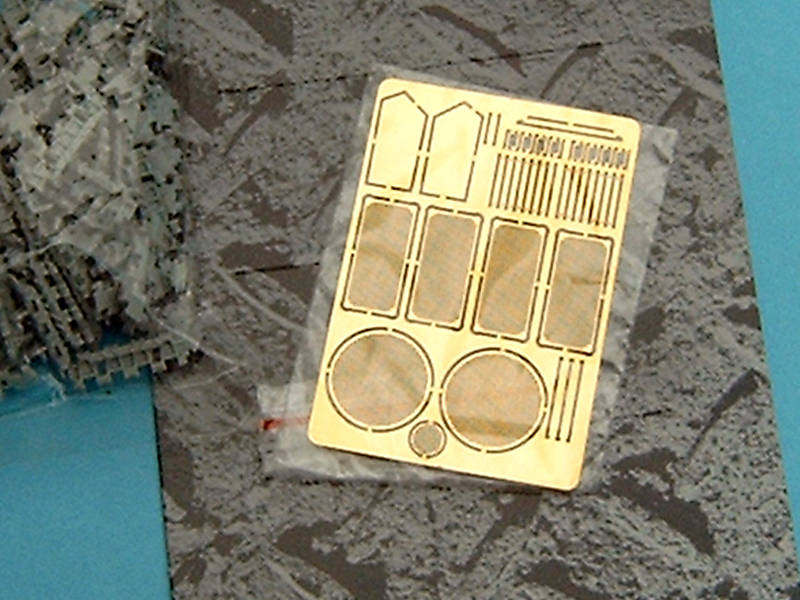
1 PE brass fret
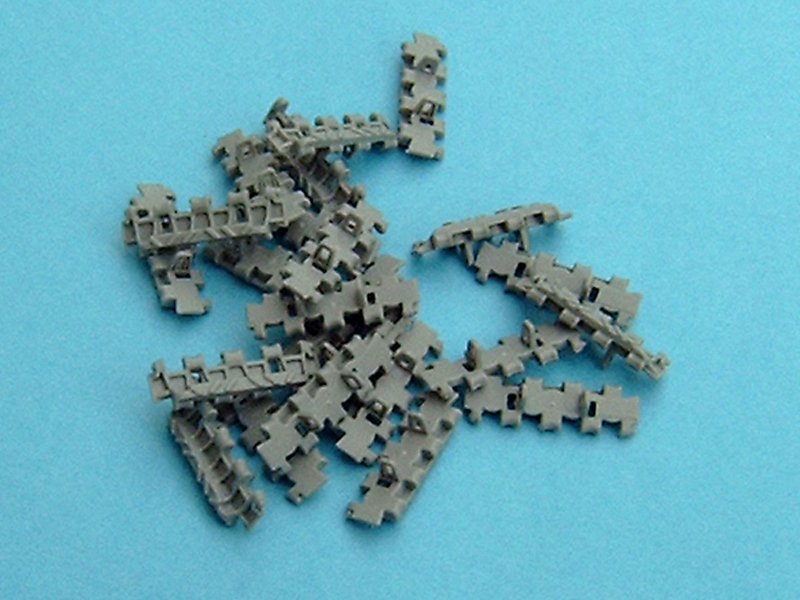
1 bag of Magic Tracks links
1 decal sheet
Instruction booklet
Unusual for DML products in my experience, they have decided not to pack the sprues individually, which has resulted in some very minor scratches to some pieces, though all pieces are intact and attached to the sprues. The extra armour for the turret is supplied separately in its own bag and inside a moulded plastic container for it protection. The card in the box contains a small photo etch set, the clear periscopes, a small decal sheet, and the Magic tracks.
The Review
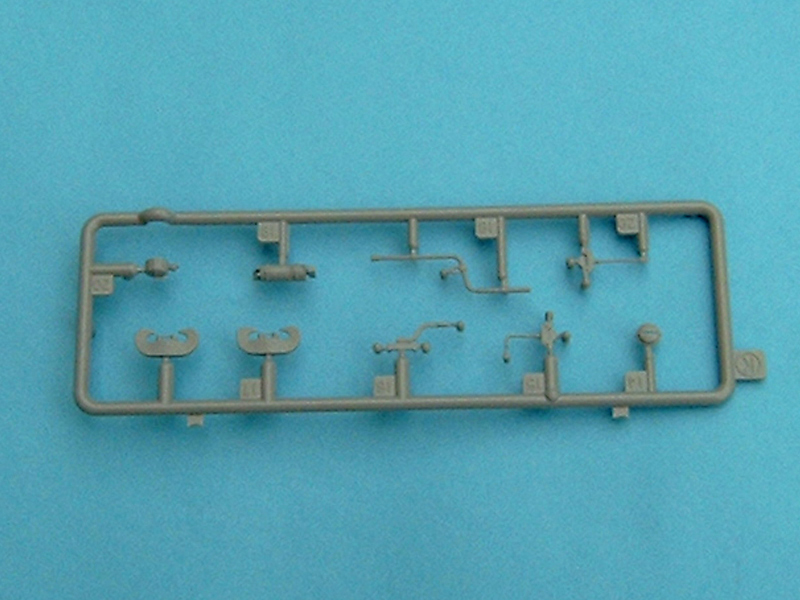
This model is labelled as a Smart kit, and is a description with which I thoroughly agree with in this case. Nearly all of the sprues in the box are from one of DMLs Panther G kits, and this has resulted in a very large number of surplus parts which will swell your spares box. The parts are all free of flash with no ejector marks that I could find worth mentioning. There are some minor mould seams visible, but they are nothing that should cause anyone concern.
Tracks and suspension:
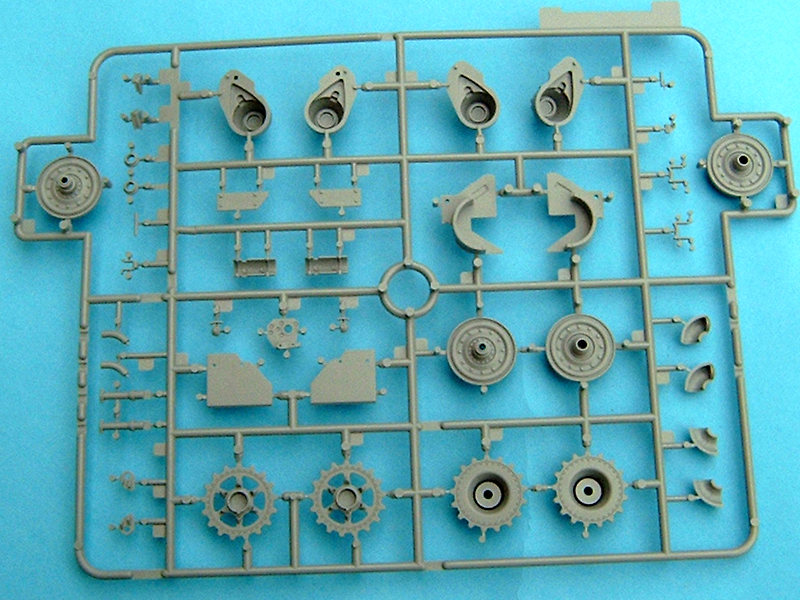
The Magic Tracks provided with this kit are excellent, as they have hollow guide horns, and only require a very small nipple of plastic to be cleaned-up in the very centre of the inner face. I know there are people who prefer Magic tracks and those that want DS tracks. Looking at these tracks, I have to say it was an excellent decision to include them, as vehicles with track sag really benefit from their use. The suspension parts with careful application will allow for articulation in the wheel height, and this will allow the vehicle to be realistically depicted travelling over rough ground that is not perfectly flat. I strongly recommend against gluing the idler wheel suspension strut in place until the track is ready to be applied. In addition to the suspension struts called out in the construction process, there are steel wheel suspension struts and two steel wheels included in the kit. I have, however, been unable to verify that any of the five Panthers made to look like the M10 had steel wheels fitted, and would recommend that they are added to your spares box rather than used. The stud pattern on the road and idler wheels appears accurate, as does the drive sprocket. The three stages that cover the construction and installation of these parts are accurate, with the parts being correctly labelled and located on the sprues.
Lower hull:
The lower hull tub is very nicely and correctly-detailed, and when measured against my reference material, appears accurate. Separate sponsons is a new one on me, and as far as I can see, there is no obvious reason for it, unless the tub has been used in a different kit where this was needed. The rear of the hull requires some minimal surgery before being applied to the model, this however should not faze anyone. The number of parts that need attaching to the lower hull is minimal, with no obvious problems to confound the builder.
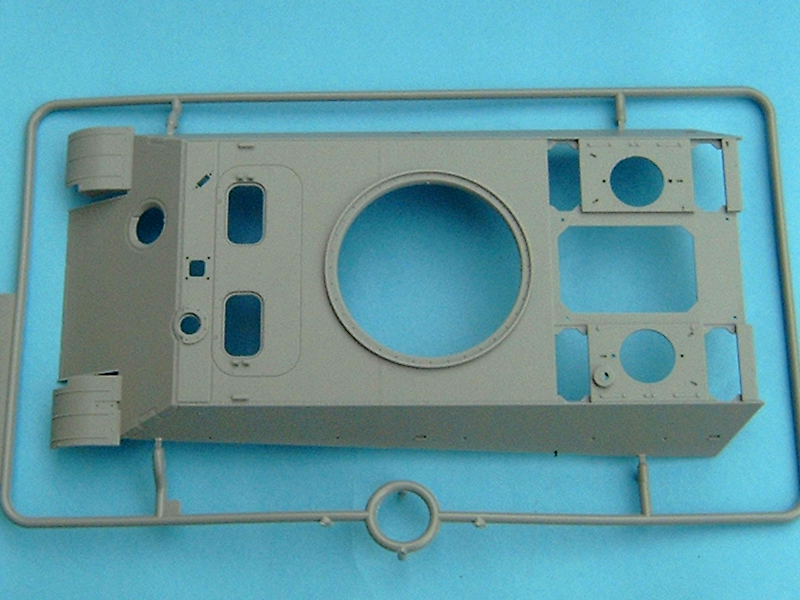
Upper hull and interior:
There is no detail supplied for the interior of this model (with the exception of a very nicely detailed bow MG with the end of the barrel hollowed out). You will need to decide if the driver and/or radio operators hatches are going to be open, as if you decide you want them open, there are some pieces that need to be attached from inside onto the upper hull. The exterior of the upper hull looks to be a specifically-designed part for the Panther Ersatz M10, and this is confirmed by the tab on the attached sprue. As with the lower hull, there are a minimal number of parts that need attaching to the exterior. Despite the fact very few parts need to be applied, nothing obvious has been omitted.
Turret:
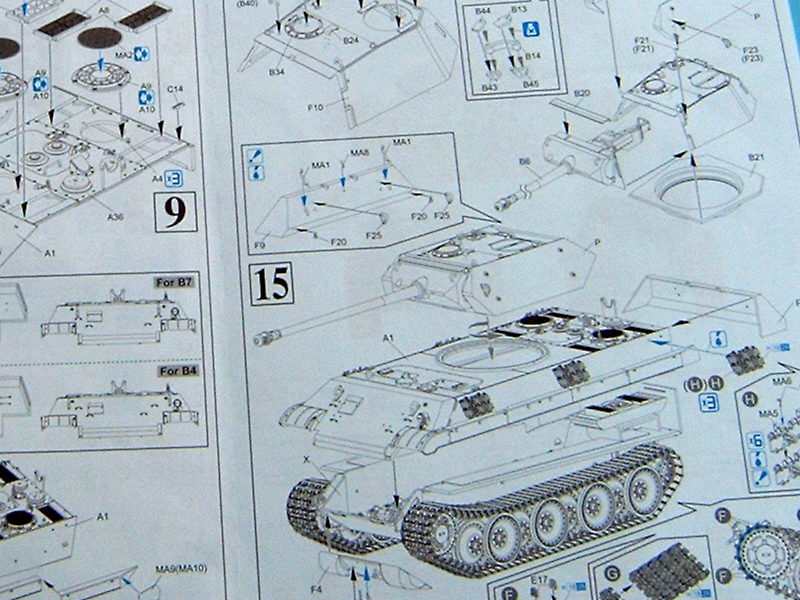
The construction of the turret on this model is simplistic, but not at the cost of accuracy. There are again very few parts to attach, but what parts there are have been well thought-out and designed. The turret looks to have all the details that I checked against my reference material. The main gun barrel is a single piece with a light seam down one side; this seam will not be difficult to remove with a light rub of a sanding stick. I will admit to no longer being a lover of plastic gun barrels, but this one will not need to be replaced to get a good realistic-looking barrel. The muzzle brake may need some work if it turns out like others of this design I have made from other DML kits. Where the end meets the main body of the muzzle brake, there has always needed some filling to hide what I believe is a horrible join, however that will not be known for sure until I begin construction. There are two mantlets included, so a decision will have to be made as to which tank you wish to build before progressing.
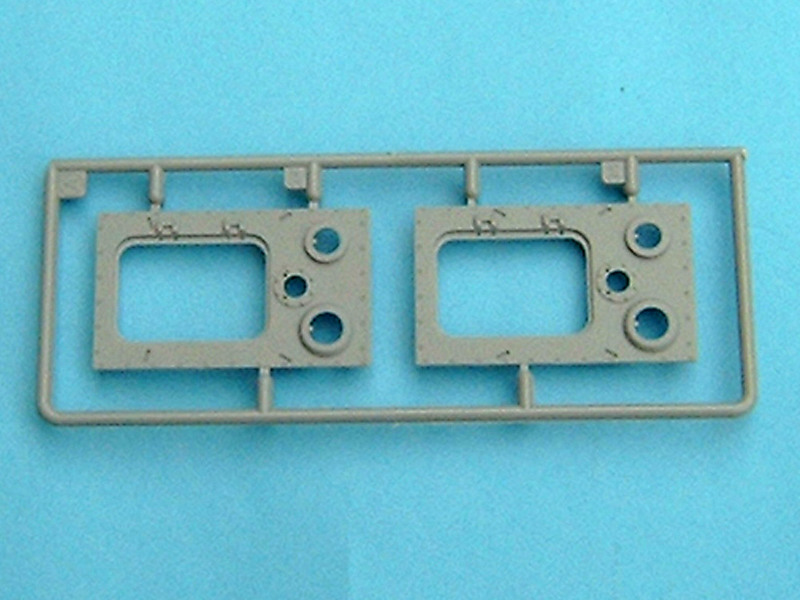
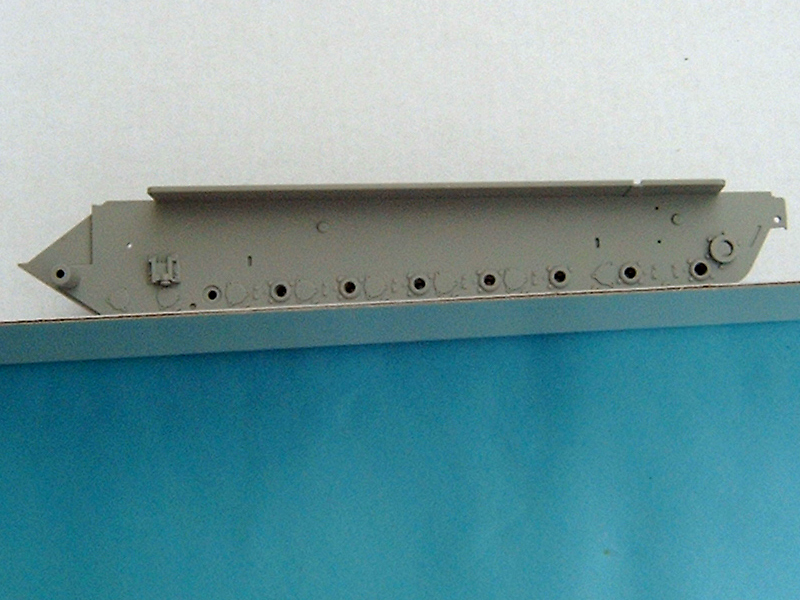
Steel plate:
The steel plate that was added to these Panthers in an effort to disguise them is well-replicated and again, accurate. The plates around the turret are especially well-made, however I am unable to confirm claims that this is scale thickness. There are two holes that need drilling in the rear of the turret plates; this will require that you have decided which one of the two vehicles you are going to replicate, as the two holes are in different locations for each version.
The instructions:
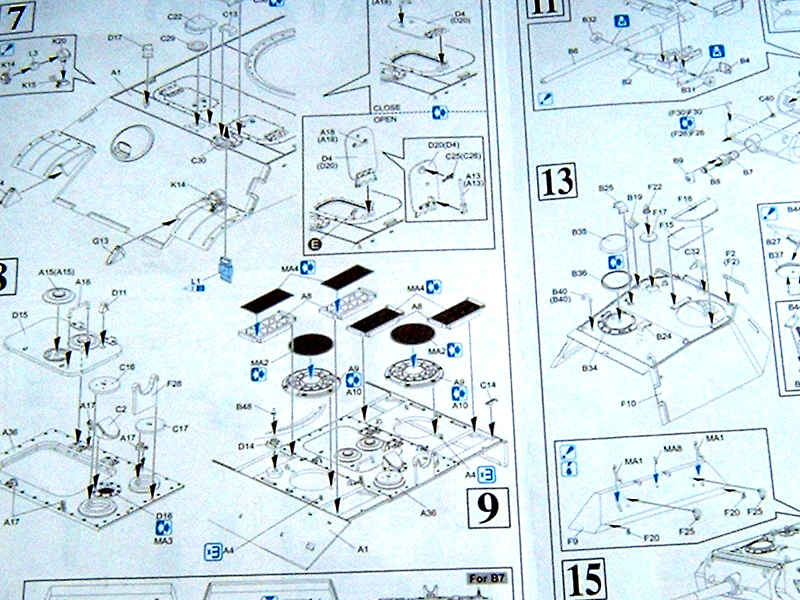
The assembly is covered by JUST six pages, of which only four cover construction, which is complete in fifteen stages. The front page contains a reproduction of the picture on the box lid, and a sprue guide. The final page covers painting and decal placement for two of the five possible Panthers, B4 and B7. Each page is 345mm x 190mm.
Conclusion
In the past I have been critical of a number of Dragon products. This criticism has been down to usually one or more of three problems:
Instructions that are way too busy
Incorrectly-numbered parts
Parts being completely missed during construction that suddenly appear in one of the diagrams at a later stage
I am unable to lay any of these faults at Dragons door with this offering, I will go so far as to say this is one of the best kits I have ever seen as regards:
Accuracy (according to my references)
Ease of construction (as regards the stages)
Well laid-out, accurate, clear instructions
This model can be built straight from the box without a degree in engineering, and result in a very accurate model of a Panther Ersatz M10, while requiring the minimum of experience. I would happily give this model to a builder of any age group (with the possible exception of the PE), and be able expect a quality build to be the end result. I accept that my opinion may change when I build this model if I find any problems. I have followed a build log in the forums for this model, and apart from some complaints about gaps, it looks to have gone speedily and easily to its conclusion. There was a complaint I noticed in a forum that the steel plate around the turret was warped; that is not the case with this sample I received which is square and true. Having handled and examined the components of this model very closely, and compared them to the reference material, I have, I am left me with a desire to start the build with the confidence that I will finish it before I lose interest or heart.
Reference material:
TANKpower 7 PzKpfw. V Panther Volume 7 from AJ Press Order Of Battle No4 - Ardennes Offensive VI Panzer Armee - Northern Sector, by Bruce Quarrie. The Battle of the Bulge: Hitler's Last Hope, 1944 by Robin Cross. Ardennes 1944, Osprey Military Campaign Series 5, by James R Arnold.
SUMMARY
Highs: An accurate and easy to construct model of a popular subject.Lows: Until I start the build the only place this product can be knocked is the price.Verdict: Highly recommended both for anyone who wants to build an accurate model of an interesting Panther oddity, or who has been concerned their abilities are not up to the usual very small and high part count of other kits.
Our Thanks to Dragon USA! This item was provided by them for the purpose of having it reviewed on this KitMaker Network site. If you would like your kit, book, or product reviewed, please contact us.
About Darren Baker (CMOT) FROM: ENGLAND - SOUTH WEST, UNITED KINGDOM
I have been building model kits since the early 70s starting with Airfix kits of mostly aircraft, then progressing to the point I am at now building predominantly armour kits from all countries and time periods. Living in the middle of Salisbury plain since the 70s, I have had lots of opportunitie...
Please could the members viewing this review give me some feedback on the intro. I know it is very long but as this model can only be one of five tanks, one of which cannot be made accurately due to the information on it being unknown. I felt it warranted a long intro as it is a battle most people know of, and these five Panthers must be some of the best known and most talked about tanks put into action during WW2.
Darren,
thank you very much for this nice and informative review. I think the intro is very good, not to long. And the kit seems to be a real nice one.
Thanks again
greetings ro
Darren, I think it's "just right" as Goldilocks said about the porridge.
If someone isn't interested in the topic, they can skip the Intro, as it's a separate section. And if they're interested, then they likely will want it LONGER! You were tackling a very specific piece of history, and handled it well IMO.
The intro gave me a lot of information I didn't know about. I was unaware there were only five of these. It was worthwhile to know what happened to them. I was glad you gave us the information.
Well I must say the intro was a very interesting read. I wasn't aware that there where only 5 of these converted, for some reason I always thought that more of these where converted for this operation.
What happened to the Stug's?
Thank you.
Some of the Stugs were I believe destroyed by mines placed by the Americans, they were ambushed after a deserter told the Americans all. I did not go into that side of the battle too far, as it was beginning to look as if instead of an introduction I was writing a book.


Comments