Campaigns
Where Armorama group builds can be discussed, organized, and updates posted.
Where Armorama group builds can be discussed, organized, and updates posted.
Hosted by Darren Baker, Richard S.
Blitzkrieg
GaryKato

Joined: December 06, 2004
KitMaker: 3,694 posts
Armorama: 2,693 posts

Posted: Tuesday, October 07, 2008 - 02:04 AM UTC
I've removed most of the parts for the UE from the trees, cleaned them up, and dry fit the hull. Everything just about snaps into place. For a fast OOTB build, I think I picked the right kit.

Bigrip74

Joined: February 22, 2008
KitMaker: 5,026 posts
Armorama: 1,604 posts

Posted: Wednesday, October 08, 2008 - 05:50 AM UTC
Adam:
Good looking H35, the dirt and dust adds to the overall finish. Hopefully I can finish my H39 before the cut off date.
Robert
Good looking H35, the dirt and dust adds to the overall finish. Hopefully I can finish my H39 before the cut off date.
Robert

Posted: Wednesday, October 08, 2008 - 08:21 AM UTC
hello all,
@Gary,
sounds good.sounds like you have got this build well in hand.
@Robert,
just keep plugging along.you have time to get it done.
@for everyone else,
Sit-rep,how are you doing?do you need anything from me(besides time).
we have 23 days left,and no more extensions left,so lets get your builds done.
cheers,
Bruce

GaryKato

Joined: December 06, 2004
KitMaker: 3,694 posts
Armorama: 2,693 posts

Posted: Thursday, October 09, 2008 - 12:51 PM UTC
Progress made. This is only step 3 in the instructions but it's where the major pieces of the hull are glued together.

ScottS

Joined: March 28, 2007
KitMaker: 81 posts
Armorama: 57 posts

Posted: Saturday, October 11, 2008 - 03:07 PM UTC
OK we are ready for paint and finishing this thing up.


and the crew, I might not be able to finish these guys by the deadline.

and the crew, I might not be able to finish these guys by the deadline.
Posted: Sunday, October 12, 2008 - 08:08 AM UTC
hello all,
@Gary,
looks like you have it in the bag.keep up with the updates so we can see how you are doing.
@Scott S,
looking good,alot better then my build.you still have 19 days to go,so try to get what you can done,done.
@John and Scott E,
how is it going,are you going to be done in 19 days?i have not heard from you two for awhile,is everything OK?
cheers,
Bruce

GaryKato

Joined: December 06, 2004
KitMaker: 3,694 posts
Armorama: 2,693 posts

Posted: Sunday, October 12, 2008 - 12:56 PM UTC
My target is to be done by Friday for the October meeting of the Silicon Valley Scale Modeler's club. This is the most progress I've ever made in a campaign as I try to make the transition from model buyer to model builder. My regret is that I'm only doing this now when I can't see the  little parts!
 little parts!
Posted: Sunday, October 12, 2008 - 01:55 PM UTC
Quoted Text
My target is to be done by Friday for the October meeting of the Silicon Valley Scale Modeler's club. This is the most progress I've ever made in a campaign as I try to make the transition from model buyer to model builder. My regret is that I'm only doing this now when I can't see thelittle parts!
hello Gary,
sounds like a plan.
about small parts,that is why i gave up doing 1/700 ships.when the part count is 150+ and half is parts i cannot see with 400 strength reading glasses i gave that scale up.i mostly do 1/35 and 1/48 scale armor,1/350 to 1/520 ships and 1/48 aircraft.
please,keep us updated with your build.it looks great.
cheers,
Bruce


c5flies

Joined: October 21, 2007
KitMaker: 3,684 posts
Armorama: 2,938 posts

Posted: Sunday, October 12, 2008 - 03:05 PM UTC
Looks like the one month extension was just what the doctor ordered! It's great to see these builds in the final stages, excellent work!
Nito74

Joined: March 04, 2008
KitMaker: 5,386 posts
Armorama: 4,727 posts

Posted: Sunday, October 12, 2008 - 10:26 PM UTC
I won't make it with the Panzer I...
Lost some parts, 3 hatches. My workbench is a mess, with all the builds, glue, etc.. just lost them can't find them anywhere... also those magic tracks are a problem...
You really need to be David Copperfield to make them look good...
Lost some parts, 3 hatches. My workbench is a mess, with all the builds, glue, etc.. just lost them can't find them anywhere... also those magic tracks are a problem...
You really need to be David Copperfield to make them look good...

Spiff

Joined: September 07, 2002
KitMaker: 807 posts
Armorama: 671 posts

Posted: Monday, October 13, 2008 - 04:57 AM UTC
I'm back to working on the Char B1 bis. I had to take a break for the last 10 days to deal with the disaster at our rental property. The renters left us with a lot of damage to the house, didn't clean anything and left us with a lot of junk, furniture and other things. So needless to say, all my spare time was taken up with dealing with that mess. We're all finished now (with the exception of the dump run, going to do that this week) and the new renters were able to move in on Saturday - a week late.
I just need to add the 6 bolts on the 75mm gun mantle and the pigtail lifting mount, then it's ready for paint!
I just need to add the 6 bolts on the 75mm gun mantle and the pigtail lifting mount, then it's ready for paint!


Desmoquattro

Joined: September 10, 2008
KitMaker: 235 posts
Armorama: 168 posts

Posted: Monday, October 13, 2008 - 03:12 PM UTC
I just snuck in under the dealine, hehe. Completed my DML Panzer I A today. Fun build. Since I took the pics I've given it another pin-wash, touched up the tracks a bit, replaced the broken aerial, and added oil stains to the starting handle hatch. No more fiddling, it's done! The paint scheme is (according to Dragon, anyway) from Poland '39.
The flag was painted freehand, because my soft mask templates were buggered up due to the compound curves. I never thought I'd be so proud of a swastika, but two hours of painstaking hand-painting endeared me to the little bastard.


The flag was painted freehand, because my soft mask templates were buggered up due to the compound curves. I never thought I'd be so proud of a swastika, but two hours of painstaking hand-painting endeared me to the little bastard.
whiteeagle

Joined: February 24, 2008
KitMaker: 299 posts
Armorama: 281 posts

Posted: Monday, October 13, 2008 - 10:34 PM UTC
Hello all 
Ron and John - thanks

John - I waiting for your H39
Jason - excellent work, I really like early German armour!
Adam

Ron and John - thanks


John - I waiting for your H39

Jason - excellent work, I really like early German armour!

Adam

Posted: Tuesday, October 14, 2008 - 04:19 AM UTC
hello Jason,
your Pz 1 looks great.i am glad that you got done before the deadline.make sure you put it in the Blitzkrieg Gallery so you can get your ribbon for the campaign.
cheers,
Bruce
your Pz 1 looks great.i am glad that you got done before the deadline.make sure you put it in the Blitzkrieg Gallery so you can get your ribbon for the campaign.
cheers,
Bruce

Posted: Friday, October 17, 2008 - 09:35 AM UTC
 Hello friends!
@ James, thanks for your kind comments and recommendation
@ Adam, thanks for your kind comments; your Hotchkiss lookes great!
@ Ron, thanks for your kind comments
@ Bruce, thanks for your kind comments and recommendation
@ Gary, nice WIP
@ Scott, your Armor looks good
@ Jason, the Panzer looks great!
Regards,
Rodolfo

Desmoquattro

Joined: September 10, 2008
KitMaker: 235 posts
Armorama: 168 posts

Posted: Friday, October 17, 2008 - 06:33 PM UTC
Some updated pics since I've done the final touch up. The antenna is just a sewing needle with the ends snipped off - it happened to be the same size as the original which I destroyed.


Posted: Friday, October 17, 2008 - 08:39 PM UTC
Excellent job on the Pz. I, Jason. That interior is great and the shell casings in the botton of the hull is a great little detail.
Thanks for sharing
Thanks for sharing

Nito74

Joined: March 04, 2008
KitMaker: 5,386 posts
Armorama: 4,727 posts

Posted: Monday, October 20, 2008 - 01:26 AM UTC
Adam I don't think I will have time for the Hotchkiss tank. But since I wanted to add another build for this campaign, I might do a little kubelwagen.. 

Posted: Monday, October 20, 2008 - 07:56 AM UTC
hello all,
11 days till the end of the campaign.lets get your builds done.i would hate that some of you will not get your ribbon for all of your hard work on your builds.
cheers,
Bruce
11 days till the end of the campaign.lets get your builds done.i would hate that some of you will not get your ribbon for all of your hard work on your builds.
cheers,
Bruce

Spiff

Joined: September 07, 2002
KitMaker: 807 posts
Armorama: 671 posts

Posted: Monday, October 20, 2008 - 10:20 AM UTC
Man oh man.... it's been another brutal week. We had some major plumbing/sewer line problems at our rental house which we weren't able to wrap up until late Saturday evening. Needless to say I spent my free time yesterday working on the Char B1 bis, and really needed the break as I was physically pretty wiped out from 2 and a half weeks of hard labor in addition to working my normal day job. Anyway......
I replicated the pigtail lifting hook for Bourrasque using a wire type item from my wife's misc. craft supply box that already had loops of about the right size in them. It worked perfectly. I just pulled the end of the loop out a bit, carefully filed the tip to a point and then gently bent it back in (but not all the way). I drilled a hole into the plastic to mount it above the 75mm gun on the top of the mantlet assembly and voila, the pigtail lifting hook is good to go! Looking at my reference photos, it was apparent to me that the lifting hooks were crafted individually, and mounted in all sorts of ways so that each tank was unique. Bourrasque's was installed parallel with the front of the tank, with the pigtail point on the front. Other Char's had them flipped the opposite way, or even perpendicular to the front, so check your reference photos if you're building one of these.

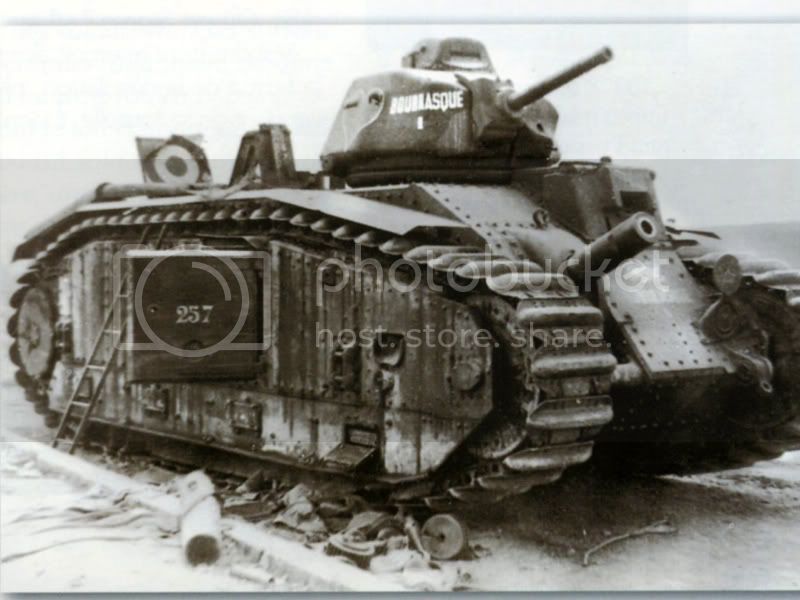
Because I'm rapidly running out of time for this GB I think I'm going to skip the other corrections I had planned (the 6 bolts on the 75mm gun mantlet and the mud scrapers).
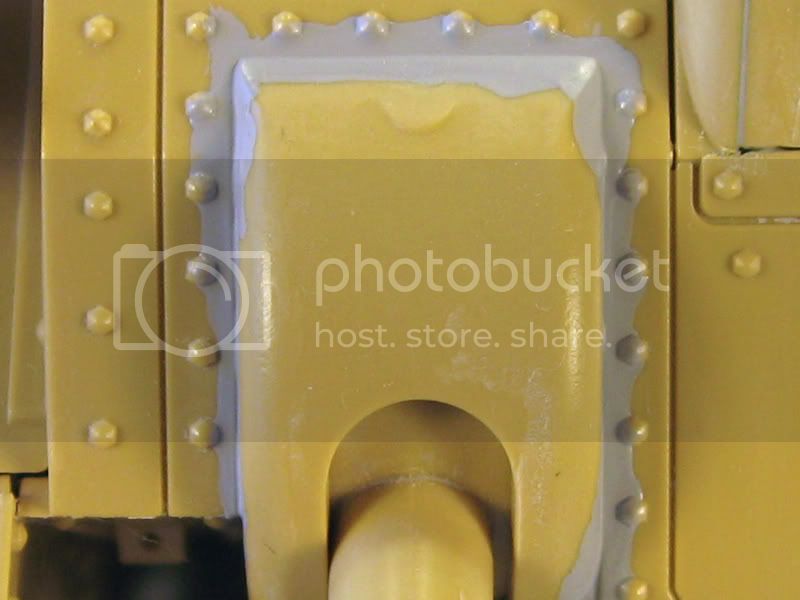
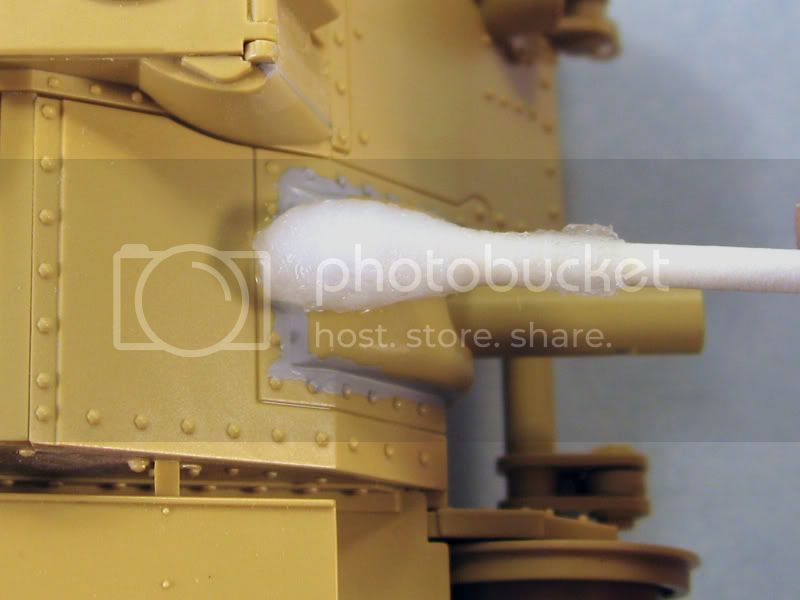
The seam corrections are complete as well. I used Mr. Surfacer 1000, Q-tips and 91% Isopropyl Alcohol to fill in the seam errors with this kit. This is a great technique for filling in seams, especially if there is delicate detail in the area or there are hard to reach places. This way you won't damage anything, unlike the fill and sand technique. Just apply the Mr. Surfacer with a toothpick or small brush. After it has dried simply dip the end of a Q-tip in the 91% Isopropyl Alcohol (squeeze a bit off so you don't flood the model) then just gently rub the area where the seam is. It may take a few moments for the alcohol to begin dissolving the Mr. Surfacer, longer if it has thoroughly dried and cured. You may need to apply more Mr. Surfacer and repeat the process a couple of times until the seams are filled to your satisfaction. I did one more application after these photos and carefully cleaned up any Mr. Surfacer residue using Q-tips and the alcohol.


I sprayed on a coat of Tamiya gray primer yesterday evening so now it's ready for the base coat. I am almost positive will be able to get this thing finished by the end of the month.
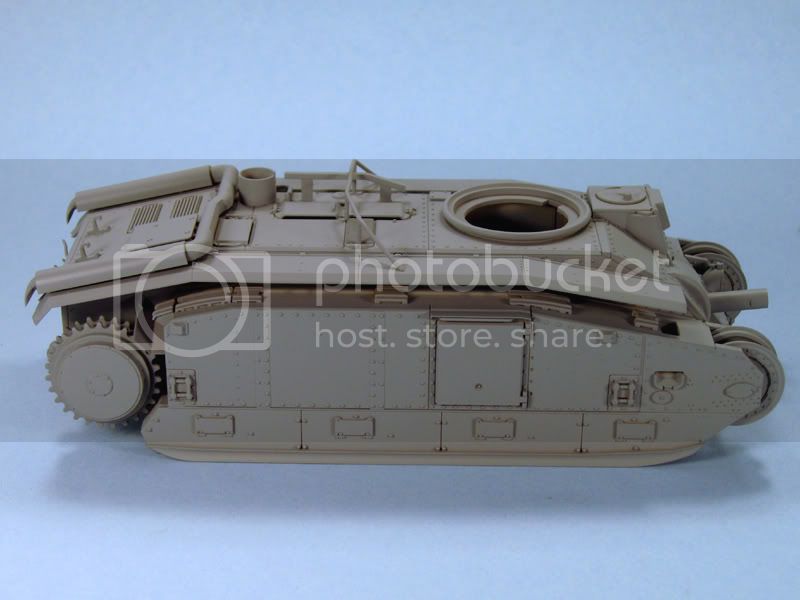
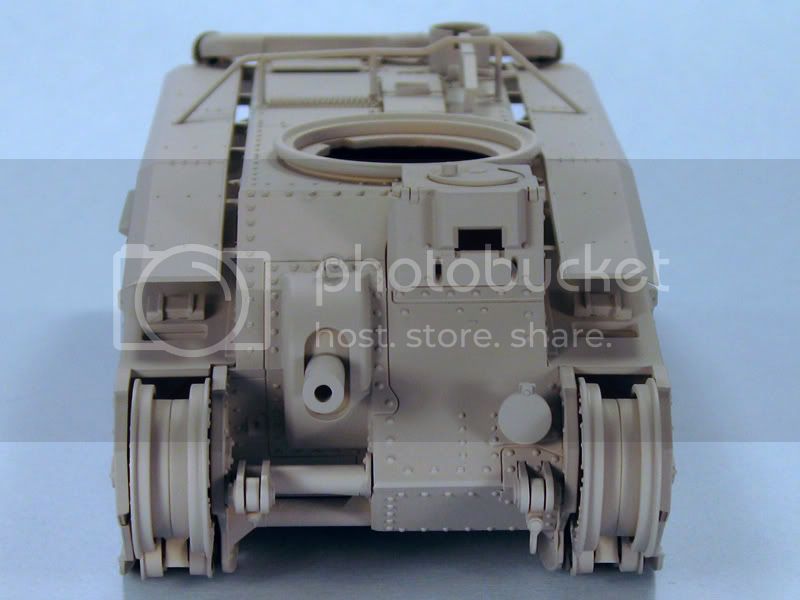
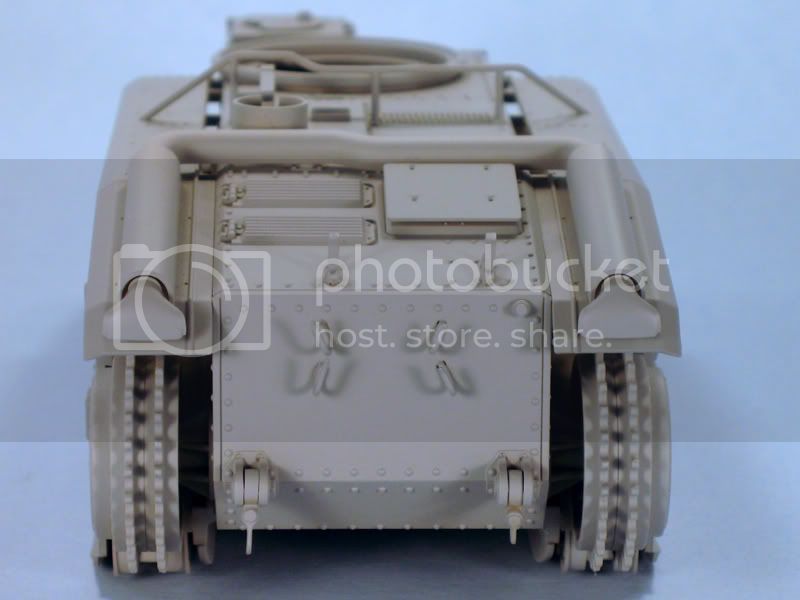
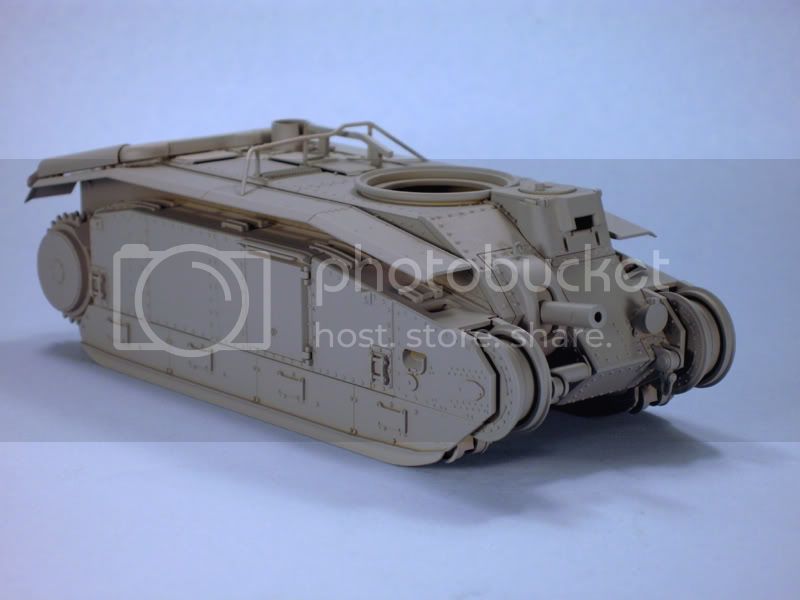

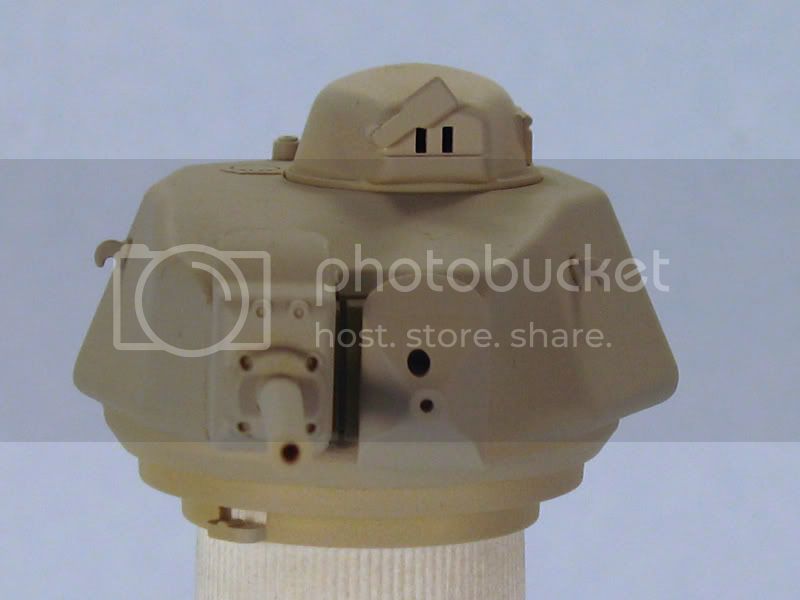
I replicated the pigtail lifting hook for Bourrasque using a wire type item from my wife's misc. craft supply box that already had loops of about the right size in them. It worked perfectly. I just pulled the end of the loop out a bit, carefully filed the tip to a point and then gently bent it back in (but not all the way). I drilled a hole into the plastic to mount it above the 75mm gun on the top of the mantlet assembly and voila, the pigtail lifting hook is good to go! Looking at my reference photos, it was apparent to me that the lifting hooks were crafted individually, and mounted in all sorts of ways so that each tank was unique. Bourrasque's was installed parallel with the front of the tank, with the pigtail point on the front. Other Char's had them flipped the opposite way, or even perpendicular to the front, so check your reference photos if you're building one of these.


Because I'm rapidly running out of time for this GB I think I'm going to skip the other corrections I had planned (the 6 bolts on the 75mm gun mantlet and the mud scrapers).

The seam corrections are complete as well. I used Mr. Surfacer 1000, Q-tips and 91% Isopropyl Alcohol to fill in the seam errors with this kit. This is a great technique for filling in seams, especially if there is delicate detail in the area or there are hard to reach places. This way you won't damage anything, unlike the fill and sand technique. Just apply the Mr. Surfacer with a toothpick or small brush. After it has dried simply dip the end of a Q-tip in the 91% Isopropyl Alcohol (squeeze a bit off so you don't flood the model) then just gently rub the area where the seam is. It may take a few moments for the alcohol to begin dissolving the Mr. Surfacer, longer if it has thoroughly dried and cured. You may need to apply more Mr. Surfacer and repeat the process a couple of times until the seams are filled to your satisfaction. I did one more application after these photos and carefully cleaned up any Mr. Surfacer residue using Q-tips and the alcohol.


I sprayed on a coat of Tamiya gray primer yesterday evening so now it's ready for the base coat. I am almost positive will be able to get this thing finished by the end of the month.


Posted: Monday, October 20, 2008 - 01:52 PM UTC
hello Scott,
hopefully that is it for your rental property.your build looks great.the paint job is fairly easy,so it should not take to long.
cheers,
Bruce
hopefully that is it for your rental property.your build looks great.the paint job is fairly easy,so it should not take to long.
cheers,
Bruce

Nito74

Joined: March 04, 2008
KitMaker: 5,386 posts
Armorama: 4,727 posts

Posted: Monday, October 20, 2008 - 10:30 PM UTC
Great build Scott and I liked the Mr Surfacer Tip !!
Spiff

Joined: September 07, 2002
KitMaker: 807 posts
Armorama: 671 posts

Posted: Tuesday, October 21, 2008 - 04:06 AM UTC
Thanks guys. I can't take credit for the technique though, I picked it up from the excellent Master Class Model Building Video "Building the Bf 109G-6" by Floyd S. Werner Jr. 
The tracks are assembled and I must say, these have got to be the easiest individual track links, they simply snap together. The joins are very strong which allows you to handle the tracks as much as you want without coming apart. I used a medium sanding stick to scuff the highest part of the track links to simulate the scuffing that appears from the tank driving over hard surfaces which can clearly be seen in most good photos of the Char B1 bis.

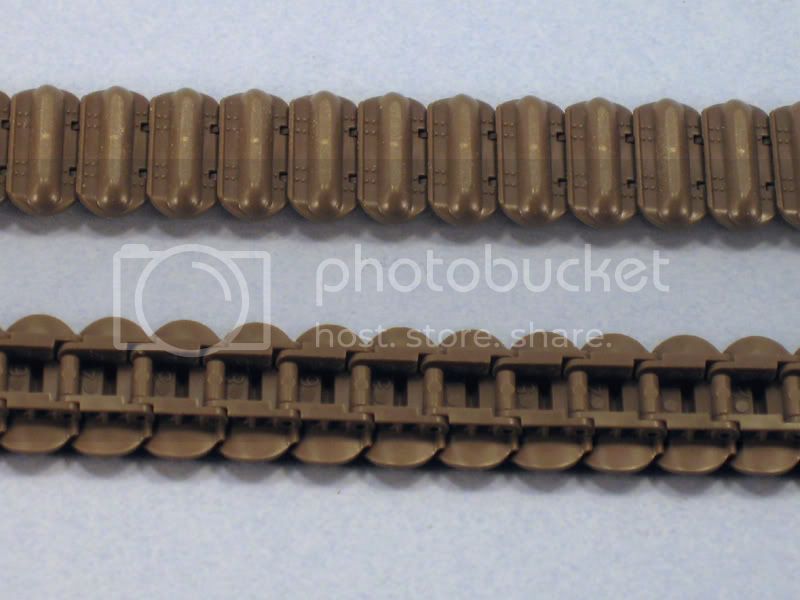

The tracks are assembled and I must say, these have got to be the easiest individual track links, they simply snap together. The joins are very strong which allows you to handle the tracks as much as you want without coming apart. I used a medium sanding stick to scuff the highest part of the track links to simulate the scuffing that appears from the tank driving over hard surfaces which can clearly be seen in most good photos of the Char B1 bis.


Spiff

Joined: September 07, 2002
KitMaker: 807 posts
Armorama: 671 posts

Posted: Wednesday, October 22, 2008 - 04:04 AM UTC
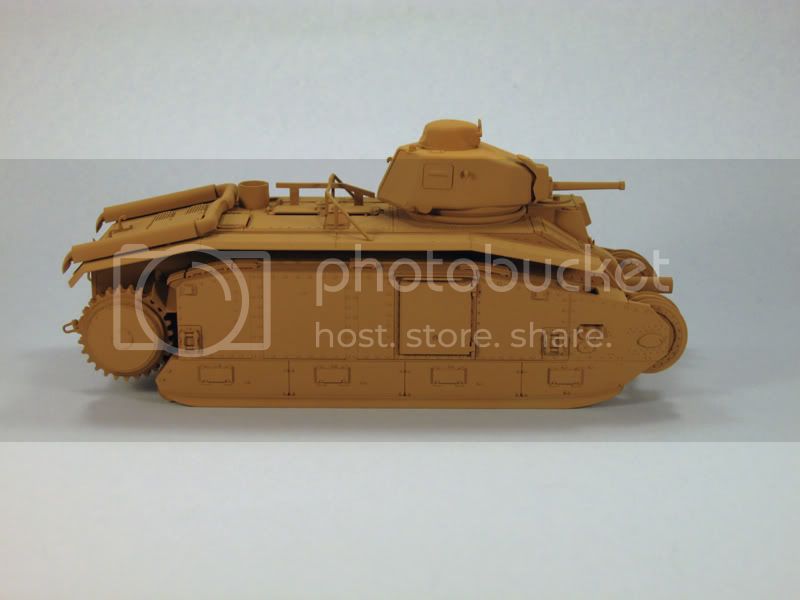
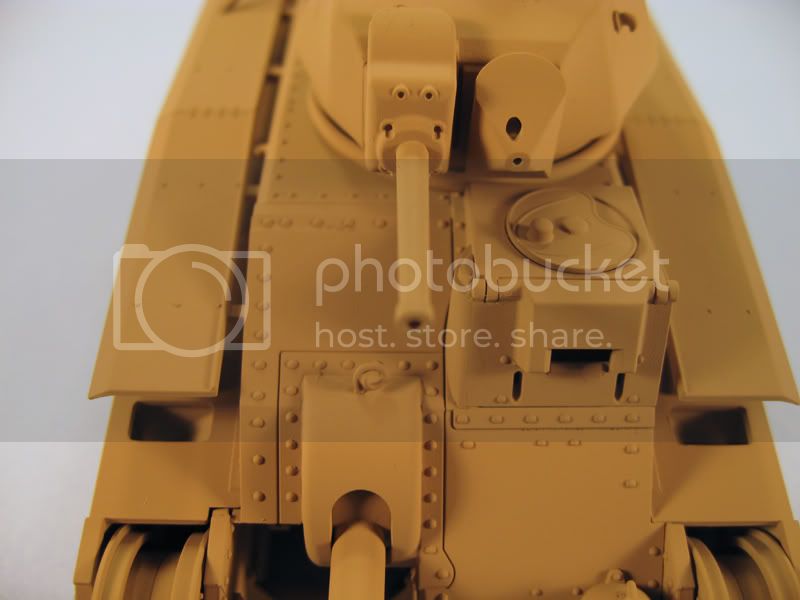
The painting has begun! I use Tamiya Acrylics exclusively. The tracks have been sprayed with a 1 to 1 ratio of XF-56 Metallic Gray/XF-64 Red Brown. That mixture was then thinned with X-20A Tamiya thinner in approximately a 50/50 ratio. The base coat has also been sprayed. I used a 2 to 1 ratio of XF-59 and XF-60 Desert Yellow XF-60 Dark Yellow, again thinned to about a 50/50 mix with Tamiya X-20A thinner.




Posted: Wednesday, October 22, 2008 - 10:34 PM UTC
Looks good with the first coat of paint, Scott.
Looking forward to see more
Looking forward to see more

 |


