Dioramas
Do you love dioramas & vignettes? We sure do.
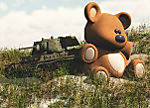
"Tea with Mr Putin..." Russian T-90A Diorama
Gundam-Mecha
Visit this Community
England - South East, United Kingdom
Joined: August 05, 2009
KitMaker: 1,019 posts
Armorama: 933 posts
Posted: Sunday, January 03, 2010 - 06:01 AM UTC
Hi Antonio, thanks for the kind comments.
As for colours I had to match the examples in the photo by eye. As you say in your PM it's tough to choose colours for modern Russian AFV.

I used the following:

Base colour: Tamiya Field Grey

Light Green Camo: Tamiya JA Grey

Black Camo: Vallejo Model Colour Black

In the end I didn't need to mix any custom shades as I thought I might have to, I found that the colours from the pot matched my reference photos quiet closely. Although on the downside I did look a little bit like a crazy person going through every bottle of paint in my local model shop and holding it up to my reference photo one by one.
bwiber
Visit this Community
Washington, United States
Joined: August 03, 2008
KitMaker: 436 posts
Armorama: 320 posts
Posted: Sunday, January 03, 2010 - 07:27 AM UTC

Quoted Text


In the end I didn't need to mix any custom shades as I thought I might have to, I found that the colours from the pot matched my reference photos quiet closely. Although on the downside I did look a little bit like a crazy person going through every bottle of paint in my local model shop and holding it up to my reference photo one by one.


That isn't crazy.... just dedicated....
ppawlak1
Visit this Community
Victoria, Australia
Joined: March 14, 2006
KitMaker: 1,973 posts
Armorama: 1,843 posts
Posted: Sunday, January 03, 2010 - 08:22 AM UTC

Quoted Text

Hi Antonio, thanks for the kind comments.
As for colours I had to match the examples in the photo by eye. As you say in your PM it's tough to choose colours for modern Russian AFV.

I used the following:

Base colour: Tamiya Field Grey

Light Green Camo: Tamiya JA Grey

Black Camo: Vallejo Model Colour Black

In the end I didn't need to mix any custom shades as I thought I might have to, I found that the colours from the pot matched my reference photos quiet closely. Although on the downside I did look a little bit like a crazy person going through every bottle of paint in my local model shop and holding it up to my reference photo one by one.


Nice Jon.

Can you post the Tamiya codes foe the paints you used please ?

Paul
Gundam-Mecha
Visit this Community
England - South East, United Kingdom
Joined: August 05, 2009
KitMaker: 1,019 posts
Armorama: 933 posts
Posted: Sunday, January 03, 2010 - 10:33 AM UTC
Bob thanks, thats what I like to tell myself!

Paul here you go:

Tamiya Field Grey XF-65

Tamiya J.A. Grey XF-14

Vallejo Model Colour 70950 Black (I think this is the only black in the Model Colour range?)

Actually I only used Vallejo black as I didn't have any Tamiya black so thats not really so important. Also whilst the Tamiya shades are described as Grey they are infact green.

ppawlak1
Visit this Community
Victoria, Australia
Joined: March 14, 2006
KitMaker: 1,973 posts
Armorama: 1,843 posts
Posted: Sunday, January 03, 2010 - 11:15 AM UTC

Quoted Text

Bob thanks, thats what I like to tell myself!

Paul here you go:

Tamiya Field Grey XF-65

Tamiya J.A. Grey XF-14

Vallejo Model Colour 70950 Black (I think this is the only black in the Model Colour range?)

Actually I only used Vallejo black as I didn't have any Tamiya black so thats not really so important. Also whilst the Tamiya shades are described as Grey they are infact green.


Thanks Jon,

the reason I asked was because the Tamiya Color references don't look like your pics :

http://www.tamiya.com/english/products/list/acrylic_2.htm

It's good to get the codes

Funny that a color labeled as Grey is actually green !

Thanks again

Paul
Gundam-Mecha
Visit this Community
England - South East, United Kingdom
Joined: August 05, 2009
KitMaker: 1,019 posts
Armorama: 933 posts
Posted: Tuesday, January 05, 2010 - 12:39 AM UTC
Thanks for pointing that out Paul, actually they look quite different than those shades on the reference chart which is strange!

I've heard of people having problems with colour matching Vallejo paints as well sometimes. I always take colour names with a pinch of salt

I got myself a new compressor yesterday, after finally having enough of "making do" with my rickety old Revell compressor (which I believe is a reboxed Sparmax model). I took the plunge and got myself an Iwata Smart Jet Pro and was blown away. I can't imagine how I ever put up with that old compressor now, the Smart Jet is quieter, easier and quicker to setup, has much better air flow and quality, and finally lets me use my airbrush to it's full potential. It's so much easier to do complex small shapes, detail, and camo patterns now.

I should have gotten one a long time ago!

The good news is that I've now been able to finish all the camo (and tidy things up) and am planning to move onto filters next , I'll be sure to post some pictures later.
ppawlak1
Visit this Community
Victoria, Australia
Joined: March 14, 2006
KitMaker: 1,973 posts
Armorama: 1,843 posts
Posted: Tuesday, January 05, 2010 - 04:45 PM UTC

Quoted Text


I got myself a new compressor yesterday, after finally having enough of "making do" with my rickety old Revell compressor (which I believe is a reboxed Sparmax model). I took the plunge and got myself an Iwata Smart Jet Pro and was blown away. I can't imagine how I ever put up with that old compressor now, the Smart Jet is quieter, easier and quicker to setup, has much better air flow and quality, and finally lets me use my airbrush to it's full potential. It's so much easier to do complex small shapes, detail, and camo patterns now.

I should have gotten one a long time ago!


Hey Jon !

I've been watching one of those for a few days on "Evilbay". It's interesting to hear your feedback on this machine.... I have an old ATLANTIS PT350 but I'd love to upgrade to the Smart Jet Pro...

I'll pm you for more details and feedback so I don't highjack your thread.

Looking forward to seeing the Camo.

Cheers

Paul
shopkin4
Visit this Community
Illinois, United States
Joined: March 29, 2009
KitMaker: 1,135 posts
Armorama: 1,030 posts
Posted: Tuesday, January 05, 2010 - 05:27 PM UTC
Me as well. I hate when you build these great Soviet/Russian Beasts. Just makes me wanna build em too but I have too many in the stash. Really looking forward to your work. Also, I was looking for a new compressor as well so I'll message you too
Gundam-Mecha
Visit this Community
England - South East, United Kingdom
Joined: August 05, 2009
KitMaker: 1,019 posts
Armorama: 933 posts
Posted: Thursday, January 07, 2010 - 10:35 AM UTC
Heres a quick update, with the full camo pattern before oils and weathering:


I also got a new Actulite polarised lamp just after christmas and and the difference in lighting while I've been working has been great. The daylight lamp has really helped my painting especially since a lot of my painting is done at night!

Heres a photo that shows the difference in light when the lamp is turned on:


I also got myself Mig Productions FAQ DVD Vol 2 the other day, on modulation style airbrushing. I found it a really interesting watch and was very impressed with the points Adam Wilder covered in the disk. The production values were also excellent and I totally agree with the review here on Armorama.

ppawlak1
Visit this Community
Victoria, Australia
Joined: March 14, 2006
KitMaker: 1,973 posts
Armorama: 1,843 posts
Posted: Thursday, January 07, 2010 - 10:56 AM UTC
That's a great DVD... I have it too...

How did you do the tracks Jon ?

I've just shot mine with Gunze Hobby Colour H076 Metallic Burnt Iron, and I've washed them with Abteilung 502 Wash Brown - I'll see how they look when they're dry.

Cheers

Paul
Gundam-Mecha
Visit this Community
England - South East, United Kingdom
Joined: August 05, 2009
KitMaker: 1,019 posts
Armorama: 933 posts
Posted: Thursday, January 07, 2010 - 11:44 AM UTC
Hi Paul, at the moment I've just given the tracks a coat of Track Primer from Vallejo's Panzer Aces range.

I plan to add oil washes and pigments later along with some graphite etc for a metallic effect.

Actually although I sprayed with Tamiya paints (after running out of Vallejo black I got myself some Tamiya Nato black and went over the black parts again when finishing the patterns off as the shades are quite different) I managed to find Vallejo colours that were a very close match to the main tamiya colours for tidying up via brush painting.

This gave me a chance to tidy up any over spray or fix little problems. I found that Vallejo's Grey Green was a good match to Tamiya JA Grey, and Vallejo's German Field Grey was a close match to Tamiya's Field Grey.
TonyDz
Visit this Community
United States
Joined: December 13, 2009
KitMaker: 420 posts
Armorama: 419 posts
Posted: Thursday, January 07, 2010 - 02:53 PM UTC

Quoted Text

Vallejo Model Colour 70950 Black (I think this is the only black in the Model Colour range?)


No, there is 70862 Black Grey. It might have been a better choice.
kaiserine
Visit this Community
Rhone, France
Joined: April 14, 2008
KitMaker: 383 posts
Armorama: 320 posts
Posted: Thursday, January 07, 2010 - 08:13 PM UTC
Hi Jon,
Very clean paintwork!
Well, I must say that your pics are pretty cool to see.
Great Build log to follow.
This tank is so over loaded with little things and so, it looks like a space ship. Really nice.
Gundam-Mecha
Visit this Community
England - South East, United Kingdom
Joined: August 05, 2009
KitMaker: 1,019 posts
Armorama: 933 posts
Posted: Thursday, January 07, 2010 - 09:56 PM UTC
Thanks Tony, Actually I think your right. Thats why I changed to Nato Black and re did these parts again as per the photo.

The Vallejo Black was a bit too strong, and the Nato Black had a softer slightly grey colour to it that went better with the other shades.

Alexandre, thanks! I hope to do some more work on the building today!
arpikaszabo
Visit this Community
Praha, Czech Republic
Joined: February 13, 2006
KitMaker: 674 posts
Armorama: 637 posts
Posted: Saturday, January 09, 2010 - 03:26 AM UTC
Very nice project, I am building the same tank right now. A small note-dont forget to drill up the machineguns barrel...
Gundam-Mecha
Visit this Community
England - South East, United Kingdom
Joined: August 05, 2009
KitMaker: 1,019 posts
Armorama: 933 posts
Posted: Saturday, January 09, 2010 - 03:57 AM UTC
Thanks Arpad! What do you mean when you say drill up the MG?

Removed by original poster on 01/09/10 - 15:58:10 (GMT).
arpikaszabo
Visit this Community
Praha, Czech Republic
Joined: February 13, 2006
KitMaker: 674 posts
Armorama: 637 posts
Posted: Saturday, January 09, 2010 - 04:52 AM UTC
Hello, sorry for not being clear enough. I meant that you still have a piece of the casting plug on the commanders mg barrel muzzle. You should remove that piece and hollow out the flash suppressor http://www.militaryimages.net/photopost/data/1/NSV-12_7mm_AA_machine_gun.jpg
Gundam-Mecha
Visit this Community
England - South East, United Kingdom
Joined: August 05, 2009
KitMaker: 1,019 posts
Armorama: 933 posts
Posted: Saturday, January 09, 2010 - 05:52 AM UTC
Thanks, yeah I missed that. I'll try and drill the end out but to be honest I don't think I have a drill bit small enough and the resin part is very thin and fragile. I'll look into it.
Gundam-Mecha
Visit this Community
England - South East, United Kingdom
Joined: August 05, 2009
KitMaker: 1,019 posts
Armorama: 933 posts
Posted: Monday, January 11, 2010 - 08:31 AM UTC
Finally managed to get some more pictures done.

I've been working on the tank a lot recently. Giving using oils to add tones, and working on the washes, filters, and weathering as well as working on the tracks. The long drying times in between though have given lots of time to work on the figures (which until recently I hadn't touched much since my last photos of them).

For me the most enjoyable part of diorama building is getting the chance to work on so many different things, armour, figures, scenery, and groundwork. It keeps things varied and interesting.

I've now found myself really enjoying painting these figures. I've been reading a few different books as well, having recently gotten myself Calvin Tan's book on figure painting "Modelling Waffen SS figures." I don't have much interest in the Waffen SS, however the tips and ideas in the book are applicable to any figure painting so it was still an interesting read. It as also interesting comparing the ideas on painting figures with oils (that i've been following in Mark Bannerman's book) to painting with acrylics as Calvin does.

Here's a few quick photos on the progress on the T-90 tracks. These have now be given a few different layers of different pigments to give some depth of colour and show operation in different environments (both dark mud, Europe earth and rubble dust):


Heres my current progress on the figures, they are still very heavily a work in progress but I'm happy with how they are shaping up and it's been a real pleasure painting them:




xsoft_ej
Visit this Community
Guatemala
Joined: March 21, 2009
KitMaker: 18 posts
Armorama: 17 posts
Posted: Monday, January 11, 2010 - 01:47 PM UTC
can't wait to see this figures to be finished, look already very nice... that guy must be freezing...(the 3rd figure)
ppawlak1
Visit this Community
Victoria, Australia
Joined: March 14, 2006
KitMaker: 1,973 posts
Armorama: 1,843 posts
Posted: Monday, January 11, 2010 - 04:37 PM UTC
Good progress Jon !

I just received the DVD "Realistic Model Buildings" by COMPENDIUM FILMS with Marcus Nicholls in the Mail yesterday, and I watched it last night.

It has some great tips on finishing various buildings including a modern one with shell damage to concrete slabs with 'reo' sticking out (he uses solder).

I'm going to use the way he paints brickwork and stucco.. he uses MiniArt buildings in his demo's.

If you don't have it, there are definately some good tips in it... AND its visual

Cheers

Paul

PS: Looking forward to seeing the T-90 picks !
guygantic
Visit this Community
Antwerpen, Belgium
Joined: August 19, 2006
KitMaker: 7,084 posts
Armorama: 970 posts
Posted: Wednesday, January 13, 2010 - 02:55 AM UTC
You are doing a great job on the painting of the figures !
mikey
Visit this Community
Idaho, United States
Joined: March 14, 2006
KitMaker: 229 posts
Armorama: 227 posts
Posted: Wednesday, January 13, 2010 - 04:13 AM UTC
Excellent work Jon. Did you do the airbrush the camo freehand or did you do some masking? Your figures are coming to life! I especially like the one of the Russian soldier who is sitting turned to the side with his arm out for support. His cheeks look cold, just like when you have been outside and the same thing happens to you! Great work.
razorboy
Visit this Community
Virginia, United States
Joined: October 14, 2007
KitMaker: 317 posts
Armorama: 307 posts
Posted: Wednesday, January 13, 2010 - 09:16 PM UTC
Well done Jon, Well done indeed! Can't wait to see the figures with the tank, awesome job mate.
rb