Campaigns
Where Armorama group builds can be discussed, organized, and updates posted.
Where Armorama group builds can be discussed, organized, and updates posted.
Hosted by Darren Baker, Richard S.
Sherman Campaign

JokerNinjay

Joined: August 26, 2010
KitMaker: 125 posts
Armorama: 112 posts

Posted: Wednesday, September 01, 2010 - 03:58 PM UTC
Hi, I'm Jay nice to meet you all I'll be in this campaign as soon as my Dragon M4A3 Sherman 105mm HVS comes in the mail I'm quite excited so I hope I'll make a few friends and alot of critics lol. So just message me about anything and I'mm all ears for any advice you would have for me.

ppawlak1

Joined: March 14, 2006
KitMaker: 1,973 posts
Armorama: 1,843 posts

Posted: Wednesday, September 01, 2010 - 04:02 PM UTC
Quoted Text
Hi, I'm Jay nice to meet you all I'll be in this campaign as soon as my Dragon M4A3 Sherman 105mm HVS comes in the mail I'm quite excited so I hope I'll make a few friends and alot of critics lol. So just message me about anything and I'mm all ears for any advice you would have for me.
Welcome Jay

When the Shermie arrives make sure you let us know what you have planned for it.
What paints do you plan on using ? Do you have an airbrush ?
Cheers
Paul

JokerNinjay

Joined: August 26, 2010
KitMaker: 125 posts
Armorama: 112 posts

Posted: Wednesday, September 01, 2010 - 05:53 PM UTC
Ok pretty much my plans for it should have it ending up in a display case somewhere as my first sherman let alone my first 1/35 tank and to get experience from it and most of all enjoy myself while working on it. For the colors I was thinking Tamiya and was wanting to ask some people on their ideas on the color of green I should use for it from anyone who has done a sherman in the past and had it turn out to the right color they wanted. Of course I'm going to want it to appeal to me and just wanted to see how the colors looked on a Sherman in general. So whoever has pictures I can look at feel free to private message me. I'm going to either use my dry mud from mig or go with a mix of dry and wet mud on the tracks and the tank. As for the airbrush yes I've got one I have a part for it on the way since just recently it started to continuasly spray and found out the O ring was gouged up a little bit. So now I'm just waiting for the mailman who seems to be taking his time even though it hasn't been long since I've ordered it, I'm sure you guys know this feeling lol. Well thanks for everything and talk with you later 


vonHengest

Joined: June 29, 2010
KitMaker: 5,854 posts
Armorama: 4,817 posts

Posted: Wednesday, September 01, 2010 - 07:09 PM UTC
Jay: I'm pretty much in the same boat as you. Looks like we'll both be learning a lot from this campaign 
Guys, I'm not sure what to build for this campaign. Here is a list of options for me, let me know what you all think:
(all 1/35)
Tasca M4A1 Direct Vision
Tasca M4A1 Mid Prod
Tasca Sherman II Direct Vision (El Alamein)
Dragon M4A2 Late PTO
Dragon M4A3 (76) W
Dragon M4A3 HVSS POA-CWS-H5 Flamethrower
Tasca Firefly Vc

mopnglo

Joined: January 07, 2006
KitMaker: 452 posts
Armorama: 271 posts

Posted: Wednesday, September 01, 2010 - 07:14 PM UTC
Jeremy, if you don't mind me being selfish, I have both the Tasca M4A1 Mid-production and Tasca Firefly Vc in my stash, so I wouldn't mind to get your thoughts on either kit. I have plans for the M4A1 for a future build, but I'm still collecting the AM pieces I need. Hopefully I can make that my second build for this campaign.

vonHengest

Joined: June 29, 2010
KitMaker: 5,854 posts
Armorama: 4,817 posts

Posted: Wednesday, September 01, 2010 - 07:31 PM UTC
They are both beautiful kits and well engineered, and they shouldn't need to much extra work oob. If they weren't so pricey, I wouldn't mind adding some more to my stash. I would encourage you to build both of them if you have the time  Just out of curiosity, what extras are you planning to ad to your M4A1 build?
 Just out of curiosity, what extras are you planning to ad to your M4A1 build?
mopnglo

Joined: January 07, 2006
KitMaker: 452 posts
Armorama: 271 posts

Posted: Wednesday, September 01, 2010 - 07:37 PM UTC
I really want to build "Hang It N". I just need some figures and decals to finish off the AM. I'm planning to use the Monroe Perdu umbrella kit, which is a bit oversized, but should work well enough. I'm looking forward to it, but I have two campaigns ahead of it, so it will be early 2011 before I start.

JokerNinjay

Joined: August 26, 2010
KitMaker: 125 posts
Armorama: 112 posts

Posted: Wednesday, September 01, 2010 - 07:53 PM UTC
Ahh well then allright lol. Hopefully you and I can grow together on this and other future models just keep in touch and I'll let you know when I get my model in. To keep track of you I'll send you a message for if there's a friends list I am not aware of it. Nice to meet you and talk to you later 


mopnglo

Joined: January 07, 2006
KitMaker: 452 posts
Armorama: 271 posts

Posted: Wednesday, September 01, 2010 - 07:58 PM UTC
Hi, Jay! We're all friends! Just post your questions and photos of your builds. This is a great community and I'm sure you'll get some good advice. I've really benefitted from the advice and suggestions of other members. Being an Armorama member rocks!

shopkin4

Joined: March 29, 2009
KitMaker: 1,135 posts
Armorama: 1,030 posts

Posted: Wednesday, September 01, 2010 - 08:03 PM UTC
Just joined and started my first Sherman ever tonight with Tasca's new M4A3 76 (W)
Questions though: Can anyone point me to some reference photos that show the locations of all the foundry marks on the M4A3 76 (W)? I feel like there are some missing, like on the transmission cover and turret.
Very excited to finish this kit because it just melts together.
Questions though: Can anyone point me to some reference photos that show the locations of all the foundry marks on the M4A3 76 (W)? I feel like there are some missing, like on the transmission cover and turret.
Very excited to finish this kit because it just melts together.

vonHengest

Joined: June 29, 2010
KitMaker: 5,854 posts
Armorama: 4,817 posts

Posted: Wednesday, September 01, 2010 - 08:42 PM UTC
Quoted Text
I really want to build "Hang It N". I just need some figures and decals to finish off the AM. I'm planning to use the Monroe Perdu umbrella kit, which is a bit oversized, but should work well enough. I'm looking forward to it, but I have two campaigns ahead of it, so it will be early 2011 before I start.
Excellent choice, and no rush on the build, this campaign is going strong for a whole year mate

Quoted Text
Ahh well then allright lol. Hopefully you and I can grow together on this and other future models just keep in touch and I'll let you know when I get my model in. To keep track of you I'll send you a message for if there's a friends list I am not aware of it. Nice to meet you and talk to you later
Sounds good, and there's no friends list on here, but you can subscribe to threads that you like and receive notices via your email. And as Michael said, we're all one big family here, best site you could join!

And I've noted your vote on the M4A3 Flamethrower
Quoted Text
Just joined and started my first Sherman ever tonight with Tasca's new M4A3 76 (W)
Questions though: Can anyone point me to some reference photos that show the locations of all the foundry marks on the M4A3 76 (W)? I feel like there are some missing, like on the transmission cover and turret.
Very excited to finish this kit because it just melts together.
I've been wondering the same thing about the foundry marks on the transmission cover while researching the M4A3E8. Most of these tanks that are in or on museum grounds seem to be lacking any kind of foundry marks, however the M4A3 itself does have the foundry marks, so I'm not sure what to think yet. My guess is that a clean transmission cover would be correct in both of our cases. As for the turret, are there no foundry marks on the one supplied in the kit?

HONEYCUT

Joined: May 07, 2003
KitMaker: 4,002 posts
Armorama: 2,947 posts

Posted: Wednesday, September 01, 2010 - 09:26 PM UTC
Quoted Text
Questions though: Can anyone point me to some reference photos that show the locations of all the foundry marks on the M4A3 76 (W)? I feel like there are some missing, like on the transmission cover and turret.
Hey Sean there ARE definitely markings on the transmission cover. The late 'sharp nosed' cover has the markings on the centre of the underside. I posted on your new thread a link for you...
Michael, my thoughts on the Tasca M4a1 mid production are as follows.
Super fit of components, some nice innovations but some of the smaller parts are easy to break as the plastic is quite brittle?
Something else to know is that Tasca has included a rivetted hull as per their early M4A1 release. The 'early' M4A1 accurately represented a Pressed Steel Car hull (the foundry) which had the rivetted hull and angle bottom plate on the hull rear below the engine doors. Problem here is that they did a limited production run of only a few hundred so therefore the majority of earlies used were different to the kit.
Now this is exacerbated for the mid or later production M4a1s which were welded hulls. Tasca calls for us to carefully remove the rivets to realise a welded hull, but only problem is that that angle bottom plate as mentioned earlier should be a rounded style as I believe all welded hulls had. Therefore this will require some putty and carving or some plastic tubing cut and fitted. I have done this successfully although it can be a little fiddly. I went the putty option and carefully smoothed and sanded back.
Just an example of Tasca doing an accurate and excellent job, but unfortunately producing a minor hull version. Wouldn't be a problem if they included 2 rear hull tubs, as I'm sure having the rivets present to remove is a better option than there being none and having to add them if wanted!
Brad
Posted: Thursday, September 02, 2010 - 12:56 AM UTC
Quoted Text
Jesper your doing the same kit as me but mine is the reboxed Revell kit. As for the calliopies having some sandbag fitted they did in the 12th armour DIV,I,ve got some photos from the Concord Sherman Funnies book and an ospreay book by steven Zaloga if you like I,ll PM them to you
That would be a great help, Keith. Thanks a lot.
Martin, thanks for the pictures. Seems like I will be bending a lot of fine wiring

Posted: Thursday, September 02, 2010 - 01:15 AM UTC
Sean,
The later "sharpened beak" trannies that I have seen have markings on the underside. Here is an old Italeri one I detailed based on a now-lost pic of some real ones.

The numbers are a tad overscale, but I didn't have my mitts on the very nice Archer decal sheet at that time...
Tom
The later "sharpened beak" trannies that I have seen have markings on the underside. Here is an old Italeri one I detailed based on a now-lost pic of some real ones.

The numbers are a tad overscale, but I didn't have my mitts on the very nice Archer decal sheet at that time...
Tom
Rambo44

Joined: November 27, 2008
KitMaker: 55 posts
Armorama: 54 posts

Posted: Thursday, September 02, 2010 - 07:50 AM UTC
Ok...hopefully I'll post in the right spot this time.So the first part of this post is basically a rewrite of the one posted in the wrong thread plus some updates.
So here's what I've been working on for the Sherman campaign.

-Tamiya M4A3 Sherman 75mm/w VVSS
-Aber Sherman Super detail set
-Aber U.S. Antenae set
-Friuli type 54 E metal tracks
-JB Model brass M2 barrel and PE set
-JB Model aluminum 75mm tank barrel
Please note that this is a rebuild so to start off the entire kit was stripped,patched up and all unwanted molded details removed.Athis point I also swapped out the commander's cupola.
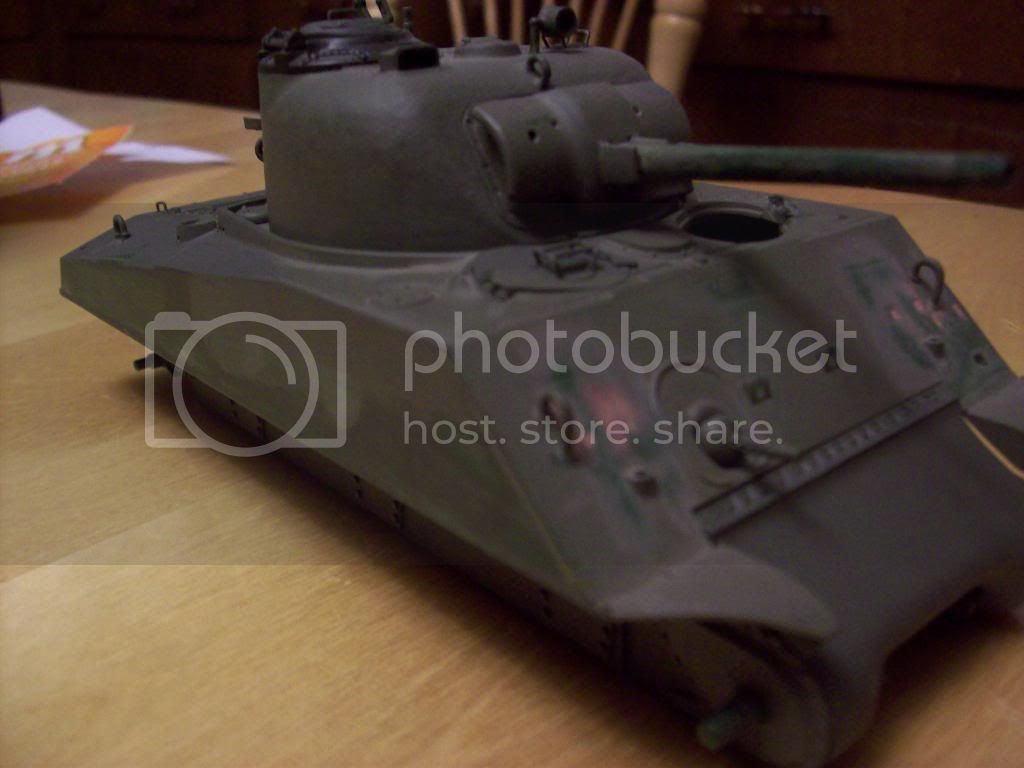
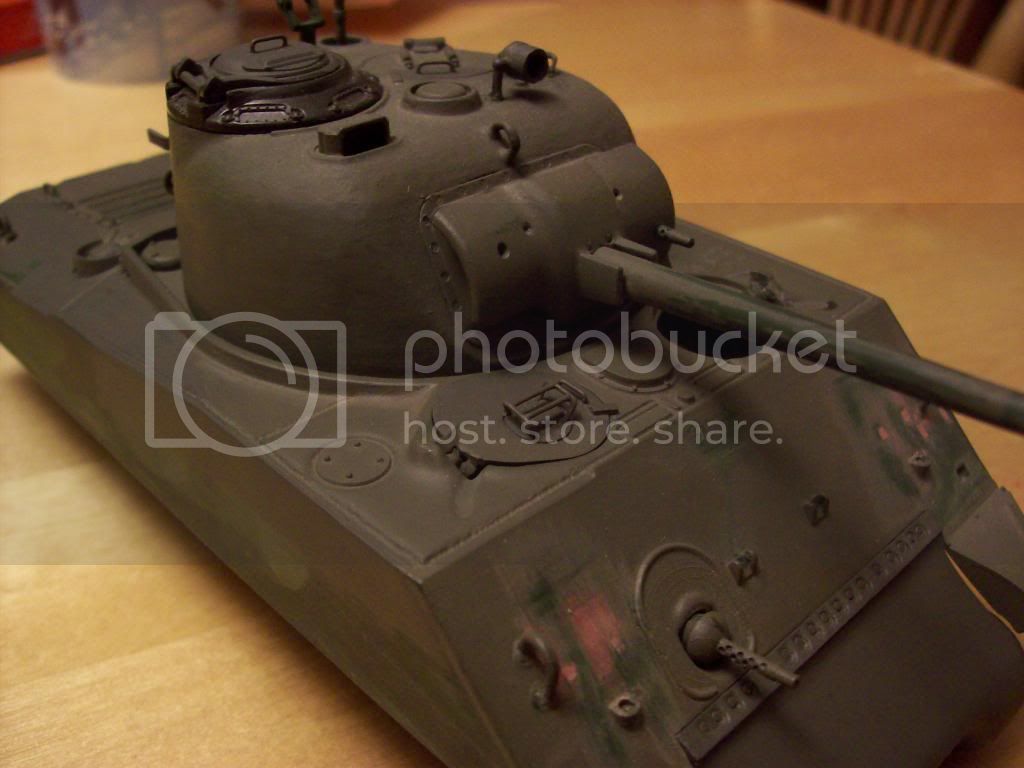
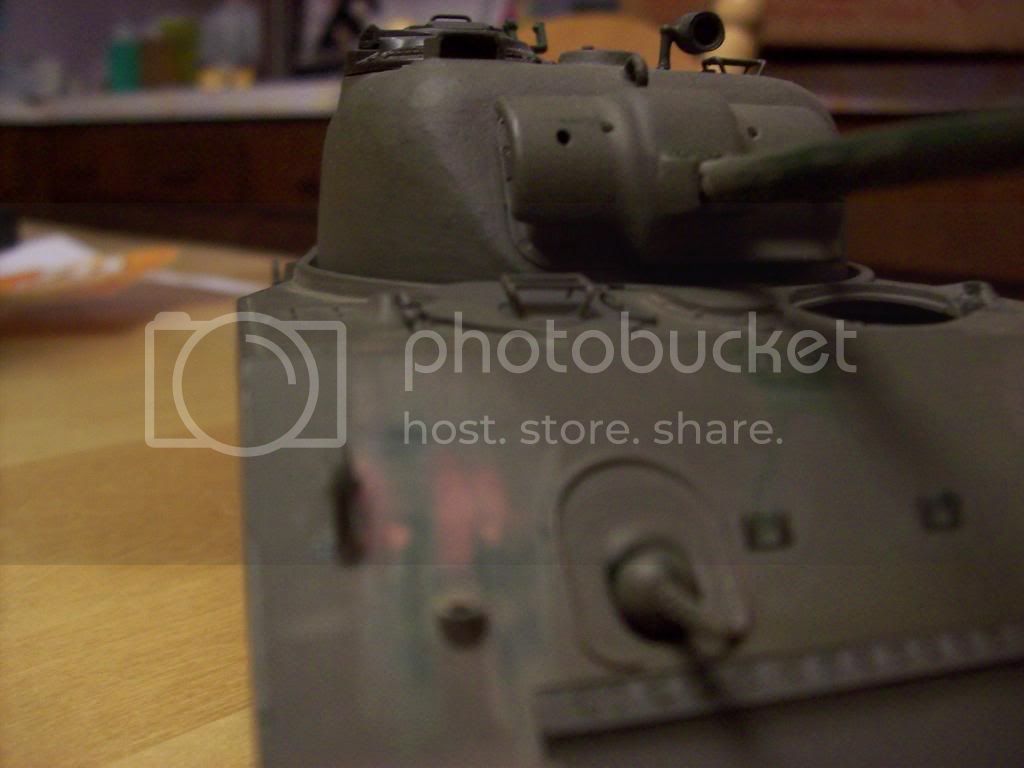

I then added the sponsons,weld seams,periscope guards built out of brass rod.


I also drilled out the drain holes at all the fuel refill ports,replaced all molded handles with brass rod.
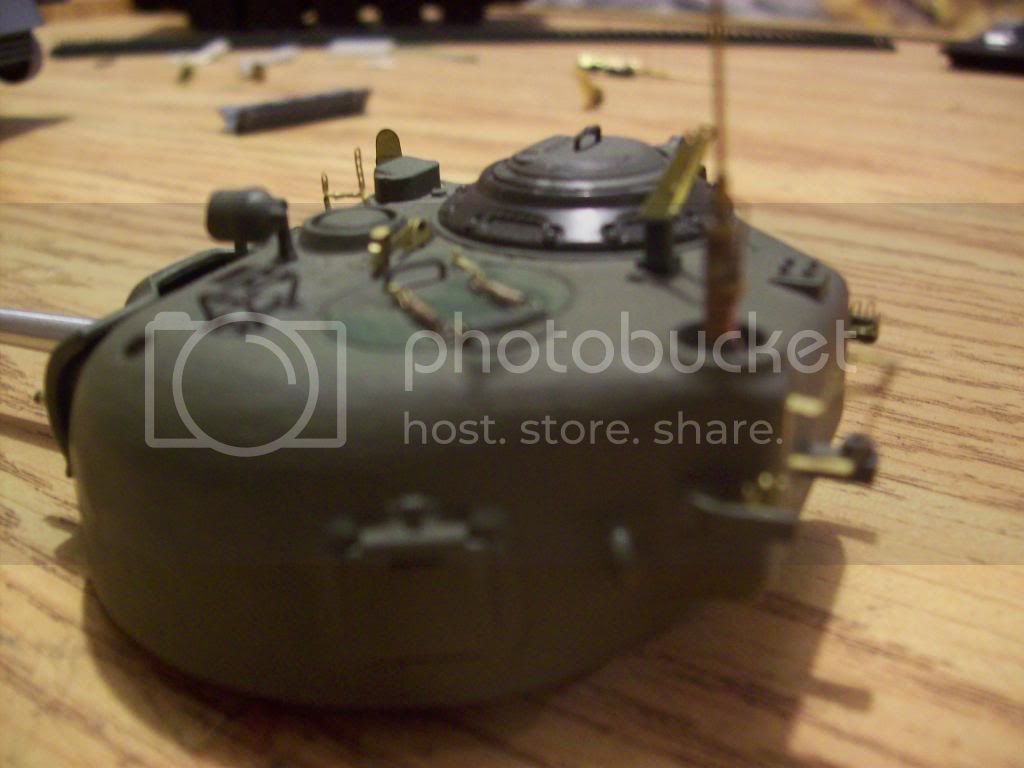
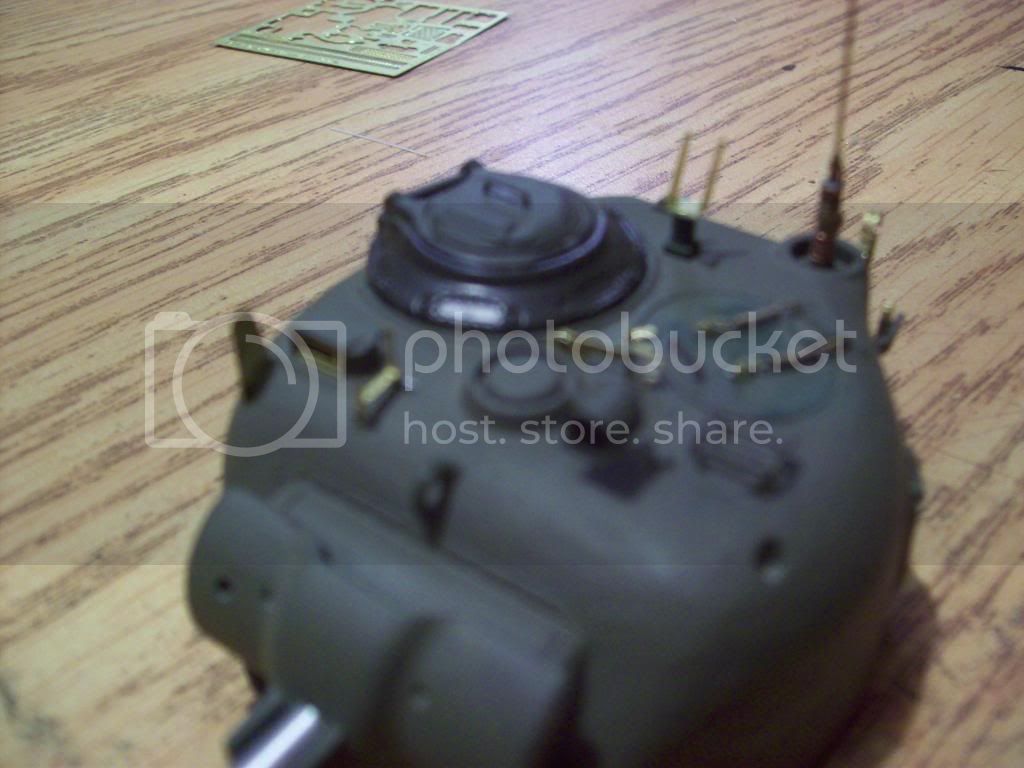
Then came the extensive photo etch.What an amazing set by Aber.I had used PE before but not to this extent and my soldering skills are still only in their infancy, but I think things came out ok...


 http://i387.photobucket.com/albums/oo318/rambo44_photos/shermancampaign032.jpg" BORDER="0">
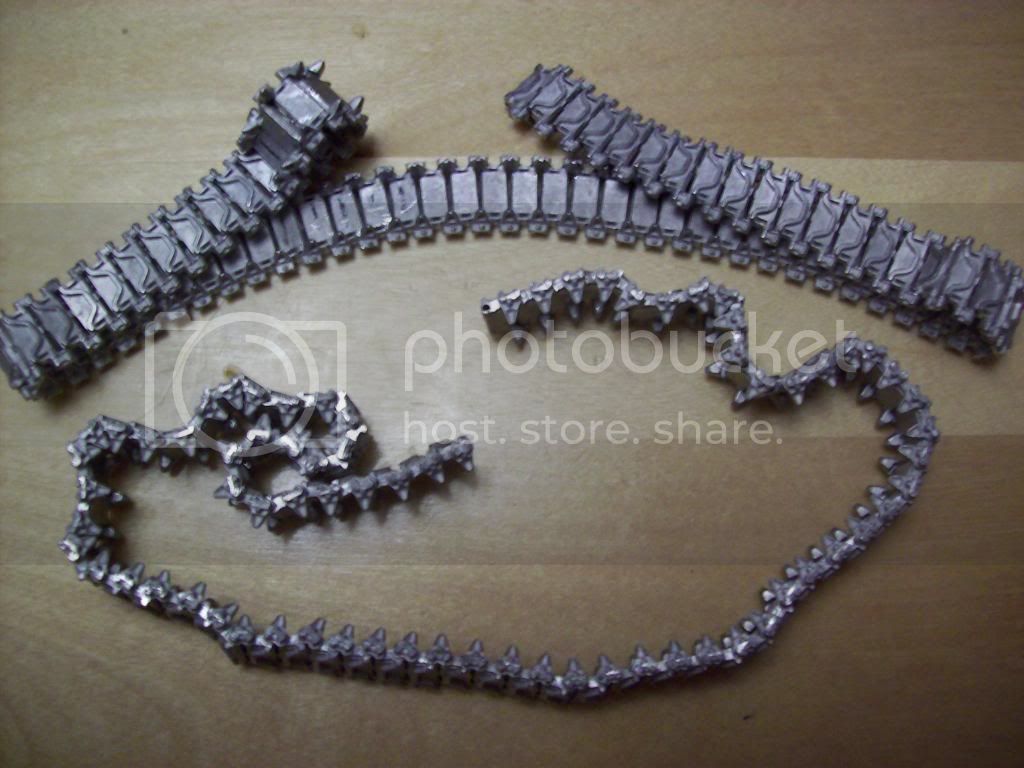
Then came the wonderful Friuli tracks.A lot of work,but well worth the effort if you ask me...
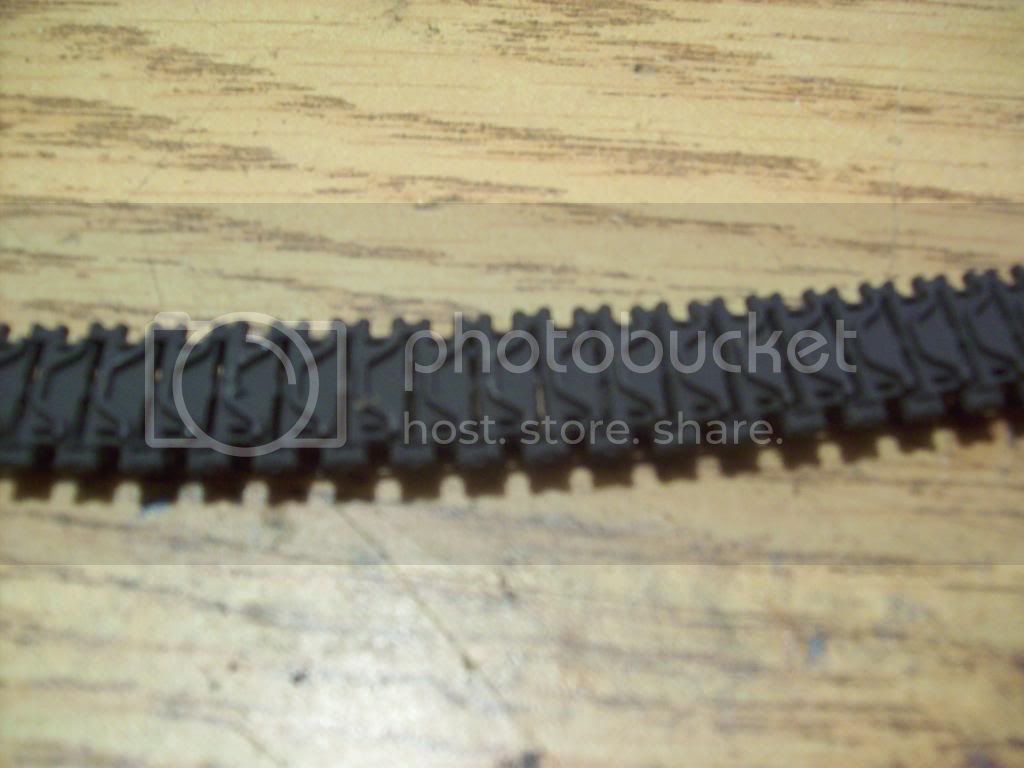
...then in their base color of XF-69 Nato Black and XF-52 Flat Earth mixed at about a 60/40 ratio.
Here are the bogeys;modified and primered.


And here is the most time consuming part to build...the rear bustle rack, and it is completely operable(foldable)


...I have a short video of it being folded and reopened but I'm not sure how to post a video in a thread.
The hull is done and primered, ready for pre shading(undertoning).I scratchbuilt the tow cable ends using aluminum tubing,the tips of the tow cable off an M113,and the cable itself is from a picture hanging kit I bought a my local Dollar Store...


Last but not least...a couple of mock up shots along the build process...


As always,comments and criticism are welcome.Prgress updates to come soon,thanks,
Ron.
So here's what I've been working on for the Sherman campaign.

-Tamiya M4A3 Sherman 75mm/w VVSS
-Aber Sherman Super detail set
-Aber U.S. Antenae set
-Friuli type 54 E metal tracks
-JB Model brass M2 barrel and PE set
-JB Model aluminum 75mm tank barrel
Please note that this is a rebuild so to start off the entire kit was stripped,patched up and all unwanted molded details removed.Athis point I also swapped out the commander's cupola.


I then added the sponsons,weld seams,periscope guards built out of brass rod.


I also drilled out the drain holes at all the fuel refill ports,replaced all molded handles with brass rod.
Then came the extensive photo etch.What an amazing set by Aber.I had used PE before but not to this extent and my soldering skills are still only in their infancy, but I think things came out ok...


Then came the wonderful Friuli tracks.A lot of work,but well worth the effort if you ask me...

...then in their base color of XF-69 Nato Black and XF-52 Flat Earth mixed at about a 60/40 ratio.

Here are the bogeys;modified and primered.


And here is the most time consuming part to build...the rear bustle rack, and it is completely operable(foldable)


...I have a short video of it being folded and reopened but I'm not sure how to post a video in a thread.
The hull is done and primered, ready for pre shading(undertoning).I scratchbuilt the tow cable ends using aluminum tubing,the tips of the tow cable off an M113,and the cable itself is from a picture hanging kit I bought a my local Dollar Store...


Last but not least...a couple of mock up shots along the build process...


As always,comments and criticism are welcome.Prgress updates to come soon,thanks,
Ron.

vonHengest

Joined: June 29, 2010
KitMaker: 5,854 posts
Armorama: 4,817 posts

Posted: Thursday, September 02, 2010 - 02:21 PM UTC
Ron: I'm going to have to rethink my decision to let go of my Tamiya M4A3 after seeing your progress so far.
cdharwins

Joined: October 28, 2006
KitMaker: 491 posts
Armorama: 462 posts

Posted: Thursday, September 02, 2010 - 02:27 PM UTC
Looking good Ron. Nice job on all that PE and I like the tow cable. There's alot of great work going on here!
Chris
Chris
MVisser

Joined: December 14, 2006
KitMaker: 2,679 posts
Armorama: 313 posts

Posted: Saturday, September 04, 2010 - 09:24 PM UTC
Great work all
some progress on my dragon Normandy M4
stowage is from legend, the hedgerow cutter is form calibre 35 and the figure is a modified verlinden.


Martin
some progress on my dragon Normandy M4
stowage is from legend, the hedgerow cutter is form calibre 35 and the figure is a modified verlinden.


Martin
Posted: Saturday, September 04, 2010 - 11:18 PM UTC
Hi Guys,
Lots of terrific work going on here, excellent range of Shermans.
Al
Lots of terrific work going on here, excellent range of Shermans.
Al

AgentG

Joined: December 21, 2008
KitMaker: 1,109 posts
Armorama: 1,095 posts

Posted: Sunday, September 05, 2010 - 09:51 AM UTC
Incredible skills are being displayed here!
With that in mind I post my mediocre scratchbuilding.
Tamiya's old M4A3 fit my plan perfectly. A few updates and with all the add ons peculiar to Marine Shermans the innacuracies will not be noticed. Besides the price was right!
One issue was there are no aftermarket wading trunks for the A3 rear. So I made my own.


The trunking over intake grills was usually taken off completely to aid cooling in the tropics. Chicken wire and sandbags cover the deck. I'll be using bridal veil and Apoxie Sculpt bags.
The exhaust trunking was left on adding some degree of protection to the rear.
So far so good.
G
With that in mind I post my mediocre scratchbuilding.
Tamiya's old M4A3 fit my plan perfectly. A few updates and with all the add ons peculiar to Marine Shermans the innacuracies will not be noticed. Besides the price was right!
One issue was there are no aftermarket wading trunks for the A3 rear. So I made my own.


The trunking over intake grills was usually taken off completely to aid cooling in the tropics. Chicken wire and sandbags cover the deck. I'll be using bridal veil and Apoxie Sculpt bags.
The exhaust trunking was left on adding some degree of protection to the rear.
So far so good.
G

canuck100a

Joined: September 13, 2005
KitMaker: 96 posts
Armorama: 96 posts

Posted: Sunday, September 05, 2010 - 09:59 AM UTC
Hi Folks,
Made a little more headway on the firefly. I tossed my first attempt at the springs for the hull hatch covers, these seem a little closer to scale. The RB metal barrel went together nicely and I have to say that i will be using thier barrels more often. I have replaced the inset weld lines on the tank with styrene rod and streched sprue.
Next step is to find if the Firefly's of the Canadian GGHG had the add on hull armour, and the storage box on th turrent rear. Will have to try and source some track for the hull and turrent side.


Eric
Made a little more headway on the firefly. I tossed my first attempt at the springs for the hull hatch covers, these seem a little closer to scale. The RB metal barrel went together nicely and I have to say that i will be using thier barrels more often. I have replaced the inset weld lines on the tank with styrene rod and streched sprue.
Next step is to find if the Firefly's of the Canadian GGHG had the add on hull armour, and the storage box on th turrent rear. Will have to try and source some track for the hull and turrent side.


Eric

ppawlak1

Joined: March 14, 2006
KitMaker: 1,973 posts
Armorama: 1,843 posts

Posted: Sunday, September 05, 2010 - 12:43 PM UTC
Great work everyone.
We have had a death in the family and I need to make all the relevant arrangements. So I won't be 'around' for a little while.
Keep up the good work.
We have had a death in the family and I need to make all the relevant arrangements. So I won't be 'around' for a little while.
Keep up the good work.
MichaelSatin

Joined: January 19, 2008
KitMaker: 3,909 posts
Armorama: 510 posts

Posted: Sunday, September 05, 2010 - 01:11 PM UTC
Paul,
My sincere condolonces and best wishes to you and your family.
Michael
My sincere condolonces and best wishes to you and your family.
Michael
MichaelSatin

Joined: January 19, 2008
KitMaker: 3,909 posts
Armorama: 510 posts

Posted: Sunday, September 05, 2010 - 01:15 PM UTC
I have a Sherman question which seems logical to ask here. I know many of you have built or are building one of the excellent Tasca Sherman variants. As far as I can tell, they all have in common parts D8, the tow rings. Has anyone here managed to get one of those suckers on the kit without breaking them? 'Cause I sure haven't! I can't even trim the stubs to make for a bigger gap without breaking them in two! 
Any advice, as always, is appreciated!
Michael

Any advice, as always, is appreciated!
Michael
thebear

Joined: November 15, 2002
KitMaker: 3,960 posts
Armorama: 3,579 posts

Posted: Sunday, September 05, 2010 - 02:32 PM UTC
First off .... Paul ..My condolenses to you and your family . Take all the time you need ...Family first!! We'll hold down the fort for you...
Micheal... I just tried to put those suckers on yesterday ...Got two on(removed the plastic knobs) and broke two...
And to the rest of you ...great stuff guys ..!!
I'm just finishing up the build...Should start painting some time this week!
Micheal... I just tried to put those suckers on yesterday ...Got two on(removed the plastic knobs) and broke two...
And to the rest of you ...great stuff guys ..!!
I'm just finishing up the build...Should start painting some time this week!
 |


