Campaigns
Where Armorama group builds can be discussed, organized, and updates posted.
Sherman Campaign
Dangeroo
#023
Visit this Community
Zurich, Switzerland
Joined: March 13, 2009
KitMaker: 2,058 posts
Armorama: 1,656 posts
Posted: Sunday, September 12, 2010 - 07:59 PM UTC
Wayne and David, great looking Shermies you've got there. They both sure make for a different looking Sherman.

As for my build, it's on hold right now to get my Drydocked and 1/48 scale builds forward. But there's a lot of time left here, right?

Cheers!
Stefan
AgentG
Visit this Community
Nevada, United States
Joined: December 21, 2008
KitMaker: 1,109 posts
Armorama: 1,095 posts
Posted: Monday, September 13, 2010 - 03:21 AM UTC
Thanks all!

Jim some did, some didn't, they were all different at different times. They were welded top and bottom by the "cleat" molded on the road side of the track link. This allowed them to be easily removed for use if necessary and didn't deform the smooth area where the road wheels made contact.

That's CAIRO, I have some good shots of her. I will be modelling "Doris" and have found several photos of her. No two show the same configuration, and that's just on Iwo during the six weeks she was there.

What fun eh? You almost cannot go wrong.

G
barkingdigger
Staff MemberAssociate Editor
ARMORAMA
#013
Visit this Community
England - East Anglia, United Kingdom
Joined: June 20, 2008
KitMaker: 3,981 posts
Armorama: 3,403 posts
Posted: Monday, September 13, 2010 - 06:58 AM UTC
Wow! Some great stuff being posted. David, that Bolster is excellent. And G-man your build is beautiful.

My own work is a bit slow at the moment, and it might be the weekend before I can post any real progress. Oh, well...

Tom
AgentG
Visit this Community
Nevada, United States
Joined: December 21, 2008
KitMaker: 1,109 posts
Armorama: 1,095 posts
Posted: Monday, September 13, 2010 - 08:49 AM UTC
Thanks Tom. I hear ya about the lack of bench time. I usually work 4, 10 hour days but the last two weeks saw 5, 12's and several call outs as well. I'm working on my day off tomorrow (my wedding anniversary) but get Wednesday off instead. Looks like Mrs G gets taken to dinner twice for our anniversary .

G
PvtMutt
Visit this Community
Missouri, United States
Joined: July 01, 2006
KitMaker: 614 posts
Armorama: 601 posts
Posted: Monday, September 13, 2010 - 09:30 AM UTC
Howdy Folks
Not a lot to brag about but I got the storage boxes built and at least wired the tail lights on the M7.


It's about time real life gave me a break so I can have some fun.
Tony the Mutt
AgentG
Visit this Community
Nevada, United States
Joined: December 21, 2008
KitMaker: 1,109 posts
Armorama: 1,095 posts
Posted: Monday, September 13, 2010 - 01:47 PM UTC
Tony I'm loving that brass!

Here's where I'm at as of today. Thanks to Vallejo and that hot Nevada sunshine I'm getting some work done.


G
PvtMutt
Visit this Community
Missouri, United States
Joined: July 01, 2006
KitMaker: 614 posts
Armorama: 601 posts
Posted: Monday, September 13, 2010 - 02:34 PM UTC
My Goodness WOW G-Man was that for real??????

Tony the Mutt
littlebear573
#016
Visit this Community
England - East Anglia, United Kingdom
Joined: March 18, 2009
KitMaker: 142 posts
Armorama: 138 posts
Posted: Tuesday, September 14, 2010 - 11:03 AM UTC
looking really good G like the camo
thebear
Visit this Community
Quebec, Canada
Joined: November 15, 2002
KitMaker: 3,960 posts
Armorama: 3,579 posts
Posted: Tuesday, September 14, 2010 - 11:21 AM UTC
Two thumbs up G !

Mutt ..that priest is sure coming along ...great PE work..
ppawlak1
Visit this Community
Victoria, Australia
Joined: March 14, 2006
KitMaker: 1,973 posts
Armorama: 1,843 posts
Posted: Tuesday, September 14, 2010 - 04:26 PM UTC
G'day guys, I'm back on deck and I must say the progress and quality of the builds here is simply outstanding !!

This must be the best Canpaign EVER

More modellers are enlisting as we get deeper into these projects

@ Ron - nice work on the PE and the fruilmodel tracks.

@ Martin - that M4 and figure looks brilliant. I love the figure's pose and the stowage on the engine deck - great work !!

@ Wayne - the scratch work on the wading trunks has come up a treat ! The chicken wire, the side armor, sandbags, Camo, everything !
I'm really hanging out for the weathering and final touches !!

@ Eric - the Vc is coming along nicely. Good work on those hatches.

@ Rich - that's some heavy duty clamping on those bogies !

@ Jim - nicely done scratch work on the Baldwin, the welds etc on the pot and Mg port look like they're OOTB ! NICE !

@ John - thanks for the link to your M1A1 build, I've subscribed

@ Brad - those small touches you add to your builds always make a great build ---> Brilliant !
Love the jacket on the engine deck !

@ Ed - I really like the color variation on the inside of ther M7, Keep up the great work.

@ David - excellent work on the Bolster - we have some fantastic variation in this Campaign. Another reason to love the Shermie !!

@ Tony - first class PE work there mate. I wish my PE tool boxes, etc, came out like that !!

Thanks for you kind words guys, it's been a 'trying' last 2 weeks.

Cheers and once again outstanding work !!

Paul


vonHengest
Visit this Community
Texas, United States
Joined: June 29, 2010
KitMaker: 5,854 posts
Armorama: 4,817 posts
Posted: Tuesday, September 14, 2010 - 07:13 PM UTC
Glad to have you back with us Paul

Has anyone submitted a BARV or Ram II Badger flamethrower build yet?
Rebilda
#057
Visit this Community
Bayern, Germany
Joined: May 11, 2010
KitMaker: 248 posts
Armorama: 119 posts
Posted: Tuesday, September 14, 2010 - 07:27 PM UTC
Hi guys, long time no see.

My sincere condolences, Paul. Hope you found strength in your family and will be draged along with us in our joygiving hobby...

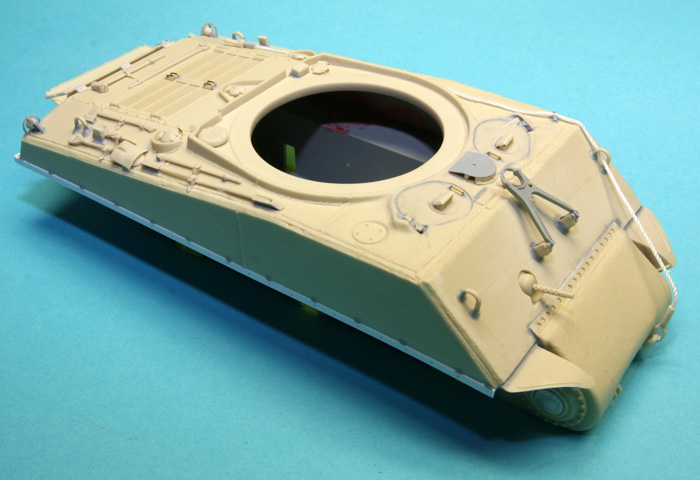
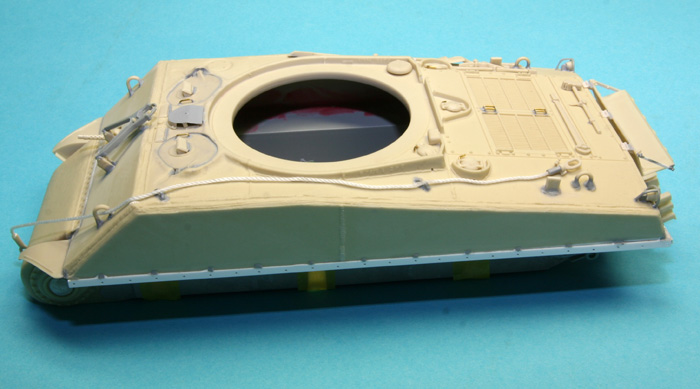
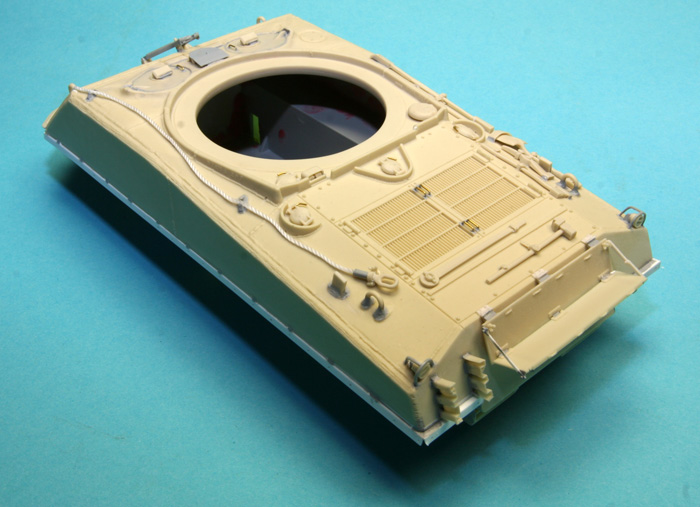
Here a few pics of were i am right now, main body's done. Must say it's been a lot more work than i anticipated but much simpler than feared:


Most of the joints were smoothed in with Mr. Surfacer, the light guards are heavily thinned out dragon spares. And no, there are no periscope guards, I'm still struggling with producing straight grabhandles!

Any oversights? Please, tell me. I'd love to shoot some primer this evening.

Now on to the turret...


Rebilda
#057
Visit this Community
Bayern, Germany
Joined: May 11, 2010
KitMaker: 248 posts
Armorama: 119 posts
Posted: Tuesday, September 14, 2010 - 07:35 PM UTC
Oh, i forgot: hatches are NOT smoothed flush with the hull! The gaps just looked overscale so I deepened them a little so they are still able to hold a generous wash.
The sand shield rails are scratched with evergreen L-beams, thansk so much for the tip, stefan!!!
HONEYCUT
Visit this Community
Victoria, Australia
Joined: May 07, 2003
KitMaker: 4,002 posts
Armorama: 2,947 posts
Posted: Tuesday, September 14, 2010 - 09:53 PM UTC
Hey Leo
You're flying here mate!
A couple of things to ponder...
The cable clamp on the rear deck, should it be further back and square with the hull side?
Do you know if there is to be a foul weather attachment strip around the bow .30cal?
Looking lovely...
Brad
Rebilda
#057
Visit this Community
Bayern, Germany
Joined: May 11, 2010
KitMaker: 248 posts
Armorama: 119 posts
Posted: Tuesday, September 14, 2010 - 11:15 PM UTC
Woah, good one, Brad. Might have a Tasca FWC-attachment somewhere..

Not shure about the cable clamp, though. Weren't they rearranged in the field sometimes or even put a little ascew in the factory? I'm asking because (no idea where) I thought i'd seen some pics with the clamps in different positions and angles.

Thanks for the comemnts and kind words
AgentG
Visit this Community
Nevada, United States
Joined: December 21, 2008
KitMaker: 1,109 posts
Armorama: 1,095 posts
Posted: Wednesday, September 15, 2010 - 05:11 AM UTC
Good to hear from you Paul, you and yours have been in my thoughts and prayers.

Tony - Yes this was for real! References say forest green, brick red, tan, and black. All were different as it was reportedly painted by the crew with 4" brushes.

This just goes to prove my point. We strive for "accuracy" and take our time with spectacular finishes, yet the real thing, all 35 tons, was painted by a p!$$ed off private with a paint brush.

G
PvtMutt
Visit this Community
Missouri, United States
Joined: July 01, 2006
KitMaker: 614 posts
Armorama: 601 posts
Posted: Wednesday, September 15, 2010 - 07:01 AM UTC
Been there done that as they say. When I only had a couple weeks left in Nam they had me painting equipment too.

Put grease on the glass,head and tail lights,taped over the numbers and spray painted everything even the tires.

War is hell
Tony Lee
AgentG
Visit this Community
Nevada, United States
Joined: December 21, 2008
KitMaker: 1,109 posts
Armorama: 1,095 posts
Posted: Wednesday, September 15, 2010 - 07:51 AM UTC
We pretty much had nothing left on the ground by the time I got there. When we came back though we spent a week washing and waxing 2 1/2 tonners!

G
vonHengest
Visit this Community
Texas, United States
Joined: June 29, 2010
KitMaker: 5,854 posts
Armorama: 4,817 posts
Posted: Wednesday, September 15, 2010 - 06:42 PM UTC
Wow, that says a lot
PvtMutt
Visit this Community
Missouri, United States
Joined: July 01, 2006
KitMaker: 614 posts
Armorama: 601 posts
Posted: Thursday, September 16, 2010 - 01:40 PM UTC
The bright lights made my three shades of OD seem like wasted time but in RL it's just fine to me.


Got Paint
Tony the Mutt
opsguy
Visit this Community
Pennsylvania, United States
Joined: April 18, 2010
KitMaker: 55 posts
Armorama: 54 posts
Posted: Thursday, September 16, 2010 - 03:48 PM UTC
Excellent work all!

Progress is slow but steady with the Tasca A1 Mid. I'm down to the "fiddly bits" which are very time consuming. The turret and commander are all that is left to complete before paint and weathering...

casting-number

This is the NICEST Ma Deuce EVER.

ma-deuce1

Rich
opsguy
Visit this Community
Pennsylvania, United States
Joined: April 18, 2010
KitMaker: 55 posts
Armorama: 54 posts
Posted: Thursday, September 16, 2010 - 04:03 PM UTC
I do have one question for the group...

I'm using the box tracks from Tasca. There are some ejector pin scars that need to be cleaned up and filled. What's the best way to do that on vinyl tracks?
vonHengest
Visit this Community
Texas, United States
Joined: June 29, 2010
KitMaker: 5,854 posts
Armorama: 4,817 posts
Posted: Thursday, September 16, 2010 - 04:41 PM UTC
Tony: Try shooting in natural light if you can.

Rich: I agree with you on the Ma Deuce, that's a sweet piece of styrene there I'm going to have to deal with those tracks too, but mine didn't seem to have any injector pin scars on them. They are very nice tracks, especially for vinyl. I'm thinking that you should be able to get away with filling the scars with some glue or Mr. Surfacer after you cut the pins off with your choice of blade.
Abn-modeller
Visit this Community
Stockholm, Sweden
Joined: July 05, 2009
KitMaker: 76 posts
Armorama: 75 posts
Posted: Thursday, September 16, 2010 - 10:47 PM UTC
Hi, so I was nearly done with my DD tank, had just put on the decals and a large number #2 whn I found two photos on the web showing tank number #2 from both A and B companies of the 70th TB ( both companies that had DD tanks) and both have large-hatch hulls, unlike mine
I guess I could live with it but I'd rather have another number on it, so does anybody know a safe technique to remove decals without damaging the model?!

barkingdigger
Staff MemberAssociate Editor
ARMORAMA
#013
Visit this Community
England - East Anglia, United Kingdom
Joined: June 20, 2008
KitMaker: 3,981 posts
Armorama: 3,403 posts
Posted: Thursday, September 16, 2010 - 11:00 PM UTC
Cal,

If you haven't already top-coated it with matte varnish, you could just re-wet it with water (or Micro-Sol) and slide it off again (sometimes a little agitation from a stiff brush helps). If you have varnished over it, then I can't offer much other than my prayers that you can scrape it off with a knife without scraping the underlying paint...

Tom