ok....I'm stumped. Does anyone know if the round disc on the side of the ammo can for the RWS serves any purpose? Its facing forward, and almost appears to be a crank.
Jeff
Hosted by Darren Baker
AFV Club M1132 Stryker ESV w/SMP
heliman

Joined: June 14, 2010
KitMaker: 702 posts
Armorama: 604 posts

Posted: Thursday, January 13, 2011 - 01:18 PM UTC

Burik

Joined: March 12, 2002
KitMaker: 1,437 posts
Armorama: 1,303 posts

Posted: Thursday, January 13, 2011 - 03:38 PM UTC
Quoted Text
ok....I'm stumped. Does anyone know if the round disc on the side of the ammo can for the RWS serves any purpose? Its facing forward, and almost appears to be a crank.
Jeff
Jeff, that is the cover for the RWS sight. When it is removed it is kept on the ammo can and secured w/ a chain. I believe the kit even comes w/ a PE chain for this as well.
Posted: Thursday, January 13, 2011 - 05:24 PM UTC
Quoted Text
Quoted Textok....I'm stumped. Does anyone know if the round disc on the side of the ammo can for the RWS serves any purpose? Its facing forward, and almost appears to be a crank.
Jeff
Jeff, that is the cover for the RWS sight. When it is removed it is kept on the ammo can and secured w/ a chain. I believe the kit even comes w/ a PE chain for this as well.
Robert is correct...The chain is included with the kit. Jeff, you can see the optic cover that Robert refers to and the PE chain in my blog on page 2, Step 29. AFV Club does not represent the optic cover very well, but it is there on the ammo can. You can see the PE chain installed in Step 30.
heliman

Joined: June 14, 2010
KitMaker: 702 posts
Armorama: 604 posts

Posted: Sunday, January 16, 2011 - 11:45 AM UTC
Ohhh, that makes sense! I found the pic in pg 2, thanks.
I found a "whoopie light" for the back of the hull..but few pics show it? is this a common addition ? sorry for highjacking the thread!
I'm trying to put off the plow.....
I found a "whoopie light" for the back of the hull..but few pics show it? is this a common addition ? sorry for highjacking the thread!
I'm trying to put off the plow.....

Burik

Joined: March 12, 2002
KitMaker: 1,437 posts
Armorama: 1,303 posts

Posted: Sunday, January 16, 2011 - 01:04 PM UTC
Quoted Text
I found a "whoopie light" for the back of the hull..but few pics show it? is this a common addition ?
It depends on which light you are talking about. If you mean the light by itself this is used commonly in Germany. If you mean the one that comes in the Trumpeter MEV kit w/ a frame and antenna on the top, this is the MILES training light used when the vehicle becomes a casualty. This is used in the US and Germany.
heliman

Joined: June 14, 2010
KitMaker: 702 posts
Armorama: 604 posts

Posted: Monday, January 17, 2011 - 12:19 PM UTC
The light I'm asking about shows mounted to the left rear corner of the car, mounted to a pole just behind the stowage basket? Step number 55. Its mounted just in front of the lane marker.
Quoted Text
Quoted Text
I found a "whoopie light" for the back of the hull..but few pics show it? is this a common addition ?
It depends on which light you are talking about. If you mean the light by itself this is used commonly in Germany. If you mean the one that comes in the Trumpeter MEV kit w/ a frame and antenna on the top, this is the MILES training light used when the vehicle becomes a casualty. This is used in the US and Germany.
Posted: Thursday, January 27, 2011 - 05:26 PM UTC
Well, after a bit of a delay, I'm finally back with another update.
STEP 50
Step 50 is another step in the assembly of the surface mine plow.
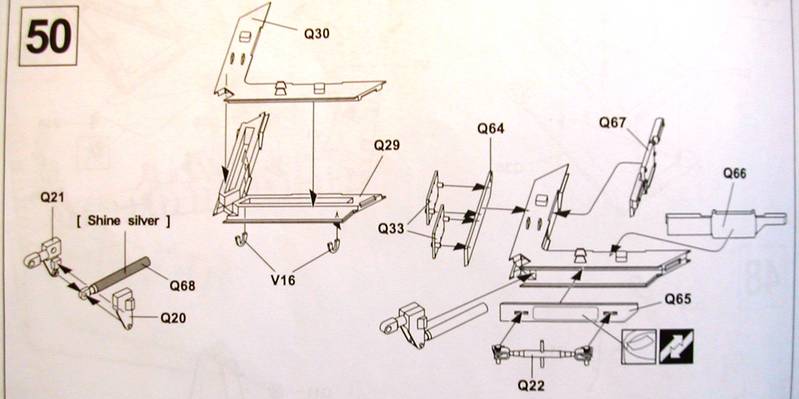
There are three sub-steps.
The first sub-step was very simple and all parts went together with no issue.
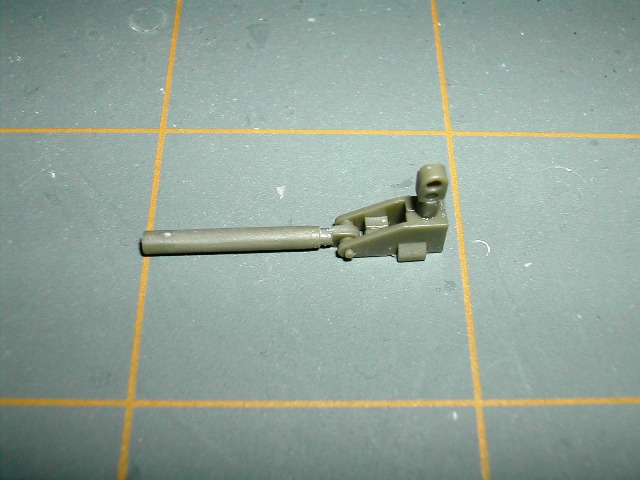
The second sub-step has four parts. Two of which (V16) are very tiny and had to be installed with CA glue. Here are a few shots of sub-step two in progress.
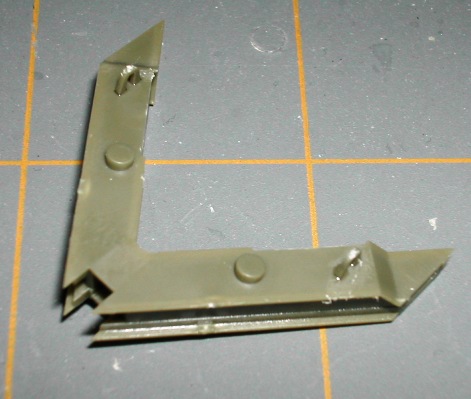
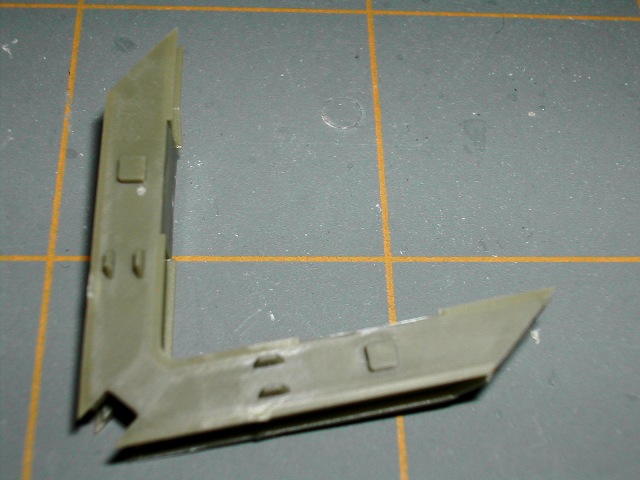
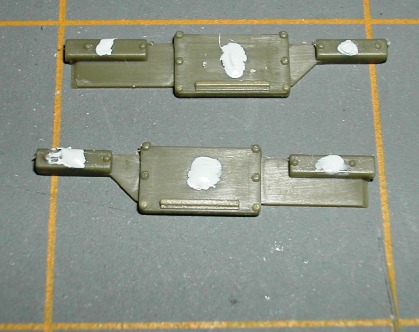
The third sub-step overall went together well. I had a few problems here though. Parts Q66 and Q67 had some pretty significant mold release marks.
Here is a photo where I added Mr. Surfacer to the marks. I let it dry overnight.
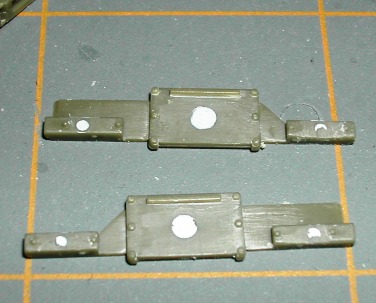
Here, I have sanded down the Mr. Surface to leave a smooth surface without damaging the detail.
Part Q22 have two very small 'shafts' that come off of the center of the part. These are incredibly brittle and broke one off. I managed to find it and glue it back on but it broke off again and is forever lost.
When I glued parts Q66 and Q67 on to the assembly from sub-step 2, the top plate of the sub-step two assembly developed a crack. I believe this part cracked as a result of excessive softening from the Testors liquid cement I use.
Here are some shots of the completed assembly.
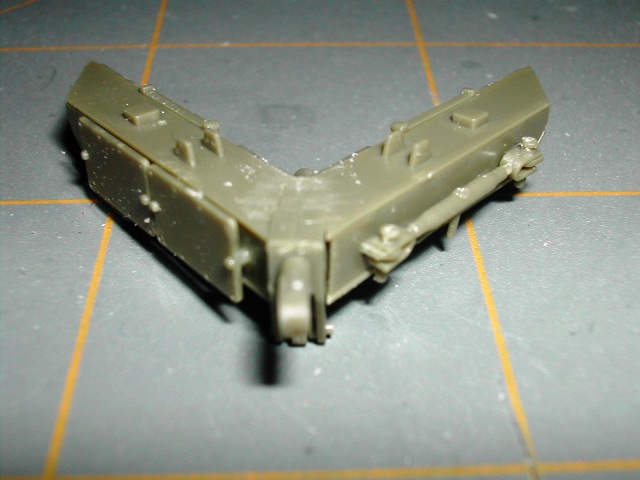
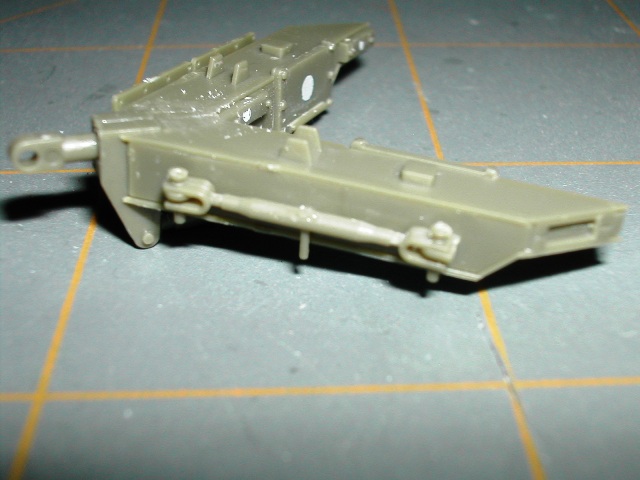
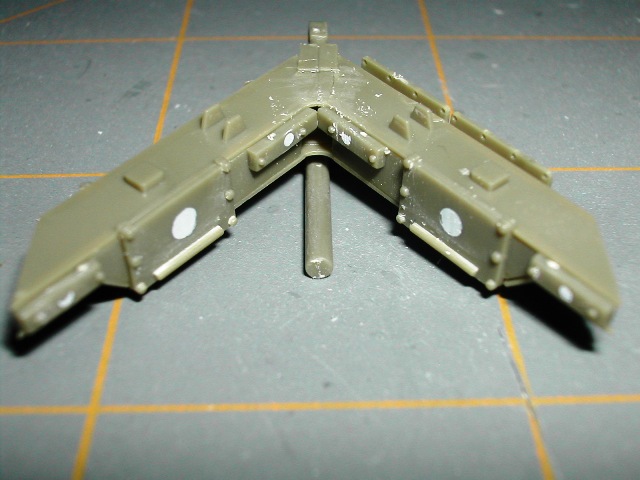
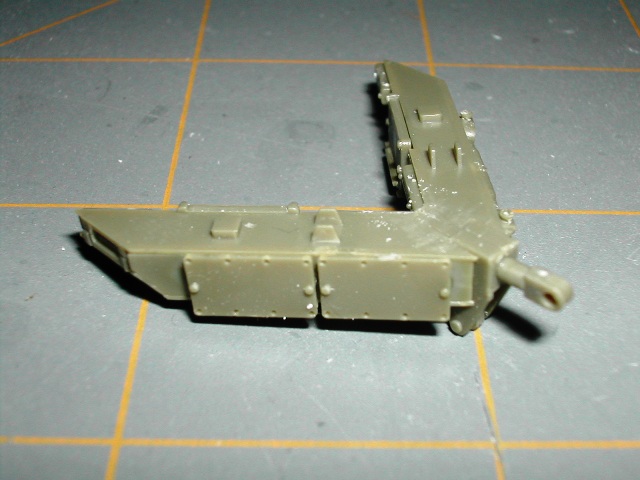
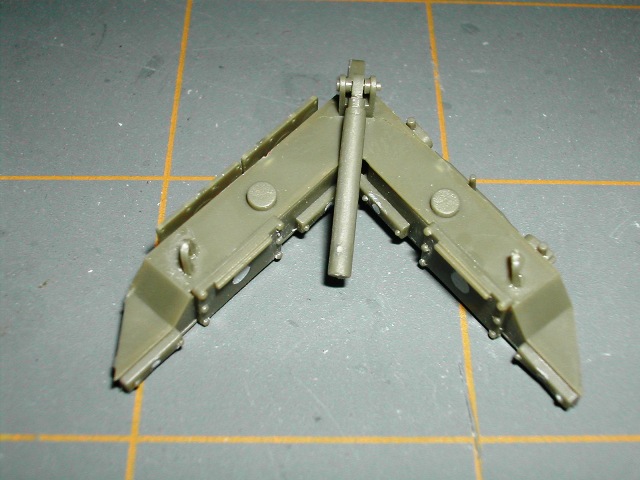
STEP 50
Step 50 is another step in the assembly of the surface mine plow.

There are three sub-steps.
The first sub-step was very simple and all parts went together with no issue.

The second sub-step has four parts. Two of which (V16) are very tiny and had to be installed with CA glue. Here are a few shots of sub-step two in progress.


The third sub-step overall went together well. I had a few problems here though. Parts Q66 and Q67 had some pretty significant mold release marks.
Here is a photo where I added Mr. Surfacer to the marks. I let it dry overnight.

Here, I have sanded down the Mr. Surface to leave a smooth surface without damaging the detail.

Part Q22 have two very small 'shafts' that come off of the center of the part. These are incredibly brittle and broke one off. I managed to find it and glue it back on but it broke off again and is forever lost.
When I glued parts Q66 and Q67 on to the assembly from sub-step 2, the top plate of the sub-step two assembly developed a crack. I believe this part cracked as a result of excessive softening from the Testors liquid cement I use.
Here are some shots of the completed assembly.


woody6968

Joined: March 02, 2006
KitMaker: 454 posts
Armorama: 380 posts

Posted: Friday, January 28, 2011 - 01:49 AM UTC
hi bret
good clean build so far , i will follow this build with great interest as its a little different from the normal strykers , thanks for sharing your blog
good clean build so far , i will follow this build with great interest as its a little different from the normal strykers , thanks for sharing your blog
heliman

Joined: June 14, 2010
KitMaker: 702 posts
Armorama: 604 posts

Posted: Friday, January 28, 2011 - 11:17 AM UTC
The plow is coming along beautifully!! The pics don't even do justice to how tiny and detailed some of these parts really are!!! The only disappointment is the separate springs mounted to each segment...they have a large "pin" on each part, makes for long cleanup work....
I have a question ...are the landing legs commonly seen raised or lowered while mounted to the car? I 've reached that step, and would hate to botch it now.
Thanks
Jeff
I have a question ...are the landing legs commonly seen raised or lowered while mounted to the car? I 've reached that step, and would hate to botch it now.
Thanks
Jeff
Posted: Sunday, February 20, 2011 - 08:55 AM UTC
STEP 51:
Step 51 is yet another plow sub-assembly. I have no idea what to call it. This step consists of two sub-steps.
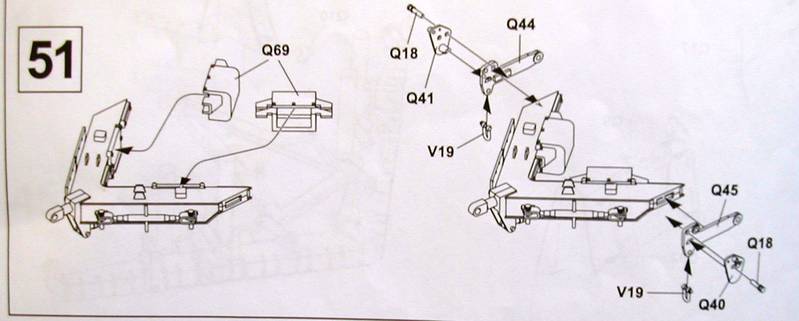
The first sub-assembly consists of installing just two parts (Q69 x 2). Here is a couple of shots of the completed sub-step.
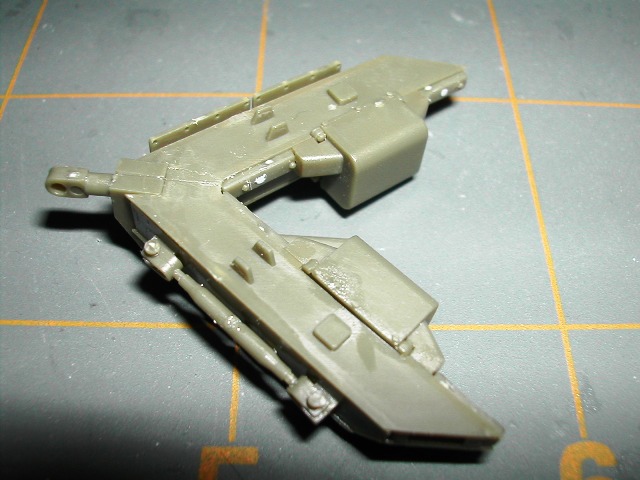
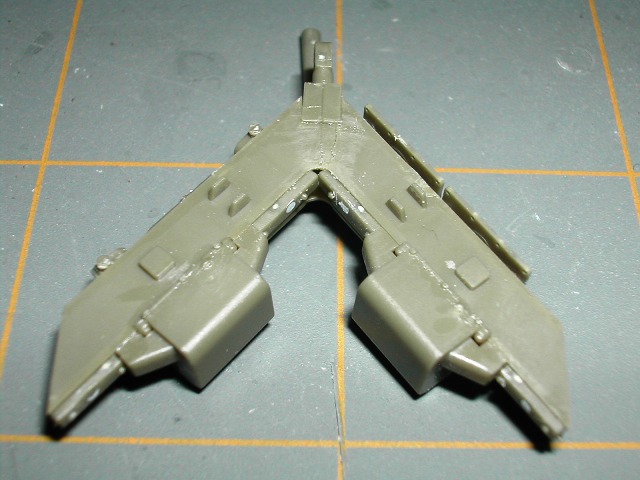
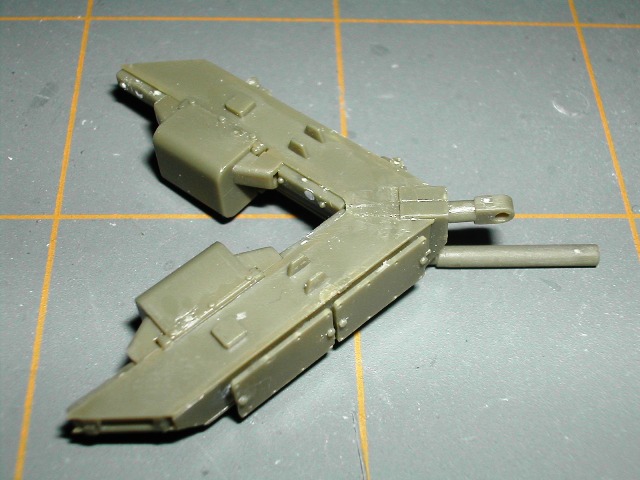
The next sub-step consists of several tiny parts. Of particular note is Q18, Q40, Q41, and V19.
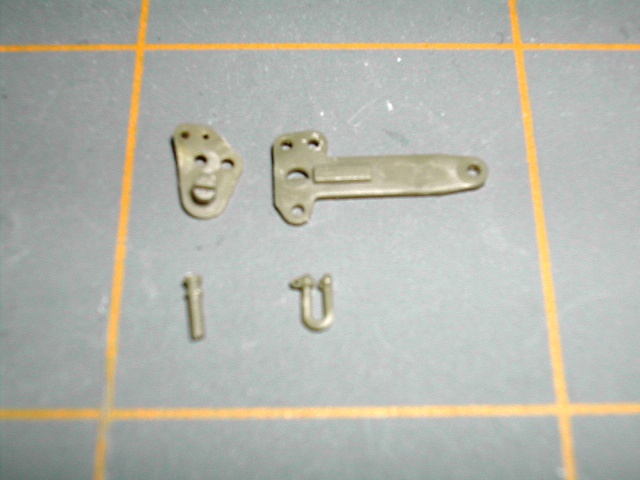
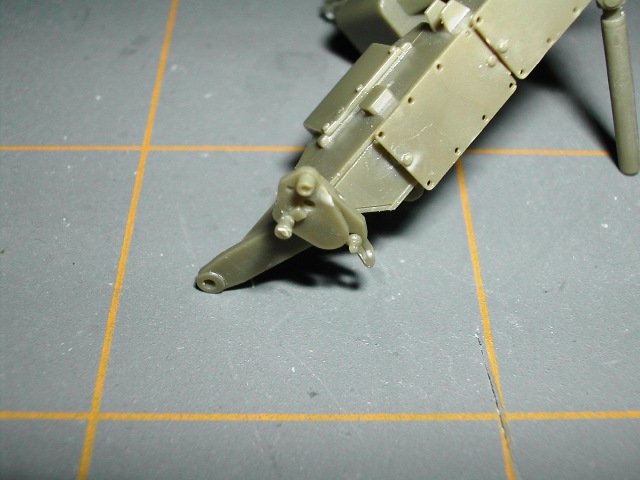
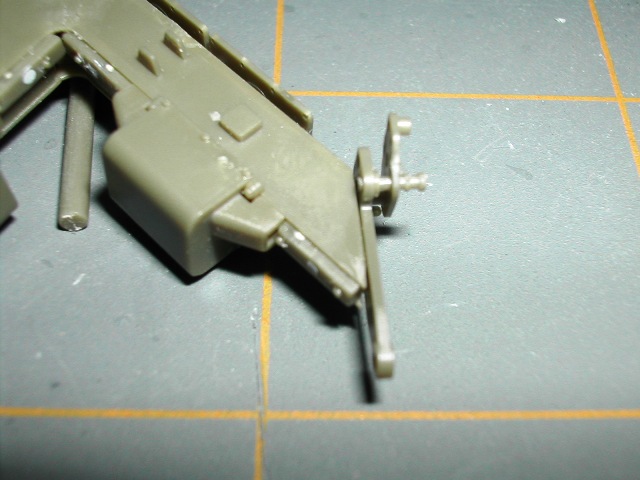
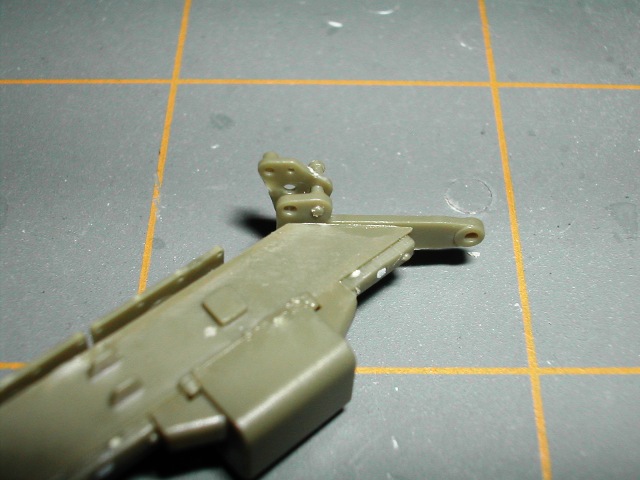
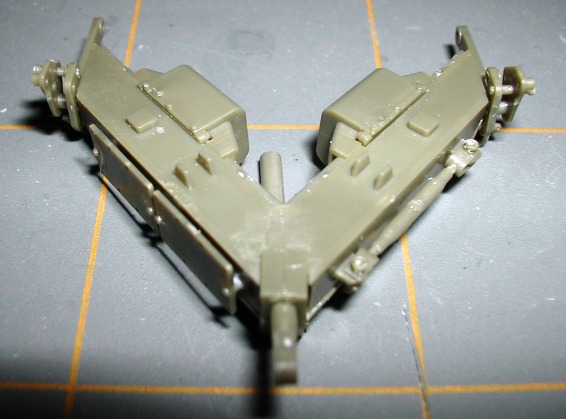
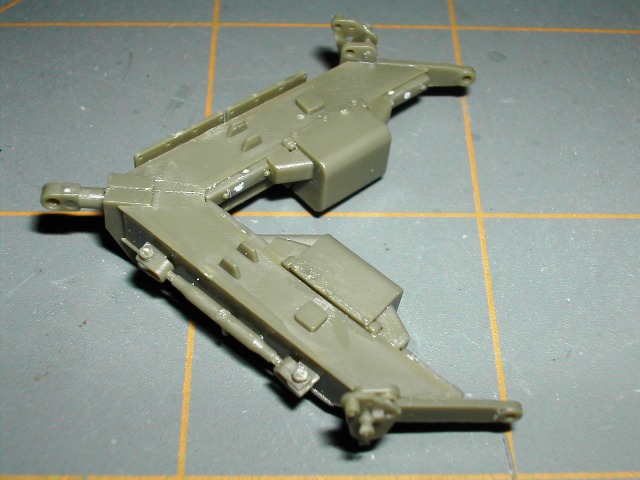
Overall, I didn't have much trouble with this step. You have to be patient working with the smaller parts. You want to test fit Q18 in Q40,Q41,Q44 and Q45 before gluing the parts to make sure they will fit.
Step 51 is yet another plow sub-assembly. I have no idea what to call it. This step consists of two sub-steps.

The first sub-assembly consists of installing just two parts (Q69 x 2). Here is a couple of shots of the completed sub-step.


The next sub-step consists of several tiny parts. Of particular note is Q18, Q40, Q41, and V19.


Overall, I didn't have much trouble with this step. You have to be patient working with the smaller parts. You want to test fit Q18 in Q40,Q41,Q44 and Q45 before gluing the parts to make sure they will fit.
Posted: Sunday, February 20, 2011 - 07:15 PM UTC
STEP 52:
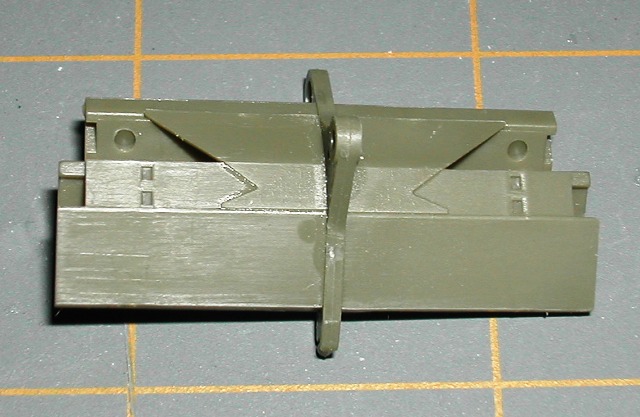
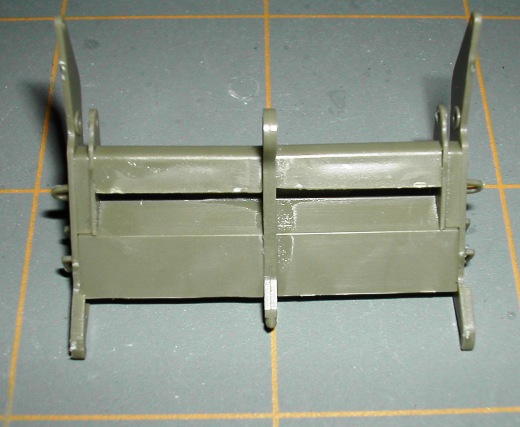
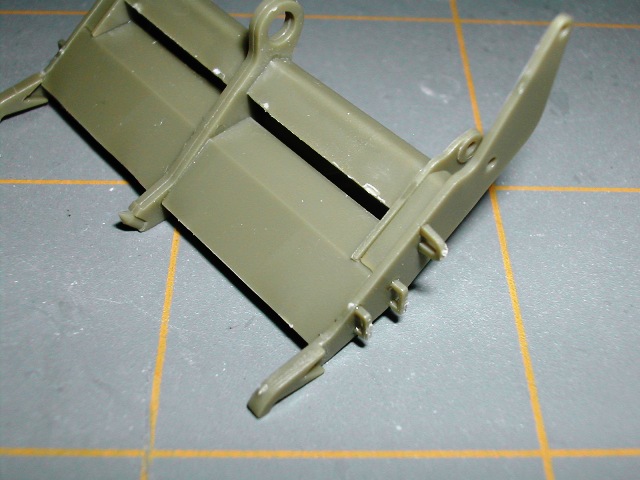
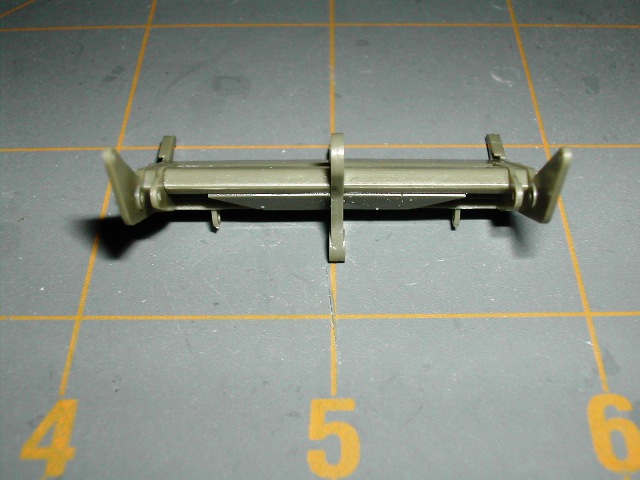
Step 52 is another sub-component of the SMP. It consists of 3 sub-steps.
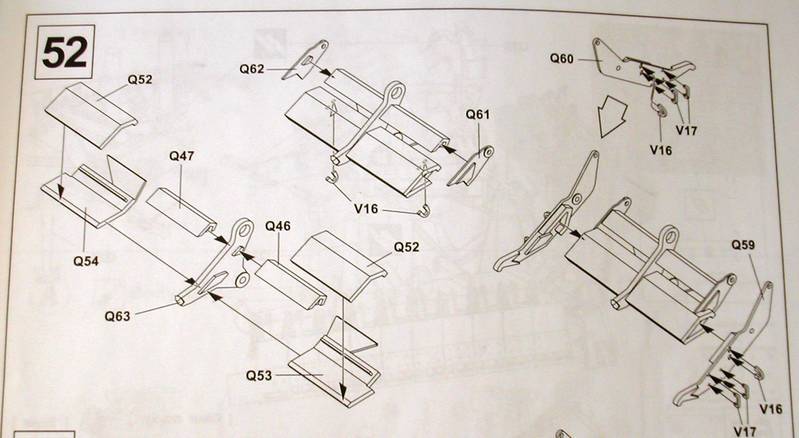
Assembly here is pretty straight forward. Take your time and pay attention to part placement. There are 'keys' molded onto part Q63 that help you align parts Q52/Q54 and Q52/Q53.
Here is sub-step one complete:
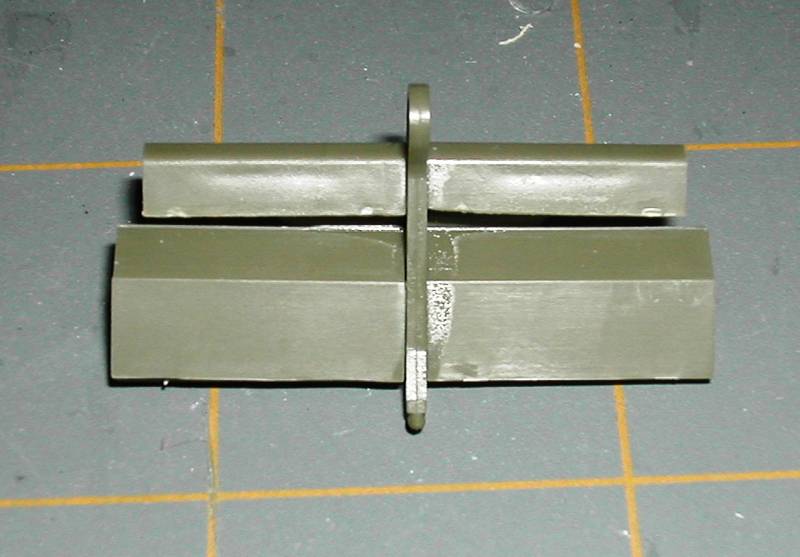
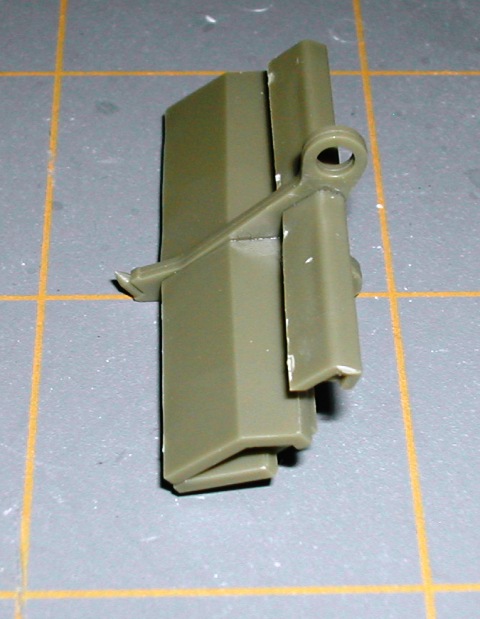
I did sub-step two and sub-step three pretty much simultaneously. There were no issues with the remainder of the construction.
Here is the sub-assembly from Step 52 complete.
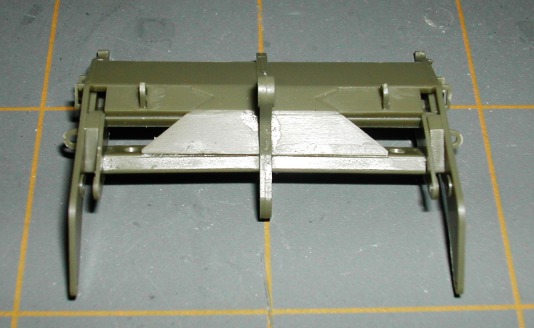
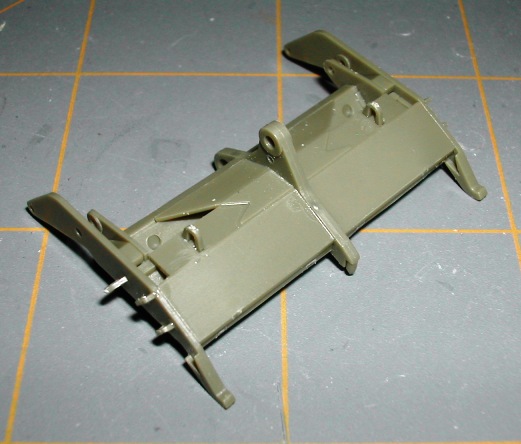
Step 52 is another sub-component of the SMP. It consists of 3 sub-steps.

Assembly here is pretty straight forward. Take your time and pay attention to part placement. There are 'keys' molded onto part Q63 that help you align parts Q52/Q54 and Q52/Q53.
Here is sub-step one complete:


I did sub-step two and sub-step three pretty much simultaneously. There were no issues with the remainder of the construction.
Here is the sub-assembly from Step 52 complete.


Posted: Thursday, February 24, 2011 - 06:35 PM UTC
STEP 53:
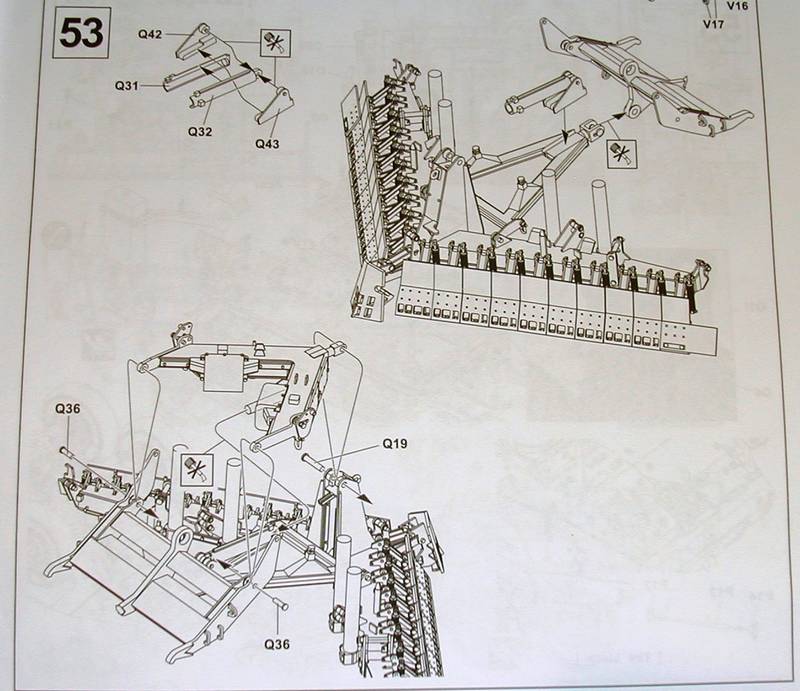
Step 53 is the assembly of 4 sub-assemblies consisting of the main plow body and the sub-assemblies put together in Steps 50, 51, 52 and here in 53.
Here are parts Q31, Q32, Q42 and Q43 prior to assembly.
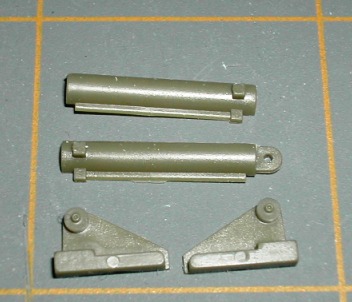
Here is a couple of shots after assembly of Q31, Q32, Q42 and Q43.
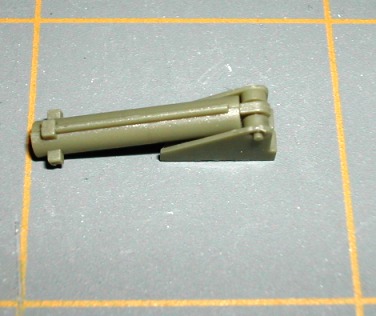
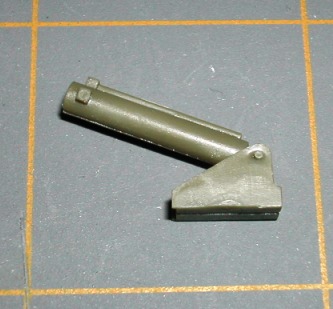
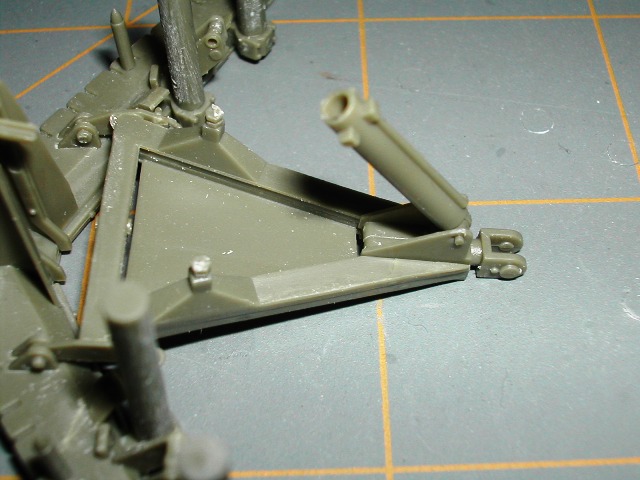
Here is shot of Q31, Q32, Q42 and Q43 installed on the sub-assembly from Step 47.
Here are the 3 remaining sub-assemblies prior to assembly.
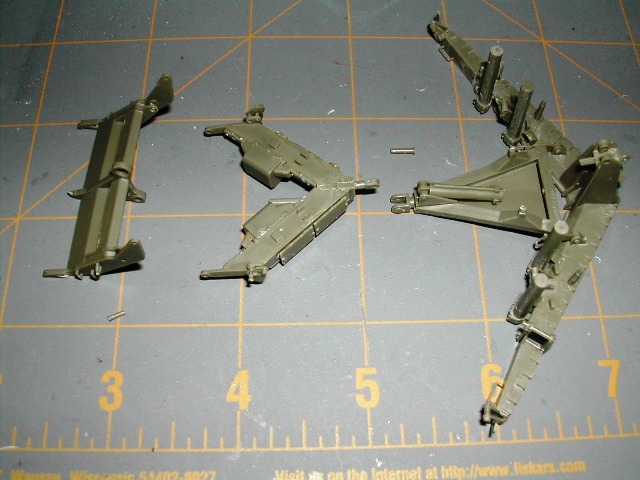
Here is Step 53 completed.
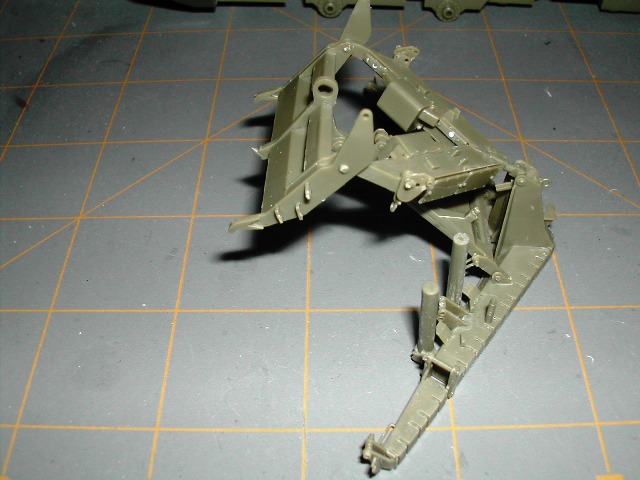
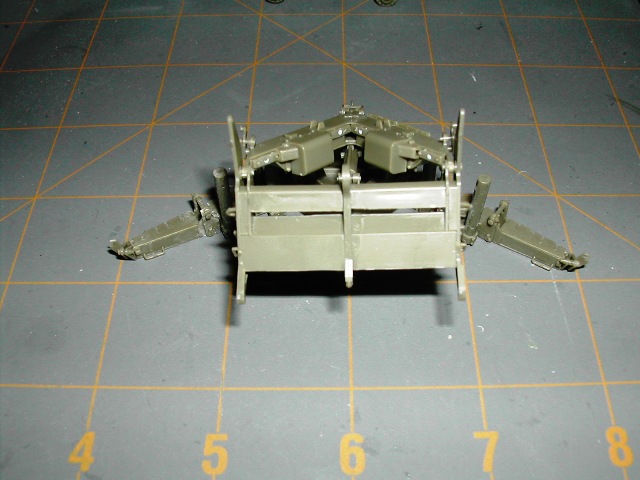
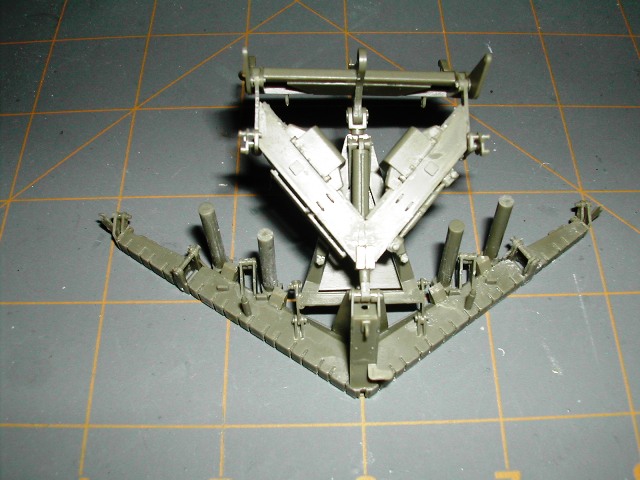
Overall, I didn't run into any significant issues. You want to be sure to test fit the 'pins' (Q19 and Q36 x2) prior to putting all the sub-assemblies together. I found that I had fit issues with a Q36 on one side. A 1/2 twist with the tip of my xacto blade and it fit just fine.

Step 53 is the assembly of 4 sub-assemblies consisting of the main plow body and the sub-assemblies put together in Steps 50, 51, 52 and here in 53.
Here are parts Q31, Q32, Q42 and Q43 prior to assembly.

Here is a couple of shots after assembly of Q31, Q32, Q42 and Q43.


Here is shot of Q31, Q32, Q42 and Q43 installed on the sub-assembly from Step 47.

Here are the 3 remaining sub-assemblies prior to assembly.

Here is Step 53 completed.


Overall, I didn't run into any significant issues. You want to be sure to test fit the 'pins' (Q19 and Q36 x2) prior to putting all the sub-assemblies together. I found that I had fit issues with a Q36 on one side. A 1/2 twist with the tip of my xacto blade and it fit just fine.
ossie262

Joined: August 31, 2009
KitMaker: 256 posts
Armorama: 250 posts

Posted: Thursday, February 24, 2011 - 08:56 PM UTC
hi
i have been following this build for some time . i also have AG35024 the chain and indicator assembly for the Plow .
i intend building mine towing a M58 mcl but i now found out i have to change the tow hitch on the trailer.
great build and very informative.
Ossie
i have been following this build for some time . i also have AG35024 the chain and indicator assembly for the Plow .
i intend building mine towing a M58 mcl but i now found out i have to change the tow hitch on the trailer.
great build and very informative.
Ossie
Posted: Friday, February 25, 2011 - 01:46 AM UTC
I'm looking for the AFV Club plow chain/indicator set. I'm going to put it on this model as well.
Posted: Saturday, February 26, 2011 - 04:43 PM UTC
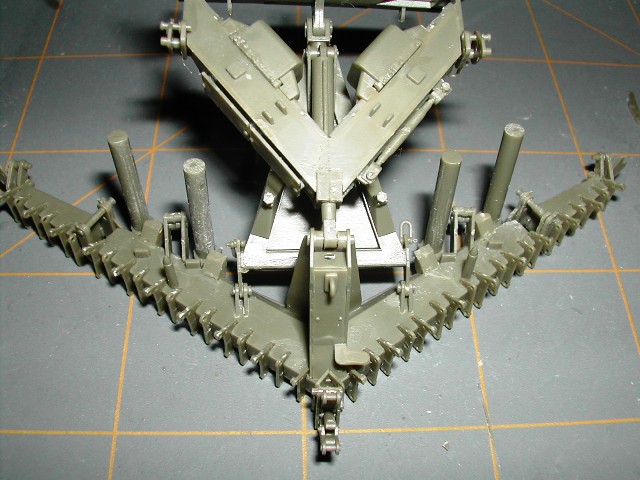
I've done a little more work on the plow over the last couple of nights. I've installed 40 parts that are the mounting brackets for the individual plow blade sections. Here is a close-up of 20 on one side.
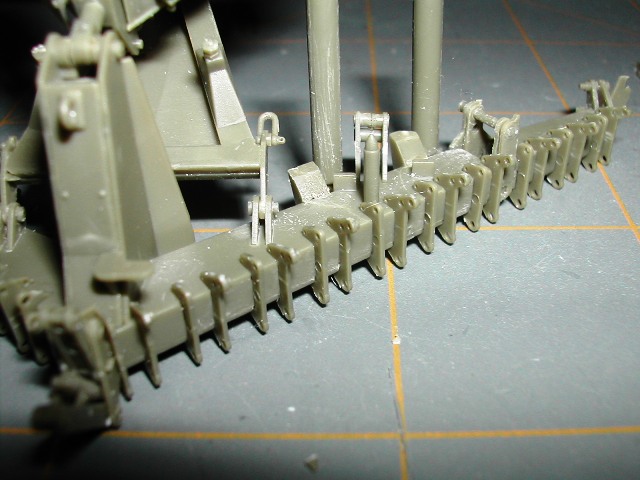
Here is an over-all photo of all 40 installed.

Here is an over-all photo of all 40 installed.

DeskJockey

Joined: July 17, 2006
KitMaker: 1,558 posts
Armorama: 1,159 posts

Posted: Sunday, February 27, 2011 - 03:56 AM UTC
Wow--40 pieces! That sounds like it took a while... 


Captin_Caveman_III

Joined: October 20, 2008
KitMaker: 1,069 posts
Armorama: 1,062 posts

Posted: Sunday, February 27, 2011 - 05:40 PM UTC
WoW now that's some complex work, grat job man! 

heliman

Joined: June 14, 2010
KitMaker: 702 posts
Armorama: 604 posts

Posted: Wednesday, March 16, 2011 - 08:06 AM UTC
I finally finished mine up..following your build. Thanks for all the help w/ the details.


Jeff


Jeff

Captin_Caveman_III

Joined: October 20, 2008
KitMaker: 1,069 posts
Armorama: 1,062 posts

Posted: Wednesday, March 16, 2011 - 11:30 AM UTC
WoW I like the over all look of that baby man, I may just get one for my shelf.  Just a stunner!
 Just a stunner!
shobud

Joined: April 06, 2009
KitMaker: 4 posts
Armorama: 1 posts

Posted: Wednesday, March 16, 2011 - 11:39 AM UTC
Very nice builld so far. I'm just about at the same stage as you. I did however paint the horizontal surfaces with Rust-o-leum Terra cotta for the anti-slip effect. The actual photos are a real help.
Keep up the good work!
Keep up the good work!

Posted: Saturday, March 26, 2011 - 06:25 PM UTC
Good evening all...I've done a little more work on the mine plow this weekend. This plow is honestly the hardest model item I've ever worked on. This thing is extremely challenging for me. There has been a lot of broken parts, a lot of dropped parts and a lot of cussing...But, I am still swinging away.
Here is what I did today.
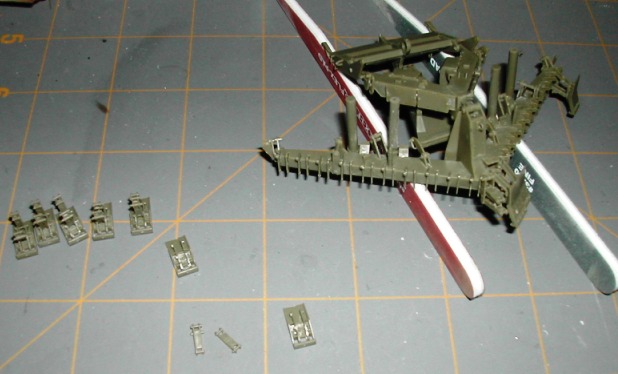
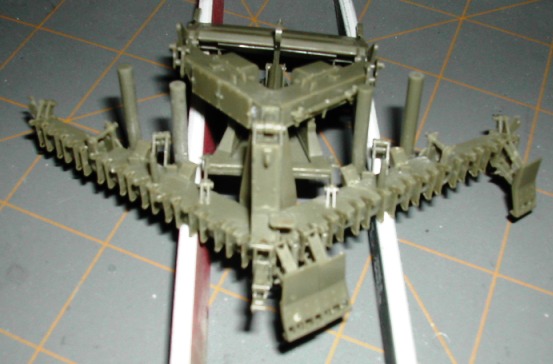
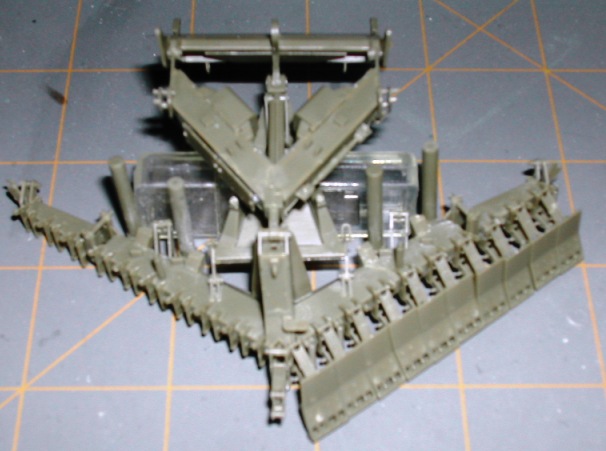
More to follow tomorrow hopefully.
Heliman, your Stryker looks great...I hope mine looks half as good as yours when I'm done. Great job!!
Here is what I did today.


More to follow tomorrow hopefully.
Heliman, your Stryker looks great...I hope mine looks half as good as yours when I'm done. Great job!!

Posted: Wednesday, March 30, 2011 - 04:39 PM UTC
Well, I am almost victorious in my battle with the mine plow. All I have to do is install the springs (V32) on the side of the individual blade sections. The hard part of the plow is done. I broke 8 to 10 pieces trying to get to this point. Fortunately, there were extra parts included to replace what I broke.
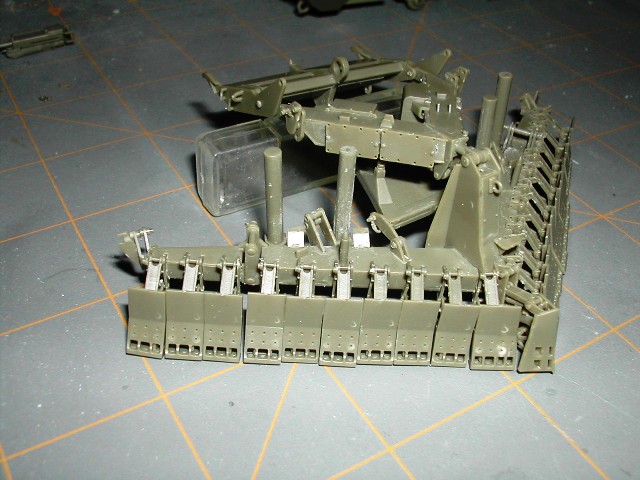
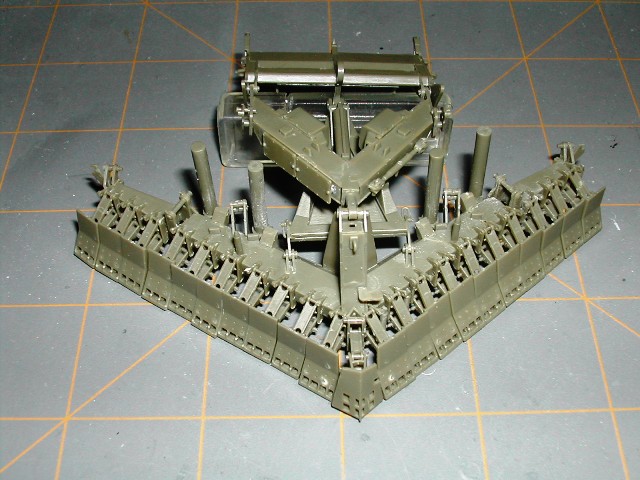
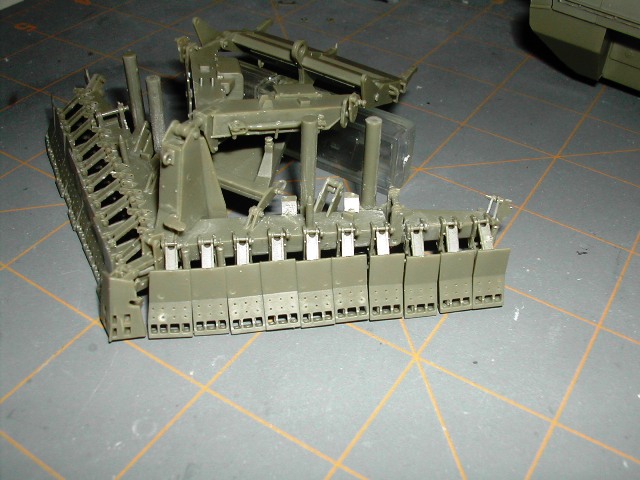
All the blade sections are still 'free-floating'. After I get the suspension installed on the stryker and install the plow assembly, I will align all the blade sections, set them at the appropriate angle and glue the blade sections in place.


All the blade sections are still 'free-floating'. After I get the suspension installed on the stryker and install the plow assembly, I will align all the blade sections, set them at the appropriate angle and glue the blade sections in place.
heliman

Joined: June 14, 2010
KitMaker: 702 posts
Armorama: 604 posts

Posted: Thursday, March 31, 2011 - 10:44 AM UTC
That looks great Brent..the plow is the hardest part of the whole build. I too lost a few segments , and resorted to the spares.
I wish they would release the wires chain set...
Keep up the great work
Jeff
I wish they would release the wires chain set...
Keep up the great work
Jeff

shopkin4

Joined: March 29, 2009
KitMaker: 1,135 posts
Armorama: 1,030 posts

Posted: Thursday, March 31, 2011 - 01:12 PM UTC
Brent,
Guess what kit and massive amount of PE and Resin are in my cart at hobbyeasy?


Guess what kit and massive amount of PE and Resin are in my cart at hobbyeasy?


Posted: Wednesday, April 13, 2011 - 05:27 PM UTC
Well, one word of advice for anyone that reads this blog before tackling this kit......Don't deviate from the order of steps in the instructions. 
I deviated by skipping the undercarriage and going to the upper hull..big, big mistake on my part. Now, I'm having to be exceptionally careful to not break off/damage any of the upper hull detail while trying to assemble the undercarriage. To assist in this, I'm using a kitchen turn table a few paint jars as an ad-hoc model stand.
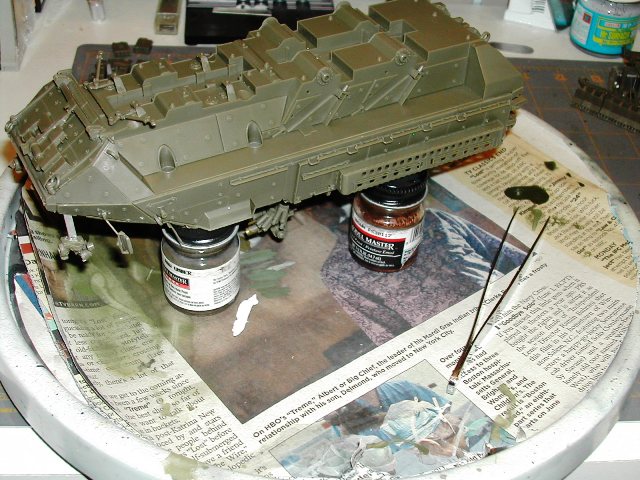
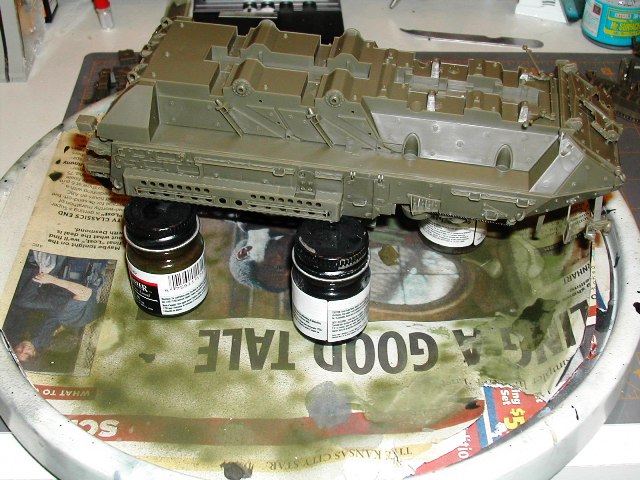

I deviated by skipping the undercarriage and going to the upper hull..big, big mistake on my part. Now, I'm having to be exceptionally careful to not break off/damage any of the upper hull detail while trying to assemble the undercarriage. To assist in this, I'm using a kitchen turn table a few paint jars as an ad-hoc model stand.


 |


