AFV Club M1132 Stryker ESV w/SMP

#065
Missouri, United States
Joined: March 30, 2002
KitMaker: 2,605 posts
Armorama: 1,814 posts
Posted: Wednesday, April 13, 2011 - 05:31 PM UTC
STEP 3
Step 3 is the first step in assembling the undercarriage/suspension of the Stryker.
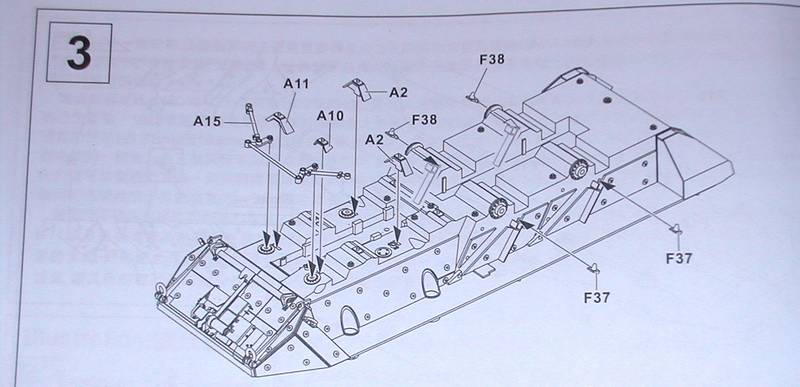
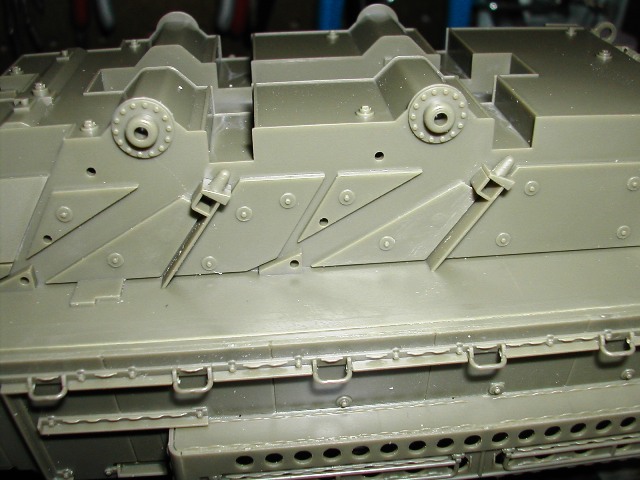
In this photo, I have attached both parts F37. I repeated the same thing on the opposite side for both parts F38.
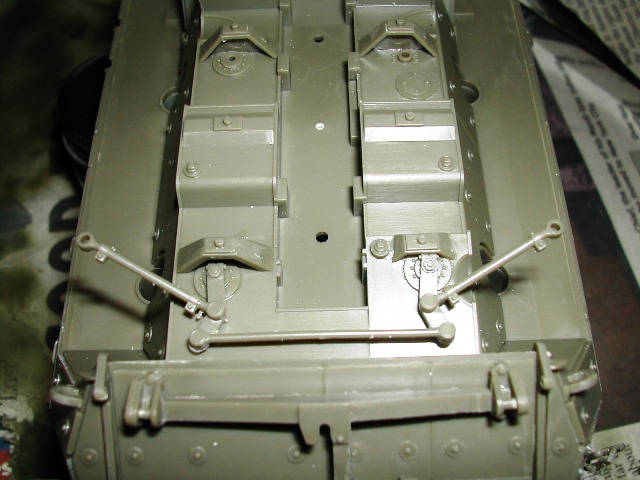
In this photo, I have installed both parts A2, part A10, A11 and A15.
IPMS # 41155
Current Campaigns:
Indiana, United States
Joined: July 31, 2003
KitMaker: 1,523 posts
Armorama: 710 posts
Posted: Thursday, April 14, 2011 - 03:57 AM UTC
Is that light i see at the end of the tunnel? Looks great Bud!. I guess I might have to break down and get one as well. Now if AFV Club could get to releasing the M1133 and M1135!!!!!!
Joined: January 25, 2003
KitMaker: 39 posts
Armorama: 34 posts
Posted: Saturday, April 16, 2011 - 02:21 PM UTC
You do know that there are more pieces to the plow? There are springs and chain. AFV sells them separately in a set. You'd think they would have charged more and included them.
Owen

#065
Missouri, United States
Joined: March 30, 2002
KitMaker: 2,605 posts
Armorama: 1,814 posts
Posted: Saturday, April 16, 2011 - 04:32 PM UTC
I've been looking for the chain and spring set but I haven't found a retailer yet that has it in stock. There are some more kit parts that go on the plow but they don't go on till toward the end.
IPMS # 41155
Current Campaigns:
Louisiana, United States
Joined: October 20, 2008
KitMaker: 1,069 posts
Armorama: 1,062 posts
Posted: Saturday, April 16, 2011 - 11:55 PM UTC
If you have the skills to scratchbuild,I'd make the springs my self. As for the chain. You could use the chain from a Legend Productions-kit of the Merkave ball and chain kit. I'll look around to see if I can fiend any sites with 1/35 chains.
Building the impossible is my main goal. Build baby build never sleep!!
Texas, United States
Joined: July 16, 2005
KitMaker: 264 posts
Armorama: 263 posts
Posted: Monday, April 25, 2011 - 12:18 PM UTC
Thats looking really nice!!!!!

Alberta, Canada
Joined: July 23, 2010
KitMaker: 786 posts
Armorama: 753 posts
Posted: Monday, April 25, 2011 - 12:41 PM UTC
this is a cool build Brent, makes me wish i had bought the 1132 rather than the 1128 after seeing yours come together. look forward to seeing the paint hit the plastic. cheers, bd.
the opposite of courage in our society is not cowardice, it is conformity.
Australia
Joined: August 12, 2009
KitMaker: 93 posts
Armorama: 91 posts
Posted: Monday, April 25, 2011 - 12:57 PM UTC
Man talk about a detailed build review, excellent stuff dude.I will be using this as a guide when I start on mine. Cant wait to see the finished product all weathered up. Are you going to add some figures to this as well.
Top work.
Cheers Andrew

#065
Missouri, United States
Joined: March 30, 2002
KitMaker: 2,605 posts
Armorama: 1,814 posts
Posted: Saturday, November 12, 2011 - 05:50 AM UTC
Well, after a long time away from this project due to my military career and life in general, I'm back at it.
Here is Step 56.
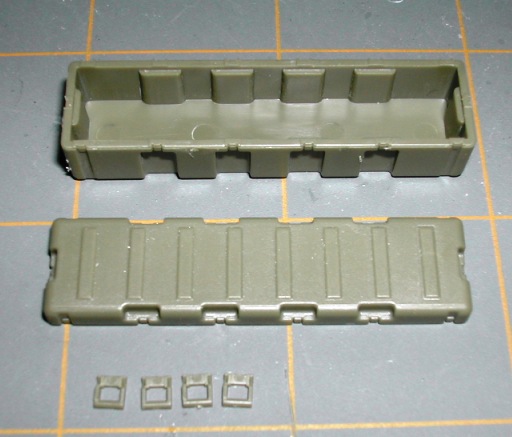
In Step 56 you assemble the plastic storage box that goes on the rear and remove the two M4 rifles from the sprue.
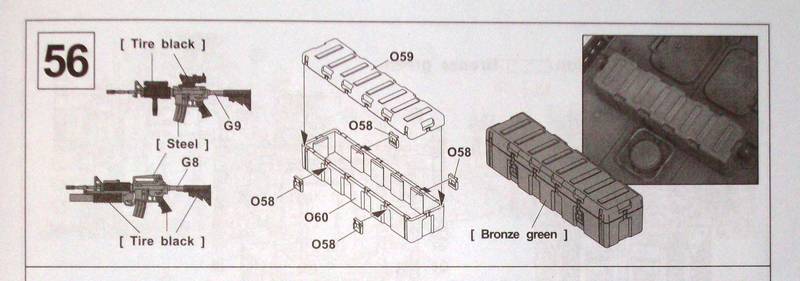
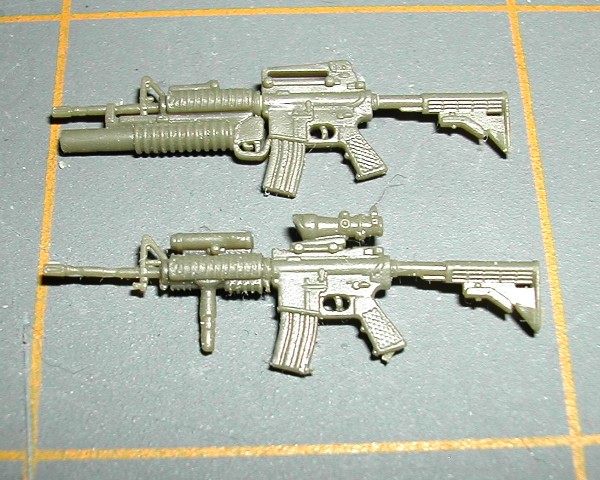
One M4 carbine is configured with the Knights Armament Rail Interface System (RIS), Knights Armament foregrip (component of the RIS), a TA01NSN ACOG rifle scope and an AN/PEQ-4 laser illuminator.
The second M4 Carbine is configured with the Knights Armament Rail Interface System and an M203 Grenade Launcher.
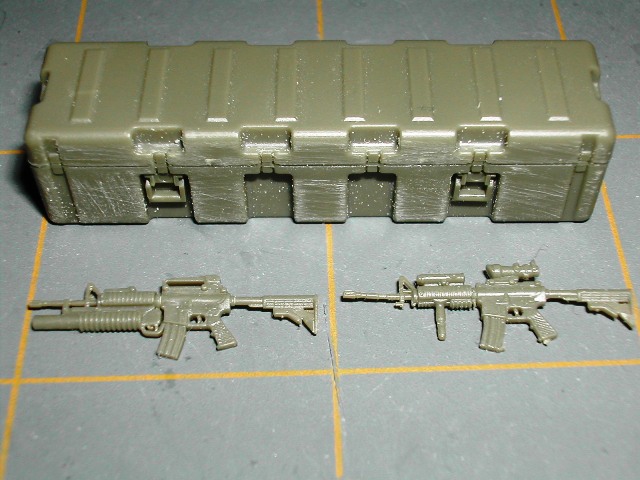
There were not any problems encountered with these parts. I had to do a little bit of sanding on the storage box to remove some mold lines but that wasn't an issue with me.
IPMS # 41155
Current Campaigns:

#065
Missouri, United States
Joined: March 30, 2002
KitMaker: 2,605 posts
Armorama: 1,814 posts
Posted: Sunday, November 13, 2011 - 10:29 AM UTC
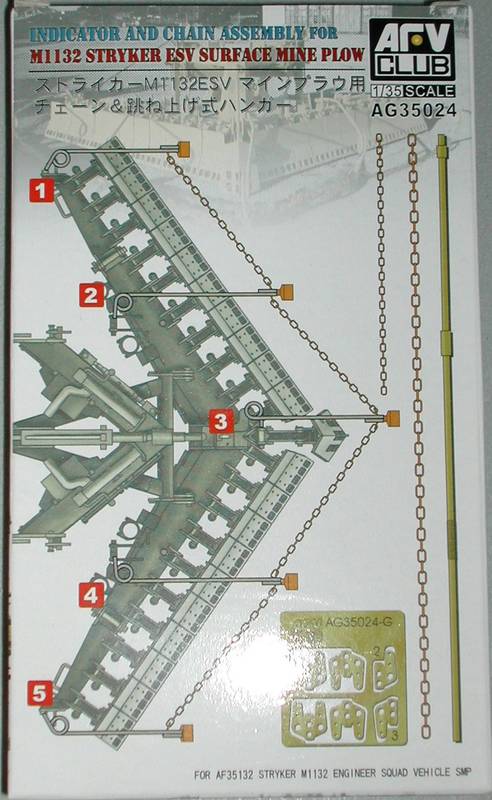
I'm adding the AFV Club Surface Mine Plow Indicator and Chain Assembly to this kit. Here is the box cover:
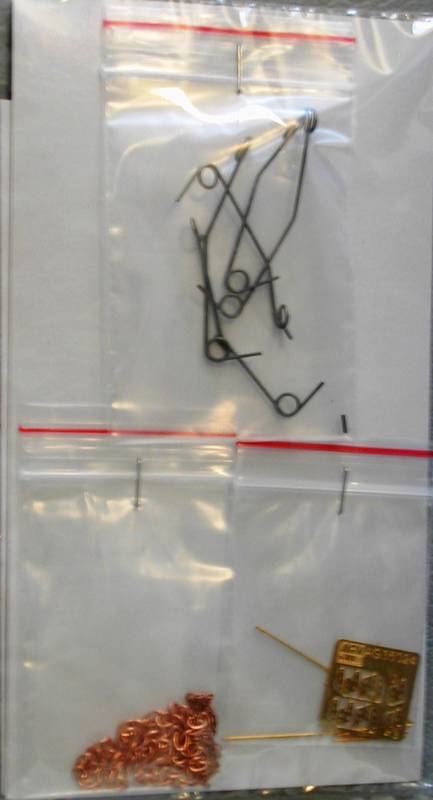
Contents of the box comes in 3 small bags stapled to a card backer:
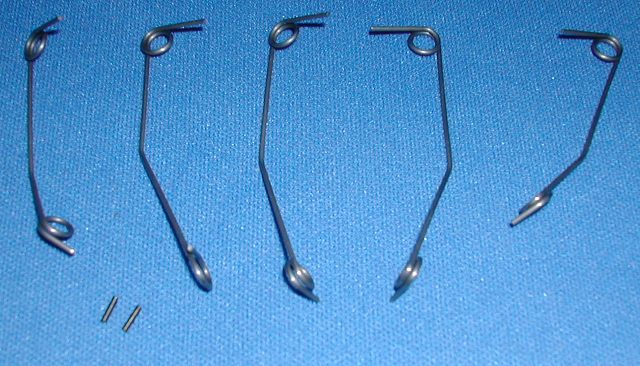
Here are the chain supports:
Here are the indicator poles and photoetch brackets:
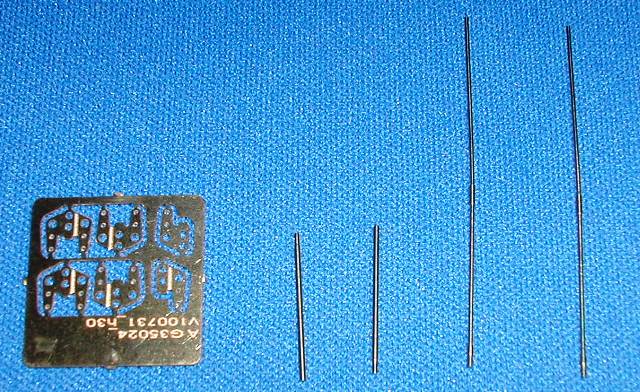
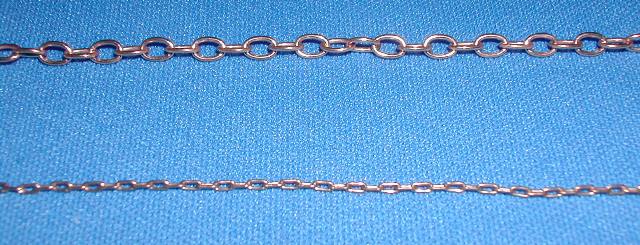
You get two different diameters/lengths of chain:

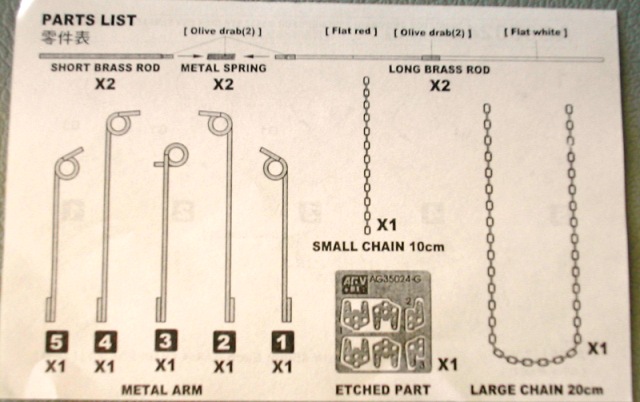
Here is the parts list:
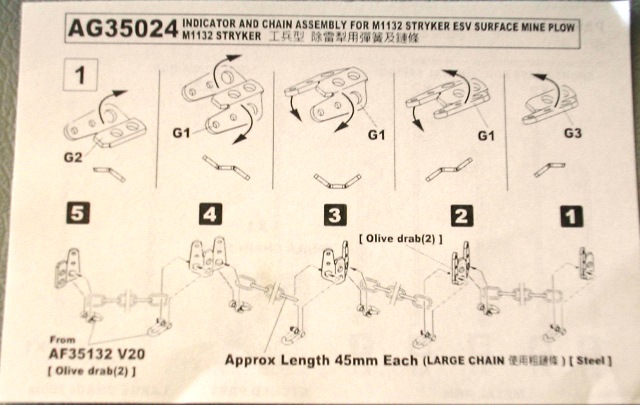
Here is the instructions:
IPMS # 41155
Current Campaigns:
Oregon, United States
Joined: January 08, 2012
KitMaker: 520 posts
Armorama: 516 posts
Posted: Sunday, January 08, 2012 - 10:48 AM UTC
I've been lurking this site for a while and just now signed up.

I wanted to drop you a small note to say ..
“I really appreciate your post…It’s motivated me to get back into model building. “
I haven’t built a model since 1973, but I have set my sights on a M1128 and I’m wanting to add on Slat and the mine plow from AFV M1132. I think this attempt will keep me busy for a while….
Again…thank you for you post, I found it inspiring and is the reason I want to put a plow on a M1128.. hehehehe

Life,, IS, unfortunately...
measured by the number of breaths we take,
but the moments that take our breath away,
are the moments that we wish;.,.,
Eternity remembers Of us.

#161
New York, United States
Joined: May 03, 2010
KitMaker: 392 posts
Armorama: 373 posts
Posted: Tuesday, January 15, 2013 - 03:17 PM UTC
This build is making me go get this kit. Because your step by step is a big help and would be a big help when I start my build. Keep up the amazing work and can't wait to see the weathering and painting.
Happy Modeling
William DeCicco


United States
Joined: November 25, 2007
KitMaker: 96 posts
Armorama: 89 posts
Posted: Wednesday, January 16, 2013 - 08:18 AM UTC
Still waiting for my kit to arrive from JACS. Great build so far. Looks like I'm going to have fun when I start building it.
Keep up the great work.

#161
New York, United States
Joined: May 03, 2010
KitMaker: 392 posts
Armorama: 373 posts
Posted: Wednesday, January 23, 2013 - 07:01 AM UTC
Could I add slat armor to this kit if it was in Iraq or Afghanistan or was the armor already on the kit is good enough. Was there any Sand color ones or where they all OD green that are in service because I never really did one of the Stryker's before I seen this kit an got me interested in them to see if I can do it.
Who makes the better slat armor because I got the 1126 infantry one an I seen a few so far on my research I have started an seen this 1126 had a lot of extra stuff. I seen pro art models, Blast models and of course Eduard or some other company.
Was also wondering if there is any aftermarket resin kits out there.
Happy Modeling
William DeCicco


Ontario, Canada
Joined: September 28, 2006
KitMaker: 2,672 posts
Armorama: 2,475 posts
Posted: Wednesday, January 23, 2013 - 08:26 AM UTC
If you have a few hours to kill this thread is worth reading
 Stryker Thread
 cheers
One of the serious problems in planning against Canadian doctrine is that the Canadians do not read their manuals, nor do they feel any obligations to follow their doctrine.
---From a Russian document
------------------------------------------------
United States
Joined: November 25, 2007
KitMaker: 96 posts
Armorama: 89 posts
Posted: Wednesday, January 23, 2013 - 08:33 AM UTC
Quoted Text
You do know that there are more pieces to the plow? There are springs and chain. AFV sells them separately in a set. You'd think they would have charged more and included them.
Owen
Really?
Amazing, you'd honestly think AFV would have included them. Well, that's their marketing plan at work I guess.
One more thing to order now besides the basic kit.
Kildare, Ireland
Joined: November 21, 2007
KitMaker: 3,212 posts
Armorama: 2,807 posts
Posted: Monday, February 23, 2015 - 05:49 PM UTC
Hi Brent, what happened your build? I just got my paws on one of these and went looking for good reference material and came across this thread....great detail, thanks, but it's incomplete

Now gotta go look for those springs & chains too.....

#065
Missouri, United States
Joined: March 30, 2002
KitMaker: 2,605 posts
Armorama: 1,814 posts
Posted: Monday, February 23, 2015 - 06:06 PM UTC
Hi Sean! I actually intend to pick this project again about July of this year and finish it. That SMP is a bear.
IPMS # 41155
Current Campaigns:
Kildare, Ireland
Joined: November 21, 2007
KitMaker: 3,212 posts
Armorama: 2,807 posts
Posted: Tuesday, February 24, 2015 - 07:23 PM UTC
I might have got as far as you by then Brent! Just ordered the last spring & chain set from Lucky. Was looking at the Upgrade Equipment set but it doesn't really add anything to what's already in the box.
Cheers
Sean

#065
Missouri, United States
Joined: March 30, 2002
KitMaker: 2,605 posts
Armorama: 1,814 posts
Posted: Tuesday, February 24, 2015 - 07:32 PM UTC
You are correct...you wont gain anything with the upgrade set.
IPMS # 41155
Current Campaigns:
Kildare, Ireland
Joined: November 21, 2007
KitMaker: 3,212 posts
Armorama: 2,807 posts
Posted: Sunday, March 01, 2015 - 01:49 PM UTC
Quoted Text
STEP 17:
My next battle was with part D9. Here is a picture of D9 on the sprue:
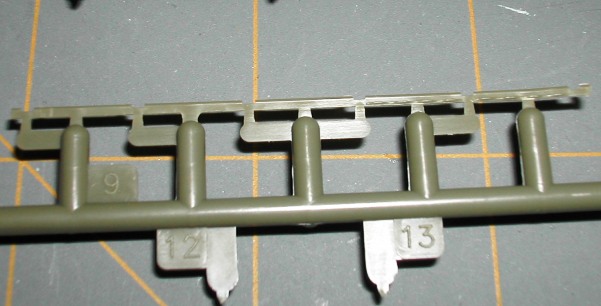
This part runs almost the entire width of the upper hull. The part is very fragile and needs to be oriented appropriately when being installed. There are eight tie-down points that need to face upward on the left side of the vehicle behind the winch housing. Here is a picture of D9 installed on my kit appropriately.
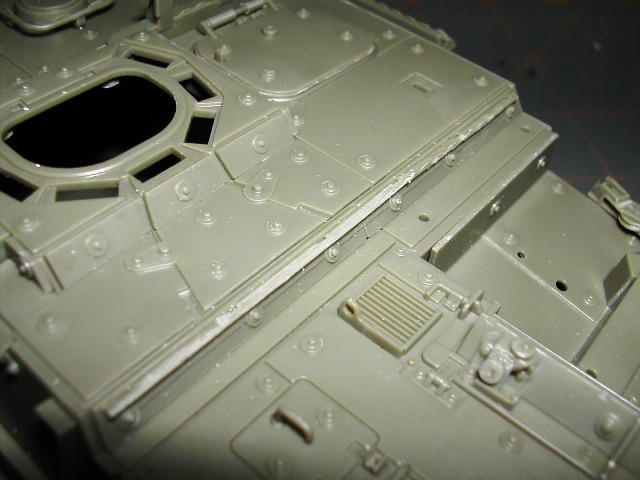
You can barely make out the tie-down point 'bumps' at the upper right of the photo, behind the winch housing recess. You will hear me say this a bunch....Ralphs book was indispensible in determining proper placement of this part. I could not determine from looking at the kit instructions how to properly install the part.
DANGER...DANGER.....This part is very thin and very fragile. Take great care when removing it from the sprue. I got my part off of the sprue with no problem but it broke on my twice, in two different places, as I was trying clean the part up and install it.
Yep, that part is a
bit@h! I'm actually tempted to cut it into sections in order to attach it. Mine didn't break but has bent in different directions....

Kildare, Ireland
Joined: November 21, 2007
KitMaker: 3,212 posts
Armorama: 2,807 posts
Posted: Tuesday, March 17, 2015 - 03:50 AM UTC
Quoted Text
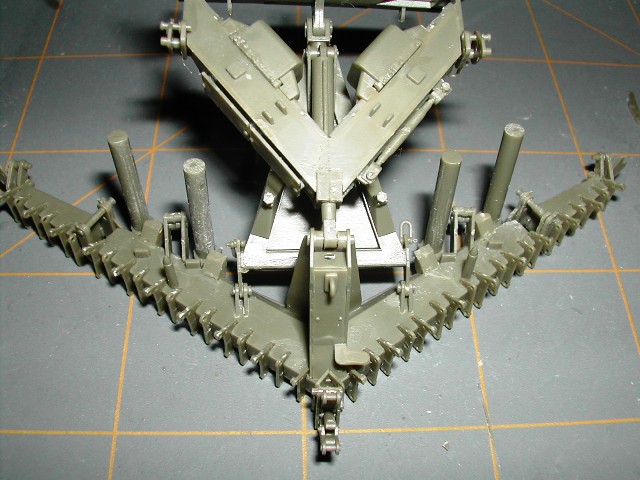
I've done a little more work on the plow over the last couple of nights. I've installed 40 parts that are the mounting brackets for the individual plow blade sections. Here is a close-up of 20 on one side.
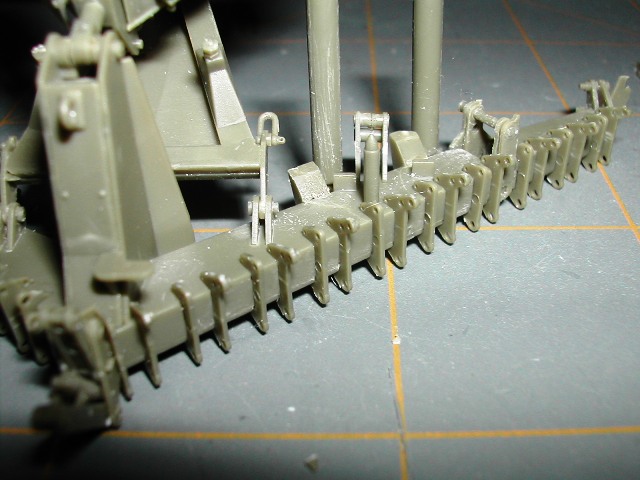
Here is an over-all photo of all 40 installed.
Thanks Brent, without your approach I don't think I could get past this step....
Kildare, Ireland
Joined: November 21, 2007
KitMaker: 3,212 posts
Armorama: 2,807 posts
Posted: Friday, July 10, 2015 - 12:36 AM UTC
Well Brent, its July and I figured you could do with some motivation


but if wasnt for your build log I woukd have stalled at the plow. Thanks!
California, United States
Joined: May 14, 2008
KitMaker: 534 posts
Armorama: 344 posts
Posted: Sunday, July 24, 2016 - 10:16 AM UTC
I was looking through this old thread and was wondering if this every got finished? So, Sgt Sauer are you still active on this build? Over


#065
Missouri, United States
Joined: March 30, 2002
KitMaker: 2,605 posts
Armorama: 1,814 posts
Posted: Sunday, July 24, 2016 - 10:21 AM UTC
I have not finished it yet.

IPMS # 41155
Current Campaigns:


