Muhammad: great dio!! thanks for sharing as it is very inspirational.
Jesper: nice work on the missiles. The phantom looks good too.
Happy Modeling, -zon
Campaigns
Where Armorama group builds can be discussed, organized, and updates posted.
Hosted by Darren Baker, Richard S.
Vietnam: Trouble in Southeast Asia
zontar
Hawaii, United States
Joined: August 27, 2006
KitMaker: 1,646 posts
Armorama: 1,557 posts
Joined: August 27, 2006
KitMaker: 1,646 posts
Armorama: 1,557 posts
Posted: Wednesday, May 02, 2012 - 10:30 AM UTC
Posted: Thursday, May 03, 2012 - 08:49 AM UTC
Decaling now complete. I replaced the national insignia with ones from a Super Scale sheet. These behaved themselves and went on with no trouble. Should have it finished by the end of next week.
mojo72
Kuala Lumpur, Malaysia
Joined: September 05, 2010
KitMaker: 160 posts
Armorama: 130 posts
Joined: September 05, 2010
KitMaker: 160 posts
Armorama: 130 posts
Posted: Thursday, May 03, 2012 - 09:36 AM UTC
@Zon : thanks for the feedback
@Jesper : the Phantom is coming along nicely
@Stephen : I'm pleased that you managed to overcome the decals issue. Nice to see the Canberra nearly completed
Keep up the good work guys
Regards
@Jesper : the Phantom is coming along nicely
@Stephen : I'm pleased that you managed to overcome the decals issue. Nice to see the Canberra nearly completed
Keep up the good work guys
Regards
Scoutmaster
Singapore / 新加坡
Joined: March 05, 2010
KitMaker: 81 posts
Armorama: 79 posts
Joined: March 05, 2010
KitMaker: 81 posts
Armorama: 79 posts
Posted: Sunday, May 06, 2012 - 12:43 AM UTC
Hello Folks!
An update on my NVA T54 build:
1) The Running Gears and tracks have been assembled. Tracks were glued using superglue from the local DIY shop. Normally the tracks would easily separate if one would rely on the so-called 7-sec bond promised by the superglue. I clamped the tracks at the section that was glued and waited about 4hrs before removing the clamps and using the assembled tracks. 0.8mm brass rods were used to simulate track sag. (Trumpeter made holes at the lower hull to allow the modeller to do this method of sagging the tracks):
2) The turret and upper hull were assembled. I plan to texturize the turret by applying plastic cement (Thin) and pound the surface with the bristles of an old toothbrush. I'll also be using a 0.5mm wire for the turret braces:
As of tonight, here's how the kit is:
zontar
Hawaii, United States
Joined: August 27, 2006
KitMaker: 1,646 posts
Armorama: 1,557 posts
Joined: August 27, 2006
KitMaker: 1,646 posts
Armorama: 1,557 posts
Posted: Sunday, May 06, 2012 - 11:56 AM UTC
Marcos: good work on the T54.
Happy Modeling, -zon
Scoutmaster
Singapore / 新加坡
Joined: March 05, 2010
KitMaker: 81 posts
Armorama: 79 posts
Joined: March 05, 2010
KitMaker: 81 posts
Armorama: 79 posts
Posted: Thursday, May 10, 2012 - 03:26 AM UTC
Another Update on my NVA T54 build:
0.5mm Brass rods bent and shaped replace the braces for the turret that originally came with the kit. The ACE kit came in handy and provided the brackets for the rear fuel tanks. But these required a lot of clean-up.
I've scratch-built the headlamp guards from 0.3mm brass rods.
Textured the turret by brushing Tamiya Extra-thin plastic cement then pounding the turret surface with a worn tooth brush.
Hoping that we get good weather this weekend so I can start painting the model.
Kinggeorges
Barcelona, Spain / España
Joined: August 31, 2005
KitMaker: 1,380 posts
Armorama: 845 posts
Joined: August 31, 2005
KitMaker: 1,380 posts
Armorama: 845 posts
Posted: Saturday, May 12, 2012 - 12:07 PM UTC
Hello fellow campaigners,
It's been a wile
It's been a wile
Kinggeorges
Barcelona, Spain / España
Joined: August 31, 2005
KitMaker: 1,380 posts
Armorama: 845 posts
Joined: August 31, 2005
KitMaker: 1,380 posts
Armorama: 845 posts
Posted: Saturday, May 12, 2012 - 12:20 PM UTC
Happy to have something back to bring on the table. After some extensive and quite too long preparation exercises, lenghty braistorming with myself, and fianlly some haircutting in the middle of my had, I finally decided to dress my two figgies with a setting. No one can contest a figgy without a good base is like sex without love, Tintin without Milou or dreams without the screen movie behind.
I must say since my first post on armorama, some times ago (ouch, I was a junior then.....time is passing by) this is the nicest campaign I've experience, full of diverse materials, all I must say very weel exectuded, just to refer to the massiveFantom, the franckenstein marvellous grunt having escaped from a duel, the impressive vehicule collection and nice dioramas from Vietnamese, Malaysia and some other exotic countries, some french sculptor, a rescuing helico and now the T54 NVA entering the arena (and maybe the palace gates?? I like this kind of campaign, and website allwing us to do that, because it brings all specialisties, all personnal preference and skill levels in a sharing and fun spirit (unlike some other sites where some guards are watchful on the fact that tanks must stay with tank and plane with plane, so that as we say in France "que les vaches soient bien gardés" (so that the cow are well grazed), and the fact that grand masters publish their work there which prohibits any attempt to post something that consequently we self consider automatically as crappy). The only problem of these kind of capaign is that it gives the taste to test everything (from plane to boat), which makes me lost my focus.
So back to my sheeps, I worked on a little palace, as always in miniature, so you have to call upon your imagination to see it as the Taj Mahl, or more precisely the citadelle of Hue, where I spent some holidays two years ago, from where I brought by a lot of pastels landscape and devoted atmosphere in my head.
So the first element of the scene is basically built. I had a lot of fun in searching how my build could approach the real thing. I could add some elements (suggestions welcomed), and we'll see where the muses lead me.
On the picture only the first coat is applied. I will have a lot of f...g good time in playing with the pastel layers. Then the mercyless jungle will make its entering... For the crépis I hesitated between tempora and oils, and for the moment oils has my preference.
So some navy seals and LDNN on patrols
All comments, rethoric, poetic or just technic are welcome, happy hours for all the writers
Best,
Julien
Kinggeorges
Barcelona, Spain / España
Joined: August 31, 2005
KitMaker: 1,380 posts
Armorama: 845 posts
Joined: August 31, 2005
KitMaker: 1,380 posts
Armorama: 845 posts
Posted: Saturday, May 12, 2012 - 12:22 PM UTC
Some reference pics before the movie starts..
(angkor thom, some of the most impressive temple I did)
(a massive gate at the entrance of the parc of a wide old palace in the countryside of Hué)
(angkor thom, some of the most impressive temple I did)
(a massive gate at the entrance of the parc of a wide old palace in the countryside of Hué)
Kinggeorges
Barcelona, Spain / España
Joined: August 31, 2005
KitMaker: 1,380 posts
Armorama: 845 posts
Joined: August 31, 2005
KitMaker: 1,380 posts
Armorama: 845 posts
Posted: Saturday, May 12, 2012 - 12:23 PM UTC
And here we go
(my dwarf gate )
(Hidden Bouddahs)
(bricks work)
(the viewing lines are created)
All the best dear fellows
Julien
(my dwarf gate )
(Hidden Bouddahs)
(bricks work)
(the viewing lines are created)
All the best dear fellows
Julien
vonHengest
Texas, United States
Joined: June 29, 2010
KitMaker: 5,854 posts
Armorama: 4,817 posts
Joined: June 29, 2010
KitMaker: 5,854 posts
Armorama: 4,817 posts
Posted: Saturday, May 12, 2012 - 01:16 PM UTC
Stephen and Marcos: Both of your builds are looking good, keep at it!
Julien: Focus? What's that? I agree with you a bit on that, but I find it more inspiring than distracting. That and I really don't want to run 3 or 4 different sister campaigns at once Nice work!
Posted: Saturday, May 12, 2012 - 02:28 PM UTC
Thanks Jeremy!
Thanks Jesper! ,a couple of the guys at work build or built models and I have nrver been one to eat much at work so this let`s me enjoy my break. I am doing trumps Challenger II right now.
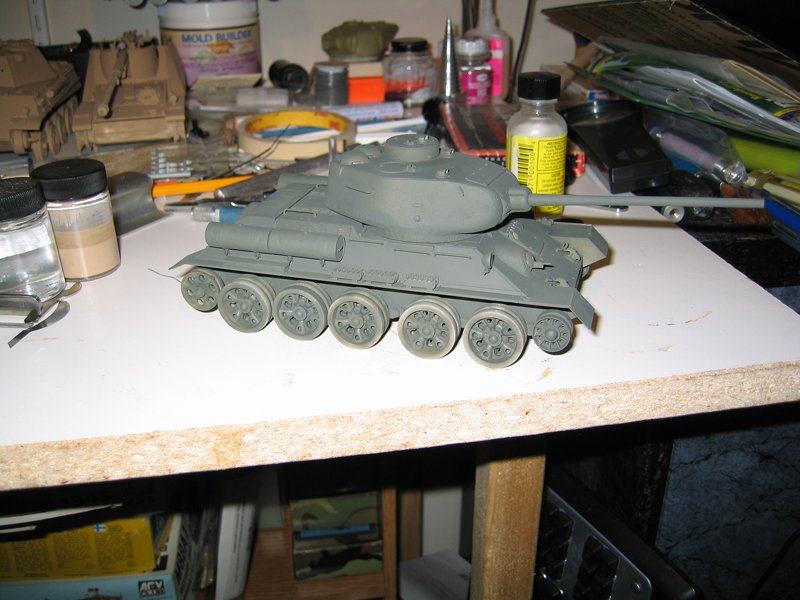
As for the T-34 I hope to get some paint on it this weekend.
Cheers Rob.
Thanks Jesper! ,a couple of the guys at work build or built models and I have nrver been one to eat much at work so this let`s me enjoy my break. I am doing trumps Challenger II right now.
As for the T-34 I hope to get some paint on it this weekend.
Cheers Rob.
zontar
Hawaii, United States
Joined: August 27, 2006
KitMaker: 1,646 posts
Armorama: 1,557 posts
Joined: August 27, 2006
KitMaker: 1,646 posts
Armorama: 1,557 posts
Posted: Saturday, May 12, 2012 - 03:34 PM UTC
Julien: great work on the gate.
Happy Modeling, -zon
Posted: Sunday, May 13, 2012 - 08:22 PM UTC
Got a coat of paint on.
Cheers Rob.
Cheers Rob.
Kinggeorges
Barcelona, Spain / España
Joined: August 31, 2005
KitMaker: 1,380 posts
Armorama: 845 posts
Joined: August 31, 2005
KitMaker: 1,380 posts
Armorama: 845 posts
Posted: Sunday, May 13, 2012 - 10:44 PM UTC
Thanks Jeremy and Zon !
Kinggeorges
Barcelona, Spain / España
Joined: August 31, 2005
KitMaker: 1,380 posts
Armorama: 845 posts
Joined: August 31, 2005
KitMaker: 1,380 posts
Armorama: 845 posts
Posted: Friday, May 18, 2012 - 10:50 PM UTC
Hello here,
I keep on going on my South Asia setting, to welcome my seals pair. I really had nice time when building this little thing !
I could say it's half way done. The left part is in the final stage, the only thing left is the green lavish application. The right part is not yet moistered. It's funny because on the picture it looks a lot more white/clear than in reality (I applied tens of balck and burnt sierra washes !).
During the first painting process I also experience some troubles. The basic material below is polyester, on which I applied a plaster layer. In order to reproduce cracks, I played and cut a little the plaster. Then I applied the oil washes, very diluted. Then the cracks became bigger and bigger, up to a cavernous point. First it was nice and convincing, but after half an hour, the building was really melting. My dumb try gave me the opportunity to cover again with plaster some part of the wall, where I played with the roughcast texture.
I hope you enjoy watching it as much as I enjoyed working on it.
Best
Julien
Posted: Sunday, May 20, 2012 - 02:43 PM UTC
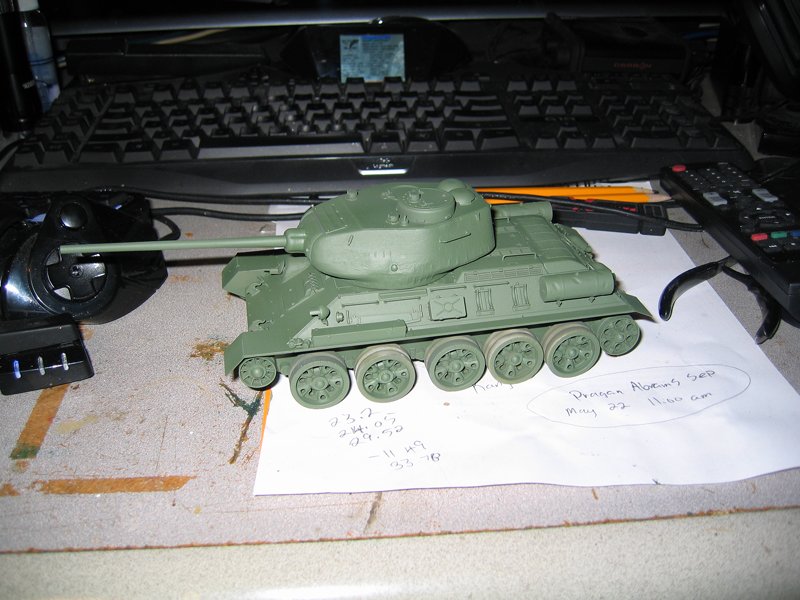
Wasn't happy with the color I mixed so remixed it and painted again.
This looks better I think.
Cheers Rob.
This looks better I think.
Cheers Rob.
Posted: Sunday, May 20, 2012 - 03:33 PM UTC
Hi James, Muhammad, Julian and Jasper excellent work folks.
Terrific campaign guys.
Thanks all.
Al
Terrific campaign guys.
Thanks all.
Al
Kinggeorges
Barcelona, Spain / España
Joined: August 31, 2005
KitMaker: 1,380 posts
Armorama: 845 posts
Joined: August 31, 2005
KitMaker: 1,380 posts
Armorama: 845 posts
Posted: Sunday, May 20, 2012 - 11:03 PM UTC
Thanks Alan.
I do agree this campaign shows a lot of good work in a good variety of subjects.
Best,
Julien
I do agree this campaign shows a lot of good work in a good variety of subjects.
Best,
Julien
vonHengest
Texas, United States
Joined: June 29, 2010
KitMaker: 5,854 posts
Armorama: 4,817 posts
Joined: June 29, 2010
KitMaker: 5,854 posts
Armorama: 4,817 posts
Posted: Monday, May 21, 2012 - 07:17 AM UTC
Julien: Looking good and crusty! I can see the black and sepia a bit, but the light is washing out slightly.
Rob: Good looking base green color, can't wait to see those decals on there!
Kinggeorges
Barcelona, Spain / España
Joined: August 31, 2005
KitMaker: 1,380 posts
Armorama: 845 posts
Joined: August 31, 2005
KitMaker: 1,380 posts
Armorama: 845 posts
Posted: Monday, May 21, 2012 - 08:26 AM UTC
hello Jeremy,
Thanks. yes, the light was a bit bright when I took the pictures. But don't worry there will be more !
Best,
Julien
Thanks. yes, the light was a bit bright when I took the pictures. But don't worry there will be more !
Best,
Julien
Posted: Wednesday, May 23, 2012 - 05:46 AM UTC
Looks great, Julien. Looks like it will end up as another masterpiece from you. Looking forward to see more.
Rob, I think you were right about the color. Difficult to judge from the pictures, but I think the new color looks much better and more "right".
Posted: Wednesday, May 23, 2012 - 09:24 AM UTC
Daniel,
I have some info on the RAAF Canberra's that will be of interest to you! Have a look at Eduards set of PE parts for the B.20 cockpit, in particular the link to the instruction sheet:
http://www.eduard.com/store/Eduard/Canberra-B20-S-A-1-48.html?cur=1&listtype=search&searchparam=canberra
B.20's did indeed only have the 2 crewmen, the right hand seat looks like it was replaced by a rack of consoles. This set seems to have all the bits needed to accurize the RAAF B.20. I know I will be getting it when I get round to doing mine. They also do a much bigger and more comprehensive set (and more expensive!) with all the external bits.
Hope this helps.
Ste
Posted: Wednesday, May 23, 2012 - 10:52 AM UTC
Jeremy,Jesper, Thanks!
Yes I am happy I changed the color, the first try came out too dark.
Cheers Rob.
Yes I am happy I changed the color, the first try came out too dark.
Cheers Rob.
tsweeney
New Jersey, United States
Joined: February 09, 2007
KitMaker: 149 posts
Armorama: 131 posts
Joined: February 09, 2007
KitMaker: 149 posts
Armorama: 131 posts
Posted: Thursday, May 24, 2012 - 03:01 PM UTC
In their very first hour in Hue, on February 1, 1968, Marines of the 2nd Platoon of Fox Company, 2nd Battalion, 5thMarines, are pinned down along with two Marine tanks by North Vietnamese soldiers defending
Tran Cao Van Street.
Thanks
Tom
Tran Cao Van Street.
Thanks
Tom