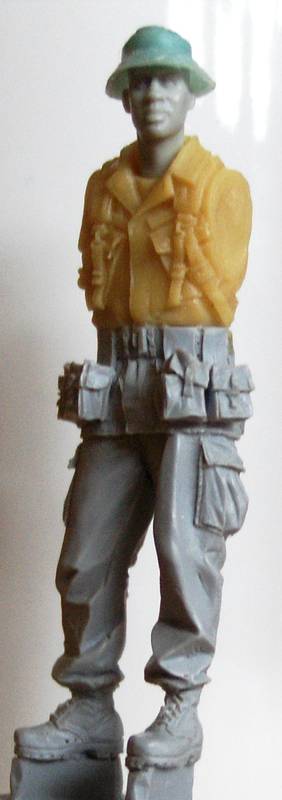
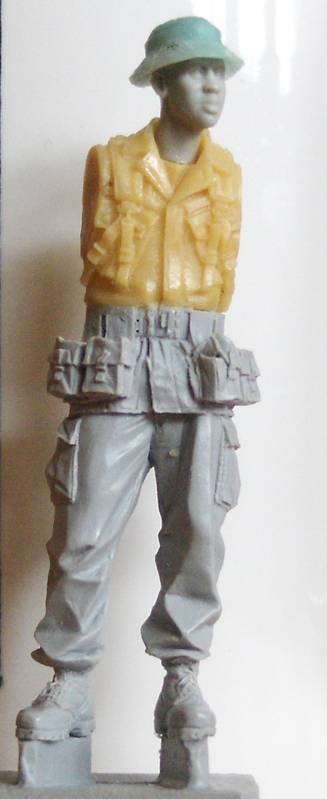
August already where is time going this will be my entry
I just don't know when I will get a chance to start it most likely take it with me on vacation and start it then
Campaigns
Where Armorama group builds can be discussed, organized, and updates posted.
Hosted by Darren Baker, Richard S.
Vietnam: Trouble in Southeast Asia
ltb073
New York, United States
Joined: March 08, 2010
KitMaker: 3,662 posts
Armorama: 3,078 posts
Joined: March 08, 2010
KitMaker: 3,662 posts
Armorama: 3,078 posts
Posted: Tuesday, August 02, 2011 - 09:04 AM UTC
Youngun
Ontario, Canada
Joined: November 10, 2010
KitMaker: 587 posts
Armorama: 550 posts
Joined: November 10, 2010
KitMaker: 587 posts
Armorama: 550 posts
Posted: Thursday, August 04, 2011 - 10:07 AM UTC
If its not to late count me in with the Tamiya M577 and M113 perhaps in a diorama im not sure yet>
vonHengest
Texas, United States
Joined: June 29, 2010
KitMaker: 5,854 posts
Armorama: 4,817 posts
Joined: June 29, 2010
KitMaker: 5,854 posts
Armorama: 4,817 posts
Posted: Saturday, August 06, 2011 - 01:59 PM UTC
Garry: Thanks!
Alex: You've got plenty of time bud, model on!
Phill: The M48 is oddly enough part of what inspired me to start this campaign
We have some good projects lined up in the works for this campaign, and I'm looking forward to seeing them come to fruition. Carry on!!
Alex: You've got plenty of time bud, model on!
Phill: The M48 is oddly enough part of what inspired me to start this campaign
We have some good projects lined up in the works for this campaign, and I'm looking forward to seeing them come to fruition. Carry on!!
orpant
Attica, Greece / Ελλάδα
Joined: January 16, 2010
KitMaker: 139 posts
Armorama: 135 posts
Joined: January 16, 2010
KitMaker: 139 posts
Armorama: 135 posts
Posted: Saturday, August 06, 2011 - 09:02 PM UTC
Hi everybody!!!
So the SNAP FOX, has begun...
The construction is separated in to halves: the M-548 carrier, and the Quad.
The carrier, practically builded it self: the putty was used only in the joint of the upper front section with the lower
Since Friday afternoon that I started it, I'm up to here:
I have already primed it, and painted the driver compartment...
The seats are covered with aluminium foil, and the warning signs came from couple of old aircraft markings from my spare box (yes I used to build planes back in my youth )
So I'll put it aside and start on the quad, witch is a bit more demanding (resin and p.e. parts)
WARDUKWNZ
Auckland, New Zealand
Joined: June 01, 2011
KitMaker: 1,716 posts
Armorama: 1,638 posts
Joined: June 01, 2011
KitMaker: 1,716 posts
Armorama: 1,638 posts
Posted: Saturday, August 06, 2011 - 10:14 PM UTC
Jeremy I am quite happy then that i'm using a tank which inspired you slightly for this campaign ...and i look forward to smashing the living hell out of it .. i have a book called Vietnam Tracks and it has many good pics of M48's in it ,,many showing damage from bush bashing ,,I am going to use the damage from about 5 tanks in total and combine them on to the one tank ..make it look like its been in the Nam since day one and its still rockin .
I did the same thing to another M48 yrs ago when i wasnt all that good ,,now i have better skills and ohhh its gonna look very good now
Panzerace
Ankara, Turkey / Türkçe
Joined: November 30, 2004
KitMaker: 459 posts
Armorama: 109 posts
Joined: November 30, 2004
KitMaker: 459 posts
Armorama: 109 posts
Posted: Monday, August 08, 2011 - 09:44 PM UTC
Hi Everybody! I will have a little contribution to this campaign. Vietnam is M-113 to me and I like to build my new arrived 1/72 M-113 ACAV. If I find more time from other campaigns I can prepare a mini dio for it or may be a second vehicle.
vonHengest
Texas, United States
Joined: June 29, 2010
KitMaker: 5,854 posts
Armorama: 4,817 posts
Joined: June 29, 2010
KitMaker: 5,854 posts
Armorama: 4,817 posts
Posted: Friday, August 12, 2011 - 12:54 PM UTC
Orestis: Interesting choice, I like it! Looking forward to that quad as well
Phill: They look great like that don't they?
Burak: The more the better! It'll be grate to see some braille armour in here
Phill: They look great like that don't they?
Burak: The more the better! It'll be grate to see some braille armour in here
WARDUKWNZ
Auckland, New Zealand
Joined: June 01, 2011
KitMaker: 1,716 posts
Armorama: 1,638 posts
Joined: June 01, 2011
KitMaker: 1,716 posts
Armorama: 1,638 posts
Posted: Friday, August 12, 2011 - 11:31 PM UTC
Jeremy you got that right buddy they a big mean looking tank but when they are damaged due to bush bashing they just look even better ..bugger all to damage on the M113 but scratching and maybe some slight panel damage but i am going to enjoy building the M48 again like that and i will be using the AFV Club M48/60 workable track set to ..they fit great ,,look great and a heap cheaper than the Furil tracks
Whitey
Massachusetts, United States
Joined: September 20, 2010
KitMaker: 137 posts
Armorama: 100 posts
Joined: September 20, 2010
KitMaker: 137 posts
Armorama: 100 posts
Posted: Saturday, August 13, 2011 - 11:35 AM UTC
Here's my kit.
Duece and a half was the best truck the army ever had. I bet you can't find a soldier who enlisted between 1960 and 1995 who didn't ride in one at some point.
I'm looking forward to getting started, but it might be a few months before I get into it. I have a few other campaigns I'm running behind on.
RonC
Texas, United States
Joined: May 16, 2006
KitMaker: 56 posts
Armorama: 39 posts
Joined: May 16, 2006
KitMaker: 56 posts
Armorama: 39 posts
Posted: Saturday, August 13, 2011 - 01:56 PM UTC
I'm a very later entry, I know! I'm looking to build a 1/32nd MiG-21 of the VPAF and a diorama on the Ho Chi Minh Trail for the campaign.
Thanks!
Ron
Thanks!
Ron
VLADPANZER
Lebanon
Joined: December 20, 2010
KitMaker: 568 posts
Armorama: 549 posts
Joined: December 20, 2010
KitMaker: 568 posts
Armorama: 549 posts
Posted: Sunday, August 14, 2011 - 07:05 AM UTC
Hey all,
Will be starting on this soon, I have drawn up some plans for my sand bag bunker. I might have found a figure to use on the dio from dragon.
Regards,
Will be starting on this soon, I have drawn up some plans for my sand bag bunker. I might have found a figure to use on the dio from dragon.
Regards,
35th-scale
Kildare, Ireland
Joined: November 21, 2007
KitMaker: 3,212 posts
Armorama: 2,807 posts
Joined: November 21, 2007
KitMaker: 3,212 posts
Armorama: 2,807 posts
Posted: Monday, August 15, 2011 - 01:37 AM UTC
Started my LSSC this weekend.
The boat itself is very simple but needs lots of filler and sanding:
The real challange is going to be the 6 figures.
The origional 2 crew need lots of sanding. The extra 5 that come with the kit seem a little better but will still be busy with the filler. For me figures are always an issue....
The boat itself is very simple but needs lots of filler and sanding:
The real challange is going to be the 6 figures.
The origional 2 crew need lots of sanding. The extra 5 that come with the kit seem a little better but will still be busy with the filler. For me figures are always an issue....
atoplu
Ontario, Canada
Joined: August 17, 2003
KitMaker: 753 posts
Armorama: 107 posts
Joined: August 17, 2003
KitMaker: 753 posts
Armorama: 107 posts
Posted: Monday, August 15, 2011 - 02:01 AM UTC
Here is my entry campaign. This is HobbyBoss Commando car in 35th scale. Some progress pictures.
Barrels come from RB model.
atoplu
Ontario, Canada
Joined: August 17, 2003
KitMaker: 753 posts
Armorama: 107 posts
Joined: August 17, 2003
KitMaker: 753 posts
Armorama: 107 posts
Posted: Monday, August 15, 2011 - 02:03 AM UTC
atoplu
Ontario, Canada
Joined: August 17, 2003
KitMaker: 753 posts
Armorama: 107 posts
Joined: August 17, 2003
KitMaker: 753 posts
Armorama: 107 posts
Posted: Monday, August 15, 2011 - 02:04 AM UTC
atoplu
Ontario, Canada
Joined: August 17, 2003
KitMaker: 753 posts
Armorama: 107 posts
Joined: August 17, 2003
KitMaker: 753 posts
Armorama: 107 posts
Posted: Monday, August 15, 2011 - 02:06 AM UTC
Whitey
Massachusetts, United States
Joined: September 20, 2010
KitMaker: 137 posts
Armorama: 100 posts
Joined: September 20, 2010
KitMaker: 137 posts
Armorama: 100 posts
Posted: Monday, August 15, 2011 - 08:09 AM UTC
Holy speed-builder, Batman!
zontar
Hawaii, United States
Joined: August 27, 2006
KitMaker: 1,646 posts
Armorama: 1,557 posts
Joined: August 27, 2006
KitMaker: 1,646 posts
Armorama: 1,557 posts
Posted: Tuesday, August 16, 2011 - 10:45 AM UTC
Axel: nice choice. I drove one of those a few times myself.
Sean: there's almost more putty than plastic on your LSSC. Good work though and I look forward to seeing it develop.
Ayhan: very nice. I particularly like the weathering.
I've finally settled on an M-50 Ontos for this campaign, which I picked it up at a hobby store recently. Now I have to order the Verlinden interior, so it'll be a while before I can start.
Happy Modelling, -zon
Firefly74
Queensland, Australia
Joined: April 15, 2010
KitMaker: 224 posts
Armorama: 205 posts
Joined: April 15, 2010
KitMaker: 224 posts
Armorama: 205 posts
Posted: Saturday, August 20, 2011 - 02:58 PM UTC
Hi all.
I opened my kit last night. It's the 1:76 Airfix M113 Fire Support Vehicle in Australian service
It's a very simple kit and I don't think i'll be making to many improvements.
Will have to check the decals provided are accurate but will be representing a vehicle from 3rd Cavalry Regiment.
This will be the most "modern" vehicle i've ever built so looking forward to something a little different!
Cheers,
Tim
Stefan1580
Berlin, Germany
Joined: November 20, 2006
KitMaker: 360 posts
Armorama: 354 posts
Joined: November 20, 2006
KitMaker: 360 posts
Armorama: 354 posts
Posted: Sunday, August 21, 2011 - 05:36 AM UTC
Hi at all,
here is some of my WiP at the Moment. I am working at an little dio with some SASR Figures and an vignette with two or three LRRP Figures. Nearly all of them will be conversions from different Manufactures like Bravo-6 and Hobby Fan etc. There will be five to six SASR with one ore more captured VC and one of the SASR guys will have an Camera in his hands and makes some Photos of the successful Mission.
Here are the Photos:
Hope you like them :-)
Greetings
Stefan
VLADPANZER
Lebanon
Joined: December 20, 2010
KitMaker: 568 posts
Armorama: 549 posts
Joined: December 20, 2010
KitMaker: 568 posts
Armorama: 549 posts
Posted: Monday, August 22, 2011 - 12:26 PM UTC
Hi all,
So this is my progress so far, I started working on this project four days ago, I have added the celluclay and some sand! I have started to lay down some sandbag’s to make an approximation of how much I have to buy. I am using Chiclets gum that has been soaked in water; basically my diorama smells of peppermint. I am planning to have a small adjourning bunker for infantry and crew but I will only be showing a very small part of it. So that’s all for today, I need to go to the store and buy some more Chiclets.
I am really happy that this campaign started, It’s the first time I try a Vietnam build!
Any advice to improve the diorama is more than welcomed!!
Looking forward to all your builds!!
Regards,
zontar
Hawaii, United States
Joined: August 27, 2006
KitMaker: 1,646 posts
Armorama: 1,557 posts
Joined: August 27, 2006
KitMaker: 1,646 posts
Armorama: 1,557 posts
Posted: Monday, August 22, 2011 - 01:25 PM UTC
umm... peppermint...
Looking good. Is it too late to angle the tank / bunker in relation to the base?
Happy Modelling, -zon
Looking good. Is it too late to angle the tank / bunker in relation to the base?
Happy Modelling, -zon
Magpie
Queensland, Australia
Joined: July 10, 2011
KitMaker: 653 posts
Armorama: 273 posts
Joined: July 10, 2011
KitMaker: 653 posts
Armorama: 273 posts
Posted: Monday, August 22, 2011 - 02:11 PM UTC
Hi all, I signed up to this campaign thinking that I could be really unique and do some Aussies in Vietnam but I see two of our mates are on the same theme already ... Excellent stuff !
I've been out of modelling for ages so my stuff won't even come close to the amazing standard I see in here but hey I'm gonna have a crack. Stunning work on the armoured car by the way, Ayhan
I have chosen Australia's biggest engagement in Vietnam as a framework, the NVA Attacks of FSB's Coral and Balmoral and in particular the actions of Aussie armour in clearing a bunker complex that turned out to be the HQ of an NVA Division.
The scene will depict an M60 and his No2 going to ground while a Pl Comd and his Sig shelter behind a Centurion tank. The "Boss" is on the radio to the Tank Comd to give a target indication. Looking to present the finished models in a composed photo rather than an actual diorama.
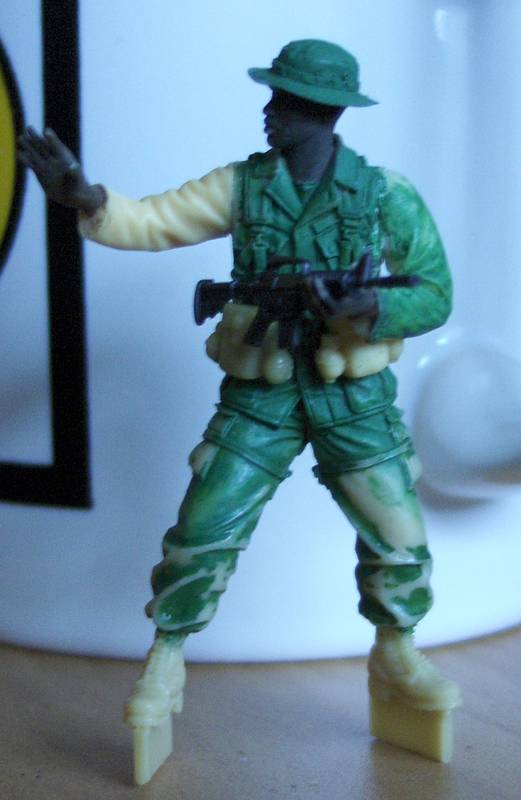
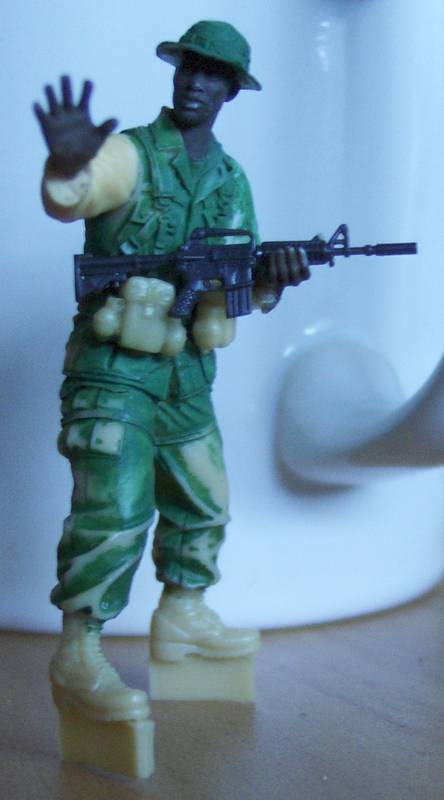
Of course Aussie soliders in scale are pretty rare so I have cobbled together a few Dragon kits, Marine Recon, LRRP and Marines at Khe San provide a fair bit of gear and the figures, although Americans, are pretty close. No where near as good looking of course I have also added some early model L1A1's from Mouse House which are OK but do need a bit of a clean up.
The tank is still in the mail but I have started work on the troops.
Here is a shot of my progress to date:
Couple of questions.
The Dragon kit comes with link for the M60, any tips on how to make this look "floppy" like the real stuff?
I want one of the diggers to have a torn shirt, any tips on how I might do that? I was thinking of using tissue paper like I saw a fellow do canvas with.
The Sig will have a radio on his back, of course, so any ideas on how to make the coiled hand piece wire and the 3 foot antenna? The problem with the 3 footer is that it is flat and I have no idea how to do that. I might use a folded down 10 footer yet as they work a lot better in the "J" and being circular might be a bit easier to make.
I am sure I will have 1000 more questions before I am done so I beg your indulgence.
PS your dio is looking great Vlad and edible too !
ltb073
New York, United States
Joined: March 08, 2010
KitMaker: 3,662 posts
Armorama: 3,078 posts
Joined: March 08, 2010
KitMaker: 3,662 posts
Armorama: 3,078 posts
Posted: Monday, August 22, 2011 - 04:23 PM UTC
Ok Im back from vacation and like I said I took my kit with me and actually got some work done on it
Most of the 105mm Gun
Most of the jeep is finished some parts are dry fit for now
and the gun placed in the back of the jeep
Now to clean off some of the other campaign stuff on the workbench that ends before this one
Most of the 105mm Gun
Most of the jeep is finished some parts are dry fit for now
and the gun placed in the back of the jeep
Now to clean off some of the other campaign stuff on the workbench that ends before this one
zontar
Hawaii, United States
Joined: August 27, 2006
KitMaker: 1,646 posts
Armorama: 1,557 posts
Joined: August 27, 2006
KitMaker: 1,646 posts
Armorama: 1,557 posts
Posted: Monday, August 22, 2011 - 04:38 PM UTC
Scott: welcome aboard and nice theme.
Sal: good clean start on the MUTT and rifle.
Happy Modelling, -zon
Sal: good clean start on the MUTT and rifle.
Happy Modelling, -zon