Campaigns
Where Armorama group builds can be discussed, organized, and updates posted.
Get 'er Done Mk3
PantherF
Visit this Community
Indiana, United States
Joined: June 10, 2005
KitMaker: 6,188 posts
Armorama: 5,960 posts
Posted: Tuesday, October 02, 2012 - 11:15 PM UTC

Quoted Text


Quoted Text

Gary,
I thought Warren was doing this campaign, did I miss something?

Cheers Rob.


He started the campaign proposal thread but didn't submit the actual campaign for approval so Jeff stepped up to the plate.


Oh that's too bad as I thought he was doing such a fine job but totally understand the real life problems that can get in the way.

I'll help out too if needed.


~ Jeff
Big-John
Visit this Community
Ohio, United States
Joined: August 12, 2010
KitMaker: 731 posts
Armorama: 711 posts
Posted: Tuesday, October 02, 2012 - 11:18 PM UTC
I finally uploaded pics to the gallery.
heliman
Visit this Community
New York, United States
Joined: June 14, 2010
KitMaker: 702 posts
Armorama: 604 posts
Posted: Wednesday, October 03, 2012 - 10:48 AM UTC
Hey everyone, been away way too long..and I apologize for that. I asked Gary to find a new leader after an issue arose work related was taking all my attention. I wont get into details, but things are looking up again..and I would enjoy wrapping up this campaign w/ everyone! My build was shelved, but time still allows me to get r done!!

Thanks everybody for your support,

Jeff
Nito74
Visit this Community
Lisboa, Portugal
Joined: March 04, 2008
KitMaker: 5,386 posts
Armorama: 4,727 posts
Posted: Thursday, October 04, 2012 - 03:53 AM UTC
Welcome back Jeff !
I hate when other stuff get in the way of my builds & bench time..

Anyway, back to my build, spare tracks are done.
Turret work is finished !
A coat of primer right after the pics were taken..


Lakota
#123
Visit this Community
New Mexico, United States
Joined: November 17, 2008
KitMaker: 1,202 posts
Armorama: 635 posts
Posted: Saturday, October 06, 2012 - 11:37 AM UTC
Howdy Y'all

It's getting late but I'm weighing in with my model. I started this for the "Great Britain" campaign but didn't finish. I'm going to do one of the Matildas on Malta.


Lakota
#123
Visit this Community
New Mexico, United States
Joined: November 17, 2008
KitMaker: 1,202 posts
Armorama: 635 posts
Posted: Saturday, October 06, 2012 - 11:40 AM UTC
Here's some of the stuff I used so far.
AlanL
Visit this Community
England - East Anglia, United Kingdom
Joined: August 12, 2005
KitMaker: 14,499 posts
Armorama: 11,675 posts
Posted: Saturday, October 06, 2012 - 08:50 PM UTC

Quoted Text

@ Alan
Thanks for the compliments. In the original sketch I made up in my mind there was a 7th figure. And you guessed it... One was a peeing figure. However. I had two. One was a masterbox Motorcycle dispatcher who did not really match up in quality with the barbarossa figures from DML. The figure itself is not bad but too much difference. The other was from Hornet but that was just a bit too big for the rest of the figures. It was just a tad too big... but I still decided to leave it off because it did not feel good. Then I had an officer but he did not look relaxed enough. And a guy feeding something to the goat who was not good in detail and size. So eventually I decided to skip figure 7 alltogether. And looking back at it I still think it was a good choice


Hi Robert,

Yes, getting ones to match can be a problem, still looks excellent, it was just a thought.

Cheers

Al
Nito74
Visit this Community
Lisboa, Portugal
Joined: March 04, 2008
KitMaker: 5,386 posts
Armorama: 4,727 posts
Posted: Sunday, October 07, 2012 - 05:53 AM UTC
Not much done this weekend, some work on the hull.
I noticed I'm missing some parts of the "P" sprue..

Anyway, I'll try to fix something up, with 3 full spare boxes I'll manage something.

GidGar
Visit this Community
Alaska, United States
Joined: August 22, 2005
KitMaker: 47 posts
Armorama: 26 posts
Posted: Sunday, October 07, 2012 - 11:09 AM UTC
Hope I'm not too late to throw in a project for the campaign.

The old Italeri 234/1 with an Eduard PE kit. Friend from our model club let them go at a swap night. No wonder with the new Dragon kits out!

Did a fair amount of work on this one, then started getting into a lot of the PE work and shelved for a while. This campaign is good motivation for me to finish.
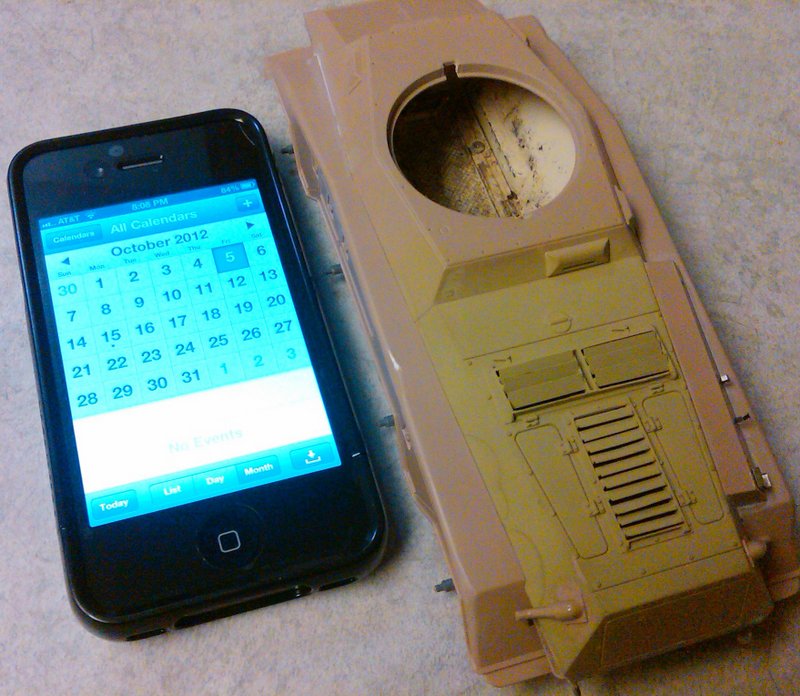


This is what I'm starting with. Hull assembled, interior complete.
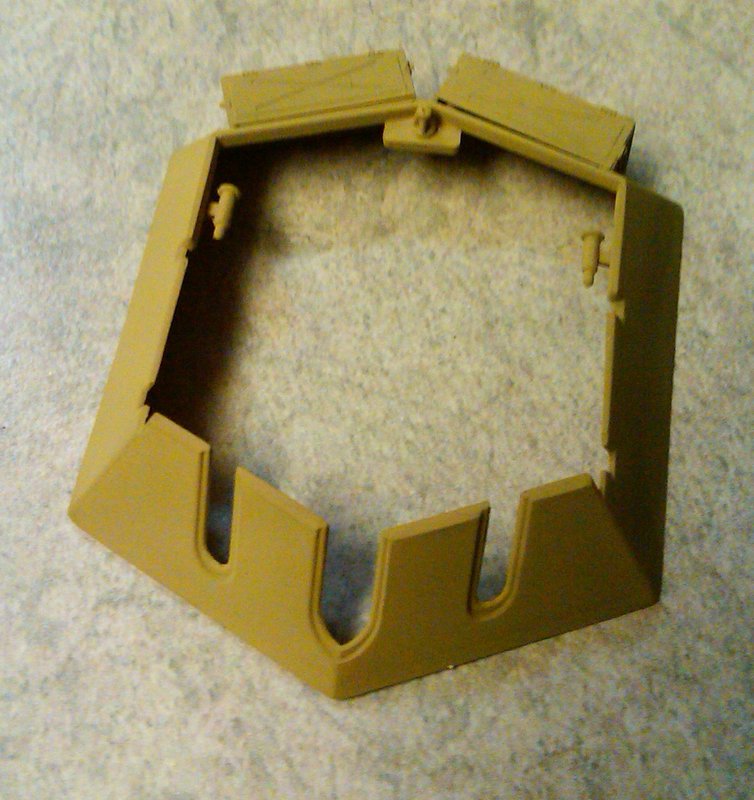


Here is the turret. Storage boxes are PE from the Eduard kit. I've never posted on a campaign before. Helps to photograph your model underway. I just noticed the gap on the right box. Nothing like a new perspective....
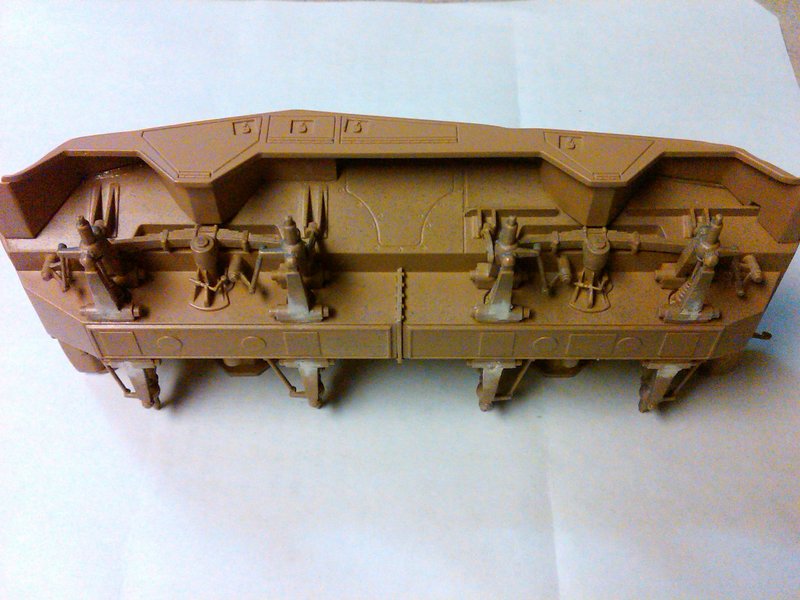


Hull side and bottom. Nice sink holes in the suspension, but nothing that some putty can't fix.
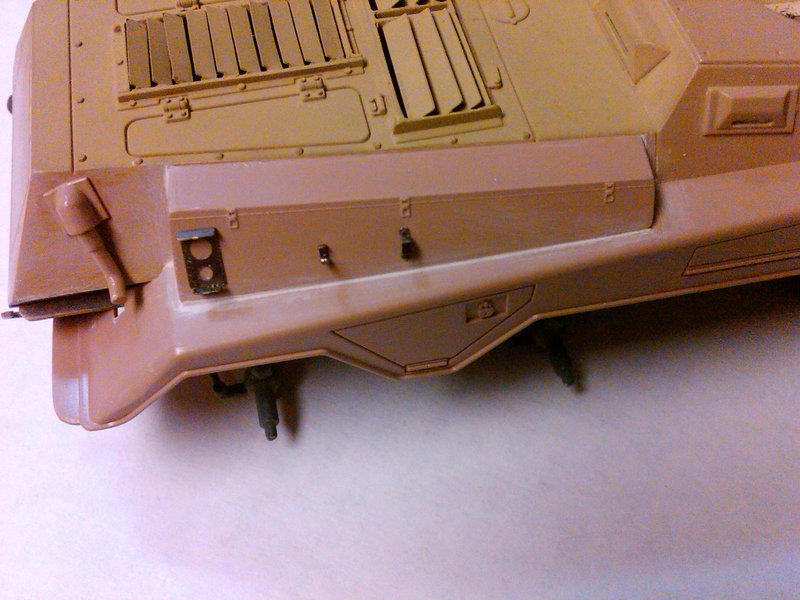


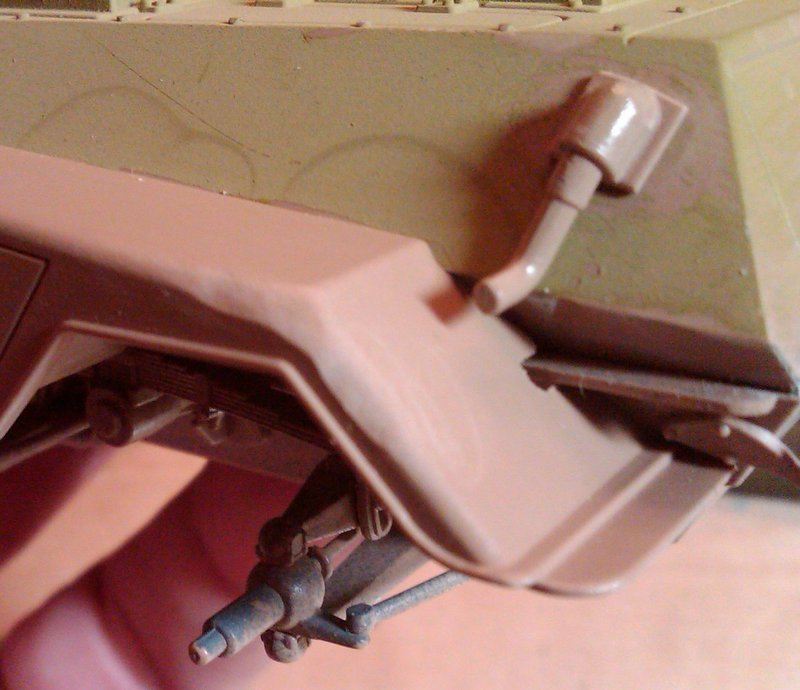
Rear storage locker with PE for the axe holding gear. I'm being selective on how many fiddly PE bits I'm going to use. I quickly reach my point of diminishing returns with PE for tool mounting brackets. All the louvers in the engine cooling area are PE as well. I like the look, but they were tedious. Trying to get the right angle on each one was a challenge. I have room to improve obviously!
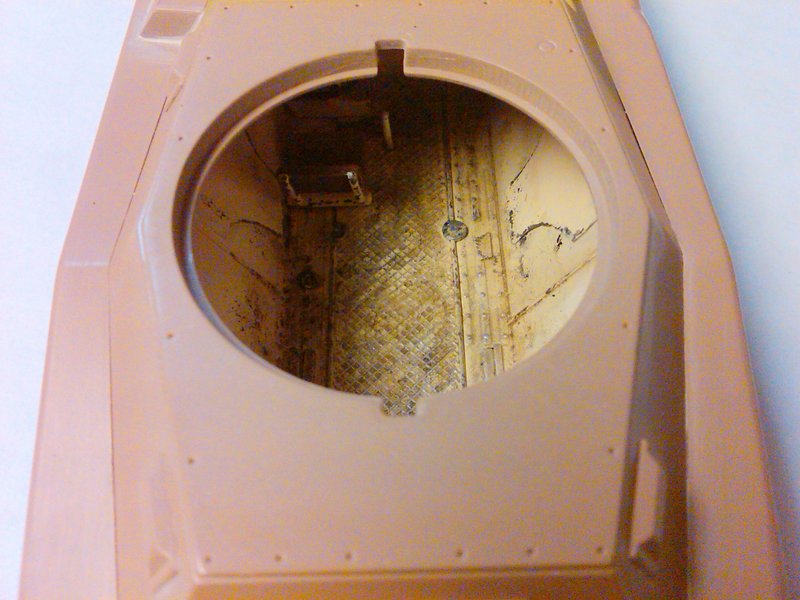


Small section of the interior. Traditional interior panzer buff with heavy weathering of floor. bit of thinned paint washes, brillo/sponge chipping, and graphite/silver drybrushing to get the nice cross tread. There are 4 annoying circles in the molding that a more attentive modeler would clean up. I merely add a Grandt line bolt to each one and make them look like access panels. Added interior door panel detail by cutting a piece of paper to shape, and then brushing on super glue to stiffen it. Glued into position and then chipped the edges a bit. Didn't have the "perfect" interior photo for reference, so bit of a guess.
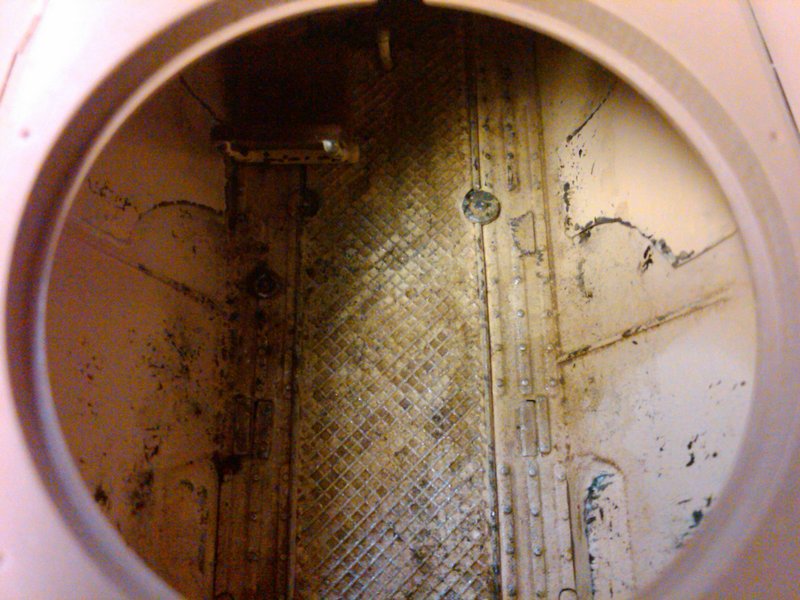


Close up of the interior floor weathering. Not pictured, but I did paint up and insert a Verlinden Uniform Jacket by the driver station.
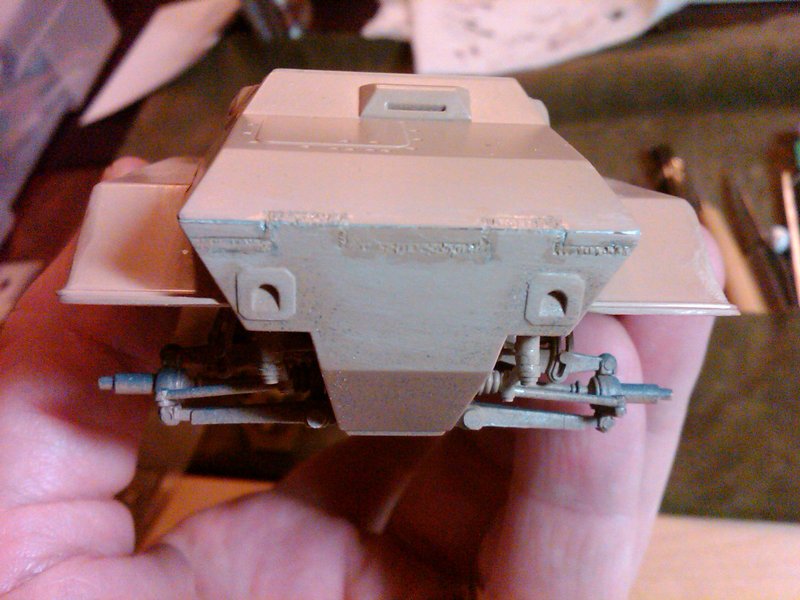


My attempt at detailing the welding seams on the front armor. Basic application of Tamiya thin cement to soften plastic, then small indentations with hobby knife. A bit rough, will see how it looks after priming.

Okay, now to work on those PE jerry can holders, rear view mirrors and other small bits that require me to meditate before attempting.

Hope to post more soon.

Thanks for the campaign, again, a good motivator to get some of my 80%'ers done.

G
roman
Visit this Community
Slovakia
Joined: July 20, 2004
KitMaker: 99 posts
Armorama: 95 posts
Posted: Sunday, October 07, 2012 - 08:21 PM UTC
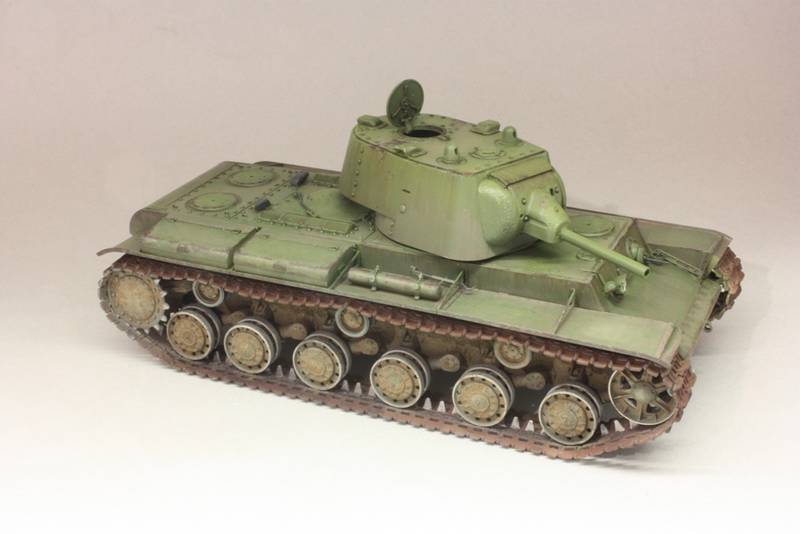
KV-1 1939 version

after fading and wash

Nito74
Visit this Community
Lisboa, Portugal
Joined: March 04, 2008
KitMaker: 5,386 posts
Armorama: 4,727 posts
Posted: Monday, October 08, 2012 - 05:28 AM UTC
@Gideon

Nice work on the old Italeri !

@roman

Looking good that KV !!


No pics today, but I managed to finish the hull details, equipment and so on, also gave 2 coats of matt black on the tracks and today a Track Wash with AK products.
More tomorrow.

I'm quite happy since this Tiger build was on hold for more than 3 yrs.. Stay tuned !
GidGar
Visit this Community
Alaska, United States
Joined: August 22, 2005
KitMaker: 47 posts
Armorama: 26 posts
Posted: Monday, October 08, 2012 - 06:33 PM UTC
Had a sick kid, so stayed home today and was able to knock out a few more PE detail parts.

Thanks for the comment John! Always fun to work on these older kits.


basic beer can dent with hobby knife.


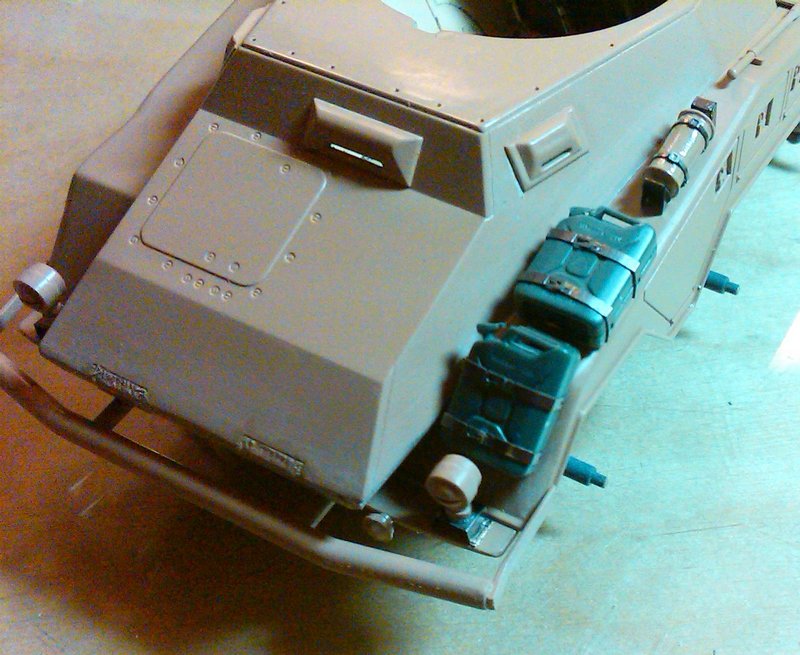
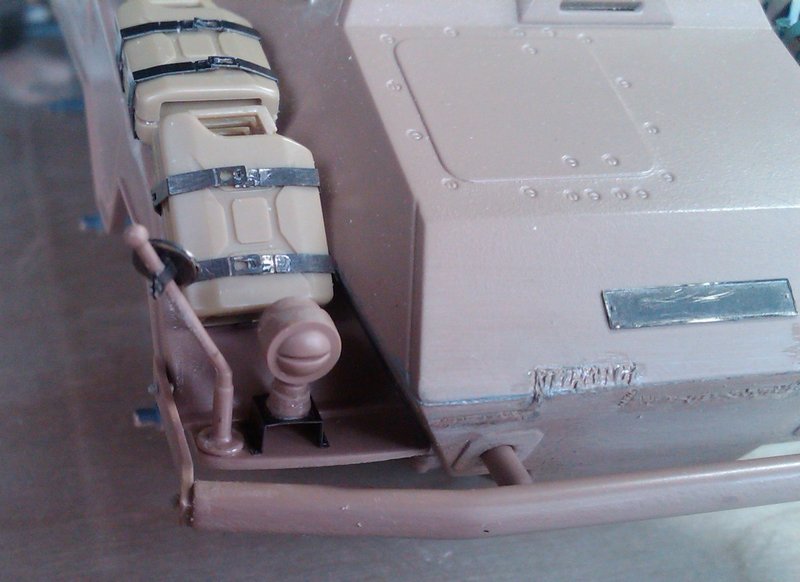
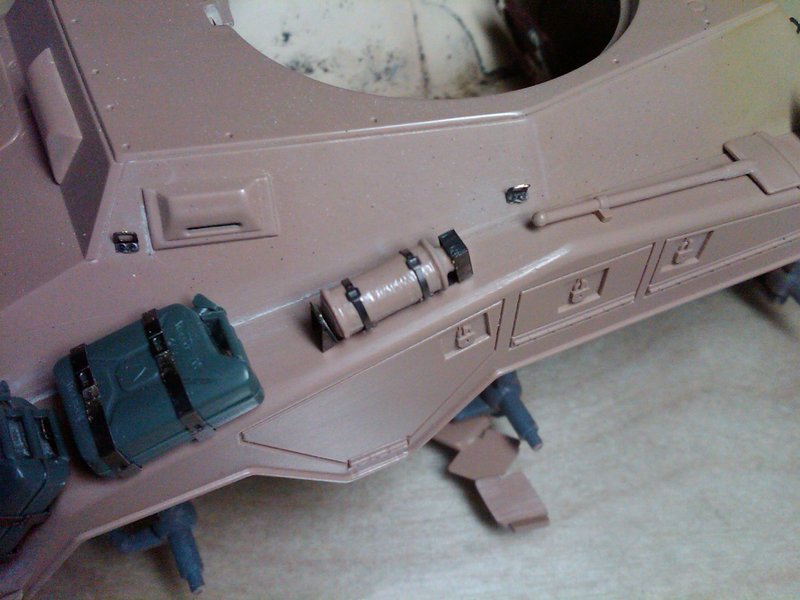
I used a mix of Tamiya and Academy jerry cans. I didn't want the hassle of cleaning up the kit cans. Green are Tamiya, and later, tan, are Academy.


Axe holder PE parts. Won't be doing many others like this!


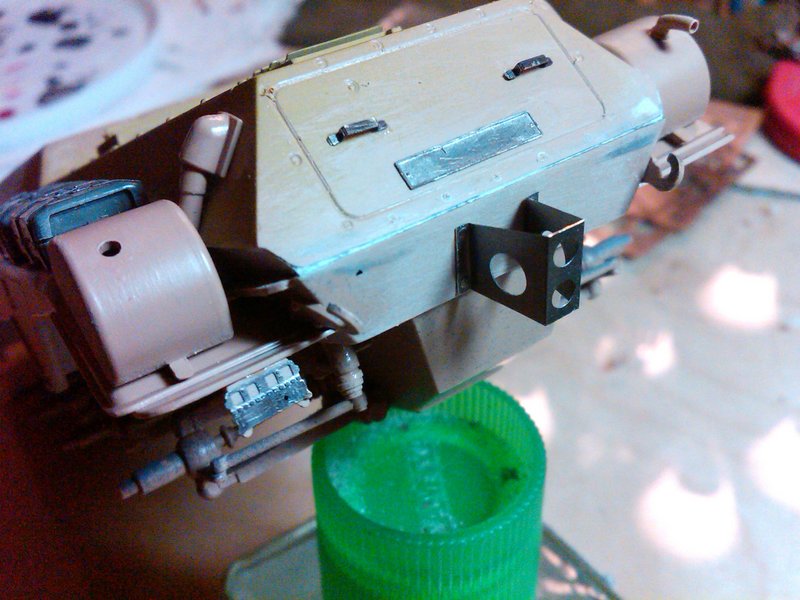
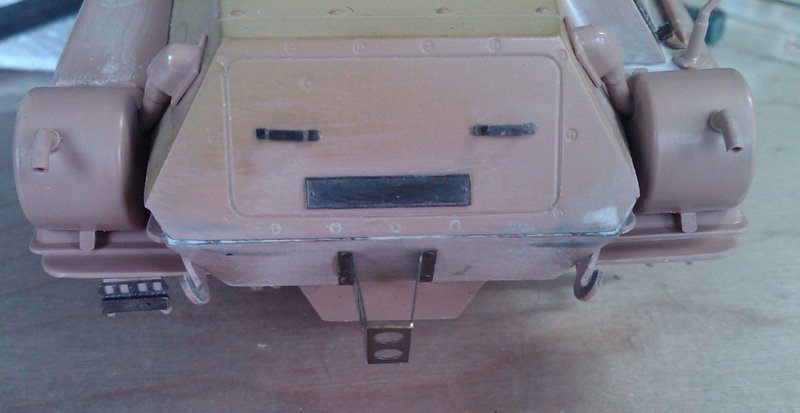
Rear of the vehicle. Will likely make a tarp to mount on the two brackets on the rear. Nothing like a photo to show your crooked work....


Same area, different angle.


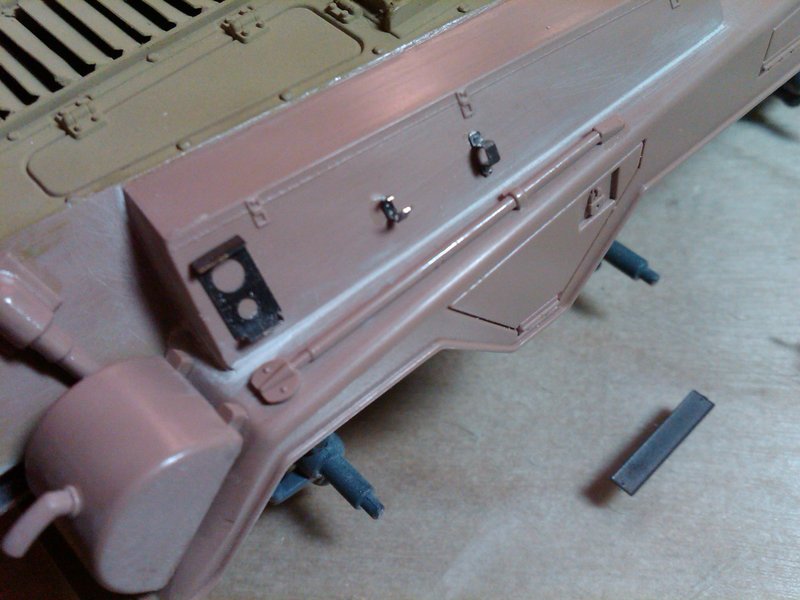
I found the rear view mirror assemblies easier to construct than I had originally thought. Jerry cans from Academy.


Lifting receptacles (8 of them!) cut, filed, bent and glued into position.


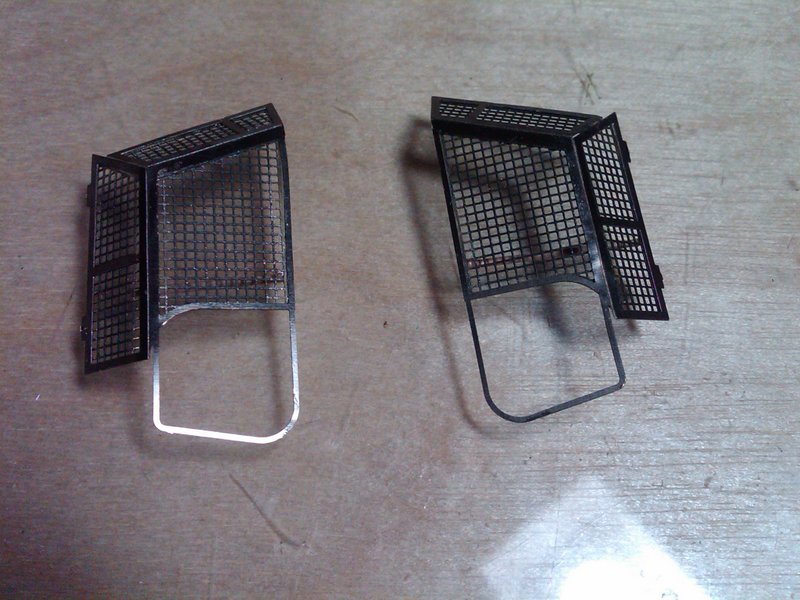
Finally, the turret mesh tops. Much easier with PE than my first attempt on this type of turret on the old Tamiya 223 armored car. Although I have fond memories of that old kit as my first "real" armor kit. Hence the nostalgia for this turret design.

Okay, ready for paint and what not.

G
Petro
Visit this Community
Connecticut, United States
Joined: November 02, 2003
KitMaker: 984 posts
Armorama: 846 posts
Posted: Tuesday, October 09, 2012 - 07:01 AM UTC
I don't remember when i did my last update. But, i started back to work on my Tamiya Hanomag 251 again.
After losing t he steering wheel, i just fabricated one together. Though definitely no perfect, it will suffice. I hope to have a photo update with in a day or two.
heliman
Visit this Community
New York, United States
Joined: June 14, 2010
KitMaker: 702 posts
Armorama: 604 posts
Posted: Wednesday, October 10, 2012 - 01:28 PM UTC
I finally got around to working on my Merkava..learned an important tip along the way! I wasn't using accelerator for CA glue kept breaking the joint. My buddy Bill suggested I try it, and it worked great!

The last of the ball n chain going together..


I'm using Verlinden small tow chain , and pin heads for the balls. The heads r a lil over scale, but from 10 ft away..looks ok! Now I can finally spray the bustle rack..and call it DONE!!!
Petro
Visit this Community
Connecticut, United States
Joined: November 02, 2003
KitMaker: 984 posts
Armorama: 846 posts
Posted: Thursday, October 11, 2012 - 03:01 PM UTC
God, i still hate this Tamiya hanomag kit.
Maybe a photupdate tomorrow, if i don't get disgusted again.
Petro
Visit this Community
Connecticut, United States
Joined: November 02, 2003
KitMaker: 984 posts
Armorama: 846 posts
Posted: Friday, October 12, 2012 - 12:32 PM UTC
Just a quick photo update.
I've got my upper seat backs assembled and installed in the lower hull. I ended scratch building the brackets for the seat backs. I have the Eduard etch set, but their brackets are too big. Upper hull just attached for photo purposes.
I've been painting wheels as i go. I will wash and highlight the rear compartment before i attach the upper super structer.
I might just complete this build before the campaign ends.

Removed by original poster on 10/15/12 - 09:17:36 (GMT).
heliman
Visit this Community
New York, United States
Joined: June 14, 2010
KitMaker: 702 posts
Armorama: 604 posts
Posted: Monday, October 15, 2012 - 12:34 PM UTC
my build has finally rounded the corner, and the end is in sight! I added the optics using blue colored confetti ,personally looks better than clear blue


as you can see, works continues on the rear basket..

shorty53
#330
Visit this Community
Queensland, Australia
Joined: July 15, 2011
KitMaker: 175 posts
Armorama: 72 posts
Posted: Monday, October 15, 2012 - 08:49 PM UTC
Nice work Jeff, the optic lens's look great and by the way I don't think you balls look too big!
Charlie-66
#186
Visit this Community
Texas, United States
Joined: May 24, 2006
KitMaker: 771 posts
Armorama: 750 posts
Posted: Saturday, October 20, 2012 - 09:28 AM UTC
I've made some more progress. All I have left is detail painting, and the throw some mud on this beast to finish it off.


AlanL
Visit this Community
England - East Anglia, United Kingdom
Joined: August 12, 2005
KitMaker: 14,499 posts
Armorama: 11,675 posts
Posted: Saturday, October 20, 2012 - 10:02 PM UTC
Hi Jeff, Gideon, Marc, Don, John and Roman,

Excellent work guys. Gideon the armoured car is coming along really well, lovely attention to detail.

Roman, neat KV 1. Will it be staying clean or getting muddy?

I've been working to try and finish a WOT3 I started 2 years ago.


Cheers

Al


roman
Visit this Community
Slovakia
Joined: July 20, 2004
KitMaker: 99 posts
Armorama: 95 posts
Posted: Monday, October 22, 2012 - 05:54 AM UTC
fading, chipping, pigments

MLD
Visit this Community
Vermont, United States
Joined: July 21, 2002
KitMaker: 3,569 posts
Armorama: 2,070 posts
Posted: Tuesday, October 23, 2012 - 08:08 AM UTC
nice work gents, love that Merkava. (he types resisting the urge to buy one and then use it in the "Getter done" Campaigns Mk5-9)

My DML Flak 36 placed at Granitecon in Nashua this weekend. Pics later tonight.
heliman
Visit this Community
New York, United States
Joined: June 14, 2010
KitMaker: 702 posts
Armorama: 604 posts
Posted: Tuesday, October 23, 2012 - 11:12 AM UTC
Well..my build has finally reached the finish line! I tried to re create that reallly dirty look seen on numerous photos.

Hope everyone likes it..


I wish I'd purchased the Legends basket set..the back appears a lil empty!

Jeff
GregCloseCombat
Visit this Community
California, United States
Joined: June 30, 2008
KitMaker: 2,408 posts
Armorama: 2,394 posts
Posted: Tuesday, October 23, 2012 - 04:44 PM UTC
Congrats Jeff! That's a awesome tank you finished there