Alberta, Canada
Joined: February 10, 2008
KitMaker: 221 posts
Armorama: 217 posts
Posted: Wednesday, May 29, 2013 - 01:08 PM UTC
Next thing to do is the Panda Plastics T48 track with Duckbills. Ounce the pads and end connectors are off the trees clean up goes quite fast. Then I use the "trapped" link method. This is where you glue one track pin on both sides of the pad. Then attach the end connectors so one hole is on the glued pin and the other is on the pin of the next pad with no glue. with one side of each shoe fixed but the other end movable. This method gives you a workable track. If everything goes according to plan. Wish me luck.
Cheers

Todd.

http://www.mvpa.org/
"Live, So That You May Live Forever".
Alberta, Canada
Joined: February 10, 2008
KitMaker: 221 posts
Armorama: 217 posts
Posted: Thursday, May 30, 2013 - 01:48 PM UTC
http://www.mvpa.org/
"Live, So That You May Live Forever".
Warszawa, Poland
Joined: March 12, 2013
KitMaker: 125 posts
Armorama: 36 posts
Posted: Friday, May 31, 2013 - 05:56 AM UTC
Hi guys,
do you think I can still jump into campaign with Tamiya kit 35250 (M4A3) ?

I have just bought this kit I thought that maybe I will finally start my first ever campaign


Regards,
Radek
On the bench: some armour ... and a plane... Oh and you would probably find some unfinished ships somewhere around the mancave ;)
Indiana, United States
Joined: June 10, 2005
KitMaker: 6,188 posts
Armorama: 5,960 posts
Posted: Friday, May 31, 2013 - 06:36 AM UTC
Thessaloniki, Greece / Ελλάδα
Joined: April 23, 2012
KitMaker: 402 posts
Armorama: 394 posts
Posted: Saturday, June 01, 2013 - 12:41 AM UTC
My work.
http://johnsprint79.wix.com/jkb-modelling
Isere, France
Joined: April 23, 2011
KitMaker: 735 posts
Armorama: 606 posts
Posted: Monday, June 03, 2013 - 01:06 AM UTC
hello, full of great editing, felicitation. I came here the Tamiya M4 Sherman. I shod with caterpillars Dragon and bogies academy.
steph


#186
Texas, United States
Joined: May 24, 2006
KitMaker: 771 posts
Armorama: 750 posts
Posted: Monday, June 03, 2013 - 02:55 AM UTC
John,
great job on the Firefly. I really love the paint job on it!
Thessaloniki, Greece / Ελλάδα
Joined: April 23, 2012
KitMaker: 402 posts
Armorama: 394 posts
Posted: Saturday, June 08, 2013 - 02:36 AM UTC
Steph interesting mix of parts! I will be waiting to see this one assembled! Good luck.
 Guy
Guy thanks a lot. This was the second Sherman i have ever built. I must admit, this got me thinking about building an early one as well at some point.


My work.
http://johnsprint79.wix.com/jkb-modelling
Isere, France
Joined: April 23, 2011
KitMaker: 735 posts
Armorama: 606 posts
Posted: Saturday, June 08, 2013 - 03:14 AM UTC
hello,
here is my progress. with a little SURGERY, the suspensions academy this mount well on the hull tamiya.
steph


#186
Texas, United States
Joined: May 24, 2006
KitMaker: 771 posts
Armorama: 750 posts
Posted: Saturday, June 08, 2013 - 04:54 AM UTC
John, be careful, as many as us have found out; building Sherman's is addictive!

MichaelSatin
 Campaigns Administrator
Colorado, United States
Joined: January 19, 2008
KitMaker: 3,909 posts
Armorama: 510 posts
Posted: Sunday, June 09, 2013 - 11:03 AM UTC
There begins to be a real possibility I might actually finish this! Here is my progress on my Tamiya 1/35 M1 Super Sherman.
Here are a couple of small additions I made to the front end based on a build review I read about the kit (to my shame, I can't remember where):

Here's the unpainted turret on the hull. Just about time for a full paint job:

It's going together well! No real problems except the strange mold issues around the turret side and back details and the sad suspension which I replaced with a Tasca set.
Michael
On the bench:
Sorta depends on your definition of "on the bench"...
MichaelSatin
 Campaigns Administrator
Colorado, United States
Joined: January 19, 2008
KitMaker: 3,909 posts
Armorama: 510 posts
Posted: Monday, June 10, 2013 - 06:33 AM UTC
OK, so I've base painted the whole thing:

It's actually browner than it looks, it's basically good old Tamiya XF-62 with some brown added. Anyway, this is where I ask for advice. As I mentioned a while ago, I'm not a big armor builder and weathering isn't my thing. This is supposed to be an Israeli tank in the Sinai in 1956.
My plan, such as it is, is to mix a bit of XF-59 Desert Yellow into my base color and spray it on very thin over the top of the tank to simulate fading. Then I will use the Yellow (again, thin) straight to do some streaking on the sides and top. Does that sound right? Am I about to screw it up? Any comments very welcome!
Michael
On the bench:
Sorta depends on your definition of "on the bench"...
MichaelSatin
 Campaigns Administrator
Colorado, United States
Joined: January 19, 2008
KitMaker: 3,909 posts
Armorama: 510 posts
Posted: Tuesday, June 11, 2013 - 10:46 AM UTC
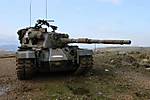
OK, well, for better or worse, I've completed my first armor build on KitMaker! A 1/35 Tamiya M1 Super Sherman from the Israeli 7th Armored Brigade in the Sinai in 1956.


I went ahead and used the weathering methods I described above and think they went well. I also used an old AFV Decals sheet for Israel Shermans. This included the cross on the engine deck that Israel used in '56 and Tamiya left out as well as the 7th AB insignia on the glacis which I know shouldn't be there but I always wanted to use.
Some things I need to do better next time: clamps for the tow cable, better tie downs for the tools, getting that track tighter and the bogies flat (shouldn't have gone for the articulation with the Tasca set).
Still, I feel pretty good about it and am glad I finished one. Thanks for the great campaign Jeff, and all the great inspiration here!
Michael
On the bench:
Sorta depends on your definition of "on the bench"...
Isere, France
Joined: April 23, 2011
KitMaker: 735 posts
Armorama: 606 posts
Posted: Thursday, June 13, 2013 - 04:21 AM UTC
hello,
some progress. caterpillars are finally over.


next step painting
steph


Indiana, United States
Joined: June 10, 2005
KitMaker: 6,188 posts
Armorama: 5,960 posts
Posted: Thursday, June 13, 2013 - 05:25 AM UTC
Looks good Steph! You're on your way!
 NOW FOR MINE
 this weekend!

~ Jeff
New Jersey, United States
Joined: October 28, 2006
KitMaker: 491 posts
Armorama: 462 posts
Posted: Sunday, June 16, 2013 - 04:09 AM UTC
Great work, everybody. It's amazing to me to see so many variants and interpretations of the same vehicle. Ya gotta love Shermans.
I'm finally finished! This is my completed Tasca Sherman II, built in a hotel room in Washington, finished back home in New Jersey. This was an outstanding kit to build. I messed up a little by making the tracks too tight. The result of that is the front roadwheels are up in the air. By the time I realized it the glue on the idler was dry.

It's not TOO noticable in the picture, but it makes me nuts every time I look at it. I used Mig Pigments for the first time, too. I'm not too sure of the result. Comments and feedback most welcome.


Keep on modeling!!
Chris
On the workbench:
Mk II Male, Takom Conversion
Hobby Boss T-18
Indiana, United States
Joined: June 10, 2005
KitMaker: 6,188 posts
Armorama: 5,960 posts
Posted: Sunday, June 16, 2013 - 04:16 AM UTC
Whoa... nice work!

~ Jeff
Alberta, Canada
Joined: February 10, 2008
KitMaker: 221 posts
Armorama: 217 posts
Posted: Sunday, June 16, 2013 - 05:18 AM UTC
I think it looks excellent Chris, very well done.
Cheers

Todd
http://www.mvpa.org/
"Live, So That You May Live Forever".
Georgia, United States
Joined: January 07, 2013
KitMaker: 572 posts
Armorama: 302 posts
Posted: Tuesday, June 18, 2013 - 07:56 AM UTC
Great looking builds, I've been very busy as of late and haven't done much But with that said I've got the Build part done now to paint and fix a gap in the frontal armor part then to decal and attempt at some type of weathering

Sascha(Ironowl)


Warszawa, Poland
Joined: March 12, 2013
KitMaker: 125 posts
Armorama: 36 posts
Posted: Tuesday, June 18, 2013 - 08:21 AM UTC
Hello,
My first update - model is glued all together and after 24hrs bath

Unfortunately I failed to make any decent bottom of spontoons (I hope this is the correct English word for the part of hull over the tracks ) which Tamiya obviously... failed to add

So I decided to leave the hull OOB.
I had to add Aber's barrel as I accidentially broke the original one...
I'll try to prime as soon as I fix my painting booth -it's self made so has a tendency to crack from time to time...
Ok, pics now:


Regards,
Radek
On the bench: some armour ... and a plane... Oh and you would probably find some unfinished ships somewhere around the mancave ;)
Alberta, Canada
Joined: February 10, 2008
KitMaker: 221 posts
Armorama: 217 posts
Posted: Thursday, June 20, 2013 - 05:02 AM UTC
[quote]
Todd, you are doing some really nice work on your Sherman. Nice interior. Good work on those tracks.
Thanks John.
Your Firefly looks excellent, I love the paint work and weathering.
Cheers

Todd.
http://www.mvpa.org/
"Live, So That You May Live Forever".
Alberta, Canada
Joined: February 10, 2008
KitMaker: 221 posts
Armorama: 217 posts
Posted: Thursday, June 20, 2013 - 08:56 AM UTC
Hi all here are some more pictures of the interior.

I scratch built the back part of the hull floor, that holds the 76 mm Ammo out of Evergreen plastic sheet and rod. The vent on the back bulkhead, the battery box and the Little Joe auxiliary generator are all from the parts box.

The water cans are from the Tasca kit.


Most of the turret was scratch built, the gun breech, radio and the gunners seat are from the parts bin.

The two commanders and the loaders seats are made of Milliput.


Almost finished and then on to the exterior.
Cheers
Todd
http://www.mvpa.org/
"Live, So That You May Live Forever".
Alberta, Canada
Joined: February 10, 2008
KitMaker: 221 posts
Armorama: 217 posts
Posted: Thursday, June 20, 2013 - 09:16 AM UTC
Darn near forgot. This is basically what you will see through the hatches.


Cheers

Todd
http://www.mvpa.org/
"Live, So That You May Live Forever".

#226
British Columbia, Canada
Joined: February 20, 2012
KitMaker: 1,909 posts
Armorama: 1,066 posts
Posted: Thursday, June 20, 2013 - 10:28 AM UTC
Wow! Todd,
Very nice indeed!

Cheers Rob.
Anything without guns is a target!
27 completed campaigns and counting :)
California, United States
Joined: November 01, 2009
KitMaker: 657 posts
Armorama: 481 posts
Posted: Thursday, June 20, 2013 - 05:40 PM UTC
Well Hello all
I am back from Afghanistan and have started my build, It is the tamiya M4A3 in 1/35 and I will build straight from the box as this is my first Armor kit ever and 1st Sherman it will be a 14th AD sherman in germany. Pics in a few whrn I can find my cord.
Eugene
" For those who fought for it Freedom has a flavor the protected will never know"
Italeri T-55, Syrian Army 6 Day War Taken out. 2%
AFV IDF Shot. 6 Day War 0%..


 ). I did the best i could with it.


