I knew all along it was going through the vent cover.
Nice picture Steve and welcome!
~ Jeff
Constructive Feedback
For in-progress or completed build photos. Give and get contructive feedback!
Hosted by Darren Baker, Dave O'Meara
Sherman M4A1 "Major Jim" Build
PantherF
Indiana, United States
Joined: June 10, 2005
KitMaker: 6,188 posts
Armorama: 5,960 posts
Joined: June 10, 2005
KitMaker: 6,188 posts
Armorama: 5,960 posts
Posted: Saturday, August 11, 2012 - 10:23 PM UTC
SdAufKla
South Carolina, United States
Joined: May 07, 2010
KitMaker: 2,238 posts
Armorama: 2,158 posts
Joined: May 07, 2010
KitMaker: 2,238 posts
Armorama: 2,158 posts
Posted: Sunday, August 12, 2012 - 03:10 AM UTC
Quoted Text
I knew all along it was going through the vent cover. ... ~ Jeff
Not through the vent COVER. There's a special mounting plate that replaces the cast armored ventilator cover and is used to mount the mast base (antenna mount).
I'll be looking forward to seeing this one in person sometime Terry!
terrybarrett
North Carolina, United States
Joined: November 20, 2010
KitMaker: 195 posts
Armorama: 180 posts
Joined: November 20, 2010
KitMaker: 195 posts
Armorama: 180 posts
Posted: Sunday, August 12, 2012 - 03:52 AM UTC
Thanks fot that Mike. Your timing is exquisite as I will be building the mount tonight!
Terry
Terry
SdAufKla
South Carolina, United States
Joined: May 07, 2010
KitMaker: 2,238 posts
Armorama: 2,158 posts
Joined: May 07, 2010
KitMaker: 2,238 posts
Armorama: 2,158 posts
Posted: Sunday, August 12, 2012 - 04:49 AM UTC
Glad to help, Terry.
Note that the circular mounting plate is held "pround" of the hull by way of a ring cast into the hull which would normally go into the bottom of the mushroom-shaped cast armored ventilator cover (forming a bullet / shrapnel trap). This is what creates the shadow line around the bottom of the mounting plate in the photo.
At anyrate, I'm glad that Mr. Zaloga was able to catch this thread in time to give us the links to the other photos. It's pretty crazy that a one-in-a-thousand chance created the circumstances where the farside antenna lined up so prefectly with the nearside periscope (on a hatch that opened at an angle, no less). Just think if the photographer had only been standing a couple of feet left or right all of the angles would have been different and this would never have occured.
terrybarrett
North Carolina, United States
Joined: November 20, 2010
KitMaker: 195 posts
Armorama: 180 posts
Joined: November 20, 2010
KitMaker: 195 posts
Armorama: 180 posts
Posted: Sunday, August 12, 2012 - 05:54 PM UTC
Wow, so now that "Antennagate" is settled. Let's get on with it! I'm a little embarrased to admit that I painted and "futured" and decaled the tank, before all the conversation about the mast. Here she is with an initial coat of Floquil Rail Brown, my favorite OD
Then I removed the mast from the ventilator based on the "optical illusion" photo and had mounted it in this ridiculous position!
Then Jesse and Steve and Mike saved my bacon, and I ripped the mast off, and the mushroom cover and got to work! I used some Grandt line bolts for the exposed heads
Then punched some discs using my wonderful $6 punch set from the tool guy at the flea market! One to represent the cast ring, then the 2 piece base.
Next I decided to scratch the mast since the one from verlinden was the incorrect type. So I cut a couple pieces of rod, tapered the one for the top in my dremel and made the spring by wrapping a strand of speaker wire around a piece of stem wire from Michael's. Then I glued it together and painted it
Also, I had sprayed the tracks Floquil steam power black, then I painted the connectors Tamiya Gunmetal, followed by a wash of Floquil Rust.
Then I Dullcoated the whole thing with my airbrush, straight out of the bottle.
Next we'll try to recreate that crazy camo!
Thanks for looking,
Terry
exer
Dublin, Ireland
Joined: November 27, 2004
KitMaker: 6,048 posts
Armorama: 4,619 posts
Joined: November 27, 2004
KitMaker: 6,048 posts
Armorama: 4,619 posts
Posted: Sunday, August 12, 2012 - 07:35 PM UTC
I really like your OD Terry. Not too dark. The antenna looks great. Looking forward to the camo.
retiredyank
Arkansas, United States
Joined: June 29, 2009
KitMaker: 11,610 posts
Armorama: 7,843 posts
Joined: June 29, 2009
KitMaker: 11,610 posts
Armorama: 7,843 posts
Posted: Sunday, August 12, 2012 - 08:58 PM UTC
I believe the "bump" is caused by an object in the background.
Pedro
Wojewodztwo Pomorskie, Poland
Joined: May 26, 2003
KitMaker: 1,208 posts
Armorama: 1,023 posts
Joined: May 26, 2003
KitMaker: 1,208 posts
Armorama: 1,023 posts
Posted: Sunday, August 12, 2012 - 09:16 PM UTC
Coming along nicely!
Judging from the photo that Steve Z. posted, I think that you need yet another disc under the antenna base, diameter matching the diameter of vent cover plus matching bolts on top of it.
Regards,
Greg
Judging from the photo that Steve Z. posted, I think that you need yet another disc under the antenna base, diameter matching the diameter of vent cover plus matching bolts on top of it.
Regards,
Greg
PantherF
Indiana, United States
Joined: June 10, 2005
KitMaker: 6,188 posts
Armorama: 5,960 posts
Joined: June 10, 2005
KitMaker: 6,188 posts
Armorama: 5,960 posts
Posted: Sunday, August 12, 2012 - 10:20 PM UTC
Thanks Mike for that correction as I am always craving for Sherman FYI's and it will come in handy for future builds.
But it did go through the models vent cover, huh.
~ Jeff
But it did go through the models vent cover, huh.
~ Jeff
SdAufKla
South Carolina, United States
Joined: May 07, 2010
KitMaker: 2,238 posts
Armorama: 2,158 posts
Joined: May 07, 2010
KitMaker: 2,238 posts
Armorama: 2,158 posts
Posted: Monday, August 13, 2012 - 01:03 AM UTC
Quoted Text
...But it did go through the models vent cover, huh. ~ Jeff
Well, in the sense that it was installed in the new, flat circular mounting plate that covered the ventilator's opening, then yes, it did go through the vent's cover (the new plate does cover the vent opening). But in the sense that it went through the standard armored ventilator cover, then no.
I was just trying to make the point to Terry that he should replace the armored, mushroom-shaped cover with a flat plate with four bolt heads and mount the antenna base (mast base) to that. The antenna base was not mounted on a modified standard cover.
There was a special, design purpose mounting plate for that that looks the same as the flat plate used to mount the mast base in the special antenna "pot" on the M4 (welded hull). This plate replaced the standard armored mushroom-shaped cover (and the normal M4 antenna "pot" plate without the mast base hole).
At any rate, I don't want to hijack Terry's thread here, but this has been an interesting and educational tangent to his build.
terrybarrett
North Carolina, United States
Joined: November 20, 2010
KitMaker: 195 posts
Armorama: 180 posts
Joined: November 20, 2010
KitMaker: 195 posts
Armorama: 180 posts
Posted: Monday, August 13, 2012 - 01:53 AM UTC
Thanks guys, additional plate added!
PantherF
Indiana, United States
Joined: June 10, 2005
KitMaker: 6,188 posts
Armorama: 5,960 posts
Joined: June 10, 2005
KitMaker: 6,188 posts
Armorama: 5,960 posts
Posted: Monday, August 13, 2012 - 02:07 AM UTC
Quoted Text
Quoted Text...But it did go through the models vent cover, huh. ~ Jeff
Well, in the sense that it was installed in the new, flat circular mounting plate that covered the ventilator's opening, then yes, it did go through the vent's cover (the new plate does cover the vent opening). But in the sense that it went through the standard armored ventilator cover, then no.
I was just trying to make the point to Terry that he should replace the armored, mushroom-shaped cover with a flat plate with four bolt heads and mount the antenna base (mast base) to that. The antenna base was not mounted on a modified standard cover.
There was a special, design purpose mounting plate for that that looks the same as the flat plate used to mount the mast base in the special antenna "pot" on the M4 (welded hull). This plate replaced the standard armored mushroom-shaped cover (and the normal M4 antenna "pot" plate without the mast base hole).
At any rate, I don't want to hijack Terry's thread here, but this has been an interesting and educational tangent to his build.
Yup... educational and more. I have a 1/16th A1 to build and this information will come in handy if I do go this route so I did learn a lot guys and thanks.
And, nice work Terry.
~ Jeff
terrybarrett
North Carolina, United States
Joined: November 20, 2010
KitMaker: 195 posts
Armorama: 180 posts
Joined: November 20, 2010
KitMaker: 195 posts
Armorama: 180 posts
Posted: Thursday, August 16, 2012 - 03:42 AM UTC
Latest update.
Added one more plate for the antenna, hopefully this now approximates the real thing!
Cut the plates for the air cleaner covers and the tiny skirts from plastruct
Then airbrushed the whole thing with this stuff straight out of the bottle. Haven't used this technique before, so no promises!
Here it is prior to camo
And here is the camo. I used Polly S "Mud" with a flat #4 brush. This was very foreign to me as I use an airbrush for just about everything! I try to keep imagining the camo being applied in the field with a mop or broom. Looks pretty harsh right now, but the weathering will tone things down!
Next the detail painting of tools, road wheels, and adding the stowage. Stay tuned!
Posted: Thursday, August 16, 2012 - 03:55 AM UTC
I'm not a big fan of the M4, but this looks excellent
210cav
Virginia, United States
Joined: February 05, 2002
KitMaker: 6,149 posts
Armorama: 4,573 posts
Joined: February 05, 2002
KitMaker: 6,149 posts
Armorama: 4,573 posts
Posted: Thursday, August 16, 2012 - 04:10 AM UTC
Terry-- outstanding! What brand and color paint did you use to simulate the mud pattern?
Thanks
DJ
Thanks
DJ
terrybarrett
North Carolina, United States
Joined: November 20, 2010
KitMaker: 195 posts
Armorama: 180 posts
Joined: November 20, 2010
KitMaker: 195 posts
Armorama: 180 posts
Posted: Thursday, August 16, 2012 - 04:24 AM UTC
Polly S "Mud" - Hard to argue with that!
pseudorealityx
Georgia, United States
Joined: January 31, 2010
KitMaker: 2,191 posts
Armorama: 1,814 posts
Joined: January 31, 2010
KitMaker: 2,191 posts
Armorama: 1,814 posts
Posted: Thursday, August 16, 2012 - 07:21 AM UTC
Looking forward to see how the weathering process changes the contrast and look of the M4. Very cool.
PantherF
Indiana, United States
Joined: June 10, 2005
KitMaker: 6,188 posts
Armorama: 5,960 posts
Joined: June 10, 2005
KitMaker: 6,188 posts
Armorama: 5,960 posts
Posted: Thursday, August 16, 2012 - 08:25 AM UTC
Looking good so far!
And that's my wives brand of hair spray too. I thought only aerosol worked and not the pump spray?
~ Jeff
And that's my wives brand of hair spray too. I thought only aerosol worked and not the pump spray?
~ Jeff
terrybarrett
North Carolina, United States
Joined: November 20, 2010
KitMaker: 195 posts
Armorama: 180 posts
Joined: November 20, 2010
KitMaker: 195 posts
Armorama: 180 posts
Posted: Thursday, August 16, 2012 - 12:33 PM UTC
aha! Maybe that's why my chipping isn't progressing how I had hoped! This one is turning into a great big experiment!
pseudorealityx
Georgia, United States
Joined: January 31, 2010
KitMaker: 2,191 posts
Armorama: 1,814 posts
Joined: January 31, 2010
KitMaker: 2,191 posts
Armorama: 1,814 posts
Posted: Thursday, August 16, 2012 - 02:58 PM UTC
I think if you use the pump style, you want to decant it and then airbrush it... is that what you did?
terrybarrett
North Carolina, United States
Joined: November 20, 2010
KitMaker: 195 posts
Armorama: 180 posts
Joined: November 20, 2010
KitMaker: 195 posts
Armorama: 180 posts
Posted: Thursday, August 16, 2012 - 03:29 PM UTC
Yes. Then dampened a small area and attacked ith a stiff brush, no luck...
BBD468
Texas, United States
Joined: March 08, 2010
KitMaker: 2,465 posts
Armorama: 2,383 posts
Joined: March 08, 2010
KitMaker: 2,465 posts
Armorama: 2,383 posts
Posted: Thursday, August 16, 2012 - 03:49 PM UTC
That looks really nice Terry, very cool!
Gary
Gary
terrybarrett
North Carolina, United States
Joined: November 20, 2010
KitMaker: 195 posts
Armorama: 180 posts
Joined: November 20, 2010
KitMaker: 195 posts
Armorama: 180 posts
Posted: Friday, August 24, 2012 - 05:26 PM UTC
Hey Guys,
Sorry I haven't posted in a while, but I've about finished this beast.
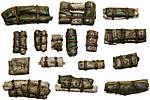
The hairspray didn't work at all. I was planning on chipping up the camo, but I guess the Polly S I slopped on was a little too thick. So I washed the whole model with a homemade dust mix of cheap yellow and white craft paint. Then I picked out some details with a burnt umber oil and mineral spirits pin wash. Then I added the stowage (tarps and crate are resin from Value Gear, jerry can and mussette bag from Verlinden, oil can from the Tamiya M4 kit.) I tied everything down with a strand of speaker wire. Added the tow cable, painted the tool straps and added P/E buckles. Painted the road wheels, put on the tracks (boy were they tight, I thought I was gonna snap off a wheel!)
Then the suspension was sprayed with a misting of Tamiya Desert Yellow and then the whole tank with Tamiya Buff. Added the aerials (bristles from a big ol paint brush!) The machine gun and ammo can. Painted the hull and turret MGs. Popped in a couple MV lenses and I am gonna call this one finished!
Ready to start something new and you can bet it will have airbrushed camo (if any) and will be from the ETO!!
Hope you enjoyed, thanks for watching!
Terry
ValueGear
Arizona, United States
Joined: May 02, 2012
KitMaker: 55 posts
Armorama: 50 posts
Joined: May 02, 2012
KitMaker: 55 posts
Armorama: 50 posts
Posted: Friday, August 24, 2012 - 10:33 PM UTC
Major Jim looks great terry... and a little easier than the M16 monster build...
SdAufKla
South Carolina, United States
Joined: May 07, 2010
KitMaker: 2,238 posts
Armorama: 2,158 posts
Joined: May 07, 2010
KitMaker: 2,238 posts
Armorama: 2,158 posts
Posted: Saturday, August 25, 2012 - 02:13 AM UTC
A very nice build and an attractive subject, Terry.
Thanks for sharing!
Thanks for sharing!