_GOTOBOTTOM
Constructive Feedback
For in-progress or completed build photos. Give and get contructive feedback!
Sherman M4A1 "Major Jim" Build
terrybarrett
Visit this Community
North Carolina, United States
Joined: November 20, 2010
KitMaker: 195 posts
Armorama: 180 posts
Posted: Friday, August 03, 2012 - 08:15 AM UTC
Greetings from Raleigh,

Here is a mini Build log based on a box of the "Dragon M4A1 Early" loose parts plus a bunch of other odds and ends to build "Major Jim"


This kit is kind of showing it's age, the detail is a little soft and the plastic is kinda "soapy", but I am going to try some different painting/weathering on this one, so I though this kit would be a good guinea pig!

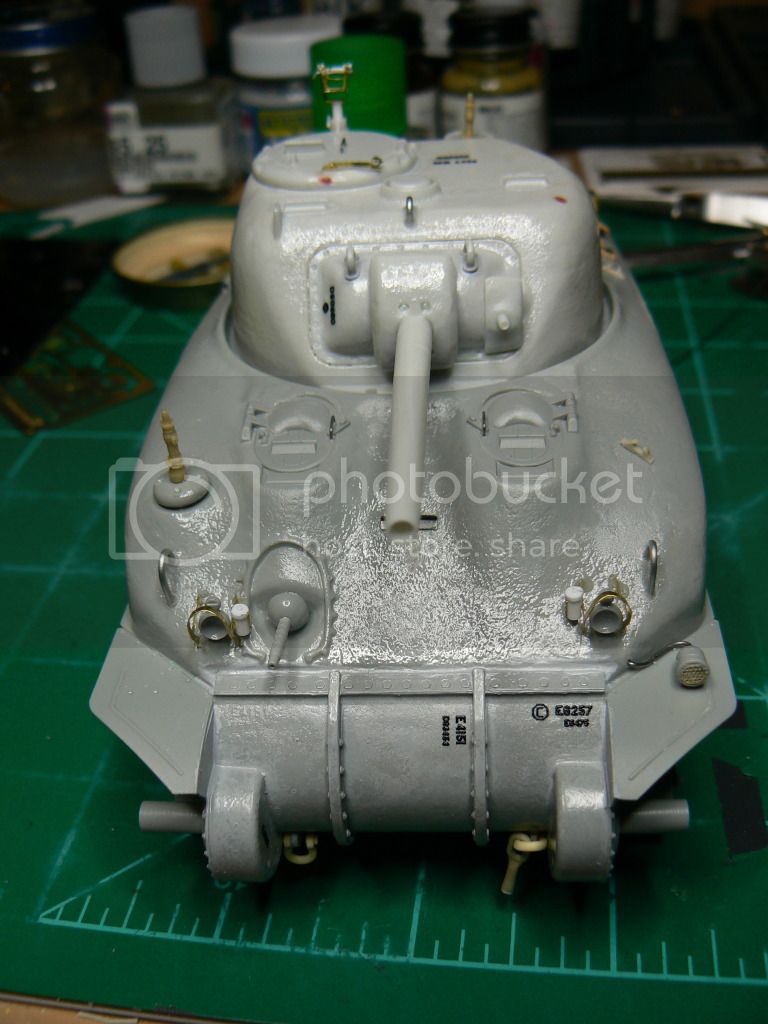
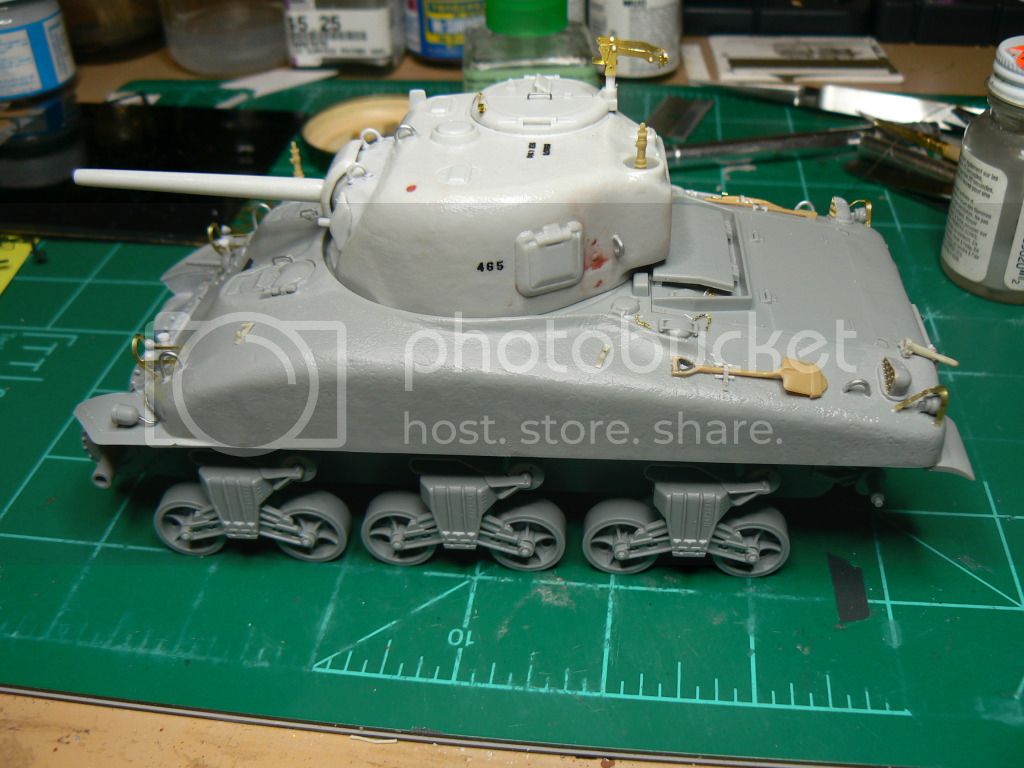
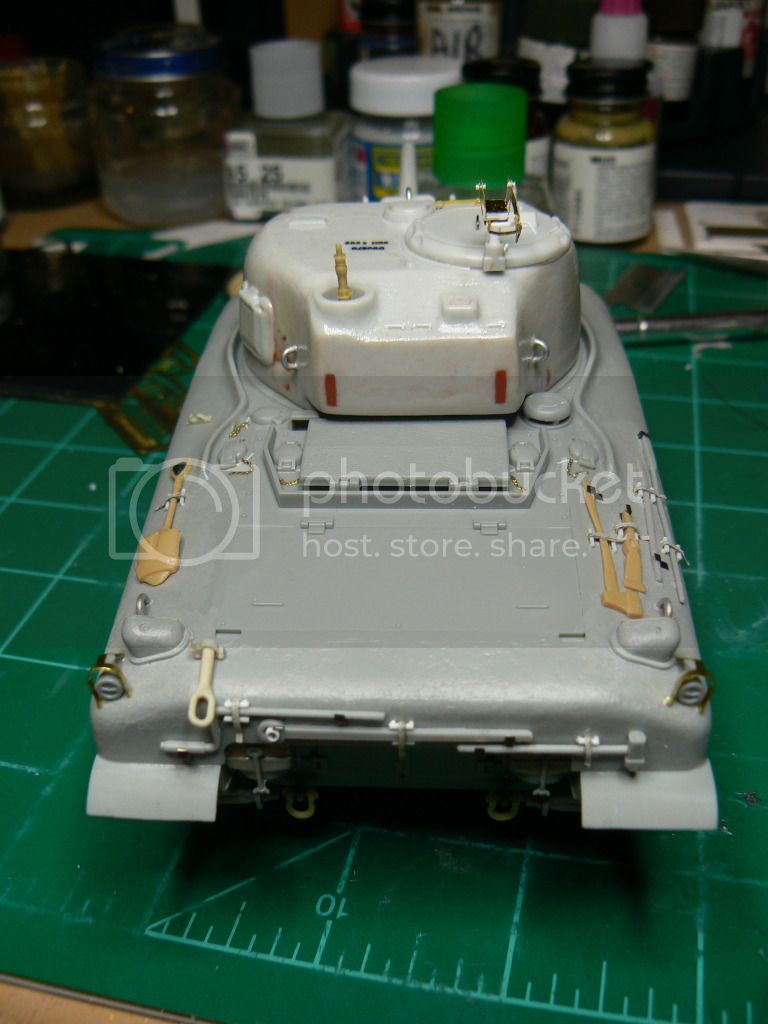
So far, I have added the three piece transmission cover, shaved a bunch of "later" detail off the turret. Removed the springs from the hull hatches to backdate them. Drilled the mounting holes in the bogies. Thinned the fenders and track skids. Used stem wire for grab handles and lift rings. Added tools from various other sources, with tie downs made from punched dots and thin evergreen rod. Brush guards from the Verlinden Sherman detail set. I scratched the holders for the headlight plugs and added a little p/e chain. Doesn't show in these pics but I also removed the collars on the barrel (would've been a lot easier before I attached the mantlet to the barrel :-P ) Added texture where appropriate with good 'ol Testors liquid cement and a stiff brush.
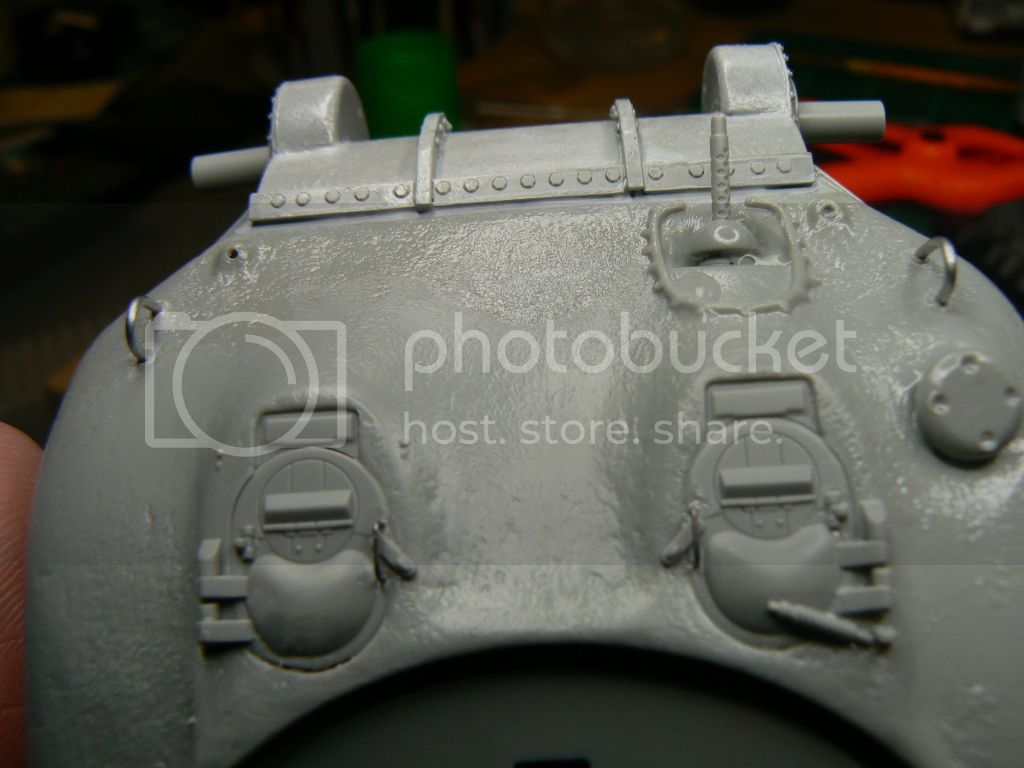
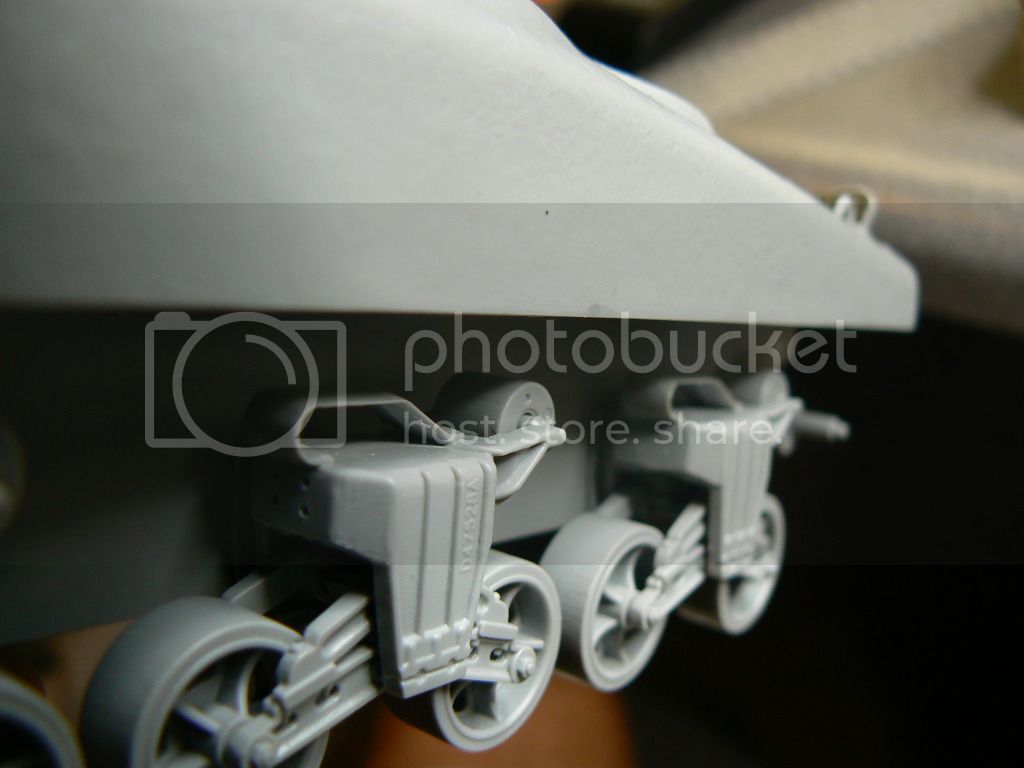
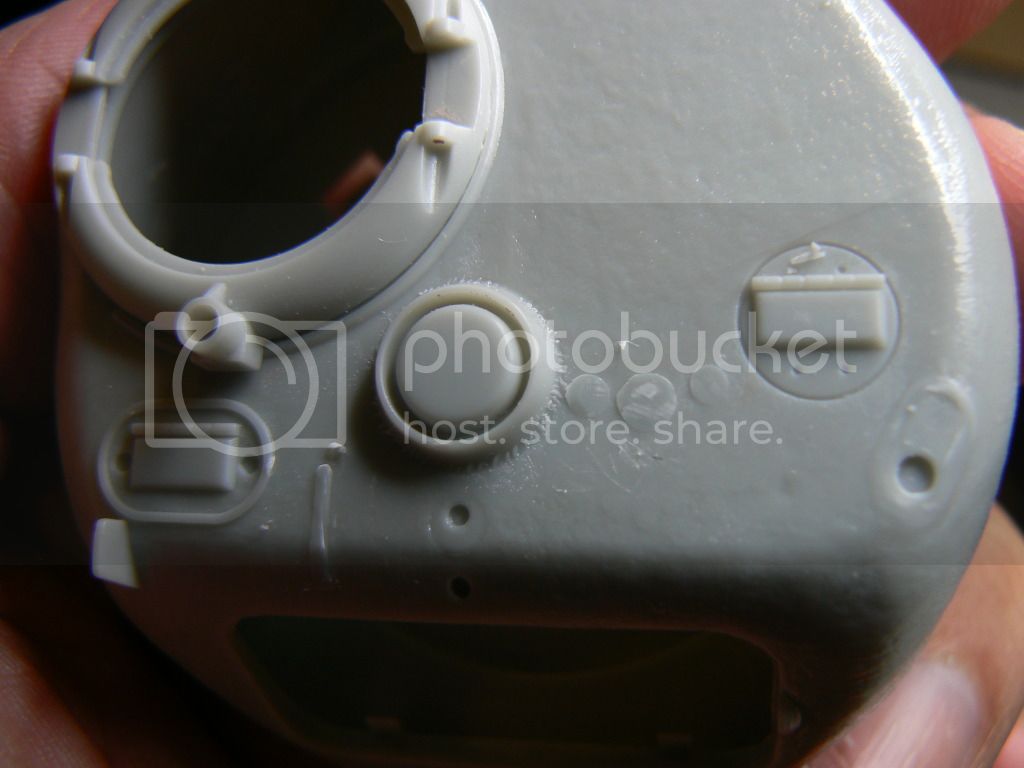
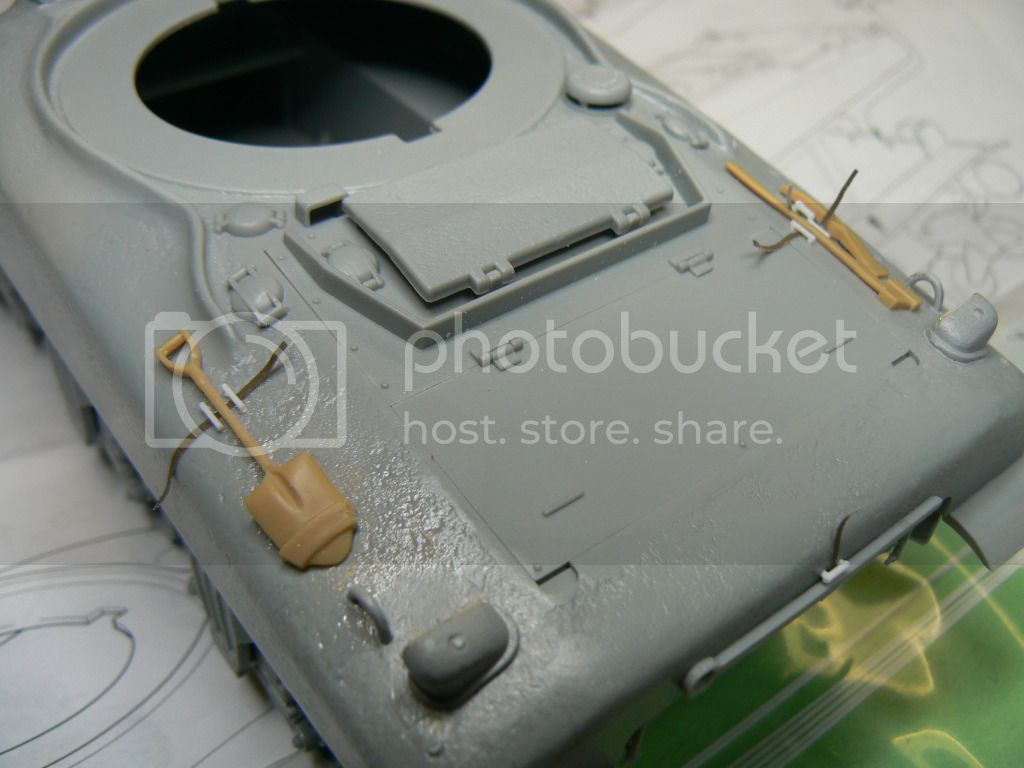
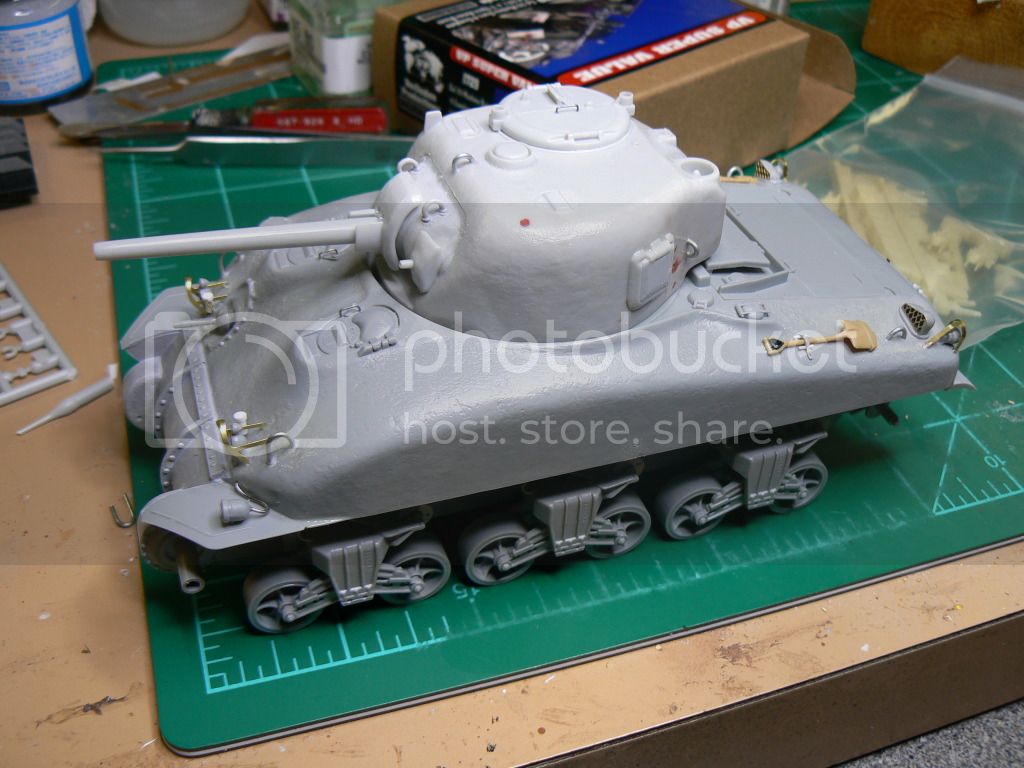
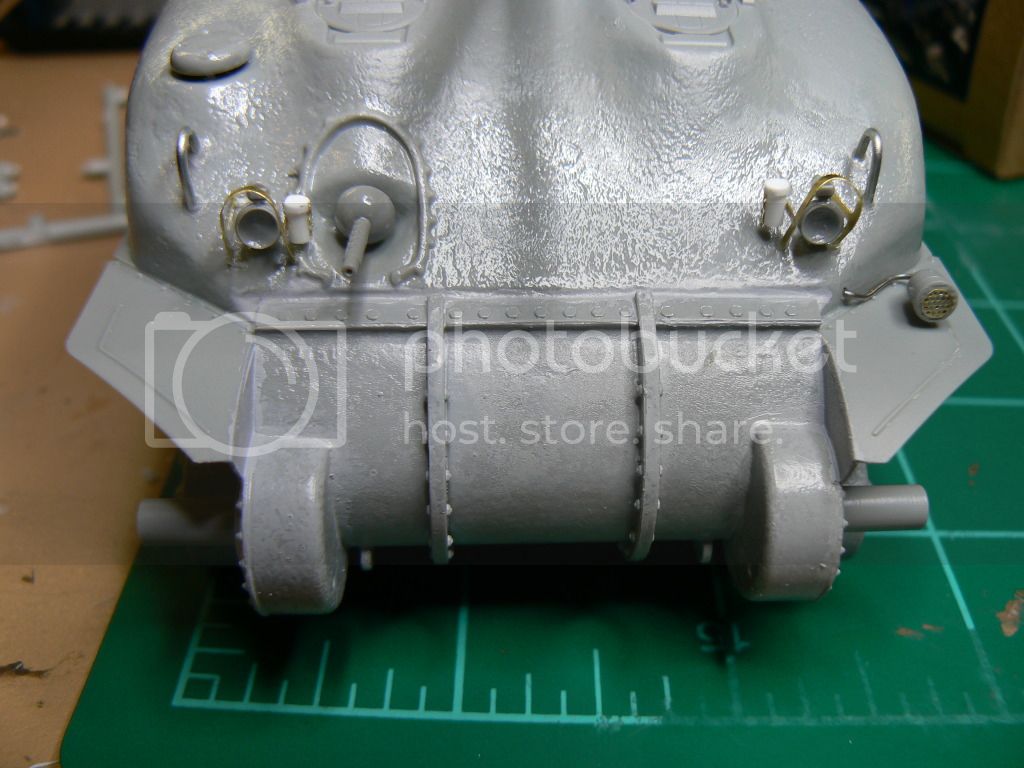
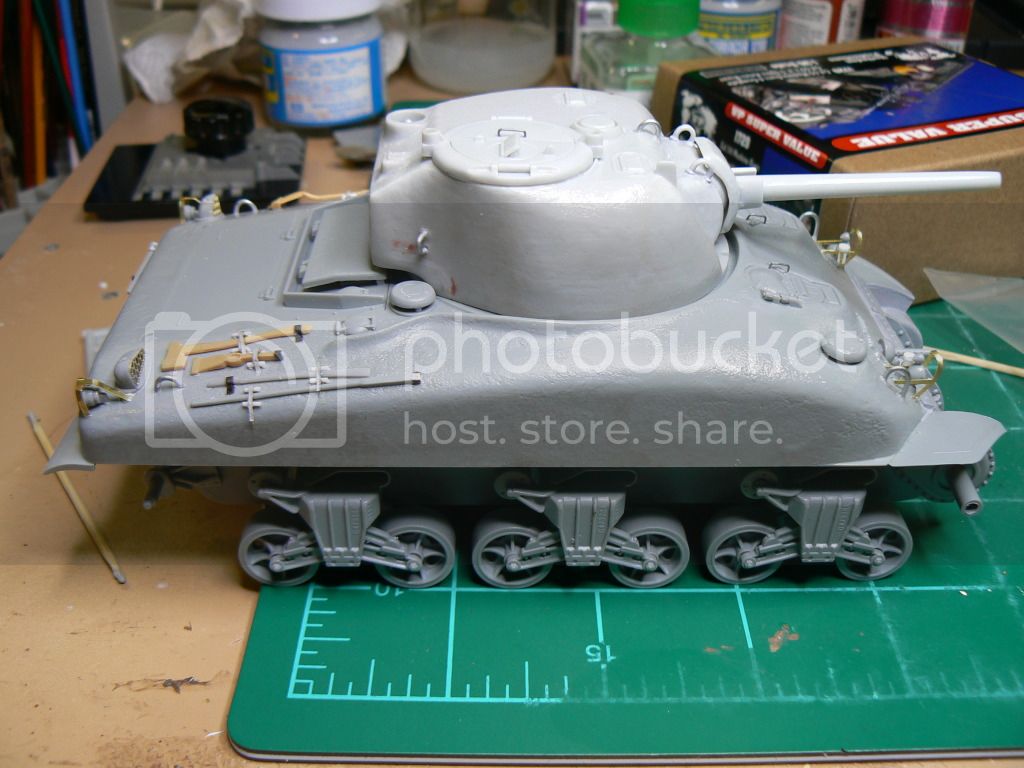
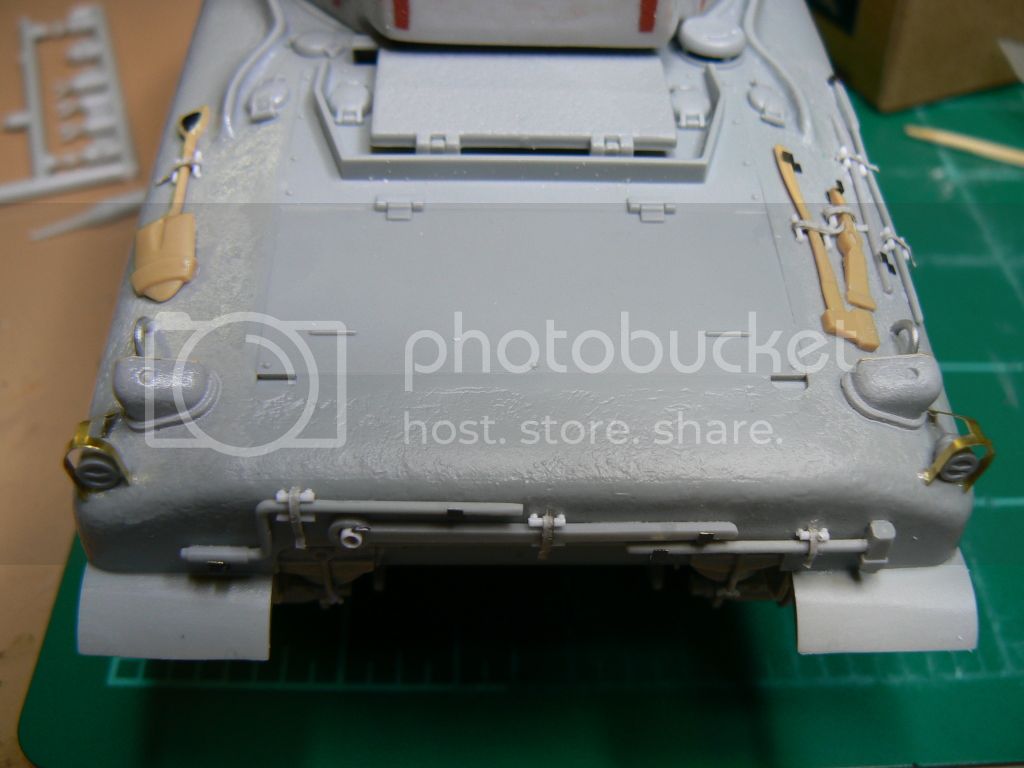
Not too far from paint. I will keep you posted. Thanks for looking!

Terry

pseudorealityx
Visit this Community
Georgia, United States
Joined: January 31, 2010
KitMaker: 2,191 posts
Armorama: 1,814 posts
Posted: Friday, August 03, 2012 - 08:17 AM UTC
Terry, something's happening in the formatting of the photo. Shows as a broken link to me.
terrybarrett
Visit this Community
North Carolina, United States
Joined: November 20, 2010
KitMaker: 195 posts
Armorama: 180 posts
Posted: Friday, August 03, 2012 - 08:33 AM UTC
Dang Jesse, you are too fast! I had an upper case/lower case issue in my link! Should be good now.

Have a great weekend!

Terry
pseudorealityx
Visit this Community
Georgia, United States
Joined: January 31, 2010
KitMaker: 2,191 posts
Armorama: 1,814 posts
Posted: Friday, August 03, 2012 - 11:22 AM UTC
Looks good Terry. I'm interested to see how you get that paint job done.
terrybarrett
Visit this Community
North Carolina, United States
Joined: November 20, 2010
KitMaker: 195 posts
Armorama: 180 posts
Posted: Friday, August 03, 2012 - 12:06 PM UTC
Zaloga did a reverse mask, but all my research says the camo was mud. I assume painted on with a mop or broom so I am planning on doing it by hand and try some hairspray since I don't think dried mud would stay on very long!

Should be interesting!
Ironmike
Visit this Community
California, United States
Joined: March 28, 2006
KitMaker: 287 posts
Armorama: 270 posts
Posted: Friday, August 03, 2012 - 01:38 PM UTC
So far so good, Terry. Nice work. I like the brackets/straps for the shovel/tools. Great idea. I will employ that trick on my next Sherman if you don't mind. Keep us posted, laddie.
Ironmike
terrybarrett
Visit this Community
North Carolina, United States
Joined: November 20, 2010
KitMaker: 195 posts
Armorama: 180 posts
Posted: Wednesday, August 08, 2012 - 08:42 AM UTC
A few more details out of the way. Hope to get it painted tonight!

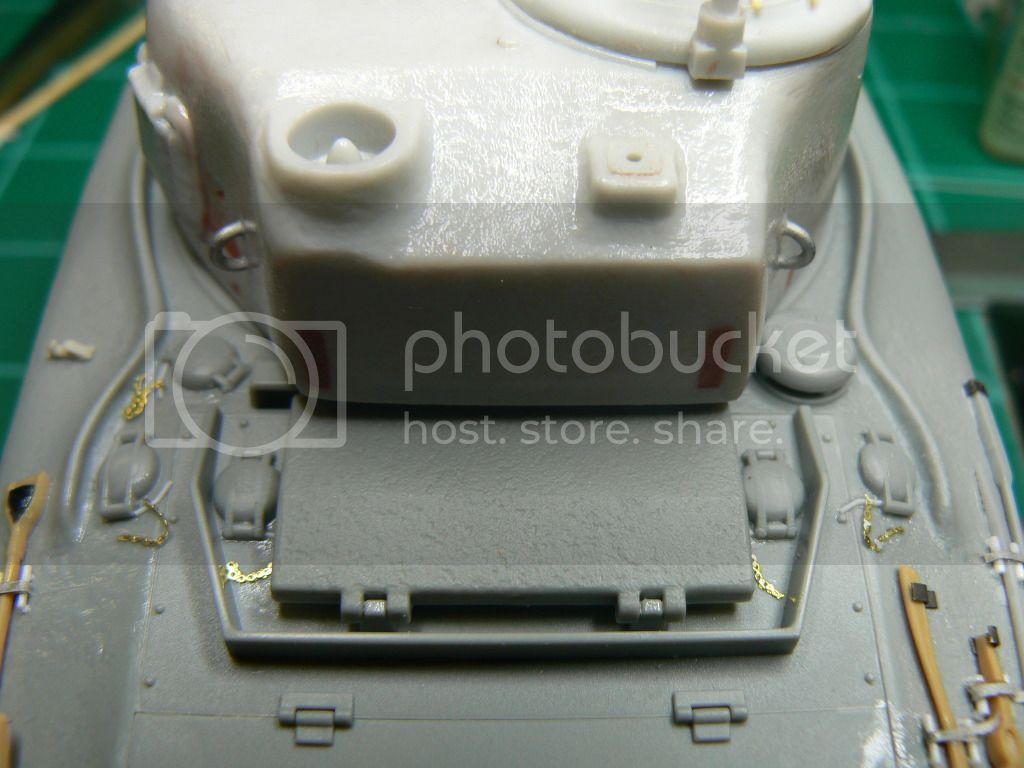
Here is the turret, textured and un-detailed

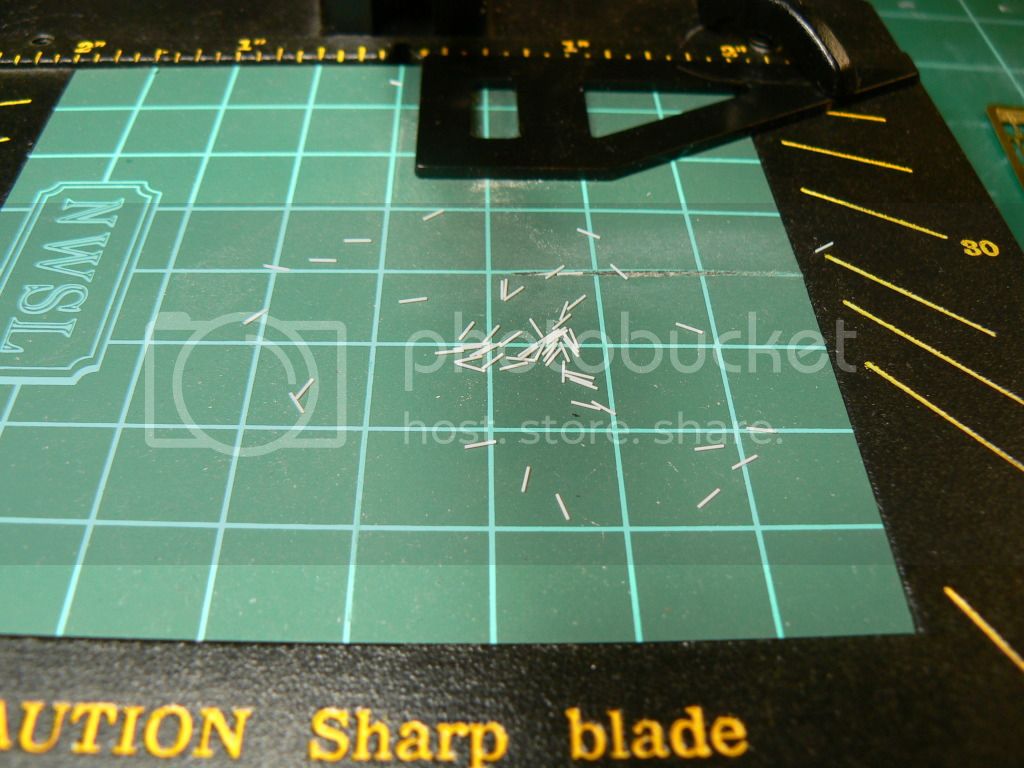
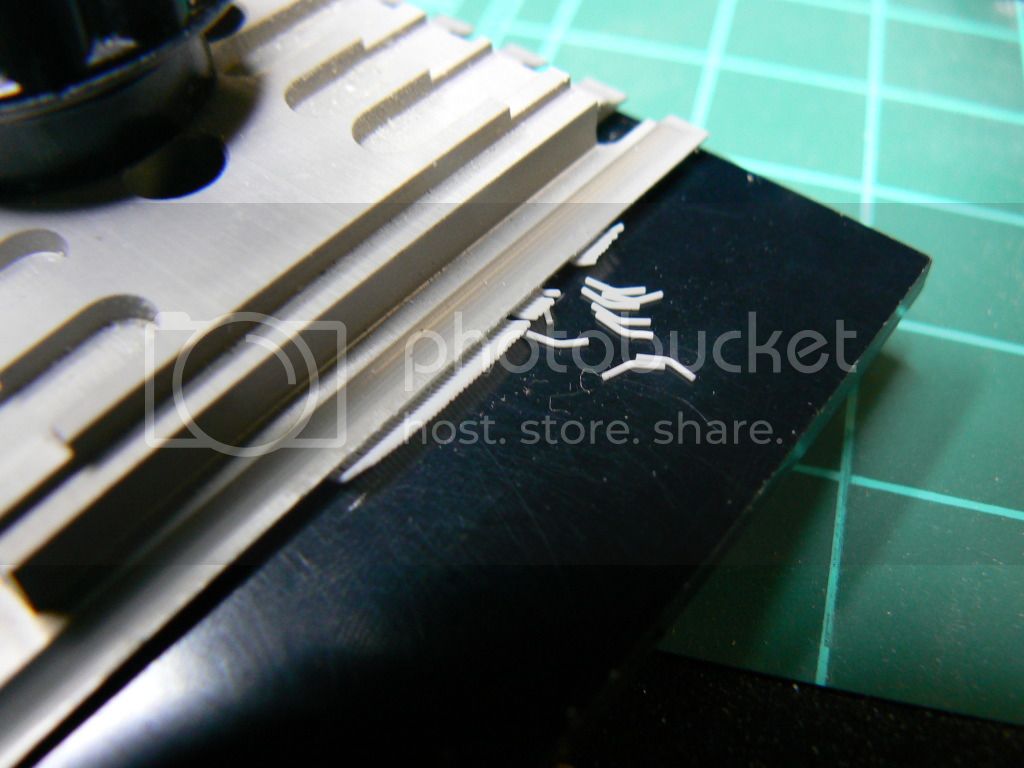
I cut a whole bunch of 1/8" plastruct .01mm rod and lined them all up on my etch tool and bent them for fuel door latches. I have a few Shermans in the stash so I am mass producing some of the "fiddly bits"

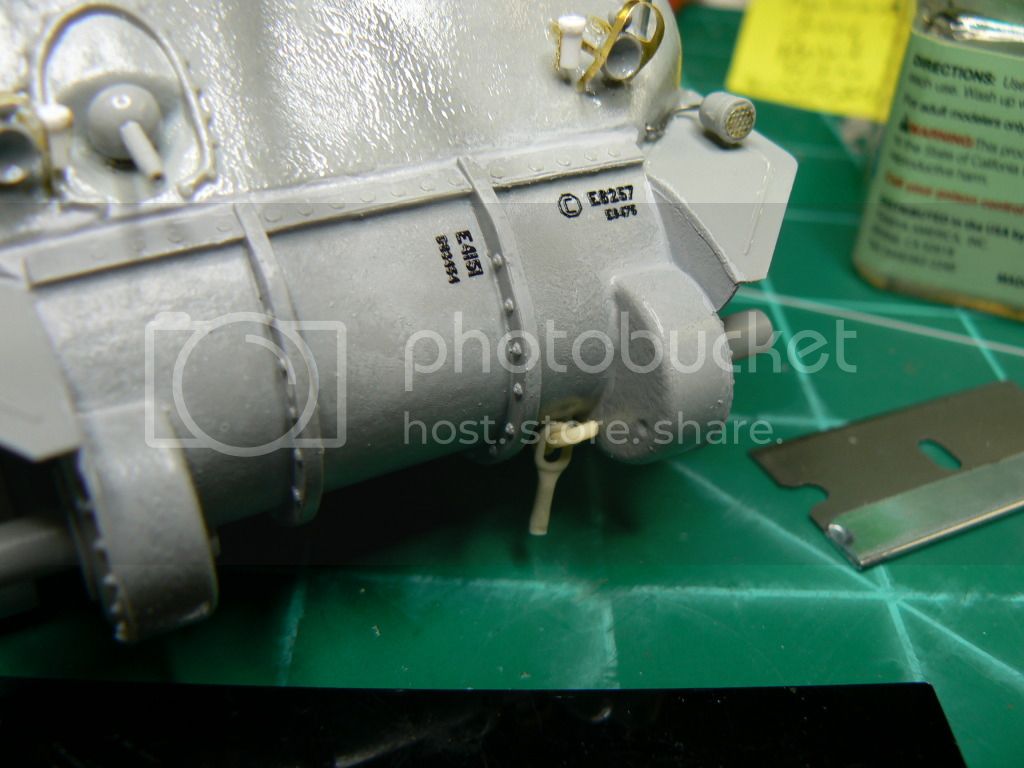
Added some casting marks from Archer on the transmission cover, mantlet and turret, using the Squadron Sherman Walkaround as a guide, also the tow shacles, tow cable ends and tie-downs from Formations.

Chains added to the fuel door latches from the Verlinden Sherman Super Detail set.

Also added tho antenna masts from a Verlinden M-20 set. Who makes some good, cheap antenna masts? I always end up cannibalizing and would love to just order a bunch. I have seen the Aber turned ones and they are nice but about $2.00 apiece plus shipping. I'll be glad when the new Formations is totally up and running!
85.jpg[/img]
Here she is ready for paint!
210cav
Visit this Community
Virginia, United States
Joined: February 05, 2002
KitMaker: 6,149 posts
Armorama: 4,573 posts
Posted: Wednesday, August 08, 2012 - 08:44 AM UTC
Terry-- great work! The texture results are awesome!
Well done
DJ
pseudorealityx
Visit this Community
Georgia, United States
Joined: January 31, 2010
KitMaker: 2,191 posts
Armorama: 1,814 posts
Posted: Wednesday, August 08, 2012 - 09:22 AM UTC
Closer to $1 each: http://www.luckymodel.com/scale.aspx?item_no=LR%20E35115

It's coming together nicely. Did you shave off the bolt detail on the final drive cover? The bolts look like they stand prouder in the earlier photos. Maybe just the lighting.
terrybarrett
Visit this Community
North Carolina, United States
Joined: November 20, 2010
KitMaker: 195 posts
Armorama: 180 posts
Posted: Wednesday, August 08, 2012 - 11:53 AM UTC
Didn't do anything with the bolts so must be the lighting.

Was going to email you. How did you scribe the separation lines on the bolted flanges on your Grant drive cover? I know I need to do it, but I have visions of my knife/razor/scriber angling off the side and a big ol mess...

Thanks for any tips!

Terry

PS thanks for the link. I ordered 5 sets!
BBD468
Visit this Community
Texas, United States
Joined: March 08, 2010
KitMaker: 2,465 posts
Armorama: 2,383 posts
Posted: Wednesday, August 08, 2012 - 12:25 PM UTC
Terry, Fantastic build man! Just came across it. SUBSCRIBED!!!

Gary
Dangeroo
#023
Visit this Community
Zurich, Switzerland
Joined: March 13, 2009
KitMaker: 2,058 posts
Armorama: 1,656 posts
Posted: Wednesday, August 08, 2012 - 06:24 PM UTC
Terry, great work so far. It's always good to see another Shermie. I'm interested in your homemade tool clamps, can you give us some more info on how you did them? Looking forward to paint!

Cheers!
Stefan
AlanL
Visit this Community
England - East Anglia, United Kingdom
Joined: August 12, 2005
KitMaker: 14,499 posts
Armorama: 11,675 posts
Posted: Wednesday, August 08, 2012 - 07:03 PM UTC
Hi Terry,

Excellent work, great attention to detail which should reflect in the finished kit. Fine work indeed.

Al

PantherF
Visit this Community
Indiana, United States
Joined: June 10, 2005
KitMaker: 6,188 posts
Armorama: 5,960 posts
Posted: Wednesday, August 08, 2012 - 11:30 PM UTC
Nice work so far Terry. Us Sherman fans must unite!

You do know we have a Sherman Campaign https://armorama.kitmaker.net/modules.php?op=modload&name=Campaigns&file=index&req=showcontent&id=611 starting next year?

Join us if you're not too burnt out on Shermans!


~ Jeff
exer
Visit this Community
Dublin, Ireland
Joined: November 27, 2004
KitMaker: 6,048 posts
Armorama: 4,619 posts
Posted: Thursday, August 09, 2012 - 12:34 AM UTC
Great work Terry. Is the tow rope clamp on the rear deck home made also?
terrybarrett
Visit this Community
North Carolina, United States
Joined: November 20, 2010
KitMaker: 195 posts
Armorama: 180 posts
Posted: Thursday, August 09, 2012 - 01:34 AM UTC
Thanks for all the kind words, guys!

Stefan: The tool clamps are made with the Zaloga method from his excellent Modeling US WWII Armor Book ( http://www.amazon.com/Modeling-Armor-Essential-Serious-Modeler/dp/B004FG8JTO/ref=sr_1_1?s=books&ie=UTF8&qid=1344518687&sr=1-1&keywords=modeling+us+armor )

You just punch out two tiny thin dots. I use a Waldron sub miniature punch (http://www.rollmodels.net/search/newsrch.php) It ain't cheap, but I use it all the time! Glue the dots where you want them with a drop of liquid cement, then cut a piece of plastruct/evergreen rod or stretched sprue and attach it to the dots.

Jeff: I did see the Sherman Campaign, but thought it was full up? Love to join if you have a spot!

Pat: The tow cable clamp and the cable ends are from Formations

Thanks everyone for following along, got the OD on last night, so will be posting more pics soon!

Terry
AgentG
Visit this Community
Nevada, United States
Joined: December 21, 2008
KitMaker: 1,109 posts
Armorama: 1,095 posts
Posted: Thursday, August 09, 2012 - 02:48 AM UTC
Why is there an antenna mast on the hull ventilator cover?

G
terrybarrett
Visit this Community
North Carolina, United States
Joined: November 20, 2010
KitMaker: 195 posts
Armorama: 180 posts
Posted: Thursday, August 09, 2012 - 03:32 AM UTC
Hey G

Major Jim was a command tank and I'm pretty sure that's where they put the extra antenna mast. That's where Steve Zaloga put his in the Military Modelling build.

Terry
AgentG
Visit this Community
Nevada, United States
Joined: December 21, 2008
KitMaker: 1,109 posts
Armorama: 1,095 posts
Posted: Thursday, August 09, 2012 - 04:44 AM UTC
Ok, but other than a painting of "Major Jim" I have never seen this before.

Just curious, that, and I don't believe all Zaloga has to say.


G
pseudorealityx
Visit this Community
Georgia, United States
Joined: January 31, 2010
KitMaker: 2,191 posts
Armorama: 1,814 posts
Posted: Thursday, August 09, 2012 - 05:16 AM UTC

Quoted Text

Ok, but other than a painting of "Major Jim" I have never seen this before.

Just curious, that, and I don't believe all Zaloga has to say.


G


How about a photo of the real thing?

http://media.photobucket.com/image/recent/StirlingLowery/MajorJim.jpg

terrybarrett
Visit this Community
North Carolina, United States
Joined: November 20, 2010
KitMaker: 195 posts
Armorama: 180 posts
Posted: Thursday, August 09, 2012 - 05:35 AM UTC
Thanks for finding that Jesse, I have that pic in a bunch of books, but hadn't been able to find it using Google Images. Now I can enlarge it and figure out if I screwed anything up!

Terry
terrybarrett
Visit this Community
North Carolina, United States
Joined: November 20, 2010
KitMaker: 195 posts
Armorama: 180 posts
Posted: Thursday, August 09, 2012 - 05:57 AM UTC
So, I blew up Jesse's picture and sure enough, the antenna mast appears to be on the port side of the glacis. It looks like there is an added "bump" in the armor for it to mount on.

I guess Zaloga isn't infallible, now I need to figure out whether to leave it as is, remove it, or try and re-create the mounting bump.

Nothin's ever easy!
PantherF
Visit this Community
Indiana, United States
Joined: June 10, 2005
KitMaker: 6,188 posts
Armorama: 5,960 posts
Posted: Thursday, August 09, 2012 - 07:31 AM UTC

Quoted Text


Jeff: I did see the Sherman Campaign, but thought it was full up? Love to join if you have a spot!

Terry


Campaign's never fill up Terry. You can join at any time!


~ Jeff
AgentG
Visit this Community
Nevada, United States
Joined: December 21, 2008
KitMaker: 1,109 posts
Armorama: 1,095 posts
Posted: Thursday, August 09, 2012 - 07:44 AM UTC

Quoted Text

So, I blew up Jesse's picture and sure enough, the antenna mast appears to be on the port side of the glacis. It looks like there is an added "bump" in the armor for it to mount on.

I guess Zaloga isn't infallible, now I need to figure out whether to leave it as is, remove it, or try and re-create the mounting bump.

Nothin's ever easy!


Jeez Terry, I didn't mean to screw up the build! I just looked at that and couldn't figure how the antenna wire would be run through what is essentially a fan.

No ones infallible

G
terrybarrett
Visit this Community
North Carolina, United States
Joined: November 20, 2010
KitMaker: 195 posts
Armorama: 180 posts
Posted: Thursday, August 09, 2012 - 08:19 AM UTC
No worries. It's still fixable. I'm fabricating the bump!
 _GOTOTOP