It feels like ages since I last did a build log!
I did an In Box Review of this kit a couple of days ago and its now on the bench and being built.
If anyone out there is also building this kit then please feel free to post some pictures of your build here as we go along.
Anyway, enough blethering, lets build!
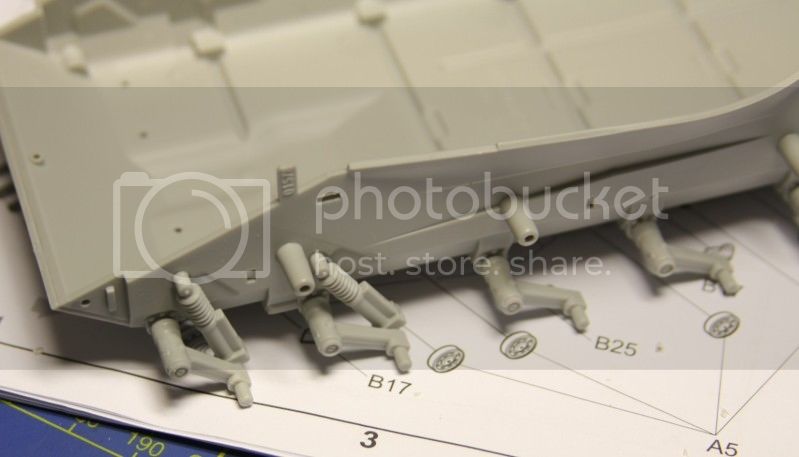
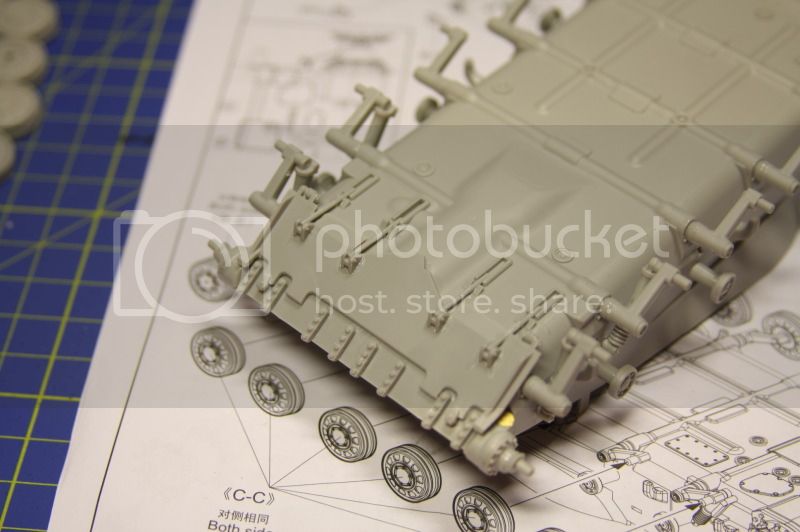
Construction begins on the lower hull:
I've go Kagero's 'Topshots' walk around of a Polish Army T-64 handy so I can compare the real steel with the detail in the kit and so far its pretty damn good. The suspension and running gear on the T-64 is quite differen to other Soviet tanks of the era, it makes for an interesting build.
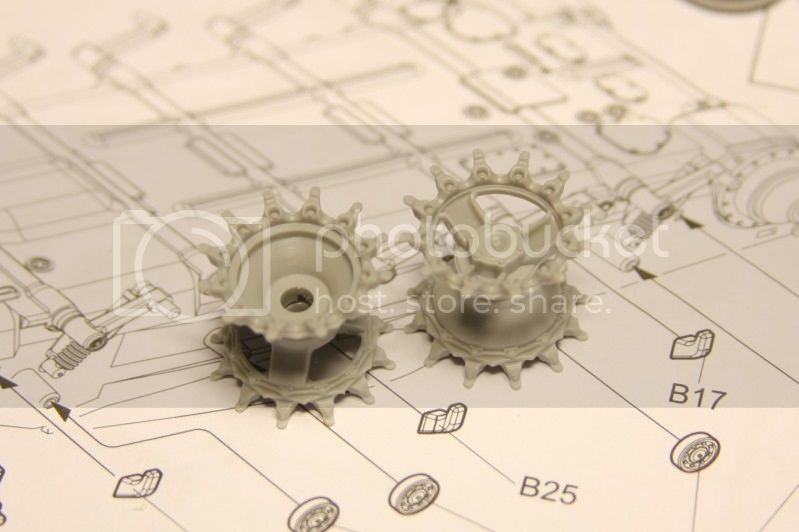
The twelve wheels are three parts (no polycaps unfortunately...I like polycaps!) with an inner and outer face plus the hub. The idler wheels are identical to the running wheels with the exception of their hubs which are a slightly different design.
The sprockets are really nicely moulded and feature what I reckon is the thinnest sprue attachment points I've ever come across- really excellent stuff!
I'm not quite finished Stage 1 yet, there's the return rollers and a good few other bits of detailing yet to do on the upper hull.
As always, thanks for taking the time to read the blog.
-KARL187-
Яusso-Soviэt Forum
Russian or Soviet vehicles/armor modeling forum.
Hosted by Darren Baker, Jacques Duquette
Trumpeter T-64 Model 1972
Posted: Thursday, September 06, 2012 - 04:48 AM UTC
hugohuertas
Buenos Aires, Argentina
Joined: January 26, 2007
KitMaker: 1,024 posts
Armorama: 1,013 posts
Joined: January 26, 2007
KitMaker: 1,024 posts
Armorama: 1,013 posts
Posted: Thursday, September 06, 2012 - 04:56 AM UTC
Like your job so far!!
Got to get one of these
cagkancakir
Ankara, Turkey / Türkçe
Joined: April 28, 2011
KitMaker: 434 posts
Armorama: 409 posts
Joined: April 28, 2011
KitMaker: 434 posts
Armorama: 409 posts
Posted: Thursday, September 06, 2012 - 05:43 AM UTC
Following your build, I'm waiting this kit is with great expectations.
CC
CC
todorovicandreas
Austria
Joined: May 01, 2007
KitMaker: 608 posts
Armorama: 593 posts
Joined: May 01, 2007
KitMaker: 608 posts
Armorama: 593 posts
Posted: Thursday, September 06, 2012 - 06:58 AM UTC
Very nice Karl! I can´t wait to get my own hands to build one of these. You mention polish T-64´s? Any pics to share, because I thought the T-64 was never exported outside the Soviet Union?
Best regards,
Andreas
Best regards,
Andreas
Posted: Thursday, September 06, 2012 - 07:36 AM UTC
My bad Andreas, I got mixed up- its a Ukranian T-64 in the Kagero book- the book itself is written in Polish and English.
todorovicandreas
Austria
Joined: May 01, 2007
KitMaker: 608 posts
Armorama: 593 posts
Joined: May 01, 2007
KitMaker: 608 posts
Armorama: 593 posts
Posted: Thursday, September 06, 2012 - 07:13 PM UTC
Thanks for the clarification, now I understand. Keep up the great build, looking really forward to see this machine finished.
Best regards,
Andreas
Best regards,
Andreas
Spiderfrommars
Milano, Italy
Joined: July 13, 2010
KitMaker: 3,845 posts
Armorama: 3,543 posts
Joined: July 13, 2010
KitMaker: 3,845 posts
Armorama: 3,543 posts
Posted: Thursday, September 06, 2012 - 07:17 PM UTC
I'll follow your build Karl!
...if you need reference pics, let me know, I'll be glad to help you
Thanks for sharing
...if you need reference pics, let me know, I'll be glad to help you
Thanks for sharing
Posted: Thursday, September 06, 2012 - 11:30 PM UTC
Thanks for the support guys, its good to have you along for the build!
Mauro- some references showing the T-64 on exercise would be good if you have any but there's no hurry!
jkb_sprint
Thessaloniki, Greece / Ελλάδα
Joined: April 23, 2012
KitMaker: 402 posts
Armorama: 394 posts
Joined: April 23, 2012
KitMaker: 402 posts
Armorama: 394 posts
Posted: Friday, September 07, 2012 - 02:15 AM UTC
Very interesting subject. The kit looks very nice. I'll be watching this one for sure. I 'm sure you will enjoy the build.
Spiderfrommars
Milano, Italy
Joined: July 13, 2010
KitMaker: 3,845 posts
Armorama: 3,543 posts
Joined: July 13, 2010
KitMaker: 3,845 posts
Armorama: 3,543 posts
Posted: Friday, September 07, 2012 - 02:25 AM UTC
Quoted Text
Mauro- some references showing the T-64 on exercise would be good if you have any but there's no hurry!
Ok, give me a little time I'll try to do my best for you
cheers
Jurjen
Groningen, Netherlands
Joined: September 21, 2003
KitMaker: 3,040 posts
Armorama: 1,016 posts
Joined: September 21, 2003
KitMaker: 3,040 posts
Armorama: 1,016 posts
Posted: Friday, September 07, 2012 - 02:37 AM UTC
Keep it up!!
brunocollin
Gironde, France
Joined: September 13, 2011
KitMaker: 98 posts
Armorama: 94 posts
Joined: September 13, 2011
KitMaker: 98 posts
Armorama: 94 posts
Posted: Friday, September 07, 2012 - 04:12 AM UTC
Is that the kind of "exercise" you're looking for ?
Posted: Friday, September 07, 2012 - 04:38 AM UTC
John- Yes I hope the rest of the build continues as well as what I've already done. Thanks for stopping by!
Mauro- Great stuff mate, looking forward to see what you dig up!!
Jurjen- Thanks for checking in, cheers.
Bruno- Have you got a bigger size of that pic? It looks pretty funny! Thanks for checking out the build log.
I've got Stage one of the build finished, the last bit on the first page was adding some smaller parts to the lower hull. I'm not great with identifying some of these smaller parts so please forgive me if I get them wrong!
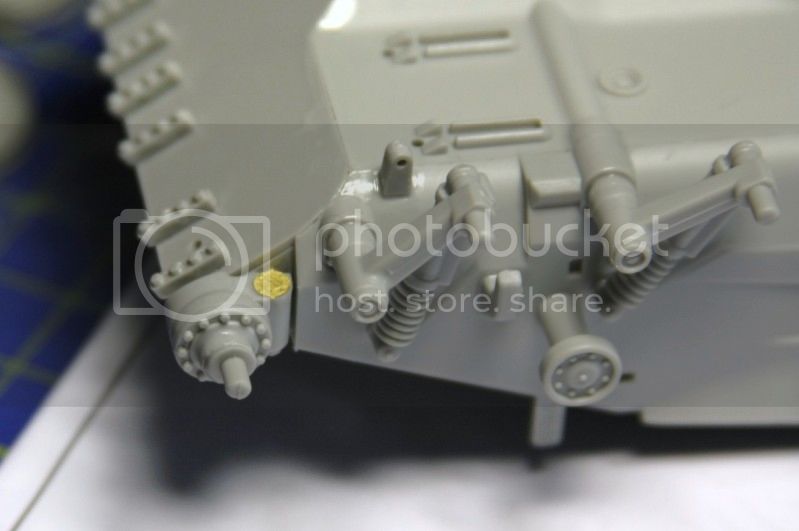
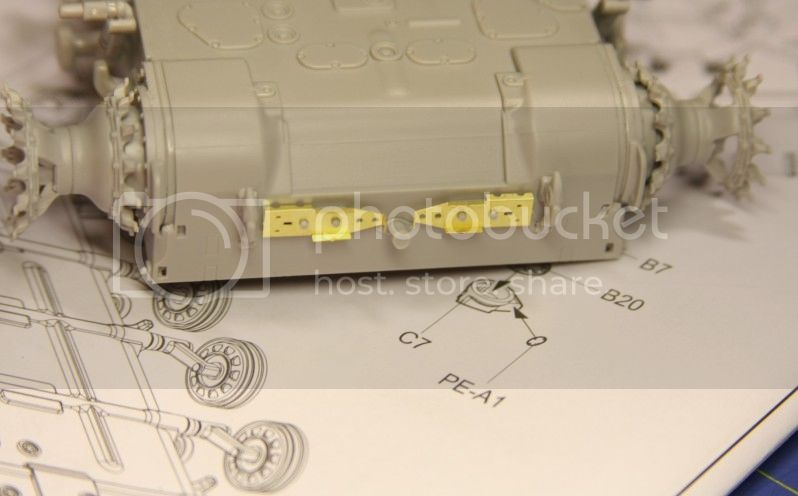
I believe this small piece with the etch attached is the debris scraper for the sprocket- there's a small shaping piece in the kit to bend it, I'll try and show it when I do the other side.
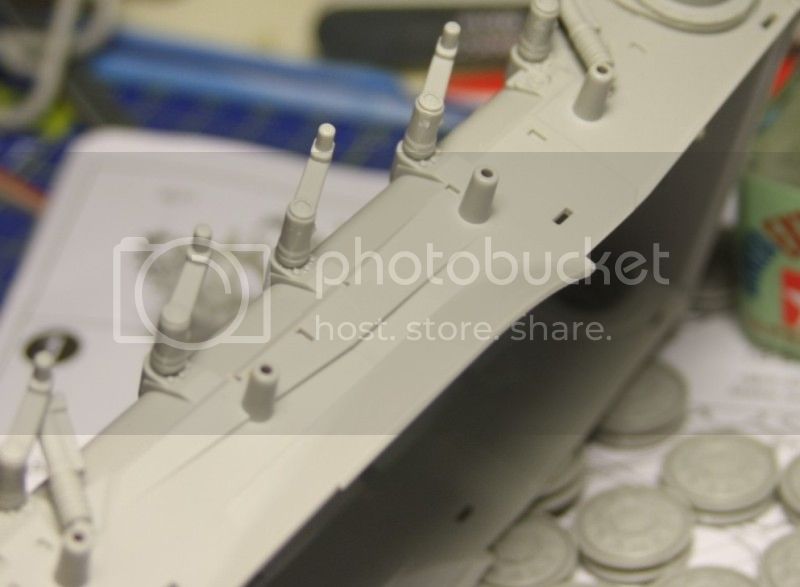
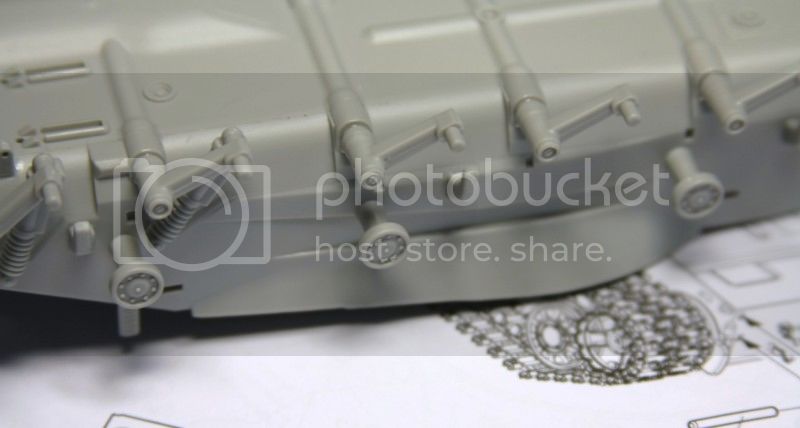
The return rollers and these small upturned arms (anyone know what they are?) go on next.
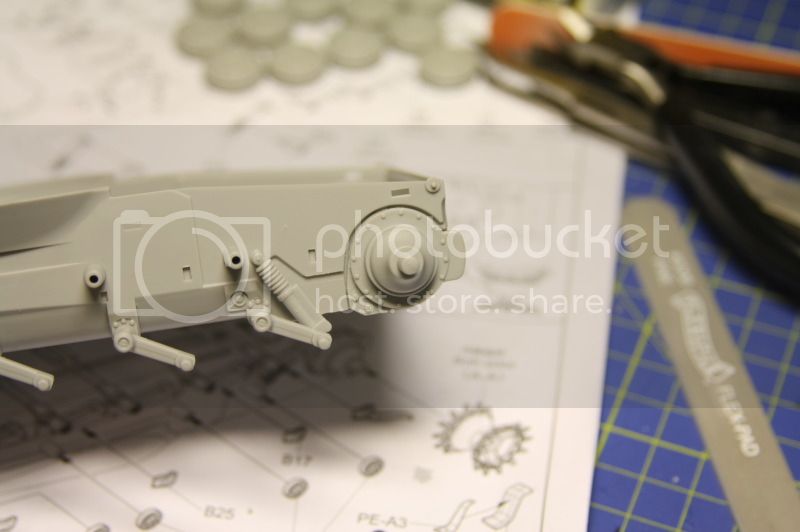
The axle for the idler is nicely detailed consisting of three plastic pieces and an etch bit.
The mounting points for the mine rollers used on the T-64 are great little pieces and the fit, as with everything thus far, is perfect with only a skim of extra thin cement needed.
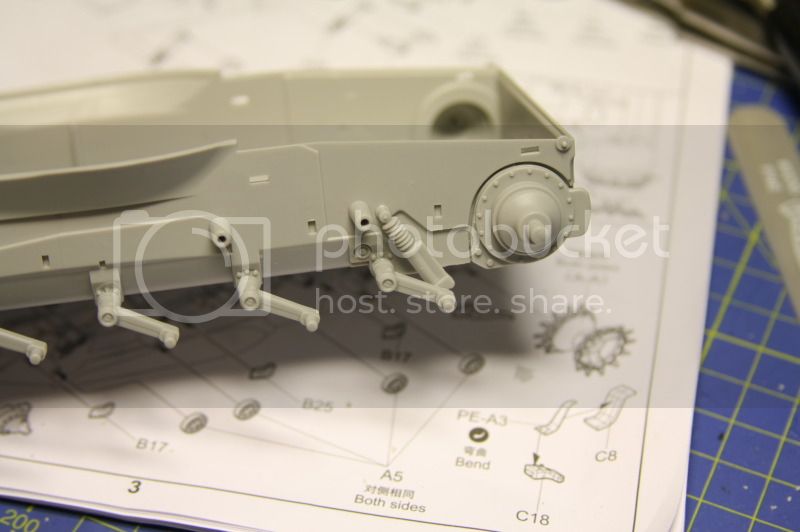
This is just a view looking down the side after all the parts were attached.
Thanks for taking the time to check out the blog.
-KARL187-
sauceman
Ontario, Canada
Joined: September 28, 2006
KitMaker: 2,672 posts
Armorama: 2,475 posts
Joined: September 28, 2006
KitMaker: 2,672 posts
Armorama: 2,475 posts
Posted: Friday, September 07, 2012 - 08:48 AM UTC
Quoted Text
The return rollers and these small upturned arms (anyone know what they are?) go on next.
They are usually called control arms. They rotate on the hull side to allow the wheels up and down movement.
cheers
kruppw
Texas, United States
Joined: March 17, 2006
KitMaker: 1,117 posts
Armorama: 1,115 posts
Joined: March 17, 2006
KitMaker: 1,117 posts
Armorama: 1,115 posts
Posted: Friday, September 07, 2012 - 09:03 AM UTC
Karl nice build so far, a most for my wish list.
Rick I think he was talking about the hook like items above the control arms. I think their bump stops for limit control of the roadwheels.
Tanksami
Victoria, Australia
Joined: August 06, 2011
KitMaker: 1,314 posts
Armorama: 1,217 posts
Joined: August 06, 2011
KitMaker: 1,314 posts
Armorama: 1,217 posts
Posted: Friday, September 07, 2012 - 09:51 AM UTC
Karl,
Looking really nice & clean will tag along & watch & learn
Cheers Mike
Looking really nice & clean will tag along & watch & learn
Cheers Mike
BBD468
Texas, United States
Joined: March 08, 2010
KitMaker: 2,465 posts
Armorama: 2,383 posts
Joined: March 08, 2010
KitMaker: 2,465 posts
Armorama: 2,383 posts
Posted: Friday, September 07, 2012 - 12:00 PM UTC
Hey Karl,
SUBSCRIBED!!! Great to see a build log Karl. Great start and i will be following along close.
Gary
SUBSCRIBED!!! Great to see a build log Karl. Great start and i will be following along close.
Gary
Posted: Friday, September 07, 2012 - 12:28 PM UTC
It's coming along nicely, I made it all the way to the tracks. Built up the tracks and got lured away by my KV's, so I haven't done much after that.
You're gonna want to sand the guide horn sides on the tracks so they'll fit between the road wheels. Mine wouldn't sit all the way and the ones around the idler and sprocket didn't want to cooperate much either.
UGBEAR
Canada
Joined: December 01, 2011
KitMaker: 248 posts
Armorama: 247 posts
Joined: December 01, 2011
KitMaker: 248 posts
Armorama: 247 posts
Posted: Friday, September 07, 2012 - 03:08 PM UTC
Since how awesome the trumpy T-64 show to us, can't wait for T-72 series!!!!!!Urah!!!!
Spiderfrommars
Milano, Italy
Joined: July 13, 2010
KitMaker: 3,845 posts
Armorama: 3,543 posts
Joined: July 13, 2010
KitMaker: 3,845 posts
Armorama: 3,543 posts
Posted: Friday, September 07, 2012 - 05:42 PM UTC
So, start to look here mate
http://vadimvswar.narod.ru/ALL_OUT/TiVOut0204/T64/T64001.htm
and here
http://vadimvswar.narod.ru/ALL_OUT/TiVOut0204/T64/T64001.htm
There are a lots of pics and drawings about the tank
You can also look here
http://www.t-64.de/frame-start.htm
is a German site, there are few pics there, but many 3 view drawings.
Anyway, i'll find for sure something else
Cheers
http://vadimvswar.narod.ru/ALL_OUT/TiVOut0204/T64/T64001.htm
and here
http://vadimvswar.narod.ru/ALL_OUT/TiVOut0204/T64/T64001.htm
There are a lots of pics and drawings about the tank
You can also look here
http://www.t-64.de/frame-start.htm
is a German site, there are few pics there, but many 3 view drawings.
Anyway, i'll find for sure something else
Cheers
dvarettoni
South Carolina, United States
Joined: September 28, 2005
KitMaker: 778 posts
Armorama: 763 posts
Joined: September 28, 2005
KitMaker: 778 posts
Armorama: 763 posts
Posted: Friday, September 07, 2012 - 06:30 PM UTC
KARL you lucky dog i want one but i'm on lock down from the wife she will not let me buy and more kits this year!!! the build looks great i will be folowing this one
dave
dave
Posted: Saturday, September 08, 2012 - 12:00 AM UTC
Rick & Chris- Yes it wasn't the control arms I was wondering about, it was those small hook like attachments just above. If they were bump stops how would they work? Thanks for checking out the thread guys!
Mike- great to have you along for the build, cheers!
Gary- Good to see you mate, thanks for subscribing!
ComradeMP- Thanks for the heads up about the guide horns. I'm just about to move on to the tracks so I'll watch out for that. Thanks for stopping by.
Dave- Yeah definetly, bring on the 72...and the 80!!
Mauro- Those sources are amazing, the interior shots on vadimvswar are very interesting. Thanks for posting them bud!
Dave- You gotta get out of lock-down mate and get this kit!! Thanks for following along.
I'll have some updates later today .
Posted: Saturday, September 08, 2012 - 04:44 AM UTC
More updates:
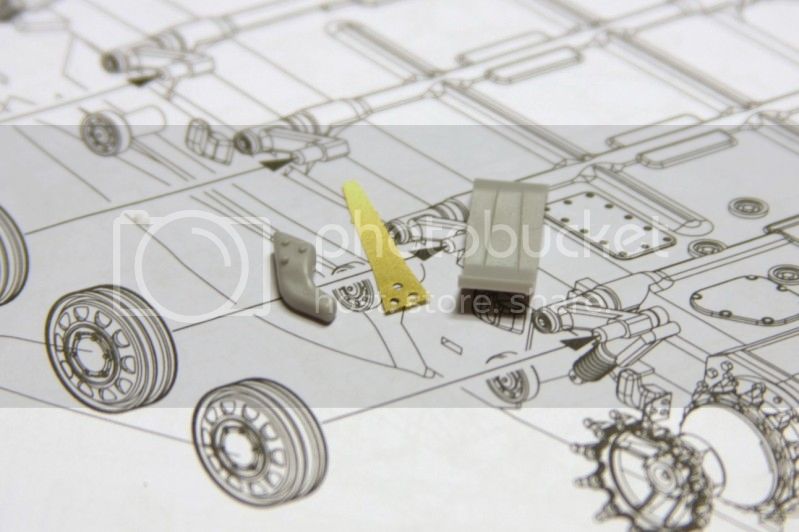
These are the three parts you need to make the debris scrapers for the sprockets.
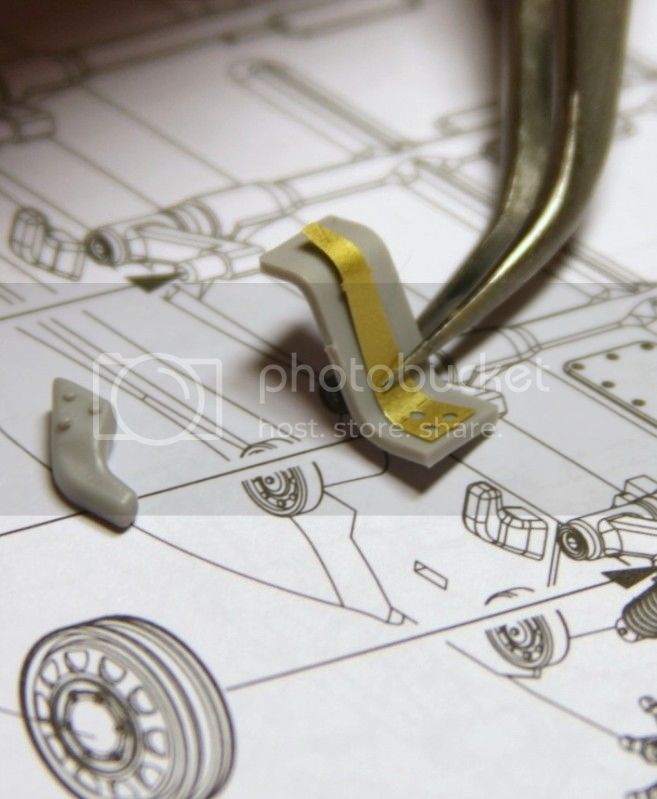
A small S shaped kit part acts as a bending channel for the PE part. I found its not totally exact, you have to bend it a slight bit more than the channel allows but you are able to achieve the general shape very easily without miss-shaping the parts.
The idler wheel connection is made of these three parts plus a small PE part.
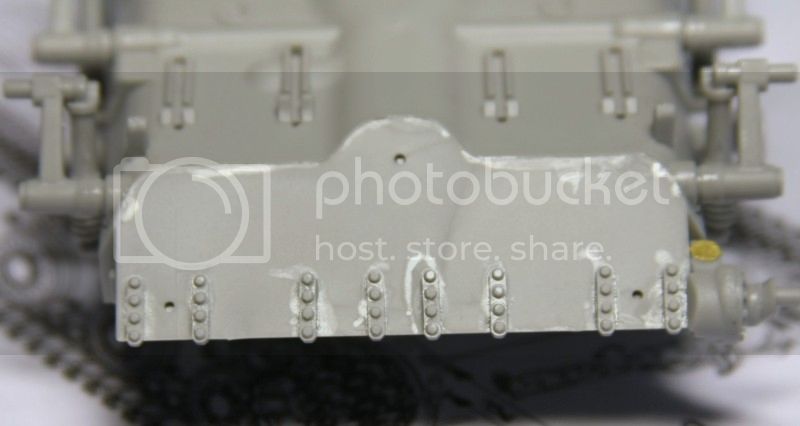
These nice PE parts make up some details on the rear. I would recommend using an etch shaping device when you need to obtain good folds in PE parts. However, when a piece is this small and the folds are quite small then you can get away with using a pair of tweezers like the curved needle-point pair shown a couple of pictures up. It takes a bit of practice to get used to it (and lots of messed up parts, believe me!) but it is sometimes easier and faster than using an etch tool. Etch tools are still fairly necessary though especially for more complex bends and larger parts.
A good, thin CA glue is always useful (I'm not recommending the brand shown or anythig!! There are loads of good brands out there.) when dealing with PE as capillary action allows it to flow under and around PE parts to get a very secure bond. I usually drop some out on an up-turned CD and use a paper clip end to place the CA glue. An accelerator for CA is handy too as it gives you a pretty much instant bond which is good for tricky parts that just won't seem to stay in place.
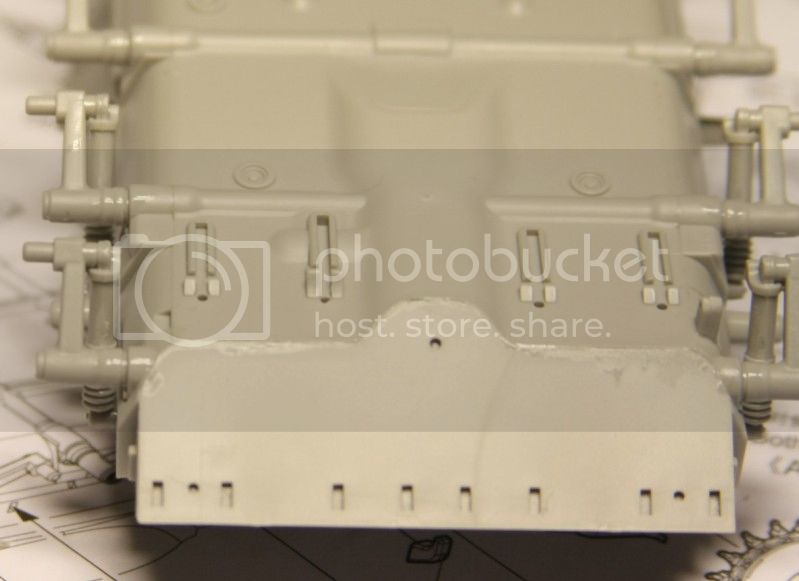
The small entrenching blade on the underside of the lower hull front is nicely done and I reckon, with some very minor modifications, it could be posed in use.
So, its on to the tracks now!
Thanks for taking the time to check out the thread.
-KARL187-
RuloMxy
District of Columbia, United States
Joined: March 05, 2009
KitMaker: 154 posts
Armorama: 137 posts
Joined: March 05, 2009
KitMaker: 154 posts
Armorama: 137 posts
Posted: Saturday, September 08, 2012 - 04:13 PM UTC
Karl,
Excellent build. In this webpage there are a few nice photos of the T-64 in exercise.
http://russianarms.mybb.ru/viewtopic.php?id=693&p=2
This kit is already on Santa's list for the Cold War Campaign.
Good luck with your build!
Raul
Excellent build. In this webpage there are a few nice photos of the T-64 in exercise.
http://russianarms.mybb.ru/viewtopic.php?id=693&p=2
This kit is already on Santa's list for the Cold War Campaign.
Good luck with your build!
Raul
Posted: Sunday, September 09, 2012 - 03:21 AM UTC
Raul- thanks for the kind words! And thanks for that link, there's some really interesting pictures there.