Campaigns
Where Armorama group builds can be discussed, organized, and updates posted.
Where Armorama group builds can be discussed, organized, and updates posted.
Hosted by Darren Baker, Richard S.
Campaign OP Market Garden
erichvon

Joined: January 17, 2006
KitMaker: 1,694 posts
Armorama: 1,584 posts

Posted: Wednesday, November 19, 2014 - 12:51 PM UTC
Hi Al, many thanks for that. Quite an interesting site. Will have a good look through it. Been doing a bit of work on one of the buildings now I've done the road. I'd forgotten how little fun it is building Miniart buildings. Good job I've bought some more putty and filler...lol. Thankfully the figures are coming on nicely.
Posted: Saturday, November 22, 2014 - 01:42 PM UTC
Sorry I have not been about for a few days.
Dave very nice brace of Panthers, very nice work on the etch.
Karl all the pictures I have seen with regards the operation show it being dry as Al says. But Northern Europe weather has a habit of changing quickly so there may have been rain during the time.
Pete
Dave very nice brace of Panthers, very nice work on the etch.
Karl all the pictures I have seen with regards the operation show it being dry as Al says. But Northern Europe weather has a habit of changing quickly so there may have been rain during the time.
Pete
Posted: Saturday, November 22, 2014 - 01:57 PM UTC
Posted: Saturday, November 22, 2014 - 10:22 PM UTC
Posted: Sunday, November 23, 2014 - 09:31 AM UTC
Looking good there Pete!
Be sure and clean those fingerprints before sealing it.
Cheers Rob.
Be sure and clean those fingerprints before sealing it.

Cheers Rob.
Posted: Sunday, November 23, 2014 - 11:06 PM UTC
@Noddy, thanks, progress has been slow but I am hoping to have them primed by the end of this weekend. Once that happens it will be down hill from there.
@Peter, the jeep looks great.
Hope everyone's build is going smoothly.
Dave
@Peter, the jeep looks great.
Hope everyone's build is going smoothly.
Dave
Posted: Saturday, November 29, 2014 - 01:04 AM UTC
Here are my start up photos for the campaign.
StuG III Ausf G.
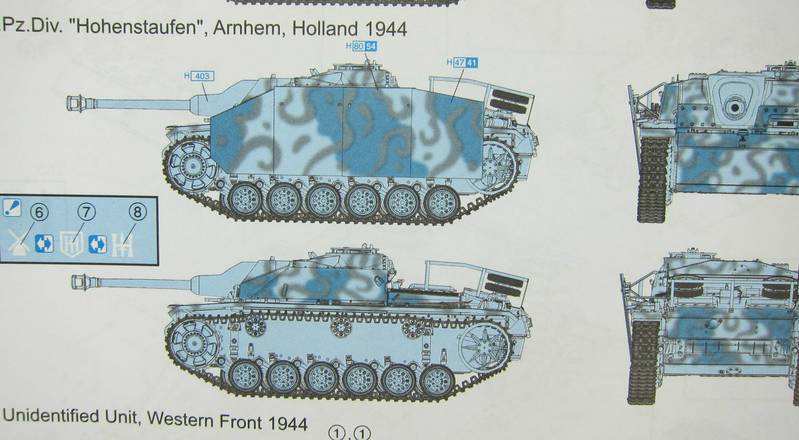
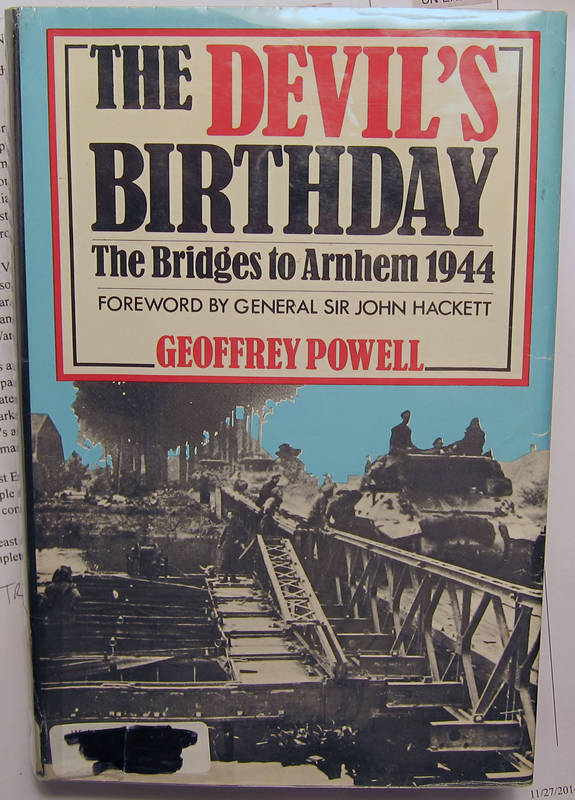
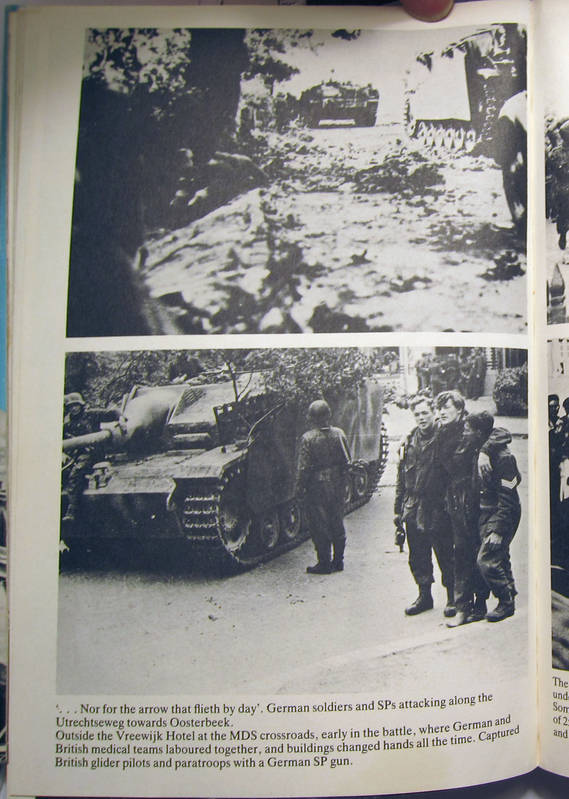
I saw the photo in the book and searched my stash till I found one that listed the 9th SS Panzer Div in Arnhem 1944. This is it.
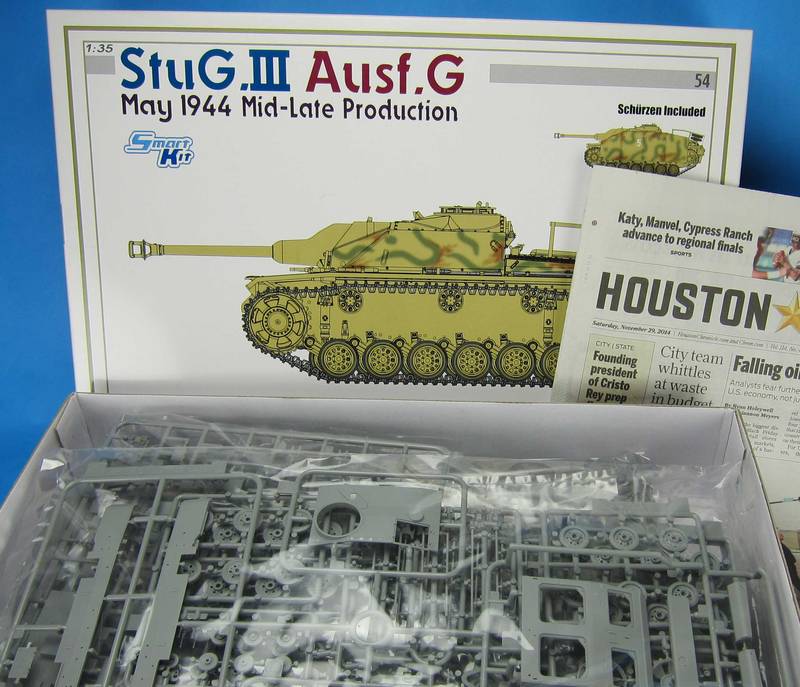
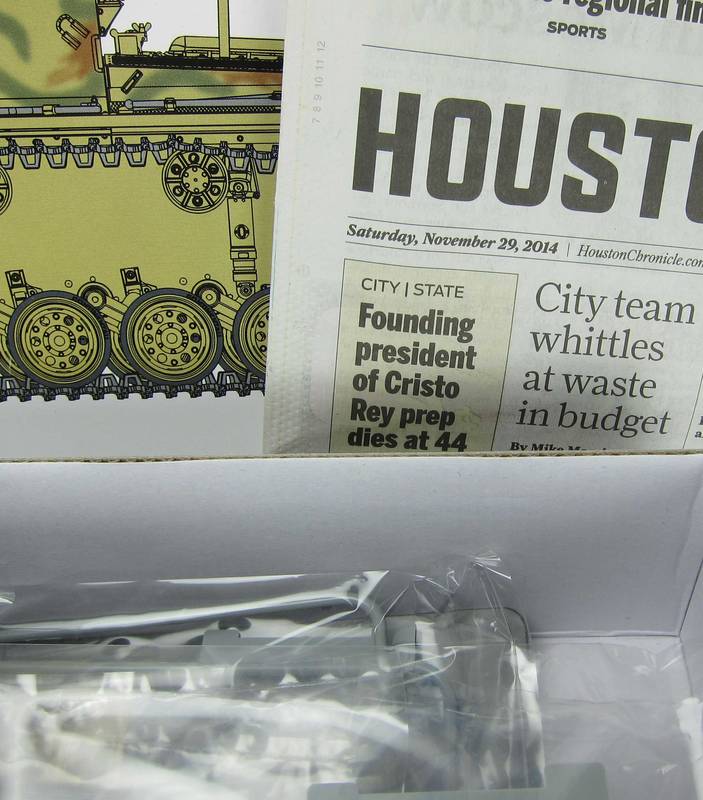
The Book:
And the photo:
Great Campaign so many subjects, it was hard to pick one.
Tom
StuG III Ausf G.
I saw the photo in the book and searched my stash till I found one that listed the 9th SS Panzer Div in Arnhem 1944. This is it.


The Book:

And the photo:

Great Campaign so many subjects, it was hard to pick one.
Tom
Posted: Saturday, November 29, 2014 - 04:33 AM UTC
Hi all,
Hope everyone had a good week. I figured I would provide an update before moving into the paint booth tomorrow. My plan is to lay down a thin primer base using Vallejo Black Surface Primer. I have had good results with it in the past.

I installed the skirt supports today, looking at the picture it is a little lopsided which I will fix this evening.


Here you can see the Tamiya individual track links that I assembled for the tracks. I am at odd cause for the most part I think it looks terrible. I am contemplating biting the bullet and purchasing another set of Fruil Model tracks.

The white stuff is Milliput Fine Grain used to fill gaps in the zimmerit and add zimmerit to the main gun mantel so that the tanks look as close to the picture as possible.
And here are the twins together. As you can see the one for the Panther campaign does have the Fruil Model tracks.

The plan for now is to complete these two and then put them to the side until I can acquire a couple Bedford QLB's and a bofors 40mm. Then it will come together deoicting the cutting of hells highway.
Will provide more photographic updates as the paint gets laid down.
Hope everyone's build is going well. As always comments are welcome and desired.
thanks
Dave
Hope everyone had a good week. I figured I would provide an update before moving into the paint booth tomorrow. My plan is to lay down a thin primer base using Vallejo Black Surface Primer. I have had good results with it in the past.
I installed the skirt supports today, looking at the picture it is a little lopsided which I will fix this evening.
Here you can see the Tamiya individual track links that I assembled for the tracks. I am at odd cause for the most part I think it looks terrible. I am contemplating biting the bullet and purchasing another set of Fruil Model tracks.
The white stuff is Milliput Fine Grain used to fill gaps in the zimmerit and add zimmerit to the main gun mantel so that the tanks look as close to the picture as possible.
And here are the twins together. As you can see the one for the Panther campaign does have the Fruil Model tracks.
The plan for now is to complete these two and then put them to the side until I can acquire a couple Bedford QLB's and a bofors 40mm. Then it will come together deoicting the cutting of hells highway.
Will provide more photographic updates as the paint gets laid down.
Hope everyone's build is going well. As always comments are welcome and desired.
thanks
Dave
Posted: Sunday, November 30, 2014 - 08:46 PM UTC
Hi David and Peter,
Coming along well.
Al


Coming along well.
Al


MikeyBugs95

Joined: May 27, 2013
KitMaker: 2,210 posts
Armorama: 1,712 posts

Posted: Sunday, November 30, 2014 - 10:05 PM UTC
Ok, I am now officially participating in this campaign. I started my L-4 Cub 2 days ago. Considering how small and how few parts it has, I got a considerable amount done.


Posted: Monday, December 01, 2014 - 03:28 AM UTC
David and Rob looking good, welcome aboard Micheal and quick work.
Rob yeh I did know about the finger prints lol. I have got some more etch to go on the outside and it will get another coat. But I should wear my gloves
Look forward to seeing more of your work guys.
Pete
Rob yeh I did know about the finger prints lol. I have got some more etch to go on the outside and it will get another coat. But I should wear my gloves

Look forward to seeing more of your work guys.
Pete
Posted: Tuesday, December 02, 2014 - 07:09 PM UTC
erichvon

Joined: January 17, 2006
KitMaker: 1,694 posts
Armorama: 1,584 posts

Posted: Saturday, December 06, 2014 - 01:40 AM UTC
Really nice build Pete. Think I'll have to pick one of those up at some point. Been working on the buildings for the dio for the last couple of weeks and here's my progress so far.
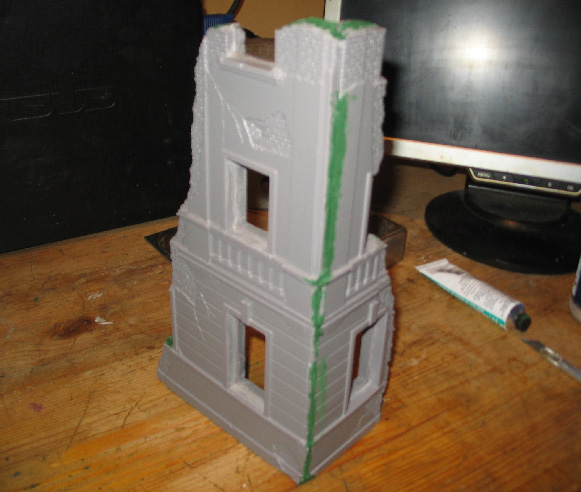
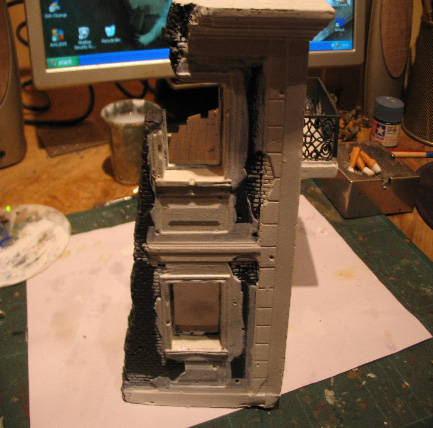
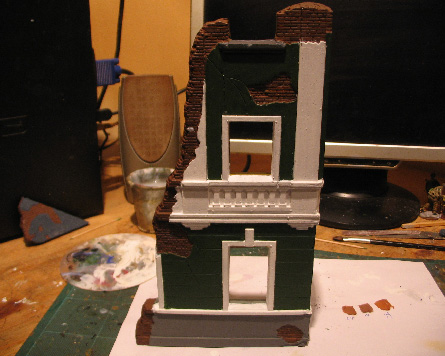
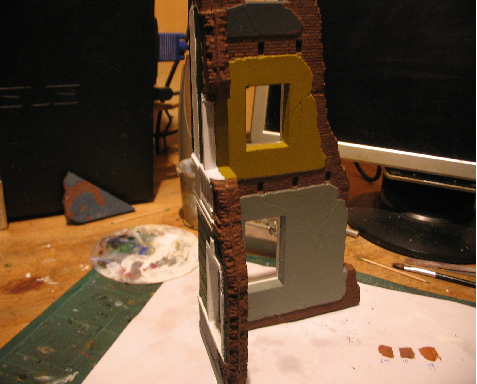
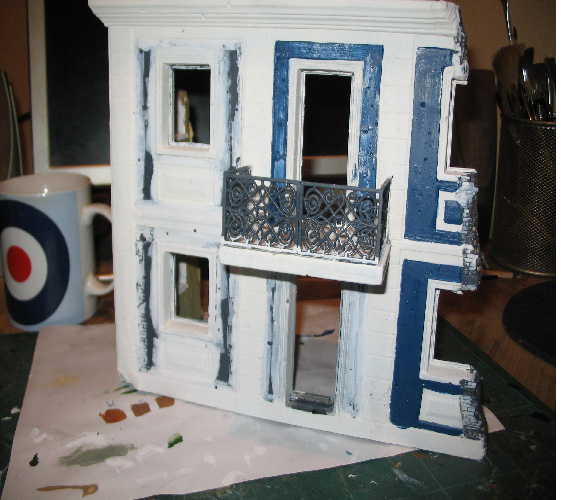
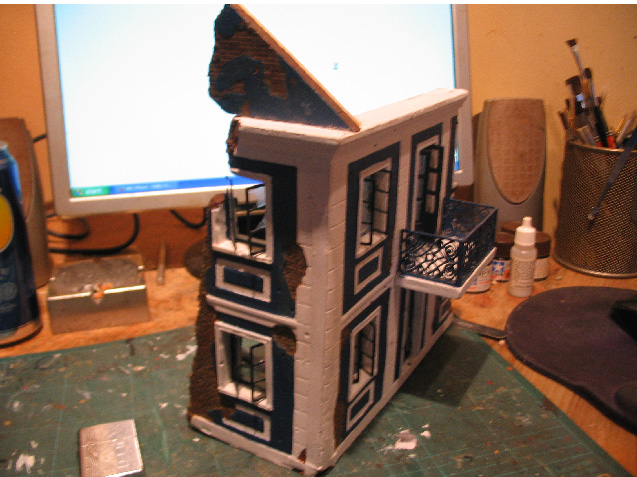
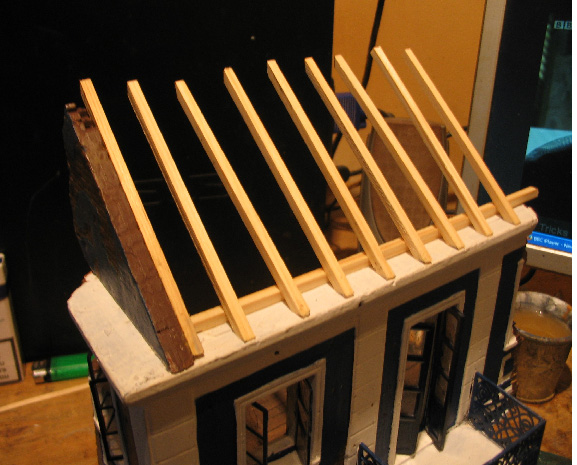
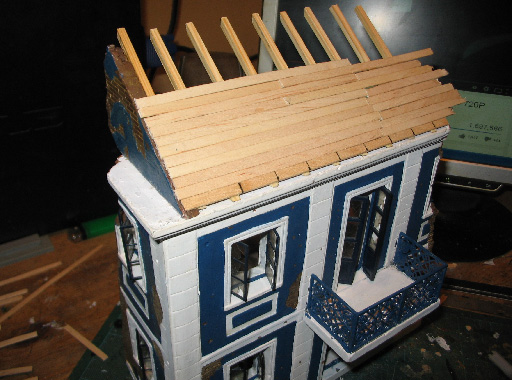
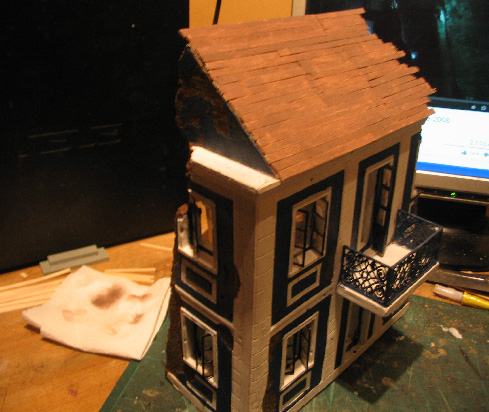
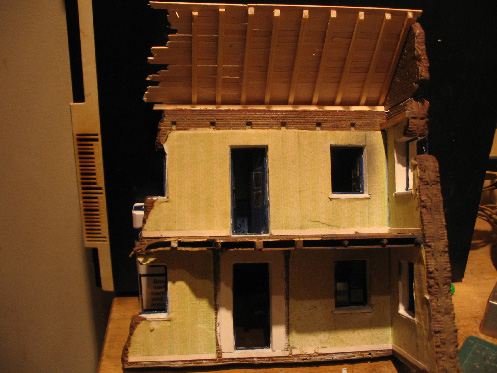
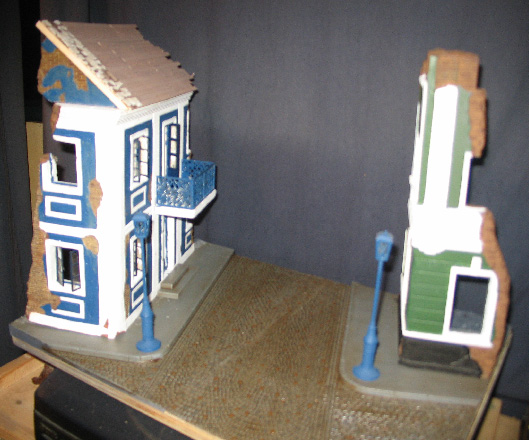
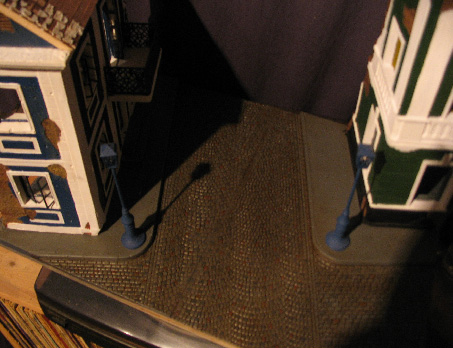
There's still quite a lot of work to do on the buildings but I thought I'd stick some in progress pics up. They're not attached to the base yet, I just thought I'd show you the general idea. Still beavering away on figures. I've realised that all of them so far are conversions of straightforward British infantry to Paras using green putty to make the Denison skirts. Still trying to nail the camo pattern.
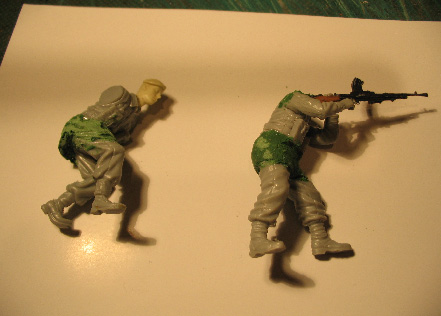
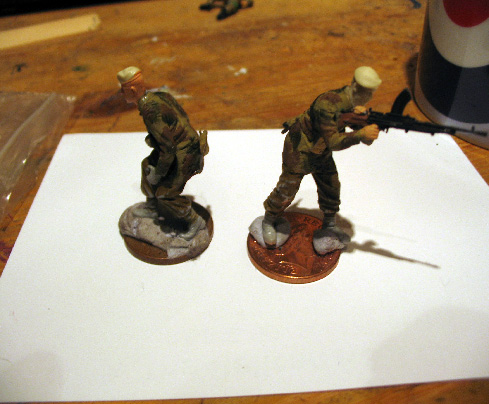


There's still quite a lot of work to do on the buildings but I thought I'd stick some in progress pics up. They're not attached to the base yet, I just thought I'd show you the general idea. Still beavering away on figures. I've realised that all of them so far are conversions of straightforward British infantry to Paras using green putty to make the Denison skirts. Still trying to nail the camo pattern.


erichvon

Joined: January 17, 2006
KitMaker: 1,694 posts
Armorama: 1,584 posts

Posted: Saturday, December 06, 2014 - 01:44 AM UTC
The 6lber and crew will go in the middle of the road facing out across the junction. I'm only going to use the loader and gun layer out of the kit with other figures representing the rest of the crew either dead or wounded. I've finished quite a few figures who'll be moving up the street to move left and right at the crossroads to secure that street. I've ordered a few bits (street signs, rooftiles, posters) from Reality in Scale so I can crack on with finishing the buildings. I need to get some more heads as well as I've run out so looks like an order to Historex for some more Resicast ones. Wee Friends never seem to have any in which is a bummer as hey look quite good plus they're cheaper than the Resicast ones
Posted: Saturday, December 06, 2014 - 04:34 AM UTC
Nice work Karl, the roof has had some major work done there buddy. The scene will look good when done, I think the 6 pounder will be just enough in the street scene. Your figs look good too, I bought some from wee friends at a show recently and they are superb figures. I plan on doing another little scene apart from the airborne jeep and 6 pounder. I got a Verlinden base on ebay cheap so have got some paint on it. The rest will be depicting Paras in action around the bridge.


Here is the work on the base for the jeep and 6 pounder


Pete


Here is the work on the base for the jeep and 6 pounder


Pete
Posted: Saturday, December 06, 2014 - 12:03 PM UTC
Hi Karl,
Nice concept and off top a good start.
Hi Peter,
Your jeep is coming along nicely.
Look forward to developments.
Cheers
Al

Nice concept and off top a good start.
Hi Peter,
Your jeep is coming along nicely.
Look forward to developments.
Cheers
Al


Posted: Saturday, December 06, 2014 - 03:25 PM UTC
Thanks Al plan on some more work today.
Pete
Pete
erichvon

Joined: January 17, 2006
KitMaker: 1,694 posts
Armorama: 1,584 posts

Posted: Saturday, December 06, 2014 - 06:28 PM UTC
Thanks Al.Going to convert some more figures over the next few days. I've decided the stooping Para in the beret above, is going to be half of a PIAT team moving up past the 6lber. The Bren gunner is going to be in one of the windows covering the street. As I've put a scratchbuilt floor in the blue building I can stick a few Paras in there as well as that will be the FEBA. I may stick a couple of the MB wounded in there after I've put some internal walls in as technically I need something to support the floor. Plus I've got the attic floor to do as well. May pick up the Resicast radio op to go up there
Posted: Saturday, December 06, 2014 - 07:00 PM UTC
Hi Karl,
sounds like a good plan, the Bren gunner firing out the Window is a good one.
Have you enough space for a few German prisoners?
Al
sounds like a good plan, the Bren gunner firing out the Window is a good one.
Have you enough space for a few German prisoners?
Al

Posted: Sunday, December 07, 2014 - 02:36 AM UTC

Bluestab

Joined: December 03, 2009
KitMaker: 2,160 posts
Armorama: 1,906 posts

Posted: Sunday, December 07, 2014 - 06:00 AM UTC
Odd question....
Anyone ever see anything towed behind a Carrier besides an anti-tank gun? I'm thinking about a utility trailer like you see towed behind a Jeep.
Anyone ever see anything towed behind a Carrier besides an anti-tank gun? I'm thinking about a utility trailer like you see towed behind a Jeep.
Posted: Sunday, December 07, 2014 - 06:44 PM UTC
Hi Alex
Yes they did have trailers for moving men and equipment about at Arnhem. I will get some pictures uploaded later for you if you like. They also used hand trailers too. If you look in the picture in the magazine in my last post the smaller picture shows the troops pushing a hand cart full of gear.
Cheers Pete
Paulinsibculo

Joined: July 01, 2010
KitMaker: 1,322 posts
Armorama: 1,239 posts

Posted: Sunday, December 07, 2014 - 07:57 PM UTC
Quoted Text
Really nice build Pete. Think I'll have to pick one of those up at some point. Been working on the buildings for the dio for the last couple of weeks and here's my progress so far.
There's still quite a lot of work to do on the buildings but I thought I'd stick some in progress pics up. They're not attached to the base yet, I just thought I'd show you the general idea. Still beavering away on figures. I've realised that all of them so far are conversions of straightforward British infantry to Paras using green putty to make the Denison skirts. Still trying to nail the camo pattern.
Dear Karl,
Nice build, but........
The colors of the building are absolutely not applicable for Arnhem in the 1940-ies.
Sorry to say, but since you put a lot of effort in the accuracy.
You could use (shades of) white or concrete grey.
Have a look at the web: there are many clear pictures of Arnhem in the mid 20 century.
I hope you allow.
P.
66fastback

Joined: June 20, 2013
KitMaker: 65 posts
Armorama: 61 posts

Posted: Monday, December 08, 2014 - 12:19 AM UTC
oops I missed that one
Yes Paul is right, those colors are way to elaborate for Dutch houses even for today's standards. The walls of most if not all houses had different hues of their natural materials or at most some form of white to gray chalk. Lamp posts where most of the time a dark green, gray or any darker more neutral color.
Here are some pictures of the city of Rotterdam before the Germans bombed the crap out of it.
http://www.froot.nl/posttype/froot/oude-fotos-van-rotterdam-van-voor-de-tweede-wereldoorlog-ingekleurd/
Although the pictures are colored in by hand, the colors are accurate for any city or village in the Netherlands. Including Arnhem, Nijmegen and Eindhoven. The canals you see where/are only present in Port cities and not in any of the Market Garden objectives.
Eric
The tall white house is one of few still standing and has one of my favorite bars on ground level. Needles to say I know that building inside out although I always had trouble finding the exit for some reason.

Bluestab

Joined: December 03, 2009
KitMaker: 2,160 posts
Armorama: 1,906 posts

Posted: Tuesday, December 09, 2014 - 05:52 AM UTC
Thanks Peter. I'll be adding a utility trailer. I plan on also using a couple of Tamiya troop sets marching alongside the Carriers.
Been a bit since I last updated. I have been working. I started assembling the components. The front was assembled and clamped.

Figures "armed" with arms and placed in the carrier.


A styrene plank to help wrangle a few stowed items on the front. I saw a picture of a carrier rigged like this. And the trailer. It's either Italeri or Tamiya, from one of the old Jeep kits.

Trailer hitched staged in to position...I hadn't added the hitch yet. A good shot of the netting bag and rolled up tarp.

Trailer "loaded". I used a piece of styrene to make a shelf and added a few crates from the spares. Underneath is actually hollow. I added a tissue/white glue tarp and used thread as rope. I'll probably add a few odd bits atop the canvas as well...an extra shovel...stuff like that.

Basic assembly is done. Add ed the side shields. Hitch is on...can't see it though.

And a rear shot with trailer hitched.

And that's where I stand at the moment.
Been a bit since I last updated. I have been working. I started assembling the components. The front was assembled and clamped.

Figures "armed" with arms and placed in the carrier.


A styrene plank to help wrangle a few stowed items on the front. I saw a picture of a carrier rigged like this. And the trailer. It's either Italeri or Tamiya, from one of the old Jeep kits.

Trailer hitched staged in to position...I hadn't added the hitch yet. A good shot of the netting bag and rolled up tarp.

Trailer "loaded". I used a piece of styrene to make a shelf and added a few crates from the spares. Underneath is actually hollow. I added a tissue/white glue tarp and used thread as rope. I'll probably add a few odd bits atop the canvas as well...an extra shovel...stuff like that.

Basic assembly is done. Add ed the side shields. Hitch is on...can't see it though.

And a rear shot with trailer hitched.

And that's where I stand at the moment.
 |


