Mirror Model's D7 Bulldozer in 1/35th

#521
Kentucky, United States
Joined: April 13, 2011
KitMaker: 9,465 posts
Armorama: 8,695 posts
Posted: Monday, August 10, 2015 - 12:04 AM UTC
Mirror Model's D7 Bulldozer in 1/35thStarted my Mirror Model's D7 Bulldozer just a few days ago. Thought this might be a good chance to post some progress build photos and to squash a few negative rumors about the quality of this kit.


CAD image Mirror Models

#521
Kentucky, United States
Joined: April 13, 2011
KitMaker: 9,465 posts
Armorama: 8,695 posts
Posted: Monday, August 10, 2015 - 12:10 AM UTC
Mirror, as promised, now has a new injection molding company producing their kits. I have built Mirror's Diamond T Wrecker and unlike the wrecker the sprue gate sizes even on the smallest of bulldozer parts is very reasonably sized and manageable. The parts separate from the sprue using the normal nippers or an X-acto knife, leaving very little clean up necessary. So far the only part I have broken getting it off the main sprue was one of the fanbelts which ended up being my own fault and was easily repaired.

#521
Kentucky, United States
Joined: April 13, 2011
KitMaker: 9,465 posts
Armorama: 8,695 posts
Posted: Monday, August 10, 2015 - 01:08 AM UTC
When first received the very substantial cardboard box certainly comes fully loaded - each sprue packed in it's own separate crystal clear RE-SEALABLE plastic envelope - these envelopes are proving to be VERY helpful!
The molding quality is sharp and crisp. The plastic material used is surprisingly strong allowing most parts to be molded at near scale thickness!


#521
Kentucky, United States
Joined: April 13, 2011
KitMaker: 9,465 posts
Armorama: 8,695 posts
Posted: Monday, August 10, 2015 - 01:11 AM UTC
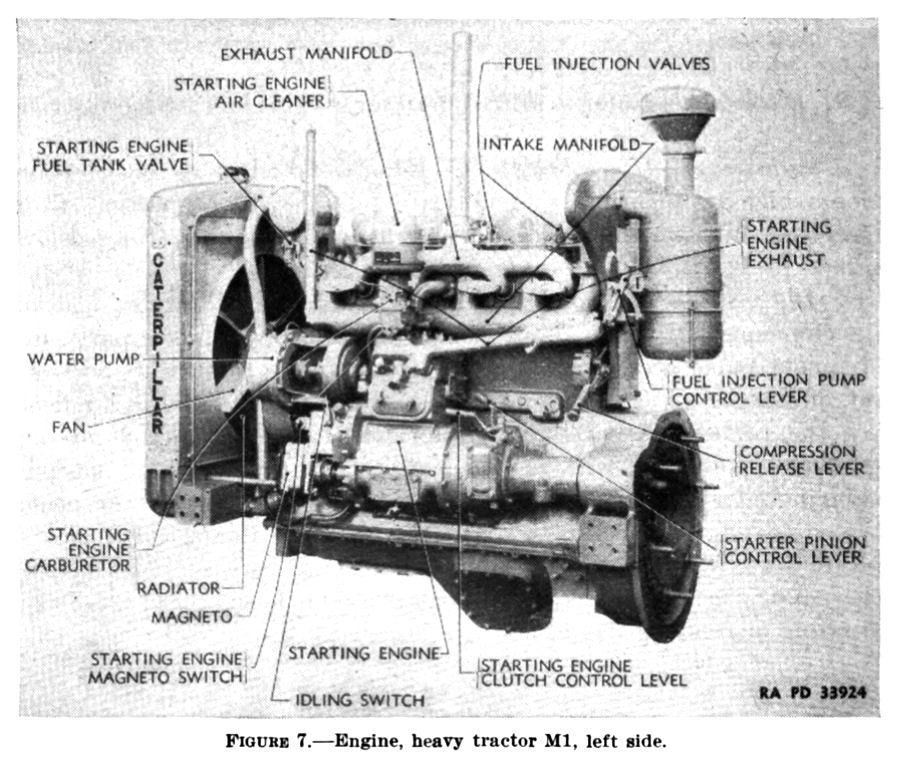
The left side or starting motor side of the engine:
(These build photos are still incomplete as there are additional details as well as brass etch yet to add.)
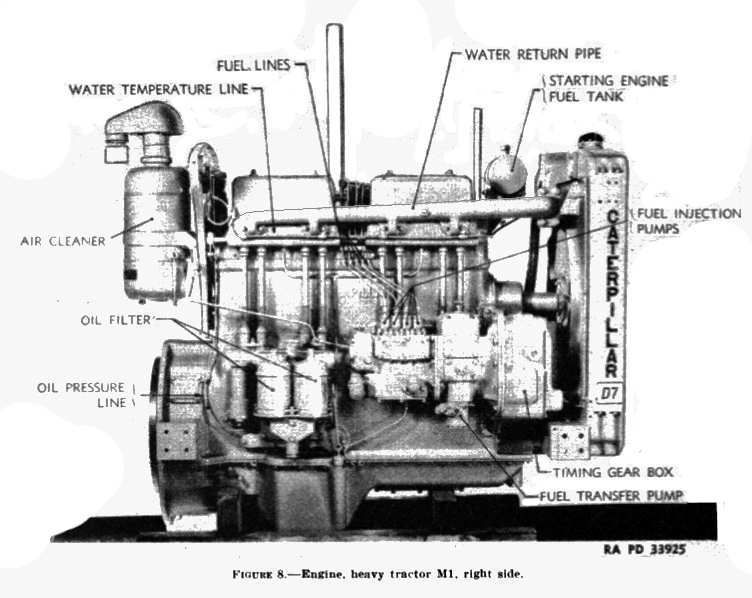
The right or fuel injector/oil filter side of the engine:


#521
Kentucky, United States
Joined: April 13, 2011
KitMaker: 9,465 posts
Armorama: 8,695 posts
Posted: Monday, August 10, 2015 - 01:13 AM UTC
Top 3/4 view, right side:
(Again these build photos are still incomplete as there are additional details and some brass etch yet to add.)
Joined: June 22, 2007
KitMaker: 165 posts
Armorama: 97 posts
Posted: Monday, August 10, 2015 - 01:16 AM UTC
I started mine a while ago, It's a nice kit, but the fact that the parts are not numbered in a logical order is driving me nuts. I spend a lot of times scanning sprues for the location of parts.

#521
Kentucky, United States
Joined: April 13, 2011
KitMaker: 9,465 posts
Armorama: 8,695 posts
Posted: Monday, August 10, 2015 - 01:18 AM UTC
Transmission, braking clutch differential box, tow bar and final drive gear reduction:


#521
Kentucky, United States
Joined: April 13, 2011
KitMaker: 9,465 posts
Armorama: 8,695 posts
Posted: Monday, August 10, 2015 - 01:23 AM UTC
Front view of Transmission, braking clutch differential box and final drive gear:


#521
Kentucky, United States
Joined: April 13, 2011
KitMaker: 9,465 posts
Armorama: 8,695 posts
Posted: Monday, August 10, 2015 - 01:37 AM UTC
I cannot stress greatly enough how impressed I am with the engineering that went into this kit! It is like a fine Swiss Watch! The fit and finish are excellent and every inch is packed with detail. As to all that detail I am sure this kit has more parts than a fine Swiss Watch but the result is all very much worth it, if I do say!
Engine mounted in frame, left side:


#521
Kentucky, United States
Joined: April 13, 2011
KitMaker: 9,465 posts
Armorama: 8,695 posts
Posted: Monday, August 10, 2015 - 01:38 AM UTC
Engine mounted in frame, right side:


#521
Kentucky, United States
Joined: April 13, 2011
KitMaker: 9,465 posts
Armorama: 8,695 posts
Posted: Monday, August 10, 2015 - 01:54 AM UTC
I suggest following the Mirror Instruction Sheet assembly order to the letter.
Personally, I have at least one failing, I love to jump around on a kit build to off-set the fact that I bore easily. I therefore decided to install the transverse mounted front suspension leaf spring out of proper order and upon finishing the assembly I discovered that the engine would no longer go in and out of the frame. (Some less than judicious sanding and the removal of one small detail corrected the problem but all in all I would have rather done it the correct way!
Top view of transverse mounted spring: (Note small piece of 10 thou sheet stock added to make it easier to keep these pieces aligned while gluing - a word to the wise.)

View from below of transverse leaf spring: (Again note some small bits of sheet plastic added here for alignment and strengthening purposes.

British Columbia, Canada
Joined: May 21, 2014
KitMaker: 109 posts
Armorama: 109 posts
Posted: Monday, August 10, 2015 - 02:02 AM UTC
Looks good so far. I have been thinking about this kit for a while now.
I really like the Mirror kits.

#521
Kentucky, United States
Joined: April 13, 2011
KitMaker: 9,465 posts
Armorama: 8,695 posts
Posted: Monday, August 10, 2015 - 02:20 AM UTC
As to the instruction sheet that comes with this kit you will receive a B&W 16 page 8.5" x 11" - BOOK- plus a separate painting chart in full color.
One comment would be that the commercial printer Mirror is using for their B&W instruction sheet is doing them no favors. All the photos on the printed instruction sheet are dark, muddy and hard to make sense of.** However Mirror comes to the rescue even here by publishing a complete set of instructions online for anyone to view at any time.
The online instruction sheet does not suffer from this photographic problem. All photos online are crisp and easy to view. I very much recommend studying these online images before starting the model and consulting them frequently when you have any doubts about the correct way to put something together.
The digital instruction sheet file can be downloaded at:
http://www.mirror-models.com/135-US-Military-Bulldozer.html** Libor over at Mirror Models told me a few days ago that the problems with the dark pictures on the instruction sheets has now been corrected in later issues of the kit.

#521
Kentucky, United States
Joined: April 13, 2011
KitMaker: 9,465 posts
Armorama: 8,695 posts
Posted: Monday, August 10, 2015 - 02:29 AM UTC
Please note: Mirror recommends to use the Tamiya Extra Thin glue for best results. I second that advice. The Extra Thin works like a charm!
I started out with the Tamiya thicker glue because that is what I had on my workbench but that offered only limited results and smearing the thick glue where it was not wanted was always a problem. Also from past experience with the Mirror kits I knew regular Testor's model glue would not even craze this tough formulated plastic.

The Tamiya Extra Thin is absolutely the glue to use!
(Catalog photo above from HobbyLinc website.)

#521
Kentucky, United States
Joined: April 13, 2011
KitMaker: 9,465 posts
Armorama: 8,695 posts
Posted: Monday, August 10, 2015 - 02:34 AM UTC
The photo that started this entire 3 kit construction project:


#521
Kentucky, United States
Joined: April 13, 2011
KitMaker: 9,465 posts
Armorama: 8,695 posts
Posted: Monday, August 10, 2015 - 03:14 AM UTC
Quoted Text
I started mine a while ago, It's a nice kit, but the fact that the parts are not numbered in a logical order is driving me nuts. I spend a lot of times scanning sprues for the location of parts.
I have to agree with that to some extent. #67 and #69 may be right next to each other on one sprue and #68 can be three sprues away. It is a headache!
I imagine there is some sort of mancfacturing logic that would explain all this strange arrangement of parts but I don't know what that would be. Probably something about wanting to keep small parts grouped together and not mix small and large parts on the same sprue. This due to the need to use different injection pressures to fill molds containing a few large parts vs. molds containing lots of small parts.

#521
Kentucky, United States
Joined: April 13, 2011
KitMaker: 9,465 posts
Armorama: 8,695 posts
Posted: Monday, August 10, 2015 - 03:28 AM UTC
Like I say I like to bounce around to different parts of the construction process to stave off boredom. I spent some time last night working on the bulldozer blade.
Front of blade:

Rear view:

End cap:


#521
Kentucky, United States
Joined: April 13, 2011
KitMaker: 9,465 posts
Armorama: 8,695 posts
Posted: Monday, August 10, 2015 - 07:01 PM UTC
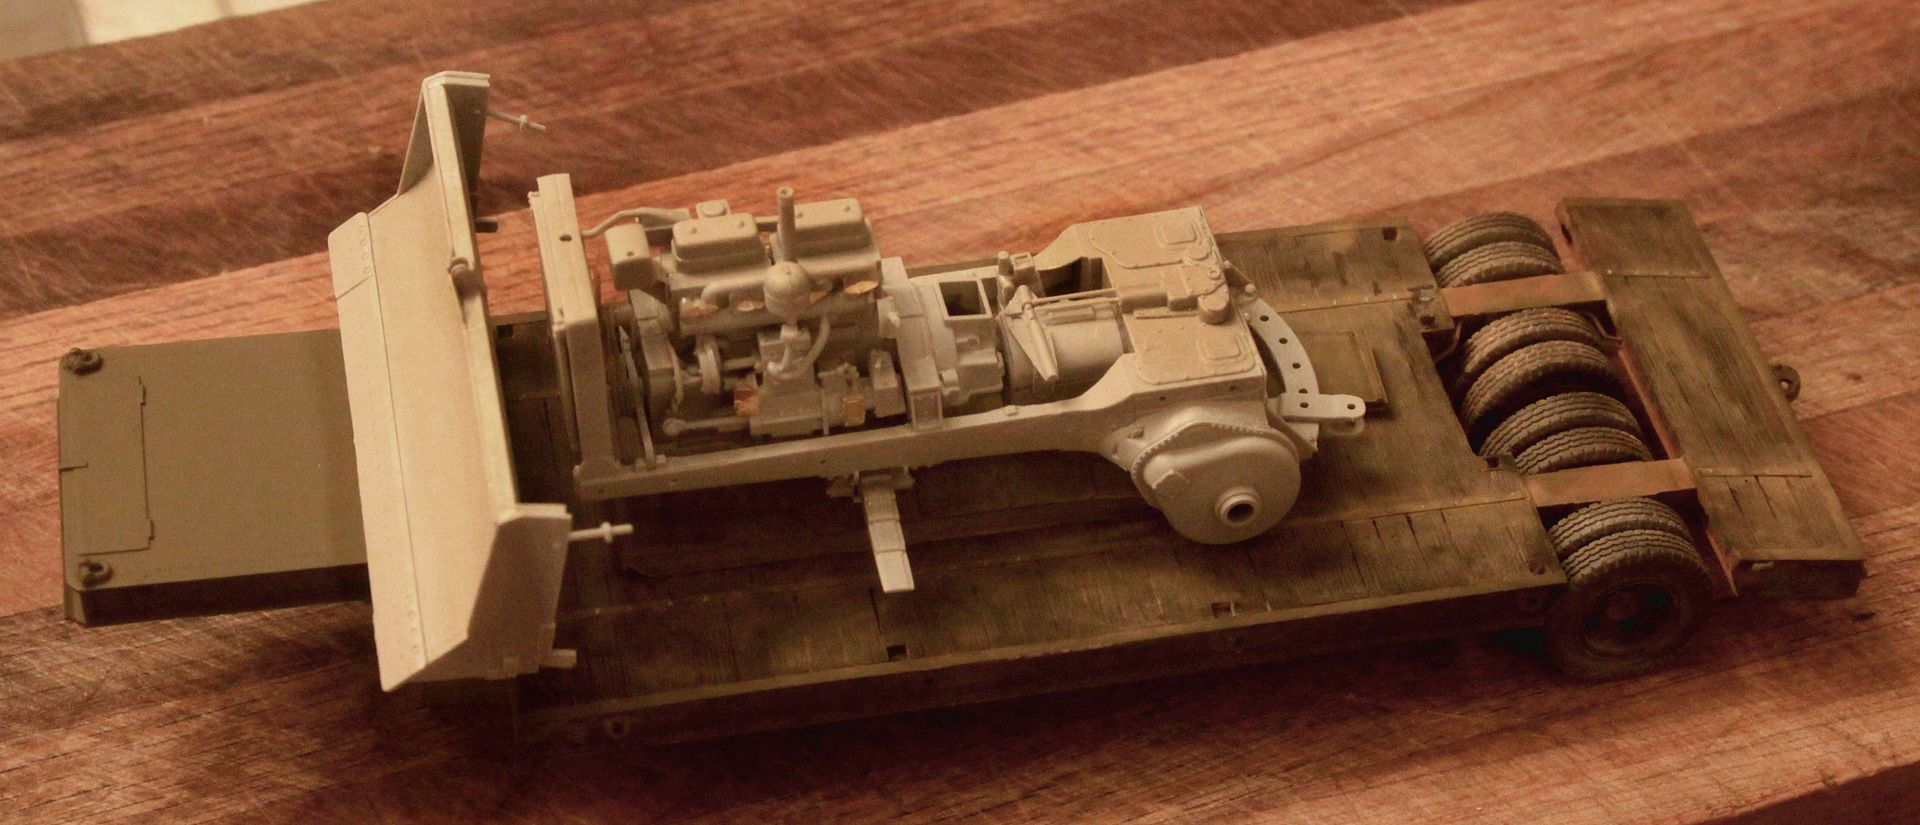
Anyone on Armorama who knows my work has probably already figured out that the D7 Tractor has just been waiting in the wings. Waiting for me to complete my 20 ton low bed trailer and White 666 semi-tractor to pose the Bulldozer on!


The 20 ton trailer is a resin kit from Scale-Link in the UK with much underbody detail added. The White tractor is a conversion of the HobbyBoss 666 kit and of course the D7 Bulldozer is OOB from Mirror Models.
Blog covering the conversion of the White 666 semi-tractor and 20 ton low bed trailer can be found at:
https://armorama.kitmaker.net/forums/236169An additional blog with more info on the 20 ton low bed trailer can be viewed at:
https://armorama.kitmaker.net/forums/236939
#521
Kentucky, United States
Joined: April 13, 2011
KitMaker: 9,465 posts
Armorama: 8,695 posts
Posted: Monday, August 10, 2015 - 09:06 PM UTC

Note the different construction of the forward lifting frame. This vehicle originally was a very rare variant of the Cat dozer called a "Beach Dozer". It was fitted with a very narrow blade that was hinged to the dozer frame inside the track legs.

This dozer (just like the Mirror offering) has the starter crank for the donkey engine mounted in the front left engine cowl.
Both photos MilitaryVehicleWeb.com
(Vehicle has now SOLD)

#521
Kentucky, United States
Joined: April 13, 2011
KitMaker: 9,465 posts
Armorama: 8,695 posts
Posted: Monday, August 10, 2015 - 09:07 PM UTC

U.S. Army Photo
_________________________________________________________________________________
Nice accessory to the dozer; the LeTourneau scraper, available from LZ Models - the resin division of Mirror Models.


#521
Kentucky, United States
Joined: April 13, 2011
KitMaker: 9,465 posts
Armorama: 8,695 posts
Posted: Tuesday, August 11, 2015 - 05:35 AM UTC
OK here is where everyone will say I am totally crazy and over-doing it but here goes . . . .
As built I did not like the way the Mirror Models frame side C channels were molded out of two long horizontal pieces with a visible seam running length wise down the vehicle. Also the forward portion of the frame as built was a little wobbly, I know it would firm up once the engine was glued in place but I just wanted to produce something more solid right from the get-go.

So I cut some thin plastic sheet stock to match the inside taper of the C channel frame rails. Once fitted and sanded to size I glued these thin sheet plastic strips into the C channels which also served to hide the inside seam of the channel.
I let the assembly dry overnight and by the morning I had one very solid caterpillar frame, no wobble and very little twist!
At that point I was also able to fill and sand the outside surface of the frame members to give a smooth seamless beam down the entire length of the vehicle.
Probably totally unnecessary but I just had to do it!
California, United States
Joined: August 09, 2014
KitMaker: 180 posts
Armorama: 180 posts
Posted: Tuesday, August 11, 2015 - 06:43 AM UTC
Looking good, Mike! I have to complete my Chevy C60 before I can get to this, alas.

#521
Kentucky, United States
Joined: April 13, 2011
KitMaker: 9,465 posts
Armorama: 8,695 posts
Posted: Tuesday, August 11, 2015 - 08:58 AM UTC
Completed engine - left side - all parts both plastic and brass etch have now been added. I may still scratch build the fuel injectors for the main engine and the two spark plugs plus wiring that stick up out of the top of the donkey motor.


Completed engine - right side.


Main air cleaner, wiring, fuel injector tubing and radiator caps are all that remain to be added.
PLEASE NOTE: TM photos show a slightly earlier engine design for the D7 so some details will vary from those seen on the model.

#521
Kentucky, United States
Joined: April 13, 2011
KitMaker: 9,465 posts
Armorama: 8,695 posts
Posted: Tuesday, August 11, 2015 - 06:11 PM UTC
Wanna know what's inside that big box at the rear of the frame?

Differential gears, left and right slip clutches, left and right track brakes all for accomplishing differential steering for the dozer.

#521
Kentucky, United States
Joined: April 13, 2011
KitMaker: 9,465 posts
Armorama: 8,695 posts
Posted: Wednesday, August 12, 2015 - 05:34 AM UTC
Working on the hood and front radiator grill. Be very careful when gluing these two parts together. One can easily glue the grill too deeply into the underside curve of the hood leaving this front vertical piece too short to reach all the way down to the bottom edge of the frame. I did the first time I tried and nearly messed things up big time!
 Use the smallest flange overlap possible when connecting the vertical radiator grill to the hood.


 The Tamiya Extra Thin is absolutely the glue to use!


