Hosted by Richard S.
Campaign 150- Mk. II
Removed by original poster on 09/08/17 - 12:15:32 (GMT).
Armored76

Joined: September 30, 2013
KitMaker: 1,615 posts
Armorama: 1,500 posts

Posted: Thursday, September 07, 2017 - 10:31 PM UTC
Glad to hear you have the first entry AND finished build in this campaign, Gary!
Is there anything you can do about the images as these won't show?
Is there anything you can do about the images as these won't show?
erichvon

Joined: January 17, 2006
KitMaker: 1,694 posts
Armorama: 1,584 posts

Posted: Saturday, September 09, 2017 - 07:10 PM UTC
Just noticed the campaign so have signed up. I enjoyed the last one and I'm sure I've got something less than 150 parts in the stash which will do. In fact off the top of my head I can think of about six kits under 150 I've been meaning to build for a while so I should have something started in the next couple of days.
Armored76

Joined: September 30, 2013
KitMaker: 1,615 posts
Armorama: 1,500 posts

Posted: Saturday, September 09, 2017 - 08:50 PM UTC
Glad to have you join, Karl!
Posted: Sunday, September 10, 2017 - 06:25 AM UTC
Howdy Y'all 
I'll be building the old MPC AT-ST kit. It has about 23 parts total. I bought a MPC AT-AT kit at an IMPS Regional show. The seller wanted $10.00 for it. When I looked inside I saw there was an AT-ST inside the box. The price seemed very fair to me so I immediately gave him a $10 bill.
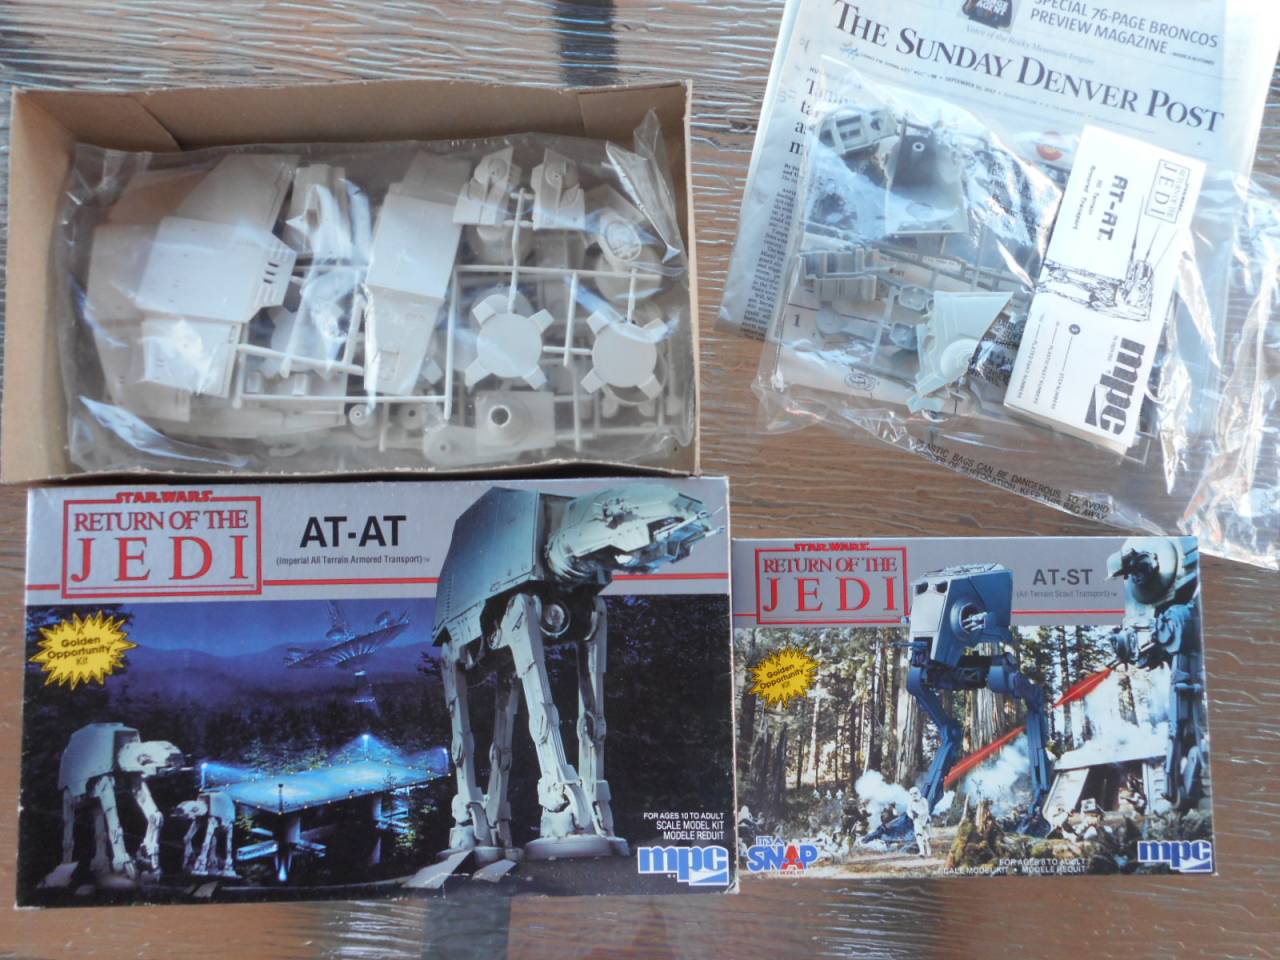
It looks like a very crude kit but let's see what I can do with it. I am think of a "WHIF" in Eastern Block markings (the evil empire).
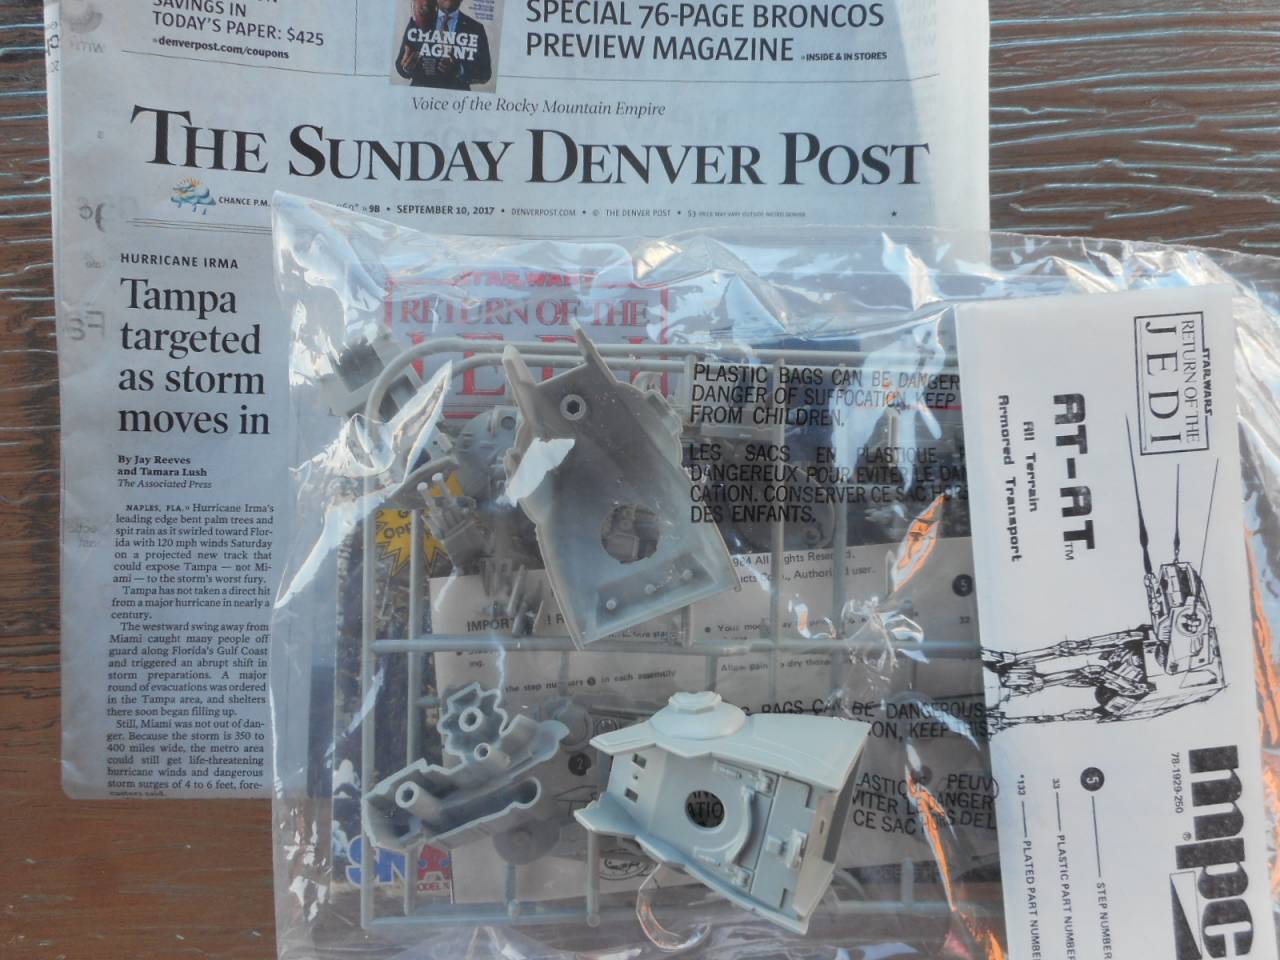
Take care,
Don "Lakota"

I'll be building the old MPC AT-ST kit. It has about 23 parts total. I bought a MPC AT-AT kit at an IMPS Regional show. The seller wanted $10.00 for it. When I looked inside I saw there was an AT-ST inside the box. The price seemed very fair to me so I immediately gave him a $10 bill.
It looks like a very crude kit but let's see what I can do with it. I am think of a "WHIF" in Eastern Block markings (the evil empire).

Take care,
Don "Lakota"
Armored76

Joined: September 30, 2013
KitMaker: 1,615 posts
Armorama: 1,500 posts

Posted: Sunday, September 10, 2017 - 10:18 AM UTC
Interesting idea, Don! Looking forward to this one!
erichvon

Joined: January 17, 2006
KitMaker: 1,694 posts
Armorama: 1,584 posts

Posted: Sunday, September 10, 2017 - 12:12 PM UTC
I woke up and couldn't get back to sleep so thought I'd make a start. I was having a look through my figures to see if anything jumped out when I had the idea for a small Normandy dio. I'd bought a Universal Carrier off ebay a while back really cheap as it hadn't got any tracks which wasn't a problem as I've got a scrap one kicking about so a Universal Carrier it is. I'm going to have it knocked out in a lane with 12th SS Hitlerjugend using it as cover while engaging unseen Canadian troops. (I've decided to go for the Canadian markings as they spent most of their time engaging 12th SS and chose 12th SS as they bore the brunt of the Allied offensive. The Cannucks don't get the credit they deserve for their actions in Normandy so I thought I'd have a change).
I'd forgotten what a nice little kit this is. Really straightforward and being Tamiya I'm not expecting any fit issues. I'm doing my usual and building it in sections and painting it before I put it all together. Once it's all together I'll give it a final coat then weathering.
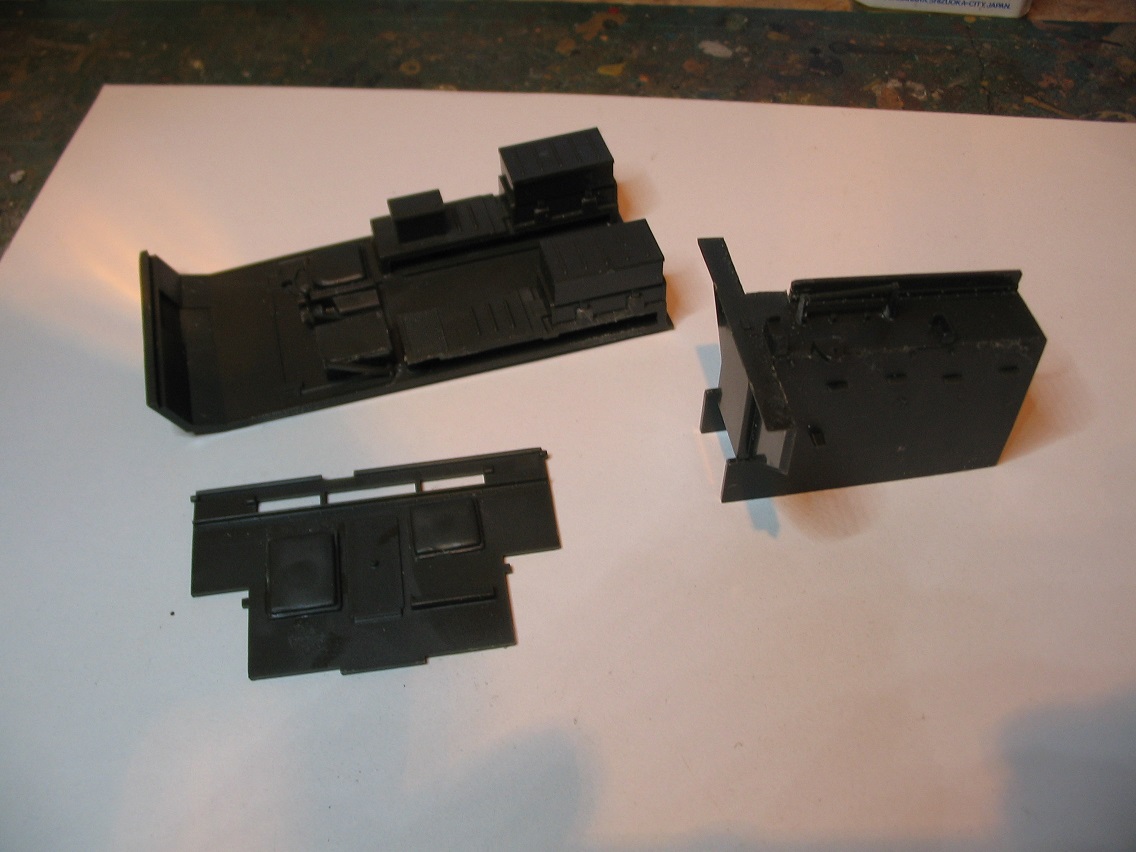
I asked a while back for suggestions for British green and was pointed towards a Mike Starmer mix which does look right. I mixed 5 parts XF81 (RAF Dark Green) to 1 part XF58 Olive Green and 1 part XF14 J.A. Grey (it should have been XF71 Cockpit green but I'd not got any of that and the colours are close so went for that). I finally got to use one of my Oramorph syringes that I collect whenever I'm in hospital to mix it. It naturally has 1ml increments on the side for morphine and because it's for oral medication the actions really smooth. Loads better than the syringes I've bought from modelling suppliers which tend to be stiffer plus they're free lol. I usually end up with a bagfull when I'm discharged but I have no plans on going back in if I eventually run out lol.
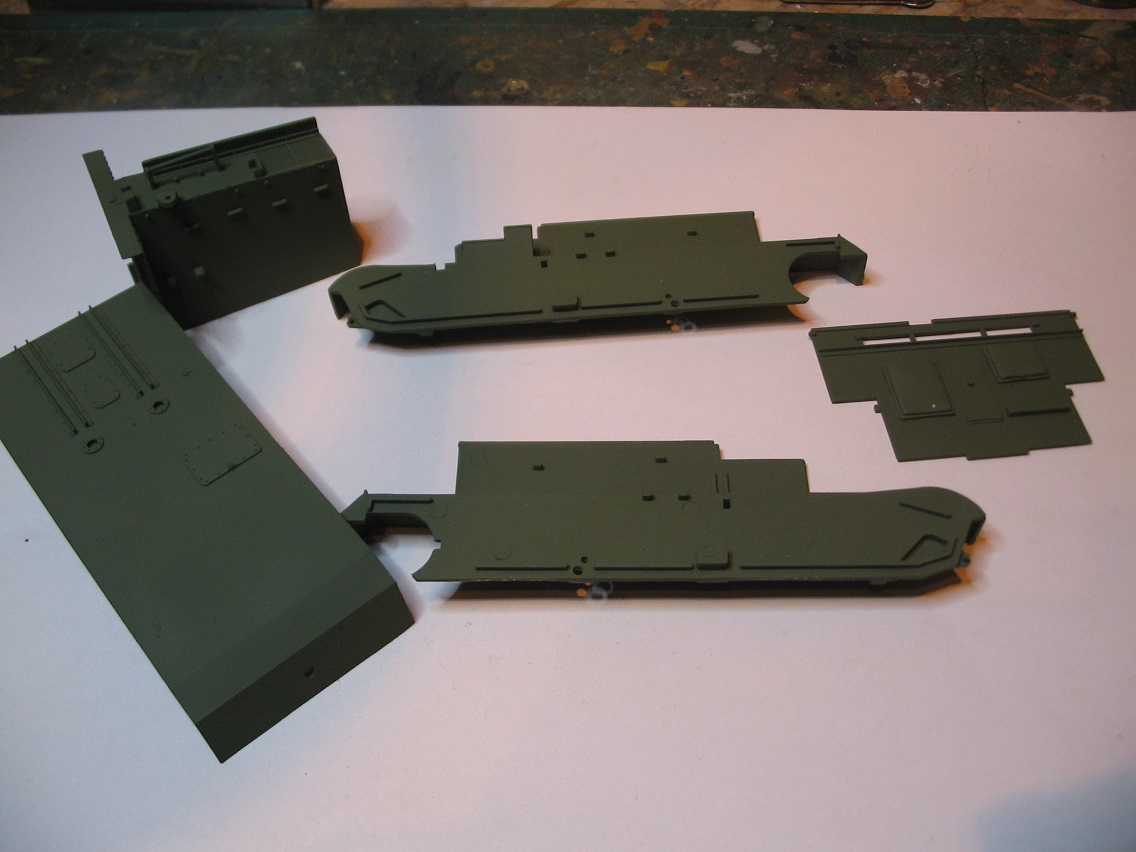
That's with the first coat on. I'm impressed with the colour as it does look like British green as opposed to straightforward OD. I suppose I could have got away with that the amount of carriers that were built in Canada and the US as they came sprayed OD but I wanted to try the mix. I don't think that this is going to be a long build given the simplicity of the kit so I'll plough on. More pics later once it starts going together.
I'd forgotten what a nice little kit this is. Really straightforward and being Tamiya I'm not expecting any fit issues. I'm doing my usual and building it in sections and painting it before I put it all together. Once it's all together I'll give it a final coat then weathering.

I asked a while back for suggestions for British green and was pointed towards a Mike Starmer mix which does look right. I mixed 5 parts XF81 (RAF Dark Green) to 1 part XF58 Olive Green and 1 part XF14 J.A. Grey (it should have been XF71 Cockpit green but I'd not got any of that and the colours are close so went for that). I finally got to use one of my Oramorph syringes that I collect whenever I'm in hospital to mix it. It naturally has 1ml increments on the side for morphine and because it's for oral medication the actions really smooth. Loads better than the syringes I've bought from modelling suppliers which tend to be stiffer plus they're free lol. I usually end up with a bagfull when I'm discharged but I have no plans on going back in if I eventually run out lol.

That's with the first coat on. I'm impressed with the colour as it does look like British green as opposed to straightforward OD. I suppose I could have got away with that the amount of carriers that were built in Canada and the US as they came sprayed OD but I wanted to try the mix. I don't think that this is going to be a long build given the simplicity of the kit so I'll plough on. More pics later once it starts going together.
Armored76

Joined: September 30, 2013
KitMaker: 1,615 posts
Armorama: 1,500 posts

Posted: Sunday, September 10, 2017 - 12:56 PM UTC
That's a great start for the kit and the week! 

mechaman

Joined: November 18, 2003
KitMaker: 61 posts
Armorama: 57 posts

Posted: Sunday, September 10, 2017 - 09:49 PM UTC
Here is my entry!
I am going Small scale with the Revell 1/72 scale T-80. I have had this one kicking around the stash for many years now, usually using the box for a part painting platform.

I am going Small scale with the Revell 1/72 scale T-80. I have had this one kicking around the stash for many years now, usually using the box for a part painting platform.

Armored76

Joined: September 30, 2013
KitMaker: 1,615 posts
Armorama: 1,500 posts

Posted: Sunday, September 10, 2017 - 10:14 PM UTC
That should be a nice kit, John! Glad to see you starting your build.
erichvon

Joined: January 17, 2006
KitMaker: 1,694 posts
Armorama: 1,584 posts

Posted: Tuesday, September 12, 2017 - 04:45 PM UTC
I had quite a productive day yesterday although I thought I'd get further on than I did. I spent hours looking for some decent pics of the No 19 radio set so that I could see how it was wired up, colours etc. Of course you can't just go off one set for colours as it may be a one off so you need to look at a few to make sure you're getting an unadulterated one. Finally found some good ones, painted it up and saved the photos on my military modelling stick. That is the go to reference place for me the amount of stuff I've got saved on there lol. It's 16GB and it's almost full so time to get another.
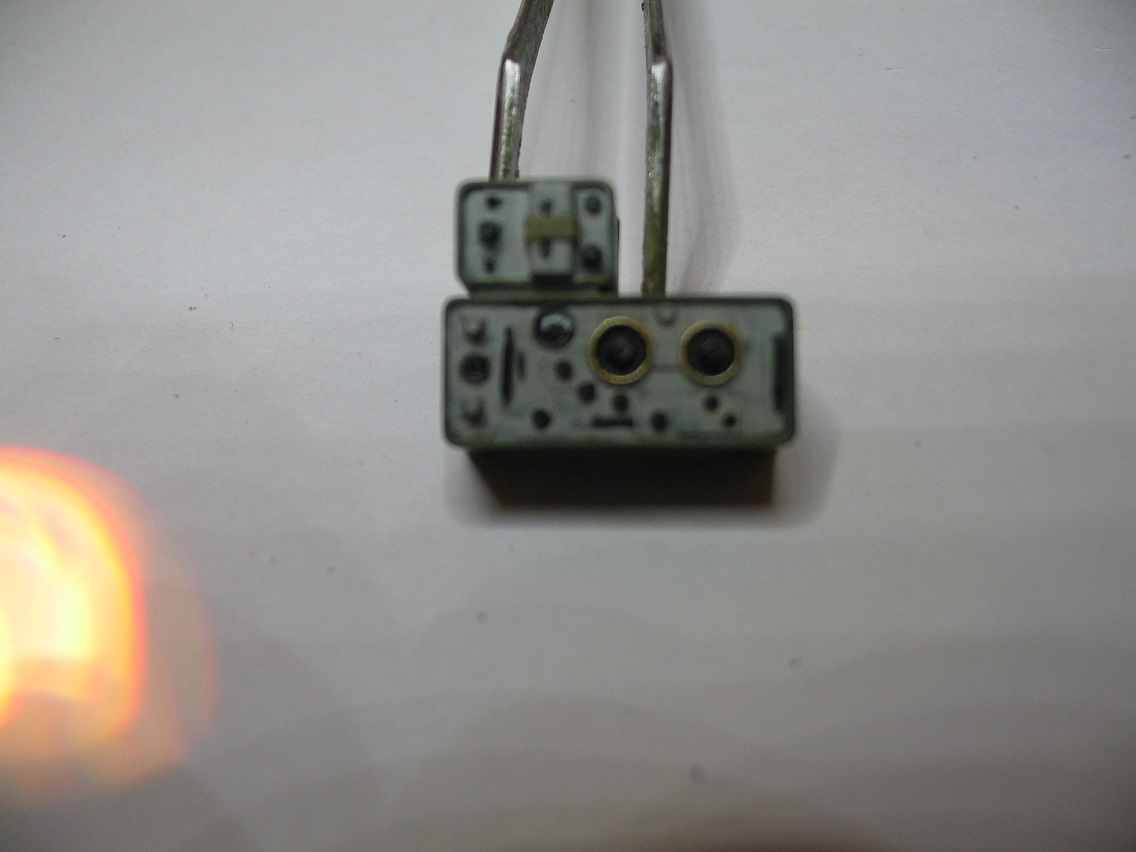
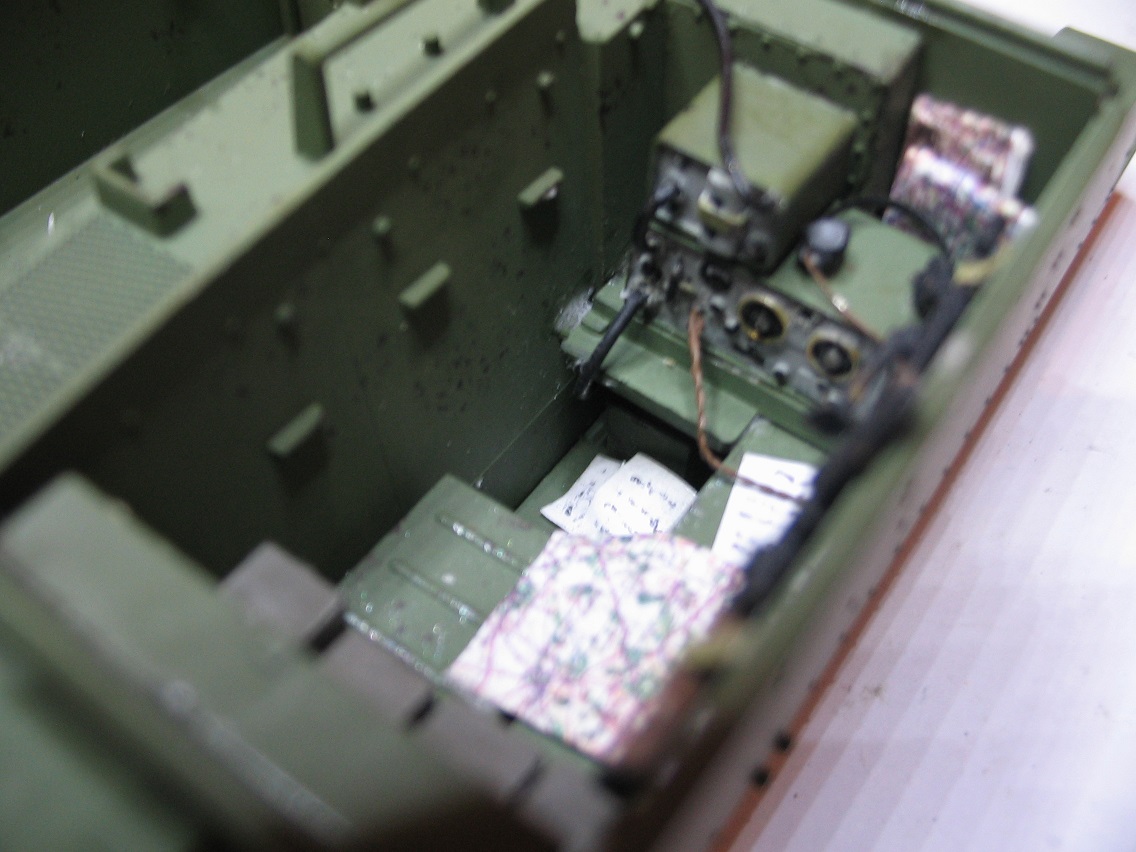
This is the radio as basic just after I'd finished it. It's a bit blurry unfortunately. I should have checked before I fixed it in.
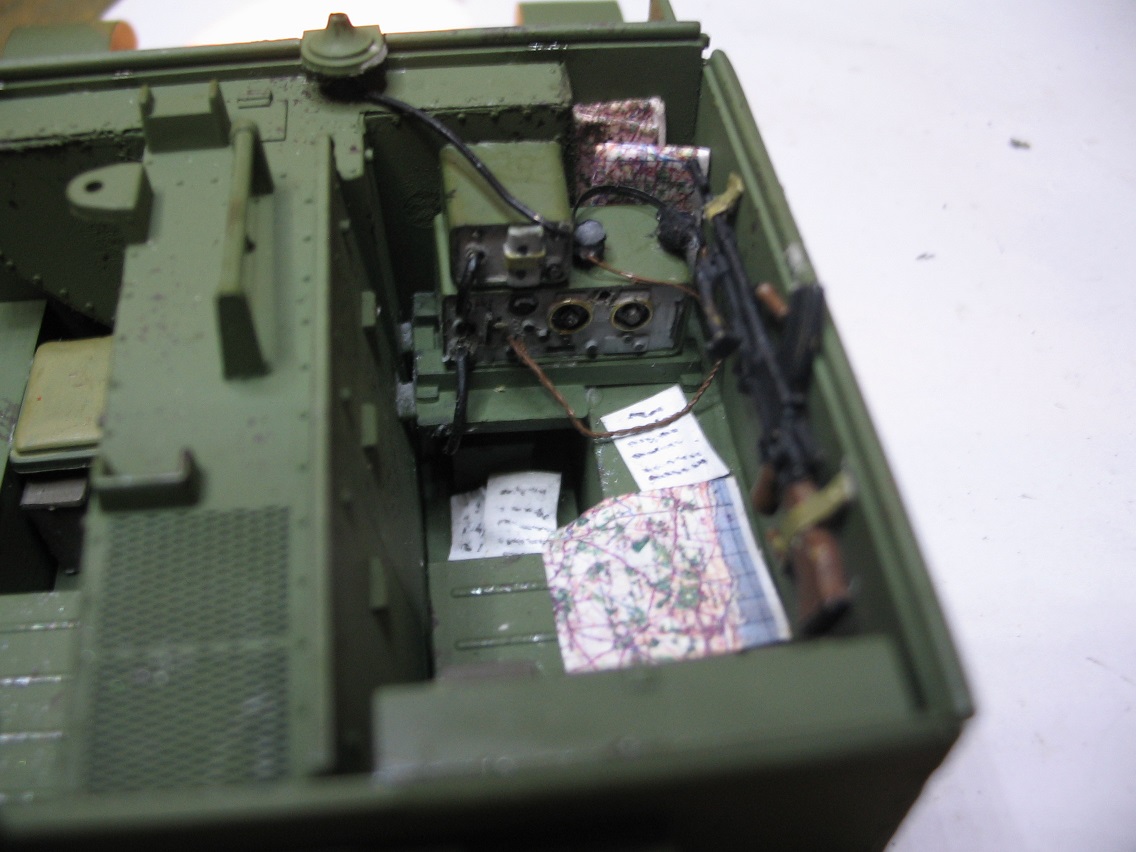
You can see it a lot clearer in these ones. I wired the set up to the aerial which I try to do with open top vehicles these days. I've noticed quite a few Universal Carriers that people have built that are sporting three aerials which I think is an error. There are three seperate aerial mounts but as far as I can tell you can't link up three aerials to one radio. When I was doing my research I found some interesting line drawings from a WW2 manual which showed the layout of various uses. The basic set up of the Tamiya kit is for the platoon commanders vehicle which mounted the radio in the same place as the kit but was a No22 rather than a No19 as in the kit. It also has a Vickers mounted on top which the kit doesn't have so a bit of a mish mash. I may build one later as I've got some of the excellent Resicast Vickers guns and mounts which I bought for an LRDG project I still have to finish. A straightforward scout carrier mounts a No19 but it is fitted at the back on the right where there's another mount. It looks like they attached aerial mounts to suit various versions as radios were carried in different places. If anyone can shed any light on it I'd be interested as it's supposition on my part, just seemed logical.
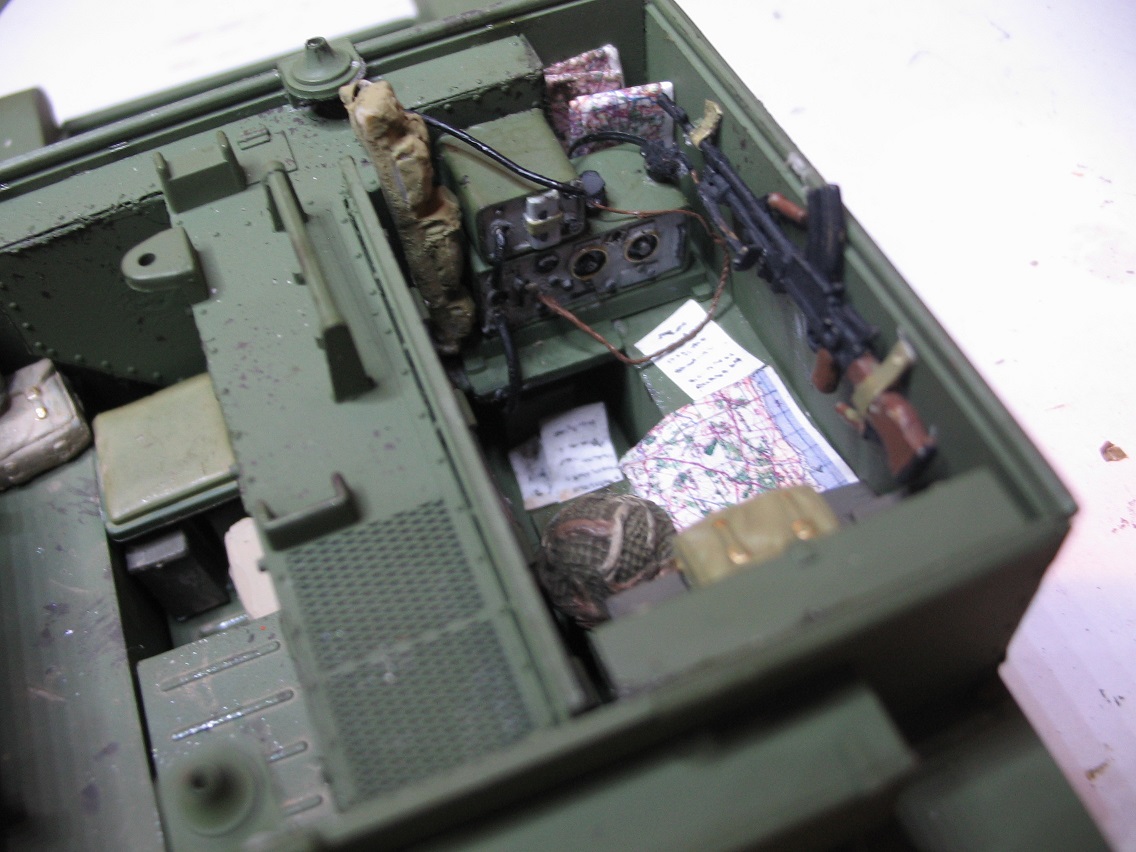
Starting to fill the inside up with kit etc. The maps are all of the British/Canadian sector of Normandy so I have the right maps for the dio. Actually that seems a bit anal thinking about it lol. I found a site with them on, downloaded and resized them,cut and pasted in word then printed off. I've got enough maps now to last me years and they didn't cost me anything.
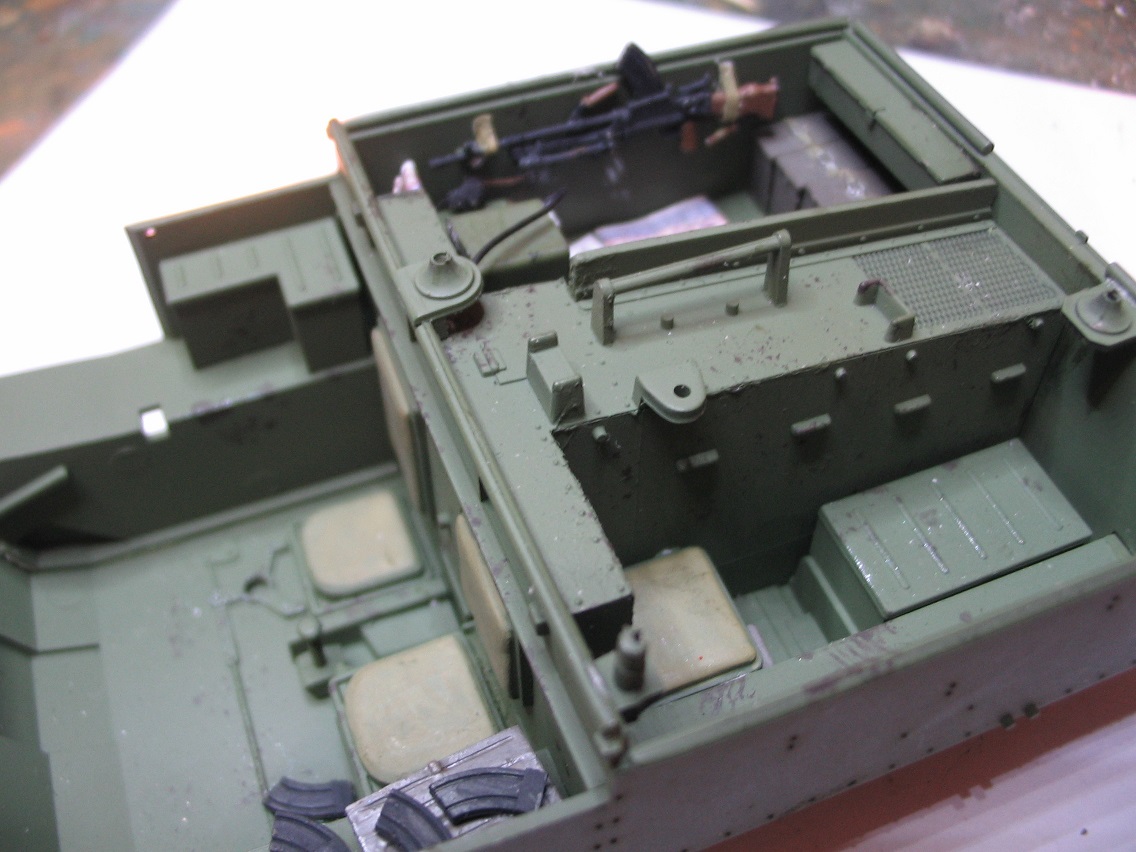
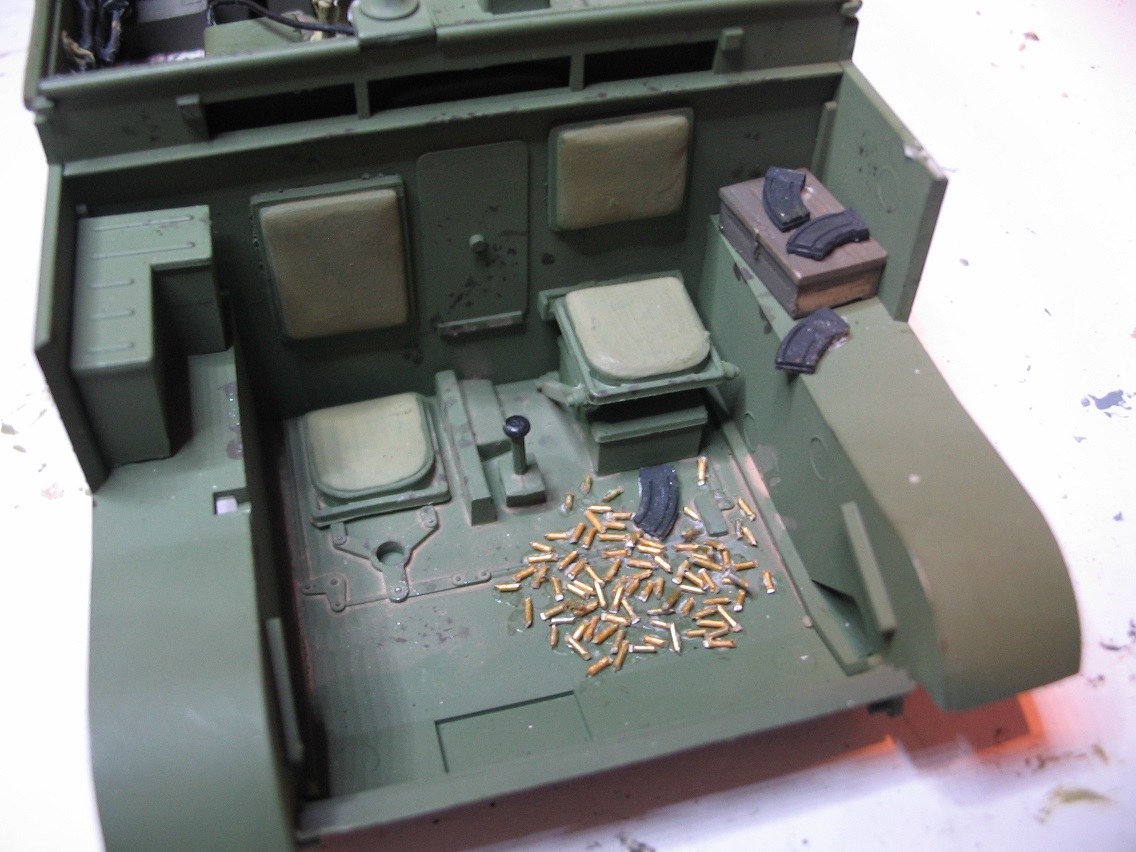
I need to add more brass to the floor and then do a bit of a tidy up with the glue. As the Brens in the kit are bog awful I've chopped them up for the mags so I can have some empties. The Tamiya Brens look too big and lack detail so I'm going for DML and Italeri ones. I've not decided yet which ones I'm going to use. The Italeri ones are MkI's and the DML are MkII's but both were in use in 1944. Changing the main Bren's a pain in the neck as it means recarving the mount and filing it out to put in a new Bren. I've done it before and it's not that enjoyable as I inevitably end up cutting myself lol. So that's where I'm up to today. I need to do some work on the driver as the one in the kit is kneeling looking over the top but I want my driver sitting and dead so I'm modifying the 8th army figure in shorts. I'll dig out a DML torso etc to finish him off. I still need to find the scrap Bren carrier for the tracks as it wasn't where I thought it was. Buggar! Right back to the building...
This is the radio as basic just after I'd finished it. It's a bit blurry unfortunately. I should have checked before I fixed it in.

You can see it a lot clearer in these ones. I wired the set up to the aerial which I try to do with open top vehicles these days. I've noticed quite a few Universal Carriers that people have built that are sporting three aerials which I think is an error. There are three seperate aerial mounts but as far as I can tell you can't link up three aerials to one radio. When I was doing my research I found some interesting line drawings from a WW2 manual which showed the layout of various uses. The basic set up of the Tamiya kit is for the platoon commanders vehicle which mounted the radio in the same place as the kit but was a No22 rather than a No19 as in the kit. It also has a Vickers mounted on top which the kit doesn't have so a bit of a mish mash. I may build one later as I've got some of the excellent Resicast Vickers guns and mounts which I bought for an LRDG project I still have to finish. A straightforward scout carrier mounts a No19 but it is fitted at the back on the right where there's another mount. It looks like they attached aerial mounts to suit various versions as radios were carried in different places. If anyone can shed any light on it I'd be interested as it's supposition on my part, just seemed logical.

Starting to fill the inside up with kit etc. The maps are all of the British/Canadian sector of Normandy so I have the right maps for the dio. Actually that seems a bit anal thinking about it lol. I found a site with them on, downloaded and resized them,cut and pasted in word then printed off. I've got enough maps now to last me years and they didn't cost me anything.


I need to add more brass to the floor and then do a bit of a tidy up with the glue. As the Brens in the kit are bog awful I've chopped them up for the mags so I can have some empties. The Tamiya Brens look too big and lack detail so I'm going for DML and Italeri ones. I've not decided yet which ones I'm going to use. The Italeri ones are MkI's and the DML are MkII's but both were in use in 1944. Changing the main Bren's a pain in the neck as it means recarving the mount and filing it out to put in a new Bren. I've done it before and it's not that enjoyable as I inevitably end up cutting myself lol. So that's where I'm up to today. I need to do some work on the driver as the one in the kit is kneeling looking over the top but I want my driver sitting and dead so I'm modifying the 8th army figure in shorts. I'll dig out a DML torso etc to finish him off. I still need to find the scrap Bren carrier for the tracks as it wasn't where I thought it was. Buggar! Right back to the building...
Posted: Tuesday, September 12, 2017 - 06:04 PM UTC
Awesome details, Karl!!
Armored76

Joined: September 30, 2013
KitMaker: 1,615 posts
Armorama: 1,500 posts

Posted: Tuesday, September 12, 2017 - 08:21 PM UTC
Absolutely great details, Karl! I especially like the brass colored rings.
erichvon

Joined: January 17, 2006
KitMaker: 1,694 posts
Armorama: 1,584 posts

Posted: Tuesday, September 12, 2017 - 09:14 PM UTC
Thanks guys, glad you like the way it's coming on. You know how much I like doing open topped vehicles so I can make them look lived in. I cracked on with the dead driver and am quite pleased with how he's come out. I forgot to take any photos of him in his Squadron green putty pantaloons before I sanded and shaped them.
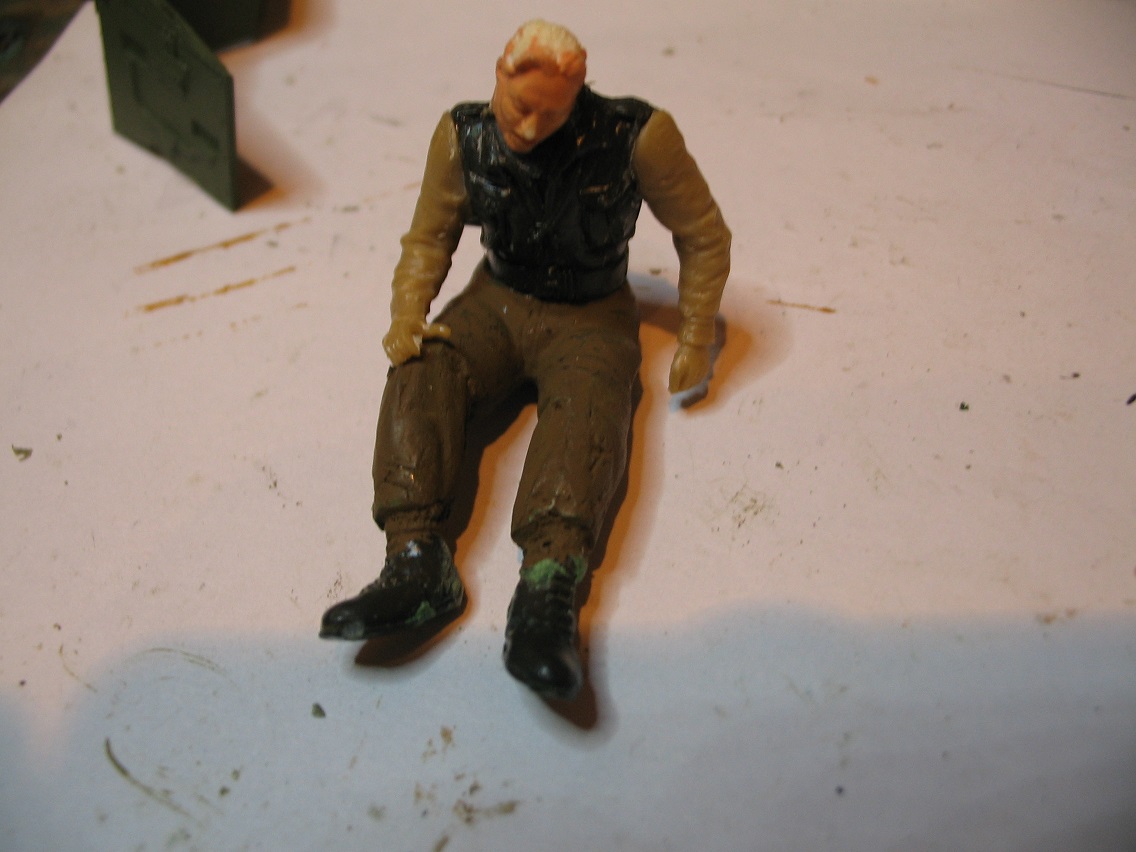
He's an abbatoir special. Legs rom the 8th army driver out of the Bren Carrier, torso from a Tamiya Churchill crewman (decapitated), arms from a Masterbox British infantryman and a Legends head. I noticed looking at the photos that his heads on at a funny angle but he's dead so I may get away with it. Especially if he has a neck wound lol.
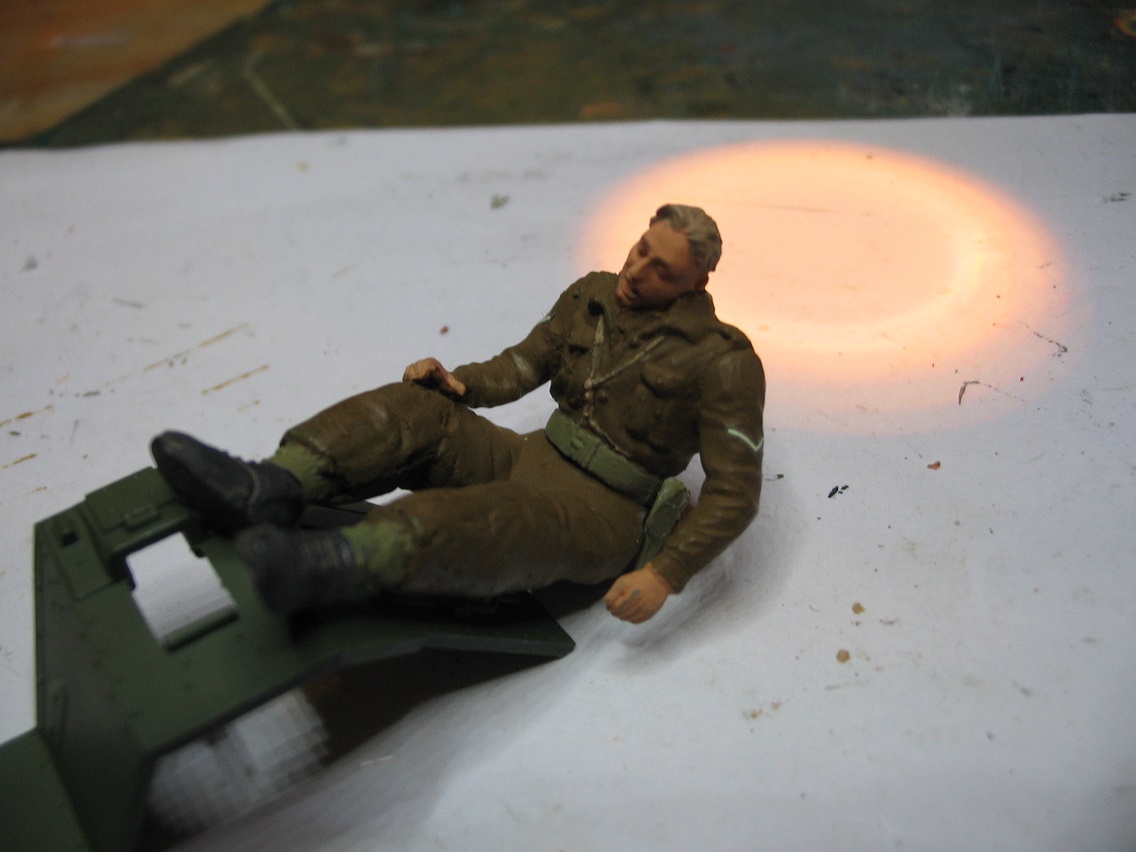
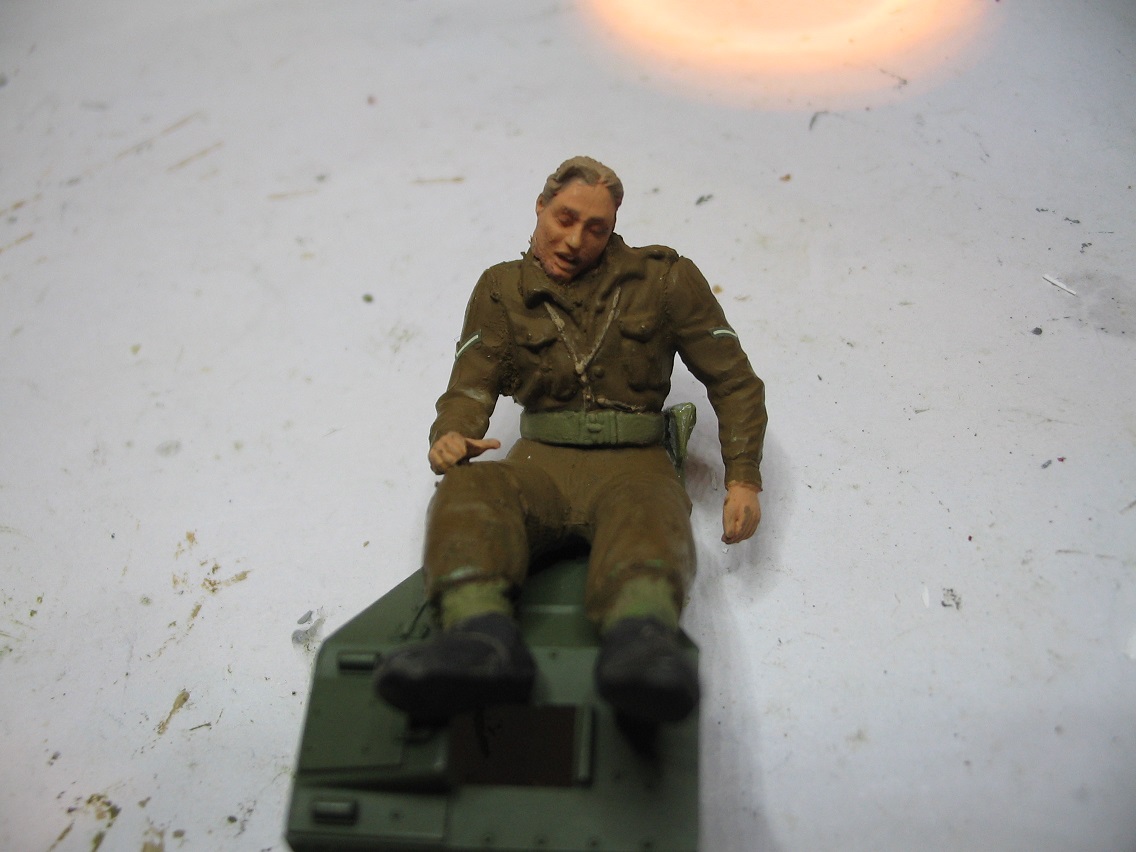
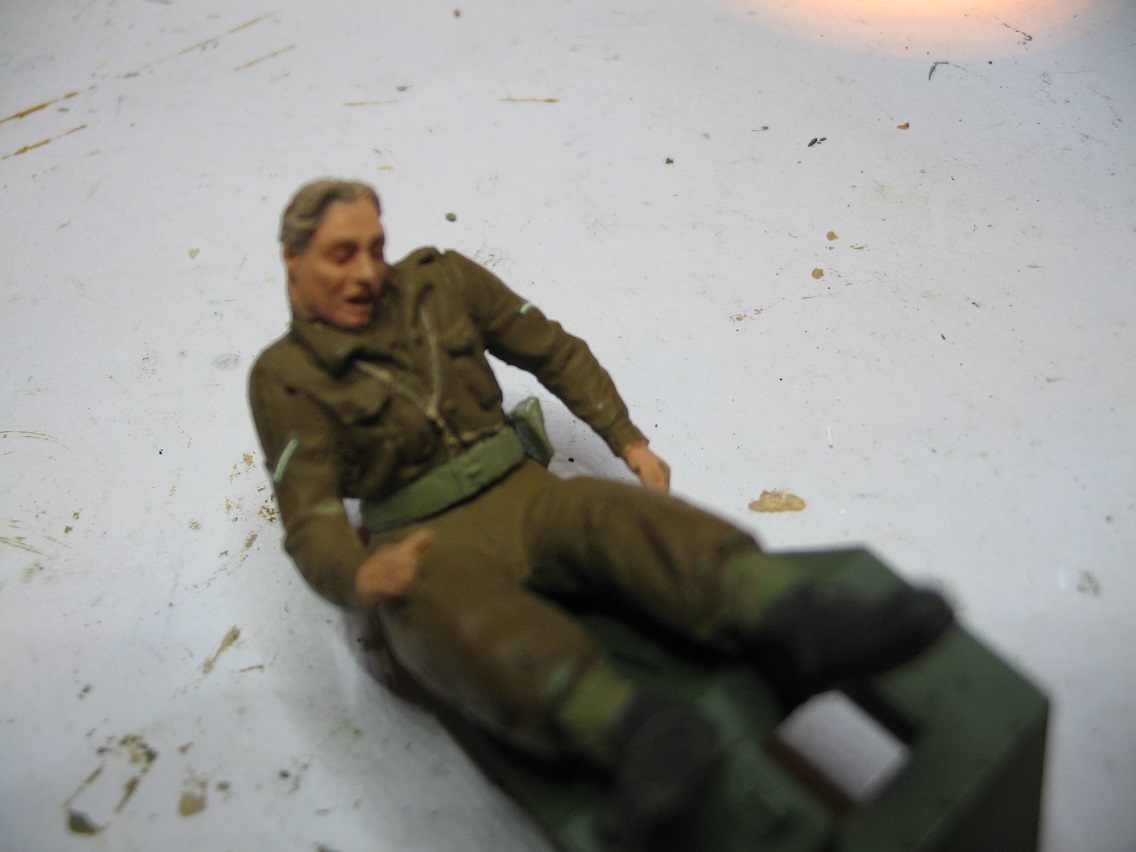
This iswhat he should look like once he's in. I didn't bother doing gaiters as you won't be able to see his feet but as he's got 8th army legs it just looks like he's rolled his socks over his boots. That's my cheat for being lazy and I'm sticking to it lol.
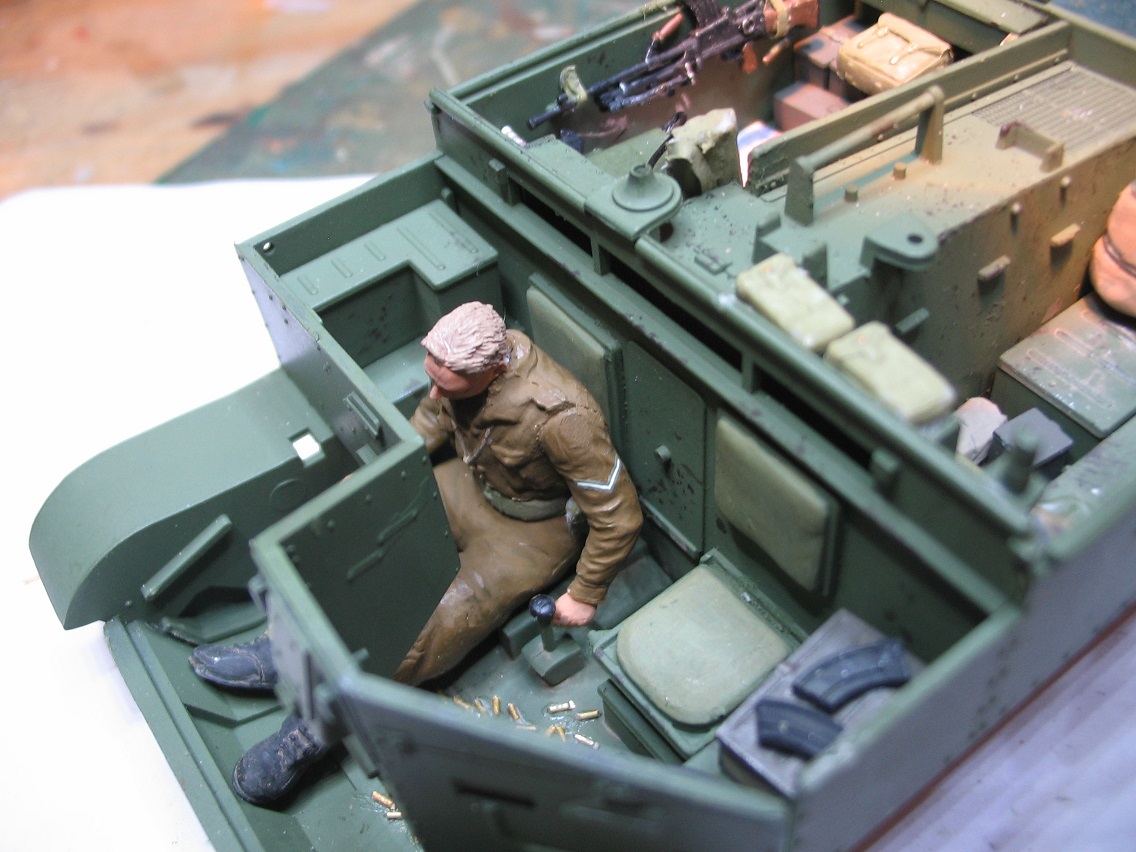
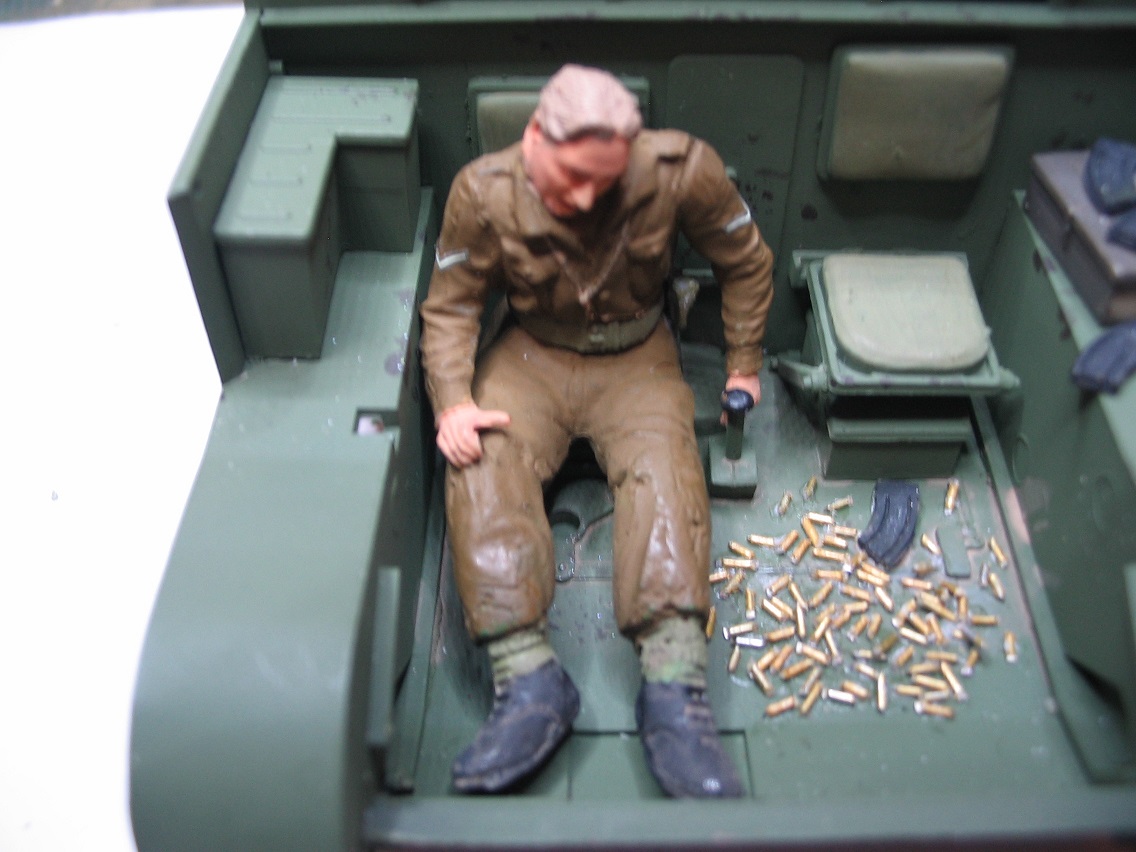
Next stage is finish the front end off, put a few more bits of kit in then do the wheels and suspension. At least there's only 8 road wheels to paint the tyres on unlike German vehicles where there's always double figures. I hate doing that as it's soooo repetitive and boring. This is shaping up to be a very quick build but I'll do the diorama in here as well once I've finished the carrier.

He's an abbatoir special. Legs rom the 8th army driver out of the Bren Carrier, torso from a Tamiya Churchill crewman (decapitated), arms from a Masterbox British infantryman and a Legends head. I noticed looking at the photos that his heads on at a funny angle but he's dead so I may get away with it. Especially if he has a neck wound lol.


This iswhat he should look like once he's in. I didn't bother doing gaiters as you won't be able to see his feet but as he's got 8th army legs it just looks like he's rolled his socks over his boots. That's my cheat for being lazy and I'm sticking to it lol.


Next stage is finish the front end off, put a few more bits of kit in then do the wheels and suspension. At least there's only 8 road wheels to paint the tyres on unlike German vehicles where there's always double figures. I hate doing that as it's soooo repetitive and boring. This is shaping up to be a very quick build but I'll do the diorama in here as well once I've finished the carrier.
Posted: Wednesday, September 20, 2017 - 12:19 AM UTC
I am going to enter with two Dust Tactics walkers. These models actually come preassembled by the manufacturer, but I take them apart to clean up the parts. Definitely under 150 parts - even when counting both models.
Next is (more) clean up of the models. More to follow soon.

Next is (more) clean up of the models. More to follow soon.


erichvon

Joined: January 17, 2006
KitMaker: 1,694 posts
Armorama: 1,584 posts

Posted: Wednesday, September 20, 2017 - 05:56 PM UTC
I had a rethink and decided against the dead crew in the vehicle as when I thought about it there was no way they'd be dead other than a mine strike which would have blown the vehicle to bits so decided to go for it unmanned. I made a set of webbing which until now I'd forgotten about so that will be dropped in now I've remembered it.
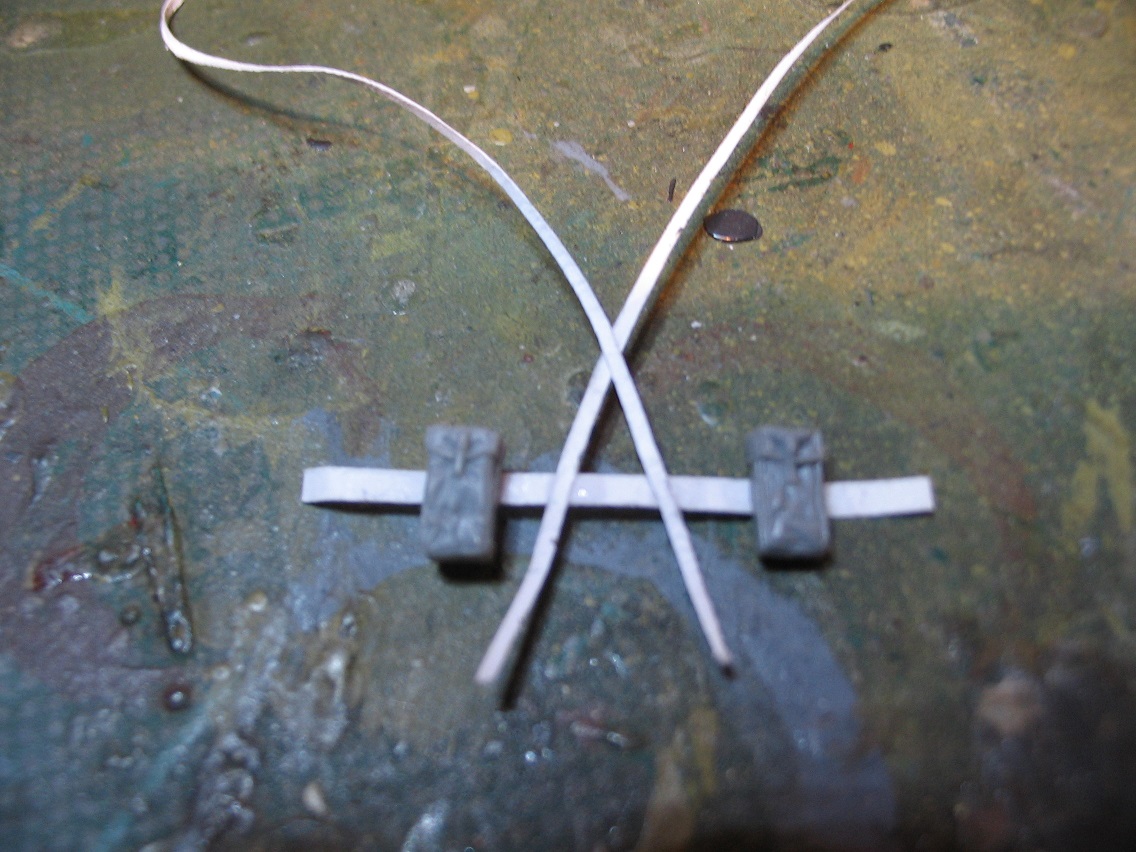
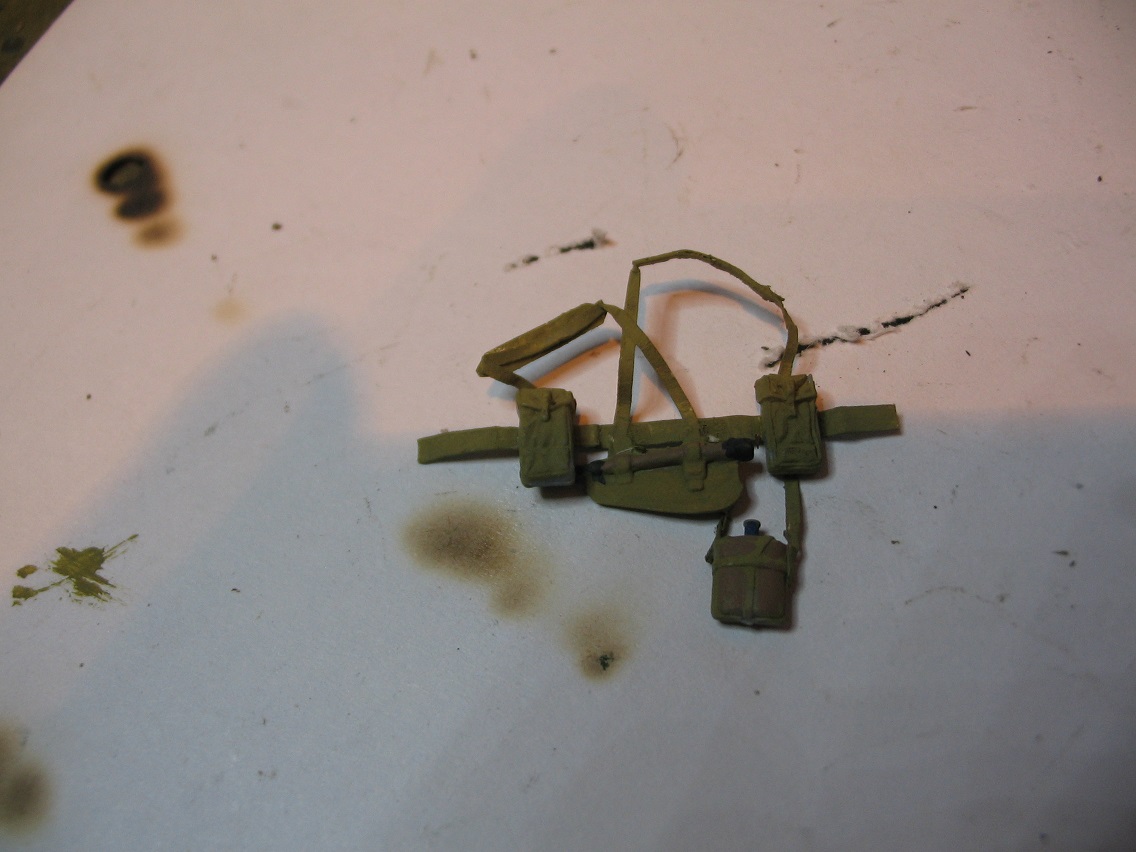
Typical really. I always remember bits after I've finished lol. This is the end result. I've not done the weathering yet as I want to build the figures for the dio for a bit of a change so once they're done I'll go back to the Carrier.
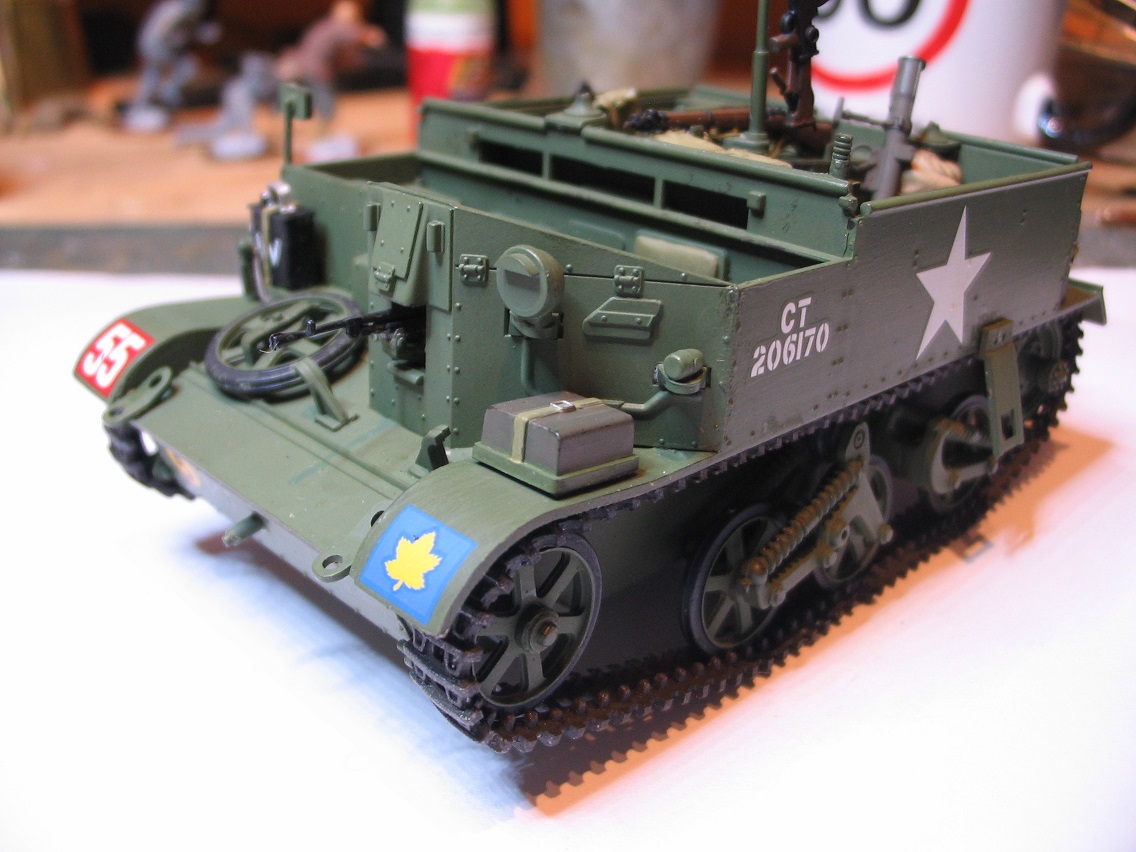
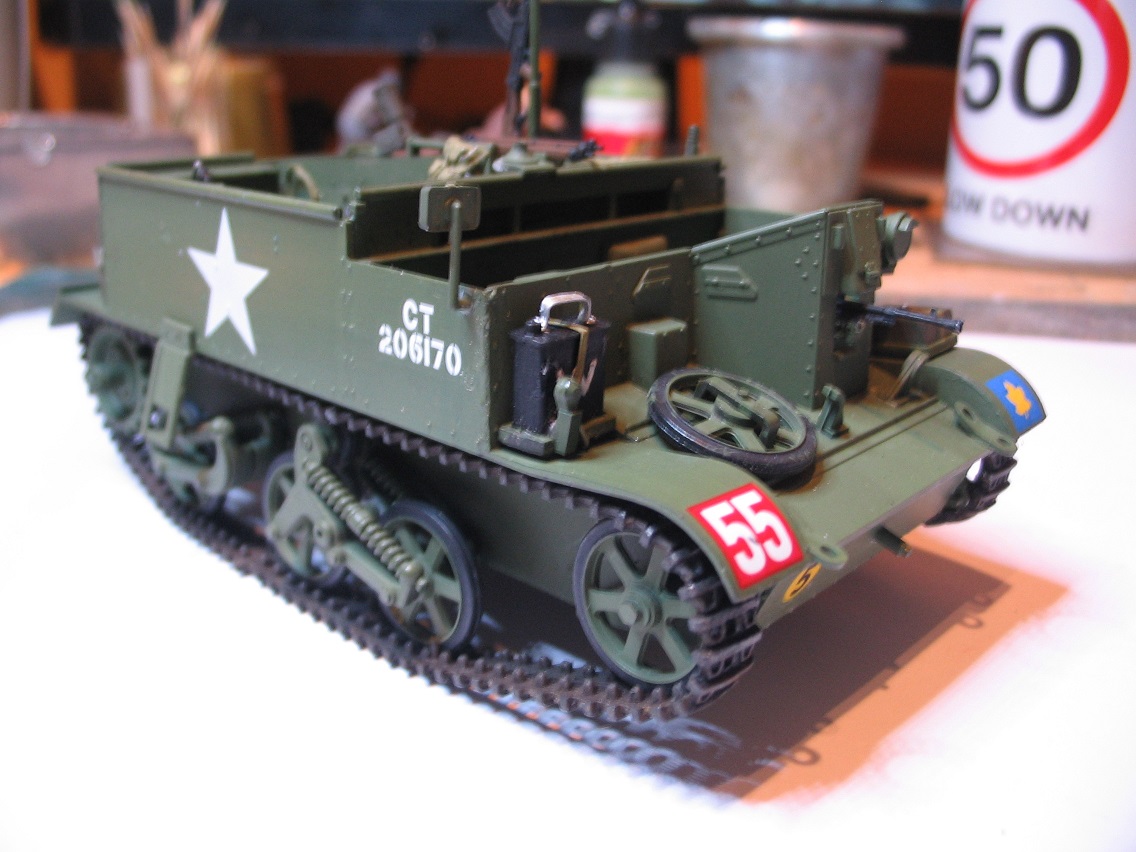
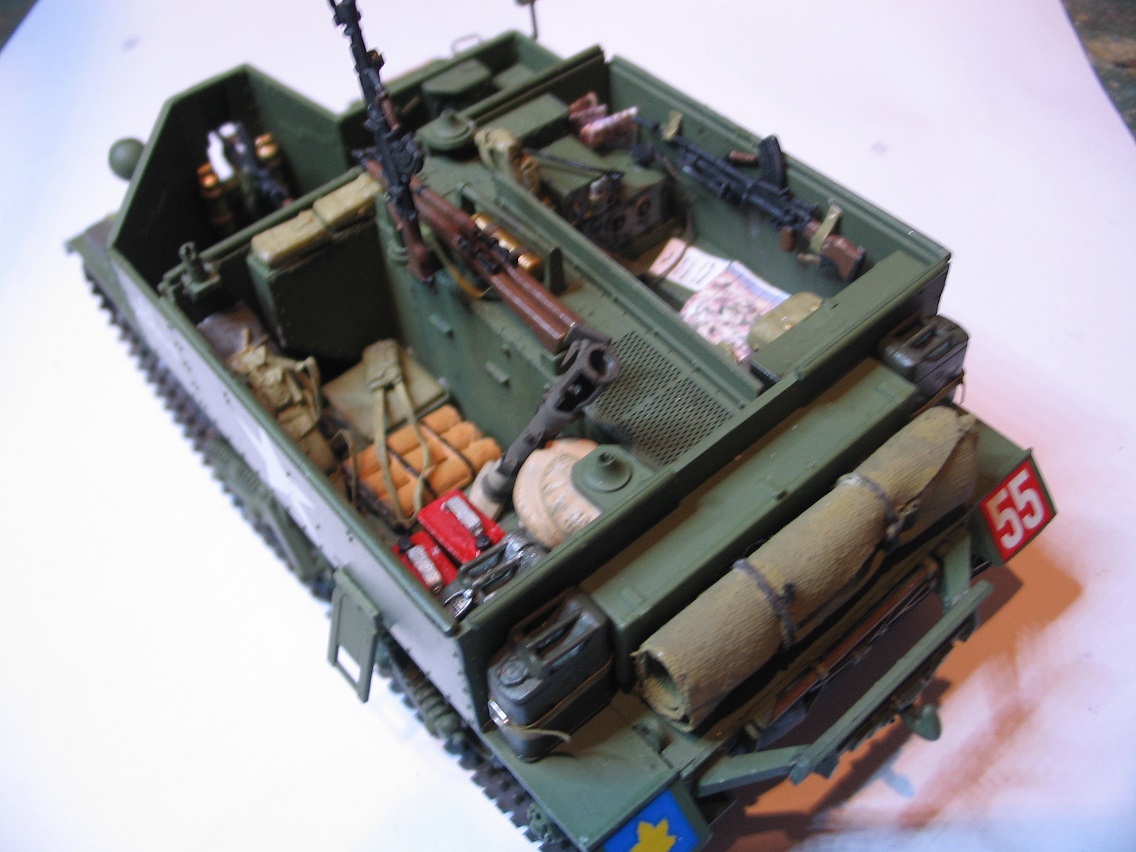
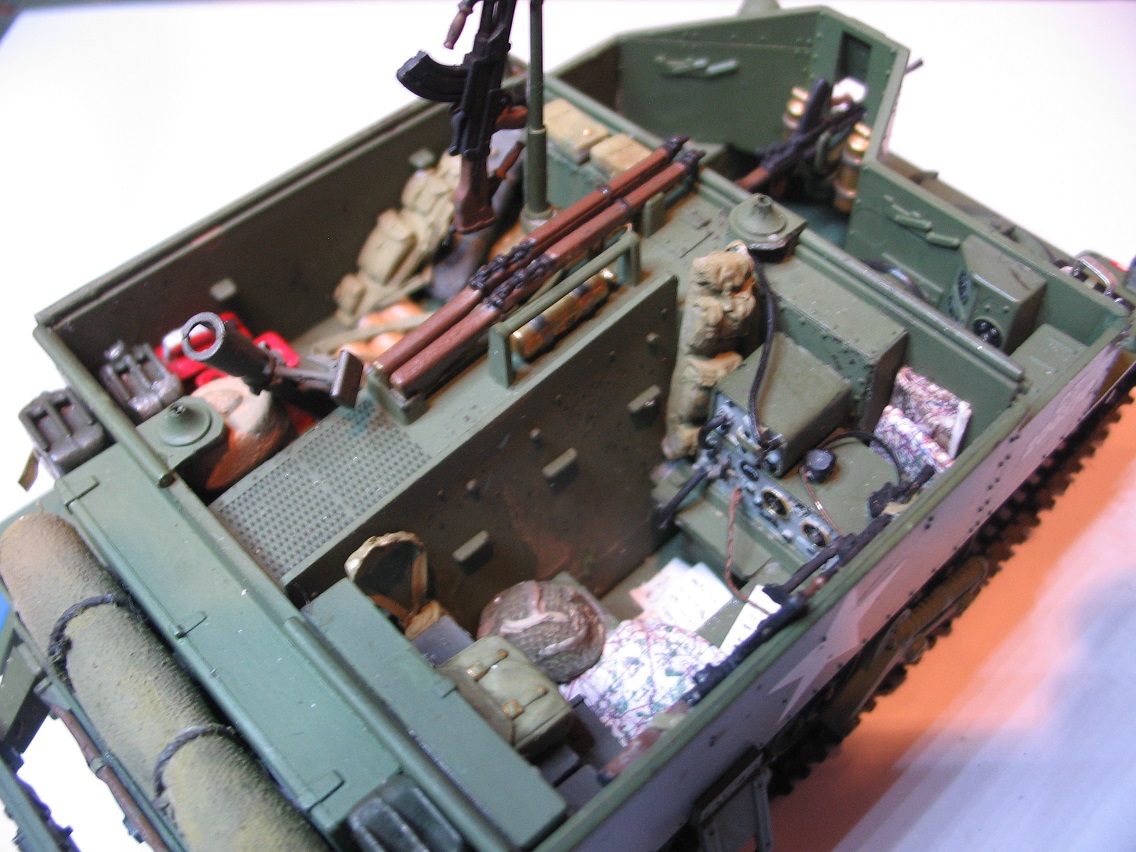
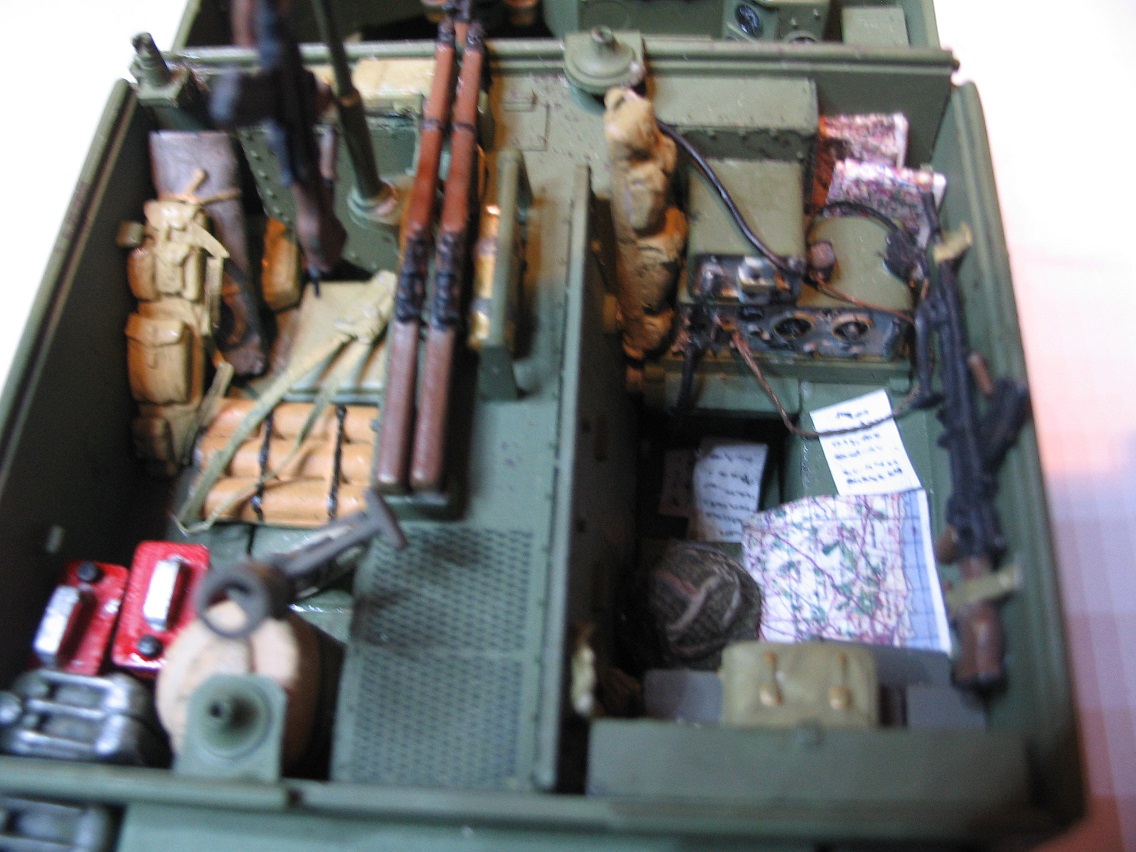
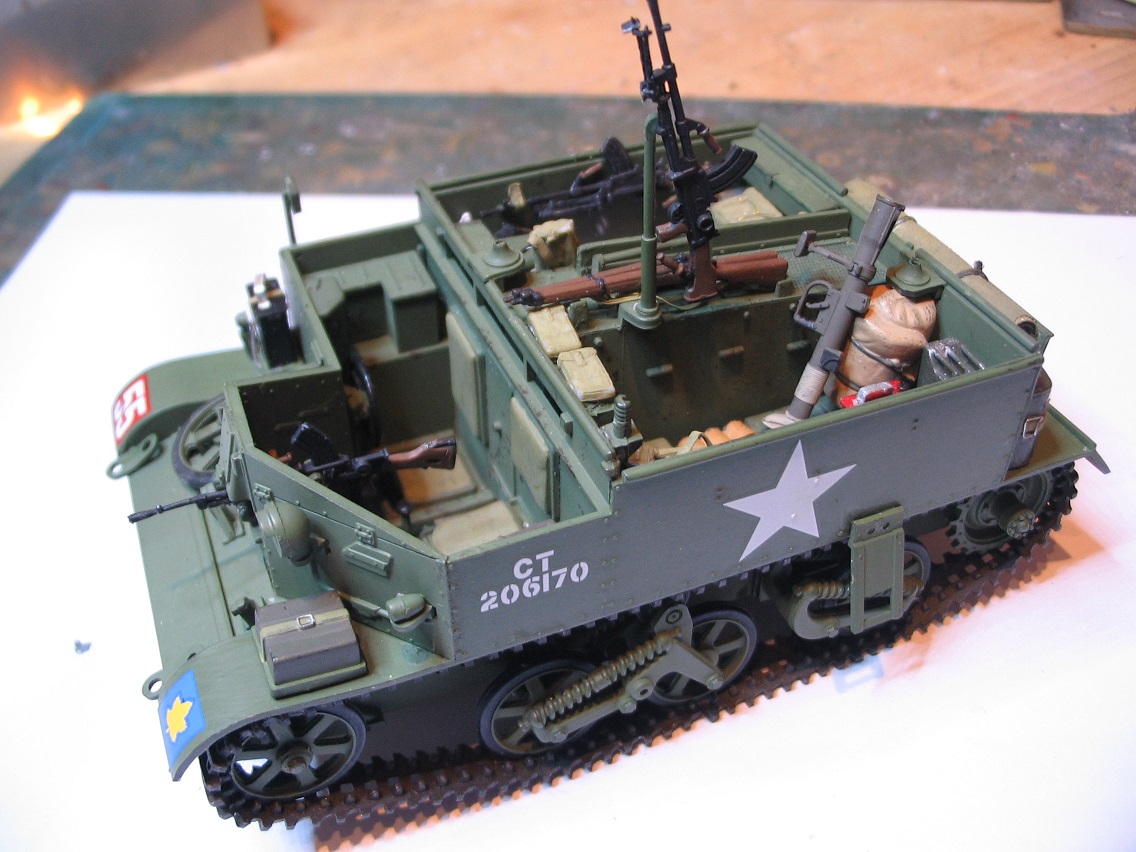
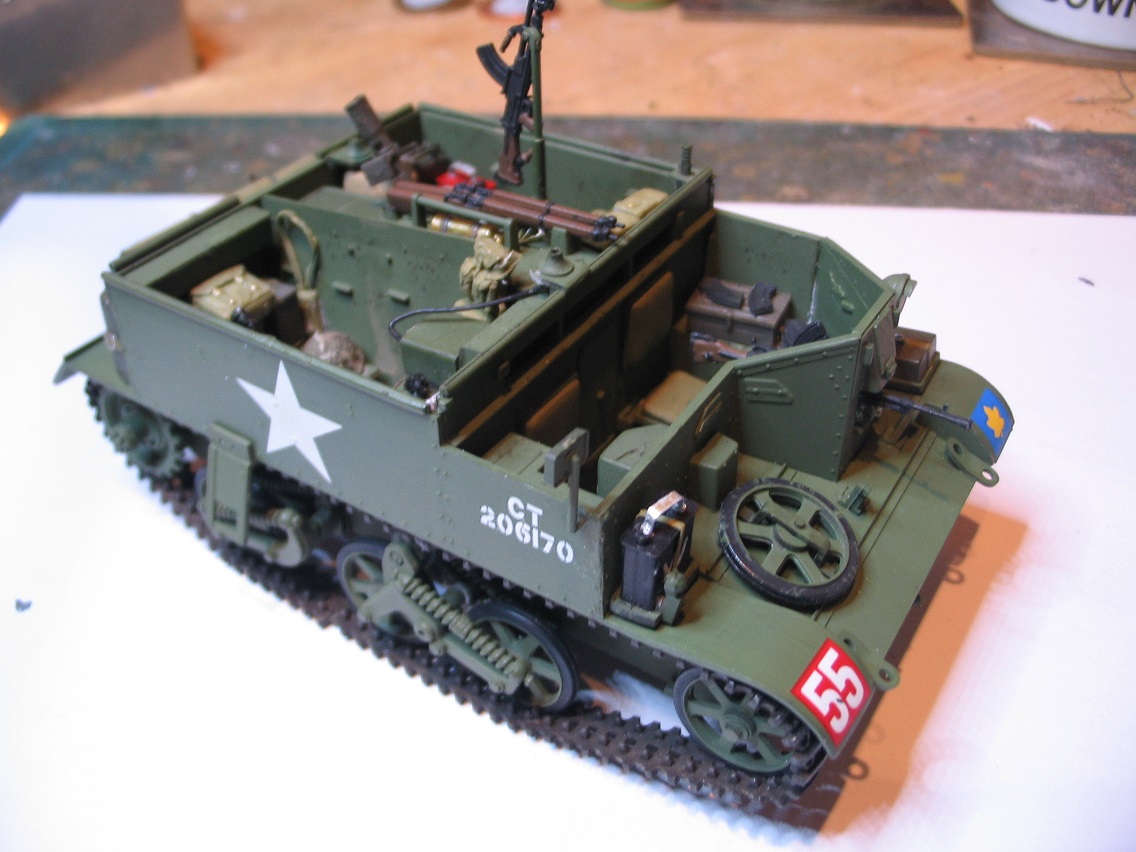
It's pretty much out of the box although I did make a few changes. I took off the moulded handles on the oil and water cans as it wasn't a handle just a raised surface and cut some PE sprue to make the handles although the one on the water can needs making shorter as it sits too high. The tarp on the back is an old handkerchief, painted with white glue and then rolled and tied with cotton. I think it looks a lot more effective than putty as it's the right thickness. I changed the Brens as the kit ones were crap. I've used both Dragon and Italeri for those. The old Italeri weapons set still holds it's own against all the more modern sets for Brens, Boys anti-tank rifles and SMLE's. Plus it's in scale and not expensive. I find some manufacturers weapons look like kids toys. The Bren bags are Accurate Armour ones out of the infantry update set which I bought years ago for the Commando bergans. I added straps for the wall mounted Bren and added the cables for the radio.
I really enjoyed building this Bren carrier as I've improved a lot since I built my last one years ago and it just falls together. I'll add some more pics later when the dio's completed. It's only going to be a small one so should be finished in time. Thanks for another fun campaign.


Typical really. I always remember bits after I've finished lol. This is the end result. I've not done the weathering yet as I want to build the figures for the dio for a bit of a change so once they're done I'll go back to the Carrier.


It's pretty much out of the box although I did make a few changes. I took off the moulded handles on the oil and water cans as it wasn't a handle just a raised surface and cut some PE sprue to make the handles although the one on the water can needs making shorter as it sits too high. The tarp on the back is an old handkerchief, painted with white glue and then rolled and tied with cotton. I think it looks a lot more effective than putty as it's the right thickness. I changed the Brens as the kit ones were crap. I've used both Dragon and Italeri for those. The old Italeri weapons set still holds it's own against all the more modern sets for Brens, Boys anti-tank rifles and SMLE's. Plus it's in scale and not expensive. I find some manufacturers weapons look like kids toys. The Bren bags are Accurate Armour ones out of the infantry update set which I bought years ago for the Commando bergans. I added straps for the wall mounted Bren and added the cables for the radio.
I really enjoyed building this Bren carrier as I've improved a lot since I built my last one years ago and it just falls together. I'll add some more pics later when the dio's completed. It's only going to be a small one so should be finished in time. Thanks for another fun campaign.

erichvon

Joined: January 17, 2006
KitMaker: 1,694 posts
Armorama: 1,584 posts

Posted: Wednesday, September 20, 2017 - 06:11 PM UTC
I almost forgot. I mentioned how crap the Tamiya Brens are but I needed the mount for the front one so major surgery...
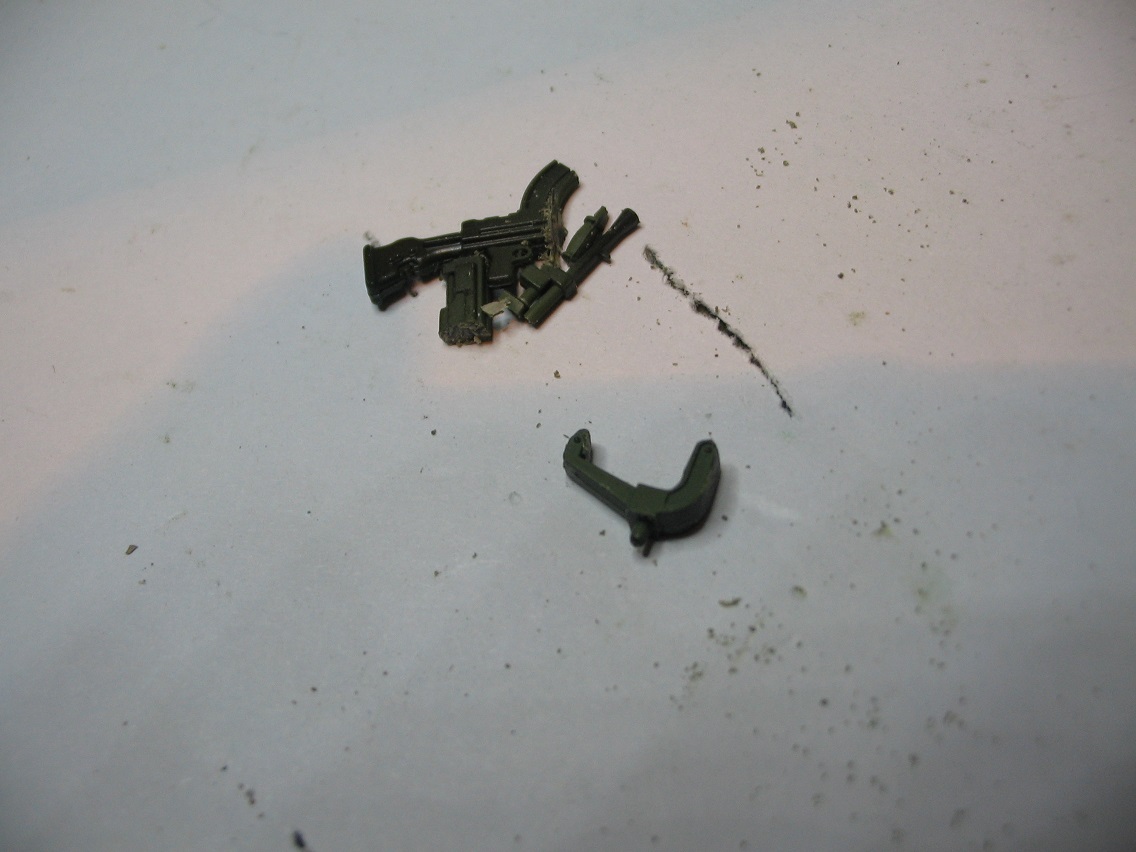
Once the terrible Bren was out of the way it was just a question of tidying it up with some gentle sanding and filing a gap in the middle for the new Bren gun.
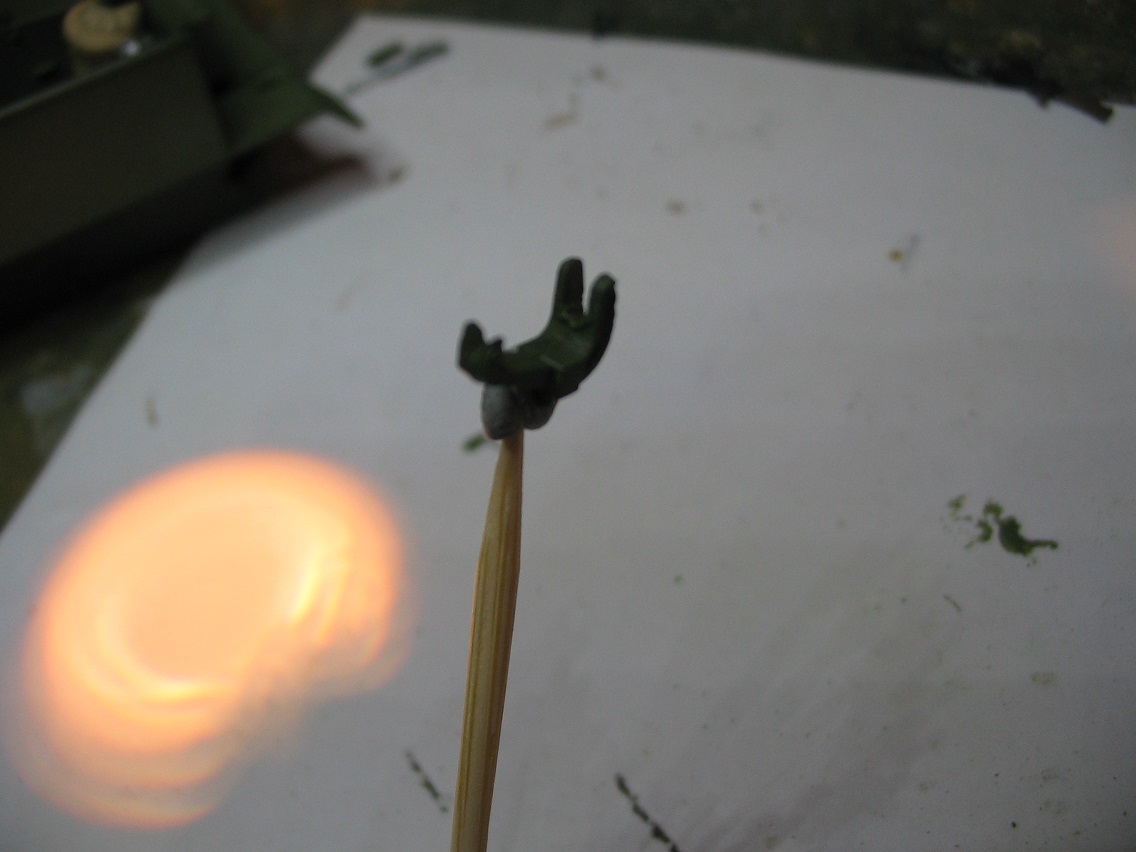
Not a difficult job at all and it means you can subsitute a decent Bren

Once the terrible Bren was out of the way it was just a question of tidying it up with some gentle sanding and filing a gap in the middle for the new Bren gun.

Not a difficult job at all and it means you can subsitute a decent Bren

Martinvidas

Joined: February 13, 2011
KitMaker: 322 posts
Armorama: 300 posts

Posted: Friday, September 22, 2017 - 11:08 AM UTC
Good Morning
The resin tires were cut from the pouring blocks. 2 sets of tired, because I have second Boxer who is already built.


The resin tires were cut from the pouring blocks. 2 sets of tired, because I have second Boxer who is already built.


TacFireGuru

Joined: December 25, 2004
KitMaker: 3,770 posts
Armorama: 2,263 posts

Posted: Monday, September 25, 2017 - 05:20 AM UTC
My entry is the Fujimi Q-Series Yamato Battleship:


Mike


Mike

panzerIV

Joined: January 02, 2007
KitMaker: 781 posts
Armorama: 676 posts

Posted: Tuesday, September 26, 2017 - 03:01 AM UTC
Armored76

Joined: September 30, 2013
KitMaker: 1,615 posts
Armorama: 1,500 posts

Posted: Tuesday, September 26, 2017 - 07:30 PM UTC
Sorry for not being around too much lately!
@Karl: Great progress! Nice details!
@Jesper: Nice choice! I've been eyeing some of those kits but the prices are a bit hard to justify... For me, at least!
@Martin: Nice upgrades! These are 1/72 scale, right? Are they so much better compared to the kit parts?
@Mike: Cuuute! Egg kits are among my favorites.
@Anthony: I've had one of these in 1/35 on my list for a looong time. Nice to see one being built!
panzerIV

Joined: January 02, 2007
KitMaker: 781 posts
Armorama: 676 posts

Posted: Wednesday, September 27, 2017 - 01:50 AM UTC
@cristian hopfuly a 1/35 uaz 469 will not have so much as this kit does. All ive bin able to do is sand tram file clean majority of parts ive only assembled the suspension & drive shafts but the suspension had some redicilous flash.. patience is a virtue is what comes to mind with this kit
Armored76

Joined: September 30, 2013
KitMaker: 1,615 posts
Armorama: 1,500 posts

Posted: Wednesday, September 27, 2017 - 11:11 AM UTC
Sorry to hear that, Anthony! I never saw any Mac kits in flesh/polystyrene so that's something to keep in mind.
Posted: Wednesday, September 27, 2017 - 11:25 AM UTC
Quoted Text
@Jesper: Nice choice! I've been eyeing some of those kits but the prices are a bit hard to justify... For me, at least!
Recently, the kits have been available in the EU again through warfactory in Poland and prices have come down somewhat. A typical walker kit is around 30 EUR in the unassembled condition I prefer. Not to bad compared to a normal tank kit.
Armored76

Joined: September 30, 2013
KitMaker: 1,615 posts
Armorama: 1,500 posts

Posted: Wednesday, September 27, 2017 - 04:53 PM UTC
Hmmm... for whatever reason I had figures in the range of 60 Euro in mind. Might have been a different kit, tough.
 |


