Campaigns: Completed Campaigns
Campaigns that are completed should be grouped here.
Hosted by Richard S.
Campaign 150- Mk. II
Armored76
Visit this Community
Bayern, Germany
Joined: September 30, 2013
KitMaker: 1,615 posts
Armorama: 1,500 posts
Posted: Sunday, October 15, 2017 - 10:20 AM UTC
@Marek: Would these bring you over the 150 limit? These are really small additions so they are fine.

@Mike: Congrats on the finished build!

@Linus: Welcome to the campaign! That looks like a quick build.
LinusB
Visit this Community
Western Australia, Australia
Joined: March 21, 2016
KitMaker: 247 posts
Armorama: 126 posts
Posted: Tuesday, October 17, 2017 - 11:40 AM UTC
My starting pictures


SGTJKJ
#041
Visit this Community
Kobenhavn, Denmark
Joined: July 20, 2006
KitMaker: 10,069 posts
Armorama: 4,677 posts
Posted: Thursday, October 19, 2017 - 01:00 AM UTC
I am calling these walkers done. This is a great campaign and looking forward to follow more rest builds here.


Armored76
Visit this Community
Bayern, Germany
Joined: September 30, 2013
KitMaker: 1,615 posts
Armorama: 1,500 posts
Posted: Thursday, October 19, 2017 - 10:27 AM UTC
Superb job, Jesper! Great build and even better weathering! The snow patches really add to the overall effect, putting the winter camo in context. Fantastic!

Congrats on the finished build!
SGTJKJ
#041
Visit this Community
Kobenhavn, Denmark
Joined: July 20, 2006
KitMaker: 10,069 posts
Armorama: 4,677 posts
Posted: Thursday, October 19, 2017 - 01:45 PM UTC
Thanks for the comments, Christian. I am also quite satisfied with the final result.
ClaytonFromEllijay
#454
Visit this Community
Georgia, United States
Joined: July 10, 2016
KitMaker: 1,273 posts
Armorama: 1,138 posts
Posted: Thursday, October 19, 2017 - 08:04 PM UTC
Excellent as usual, Jesper, you make the imaginary look legit. Great work!
Yeti01012001
Visit this Community
England - North West, United Kingdom
Joined: July 28, 2005
KitMaker: 360 posts
Armorama: 334 posts
Posted: Friday, October 27, 2017 - 12:24 AM UTC
My entry for the campaign.

hope you like. I think that there is around 78 pieces to this kit and the figures are from dragon


ClaytonFromEllijay
#454
Visit this Community
Georgia, United States
Joined: July 10, 2016
KitMaker: 1,273 posts
Armorama: 1,138 posts
Posted: Friday, October 27, 2017 - 01:35 AM UTC
Very nice, Gary, you don't see too many of those around here!
Armored76
Visit this Community
Bayern, Germany
Joined: September 30, 2013
KitMaker: 1,615 posts
Armorama: 1,500 posts
Posted: Saturday, October 28, 2017 - 10:18 AM UTC
That turned out really nice, Gary!

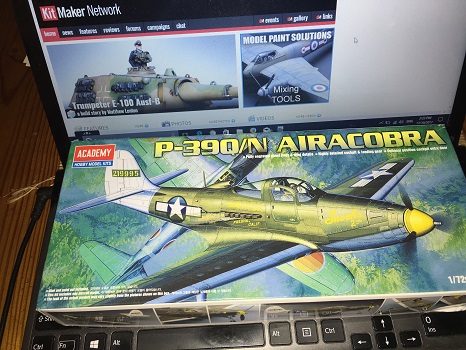
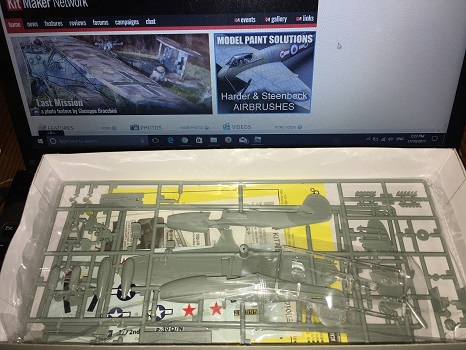
Do you happen to have an image of the un-built kit with a proof of date? Rule #3 and #5 says that the kit needs to be unstarted when you enter it to the campaign and that you need to upload a photo of it with a proof of date.

Thanks!
Buckeye198
Visit this Community
Ohio, United States
Joined: May 02, 2010
KitMaker: 596 posts
Armorama: 265 posts
Posted: Tuesday, November 07, 2017 - 02:15 AM UTC
Hope you all don't mind me joining the campaign a touch late...looks like a bunch of you are already done! Actually, after a three-year hiatus, I'm finally returning to the hobby of turning small pieces of gray plastic into big pieces of green plastic. A short build like this should be just what I need to get my modeling chops back in order.

My entry will be Tamiya's 1/48 USAAF fighter pilot, total piece count is 1. Pardon the poor quality photos...like painting skin tones, I have yet to master macro photography.


Tamiya also included with the pilot kit a P-51B, so I'll be adding that to my campaign entry as well. Total piece count is under 80.


Cockpit went together nicely. I'm aware of the discrepancies between different Mustang models, kits, and all their cockpits, but fixing this one is out my budget and skill-set.


The plane should be taking shape shortly. It really feels great to be able to build again.
ClaytonFromEllijay
#454
Visit this Community
Georgia, United States
Joined: July 10, 2016
KitMaker: 1,273 posts
Armorama: 1,138 posts
Posted: Wednesday, November 08, 2017 - 12:24 AM UTC
Yep, it's like riding a wonky bicycle, Robby! You never quite forget how! Welcome back.
erichvon
Visit this Community
England - East Midlands, United Kingdom
Joined: January 17, 2006
KitMaker: 1,694 posts
Armorama: 1,584 posts
Posted: Wednesday, November 08, 2017 - 12:55 AM UTC
Gary, the whole point of a campaign thread is for us to show our progress on a kit as we build it. Not just a set of photos of a finished kit saying this is my build. If that were allowed then anyone of us could just stick up a photo of a finished kit and say quite dishonestly that this is my entry. BTW I just had a look at the instructions as 78 parts seemed a bit low as I was debating buying one of these and 78 parts didn't sound right. It's 127 parts as some parts like 19 is 18 wheels in total so it's something to bear in mind when campaigns are number specific with parts. It's how many parts are used not numbers on the sprue.
GulfWarrior
Staff MemberCampaigns Administrator
ARMORAMA
Visit this Community
Texas, United States
Joined: January 05, 2010
KitMaker: 1,051 posts
Armorama: 1,029 posts
Posted: Wednesday, November 08, 2017 - 01:21 AM UTC
I'm three steps into the Revell (1967) M48 AVLB kit.

Here's a pic after the hull was assembled:


Another after the bogeys were put on:


And another after I got the roadwheels and return rollers made:


Finally, I've got a real shot at actually comepleting a kit this year!!

SGTJKJ
#041
Visit this Community
Kobenhavn, Denmark
Joined: July 20, 2006
KitMaker: 10,069 posts
Armorama: 4,677 posts
Posted: Thursday, November 09, 2017 - 02:04 PM UTC
Richard, looks good on this venerable kit.

Looking forward to see more as ypou progress.
RivetCounter
Visit this Community
Warszawa, Poland
Joined: October 26, 2012
KitMaker: 65 posts
Armorama: 62 posts
Posted: Friday, November 10, 2017 - 07:54 PM UTC
Here are some progress photos of my G-13.


There are 80 basic parts used so far but I'we also added:
- oil plugs (2 pcs. and towing hooks reinforcement (2 pcs.)


- copper handles (7 pcs.) instead of plastic ones and rear hooks reinforcement (4 pcs.)


- spare road support consists of 3 parts


So, if we will count all those small parts there will be a hundred used till now.
Please, let me know if I should count every single tiny part, because I'd like to know what else I could add to this model without violating the rules of this campaign.
Lakota
#123
Visit this Community
New Mexico, United States
Joined: November 17, 2008
KitMaker: 1,202 posts
Armorama: 635 posts
Posted: Friday, November 10, 2017 - 11:42 PM UTC
Howdy Y'all
I ran into some nasty gaps in my MPC AT-ST. I've tried to fill them with auto putty and stretched spruce.

Since my model is a hypothetical Cold War Soviet machine I might try some casting texture to hide some of this mess.
I'm enjoying everyone's builds, keep up the good work!
Take care,
Don "Lakota"
Armored76
Visit this Community
Bayern, Germany
Joined: September 30, 2013
KitMaker: 1,615 posts
Armorama: 1,500 posts
Posted: Saturday, November 11, 2017 - 03:30 PM UTC
Sorry for disappearing for the last week or so! I had a couple of busy days.

@Robby: Welcome! Glad to have you join!

@Gary: I'll have to agree with Karl, you'll need to show us more of the progress and comment on them a bit, specially on such simple projects.

@Richard: Nice and clean build!

@Marek: Don't be too concerned about the overall part count. Add whatever you need to make it look good. A couple more or less parts won't cost you the banner. Great job on the welding seams, by the way!

@Don: Creative thinking at its best!
Buckeye198
Visit this Community
Ohio, United States
Joined: May 02, 2010
KitMaker: 596 posts
Armorama: 265 posts
Posted: Saturday, November 18, 2017 - 05:45 AM UTC
The main body went together quick and painless. I decided to add some wiring to the radio for extra detail. I threaded wire through the fuselage's antenna hole and CA'd it in place, then clipped it at the top of the hole. Repeat for the second wire (not pictured), a bit of CA and putty to hold the loose ends in place, and there's a cool little bit of detailing that I can now add to my repertoire.


If you'll indulge me, here's my success story. A few years ago, I had some real airbrush trouble. Without going into the details of my hatred towards airbrushing, it got to the point where I didn't even want to build because it meant something to paint later on. In order to face my demons, I bought a hobby air compressor (quiet enough to use in the apartment, especially compared to my old shop-sized compressor). For those interested, it's the Master Airbrush TC-20T with G22 airbrush kit, sells altogether just over $100 on Amazon. Guys...I now look forward to painting models!! Honestly I don't know what I'm doing different this time around, but now it's easy and enjoyable and looks SO much better than hand-painting the whole thing.

Preshading turned out good enough for a first attempt.


I'm opting for an open birdcage. All canopy parts glued into place (minus the port panel), then an unstretched piece of Parafilm was cut to size and carefully white-glued all around the canopy. I'm pretty sure it did its job keeping paint out...hopefully the glue won't be too hard to remove or cover over.


The top and bottom colors are done and sealed with Future.


Now for some suggestions regarding invasion stripes. Here's my diagram.
(Disclaimer: I did not receive any financial compensation from Epi Pro Colon, nor do I explicitly endorse them...the sticky pad was a giveaway at a medical conference )

So my plan is to apply masks for the Q's and C/S, spray the whole section black, mask off the black stripes and spray white (should give the white stripes a more distressed/rushed look), then remove all masks and put on all the decals. I don't know why I'm particularly nervous about this part, but I guess I'm just looking for support to make sure I don't ruin my model so close to the end (like I've done before). So...that plan make sense or should I change everything?
ClaytonFromEllijay
#454
Visit this Community
Georgia, United States
Joined: July 10, 2016
KitMaker: 1,273 posts
Armorama: 1,138 posts
Posted: Saturday, November 18, 2017 - 08:59 PM UTC
Hmmm, we gotta fix your pics, Robby!
Armored76
Visit this Community
Bayern, Germany
Joined: September 30, 2013
KitMaker: 1,615 posts
Armorama: 1,500 posts
Posted: Sunday, November 19, 2017 - 04:07 PM UTC
I'm not seeing your images neither, Robby. They are either too large or the privacy setting is wrong, I guess.
LikesTanks
Visit this Community
Wales, United Kingdom
Joined: May 07, 2013
KitMaker: 242 posts
Armorama: 234 posts
Posted: Sunday, November 19, 2017 - 04:53 PM UTC
Hmm, I was seeing them, but they've now gone. Odd.
Buckeye198
Visit this Community
Ohio, United States
Joined: May 02, 2010
KitMaker: 596 posts
Armorama: 265 posts
Posted: Sunday, November 19, 2017 - 07:17 PM UTC
Ah nuts...they're displaying fine to me, but I guess that's not saying much. I gave up on Photobucket since everyone's links seem to be dead now. I'm just using Google Photos now and I lowered the privacy settings for these pics, but apparently that's not enough. What's the hip new site for picture hosting nowadays? I'll try to play around a bit more in the mean time.
GulfWarrior
Staff MemberCampaigns Administrator
ARMORAMA
Visit this Community
Texas, United States
Joined: January 05, 2010
KitMaker: 1,051 posts
Armorama: 1,029 posts
Posted: Sunday, November 19, 2017 - 09:35 PM UTC

Quoted Text

Ah nuts...they're displaying fine to me, but I guess that's not saying much. I gave up on Photobucket since everyone's links seem to be dead now. I'm just using Google Photos now and I lowered the privacy settings for these pics, but apparently that's not enough. What's the hip new site for picture hosting nowadays? I'll try to play around a bit more in the mean time.


I'm using http://postimage.org
Removed by original poster on 11/26/17 - 14:35:16 (GMT).
JMartine
Visit this Community
New Jersey, United States
Joined: October 18, 2007
KitMaker: 1,698 posts
Armorama: 45 posts
Posted: Saturday, November 25, 2017 - 07:43 PM UTC
Hello all,
Been away for a few years; this looks like the perfect campaign to re-start modeling.

Couple HobbyBoss 1/700 Modern Subs; part count is less than 10 per sub…

HMS Astute

EDIT - I am trying to figure out how to post pics from Google Photos, seems Photobucket is no more....


PLA Navy Type 033