

1⁄35Building Dragons 'Smart' Panther G
30
Comments
stages 9 to 11
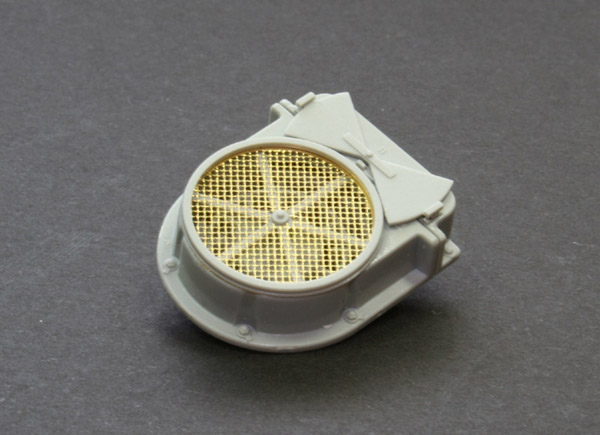
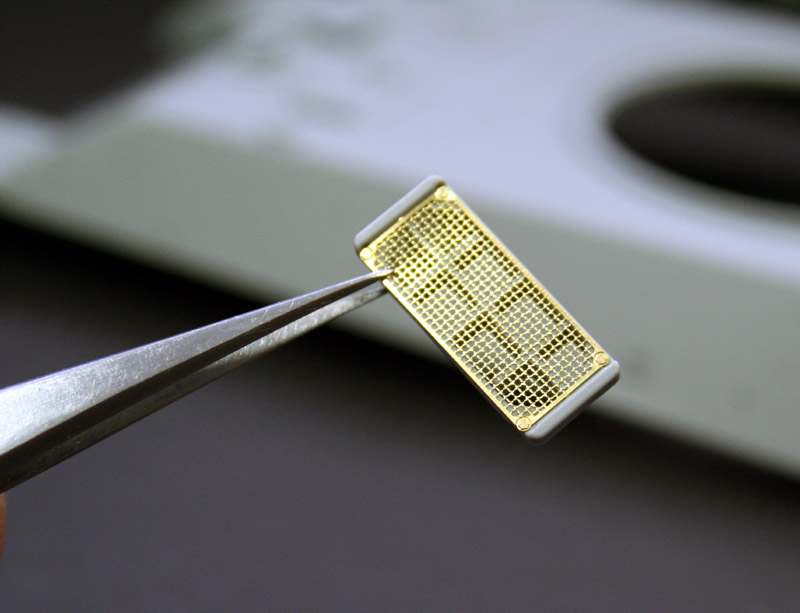
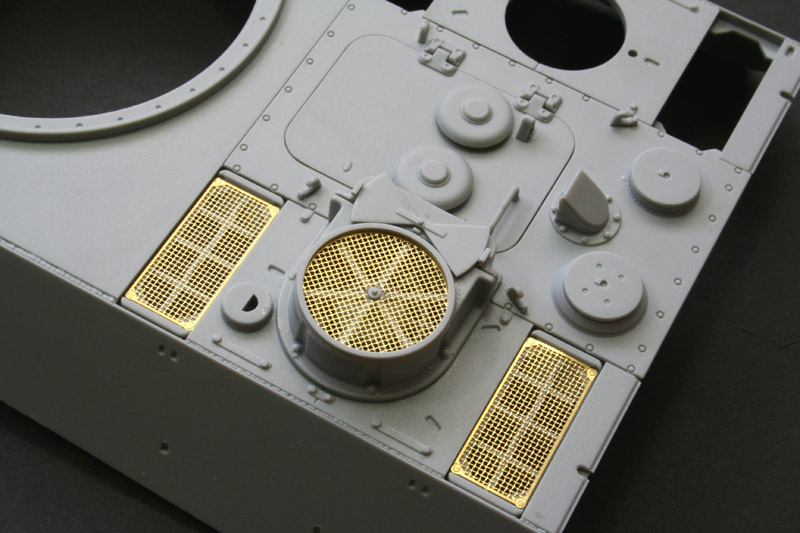
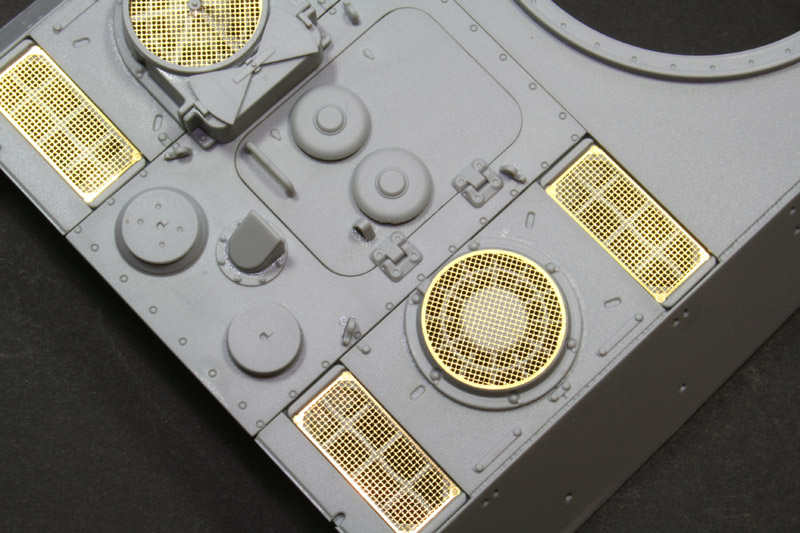
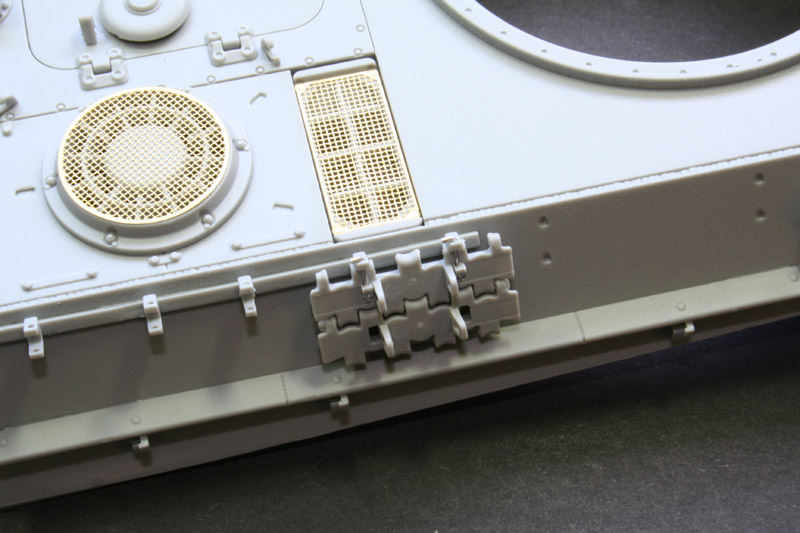
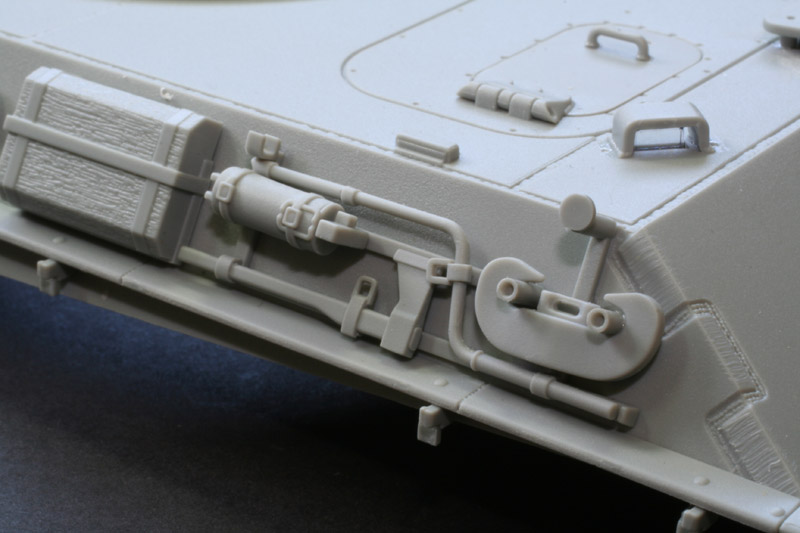
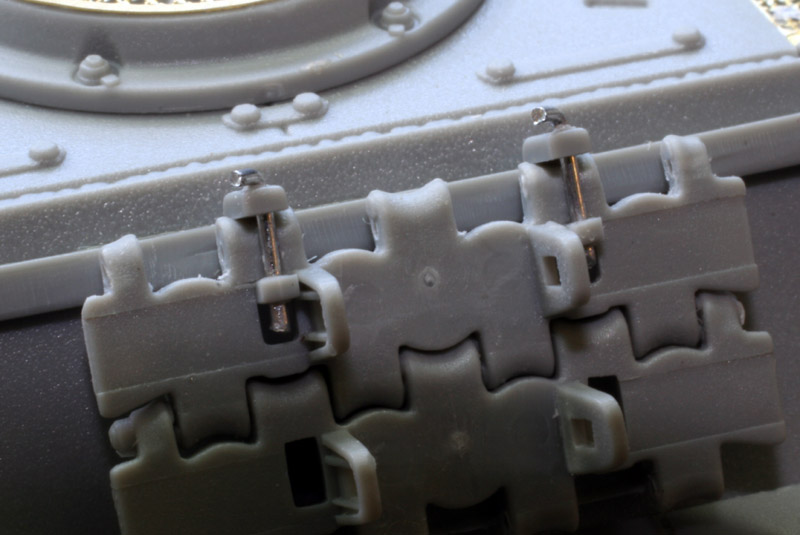
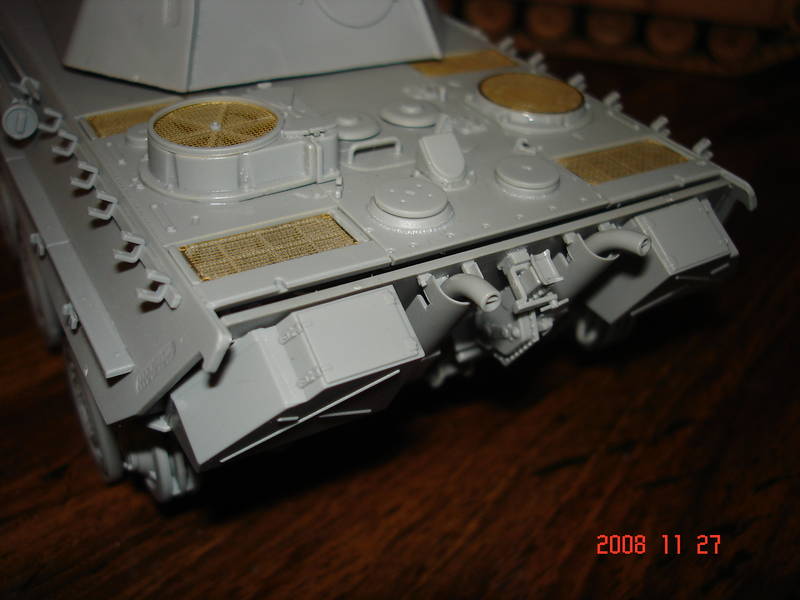
Choice, choices . You can have the louvres over the rectangular grills or not. You can have them open or closed. I chose to leave them off since the photo etched grills look superb, but check your references! The jack block on the left is also supplied as one piece with the bracket, or as separate pieces, so make your choice! This stage is also where you get to fit the very narrow side fenders, and again, there is a small mistake in the instructions. C28 should actually read C27 and vice versa. Make sure that all the brackets for each fender face the same way. The fender takes some strain when fitted, since its so long and narrow, so if you want to fit the fender to the brackets straight away, then use super glue for the brackets, or they wont take the strain straight away. Also, leave the front bracket off until after youve fitted the fender to make sure that it lines up dead straight with the front part of the fender. All the various tool brackets can be fitted now. Whether or not you choose to leave the tools off and paint them separate is a personal choice of course, but be aware that the brackets for the spare track links will need some adaptation if youre going to want to actually hang spare track links on them! These brackets for the spare track links have separate locking pins to hold the spare track links in place. There is no way they will fit if you use a spare track link, although they look great if the brackets are to be left empty! Dragon simply havent allowed for the thickness of the track link, which means that the pins cannot be inserted if you install a track link. Not only that, but the bottom arm of the bracket, that must be inserted through the link, is way too thick. So firstly, a little of the width of the lower arm must be removed, being careful not to damage the hole for the locking pin. Then a tiny shave off the back rounded part of each track link, and then lastly, substitute wire for the pins.stages 12 to 14
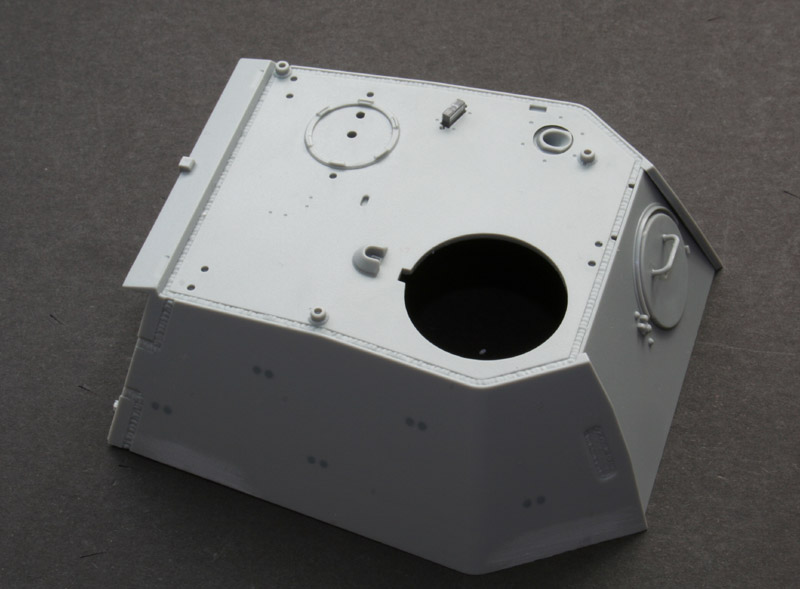
Assembly of the main gun, and detailing of the turret. Although not fantastically detailed, the breech assembly does the job, taking into account what will be seen when the kit is complete. You will have to choose which mantlet youre going to use, again use the chinned mantlet for a later example. Dragon supply a close in defense weapon that be left open or closed, mine is open, and the choice is also given to leave the rear turret hatch open. The Commanders hatch can be left open, as you would expect, and with the detail inside the cupola, you will want to! The cupola is made up of 23 parts or thereabouts. All the periscopes are supplied as transparent plastic, and look amazing once slipped into place. You again get the choice of fitting the AA ring mount to the cupola, I left mine off, in which case youll need to attach the small photo etched squares to the top of the periscope covers ..but not all of them! As you can see from the pics if you look really closely, there are a couple of parts left off my cupola, but theyre there now! Its really easy to miss things, so read those instructions carefully! Remember when you could look at the sprues, and if you had anything still on them, youd know you had missed something? Ahhh . The good old days! With modern Dragon kits, you expect loads to be left on the sprues at the end of the day, so there is no alternative to taking your time, and then double checking!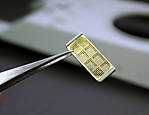 Photo etched grill
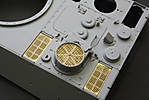 Engine deck
 Injected pins
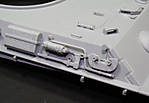
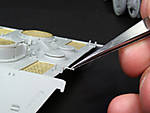
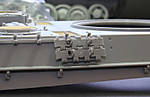 Spare Track brackets


About the Author


Comments

Good build review Vinnie, two things that spring to mind after reading the review.
1.Are there no flame suppressing hoods for the exhaust stacks?
2. Does the kit include side skirts?
Regards from the Swamp
Hawkeye
JUL 15, 2006 - 10:53 PM

Ethan, hoods are supplied, but I didn't want them, it mentions this in the build, and as you can see from the review, no schurzen.
Vinnie
JUL 15, 2006 - 10:56 PM
Vinnie,
Great review! As always, I will be looking forward to your finished product.
I have a very basic question: Your builds always appear so clean (little if any glue marks). What type of glue do you use, and how do you apply it?
Thanks again,
irish
JUL 16, 2006 - 07:03 AM
once again, thanks for the building review Vinnie...
now i'm tempted to get one.... but i have acquire quite a number of large kits this few months....
but with that kind of price tag, i should be eating grass and dried scrubs....
JUL 16, 2006 - 08:39 AM

I've been building this kit. Your write up has been a tremendous help.
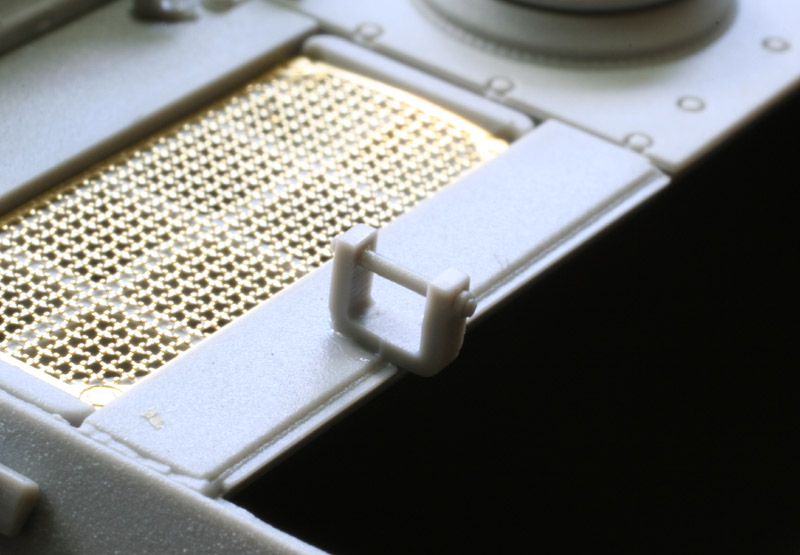
I ran into a small issue, on the back part of the rear deck I have a gap between the rear plate and the upper deck. I found in your photos that you have a plate that covers this area. There are clamp/hold-downs that bridges the rear deck and this plate. I checked the part trees and the instructions and I can not find it. It looks like, from your photo that this part was included in the kit. Yours does not look home made. What did you do?
LINK
NOV 27, 2008 - 08:46 AM

I could be completely wrong here, but it looks like your rear plate needs to go towards the front more. I don't believe there is an added piece, they just have to mate properly.
NOV 27, 2008 - 09:03 AM
Check his photos, towards the end and you can see the back with the panel. The clamp line up hole would make half the clamp hang over the edge.
NOV 27, 2008 - 09:16 AM
Like I said, I could be wrong, but looking at his photo and yours it appears that the rear plate needs to go forward and possibly raised.......

 Did you run into these same problems?
Anyway, I know nothing about this kit, just giving you something to check
Did you run into these same problems?
Anyway, I know nothing about this kit, just giving you something to check
Did you run into these same problems?
Anyway, I know nothing about this kit, just giving you something to check NOV 27, 2008 - 09:58 AM
Duh, I thought I had read his whole write-up. That's what I get for not reading it a second time. I know I built it correctly, everything else lined up perfectly. The it was very nice kit to build, except for a few instruction issues. This excellent write up solved most of the issues.
NOV 27, 2008 - 10:44 AM

Emmm, no point in asking for comments. The person who wrote this article is no longer either a member of this site nor has access to it. Why on earth a thread nearly two and a half years old gets resurrected is frankly beyond me...
Why don't you begin your OWN thread?
NOV 27, 2008 - 10:54 AM
Copyright ©2021 by Vinnie Branigan. Images and/or videos also by copyright holder unless otherwise noted. The views and opinions expressed herein are solely the views and opinions of the authors and/or contributors to this Web site and do not necessarily represent the views and/or opinions of Armorama, KitMaker Network, or Silver Star Enterrpises. All rights reserved. Originally published on: 2006-07-15 00:00:00. Unique Reads: 57100

WEB HOSTING BY


Copyright ©2021 Armorama and Kitmaker Network, a subsidiary of Silver Star Enterprises
All Rights Reserved. Please read our Conditions of Use and Privacy Policy.
All Rights Reserved. Please read our Conditions of Use and Privacy Policy.