

1⁄35Building DMLs SiG 33B
12
Comments
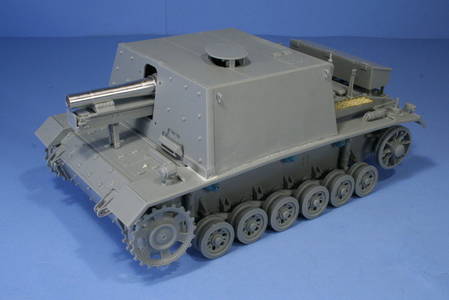
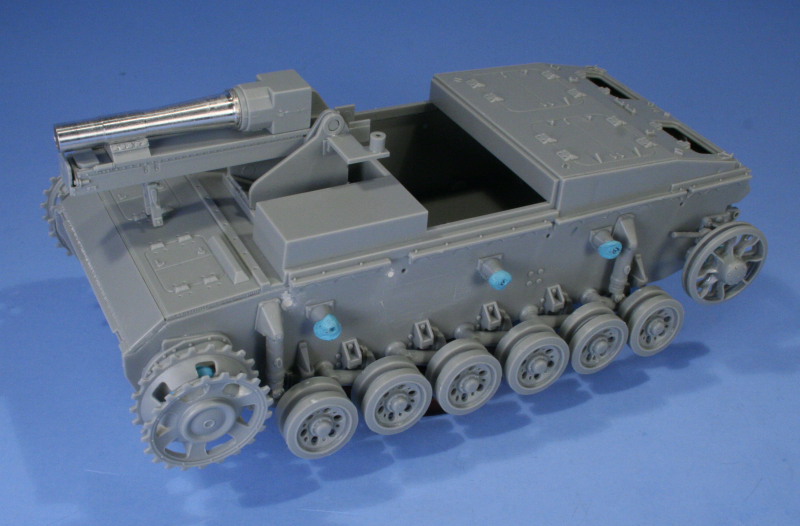
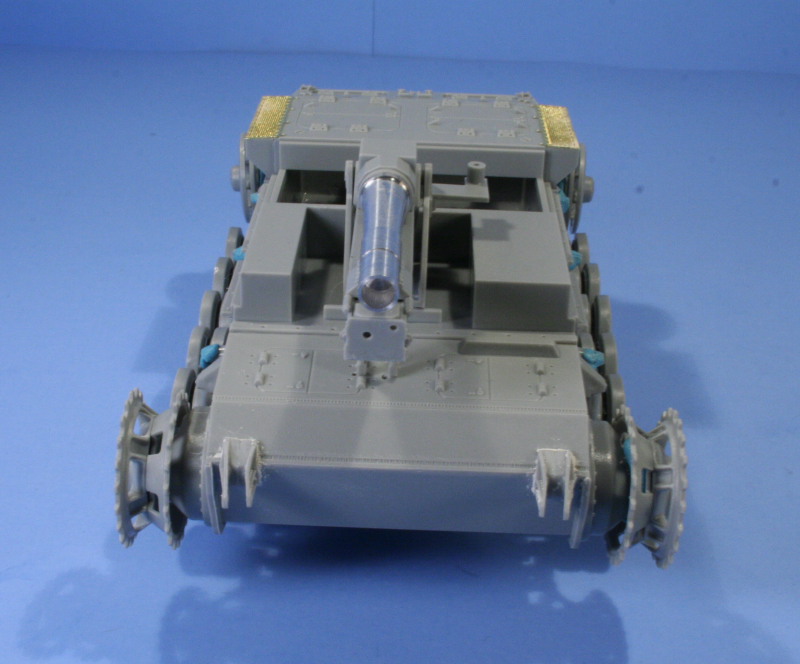
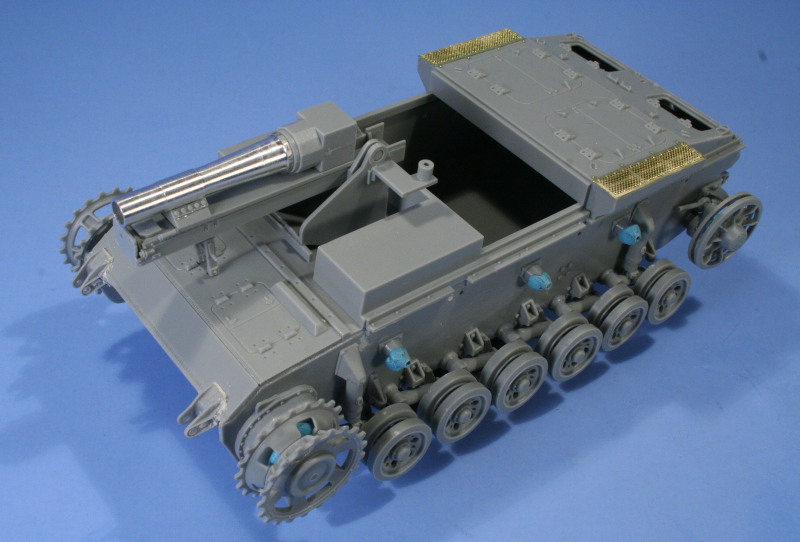
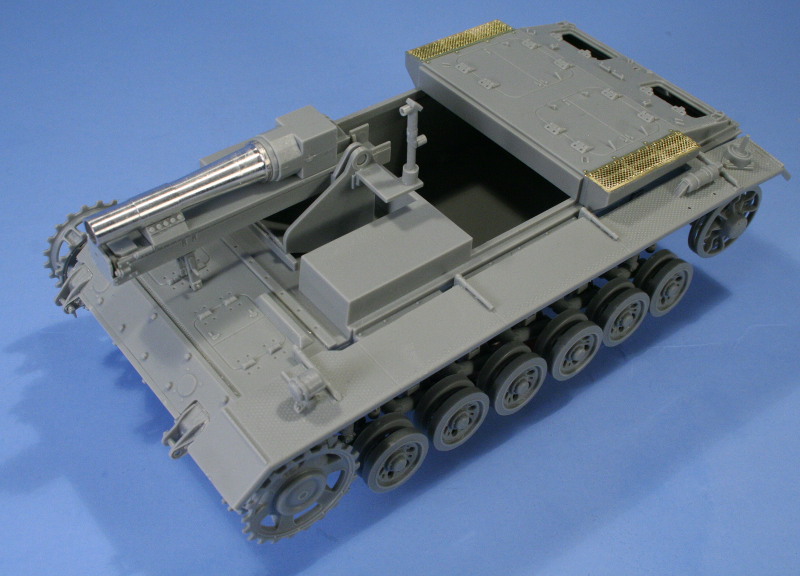
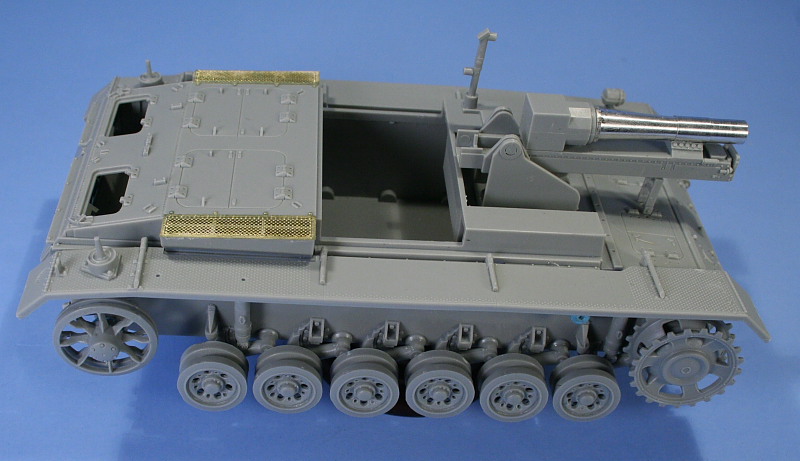
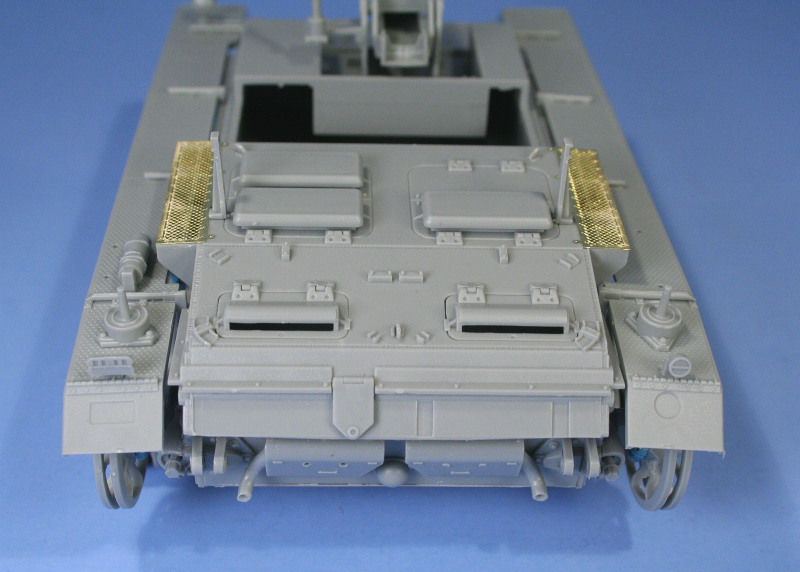
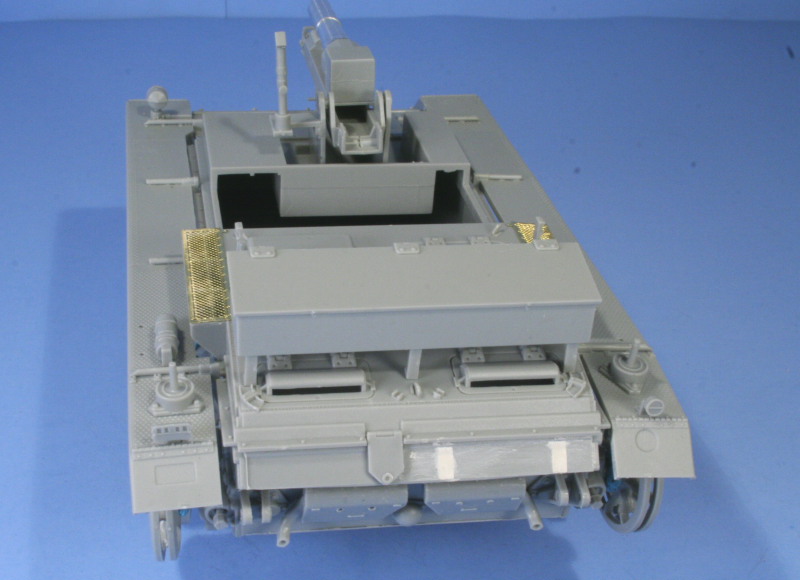
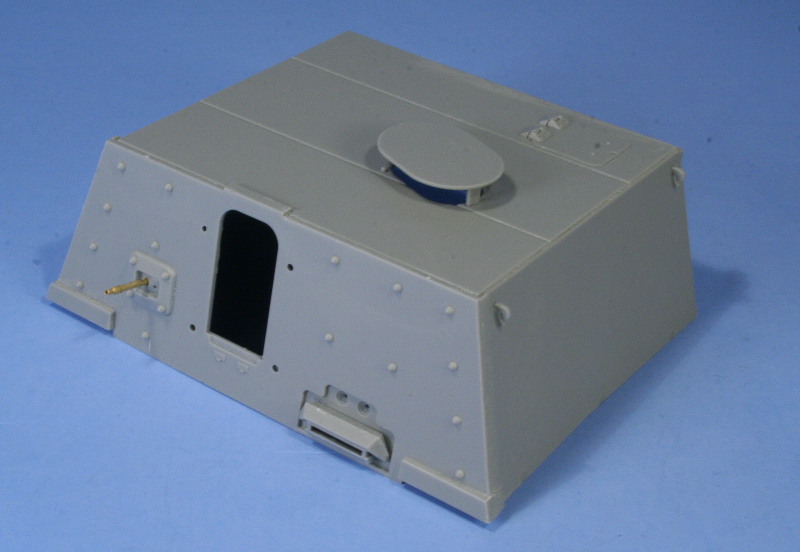
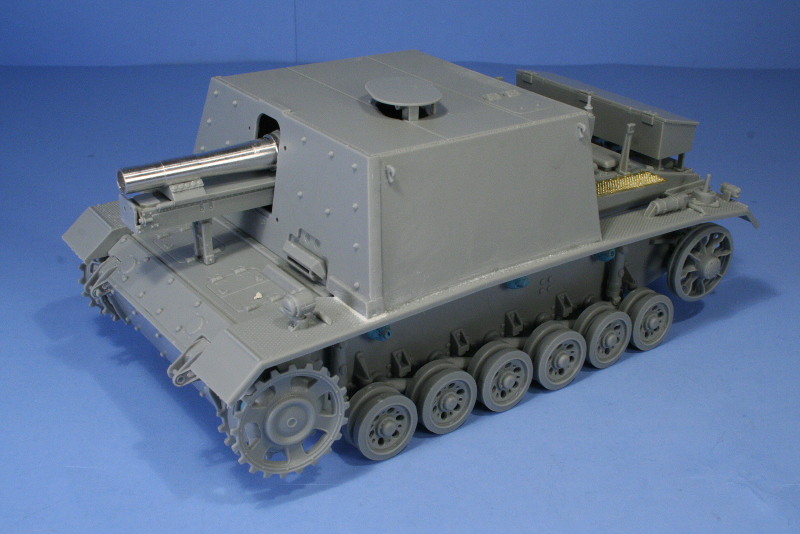
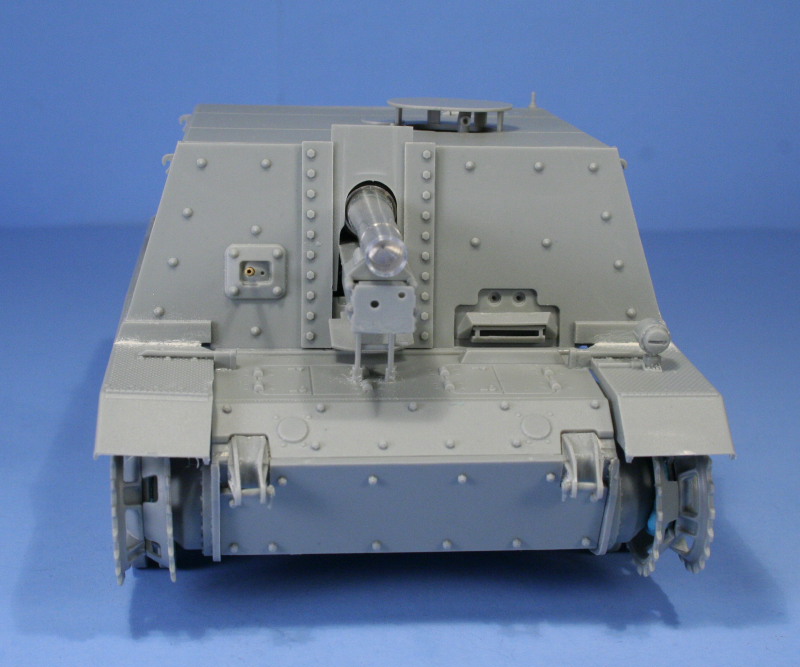
Upper Hull Construction
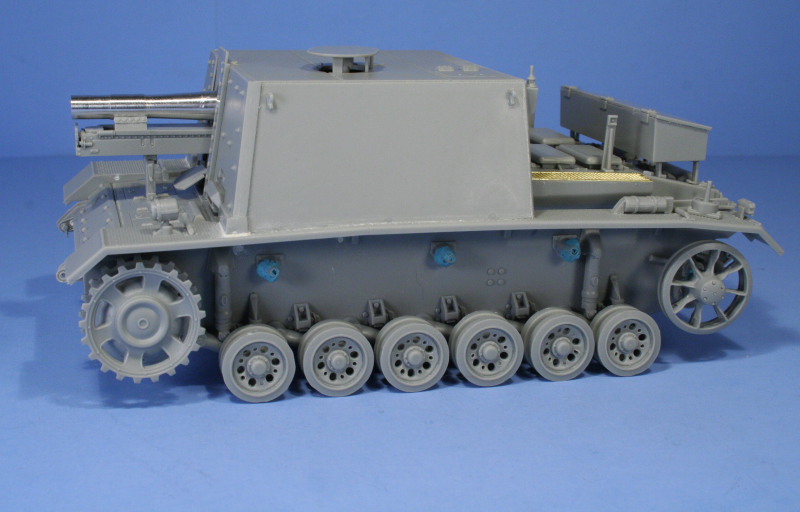
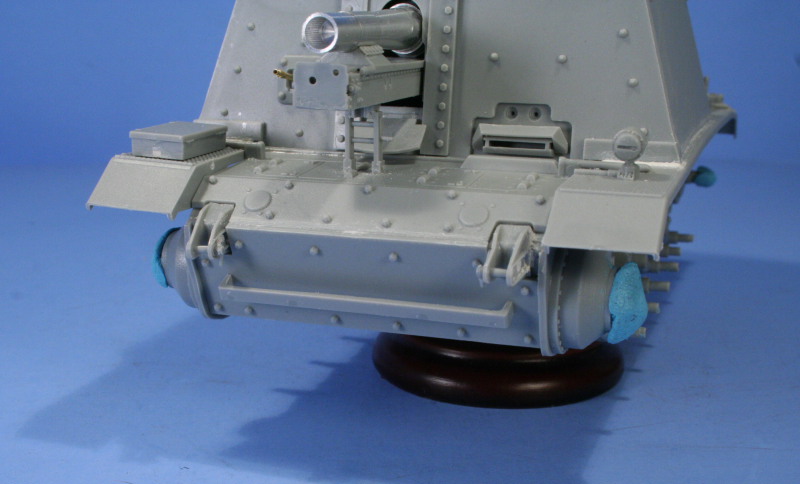
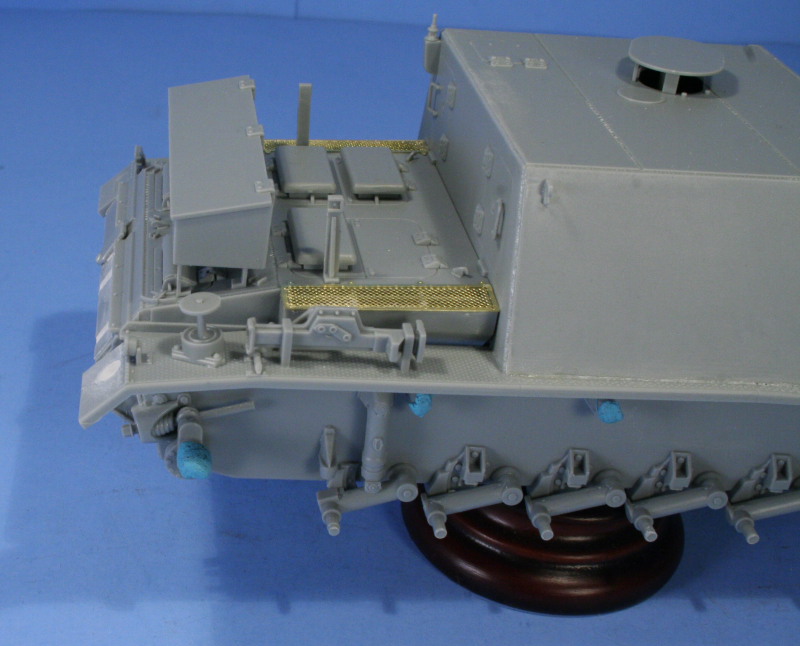
The kit utilizes the same casemate style structure as in the StuG III B kit with the same upper hull plate used here. The gun cradle is a complex assembly designed to allow the gun to elevate in its mount however a sneak peak ahead to the final step in construction reveals that the gun travel lock, part C18, can only be installed in the upright position, negating the feature of an elevated gun. Nevertheless, I left it position-able on the theory that it would allow for better access for painting later on. The kit gun is a 2-piece affair including the breech, which was glued together and allowed to dry before removing the barrel portion with sprue cutters in order to fit the JR replacement barrel using CA gel. The final assembly fit perfectly in the cradle without any problems. The added weight of the barrel did put more strain on the support arms and in hindsight it shouldve been fixed in position at this point but wasnt, creating a slight inconvenience later on as a result. Test fits of the upper hull to the lower produced a nice tight dry fit without any gaps unlike other kits in the series where rubber bands have been required to get a good join. Once the hull had been unified, the remaining features were added. First up were the side intake boxes, each of which needed to be sanded down slightly to get a good fit against the hull side before their grilles were installed with CA gel. Each of the side fenders were assembled and installed along with their various stowed items via the mount brackets and matching holes in the hull sides. At this stage the fenders droop slightly outward but get corrected once the casemate superstructure is fitted and used to bring the fenders up into their proper position. I discovered at this point that the right side cutout for the brake light was not molded in the right position, so rather than try to correct it and mangle the fender in the process it was simply filled in with putty and sanded down. It was also necessary at this point to fill in two large molded in rectangular holes on the rear deck with putty and sand them down since they are for a smoke candle rack that wasnt present on this particular vehicle. The upper hull construction finishes up with the installation of the MG34 brass barrel into the ball mount of the casemate along with the rear hatches and gun sight periscope guard, drivers hood, and antenna mount before the whole casemate is secured to the hull. The fit of the casemate is generally good, with only a little finger pressure necessary to get the fenders to match up all around and assume the proper shape. Once in place, the elevation splinter shield is fitted to the front over the main gun housing and the travel lock installed. It was at this point that it became apparent that leaving the gun movable wasnt going to work as intended and it was secured to the travel lock which in turn was glued down to the hull. I installed a spare tool box on the front right fender based on reference photos of certain vehicles having this feature and also left the rear right spare wheel holder empty to add a bit of character. I also installed a cut-down Tiger I bracket from my spares bin to serve as the spare links holder on the front hull plate and then assembled the Model Kasten links, 93 links per side plus 11 for the spare run. The MKs come as individual links with separate hollow guide horns and two pins per track and while a lengthy process, well worth it in the end in my opinion for the result they provide vs. drilling out the horns on the kit indys.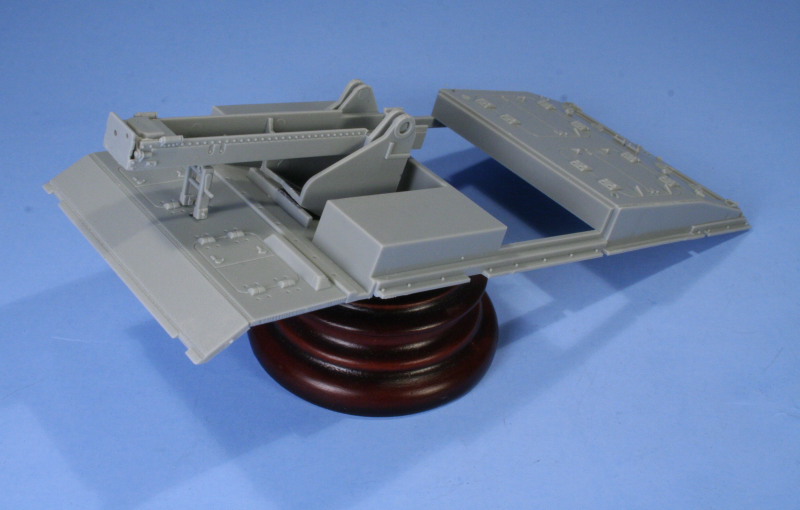

About the Author


FROM: TEXAS, UNITED STATES
Like many, I started out in the hobby as a kid building airplanes to hang from my bedroom cieling. I took a long break from the hobby, returning in 2001 with an interest in armor inspired mostly by online gaming. WW2 armor, 1/35 scale, is my preferred genre with a special taste for the stranger vehi...
Comments

I already made a few post in Bill's original building thread, but hey!, if this can help here's another round of "Wow!, great built" :-)
I should also add that this feature is now bookmarked for the day I'll find one at my LHS (or order one from an online store )
FEB 15, 2007 - 02:46 AM

Good on you both, Bill for writing the feature and Jeremy for posting it, nice one fella's.
FEB 15, 2007 - 03:53 AM

Richard, knowing that is far more gratifying than gathering up a bunch of attaboys since that was the main reason for keeping the log in the first place.
Mark, thanks for your comments as well!
FEB 15, 2007 - 04:48 AM

Another great article Bill sorry i havent replied sooner but comp layed down on me, its always appreciated even if not always said so.
Ron.
FEB 15, 2007 - 11:18 AM
Thanks Ron, glad to hear you're back online, missed you the past couple of days, hope that didn't slow your factory down any?
FEB 16, 2007 - 12:32 AM

Bill,
Simply put this is really well done. Everything. I have already printed it off and will use it as a reference for when I build my sIG 33B. Besides really helping in identifying what to look out for in the build, I really learned a lot from your painting and weathering methods.
For my sIG I hope to put an engine in it and open up the rear compartments and have two mechanics working on it. It is going into a small Stalingrad diorama.
Thanks again,
Marty
FEB 19, 2007 - 11:53 PM

Hi Bill,
Interesting and useful article and a really excellent looking kit. Not a big fan of German armour but I like this one.
Cheers
Al
MAR 14, 2007 - 03:29 AM
Thanks Alan, have to agree that it's got a strange appeal to it that's hard to pin down, but the moment I saw it available I scooped it up until the time was right to build it.
MAR 14, 2007 - 04:09 AM
Hi all,
Nice article Bill, I'm building this one right now...as well as a few others.
Only issue I see is the instructions show a Stanlingrad camo of Dark Yellow, Red Brown, etc...but I would think this should be Panzer Gray? Also, no exhaust deflector?
Pretty nice kit...kinda falls together.
Paul
MAR 22, 2007 - 09:25 AM
Paul,
The instructions do have an error in that regard...the camo scheme and markings they provide in the finishing guide are for a 1943 vehicle, not the Stalingrad vehicles. Of the 24 built, 12 were used in Stalingrad and would've been straight Panzer Gray, the other 12 were delivered later and would've been done in the dunkelgelb/camo scheme.
As for the heatshield, the StuG III-E was the basis for these and they didn't have the heatshield fitted.
MAR 22, 2007 - 10:07 AM
Copyright ©2021 by Bill Plunk. Images and/or videos also by copyright holder unless otherwise noted. The views and opinions expressed herein are solely the views and opinions of the authors and/or contributors to this Web site and do not necessarily represent the views and/or opinions of Armorama, KitMaker Network, or Silver Star Enterrpises. All rights reserved. Originally published on: 2007-02-14 00:00:00. Unique Reads: 22953

WEB HOSTING BY


Copyright ©2021 Armorama and Kitmaker Network, a subsidiary of Silver Star Enterprises
All Rights Reserved. Please read our Conditions of Use and Privacy Policy.
All Rights Reserved. Please read our Conditions of Use and Privacy Policy.