

1⁄35A Simple Diorama - Part 2
6
Comments
adding foliage
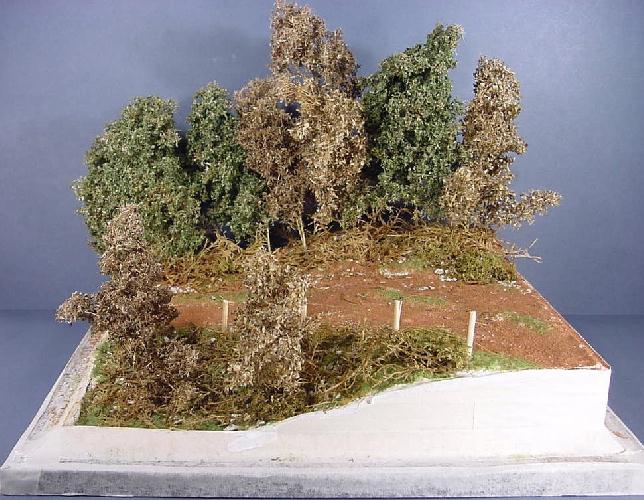
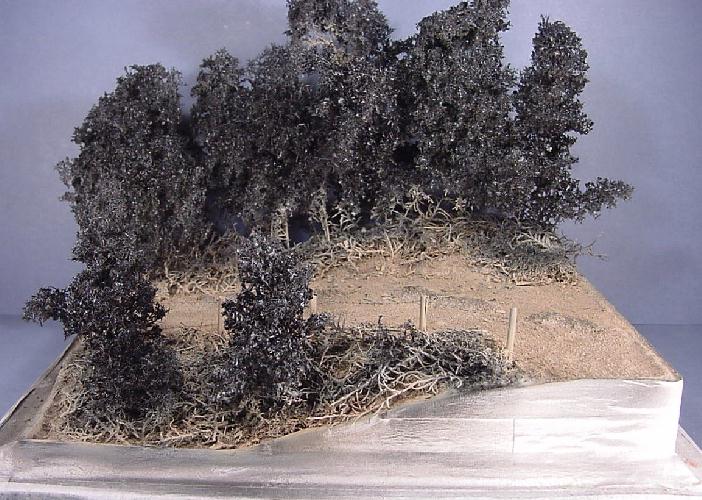
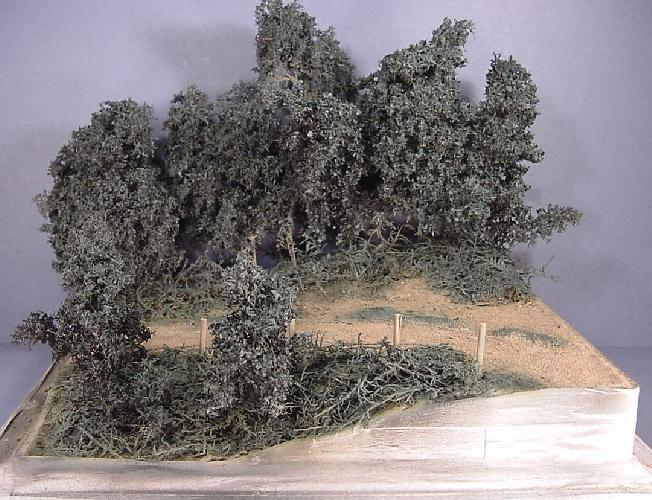
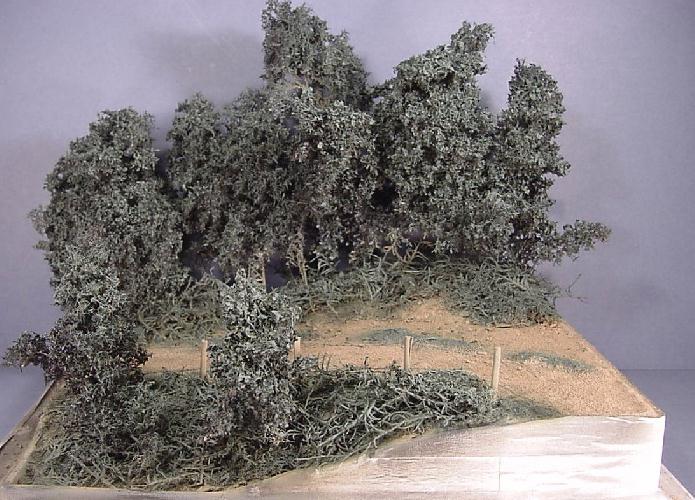
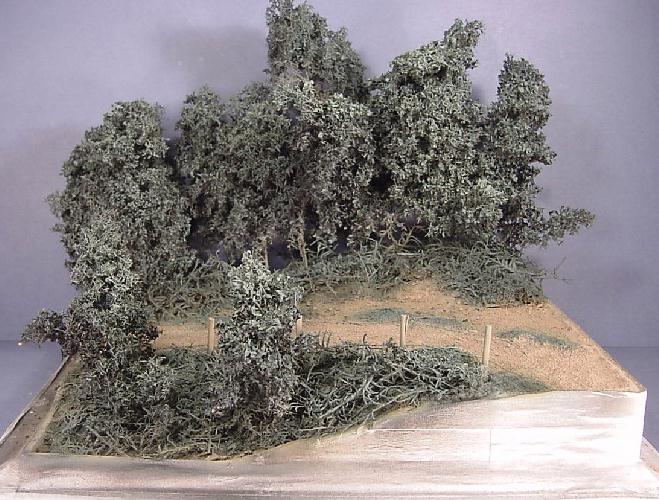
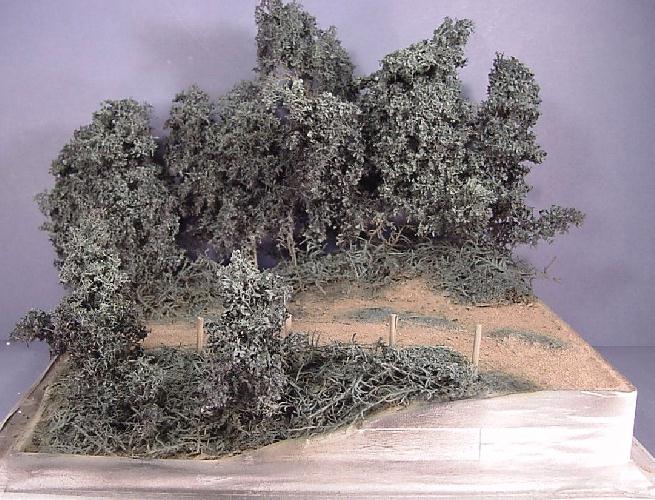
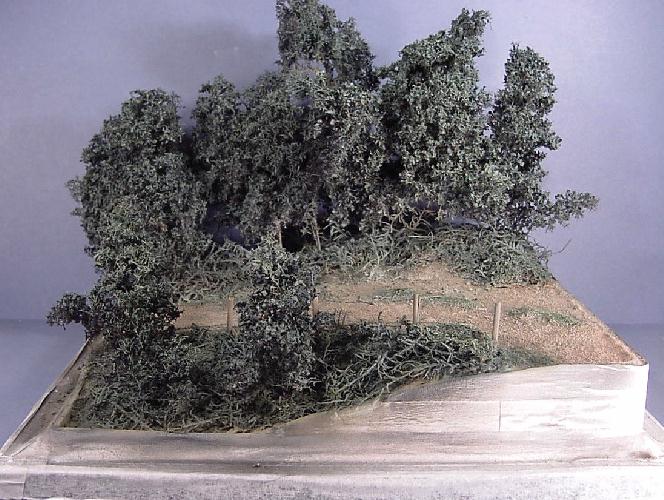
As you can see the base still looks a little plain and will not focus the viewer attention on to the diorama. To bring the focus back to wards the front of the diorama we need to increase the height at the back. This is done by adding trees along back section. The construction of simple trees is done by adding gluing spices to pieces of sea foam, again a more detailed explanation can be found in another article here. I also added a couple of small bushes to the front to give the impression of a highly wooded area. The trees are added by drilling small holes into the base along the back section, then put some PVA glue into the holes and add the trees. Allowing these to dry before you continue.Painting the base
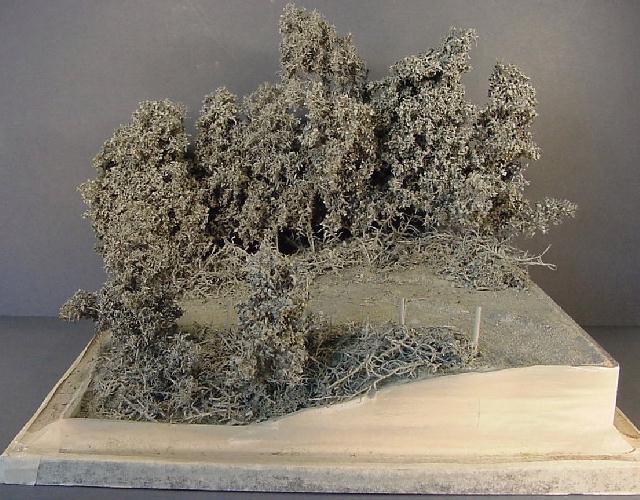
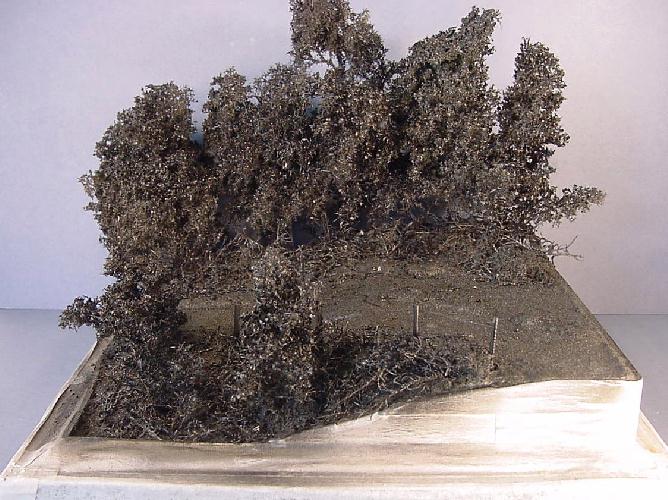
Having left the base and trees to dry over night we need to prepare the base for painting. First cover the bottom half of the base with masking tape. Then using automotive primer give the base a good coat of Grey. After that has dried then coat again with Black, not only does it help with the painting of the base it will also help again seal every thing to the base. Having left the undercoat to dry, we next need to paint the base. I use Tamiya acrylics for this mainly because I like the way they spray and I'm happy with the results. First up we spray the road using XF52 flat Earth mixed with a little XF1 Flat Black to darken the colour. Followed by the green using XF27 Black Green. Next lighten the brown and green colour with XF55 Deck Tan and give the areas a light dusting to bring out some of the highlights. Add some more Deck tan and highlight again. Next add a wash to the base as this will bring out the small details. The wash is made from thinning sepia oil paint, you are looking for tinted thinner rather than thinned paint, the use of a wash will pull the details out and help bring all the colours together, after allowing the wash to dry, we dry brush the road using alight brown nearly sand colour (I use Humbrol 187) and the green areas with various different shades of green. This helps to pick out the detail and I use generally use Humbrol enamels and oil paints for this task..the models
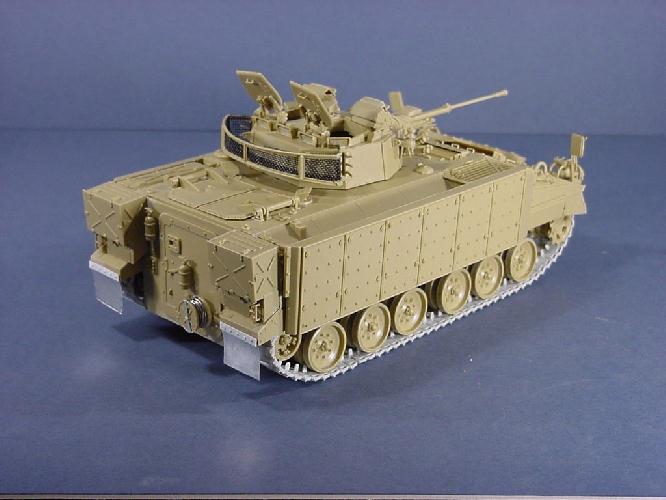
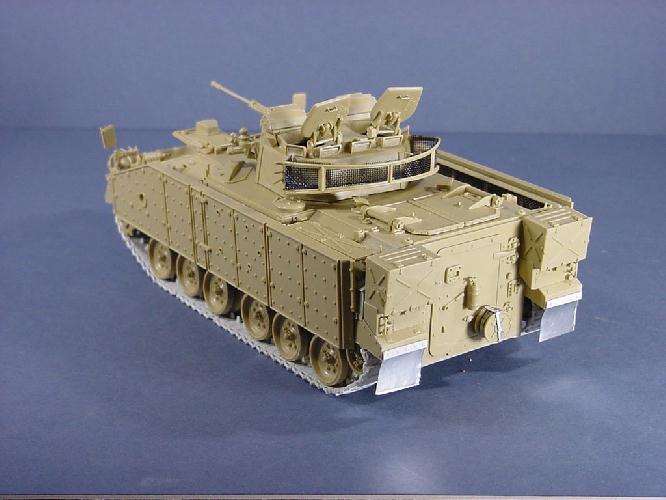
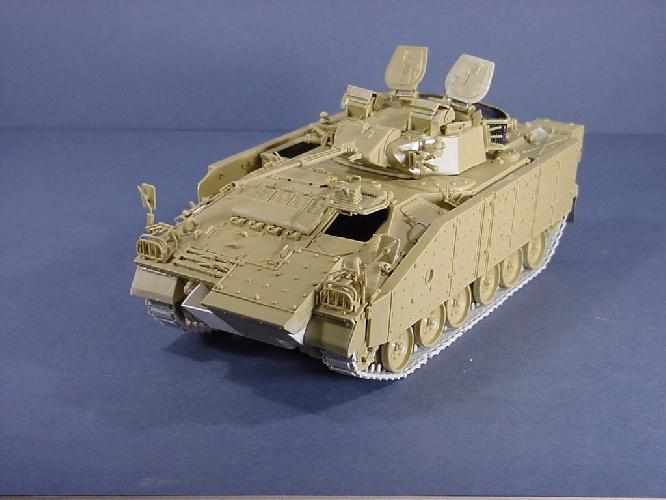
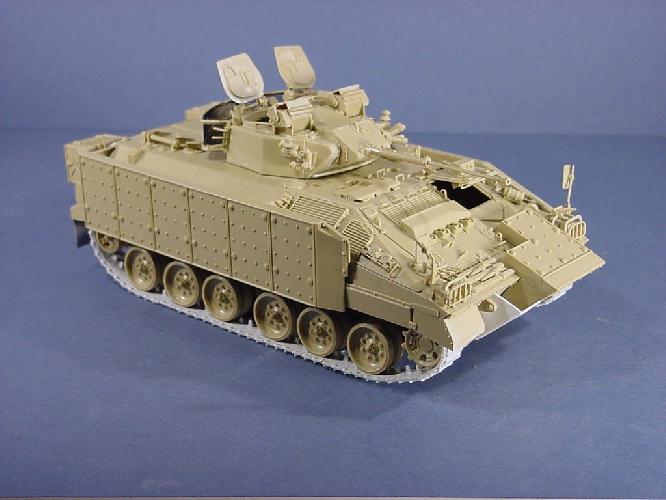
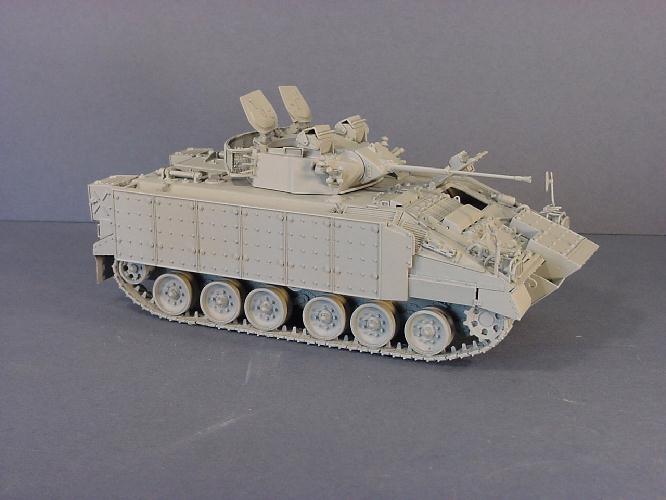
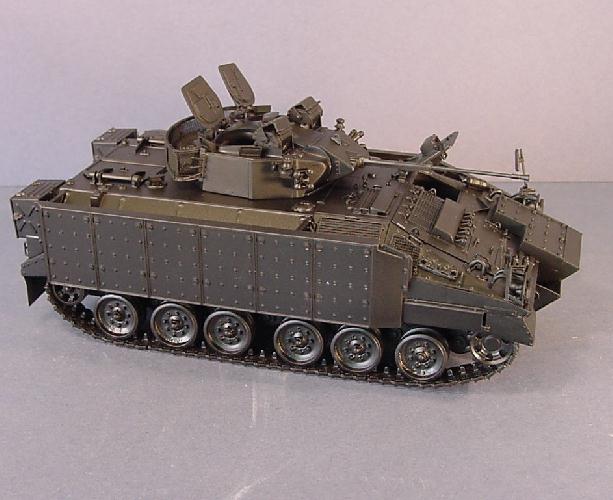
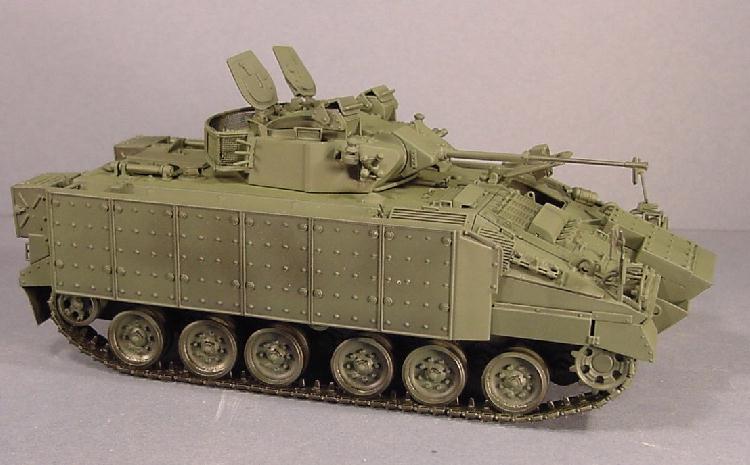
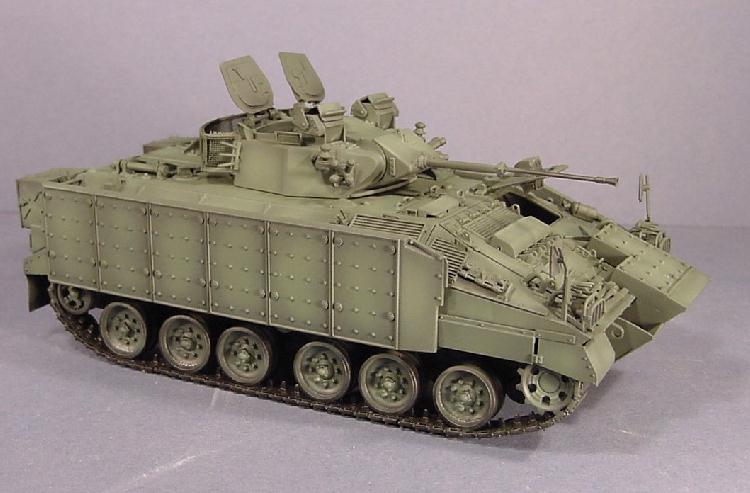
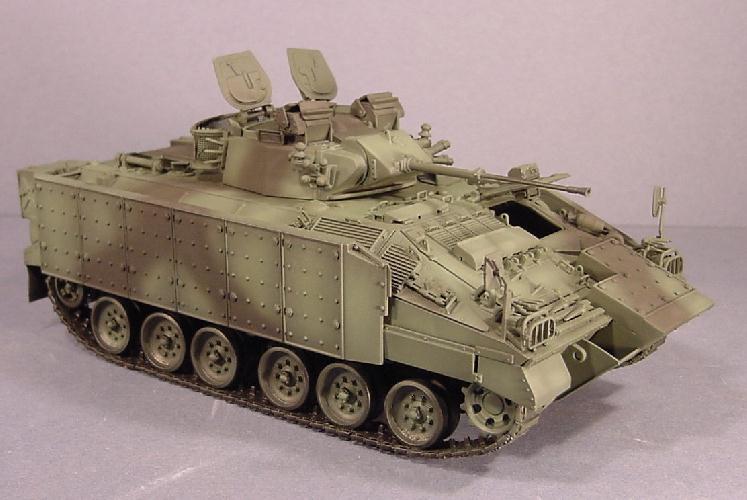
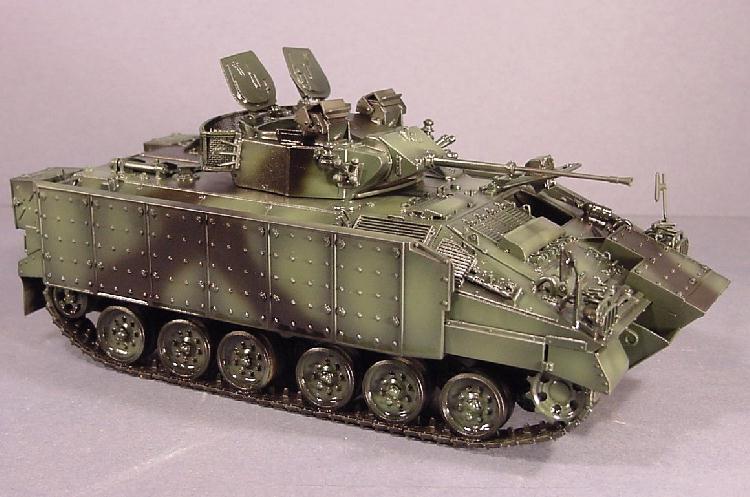
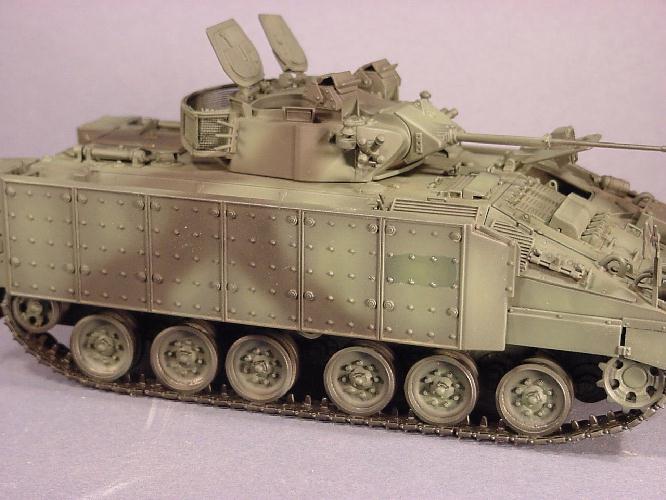
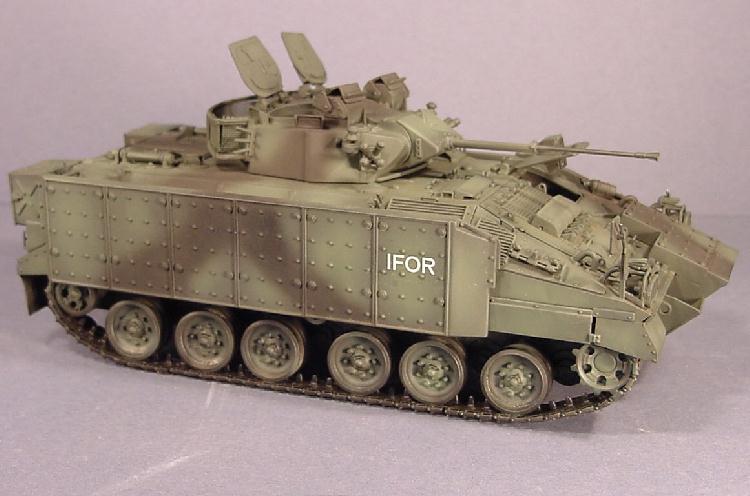
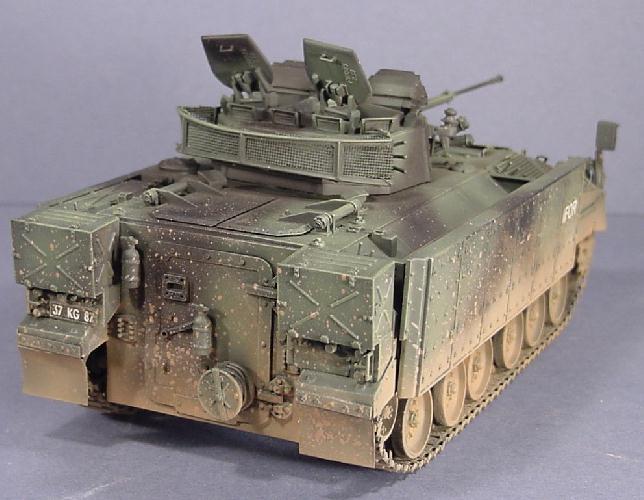
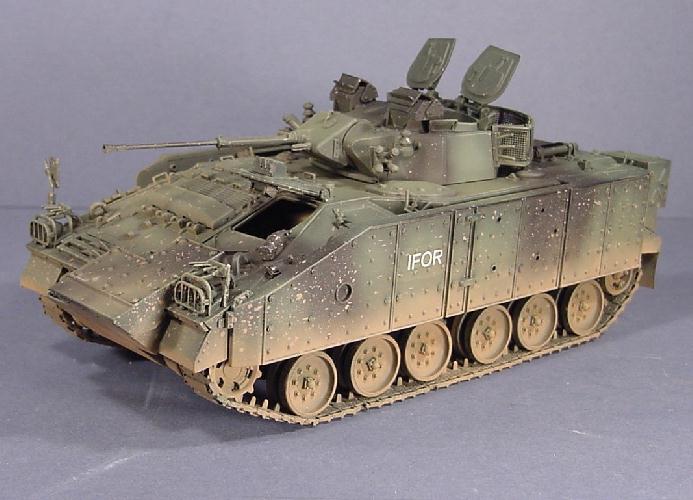
The model used for this article is the excellent kit by AFV Club off the British Warrior IFV. The kit was built more or less from the box with a few parts to tidy up some of the kits bits. The front Armour does not fit correctly and the tracks where replaced with some from Accurate Armour also the side armour needs to be moved forward by around 2mm. As an after thought I wish I had replaced the mesh in the basket with some form of Photo etch as the kit mesh was quite poor. Once the kit has been built we need to under coat so that the following top coats will have something to grip to. As with the base the model is given a coat of Matt Automotive Grey primer. Once dry followed by a coat of matt automotive Black After leaving the Black undercoat to dry the next colour is the base green, for this I use Tamiya Black Green XF27. This is misted on to the model allowing the black base coat to show through. Tamiya Deck Tan XF55 is added to the Black green to lighten it, this is then sprayed in the centre of all the panels to give a faded look. The next coat is the Black camouflage strips that are on most modern British AFV's, this is done by using Tamiya Flat Black XF1. This is sprayed on using photos or pictures of the real thing as a reference guide. Allow the coats to dry for about an hour, then give the whole model a wash of Sepia oil paint the same as if you where doing the base. After the wash has dried paint some small squares on the model using future floor polish at the points where you want the decals to go and allow to dry. Add the decals to the places you have painted the future polish, and using a setting solution set the decals in place. Once the Decals have settled and dried for a day or so give the area another coat of Future floor polish, this will remove the edge of the decal and make it look painted on to the model. After this has dried coat the areas with a flat matt varnish to help blend it into the vehicle. Allow the varnish to dry over night then give the model a light dry brush using oil paints mix Yellow ochre, sap green and titanium white for the green areas and Payne's grey for the black strips. Dry brush these over the edges of the model to bring out the raised details.weathering the vehicle
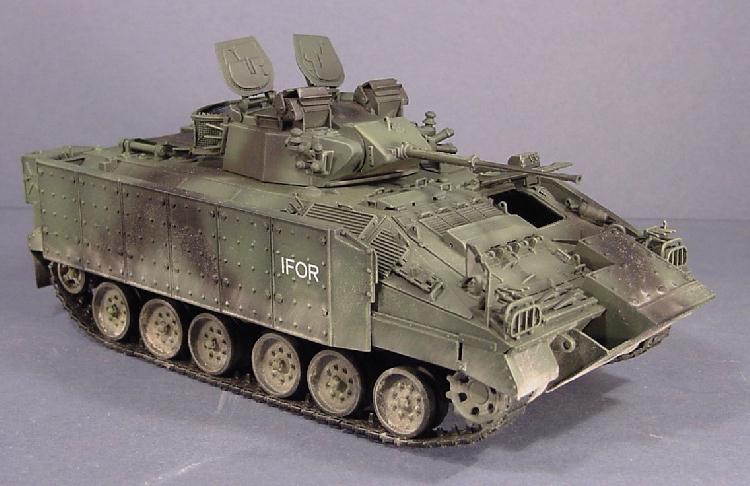
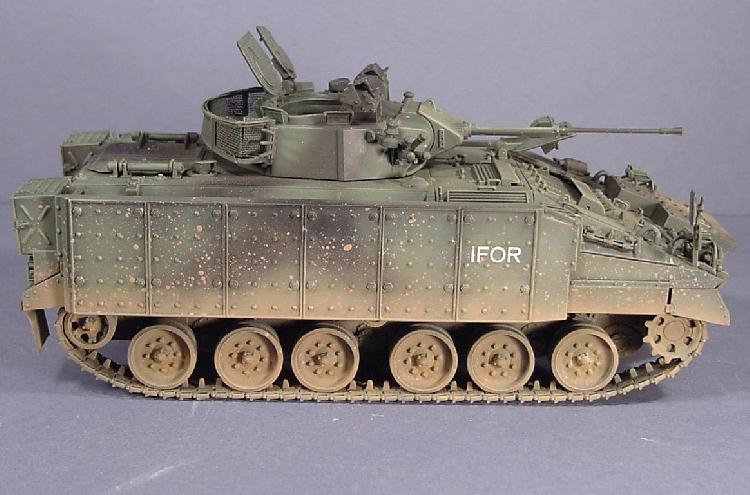
First give the lower part of the model a brush of fine dust powder, MIGs weathering powders are excellent for this. Then mist the lower half of the model using Tamiya Flat Earth XF52 doing this in light coats. Take an old wide paint brush dip this into the Flat Earth, place the model on a table edge then blow on the brush so that you get mud splats up the sides of the vehicle. Do this around the whole model. After the coat of Flat earth has dried, again add some dusting with the old weathering powders around the lower half of the model, allow to dry and then give the model a fine misting using Tamiya Buff XF57. This will give the impression of new dust. Finally aerials are added by using the bristles of an old yard brush which are then super glued into the holders. Add the crew and the model is ready for the base.fixing the kit to the base
The model is glued to the base using PVA glue mainly because it allows the model to be positioned correctly before it dries completely. Whilst this was drying the base was painted using Humbrol Acrylic satin Black and left to dry. After allowing time for the PVA glue to set, the model was given a light dusting of weathering pastels to help blend the model to the base.Figures
The last things to be added are the figures, these are from Warrior and Accurate Armour both are resin items and have excellent details. Figures are one of the main parts to creating good diorama as they add life to the scene. A British DPM pattern is painted on the figures using Humbrol enamels, the flesh parts are painted using oil colours. The figures are then glued in place using PVA glue and once it has dried blended using pastel colours. And that is it apart from naming the Diorama (the hardest part in my opinion). I have titled the diorama "BANDIT COUNTRY" as it show the Warrior passing a check point moving from a safe area into bandit country.Conclusion
This diorama was built the best part of 8 years ago and still stands the test of time, some of the construction ideas are still relevant and some painting and weathering still works. At the end of the day its down to you as the builder to try different techniques until you find one you are happy with, we never stop learning and that is still one of the thing I enjoy about this hobby. Hopefully you find it useful. Until next time, happy modelling Keith Forsyth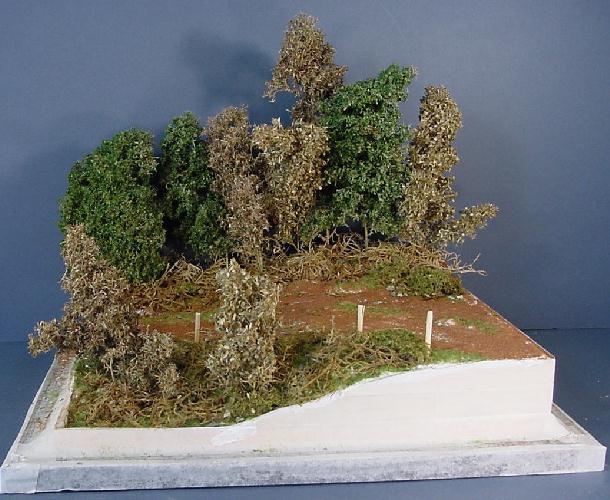
About the Author


FROM: ENGLAND - WEST MIDLANDS, UNITED KINGDOM
Keith Forsyth (docdios) comes from the small town of Stafford in the United Kingdom. He began his interest in modeling at an early age with armor being the main focus. It was not until finding himself between jobs in 1995 that he really got hooked. It was during a shopping visit to another town when...
Comments


Keith - nice to see number 2 - good solid information and a cool diorama.
AUG 09, 2007 - 08:58 AM

This article deserves a good home and to be seen again. Love the foilage and how it turned out. Also brings back fond memories of Doc´s Dios!
AUG 09, 2007 - 09:39 AM


Copyright ©2021 by Keith Forsyth. Images and/or videos also by copyright holder unless otherwise noted. The views and opinions expressed herein are solely the views and opinions of the authors and/or contributors to this Web site and do not necessarily represent the views and/or opinions of Armorama, KitMaker Network, or Silver Star Enterrpises. All rights reserved. Originally published on: 2007-08-09 00:00:00. Unique Reads: 40903

WEB HOSTING BY


Copyright ©2021 Armorama and Kitmaker Network, a subsidiary of Silver Star Enterprises
All Rights Reserved. Please read our Conditions of Use and Privacy Policy.
All Rights Reserved. Please read our Conditions of Use and Privacy Policy.