1⁄35A Simple Diorama - Part 2
6
Comments
Introduction
Following on from my last simple Diorama, which was based upon an urban setting, I wanted to do something to show how easy it was to construct a diorama that’s a little more rural. I also wanted to show that it was possible to do it with a more modern feel rather than the usual WWII affair.the base
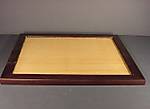
For the base of this diorama we will use a simple base by using a picture frame, with the glass remove and replaced with a piece of ply-wood. I have covered the building of simple picture frame bases in a lot more detail here. This is a cheap and easy way to display your work with out breaking the bank and with the availability of more creative frame designs the choice is endless. So for this diorama I decided to use a straight flat base.Creating height
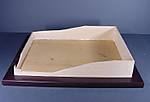
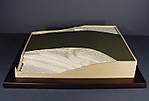
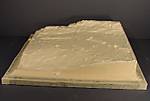
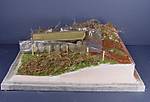
The next part is to construct the sides to achieve height. A diorama always looks better if you can create the idea using height rather than having a flat base as it makes the scene more pleasing and realistic. The height is created by using balsa panels and cutting them to shape, the scene should flow from front to back and left to right as this is the way most people are conditioned to read, so this is the way most people will view your diorama. Although it is some times useful to break these rules, just to create something a little bit different. The panels are glued with PVA glue and secured with some masking tape until dry. I have been asked why I use Balsa wood and not ply-wood to make the sides of my dioramas?, the main reason being its a lot easier to cut and shape balsa wood than it is ply-wood with out the aid of power tools! Once the sides of the base have dried, we need to start to create the slopes and the height of the diorama; this is done by using polystyrene ceiling tiles, which should be available from any good hardware store and are a off great use to the diorama builder. They come in various sizes but are all about 5mm thick this allows us to create slopes and height quite easily. Cut the ceiling tiles to fit with in the frame we have created. The tiles are cut so that they start to produce the contours of the ground; this is done rough to produce a general shape. Continue with the tiles until you reach the top of the base sides.Filling in the detail
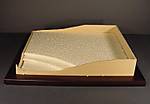
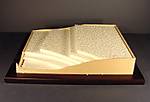
Now that you have the general height of the Diorama glue the tiles into the base using PVA glue, then put some tins on top and leave over night to dry. Once dry we need to create the slope of the road there are a couple of ways to do this :-, 1- You can cut the tiles to shape the slope (but it does makes a lot of mess) or 2- You use a piece of matt Board (some time called Mounting board), cut this to the size and shape you need then glue to tiles. You will need to add some tins to hold it down while the glue dries again over night. Don't worry about the gaps under the matt board we will sort them out later. The next thing that needs to be done is to continue adding height at the back of the base again this is to add interest but it also helps frame your work with in the confines of the base. This is done by adding strips cut from the tile. Again glue down with PVA glue, this again is done rough just to get the shape and then leave to dry.Ground work
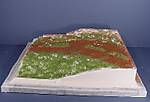
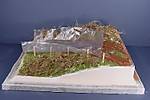
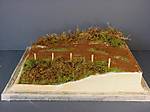
Once the polystyrene and card has dried, the next part is to build up the ground work. This is done by using a mixture made from interior filler (powder type) following the instructions on the box, although I do use a slightly wet mix as i find it easier to flow over the base, this is then brushed over the whole base until it has been totally covered. Now is the time to create the centre of the road by adding more plaster in a mound running along the raised middle of the road. As the plaster is still wet we need to start to add the texture, first up is sand. Using a small sieve, sprinkle sand over the base, allowing it to concentrate on the area that is the road. Next up add static grass to the other areas. Don't forget to add some to the top of the mounds that run down the middle of the road. Finally add some cat litter to represent small rocks, push these into the base to give them a natural look. As the base begins to dry add some dried moss, you can get various different types, the more varied the more natural and interesting the base will look. The type I have used is available from most Garden centres and used for lining hanging baskets. I have also added some cut up wooden dowel to represent the fence that will section off the road from the slope. I have used wooden Kebab sticks to do this as they are quite strong and will push into the wet base. Now that a lot of the ground work has been done leave the base to dry for about an hour, so that a skin will begin to form on the plaster. Once the skin has started to form we need to put the track and wheel marks into the road. This is done by pushing the model onto the base, but to save from getting filler on the model, first put a small plastic sandwich bag on the road. Then place the model on the bag and push into the filler. Leaving the bag in place will stop the filler from getting on the model, but will leave the track marks firmly in the base. Remember to add other tracks from different wheels in the spares box for a little variety. Leave this to dry over night before removing the bag. Once the ground work has dried, give it a coat of PVA glue/water mix using a plant sprayer or an old hair spray bottle. Whilst this is still wet fill in any bear patches with sand or static grass. Again leave to dry over night, the PVA glue will form a transparent skin over the ground work, this will help hold it all on the base.Comments
Keith - nice to see number 2 - good solid information and a cool diorama.
AUG 09, 2007 - 08:58 AM
This article deserves a good home and to be seen again. Love the foilage and how it turned out. Also brings back fond memories of Doc´s Dios!
AUG 09, 2007 - 09:39 AM
Copyright ©2021 by Keith Forsyth. Images and/or videos also by copyright holder unless otherwise noted. The views and opinions expressed herein are solely the views and opinions of the authors and/or contributors to this Web site and do not necessarily represent the views and/or opinions of Armorama, KitMaker Network, or Silver Star Enterrpises. All rights reserved. Originally published on: 2007-08-09 00:00:00. Unique Reads: 40906


