

1⁄35Paper Panzer Half-Track
8
Comments
Paint and Finish
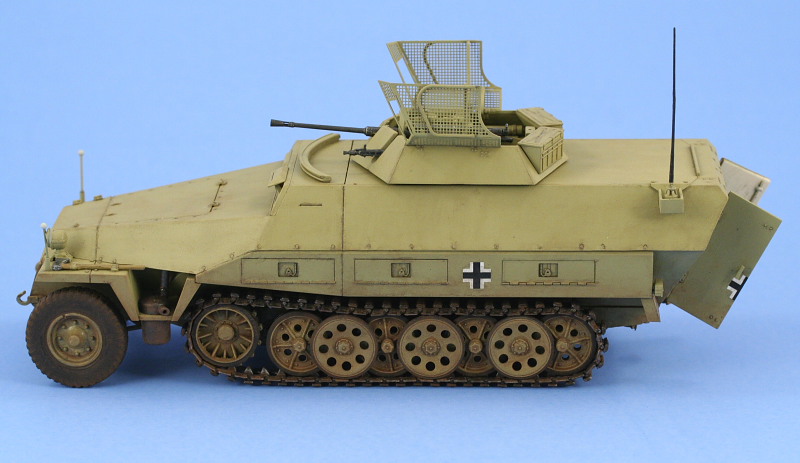
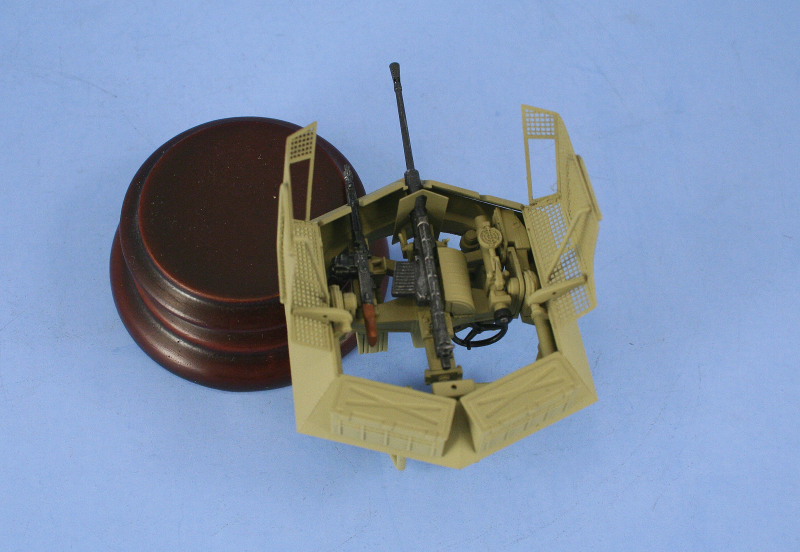
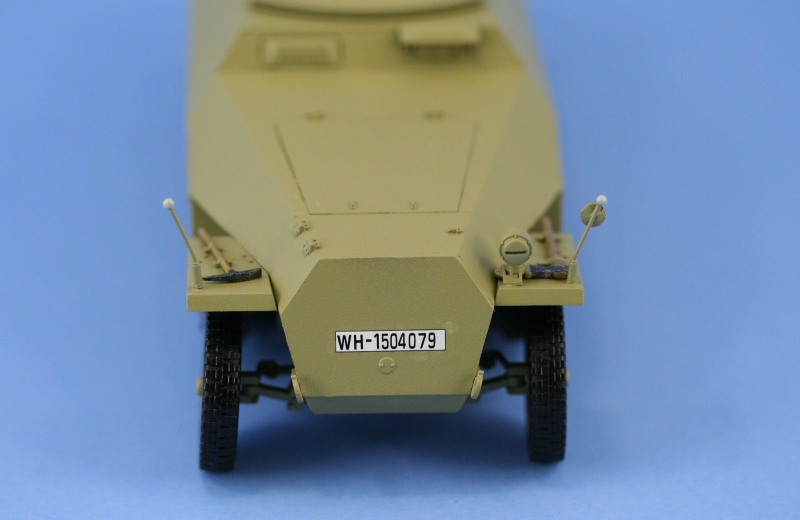
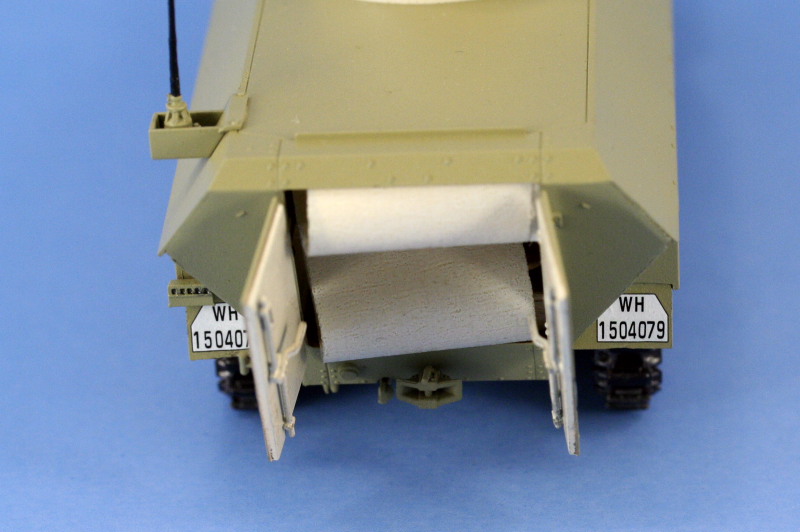
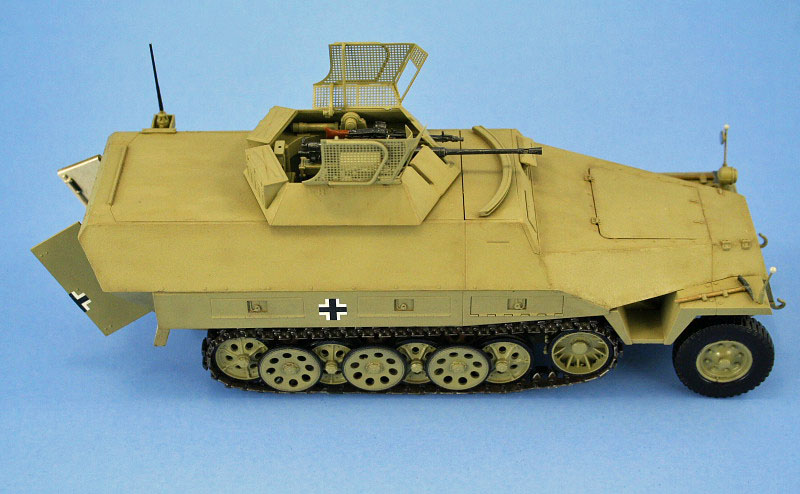
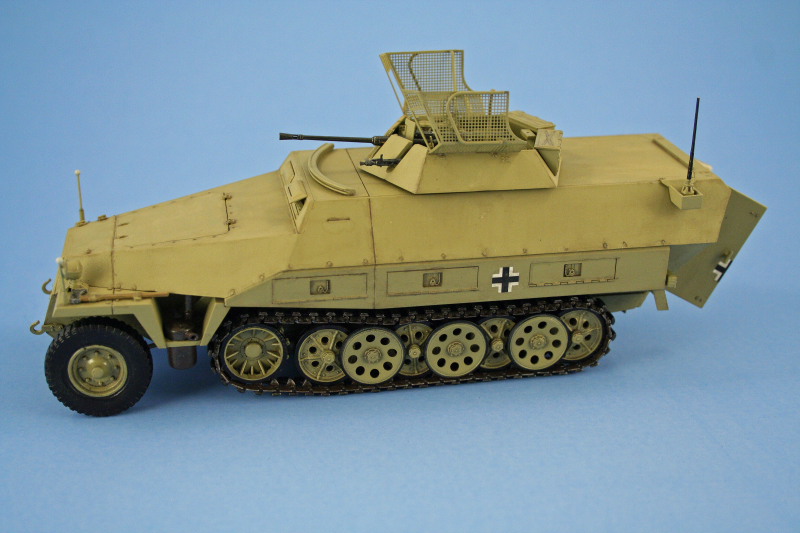
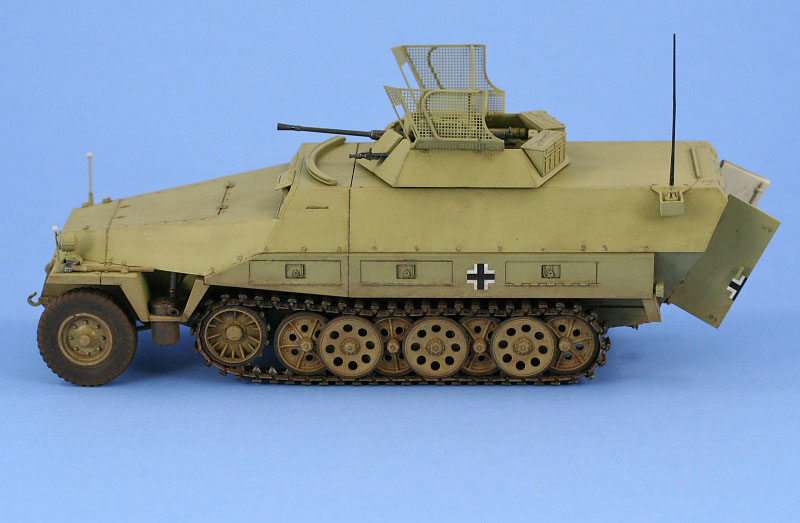
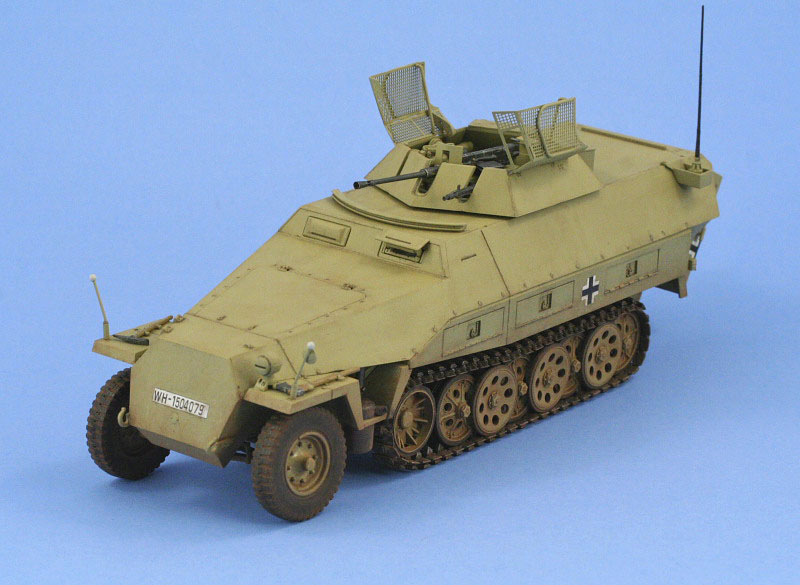
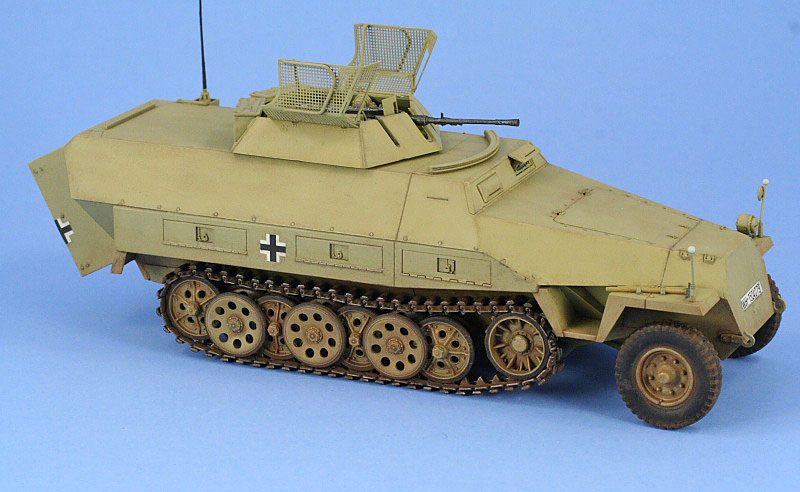
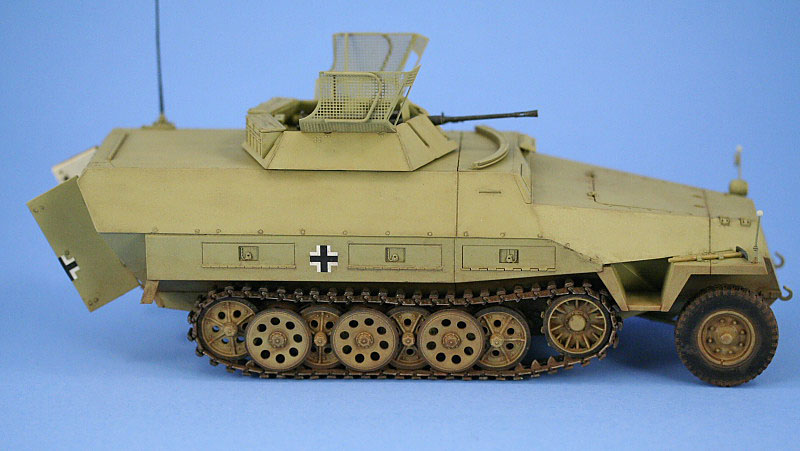
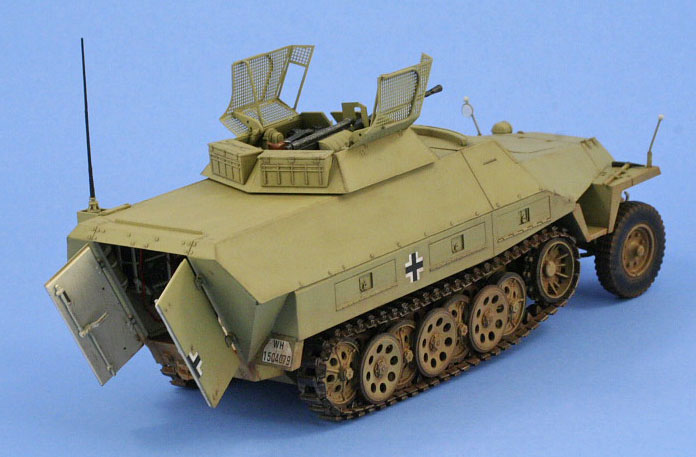
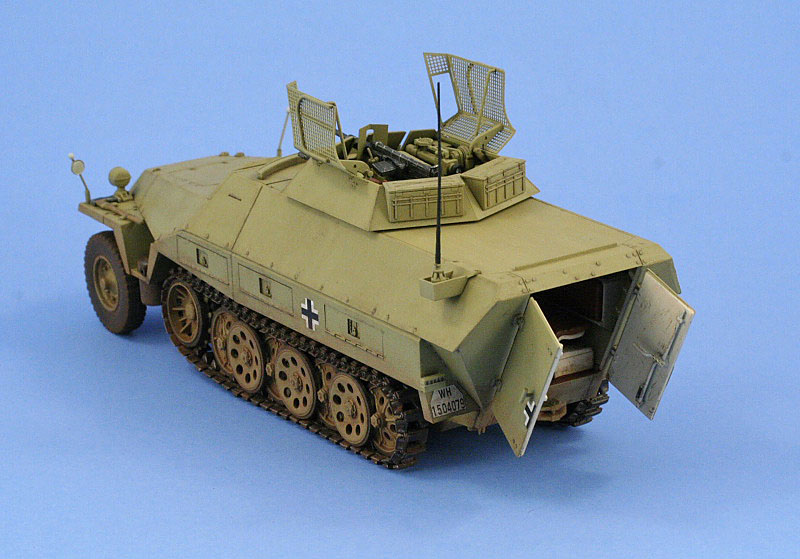
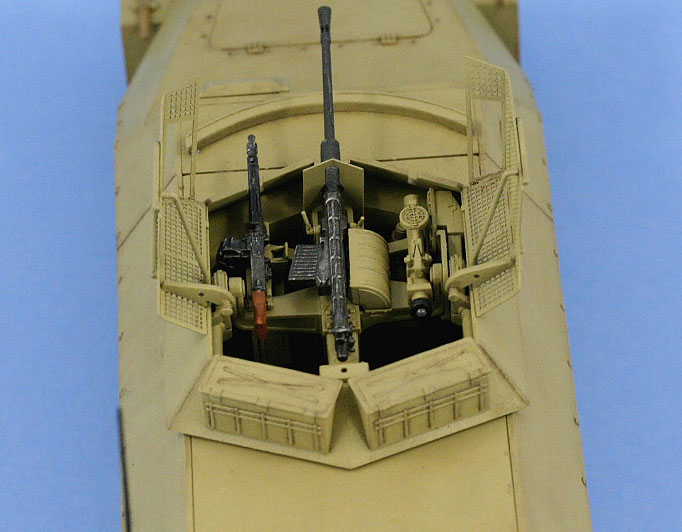
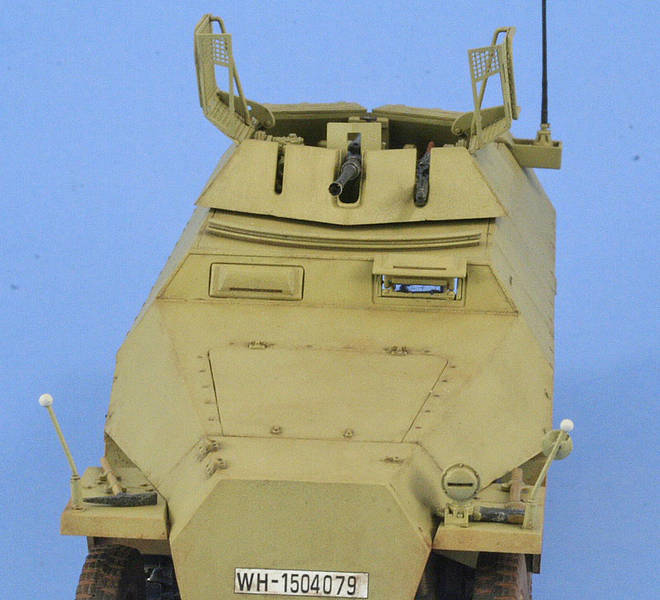
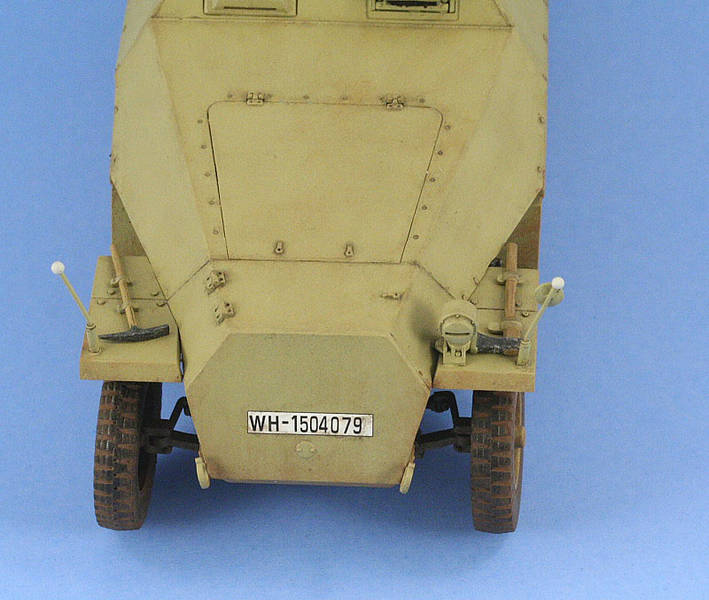
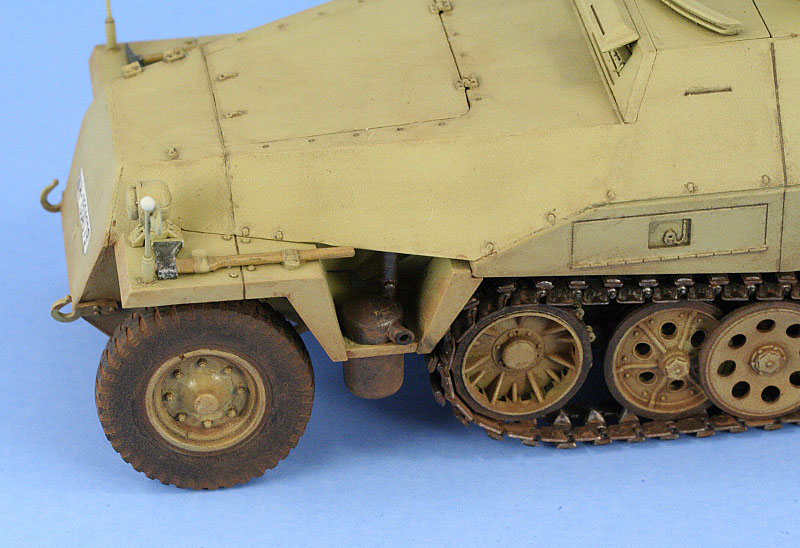
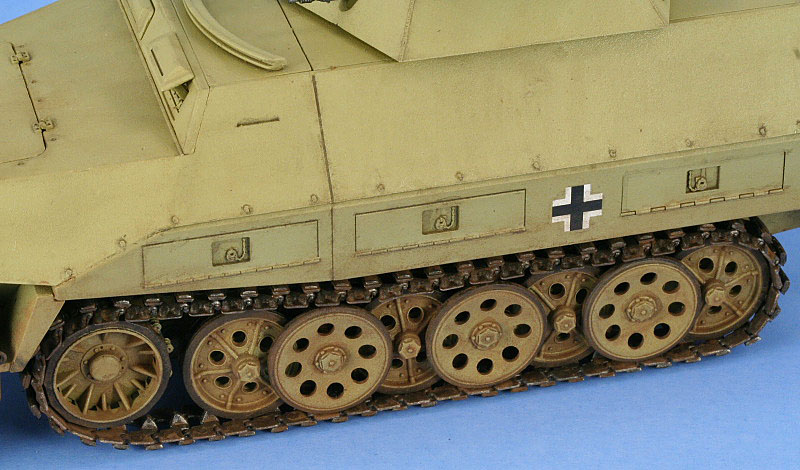
Since this vehicle never went into production, I decided to go with a straight Dunkelgelb finish since the decal markings provided are very simple and not for a specific vehicle or unit. I laid down a base coat of MM Italian Dark Brown and then sprayed an 80/20 mix of Dunkelgelb and Light Gray over that for the main finish. For the road wheels and drive sprockets, I painted the rubber rims with Flat Black and then used a circle template to paint the wheels themselves with the same process as the hull. The wheels were then installed on the vehicle permanently with only the sprockets left removable to aid with the track installation. The turret details were also added in at this time and then the entire vehicle was given a coat of Future in preparation for the decals and weathering. The decals provided in the kit come on two sheets. One sheet is a simple sheet of various balkenkreuze and I selected the uniform black cross with white outline. These were applied to the hull sides with a third cut in half with scissors and applied to the rear open doors. The second sheet of decals involves the vehicle license plates and a number jungle of individual decal digits to create the specific plates for the front and rear areas. I needed to create a 7 digit number and, not having any specific vehicle to refer to, invented a number using the date of the day I did this, April 15th 2007, as a handy way to get 6 of the 7 digits then just added in the 7th based on what would fit on the plate. This was an exercise in patience as each individual digit needed to be dry before the next one could be placed. Once all the decals were down, another coat of Future was applied to seal it together and the weathering process began. In order to keep the weathering effects subtle and still provide some variation to the straight Dunkelgelb finish, I opted for the dot method of applying dots of paint and then using a thinner dampened brush to remove/blend the spots into a translucent effect. This was done first with Raw Sienna, followed by a mix of 90/10 Dunkelgelb/Light Gray, and finally with Raw Umber. Once satisfied with this effect, a pin wash of Burnt Umber was applied to the raised detail and adjusted as needed. The entire vehicle was then given a coat of Testors Lusterless Flat via spray can and left to sit overnight. The final weathering step involved the application of Mig Dark Mud pigments mixed in ordinary tap water and applied to the lower hull, suspension, tracks, and front wheels. This was allowed to air dry and the excess removed with a stiff bristled brush. I then followed up with several q-tips and used them, sometimes wet and sometimes dry, to adjust the effect depending on the location until I had the look I wanted. The final touch came in the form of some black artist pastel applied lightly to the exhaust pipe and the fender area and this one made its way to the display shelf as a finished build.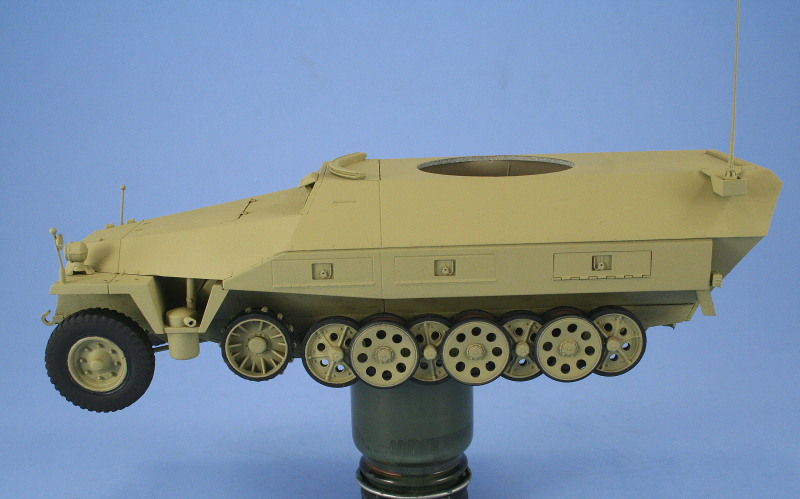

About the Author


FROM: TEXAS, UNITED STATES
Like many, I started out in the hobby as a kid building airplanes to hang from my bedroom cieling. I took a long break from the hobby, returning in 2001 with an interest in armor inspired mostly by online gaming. WW2 armor, 1/35 scale, is my preferred genre with a special taste for the stranger vehi...
Comments

Looking very purposefully, this combo. And a beautiful build. Although I personally would've added a 3-tone scheme.
One question, is it doable to use a regular 251/D and use parts from another vehicle to donate the Schwebe-laffette?
Or are there too many other areas that need modifying?
But it is looking very very nice, even with the single color scheme it still looks interesting.
Well done!
APR 21, 2007 - 11:34 PM

Herbert,
Thanks for your comments, always appreciated. I was tempted to do a 3-tone...even thought about a factory hard-edged scheme...but ended up with the straight Dunkelgelb scheme after looking at similar prototypes for the Aufklarungspanzer, Gepard, etc. where they show the prototype vehicles in plain Dunkelgelb plus I wanted to see what I could do with it from a weathering perspective so it was an "experiment" in more ways than one.
Not sure I understand your question though about swapping out parts for a 251 D? Do you mean if the Hangelafette turret can be used on another 251 D like the AFV or on another kit/ vehicle entirely? The turret is a stand-alone set of sprues/parts with a specially provided hull roof with turret ring as a one-piece modification, otherwise everything else in the kit is standard 251-D parts.
APR 22, 2007 - 12:42 AM
No I mean, since this is a one time limited edition "it will never ever be produced again" model, can you take a similar turret from another kit, and craft that on a regular D without too much additional modifications?
I love the way a 251 looks, although I've never ever built one, and this one looks very "aggresive".
So, should I wish to build one using a standard D, can I plop in a Schwebelaffette from a 250/9 or something like that?
APR 22, 2007 - 06:14 PM
Herbert,
Makes sense now, for you to get the right hybrid you'd have to take a 251-D and scratchbuild a roof top for it with turret ring and then could adapt a Hangelafette turret from either the 234/1 or Aufklarungspanzer 38(t) to get the right turret and gun mount. The 250/9 or 222 turret aren't the same layout/design in relation to the gun mount and interior and won't work on the 251 hull. The 250/9 turret has post mounts for the seats and gun whereas the 251/23, 241/1 turret has the seats "hanging" (hence the name of the mount) from the turret frame itself and uses a tank like turret ring for rotation.
APR 22, 2007 - 06:34 PM


A beauty Bill very nice finish on this one i like it a lot, i am yet to tackle one of dragons halftracks but i have 3 in the stash and it will be nice having this for reference when building one.
Ron.
APR 25, 2007 - 09:05 PM
Thanks Ron, the DML 251 series of kits present some interesting subjects although the accuracy/detail varies from the earlier to the later versions, they are all solid kits IMHO.
APR 26, 2007 - 01:56 AM
Copyright ©2021 by Bill Plunk. Images and/or videos also by copyright holder unless otherwise noted. The views and opinions expressed herein are solely the views and opinions of the authors and/or contributors to this Web site and do not necessarily represent the views and/or opinions of Armorama, KitMaker Network, or Silver Star Enterrpises. All rights reserved. Originally published on: 2007-04-22 00:00:00. Unique Reads: 29037

WEB HOSTING BY


Copyright ©2021 Armorama and Kitmaker Network, a subsidiary of Silver Star Enterprises
All Rights Reserved. Please read our Conditions of Use and Privacy Policy.
All Rights Reserved. Please read our Conditions of Use and Privacy Policy.